In this first lesson we are going to go over the Godot interface, setup our default game parameters, create our first three scenes, and create basic interactivity with those scenes.
Requirements
Intro to Godot.
Godot is an easy to use, feature rich, game engine available for the three major Operating Systems (Linux,MacOS,Windows) which is able to export games to those platforms as well as iOS,Android out of the box, and can support consoles through third party services for a small fee. Having used various game engines Unity,LeadWorks,Torque,Unreal,etc. Godot has been by far the easiest to learn and the lightest weight of those I have used. It is the Ease of use, and its "only whats needed" methodology that makes it the perfect fit for this and many other projects.
Project Setup
First Load
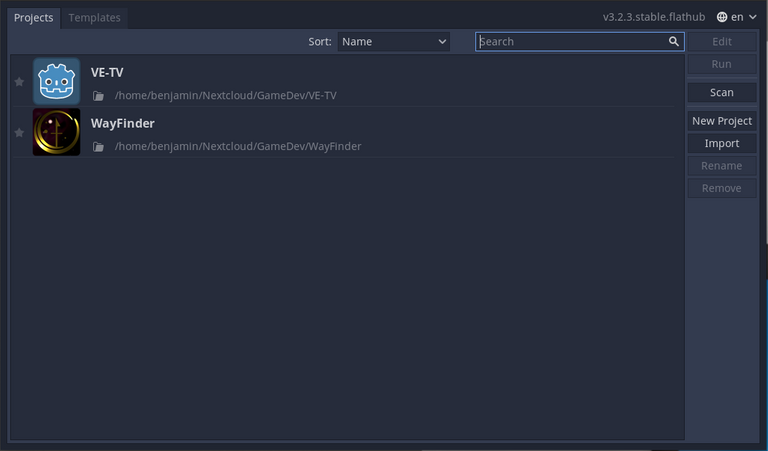
Once you have downloaded Godot and got it setup on your system (which doesn't require much work) go ahead and launch it. You will be greeted with something resembling the screenshot below.
Note: On first run a dialog may appear, and offer a template suggestion. Since we won't be using a template you can dismiss this dialog.
New Project
Click on the New Project button on the right hand side of the interface and the dialog below will appear.
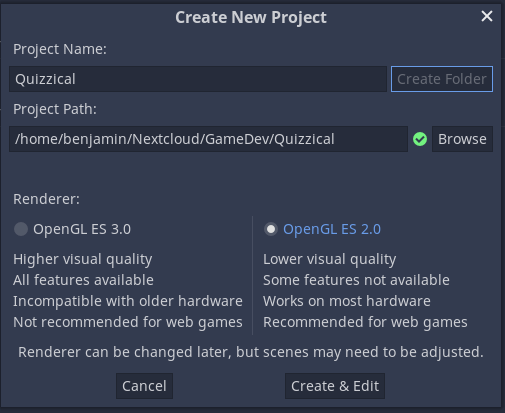
You may name the project anything you like and store it anywhere on your computer that makes sense to you. Be aware that moving the folder after creation will break the listing in Godot and you will need to "Import" the project to get it back on the list.
Be sure to select OpenGL ES 2.0 as your preferred rendering method, this can be changed at anytime throughout the project but for now lets aim to have a very low resource game.
When your are satisfied with your selections click on "Create Folder" and then "Create & Edit"
Congratulations you have now started your first game project
Project settings.
Prerequisites
Before we set out game's project settings lets create our first scene. A scene in Godot is any collection of nodes that compose the game. It can be anything as large as an entire map with thousands of nodes or a single item, but more about that later.
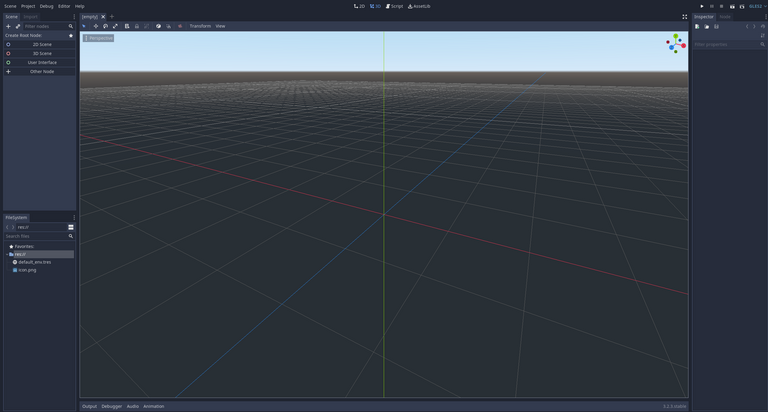
For this project the first scene we will create is a "2D Scene" once the window changes to a gray void you should see a tab title "untitled" saving the project will allow you to name this scene. Before we save the scene lets create a folder titled "Scenes" within our project. This way we can keep things organized throughout the project. Use the "Create Folder" button in the save dialog [Shown below] to create the folder.
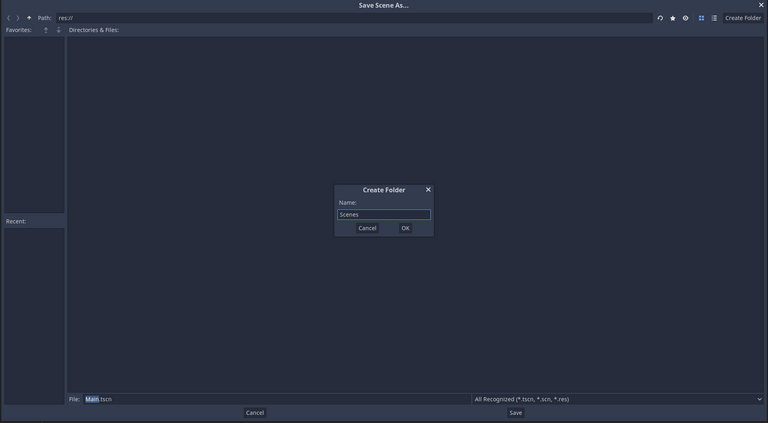
Once the folder is created save the scene under the name "Main" as it will be the what we build everything from.
On to the settings
Now that we have our scene lets go to Project --> Project Settings and set a few things there.
- Config
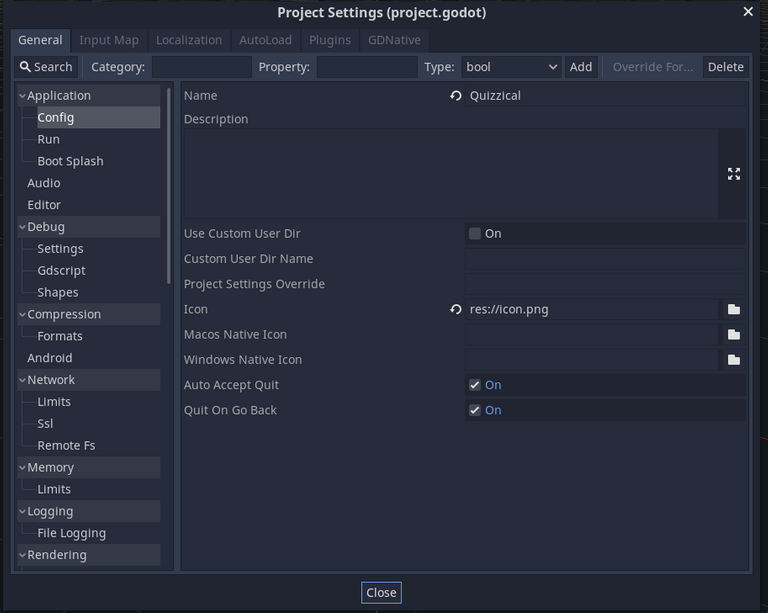
We will start by setting some basic Config options under Application--Config, These options will be what people see after they have downloaded and installed your game (once complete) so be sure the description matches the product, later on you will want to go back and set the icons to your like but for now its okay if we don't have one.
- Run
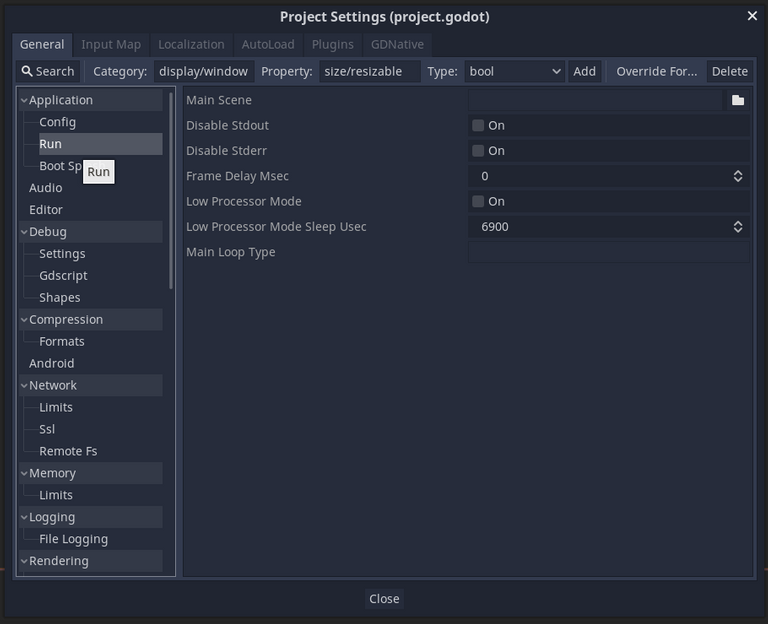
Now that we have the Config things setup we can move on to the Run options. Here we will set the main scene (or what launches once the engine loads. Click on the Folder icon find your way to the Main.tscn file which should be in the Scenes folder and confirm the dialog by clicking on "open" once Main.tscn is highlighted or simple double click on the file.
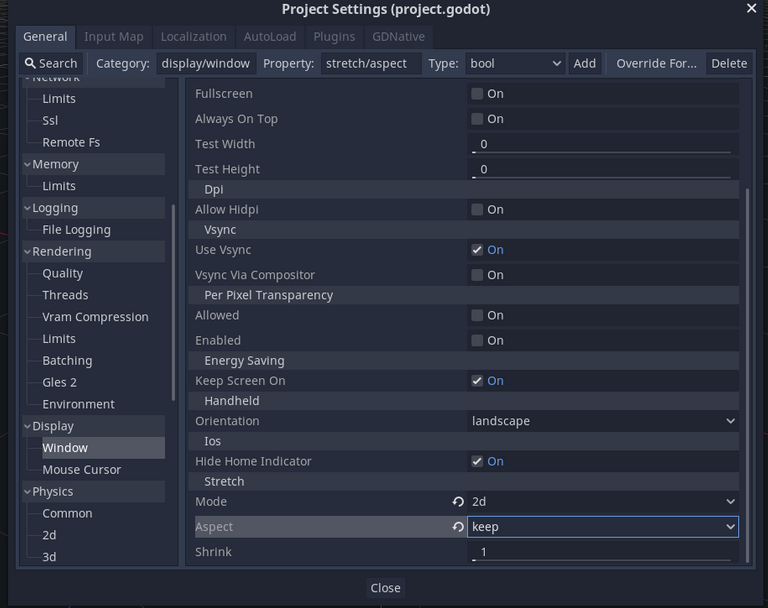
Now lets move on to the Display--Window options. These let you fine tune how the game is displayed by default. You can play around with most of the options here to suite your needs. However, for this project we need to scroll down to the bottom of the dialog so that we can set the stretch mode to "2d" and the stretch aspect to "keep." This allows the window to be resized to any screen resolution.
Note: If you set your initial resolution too low your content will look very pix-elated at higher resolutions. The rule of thumb for 2D graphics is that you can always make something smaller, but you can't always make it bigger.
With everything set click close and we're ready to get to making our game!
Scene setup.
As silly as it may seem we aren't going to do anything with this "Main" scene yet. But we will get back to it soon enough. Instead we are going to create a few more scenes to that we will then add to the Main scene to create the game. We can make these scenes at anytime and in any order, but sense we know we're going to need them lets go ahead and make them first.
- MainMenu
The first Scene we will create is the MainMenu scene, and as the name suggests it will contain the Main Menu for our game. Unlike our first scene the MainMenu scenes root node will be a "Control Node" or "User Interface"
To create this node click on the + symbol next to the Main tab. Then click "User Interface" out of the list of default scene types.
Next rename the node called "Control" as MainMenu and save.
You will see Main.tcsn in the list of scene files but before we save our new scene lets create another folder this time calling it UI
Once this folder is created you may save the MainMenu.tcsn file to this folder.
- Player
Next we create the Player scene which will become one of or more dynamic and important scenes as it will store and display each players information.
To create this node we're going to follow the steps above except we as going to use a "2D Scene" as our default scene type and we are going to save this scene in a folder called Player.
- Questions
Next we create the Questions scene. This scene will display a question, the answer, and all other data required for the players to play the game. It will end up being the most dynamic part of the game with sub scenes that add even more complexity. However, lets not worry about that at the moment as we are just starting out.
To create this node we're going to follow the same steps as the Player scene except we're going to save this scene in a folder called Questions (notice its plural). Once its saved we done with the scene creation for this lesson.
Note: It may seem like we are creating unneeded complexity to the project, but by creating these folders we make it easier on us in the future, but in the end how you organize you game is up to you. Just be aware that the rest of this series is going to assume you created it per the instructions.
In the end our project structure looks like this
/
./Player
./Player/Player.tcsn
./Questions
./Questions/Question.tcsn
./UI
./UI/MainMenu.tcsn
Design and Coding
Hint: As your scenes become more complex you will need to lock/unlock nodes and their children to keep from editing the wrong nodes. As a rule of thumb lock items as you complete them even if you think you might go back to them later. Image for reference.
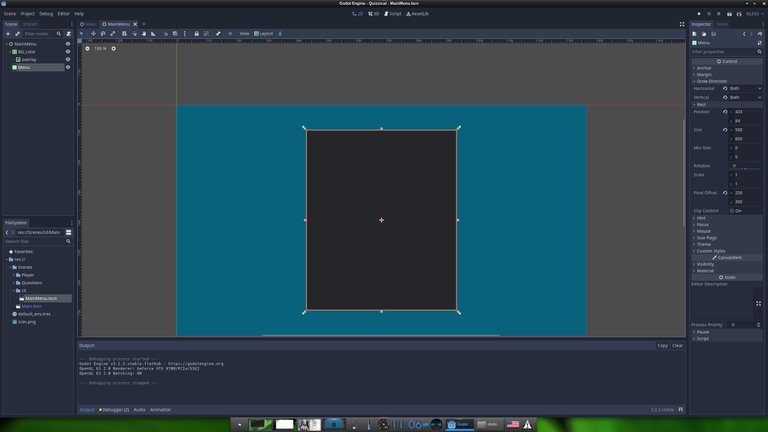
Main Menu
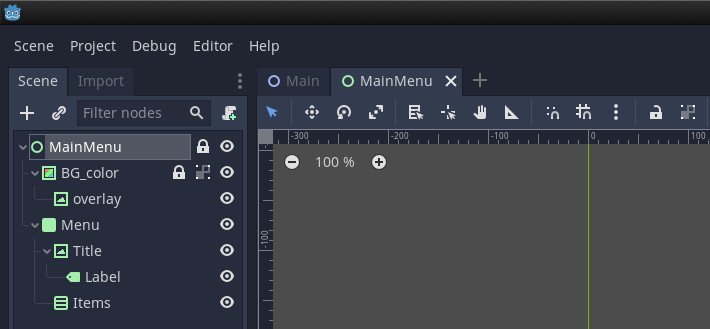
The Main Menu is the first thing that users see when they start your game. It should be both clean and inviting with as few distractions as possible, however its also important to give quick access to things that the player will need to enjoy the game. Sense the look and feel of your game is up to you, this tutorial's main menu is going to be very simple, but we will design it with modification in mind.

So with the MainMenu scene selected as seen in the image above, lets get started.
- Adding a Background
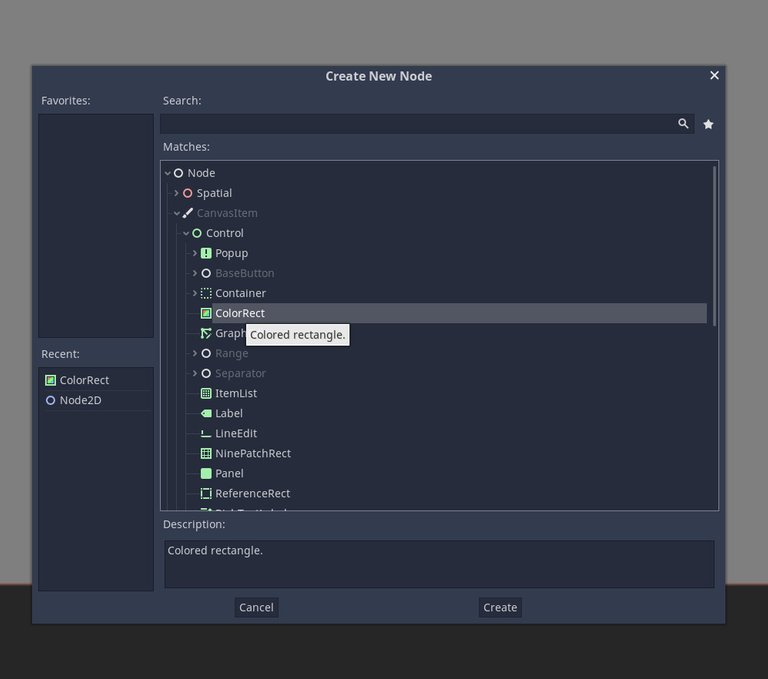
We'll start our scene by adding a ColorRect object to the scene. This is done by right clicking on the MainMenu Node or by clicking the plus icon on the left hand side of the window directly below the "Scene" tab. Once the "Create New Node" dialog box appears find ColorRect and click create.
Note: It is always best to use the right click method when working with larger scenes to make sure the items you are creating are added at the proper point in the tree. (More on that later)
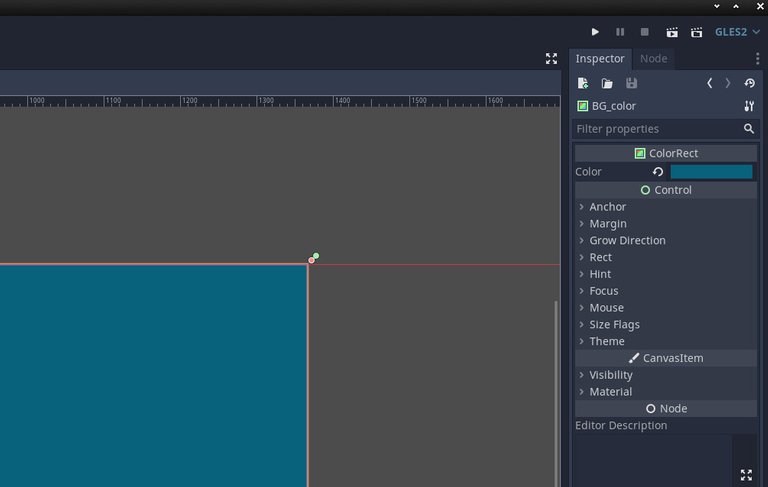
Once it has been added to the scene lets rename it "BG_color" by double clicking on the node. You will notice that the rectangle only takes up the upper right hand corner of your screen. Without resizing the square manually find the "Layout" option near the center top of your display window. Clicking Layout will display a list of anchoring options that can be used to glue your node to various parts of the screen. For our background we want it to take the whole screen so choose "Full Rect" and while you're at it change the color by using the Inspector found over on the right hand side of your screen (See Below).
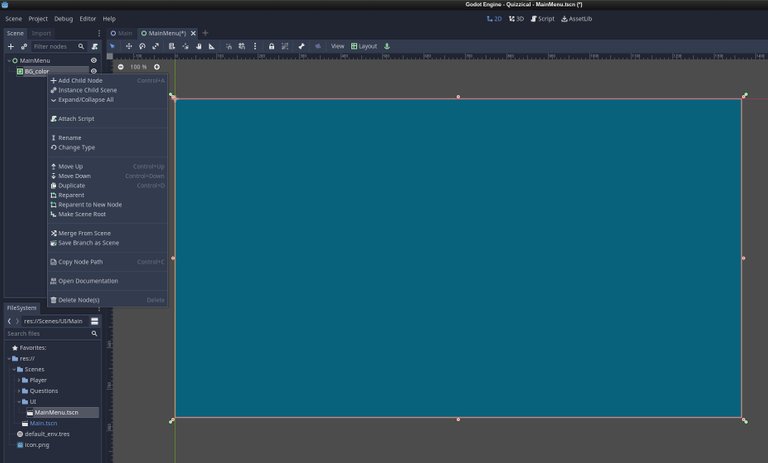
After our background color is in place lets add a child node to this item. We will be calling it "overlay" and it will be a TextureRect. Right click on the BG_color node and then on "Add Child Node" (pictured below)
Follow the steps above for to setup the overlay but be sure to select TextureRect instead of ColorRect when selecting the new node. We wont worry about the image that will go in the node at the moment, but having the place holder there now means we will be ready for it in the future.
- Menu Panel
Now that we have our background squared away lets add our menu panel. With MainMenu highlighted lets add a panel node to our scene.
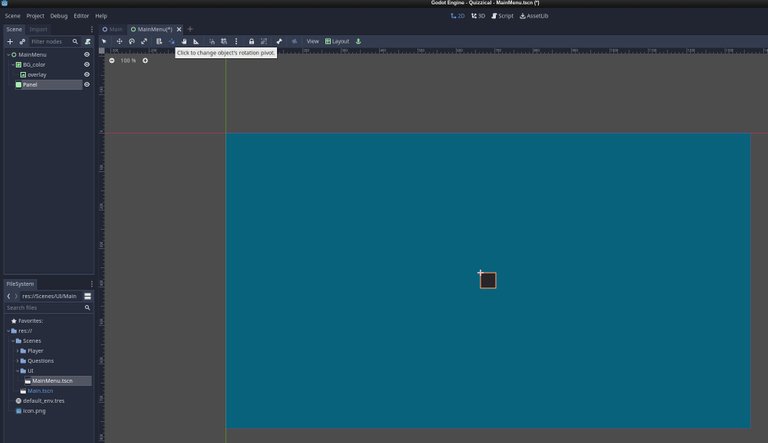
Note: In the screenshot above I have already used the Layout tools to set the node to "Center"
This will be where we display our title, and option list. For this tutorial we're going to make sure things fit inside the panel except the title, but feel free to experiment once things are working as planned.
Next its time to resize the panel and make sure its going to "Grow" properly if ever we need it to.
We do this by using the Inspector which is found on the right hand side of your screen. The options "Grow Direction" and "Rect" will be our primary targets at this point so if they aren't expanded like they are in the screenshot below lets make them that way.
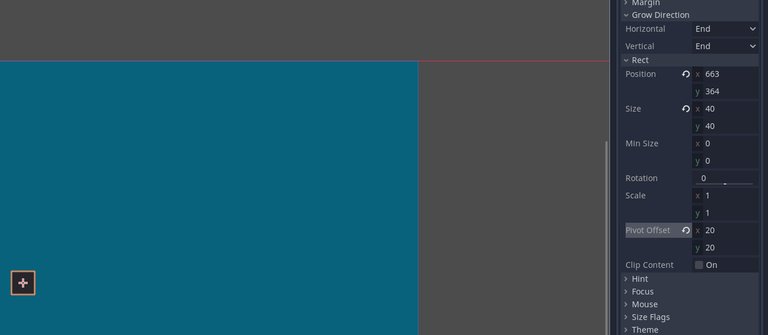
Note: As you can see from the Inspector you have full control over the Nodes within the scene, I encourage you to experiment with each of them after you have completed the tutorial.
For now lets set the "Grow Direction" options to "Both" and the "Size" option to 500x600. If you previously centered the rectangle you'll need to do so again. Lets name the panel Menu so it is easier to find later.
With our panel now in place lets add some items.
For the tutorial add a TextureRect, and a VBoxContainer to our Menu panel. Rename the TextureRect "Title" and the VBoxContainer "Items". Feel free to move them around and place them as you see fit. If you are having a hard time remembering where your Title node is you can add a set of Label nodes as a children to Title anchored in the corners to help. Likewise you can do the same for the Items node.
Here is what mine looks like at this step.
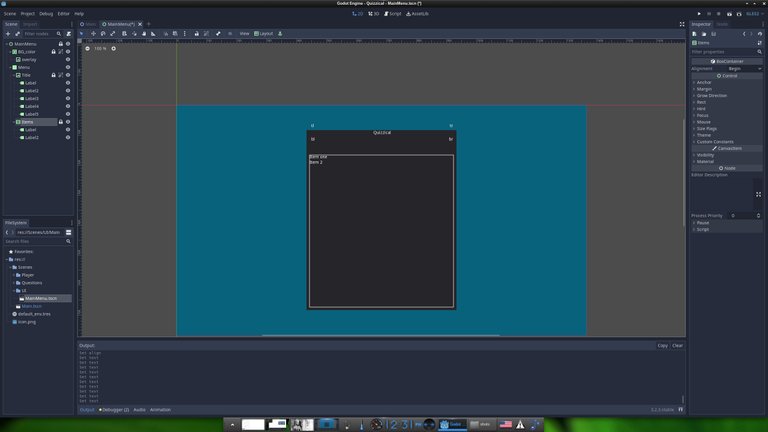
Note: I've turned off the lock icons in the interface to make things easier to see. You can toggle them on and off by using the View option next to Layout.
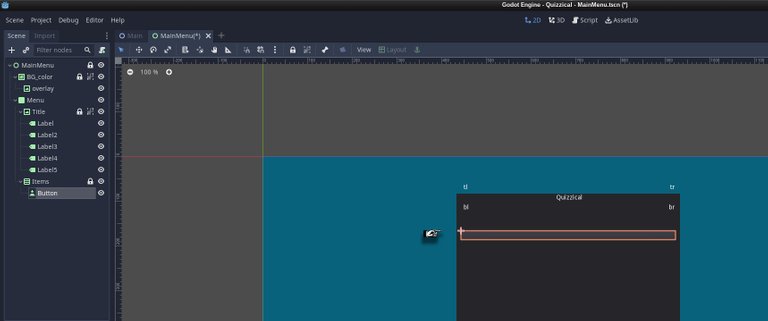
We're now ready to add the buttons to the Items container. We will do this by creating a single button and then duplicating it to create the others. There are many button options in Godot but we will be using the default button for now.
Following the same pattern as the steps before highlight Items --> Add child node --> Button we quickly create our first button. Notice however that it takes the entire length of the Items container and its height isn't exactly usable at the moment. (See image Below)
When dealing with list containers in Godot there isn't away to override some of the sizing options within the container. Thankfully we only need to deal with the height of the button and not its width. So like before we are going to change the Rect options for the button which can be found the Inspector.
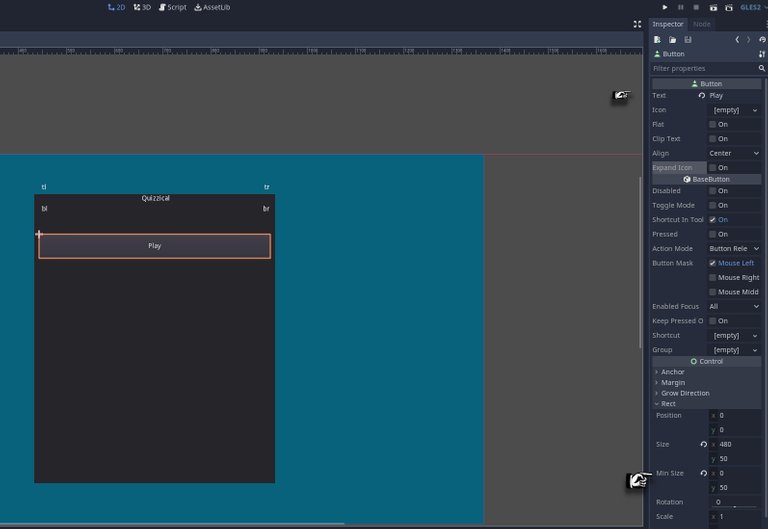
Like many things in Godot the Button node has a large assortment of modifiable options. The ones we're currently concerned with are the Text and Min. Size variables.
The Text option displays text on the button (surprise) it can been changed at anytime and shouldn't be confused with the name of the button in the scene tree. I gave my first button the text of "Play" but you can choose whatever word you want for now.
Next we move to the more important option that needs to be set the Min.Size options. Sense we can't change the width of the button thanks to the Items container we set the height. I set my height to 50 which Isn't quite right yet, but its closer to what I want.
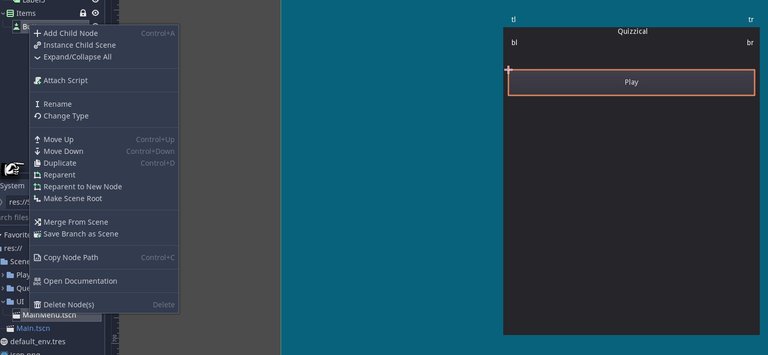
Once you have it sized the way you like we'll move on to duplicating the node. Back on the left hand side of the screen where we find our scene tree right click on the Button we have just been modifying. Find the "Duplicate" option and create two more buttons.
Notice how each button is labeled, now its time to rename these buttons. I named them "Play","Settings",and "Quit". After renaming them in the scene tree go over and change the buttons text to reflect the change.
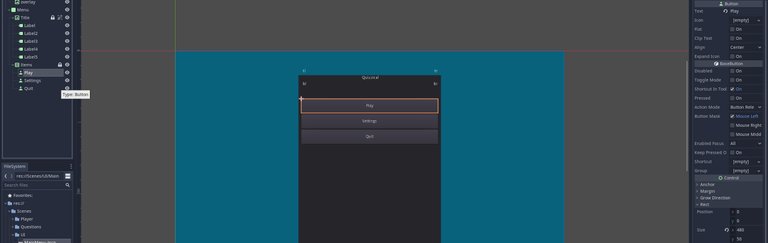
At this point we are going to switch gears from layout to coding. Yes the interface isn't perfect but you now have a general understanding of layout and can add your own flare to what we've started together.
Tip: Due to the differences between computers you will need to set the Min. Size of MainMenu to the default size of your game window. (Shown in the image below.)

- Your First script
Note: Godot supports numerous script types by default and others can be added thanks to the work of 3rd party developers. Thanks to the way Godot is designed, we can mix and match all of them into the same project, though this is discouraged for obvious reasons.
For this project we are going to use Godot's official scripting language GDscript. We do this by attaching a script to our MainMenu Node. Right click on the node and then on "Attach Script" or by highlighting MainMenu and clicking the icon pointed to in the screenshot below.
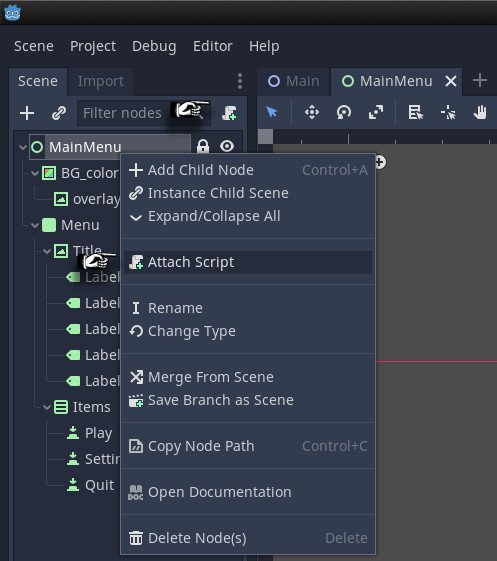
There is no need to change any of the options in the dialog that appears so simple click "Create."
Once the script is created you may be sent to a screen like the one below, you can go back to the interface building screen by clicking on any of the nodes in the scene tree or by clicking the word 2D in the top center of the interface.

We'll be going back to the 2D scene for now to connect the buttons to the script to get them to do something.
- Fun with Signals
Note: Signals are at the root of all communications in Godot. They enable the developer to separate each scene into their own separate islands that run independently of each other and are generally easy to understand once you have used them a few times.
For our Menu we will walk through the first Button but I'll leave it up to you to connect the other two.
Select Play from the scene tree and shift your eyes to the right side of the screen. There you should see Inspector (the tool we've been using) and another tab "Node" if we click on this tab we will be greeted by the following.
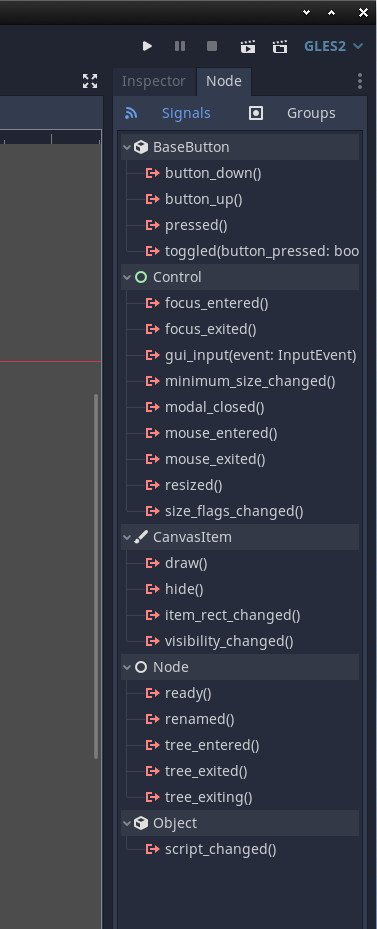
There are plenty of options here but the one we care about is the signal "pressed()" double clicking on this signal will bring up the following dialog. Since we want it to connect to MainMenu we can accept the defaults and click Connect.

Once connect it will send us back to the scripting window. Take note of the new func that has been added to our script that looks something like
func _on_Play_pressed():
    pass # Replace with function body.
Do the same on the other two buttons and you should have a block of code that looks like the below.
func _on_Play_pressed():
    pass # Replace with function body.


func _on_Settings_pressed():
    pass # Replace with function body.


func _on_Quit_pressed():
    pass # Replace with function body.
For now we don't have a game to play or a settings page to display, but we can still setup their signals. Remember we don't really want the MainMenu to do anything outside its scene but instead tell Main what we want to happen.
To add these custom signals we're going to need to get back to the scripting screen and add the following to the top of the script. So if you aren't already there Click on "Script" out of the options in the top center of Godot.
Add these lines somewhere under the extends Control but above func _ready().
signal play()
signal quit()
signal settings()
and then add emit_signal("signal name") to each func that we added. Mine will look like this.
func _on_Play_pressed():
    emit_signal("play")
    pass # Replace with function body.


func _on_Settings_pressed():
    emit_signal("settings")
    pass # Replace with function body.


func _on_Quit_pressed():
    emit_signal("quit")
    pass # Replace with function body.
Now with that done we have a fully working, albeit ugly, main menu. However, if we to run our game at this moment nothing would happen. Why? Well because we have it emitting signals but no one is listening.
Lets fix this.
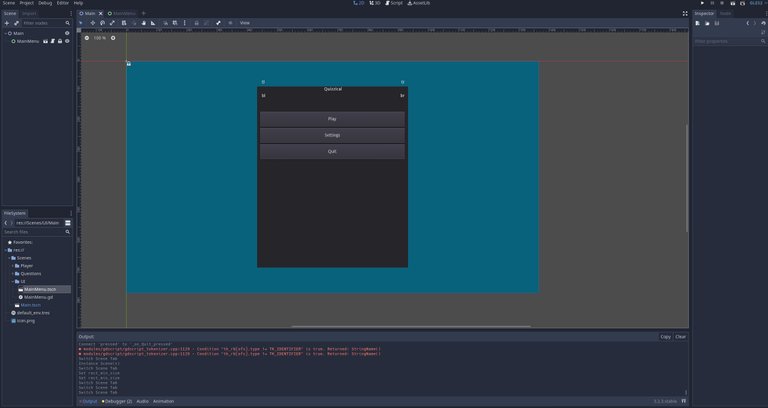
Head back to your Main scene by clicking on the tab associated with it. Then drag and drop MainMenu.tcsn into the scene tree. If everything was set correctly you should have something like this.
Now that we have our MainMenu added to our Main scene we can connect the signals from MainMenu to it the same way we connected the button signals to MainMenu. If you need a quick recap here's what we do.
Add a script to Main by right clicking and selecting "Attach Script" or using the +script icon next to "Filter Nodes" When Main is selected.
Once the script is connected jump back to the 2D view and click on MainMenu.
On the right hand side of the screen you have Inspector and Node. Click on Node and you should see three signals for MainMenu. play(),settings(),quit()
Double click each signal to add them to your Main script. Your main script should have the following lines when completed.
func _on_MainMenu_play():
    pass # Replace with function body.


func _on_MainMenu_quit():
    pass # Replace with function body.


func _on_MainMenu_settings():
    pass # Replace with function body.
Last thing to do for this section of the game is to add the a function to _on_MainMenu_quit() to quit the game. Later we'll add some sort of conformation to this section of the game, but for now lets just be happy that we wrote code that did something.
To quit the game simple add get_tree().quit() to the _on_MainMenu_quit() function so that it looks like this
func _on_MainMenu_quit():
    get_tree().quit()
    pass # Replace with function body.
In the next tutorial we will be going over the game mechanics and user input.
Until then check out our live stream over on vimm.tv and join our discord by using the link below.
Congratulations @v-entertainment! You have completed the following achievement on the Hive blockchain and have been rewarded with new badge(s) :
You can view your badges on your board and compare yourself to others in the Ranking
If you no longer want to receive notifications, reply to this comment with the word
STOPDo not miss the last post from @hivebuzz: