.JPG)
I love to cook and bake. I love the smell of food made from scratch, and teaching the children how to cook in the process. How about that smell of fresh baked bread and biscuits? Yum!
Last spring, I found out that Miss A and myself both have gluten intolerances. In some ways that's the least of our worries. On top of the gluten, Miss A also have a montage of other intolerances to include cornstarch. Did you know that cornstarch is in so many bakery items and also used frequently as a gluten free gravy or sauce thickener? I'm only human, and while I love making food from scratch for my family, I do need breaks and its been so hard to find what we need to keep Miss A healthy and happy.

The typical gluten free bread, in the stores, is anywhere from just over $3 for 6 oz up to over $8 for a 1 pound loaf, in Wisconsin, and of course it depends on the ingredients as well. On average I spent just under $5 for one loaf that both of us liked, when purchased at the store. But it was always dry, unless we toasted slices in the frying pan, then slathered them with butter. So, I started perusing the internet for different bread recipes.
After several attempts at making a good bread that would make us salivate when taking it out of the oven, I think I figured it out!

Along the way, I've had several issues arise. One was the use of Xanthan gum. Its used as a binder in gluten free baked goods, but if you use too much it dries out what your baking and makes it very crumbly. About half the flour blends out there already include it in their mixes.
Then there is also picking out the best blend for you. Personally, I trade off between two different brands. My go to blends are Thrive Life's Gluten Free Flour Blend, found at https://tinyurl.com/Thrive-GF and the other is Namaste Perfect Flour Blend, found at https://tinyurl.com/perfectflour .
While Thrive's blend is starch based, Namaste's blend is half starch half flour. Knowing that that makes a difference in your baking, I needed to be sure that the bread I came up with needed to be flexible enough to be able to use both kinds.
Another thing to keep in mind is kneading and raising. With traditional wheat breads, you knead, rise, punch down, knead, shape, rise in bread pan, then bake. However, I have come to learn that with gluten free bread, if you do that then you end up with yeasty flatbread instead. So when baking any gluten free breads with yeast, as soon as you are done mixing, you put it in the pan to rise, then after its risen, bake immediately. The grains used in gluten free baking don't have the gluten that is found in wheat, barley, rye, etc, which need exercising to be able to proof properly.
Wouldn't it be nice to not have to exercise? lol
That all being said, lets check with the judges!
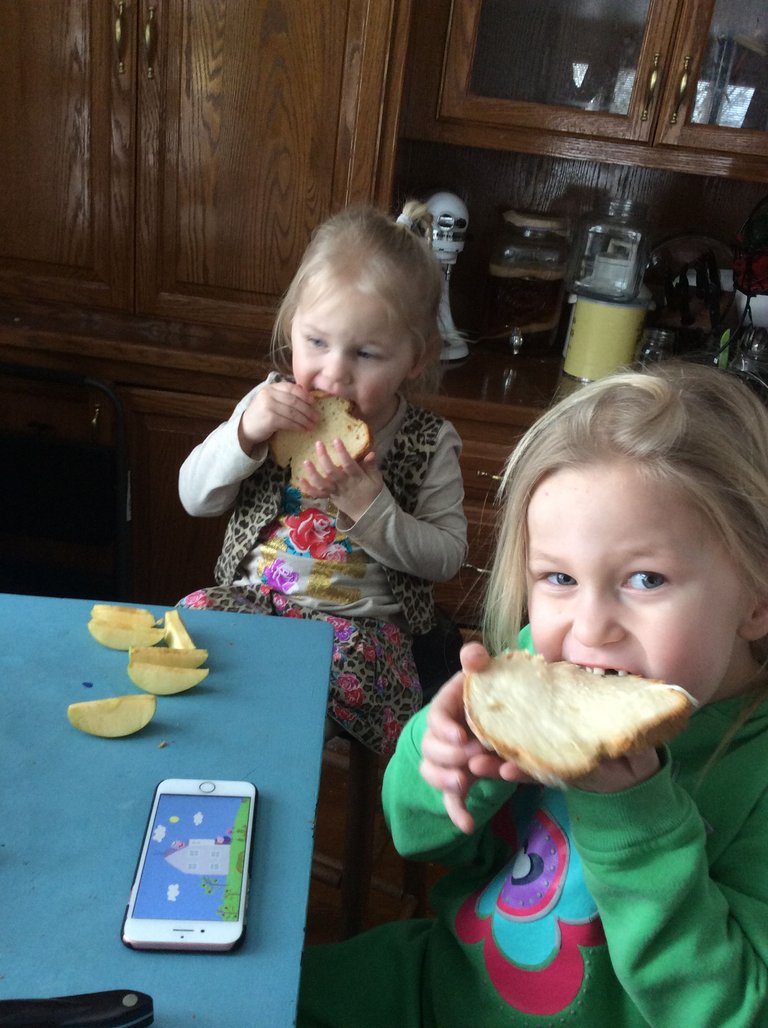
They love it!
Ready for the recipe? Here it is!
Ingredients
Part 1
1 1/2 c warm water and milk mixed together (I used Almond milk)
3 Tablespoons Sweetener of choice (I used Pure Cane Sugar)
2 1/2 teaspoon or 1 envelope Yeast (I used instant Dry Yeast here https://tinyurl.com/thrive-yeast )
Part 2
4 c gluten free flour blend of choice that has Xanthan Gum.
1 1/2 teaspoon Xanthan Gum, additional to what is in the flour blend
4 teaspoons Baking Powder (I use Hain Baking Powder because there is no cornstarch in it)
1 teaspoon salt
Part 3
2 teaspoons vinegar
1/4 c coconut oil or softened butter
3 eggs
Directions
*In a 4 cup measuring cup, mix warm water and milk with sugar, then add the yeast. Set aside to proof 10 minutes.
*Wisk together all the items from part 3 in mixing bowl.
*While mixing, add dry ingredients from Part 2, to the wet ingredients already in the bowl. Mix about a minute, using dough hook attachment if using a stand mixer.
*Add Yeast mixture and mix well till the whole thing makes a loose ball.
*Turn out onto floured surface, kneading to form into a loaf.
*Place dough in greased bread pan, then let rise on oven rack pulled half out of the oven. Set oven at 350 degrees F, leaving door open while bread is raising. Let dough rise for about 35-45 minutes or until doubled in size.
*When doubled, carefully slide rack back into oven and close door, and bake 35 minutes or till lightly browned on top.
*Within 2 minutes of removing pan from oven, tip bread out onto cooling rack and cool completely before slicing.
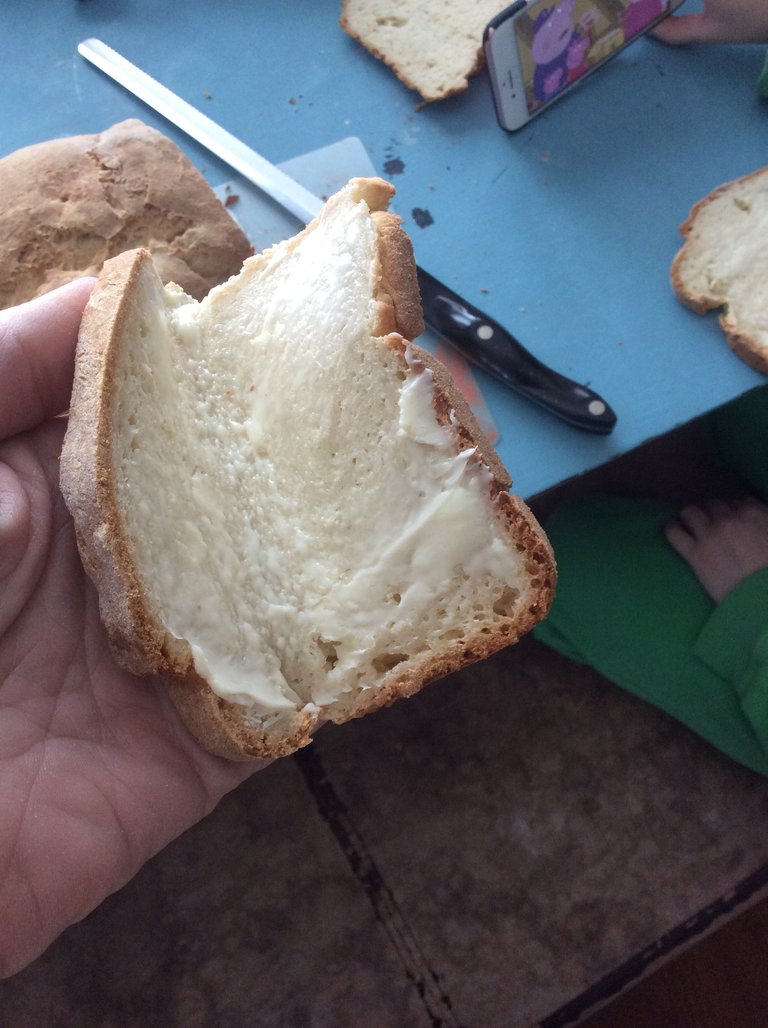
Look! It even folds without breaking!

Enjoy!
If your interested in checking out more about Thrive Life products, here's our website!
https://www.thrivelife.com/hubbardsthrive
Thanks for reading!
Congratulations @mamahubbard! You have received a personal award!
Click on the badge to view your Board of Honor.
Do not miss the last post from @steemitboard!
Participate in the SteemitBoard World Cup Contest!
Collect World Cup badges and win free SBD
Support the Gold Sponsors of the contest: @good-karma and @lukestokes
Congratulations @mamahubbard! You received a personal award!
You can view your badges on your Steem Board and compare to others on the Steem Ranking
Vote for @Steemitboard as a witness to get one more award and increased upvotes!