Hello, hivers!
Modifying tube powered amplifiers to use as a guitar amplifier is one of my hobbies. It seems like I've been doing it on and off for much of my adult life. I go through periods where I have no interest in working on amps, usually because one of my other hobbies has my attention. I had not done any work on an amplifier since probably early winter of last year, but an interesting project came my way in early June that got me interested again.
I have a friend who occasionally brings me old amps to work on. Most of them are guitar amps that he buys and has me check out and do what repairs are necessary. Then he usually resells them, they're worth more when they're working correctly. At the beginning of June, he brought me 4 amps for use as projects. These amps were all made by Bogan, a company that makes amps for commercial use in places that have background music, such as the grocery store. These 4 amps were probably all manufactured in the 1960s, they are all tube powered. There were 2 Bogan CHB-35As and 2 Bogan CHB-20As.
In the past, I've worked on several CHB-35As, they make pretty good sounding guitar amplifiers, and you can customize them in several ways. This is the first time I've had the chance to work on a CHB-20A. The amp puts out about 20 watts RMS to the speakers, so it's not real powerful, as guitar amps go, but it's still a decent amount of power, plenty enough for studio work or a smaller venue.
The thing that really got me interested in the CHB-20A that I started on is that it's the first rack mounted Bogan amp that I've seen from the 1960s era. Normally they're just housed in a metal box.
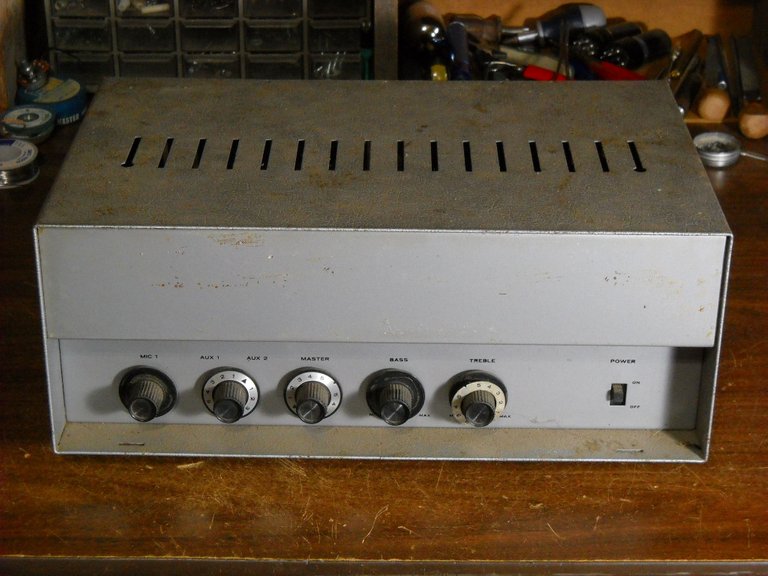
This is what the average Bogan amp from the 1960s looks like. This is a regular CHB-20A. This one is a bit rough looking, and the upper front label is missing, fairly typical for these old amps.
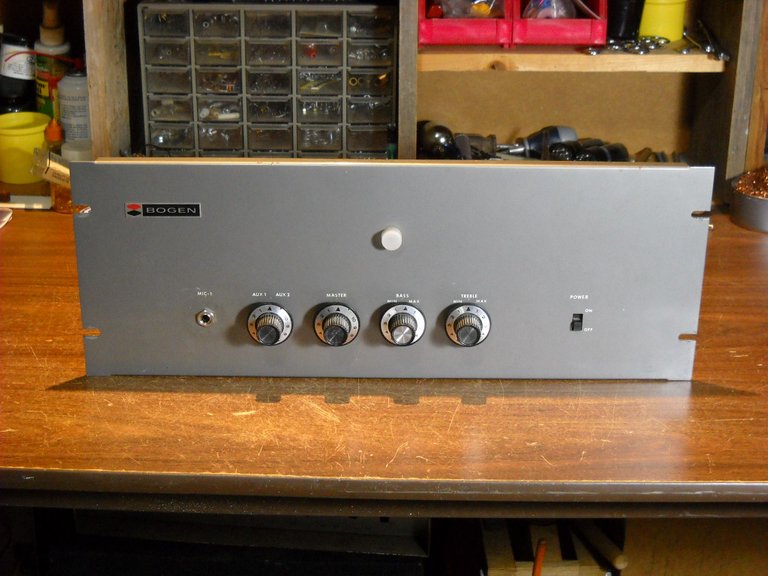
The rack mount amplifier looks like this. This picture is after I finished the modifications, so it has 1 less control knob, and the that hole is used for the input jack for the guitar cord.
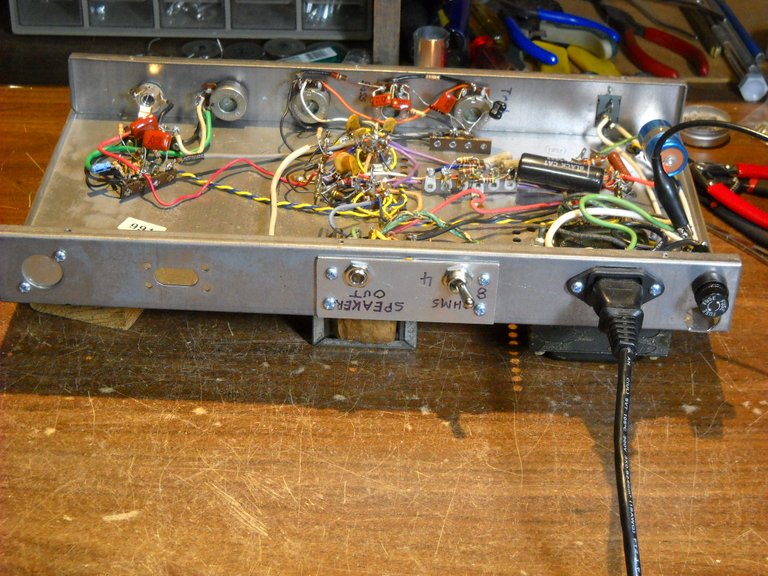
There's no cover over the back because it's made to go into an equipment rack, usually with other equipment. This picture is also taken after the modifications were done. I installed a power cord jack for a removable cord, as well as a new speaker jack and speaker impedance switch. The empty hole on the left is where the original cord was mounted. The holes on the right are where the original input connectors were mounted.

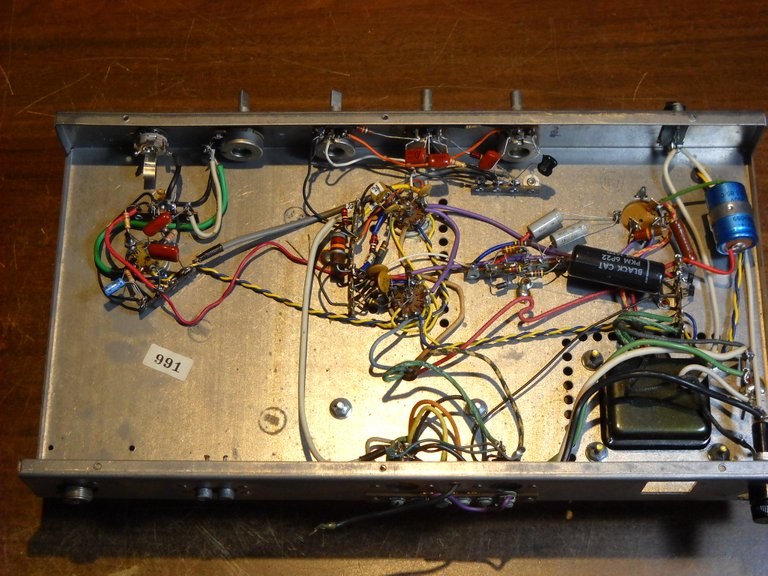
I started the modification by removing the original preamplifier circuits and the tube socket for the preamp tube. These amps are built with a 6EU7 preamp tube, and that is uncommon for a guitar amp. Most guitar amps use a 12AX7. Both tubes use the same 9 pin socket, but they're wired differently for each tube. I didn't want to spend a lot of time removing components from the original tube socket, so I just pulled it out of the chassis, complete with it's components, and replaced it with a new socket. At this point, I had not removed anything else except the original power chord, mostly to get it out of my way.
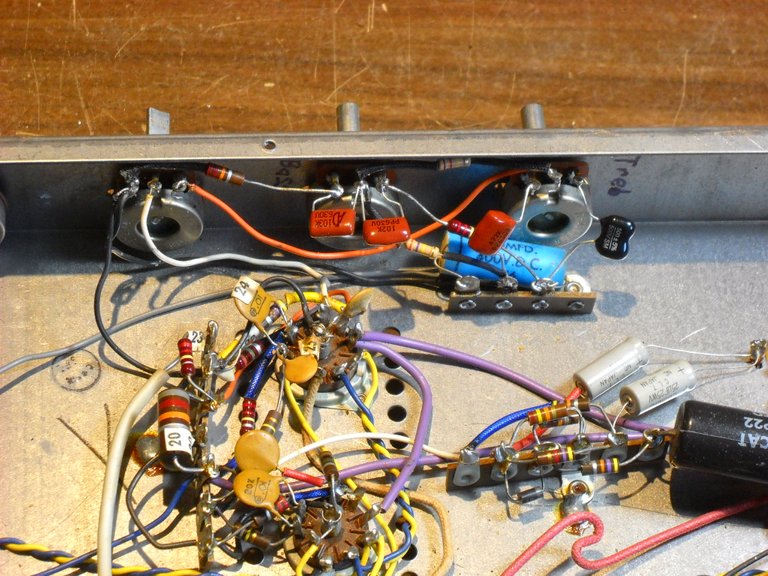
Since I was more or less following an Ampeg preamp schematic, I changed out all the components of the bass and treble circuits to make them more guitar friendly. I later on removed the big blue capacitor as part of another circuit change.
After the tone circuits were rebuilt, I started rebuilding the preamp circuit.
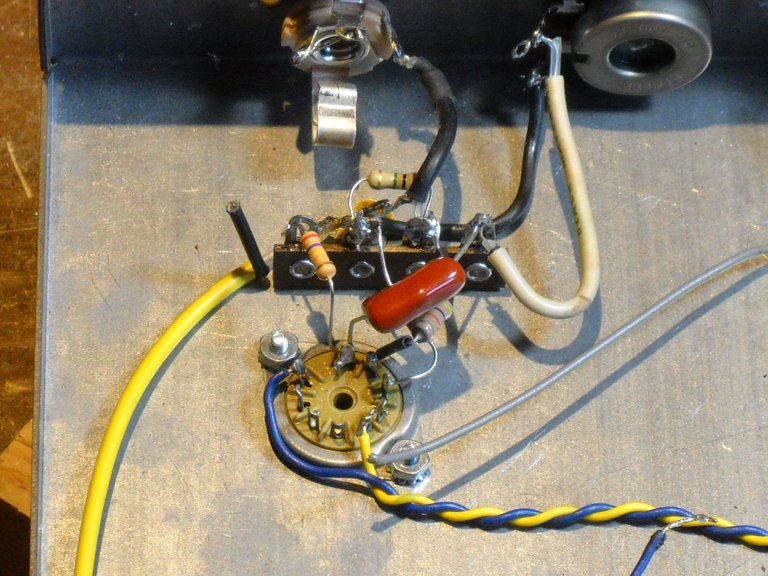
After a couple of changes, I finished the preamp circuit work.
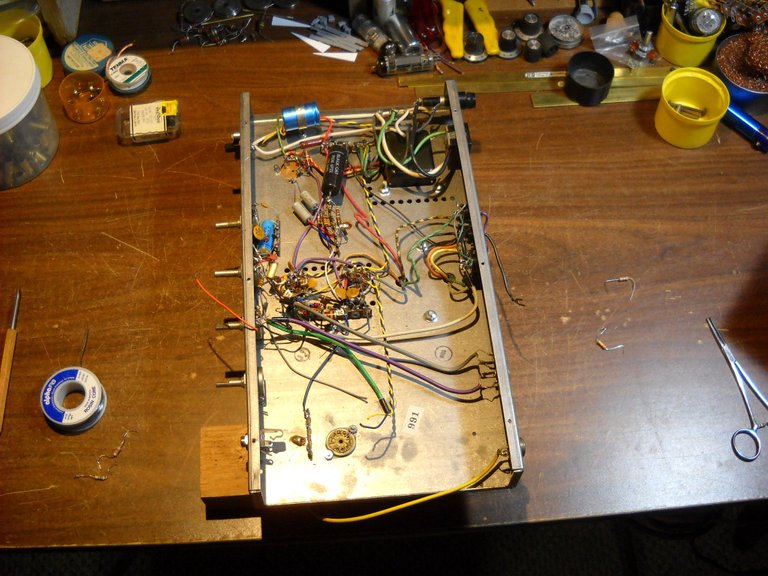
Then I installed the power cord jack for the removable power cord. It uses a standard removable 3 prong power cord. On the right side of the picture, you can see the original speaker output wiring.
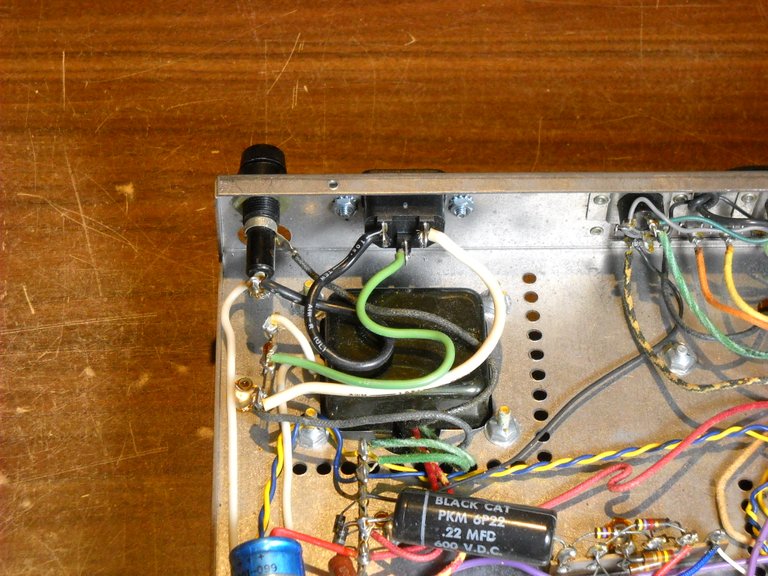
I removed the original parts of the speaker connections and mounted a tag strip in the chassis to attach the speaker wires from the output transformer to.
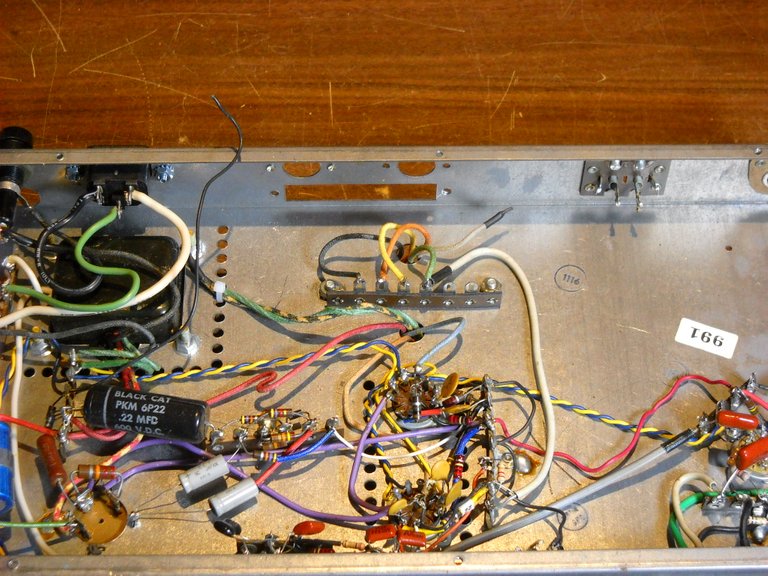
Then I made a cover plate for the big holes and drilled the holes for the speaker output jack and the impedance switch. I mounted the components on the cover plate after I put that on the chassis.
I had to make a couple of small modifications to the grounds in the amp to get rid of some buzzing, but after that, it tested out very well. This turned out to be a nice simple amp modifying project, and I'm rather happy with the results.
That's all I have for this post, I hope you found it interesting!

Your content has been voted as a part of Encouragement program. Keep up the good work!
Use Ecency daily to boost your growth on platform!
Support Ecency
Vote for Proposal
Delegate HP and earn more
Nice!
And a good fit for #stemgeeks #technology
Your electronic posts are the best! cool unit...amazed you know how to do this work.
Thanks! 😊
I'm in awe of your ability to disassmble and re-configure powers amps!
My husband is an electrical engineer (and a ham radio operator since adolescence), so yeah, HE can tinker with these things. He has restored many an old tube radio, including a big wooden Zenith.
You go!!!! I have to say much of what you wrote goes right over my head (the pictures too) but I have great respect, gratitude, appreciation, and awe for minds like yours that figure this stuff out for minds like mine to hear radios, records, TV broadcasts.... thank you!
Thank you for the lovely comment!