Hey Steemit!
As the Wonder Plants series keeps growing, some of you might eventually be interested in trying out remedies and preparations to see if such natural treatments could do you any good (always remember to talk to your doctor before trying out plant based remedies, don't hurt yourself just because you read something on Steemit, better safe than sorry), so I decided to add Tips & Tricks to the series to help you take advantage of these wonderful plants.
Wonder Plants - Tips & Tricks about drying and storing your herbs
1. The drying process:
As you most likely already noticed, many of the herbs we consume are presented to us dried. Drying your herbs allows you to store them for long periods of time and to enjoy some of their benefits even when they are not in season, or even buried under a couple feet of snow! To properly dry plant material you have to follow a couple of simple steps to preserve flavour, nutrients and the medicinal properties.
First, find a good place to dry your plants. It can be a room, a closet, a drawer and what not, but make sure it is not exposed directly to the sun or extreme temperatures (ideal temperature is 85 to 95 degrees Fahrenheit for leaves, and 115 degrees Fahrenheit for roots), and that the herbs will not be disturbed by elements, people or pets. The environment needs to be well-ventilated and free of moisture. Then, spread a thin layer of your herbs on clean and dry surface or hang a bundle of twigs or leaves. Once the drying process is done, small branches can be removed as they often hold little value.
To dry bulbs, remove the outer coat, slice and dry at a max. temperature of 100 degrees Fahrenheit.
To dry bark, peel the outer layers and leave out in the sunlight (except Wild Black Cherries, they should be dried in the shade).
If your herbs were exposed to moisture but have no mold, you can dry them again at room temperature (preferably warm).
Useful Links section below for more insight on how to use this technique!As suggested by @vegetarianbaker, you can also use a food dehydrator to dry freshly harvested herbs. Check out the
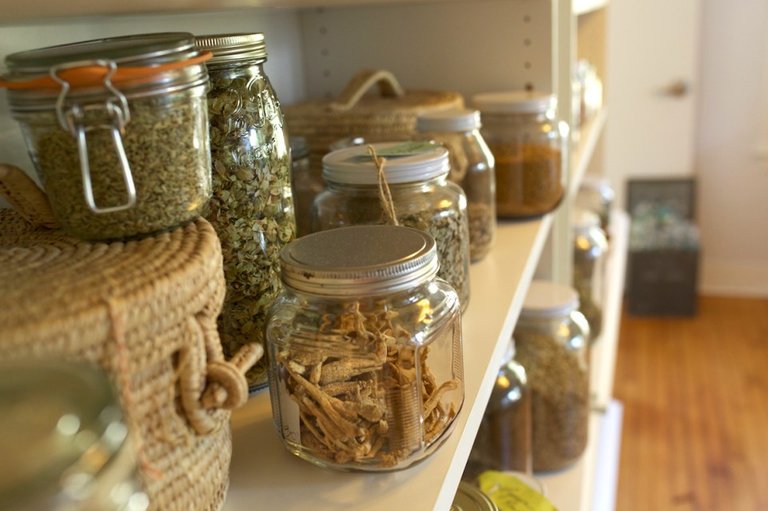
2. Storing your herbs
There are 2 main things you want to avoid when storing your herbs: light and oxygen. It is recommanded to use air-tight dark glass jars and to place the jars in a cool and dry environment. Effectiveness will be lost over time whether you like it or not, but your herbs will most likely be good to use for about 1 year, allowing you to renew your stock everytime the plant is in season.
Useful Links:
- 6 methods for drying herbs at home
- How to dry and store garden herbs
- Drying your herbs for cooking
- Using a Food Dehydrator to Dry Herbs
- Dry Fresh Herbs Using a Dehydrator
Sources:
- Lust, John. The Herb Book. 1974. Bantham Books. p. 28.
- Sivaro, Chef. How to Dry Herbs like a Pro. 2015. Kindle e-Book.
Images (in order of appearance):
- http://www.vegetablegardener.com/assets/uploads/posts/2701/kg10md4.jpg
- https://i1.wp.com/theherbalacademy.com/wp-content/uploads/2016/08/Tips-for-Storing-Dried-Herbs-Herbal-Apothecary.jpg?resize=960%2C639&ssl=1
Edits:
- 23/6/17 - Links to using a food dehydrator to dry herbs
I've never tried drying, but i have a lime basil plant that product so much basil this year. I would hate to have it go to waste. Can't wait to do this with them.
Cool, let me know how it turns out! I've been keeping a purple basil plant for 2 years and it produces enough to allow me to cook with it daily. Once every two weeks I take off some leaves and dry them. I once made the mistake of thinking the leaves were dry enough for storage but there was still a bit of moisture in them and the whole content of the jar went bad, so make sure you dry the leaves thoroughly! Best of luck!
have you tried a dehyrdator?
No I have not! When I started drying herbs from my garden I just placed them on a plate for a couple days and I just stuck to this technique. Using a dehydrator can be quite nice because you can choose (if yours allows it) optimal temperature to evaporate moisture and keep in the flavour.
Have you tried it yourself?
I will add links to this post on how to use dehydrators and what dehydrators you can use to dry your herbs. Thanks for the idea!
I don't have a dehydrator. I'm hoping for a company to send me one :)
A friend of mine told me he used some sort of Crock Pot used to warm dips, I think he said it was called the Little Dipper or something. I don't what temperature it heats up to, but that may be worth trying out too!