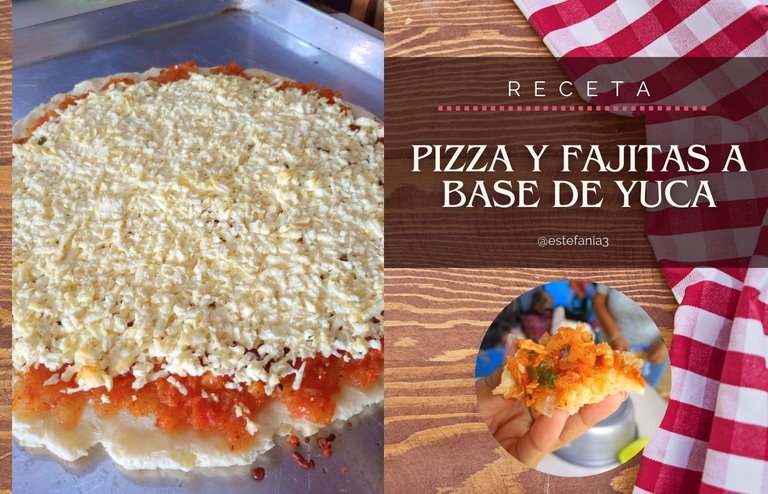

¡Hola Chicos!
Como les comenté hace algunos días, en el curso que estoy haciendo de panadería nos están enseñando a hacer comida saludable. Esta vez nos tocó hacer una pizza con masa de yuca y también unas fajitas, que vienen siendo prácticamente lo mismo pero se cocinan a la plancha.
Este mismo día tuvimos la oportunidad de hacer unas empanadas horneadas a base de yuca y la verdad es que también quedaron espectaculares.
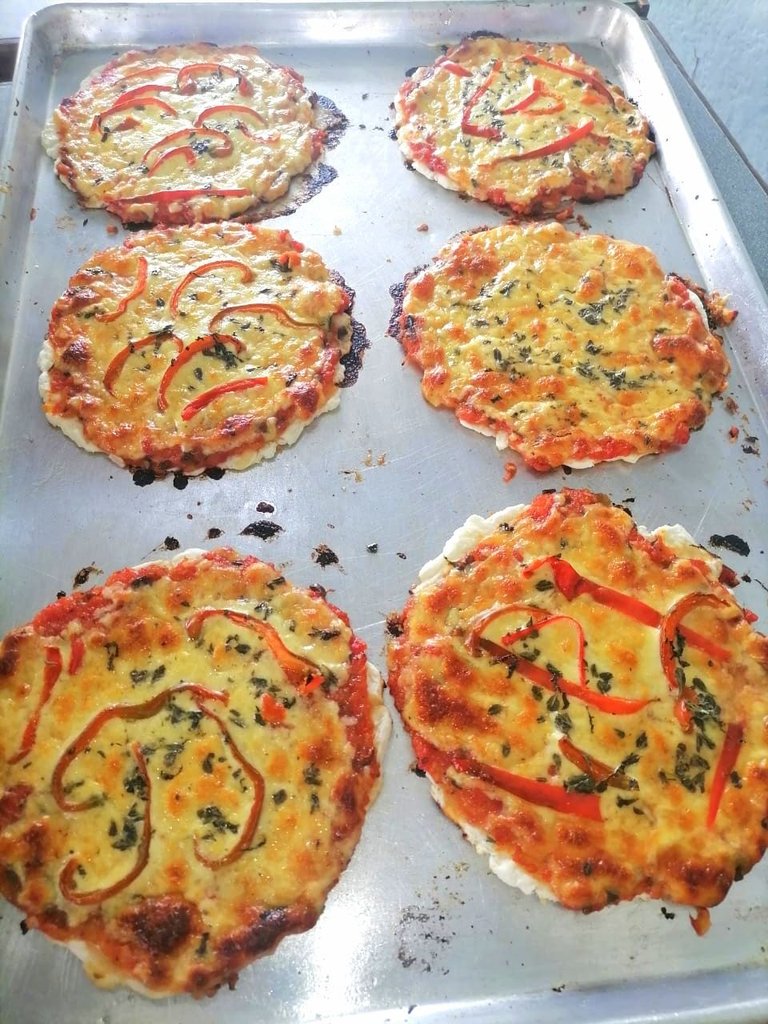
Hoy vengo a compartirles el resto de esa clase, que aunque contaran todas las recetas con la misma base, logramos diferentes experiencias y sabores. ♥
Hello Guys!
As I told you a few days ago, in the bakery course I'm taking they are teaching us how to make healthy food. This time we had to make a pizza with yucca dough and also some fajitas, which are practically the same but they are cooked on the grill.
This same day we had the opportunity to make some empanadas baked with yucca and the truth is that they were also spectacular.
Today I come to share with you the rest of that class, that although all the recipes were based on the same base, we achieved different experiences and flavors. ♥
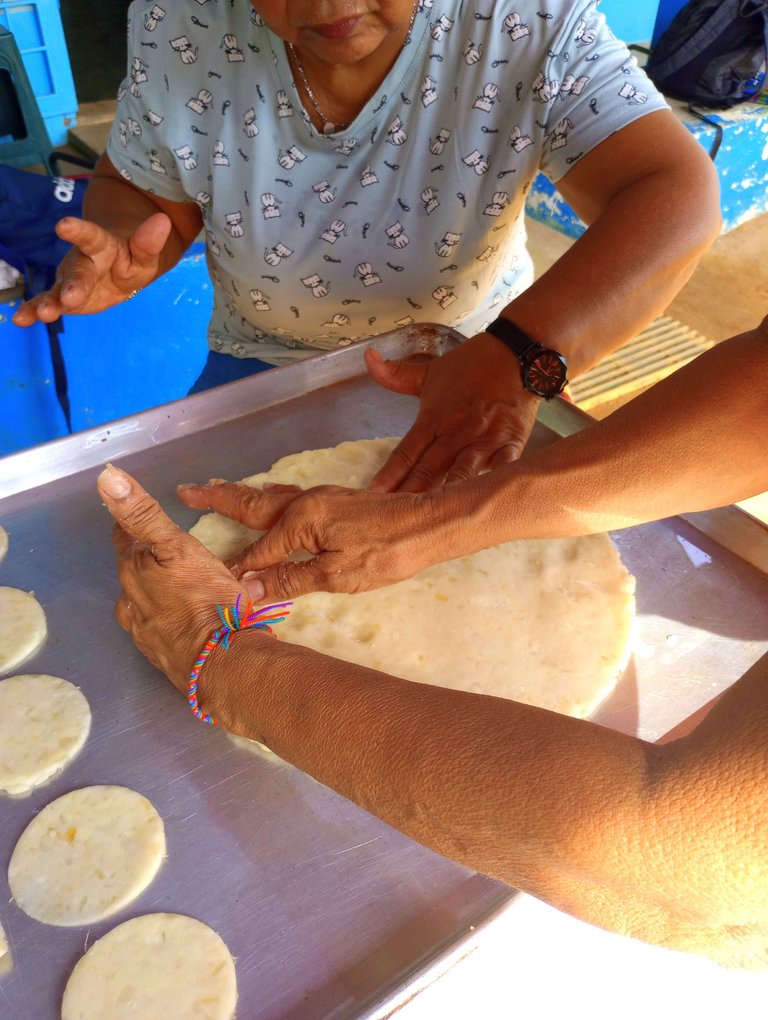
El principio fue el mismo, pues se trataba de la misma masa para todo. Igual les explico brevemente:
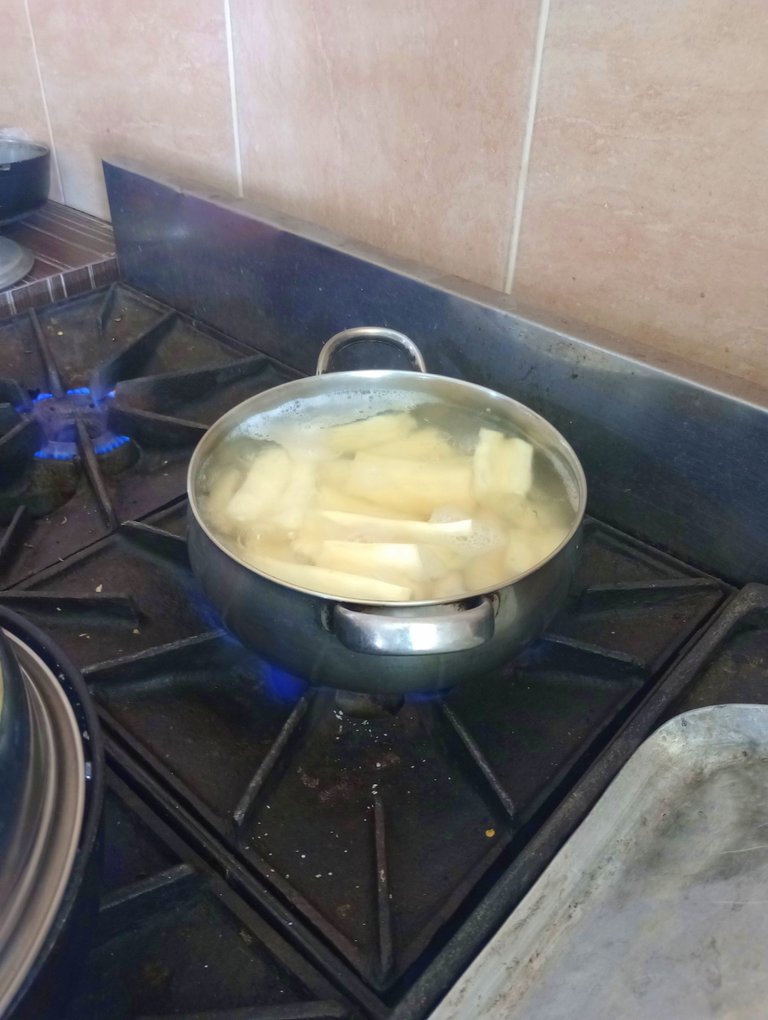
Ponemos en una olla grande abundante agua y al hervir vamos a colocar los trozos de yuca ya pelados, lavados y cortados.
Al estar blanda la sacamos del agua y hacemos un puré agregando un poco de sal.
Luego amasamos un poco con las manos engrasadas y así obtendremos la masa base.
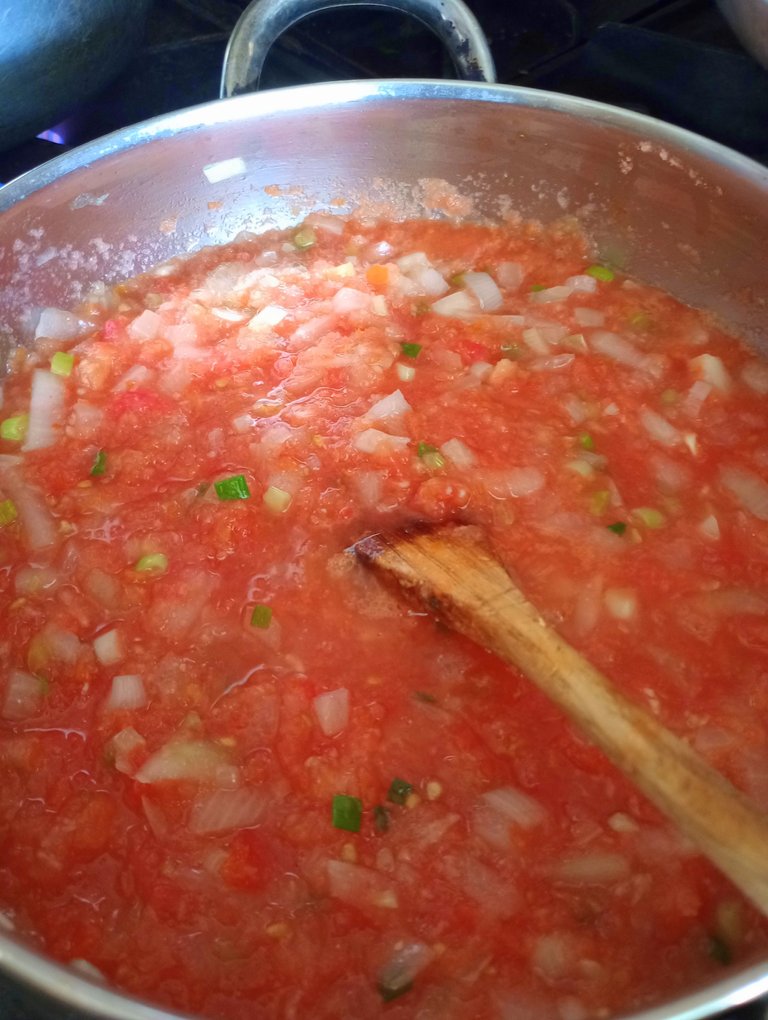
Para la pizza vamos a licuar tomates. En una olla sofreímos cebolla, ajo y un poco de cebollín con un chorrito de aceite.
Agregamos los tomates licuados y condimentamos al gusto. Se cocina hasta que la salsa reduzca un poco.
The principle was the same, because it was the same dough for everything. I will explain it briefly:
We put abundant water in a big pot and when it boils we put the pieces of yucca already peeled, washed and cut.
When it is soft we take it out of the water and make a puree adding a little salt.
Then we knead a little with greased hands and thus we will obtain the base dough.
For the pizza we are going to blend tomatoes. In a saucepan we fry onion, garlic and a little bit of chives with a little bit of oil.
Add the liquefied tomatoes and season to taste. Cook until the sauce reduces a little.
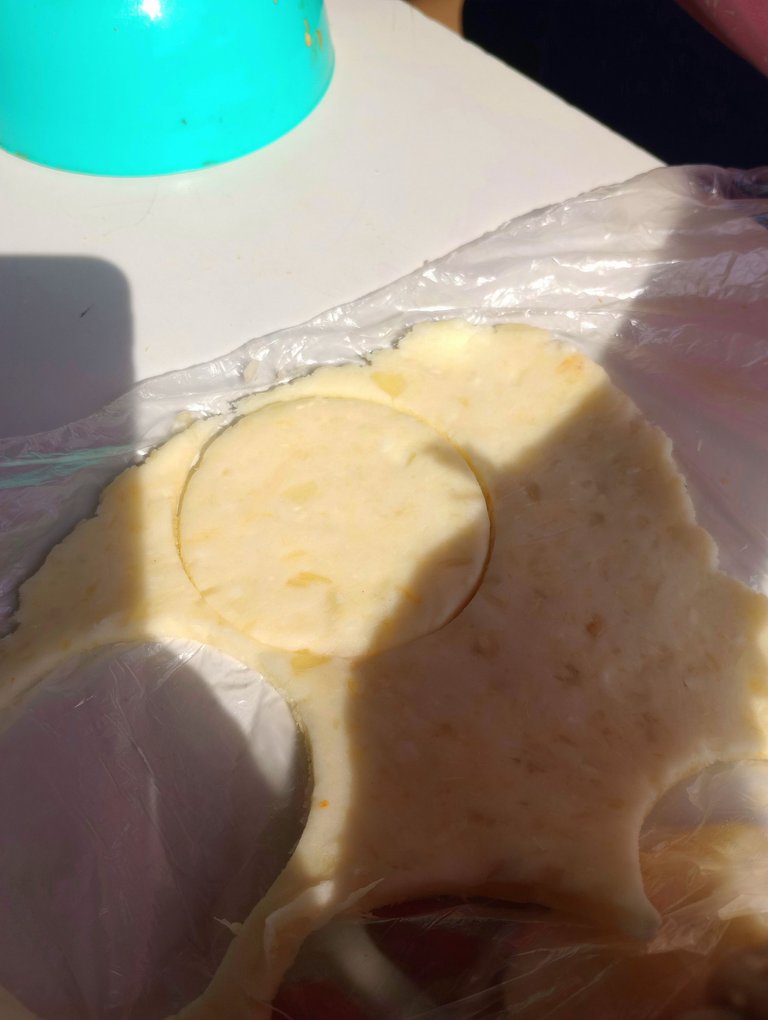
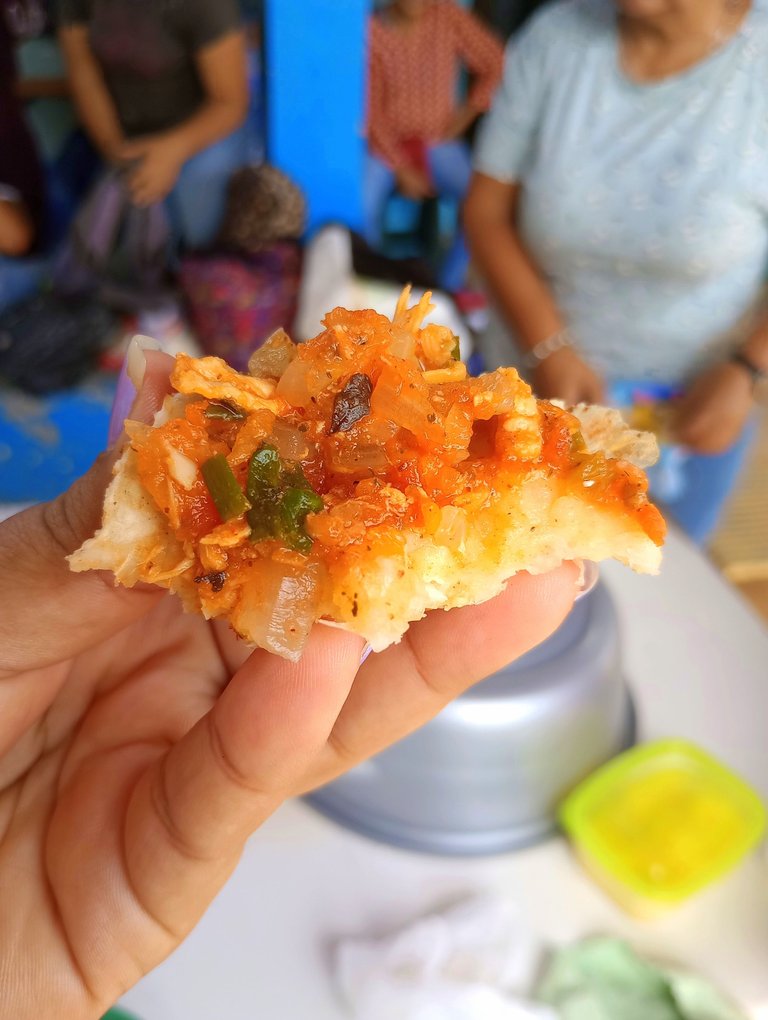
Para las fajitas aplanamos la masa con ayuda de una bolsa. Luego con un vaso o algún cortador redondo cortaremos la masa para darle forma. Podemos colocarlas mientras tanto en una fuente engrasada o llevar directo a la plancha para cocinar un poco hasta dorar por ambos lados.
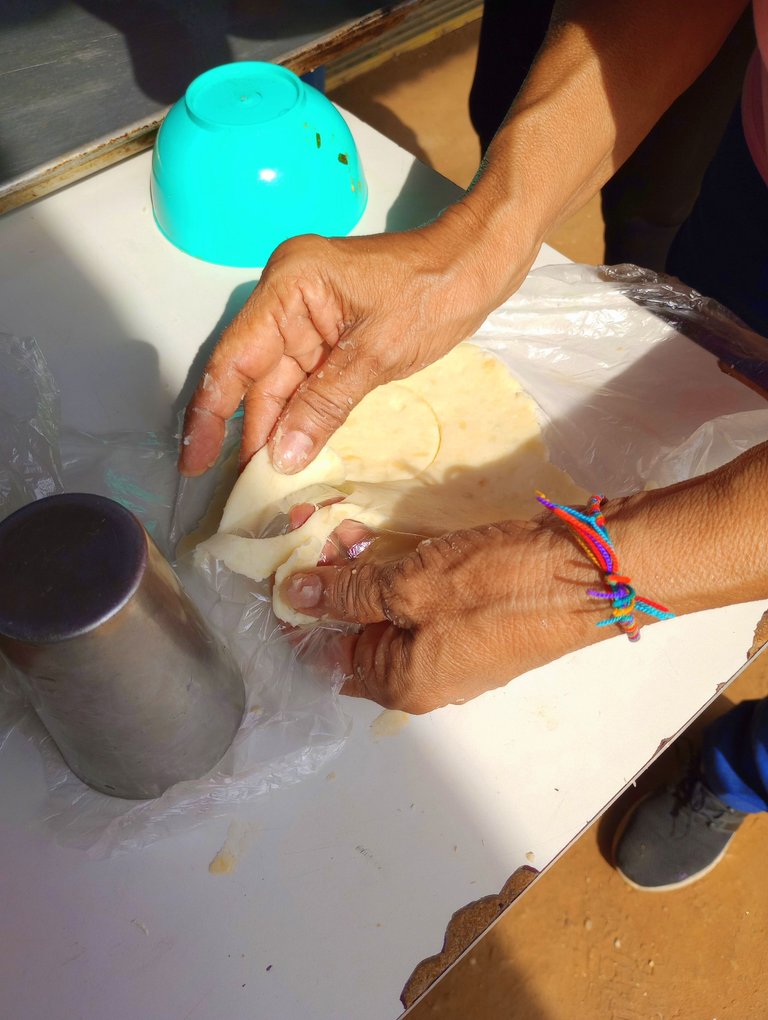
For the fajitas we flatten the dough with the help of a bag. Then with a glass or a round cutter we cut the dough to shape it. We can place them in the meantime in a greased dish or take them directly to the griddle to cook a little until golden brown on both sides.
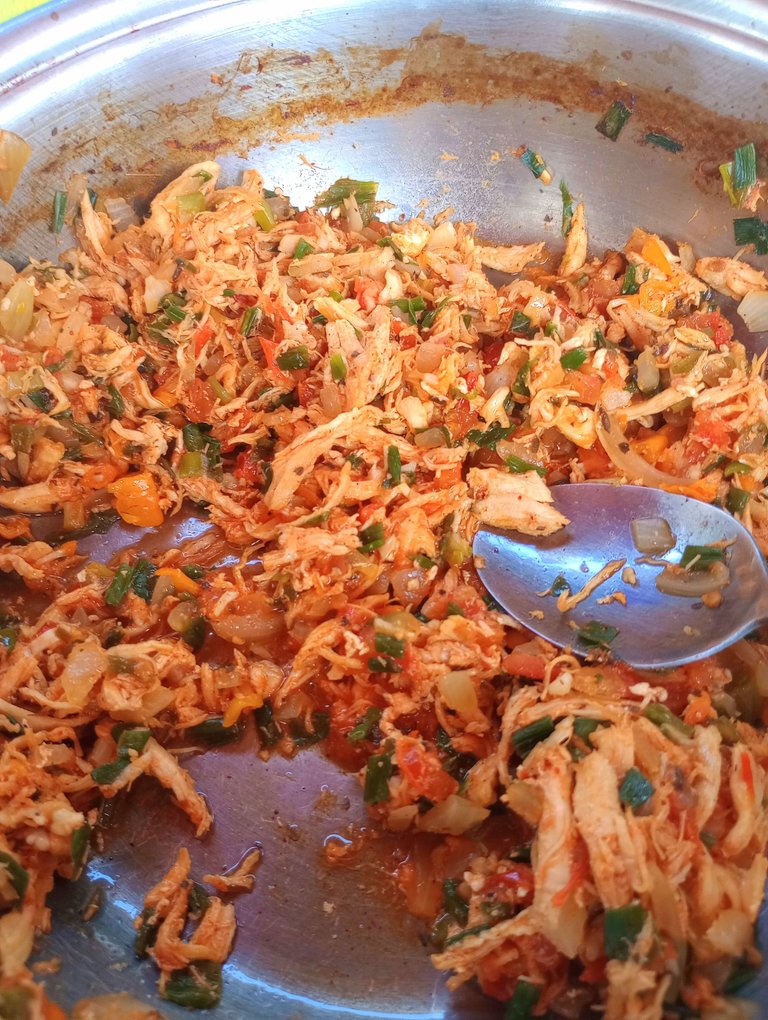
Si vieron mi post anterior de las empanadas de yuca, recordarán este pollo.
Lo cociné con varios vegetales y condimentos y utilizamos tanto de relleno para las empanadas como complemento de las fajitas.
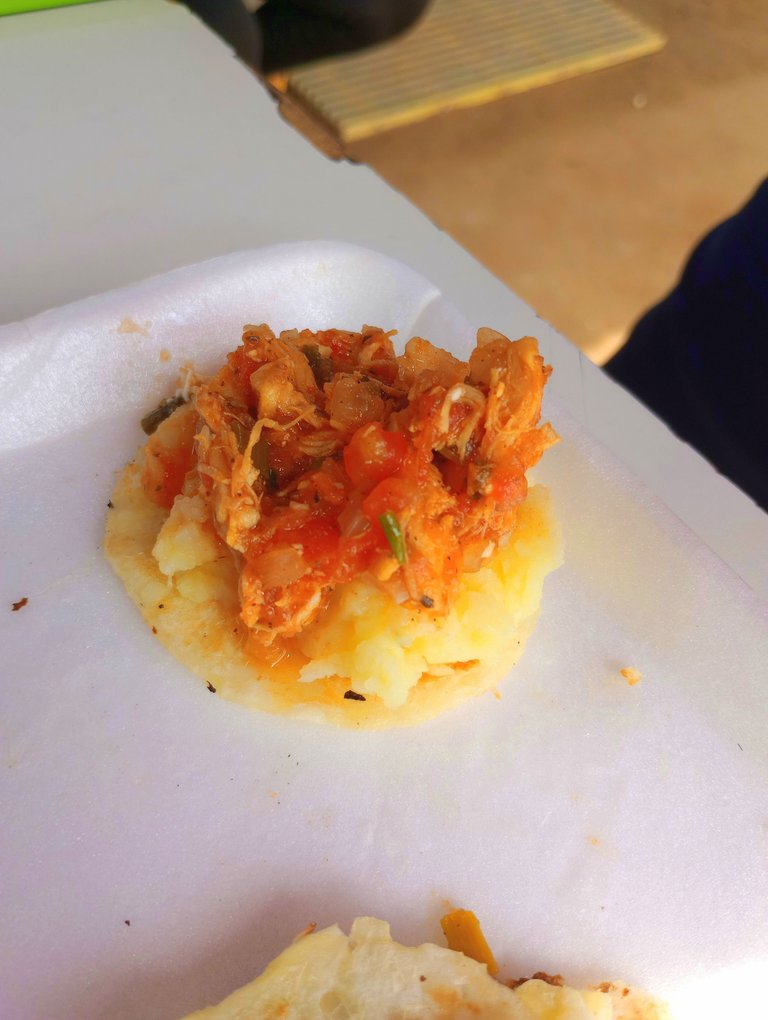
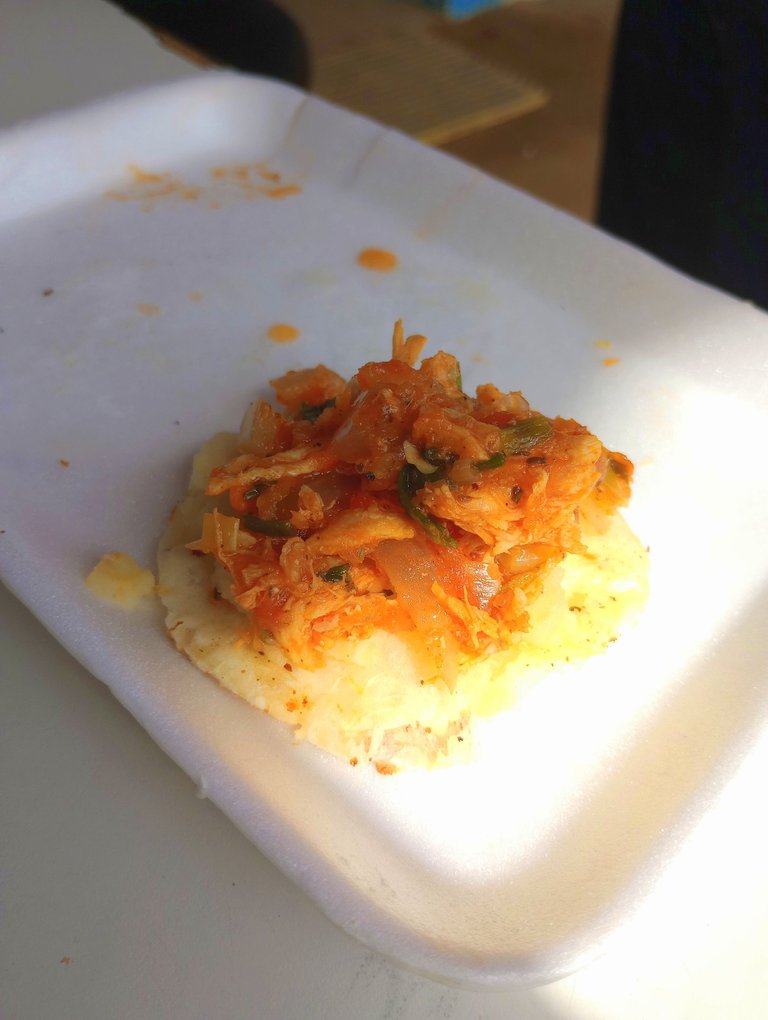
Una de mis compañeras había llevado puré de papas, así que le echamos un poco sobre las fajitas y luego colocamos el pollo.
La combinación de sabores era una delicia.
If you saw my previous post on yucca empanadas, you will remember this chicken.
I cooked it with various vegetables and seasonings and we used it both as a filling for the empanadas and as a complement to the fajitas.
One of my companions had brought mashed potatoes, so we poured some over the fajitas and then put the chicken on top.
The combination of flavors was a delight.

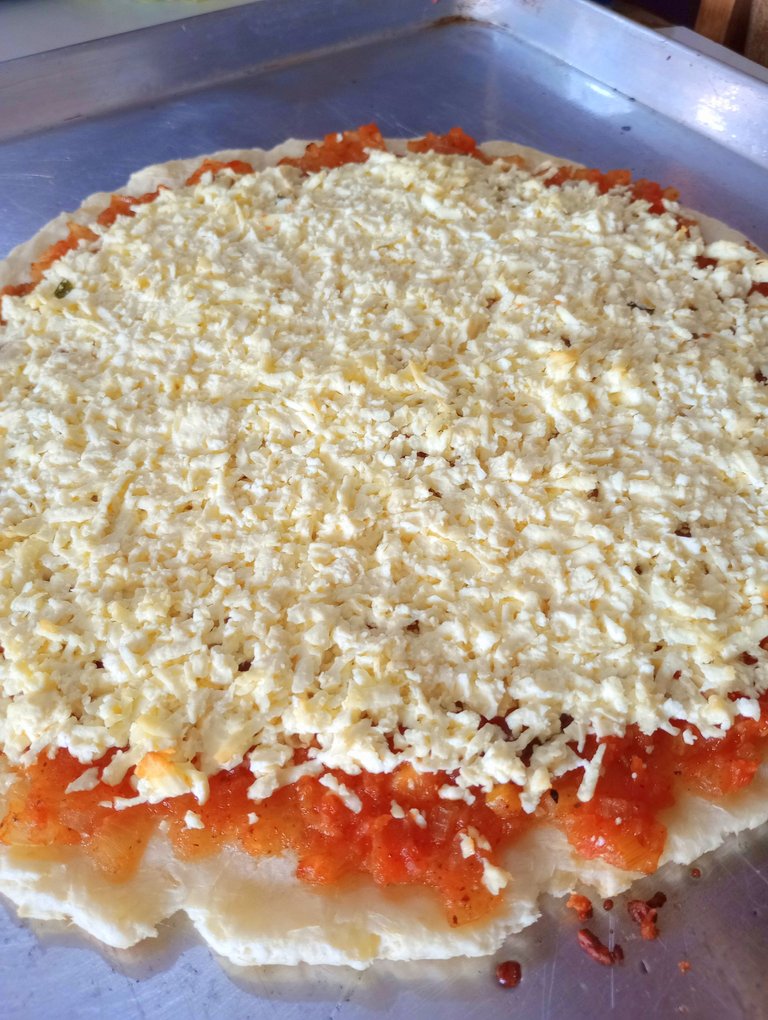
Para pizza aplanamos la masa con un rodillo, colocamos sobre la placa engrasada y terminamos de darle forma con las manos.
Luego colocamos la salsa de tomate y colocamos el queso sobre ella.
Llevamos al horno hasta que la base de la pizza estuviera bien tostada.
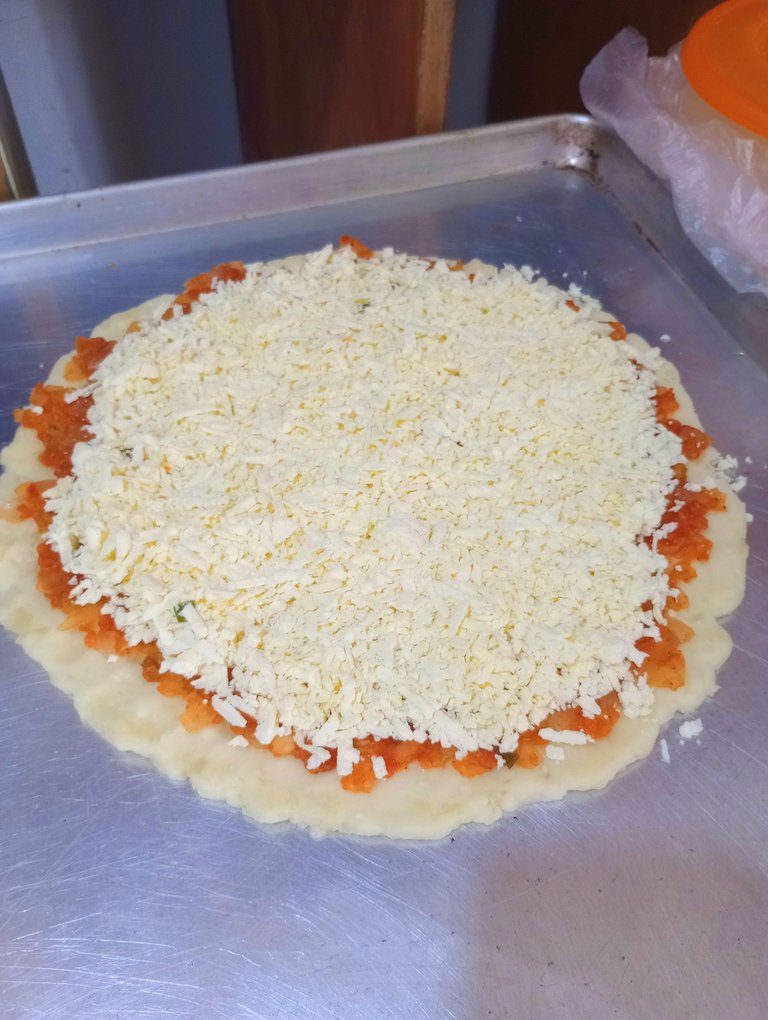
For pizza we flatten the dough with a rolling pin, place it on the greased plate and finish shaping it with our hands.
Then we put the tomato sauce and place the cheese on it.
Bake in the oven until the base of the pizza is well toasted.
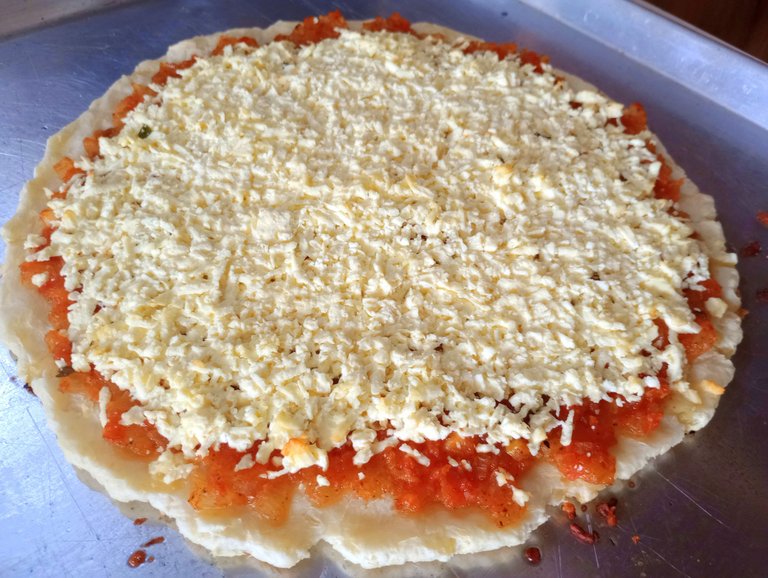
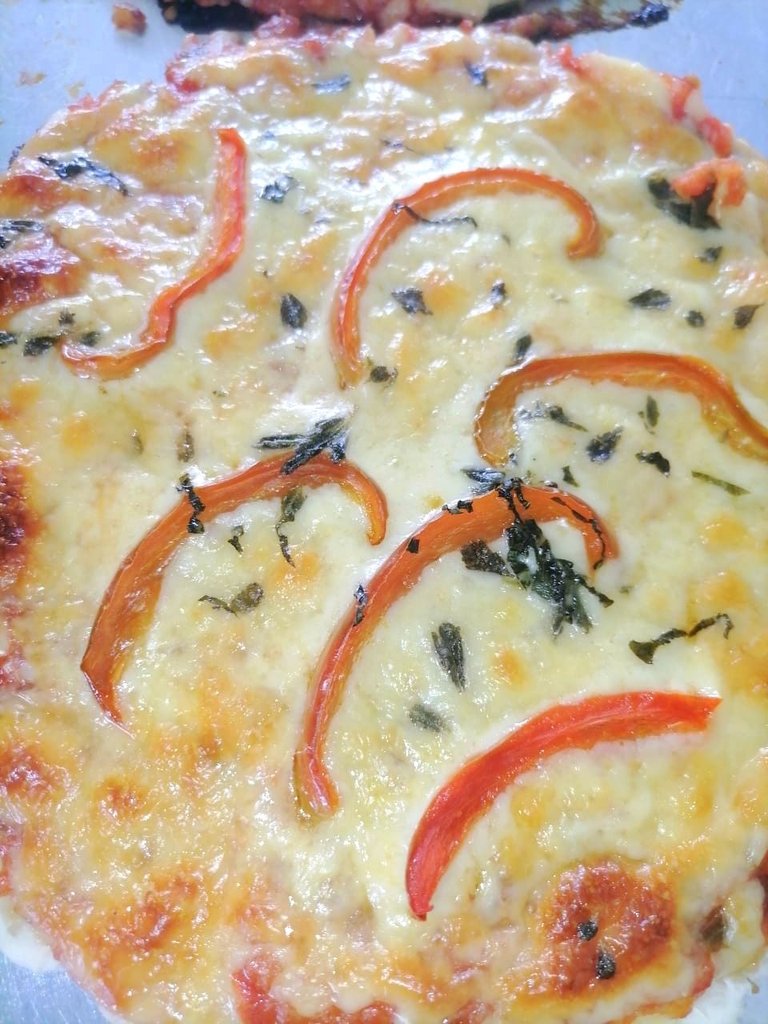
Al sacarla del horno no tuvimos mucha diferencia porque el queso que utilizamos no se derretía con el calor.
Es por eso que también les enseño la pizza de mis compañeras que si utilizaron queso mozzarella.
Esta pizza es una opción saludable y deliciosa, que les aseguro les va a encantar. ♥
When we took it out of the oven it did not make much difference because the cheese we used did not melt with the heat.
That's why I also show you my colleagues' pizza that did use mozzarella cheese.
This pizza is a healthy and delicious option that I assure you will love. ♥

Espero haya sido de tu agrado y provecho.
Un gran abrazo a todos, y nos leemos en un próximo post
• Lakrearte en Hive •
Att: Estefania Garcia ♥

Imágenes y separadores de mi autoría
Portada editada en Canva
Fotografías tomadas con un Moto G31
Texto traducido en Google ImTranslate v.14.27
Deliciosas recetas, la pizza me encanta.
Me alegra que te haya gustado ☺️
Se ve demasiado provocativa, gracias por compartir🤤
Muchas gracias 😊 saludos amiga
Ideal para evitar las harinas y se ve delicioso.
Si eso es lo genial, que es algo saludable pero muy sabroso ☺️