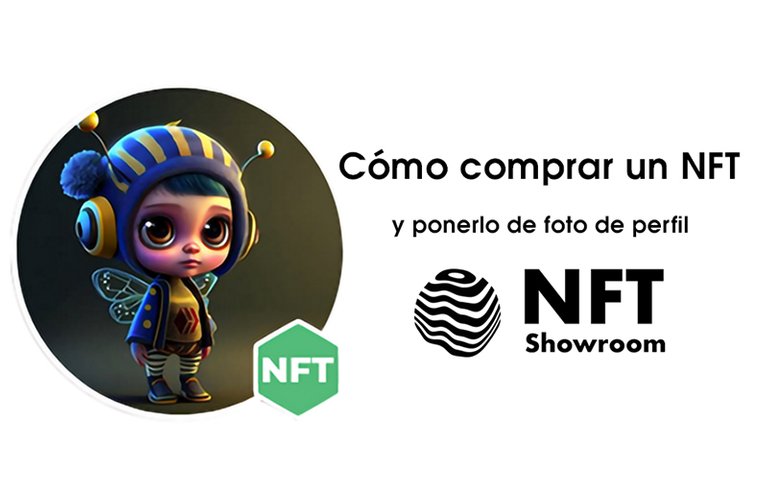
Hola Amigos!!
Con toda la bella locura desatada de las Abejitas 😍 salió a relucir que muchos usuarios no sabían cómo comprar en NFT Showroom y además, que no estaban seguros de cómo poner su NFT como foto de perfil. Así que en aras de socializar ese conocimiento, preparo este sencillo tutorial:
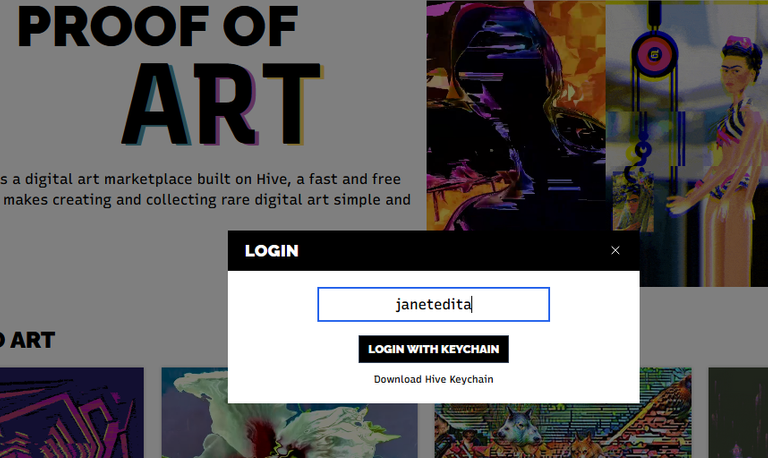
Entrando por primera vez a NFT Showroom:
Lo primero, entrar a NFT Showroom no tiene complicación alguna, no necesitas ser creador para eso, así que con tu usuario de Hive te puedes loguear sin más:

Capturas de pantalla
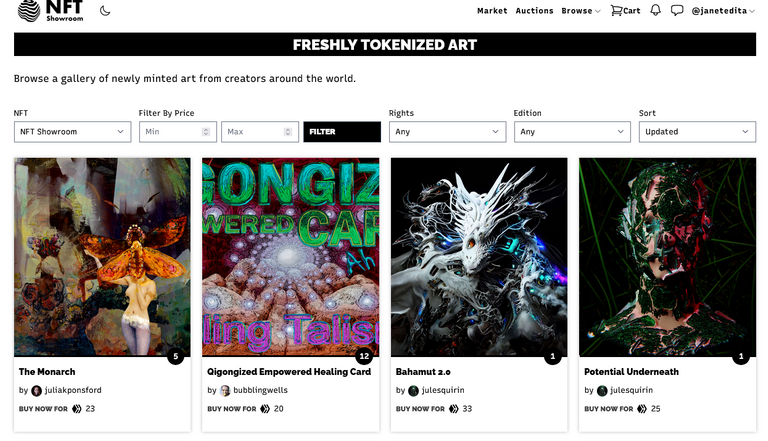
Qué comprar:
Para comprar NFT tienes varias opciones, puedes revisar lo que hay en el Market, que posee además filtros para discriminar en función de los intereses que tengas:
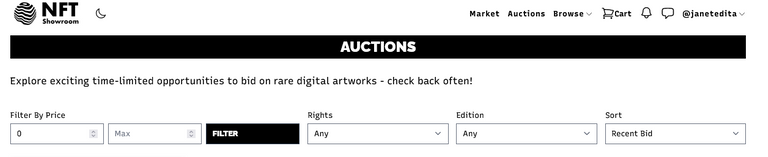
También puedes revisar lo que haya en subasta:
El otro método es con un enlace directo a la galería donde se encuentra la obra o el artista que usted busca:
Link: https://nftshowroom.com/janetedita/gallery
Con qué comprar
Para comprar, hace falta, bueno obvio...dinero!💰 😂, en el caso de NFTSHOWROOM, se emplea al token SWAP.HIVE
Normalmente tenemos en nuestras billeteras Hive o HBD, en caso de tener HBD debe ir primero al mercado interno y realizar el cambio a Hive.
Si tenemos Hive en nuestra billetera, es mucho más expedito, pues solamente deberá hacer lo siguiente:
1- Entrar a su Wallet en NFTShowroom :
2- Dentro de la Wallet, pincha el botón Deposit:
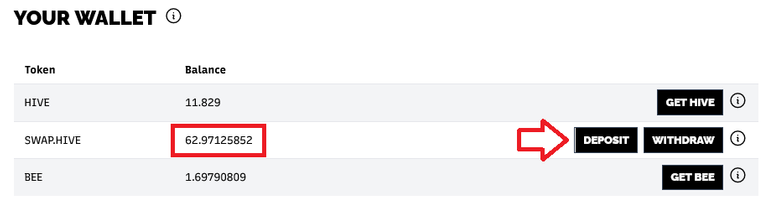
Antes del cambio
3- Se despliega un cuadro de diálogo donde usted pondrá la cantidad de Hive a convertir a Swap.Hive e inmediatamente cuando confirme la operación tendrá el monto convertido.
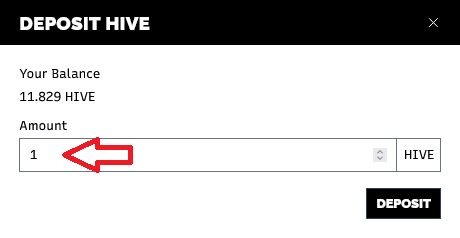
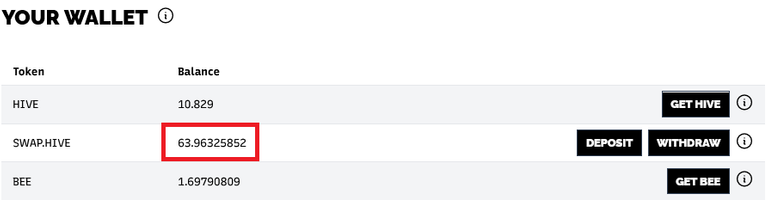
Después del cambio
4- Listo para comprar
Cómo comprar
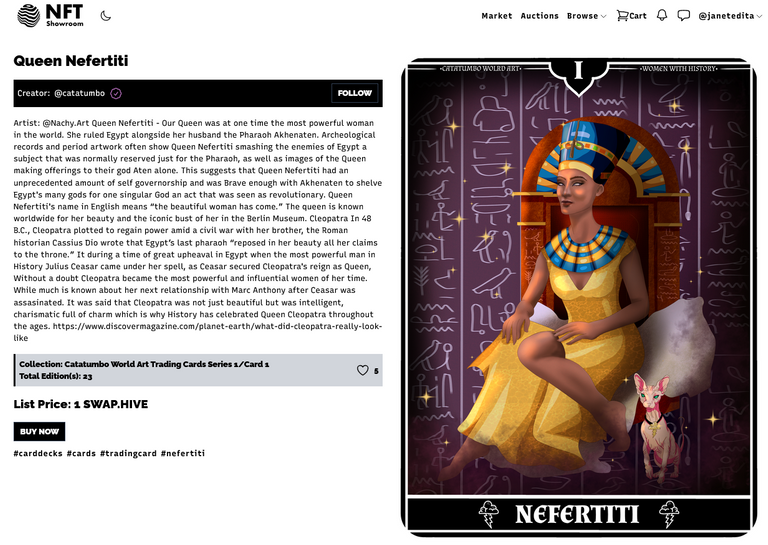
Para el proceso de compra, tomaré como ejemplo la adquisición de este NFT, pues el antiguo Egipto es un tema que me atrae mucho, sobre todo la dinastía XVIII.
1- Pinchamos el botón BUY NOW
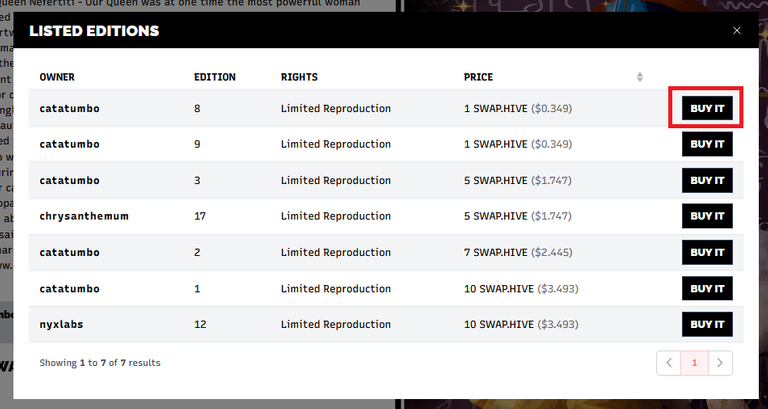
2- Se despliega el cuadro de diálogo que informa sobre las diferentes ediciones, nótese que no todas las ediciones valen igual, así que debemos percatarnos bien cuál escogemos.
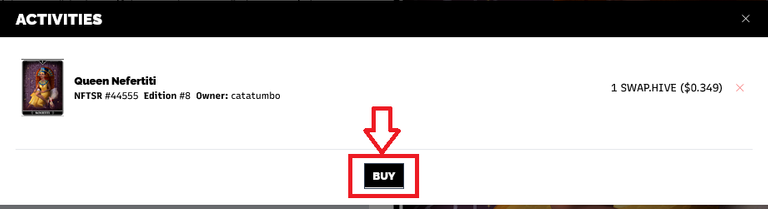
3- Luego se despliega este otro cuadro de diálogo ya con la edición específica que usted eligió:
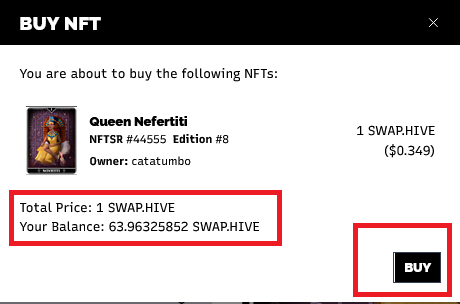
4- Por último aparece esta otra ventana con todos los datos necesarios, Nombre de la obra, NFTSR, Número de edición, el precio total y el balance de saldo del cual usted dispone. Con todos esos datos claros, Compramos.
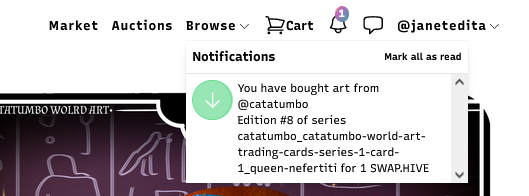
5- Te llega una notificación de que compraste el NFT, notificación que también le llega al artista, de que vendió una pieza.
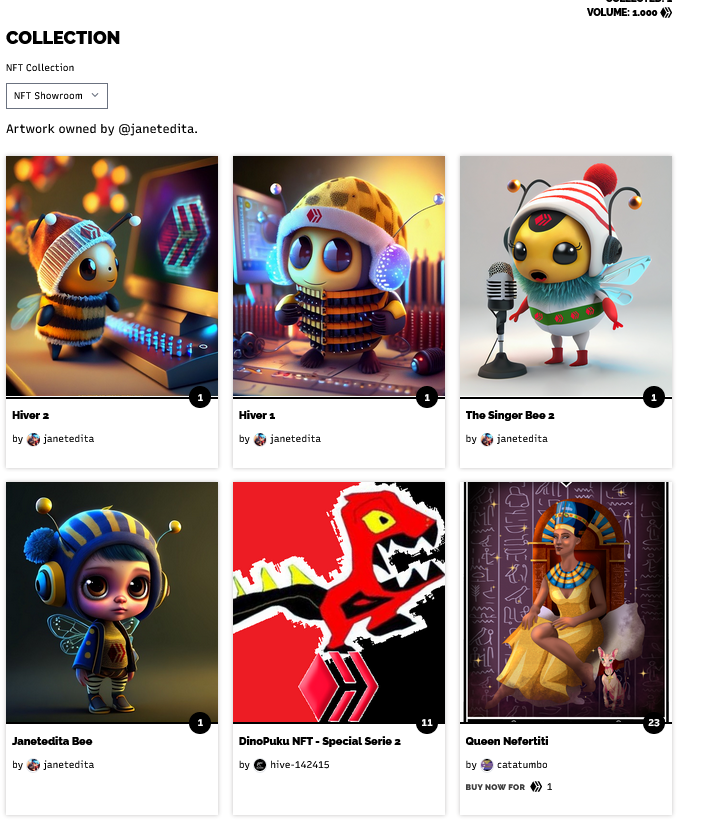
Dónde encontrar lo comprado
Todo lo que compras, está en el espacio “Colección” como podemos ver, la pieza comprada se agregó a mi colección:
Hasta aquí el proceso de compra de tu NFT!!
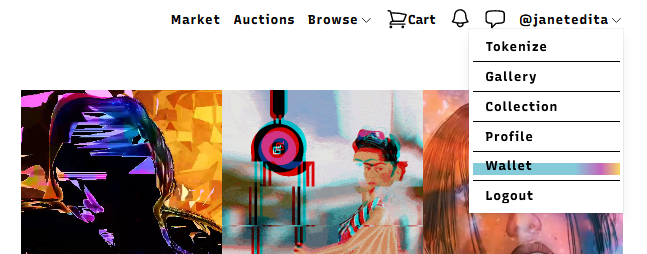
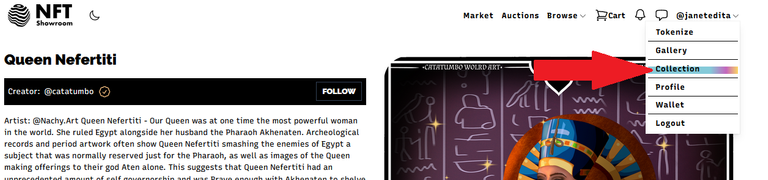
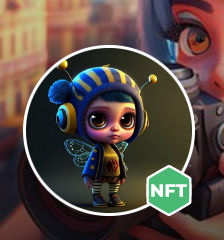
Ahora veremos como poner nuestro NFT como foto de perfil y que salga con el identificador NFT como se muestra acá:

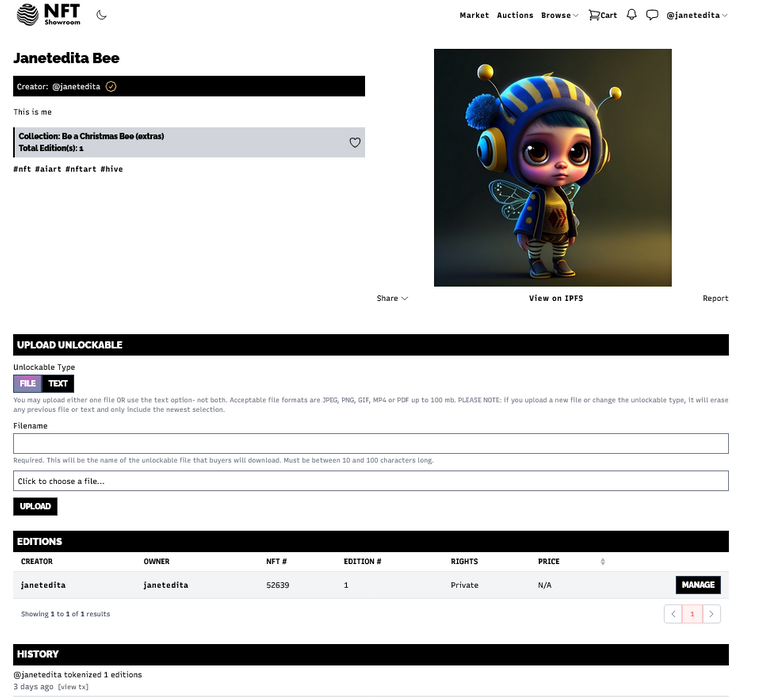
1- Para eso, en nuestra Colección vamos a pinchar sobre el NFT que queremos en nuestra foto de perfil y nos aparecerá una ventana como la siguiente:
En este caso, es una edición única, si tuviera más ediciones saldría algo así:
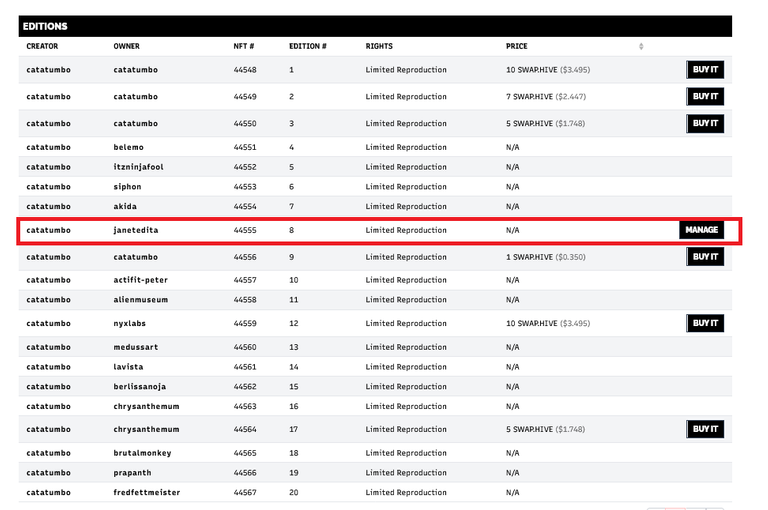
SU NFT siempre va a decir su usuario en OWNER.
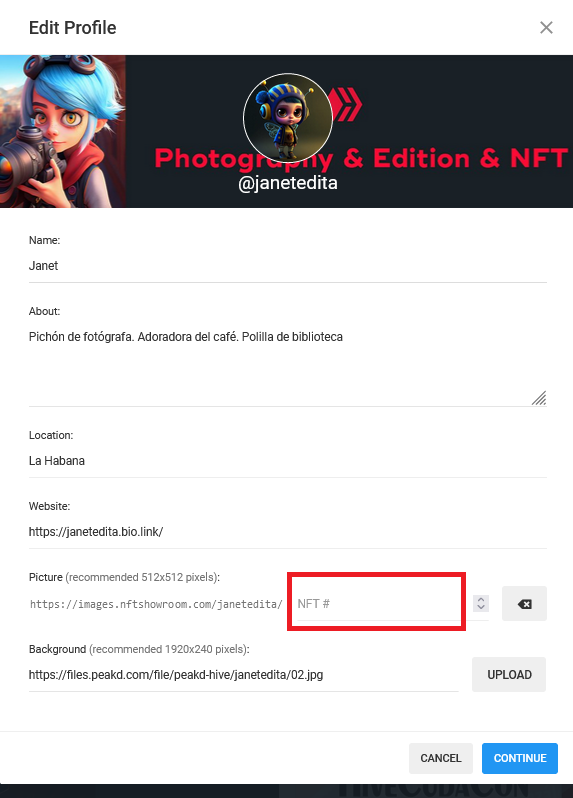
2- Ahora bien, debemos fijarnos en el número de nuestro NFT, cópielo, pues lo va a necesitar luego.

3- En Peakd, en donde mismo usted cambia su avatar y banner, vamos a encontrar varias opciones entra las que se encuentra: USE NFTShowroom
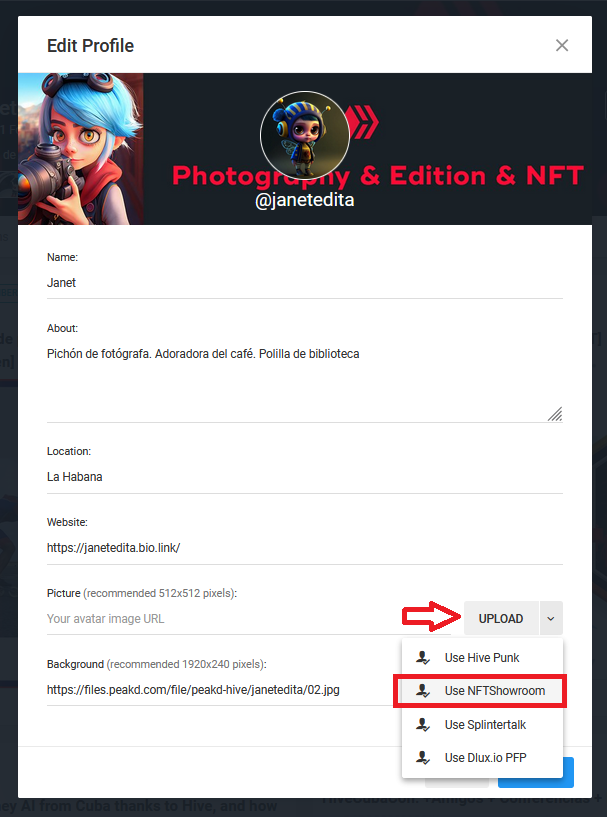
4- Al seleccionar la opción veremos que nos pide un número y ahí es donde pegamos el número del NFT que habíamos copiado anteriormente
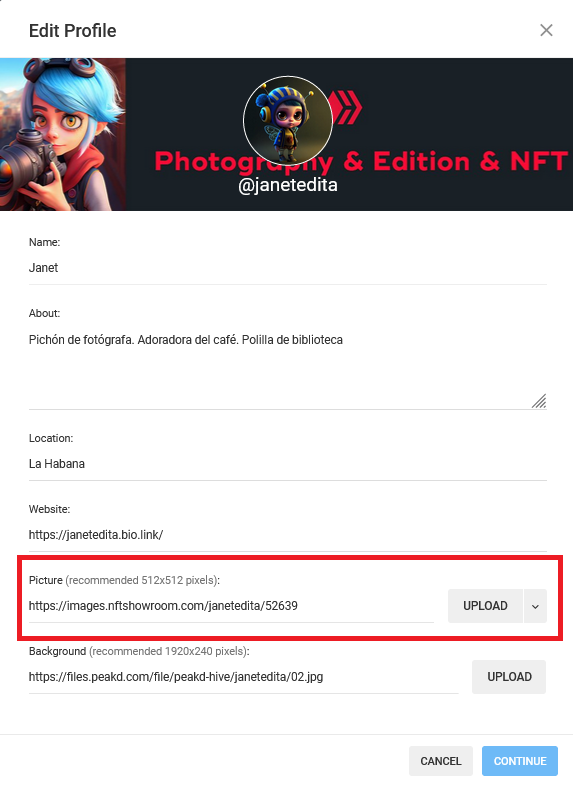
De esta forma logramos que nos quede un NFT de foto de perfil:
Espero que este tutorial les sea de ayuda!!!
ENGLISH VERSION
Hello friends!
With all the beautiful craziness unleashed from the Little Bees 😍 it came to light that many users didn't know how to shop at NFT Showroom and furthermore, that they weren't sure how to set their NFT as their profile picture. So in the interest of socializing that knowledge, I prepare this simple tutorial.
Logging in for the first time to NFT Showroom:
First of all, logging in to NFT Showroom is uncomplicated, you don't need to be a creator for that, so with your Hive user you can just log in:
Screenshots .
What to buy:
To buy NFT you have several options, you can review what's in the Market, which also has filters to discriminate based on the interests you have:
You can also check out what's on auction:
The other method is with a direct link to the gallery where the work or artist you are looking for is located:
Link: https://nftshowroom.com/janetedita/gallery
With what to buy
To buy, you need, well obviously...money!💰 😂, in the case of NFTSHOWROOM, you use the SWAP.HIVE token.
Normally we have in our wallets Hive or HBD, in case of having HBD you must first go to the internal market and make the change to Hive.
If we have Hive in our wallet, it is much more expeditious, because you only have to do the following:
1- Login to your Wallet in NFTShowroom :
2- Inside the Wallet, click on the Deposit button:
Before the change .
3- A dialog box will appear where you will enter the amount of Hive to convert to Swap.Hive and immediately when you confirm the operation you will have the converted amount.
After the change
4- Ready to buy
To teach them the process
How to buy
For the purchase process, I will take as an example the purchase of this NFT, because ancient Egypt is a subject that attracts me a lot, especially the XVIIIth dynasty.
1- Click on the BUY NOW button.
2- The dialog box that informs about the different editions is displayed, note that not all editions have the same value, so we must be aware of which one we choose.
3- Then this other dialog box is displayed with the specific edition you have chosen:
4- Finally this other window appears with all the necessary data, Name of the work, NFTSR, Edition number, the total price and the balance you have. With all these data clear, we buy.
5- You get a notification that you bought the NFT, and the artist also gets a notification that he sold a piece.
Where to find what you bought
Everything you buy, is in the space "Collection" as we can see, the purchased piece was added to my collection:
**This is the process of purchasing your NFT!
Now we will see how to put our NFT as a profile picture and make it come out with the NFT identifier as shown here:
1- For that, in our Collection we are going to click on the NFT that we want in our profile picture and a window like the following one will appear:
In this case, it is a single edition, if it had more editions it would look like this:
*YOUR NFT will always say your user in OWNER.
2- Now, we must look at the number of our NFT, copy it, because you will need it later.
3- In Peakd, where you change your avatar and banner, we will find several options among which we find: USE NFTShowroom
4- When we select the option we will see that it asks for a number and there is where we paste the number of the NFT that we had copied previously
In this way we get a profile picture NFT:

I hope this tutorial will be helpful!!!
Nota: Todas las imágenes que aparecen son capturas de pantalla realizadas por mí
Note: All images shown are screenshots taken by me.


 |
|MIS REDES SOCIALES
INSTAGRAM ♦️ TWITTER ♦️ LINKEDIN
Apoyo a la comunidad @hivecuba😍

En hora buena esas abejitas han inundado el ecosistema de #hive, muchas gracias por esa maestría y sobre todo y lo más importante y seguro muchos coincidimos en este aspecto es la posibilidad que nos da hive de compartir este arte y por supuesto adquirirlo, cuando el gusto y el deseo se unen.
Siempre un tutorial ayuda muchísimo a todos los que deambulan por hive.😘
Gracias!! La verdad es que me sorprendió un poco cuántas personas ni sabían sobre este tema, y es que es cierto que no es un nicho muy común, pero esta vez si lo era y estaba la necesidad de aprender a hacerlo...de ahí nace el post...jjj inundación de abejitas! 😂😂😂
The rewards earned on this comment will go directly to the people( @janetedita ) sharing the post on Twitter as long as they are registered with @poshtoken. Sign up at https://hiveposh.com.
Me quedó con el link de esto a ver si la próxima vez no compro uno revendido 😂😂... Mientras, espero el cronopio para mi perfil 😜
Que gusto saludar a la creativa de estos NFT, me ha encantado tu trabajo súper hermoso y que genial que seas de cuba😍
Gracias por este súper tutorial, me ha encantado honestamente porque yo aún soy una novata en todo el tema de NFT y la compra.
Muchos éxitos.
Muy instructivo tu post me encantan esos NFTs
Thank you so much for your support of my @v4vapp proposals in the past, my previous one expired this week.
I'd be really happy if you would continue supporting my work by voting on this proposal for the next 6 months:
Additionally you can also help this work with a vote for Brianoflondon's Witness using KeyChain or HiveSigner
If you have used v4v.app I'd really like to hear your feedback, and if you haven't I'd be happy to hear why or whether there are other things you want it to do.