Eliminando ruido en la pastilla de freno delantera derecha de un Neón 2000.
Si el vehículo tiene un chillido en la rueda delantera o trasera y no sabes qué lo ocasiona, acá te explico qué lo ocasiona y como se soluciona.
¿Que lo ocasiona?
Ésto lo ocasiona el que la pastilla de freno se cristaliza y al momento de frenar se genera un chillido bastante molesto. Esto puede pasar por distintos motivos.
Desgaste en las pastillas
Desgaste en el disco de freno
Mala calidad de la pastilla de freno
La última suele ser la más común y es la que presentó este vehículo.
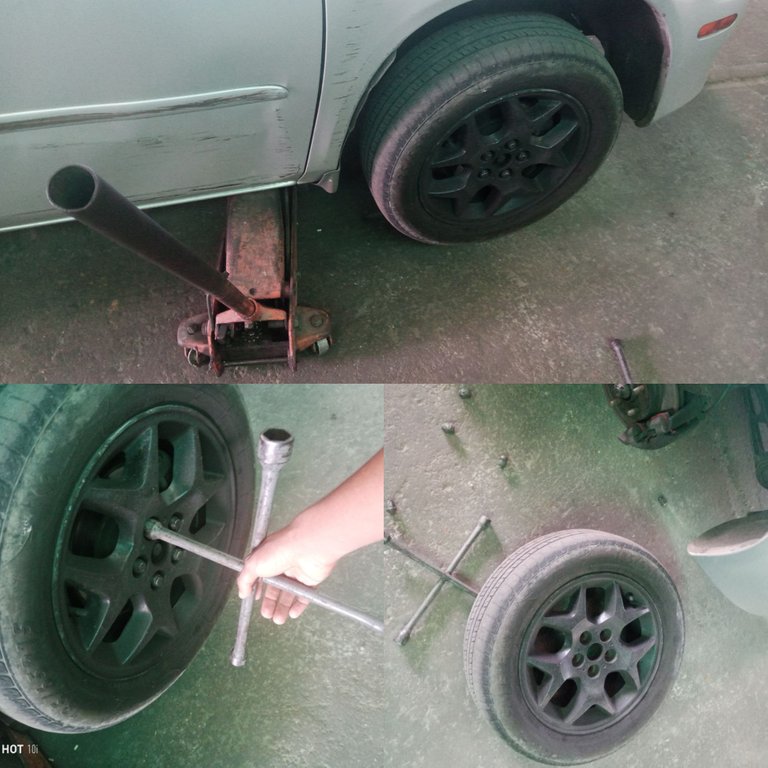
Paro eliminar este molesto ruido lo primero que vamos a hacer es aflojar las tuercas del neumático, con un gato levantamos el vehículo del lado que esté sonando y quitamos el neumático.
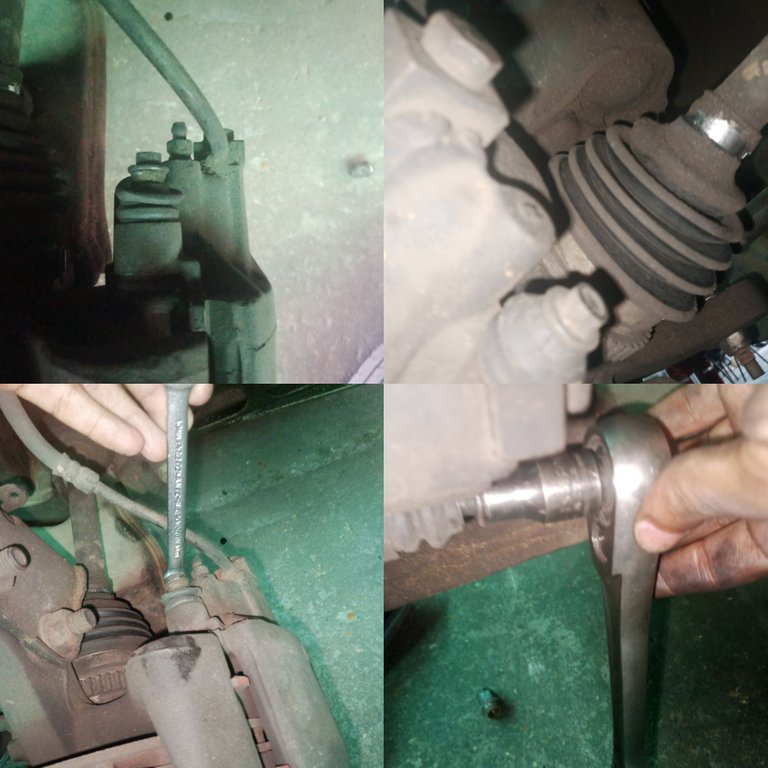
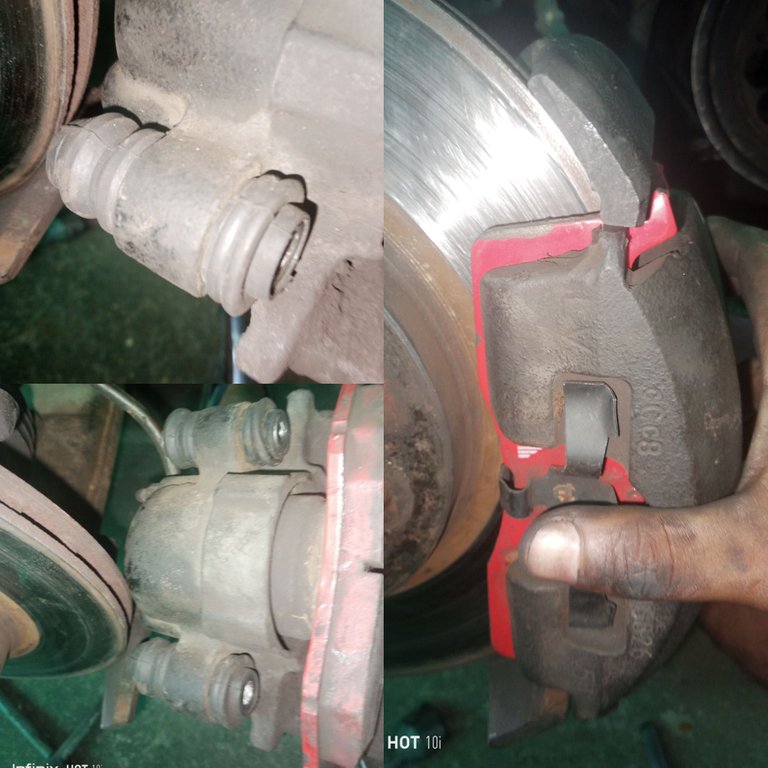
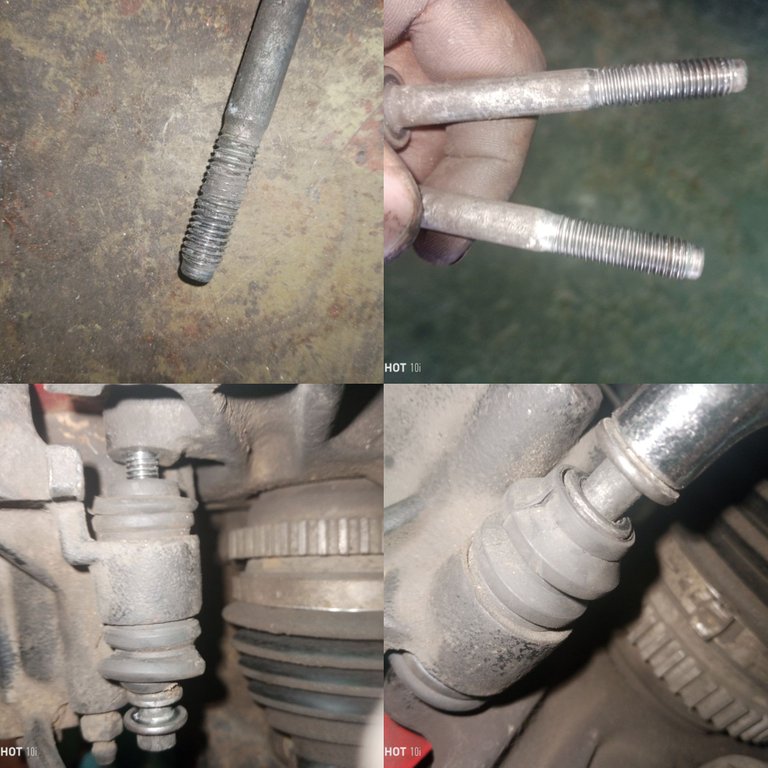
Removemos los 2 tornillos que ajustan la mordaza para poder quitar las pastillas de freno.
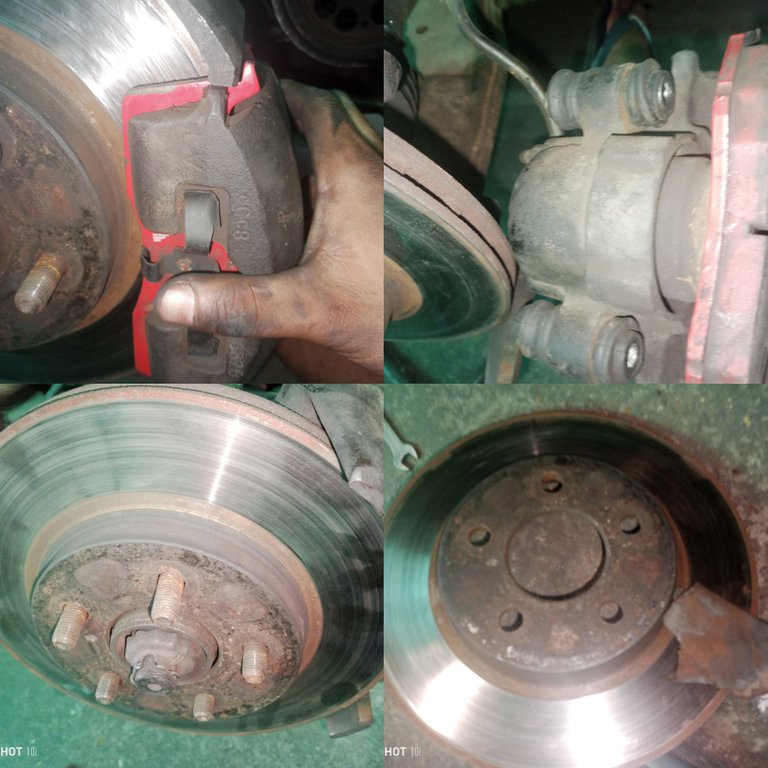
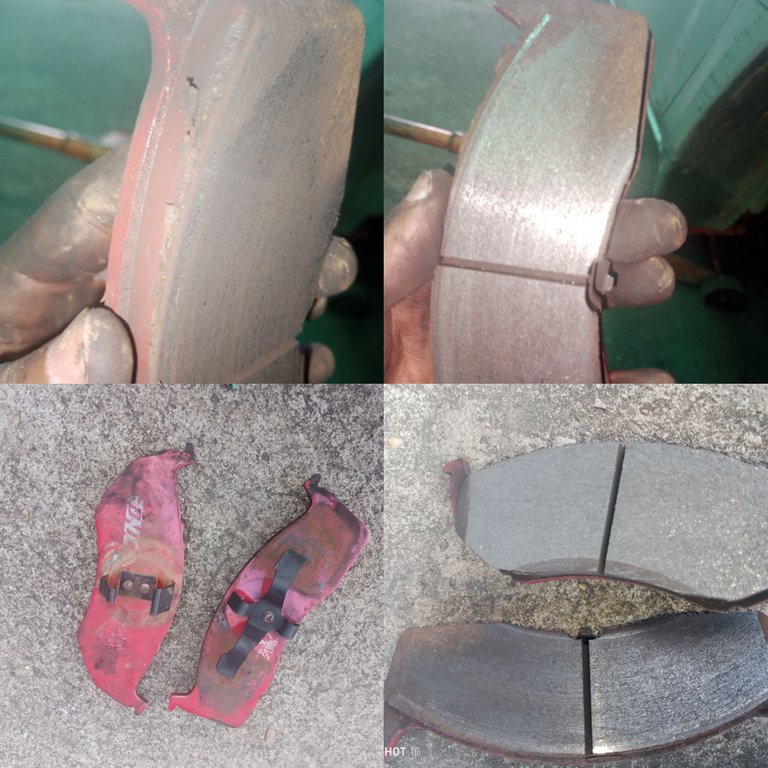
Ya removidos los tornillos, quitamos la mordaza y el disco de freno del mozo. Al disco de freno le frote una lija gruesa para eliminar así impurezas y la posible cristalización del mismo.
Para separar las pastillas de freno de la mordaza. Primero quitamos la pastilla frontal que tiene estos ganchos metálicos que se aprecian en la imagen. Con un destornillador de pala levantamos una de las esquinas del gancho y hale con un poco de presión hacia arriba, luego repita el proceso del otro lado del gancho para terminar de quitarla.
Luego de separar está pastilla de la mordaza, su compañera saldrá si la hala suavemente.
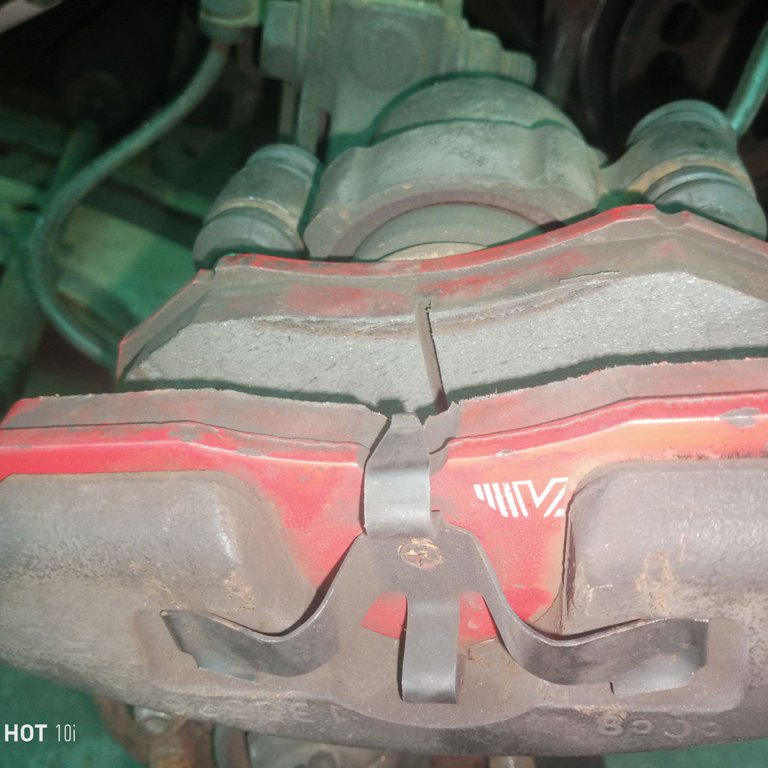
Como se puede ver en las dos imágenes superiores se ven lisas y cristalizadas. Esto crea el molesto chillido a la hora de frenar. Para eliminarle esto a las pastillas, las frotamos contra una superficie rocosa. En mi caso, use la acera de la calle. Las frote contra ella hasta que quedaron con aspereza.
¡Ahora armamos todo! Colocamos las pastillas de freno en la mordaza y la colocamos en el disco de freno como se ve acá en la imagen.
Para finalizar,la mordaza la ajustamos al mozo con los tornillos que la sujetan como se ve en la foto.
Espero que les sirva este post ya que es el mismo proceso para eliminar este molesto ruido en cualquier vehículo.
**Eliminating noise in the right front brake pad of a 2000 Neon.
If your vehicle has a squeal in the front or rear wheel and you don't know what causes it, here I explain what causes it and how to fix it.
What causes it?
This is caused by the brake pad crystallizing and at the moment of braking it generates a very annoying squeal. This can happen for different reasons.
Brake pad wear
Brake disc wear
Poor brake pad quality
The last one is usually the most common and it is the one that this vehicle presented.
To eliminate this annoying noise the first thing we are going to do is to loosen the nuts of the tire, with a jack we lift the vehicle on the side that is sounding and remove the tire.
We remove the 2 screws that adjust the clamp to be able to remove the brake pads.
Once the screws have been removed, we remove the clamp and the brake disc from the hub. The brake disc is rubbed with coarse sandpaper to remove impurities and possible crystallization.
To separate the brake pads from the caliper. First we remove the front pad that has these metal hooks that can be seen in the picture. With a spade screwdriver we lift one of the corners of the hook and pull with a little pressure upwards, then repeat the process on the other side of the hook to finish removing it.
After separating this tablet from the jaw, its mate will come out if we pull it gently.
As can be seen in the two pictures above they look smooth and crystallized. This creates the annoying squealing noise when braking. To remove this from the pads, we rub them against a rocky surface. In my case, I used the sidewalk. I rubbed them against it until they were rough.
Now we put everything together! We place the brake pads in the clamp and place it on the brake disc as shown here in the picture.
To finish, the clamp is adjusted to the waiter with the screws that hold it as shown in the photo.
I hope you find this post useful as it is the same process to eliminate this annoying noise in any vehicle.
Congratulations @josiascardenas! You have completed the following achievement on the Hive blockchain and have been rewarded with new badge(s):
Your next target is to reach 900 upvotes.
You can view your badges on your board and compare yourself to others in the Ranking
If you no longer want to receive notifications, reply to this comment with the word
STOPCheck out the last post from @hivebuzz:
Support the HiveBuzz project. Vote for our proposal!
Tengo dos preguntas ¿Qué causa el cristalizado que removiste con el concreto? Y ¿No existe una mejor forma de remover dicho cristalizado? Siento que este método podría poco a poco mermar la vida útil de las pastillas de freno, al menos en cuanto a vida óptima, pero es de recordar que si es muy denso el cristalizado la única solución segura es el reemplazo, aprendimos eso por las malas con el vehículo de mi padre que se llegó de frente contra una ambulancia hace una década, por el constante abuso de este método de raspar las pastillas.
😬 oye lamento mucho ese accidente hermano espero no hubiera heridos.
Normalmente lo causa la mala calidad en las pastillas, al fabricarlas les colocan más hierro del que deberían y crea esa reacción.
Lamentablemente es el único método que conozco para eliminarle la cristalización, claro se raspa levemente para así no quitarle mucha vida útil a la pastilla, basta con quitarle lo liso y listo.
En este caso las pastillas eran nuevas tenían 2 semanas de uso así que no perdió casi nada de vida útil.
Si esto pasa con una pastilla que tenga 20-30% de vida lo mejor sería lo que dices y reemplazar por unas nuevas
Ese accidente fue hace mucho pero la lección se quedo conmigo y con mis hermanos, especialmente el que casi se mata jajaja, si ahora nos reímos pero en el instante estábamos todos asustados. No sabia que colocaran mas hierro, esta interesante ese hecho y explica muchísimo sobre la baja calidad de los genéricos u otros detalles similares.
Gracias por las respuestas y por los consejos, saludos :)