
Well hello there Hivers!
Its time for a new week and new experiences! But first lets finish up on this job! It has been far too long.
Last week we covered how to remove side-shafts and how to strip them down both on a Toyota Hilux 4.0 V6
Check them out here in case you might have missed it.
The Tearing Bearing Conundrum (Part 1)
Tearing Down the Side-Shaft (Part 2)
So this post will be labeled part 3 and will cover how to assemble the side-shafts again. This is probably the most important one to get right (I mean you don't want them new parts damaged do you now.) I will try my best to cover mostly everything that needs to be done, no doubt I might forget something feel free to leave a comment if something was not clarified properly. There's a lot to say and mostly everything is technique so explaining something can sometimes get quite difficult so bear with me if you will.
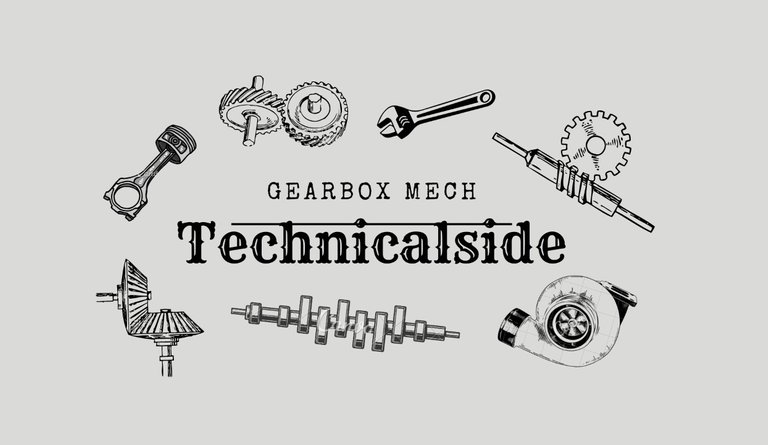
The New Parts.
This is why I don't throw away the old parts before receiving the new parts. Notice how there is no pickup collar for the wheel-speed sensor. Also didn't receive a new cir-clip to use, this is fine we will re-use both the old pickup collar and cir-clips.
Identify the parts you received.
Make sure the parts received are indeed the correct parts. (Match the bearings, seals and collars)
Neatly arrange the parts.
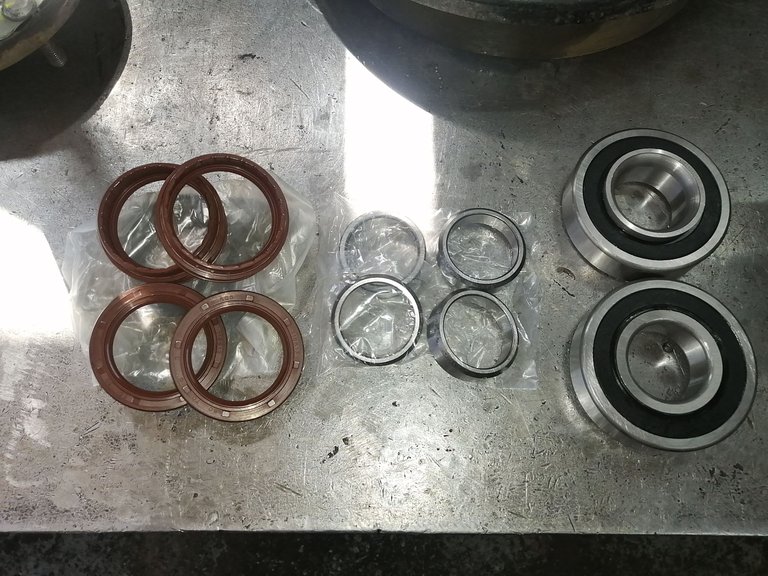
Inserting the Outer Seal.
Check again for any dirt and grimes that might have been missed with the washing of the parts before entering the seals. (Especially where the seal needs to be seated.) There are two possible ways to fit the seal and one of them includes luck or a little thumb power.
You may try and seat the seal using your thumbs, get it in place and then gently squeeze down on the sidewalls. (Adding a little bit of oil may cause it to slip into place better.)
The other method requires using a dolly what we generally do is we keep all the taper casings of the bearings and all the old bushes used. For when we need to insert a specific size of seal, etc the old bearings may be used to properly fit the seal. I don't like banging on a seal with a hammer so getting something to transfer the shock like a dolly would be perfect.
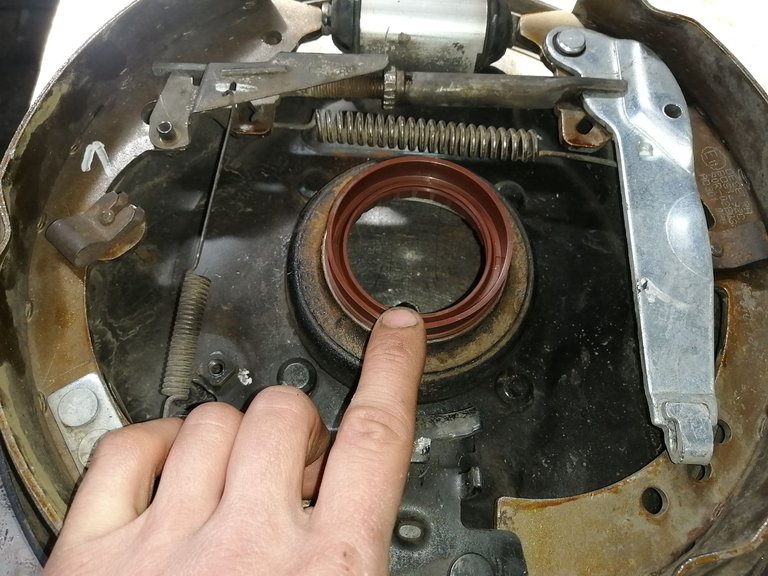
These are the parts we will re-use. The wheel-speed sensor collar (Pickup Collar) and the old cir-clips.
Take cir-clips and gently tap with a hammer to close them up a little but giving them some-kind of inwards pressure. (If that even makes sense.)
Lightly polish the inside of the pickup collar. (Just a little bit would make it slide on easier.)
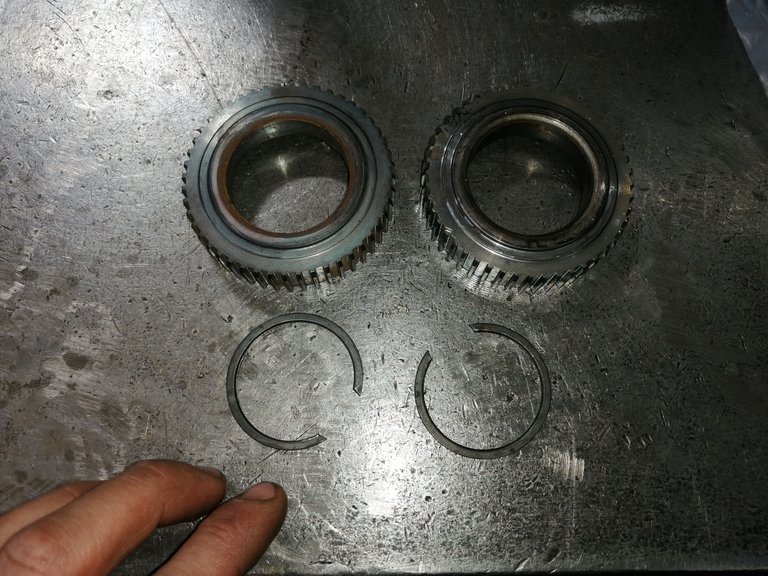
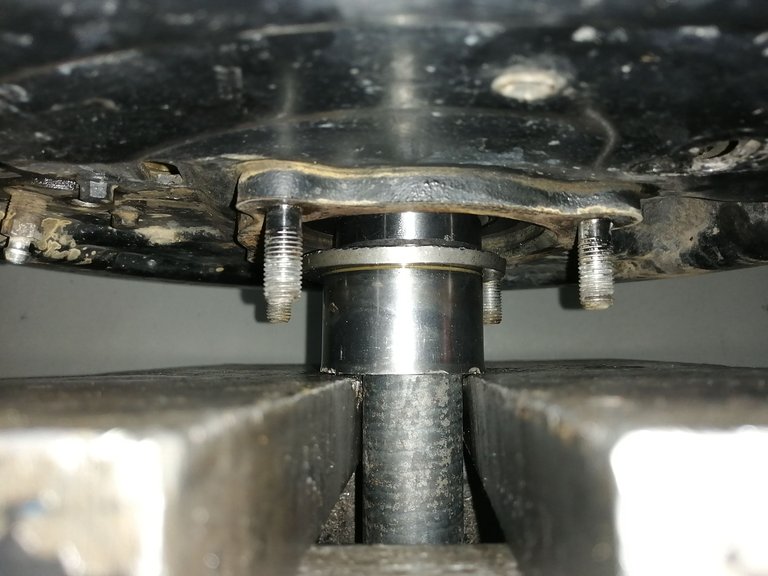
Pressing the Bearings, Collars and Shafts.
Read through the whole section before pressing anything into place.
This is where things get real tricky, this isn't about knowing how this is about experience so if you have none take your sweet damn time and triple check everything you do. Parts can break here and shatter around removing eyes and or fingers! Safety people safety!
Before we start get yourself a dolly that you can use to press with, preferably one that is thicker than the shaft so that you don't press fit the dolly as well. How can I make this more clear?
Measure the inside of the collars that you need to press fit, the dolly you are using needs to be bigger on the inner circle with at least half a millimeter so that when the collar is seated into place you can remove the dolly without struggling or using any tools to wedge it off.
The first collar you can press until its as tight as you can get it, this is where experience comes in. Obviously don't press it until you press the collar through the bearing, make sure it is seated and tightly pressed against the bearing because the first collar is what holds the bearing in place.
What I also like to do is once the collar is pressed into place I release some pressure of the press in order to move the object being pressed. once it's free I turn the object being pressed by 90 degrees left or right it doesn't really matter. Just to make sure it seated all around.
- Fit the cir-clip into its grooves (Before pressing the rest of the collars.)
Before you start pressing make sure that you shaft is perfectly aligned with the bearing, basically just make sure everything is aligned to the best of your ability. (If not keep on trying to straighten it, it might take forever and frustrate you but keep trying you will get it right eventually.)
Adding a little bit of oil on the surface that the collar will press over will help a lot! Especially if it does slip and go a little sideways the oil will prevent it from biting down and locking up (Seizing)
This actually goes without saying oil is always a big yes on any mechanical part.
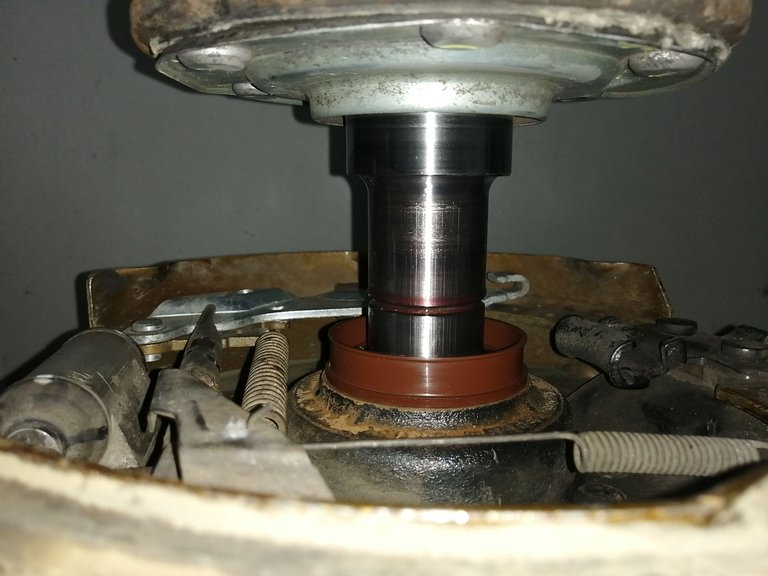
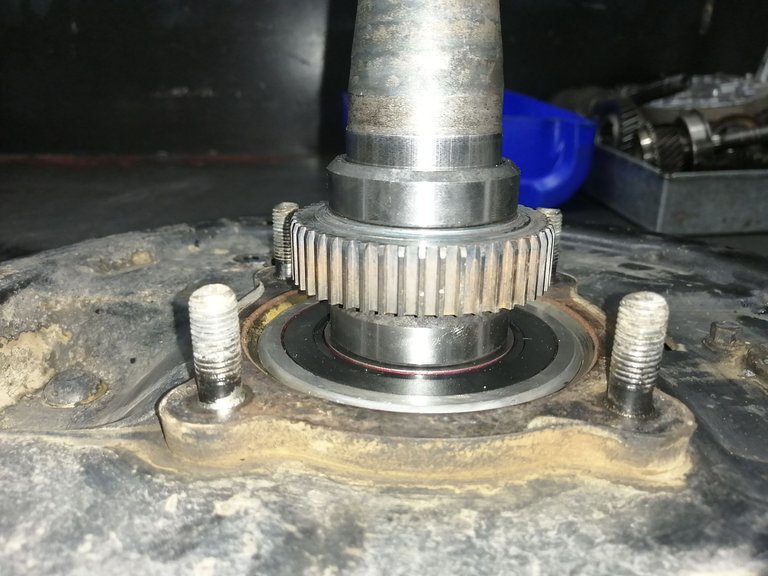
See near perfect alignment! If yours looks anything like this you are good to go! Start pressing that sucker down.
Again notice the red oil can to the right.
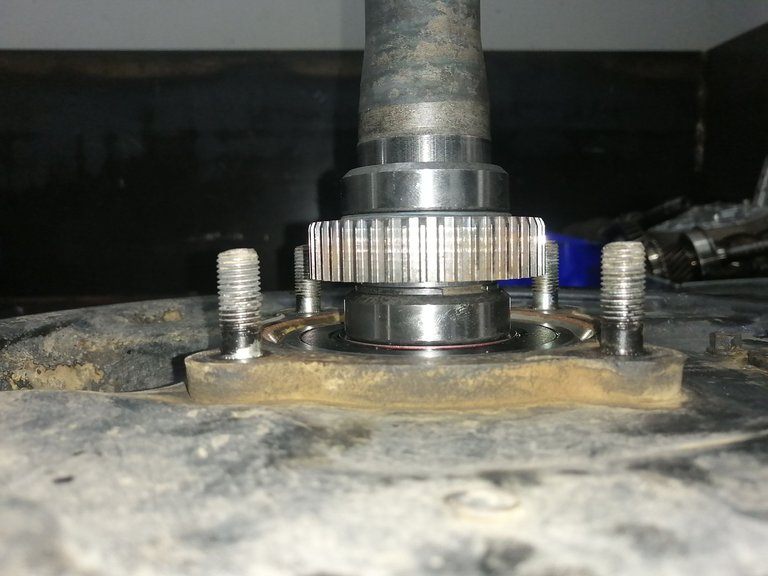
Adding the pickup collar and the last collar is somewhat easier because the shaft and the bearing will stay in place, where as the first collar the bearing tends to push out and lining everything up on the press with the bearing falling out the whole time can be a mood killer. So yes the last bit is easier.
You can press them on the same way as the first collar using a dolly, the only trick here is to get the spacing right. So usually like 95% of the time you will have marks guiding you, no not factory marks the score marks that was left behind with the removal of the collars from the shaft. (Use them as an indication)
If you don't have any marks what you can do is somewhat eye it so that the gap between the lower collar and the pickup collar is around 3 millimeters thick you can measure it with anything that has a 2.5 to 3 millimeter gap. (Whatever you do refrain from pressing them tightly together this will cause a oil leak.
Rather just press it on leaving a small gap. Keep in mind you have some room to play upward on the shaft but you cant go any lower on the pressing.
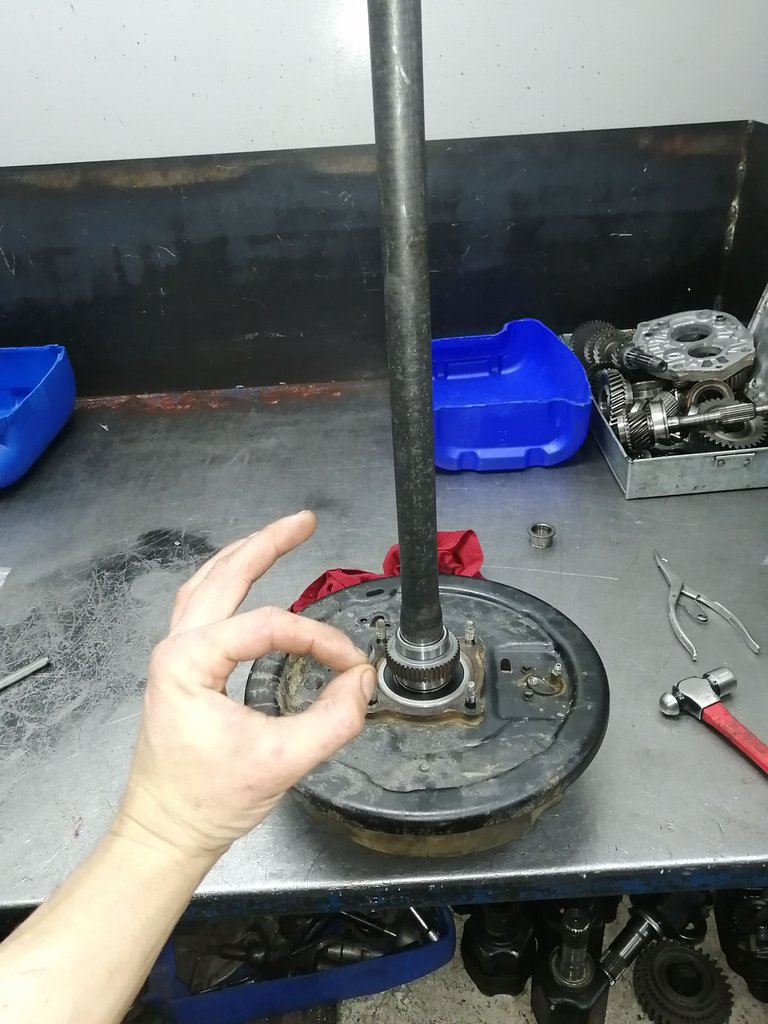
- Clean off any residual oil or grime that might have stuck to the shaft as you were working. The side-shafts can now be re-fitted to the vehicle once cleaned.
All Done and Dusted
Okay so I might have been all over the place with this post. It doesn't feel like I covered everything, if you get this feeling or you are unsure about something feel free to give a comment and I will try and explain in a better manner. I would be more than happy to help!
Goodluck in advance!
Sharing my life experience on the Hive blockchain is a great pleasure for me to do, I have been on the hive blockchain since the days of steemit, I only recently rediscovered this blockchain and I completely forgot what a blast it was sharing my everyday life and its happenings with the blockchain and its community's. I want to give a big thanks to all of the supporters out there making the blockchain great and adding value to it everyday.
Once again your feedback would be highly valued and appreciated.


Connecting the people of #HIVE across South Africa. #hive
The rewards earned on this comment will go directly to the people( @technicalside ) sharing the post on Twitter as long as they are registered with @poshtoken. Sign up at https://hiveposh.com.
Yay! 🤗
Your content has been boosted with Ecency Points, by @technicalside.
Use Ecency daily to boost your growth on platform!
Support Ecency
Vote for new Proposal
Delegate HP and earn more
Well im a bit late but is ok, hi there, i gotta say that your:
Its becoming a trademark of sorts on your mechanic posts :P as you always end them with one.
Now, going back to the post, is cool, never saw one of these that are "dirty" yet so clean xD, you havent seen the kind of things one see in venezuela, sometimes i wonder how there are working automobiles.
AAAhhhhh Its a shame that I missed this comment... I had one that I wanted to include in the last technical post but I thought not...
Laughs thanks for the idea,,, or well informing me oif my habits xD.. I will now try and make a point of it to add one to every post.. Although I have some content ,,like a lot of content already put down that I cant really go back and take a photo of the "perfekto" sign xD
We have some pretty beat up vehicles on our roads aswell.. like.. they look like they tumbled of a mountain xD but they are driving ! Ducttape and wire can do wonders xD
If silver colored Duct tape can't keep it together, then, nothing can.
Hahahahahaha 😂😂😂 that is so true...
Laughs.. Jokes aside.. That shit is amazing though 🤣🤣...
Have you checked the episode of Mythbusters where they tested ducttape on various stuff???