Hello dear hive community! I hope you are well✌
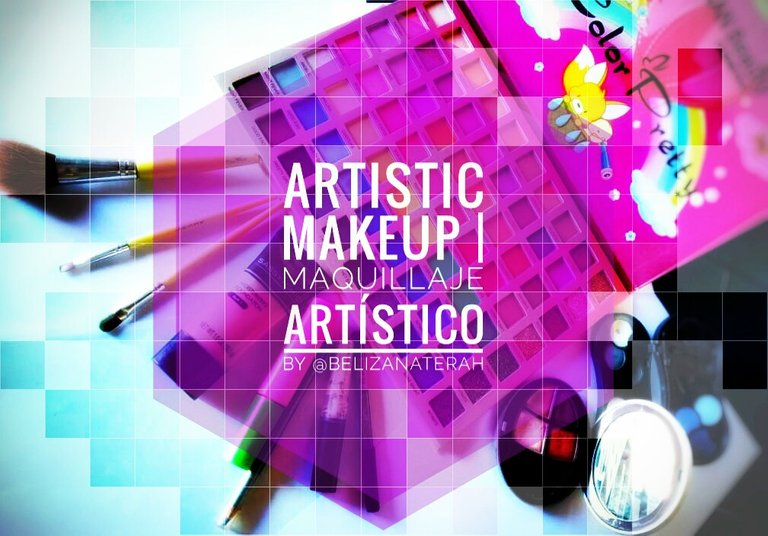
The post that I bring you today is about an artistic makeup inspired by a butterfly. I did it for my daughter, she loves nature and she asked me to do this makeup for her.
I will show you step by step how I did it and of course the final result.
▪Steps 👣
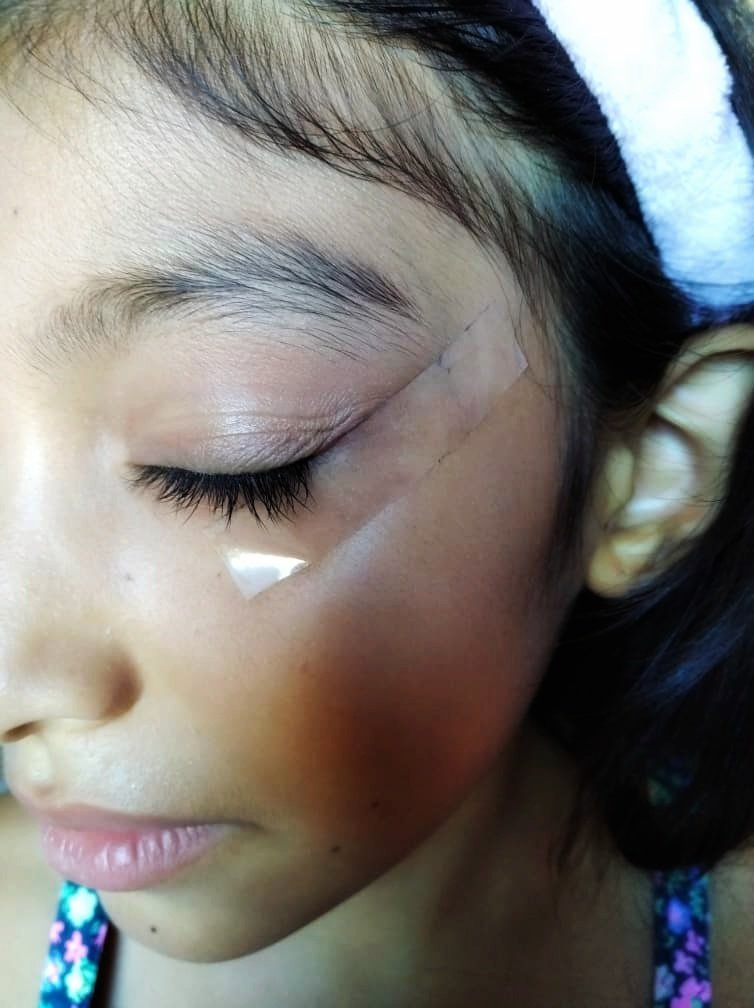
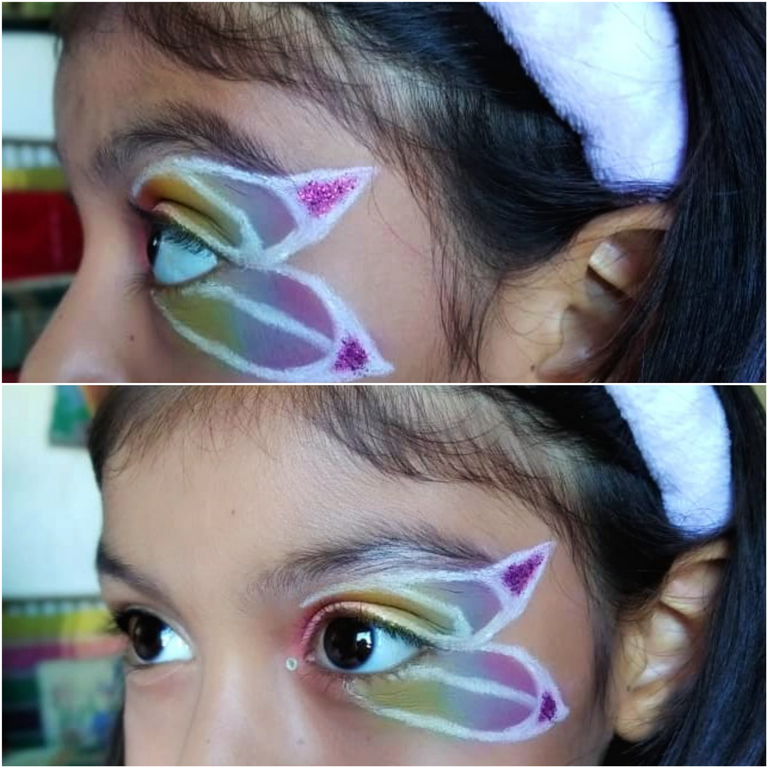
1- The first thing I did was prepare the face, adding liquid foundation all over the face and a little concealer on the part of the eyes where I would make the butterfly wings.
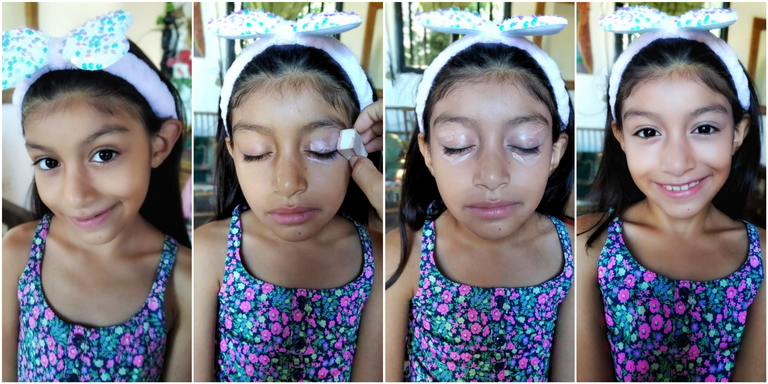
📝Note: I used an adhesive tape to guide me, I placed it from the part where the eye ends to where the eyebrow ends. As seen in the image 👇
2- Then I began to place the shadows, I used a pink tone to start, starting at the tear duct towards the corner of the eye, then applying orange, then yellow, green, turquoise blue, light blue and ending with purple. So I have the upper wing of the butterfly.
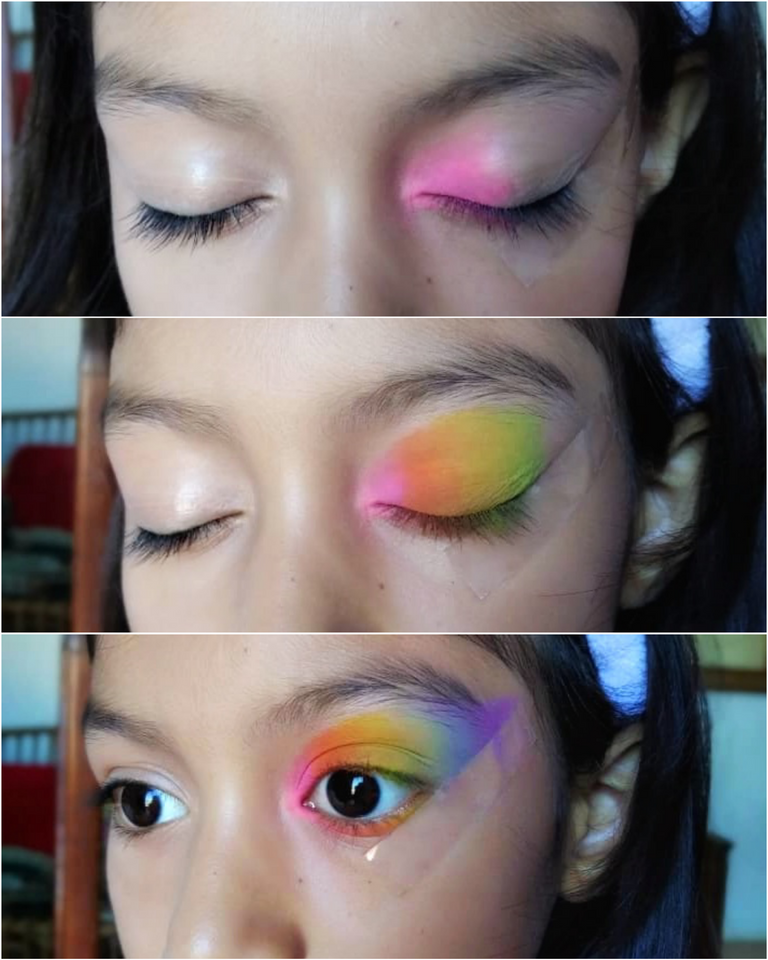
📝Note: always start over the previous shade for a better blend between shadows.
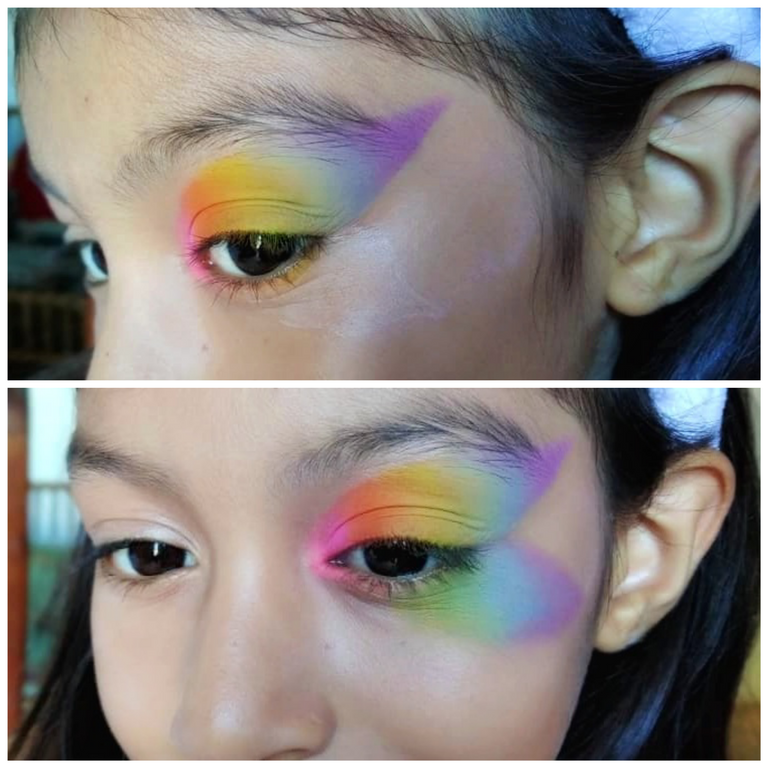
3- For the lower part, make the shape of the wing with the corrector, to obtain a better adhesion of the shadows and also so that the shape of the butterfly can be seen. I was placing the colors in the same order as in the upper part, but this time starting from the middle of the eye with the yellow tone and ending with the purple.
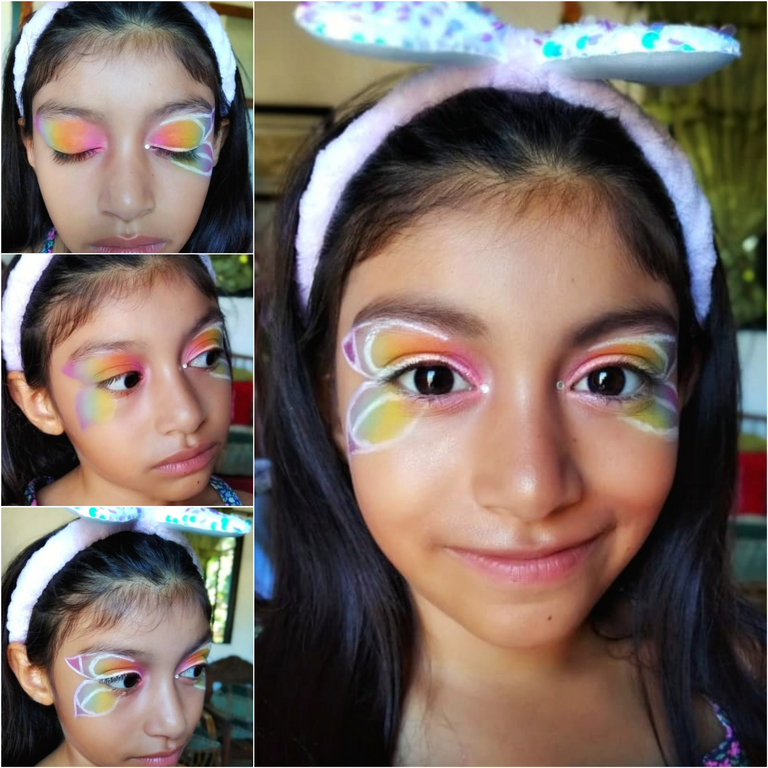
4- With a white eye pencil I made all the contour of the wings and the details of these.
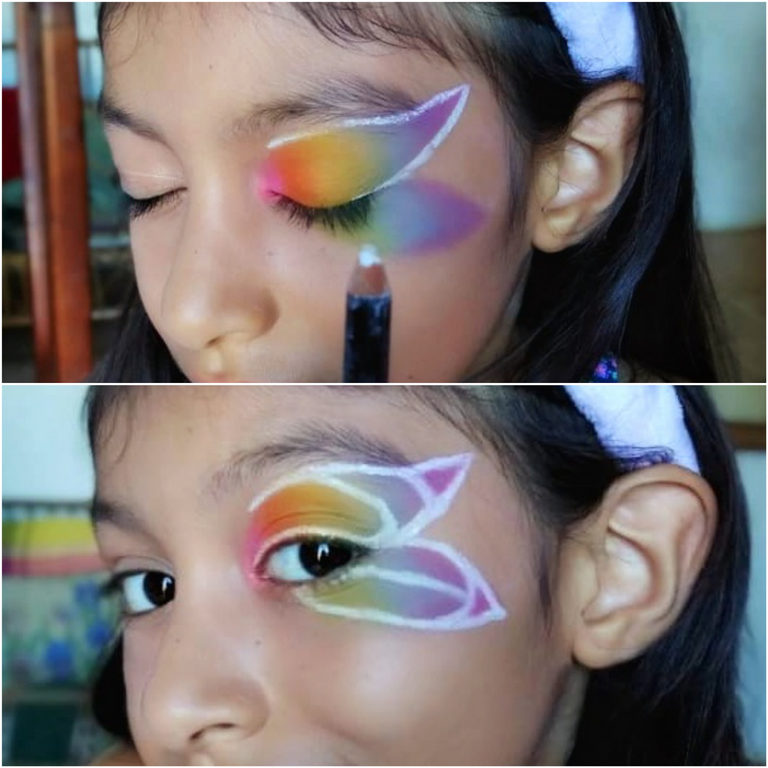
5- I finished by adding a little frosty shadow on the purple part of the wings, to add shine and I placed some shiny details on the tear duct of the eye.
6- Then I did the same steps on the other eye.
7- Clean up the rest of the splattered shadow and I finished giving the eyebrows a bit of shape with black shadow, added a bit of blush and highlighter and applied a fuchsia matte lipstick.
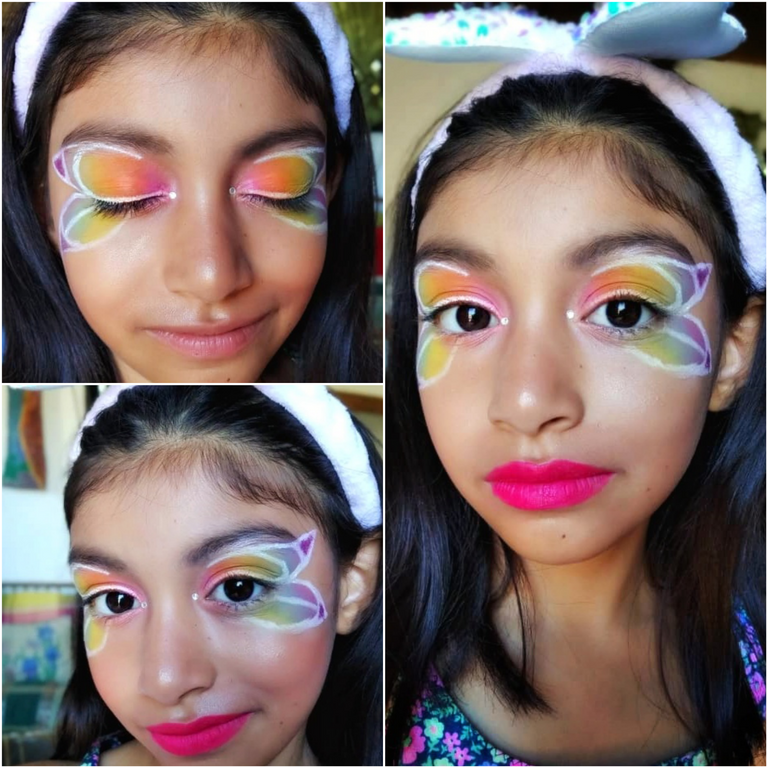
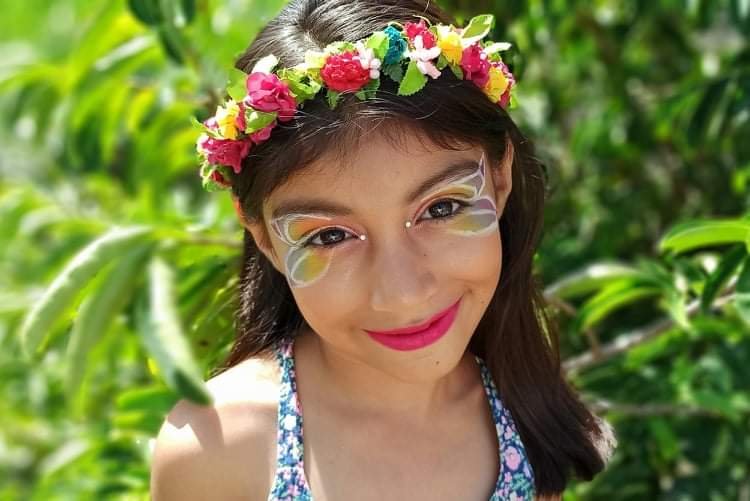
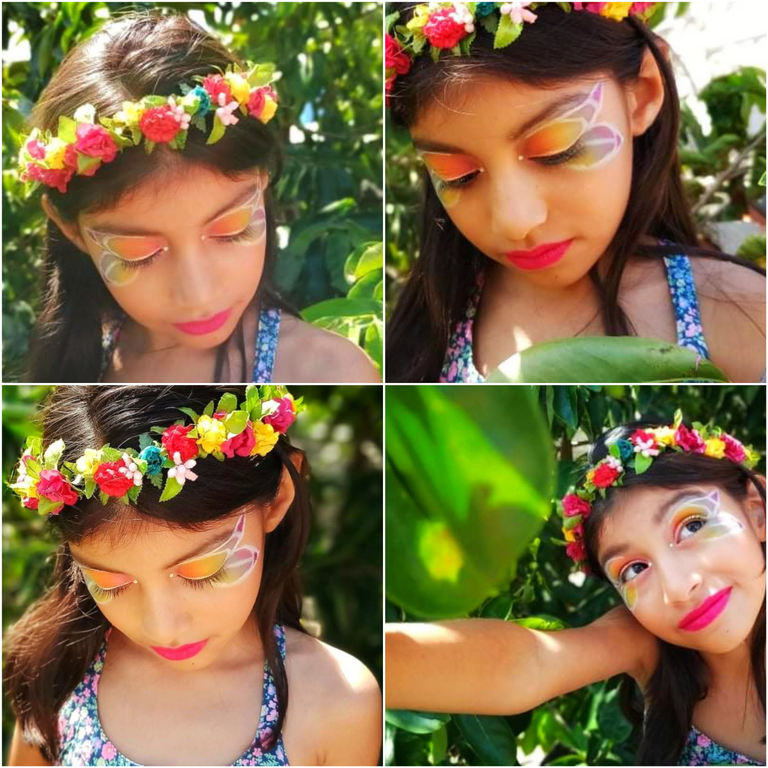
And so I finished the artistic makeup for my daughter. I hope you like it and inspire you.
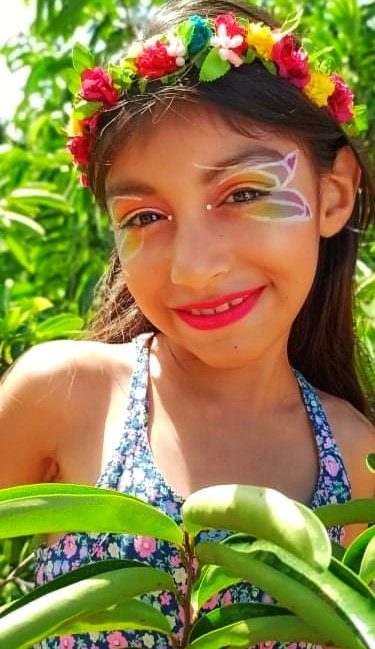
📝Note: my daughter was delighted with the result of her makeup.
Thanks for reading me! until a new post 😊
¡Hola querida comunidad hive! espero se encuentren bien✌
El post que les traigo hoy, es sobre un maquillaje artístico inspirado en una mariposa. Se lo hice a mi hija, a ella le encanta la naturaleza y me pidió que le hiciera éste maquillaje.
Les mostrare el paso a paso de como lo hice y por supuesto el resultado final.
▪Pasos 👣
1- Lo primero que hice fue preparar el rostro, agregando base líquida en toda la cara y un poco de corrector en la parte de los ojos donde haría las alas de la mariposa.
📝Nota: me ayudé con una cinta adhesiva para guiarme, la coloqué en la parte donde termina el ojo hasta donde termina la ceja. Así como se ve en la imágen 👇
2- Luego empecé a colocar las sombras, yo utilicé un tono rosado para empezar, comenzando en el lagrimal hacia la esquina del ojo, aplicando después el color naranja, luego el amarillo, verde, turquesa, azul claro y finalizando con morado. Así tengo el ala superior de la mariposa.
📝Nota: siempre comienza sobre el tono anterior para un mejor difuminado entre sombras.
3- Para la parte de abajo realice la forma del ala con el corrector, para obtener una mejor adhesión de las sombras y también para que se fuera viendo la forma de la mariposa. Fui colocando los colores en el mismo orden que en la parte superior, pero ésta vez comenzando desde la mitad del ojo con el tono amarillo hasta finalizar con el morado.
4- Con un lápiz de ojos blanco hice todo el contorno de las alas y los detalles de estas.
5- Finalicé agregando un poco de sombra escarchada en la parte morada de las alas, para agregar brillo y coloqué unos detalles brillantes en el lagrimal del ojo.
6- Luego realicé los mismos pasos en el otro ojo.
7- Limpie el resto de sombra salpicada y terminé dándole un poco de forma a las cejas con sombra negra, agregué un poco de rubor e iluminador y apliqué un labial mate color fucsia.
Y así terminé el maquillaje artístico para mi hija. Espero les guste y los inspire.
📝Nota: mi hija quedó encantada con el resultado de su maquillaje.
¡Gracias por leerme! hasta un nuevo post 😊