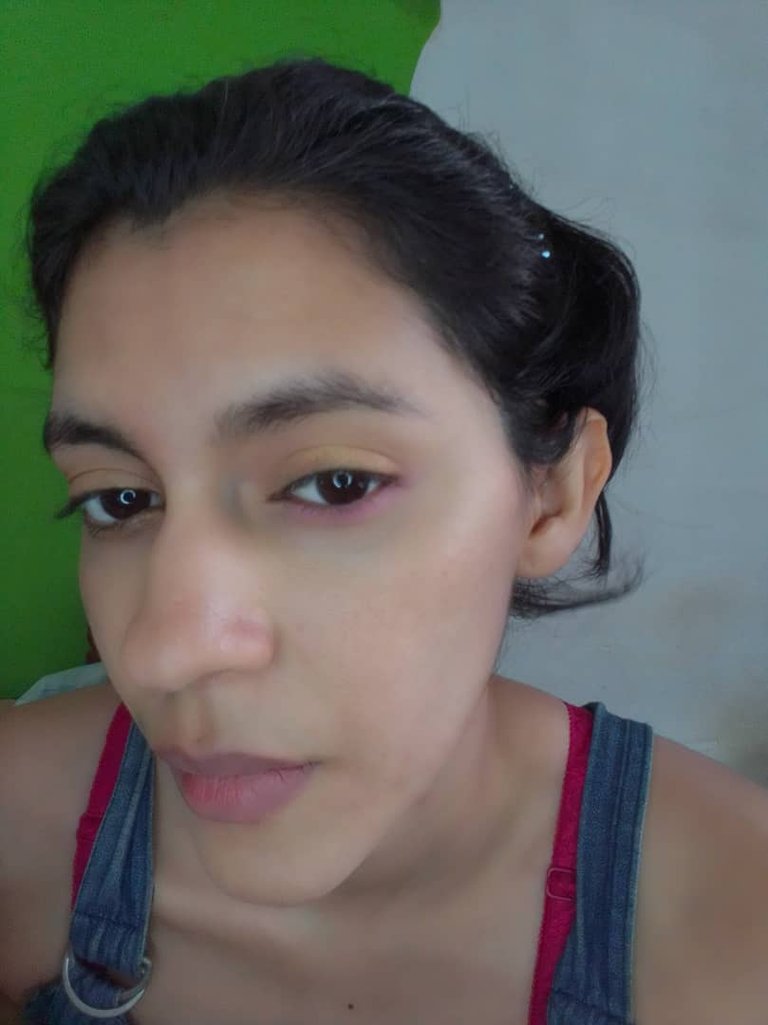
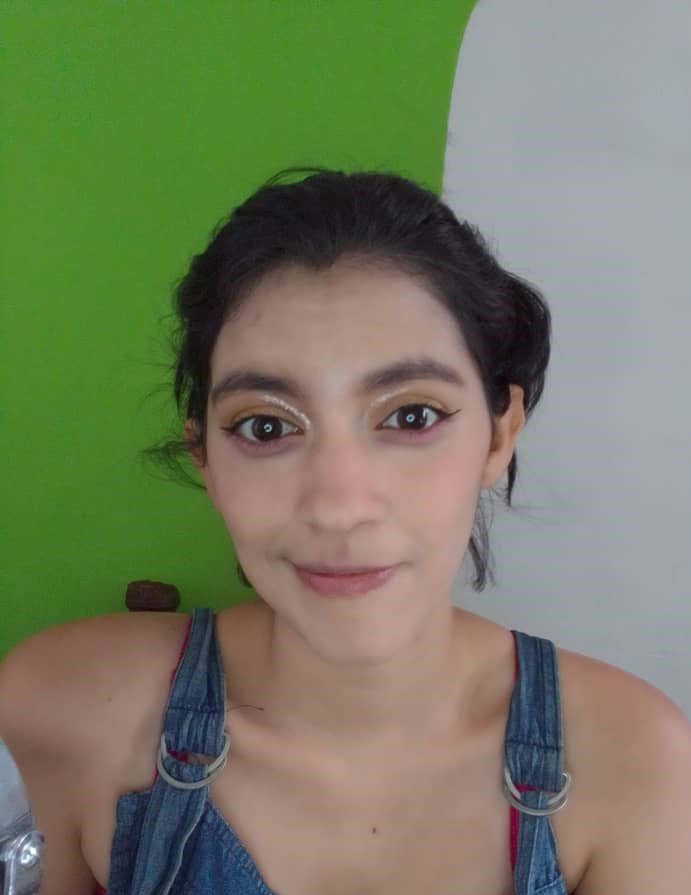
Hello internet people, I'm really excited about this post so I'll start off by saying that although Korean makeup seems simplistic it's not, it's just natural looking haha, I have some Korean friends who have taught me the way they do their skin makeup (yes, young men do makeup in Korea) and also how to do their lips, however their eye makeup is non-existent (unless they are artists and even then it's very simple just to give the illusion of having thicker eyelashes or something like that) or just a base of skin-colored shadow to seal and conceal marks of veins, so they couldn't help me with eye makeup, however they did show me some reference photos and after so much practice, I got it right (not perfect but pretty good).
Hola, gente de Internet, estoy muy contenta con este post, así que iniciaré diciendo que aunque el maquillaje Coreano parece simplista no lo es, solo es de apariencia natural haha, tengo algunos amigos coreanos que me han enseñado la forma en la que se maquillan la piel (sí, los hombres jóvenes se maquillan en Corea) y también como maquillarse los labios, sin embargo su maquillaje de ojos es inexistente (a menos que se trate de artistas y aun así es muy simple, solo para dar ilusión de tener pestañas más tupidas o algo por el estilo) o solo una base de sombra del color de la piel para sellar y ocultar marcas de venitas, por esto no pudieron ayudarme con el maquillaje de ojos, sin embargo si me enseñaron algunas fotos referenciales, y de tanto practicar, ya me sale bien (no perfecto pero si bastante bien)
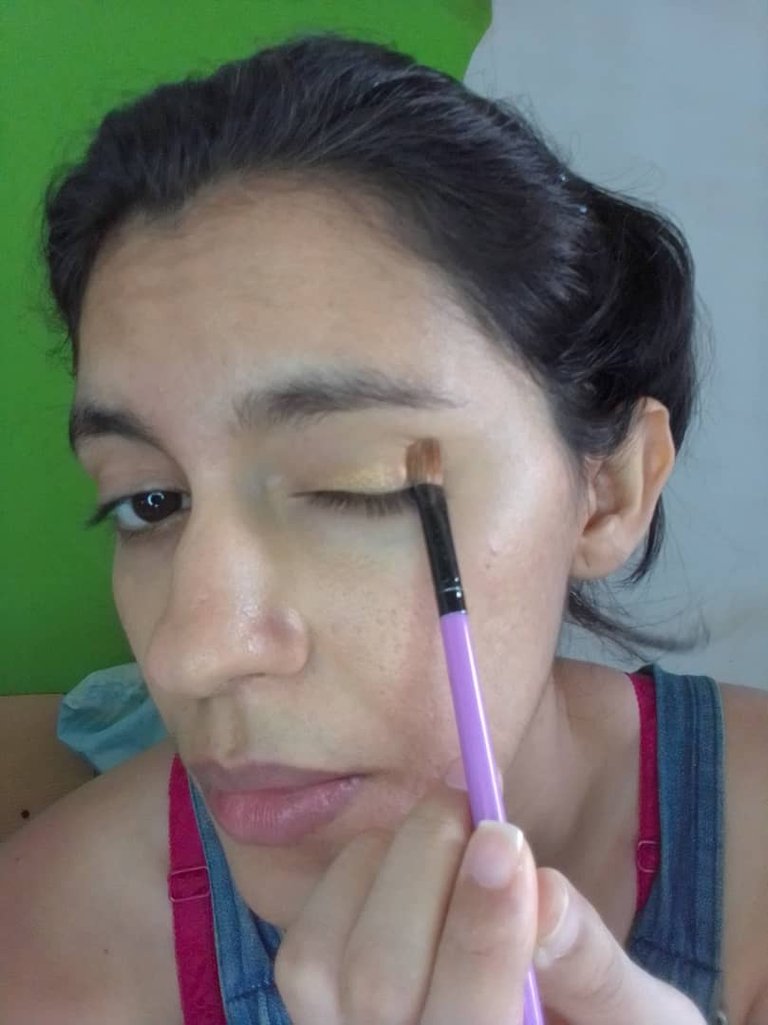
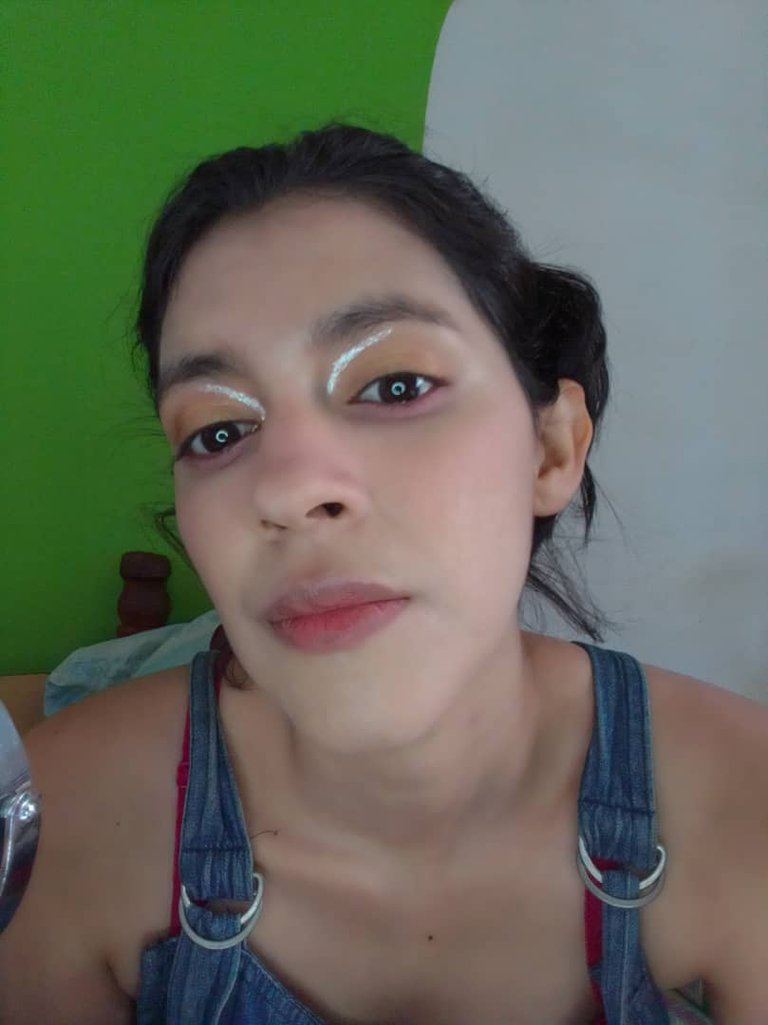
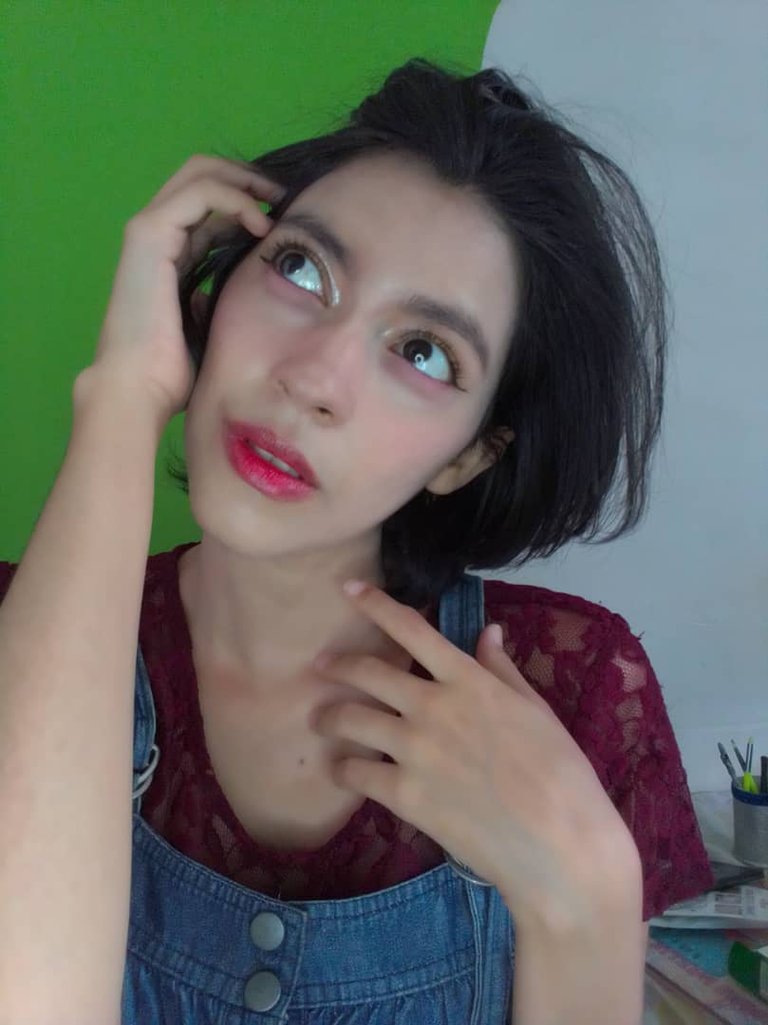
In this case, I used Barbie pink and gold as eye colours. The first thing we will do is to put a base colour of our eyelid (I didn't put this step because it is not noticeable on camera) but it helps a lot so that the colours (which are already light) don't mix with the undertones of our skin. The technique of the Korean make-up is that it doesn't leave the mobile eyelid, it always stays there, the advantage that we westerners have is that our eyelid is wider, so I put the first pigment in this area.
En este caso, usé como colores en los ojos, rosa Barbie y dorado. Lo primero que haremos es poner una base de color del nuestro parpado (no puse este paso porque no es notorio en cámara) sin embargo ayuda mucho a la hora de que los colores (que de por si son claros) no se mezclen con los subtonos de nuestra piel. La técnica del maquillaje coreano es que no sale del parpado móvil, siempre se mantiene allí, la ventaja que tenemos los occidentales es que nuestro parpado es más amplio, así que puse el primer pigmento en esta zona.
It is advisable to use a small but loose bristle brush to blend a little at the end, if your shadow does not pigment well try a tight bristle brush to deposit the colour and a loose bristle brush to blend the edges (if it still does not pigment well, wet the brush or put primer or concealer on the eyelid).
Es recomendable usar una brocha pequeña pero de cerdas sueltas para que se difumine un poco al final, si tu sombra no pigmenta bien prueba con una brocha de cerdas apretadas para depositar el color y una de cerdas sueltas para difuminar las orillas (si aún así no pigmentan bien, moja la brocha o pon en el parpado primer o corrector)
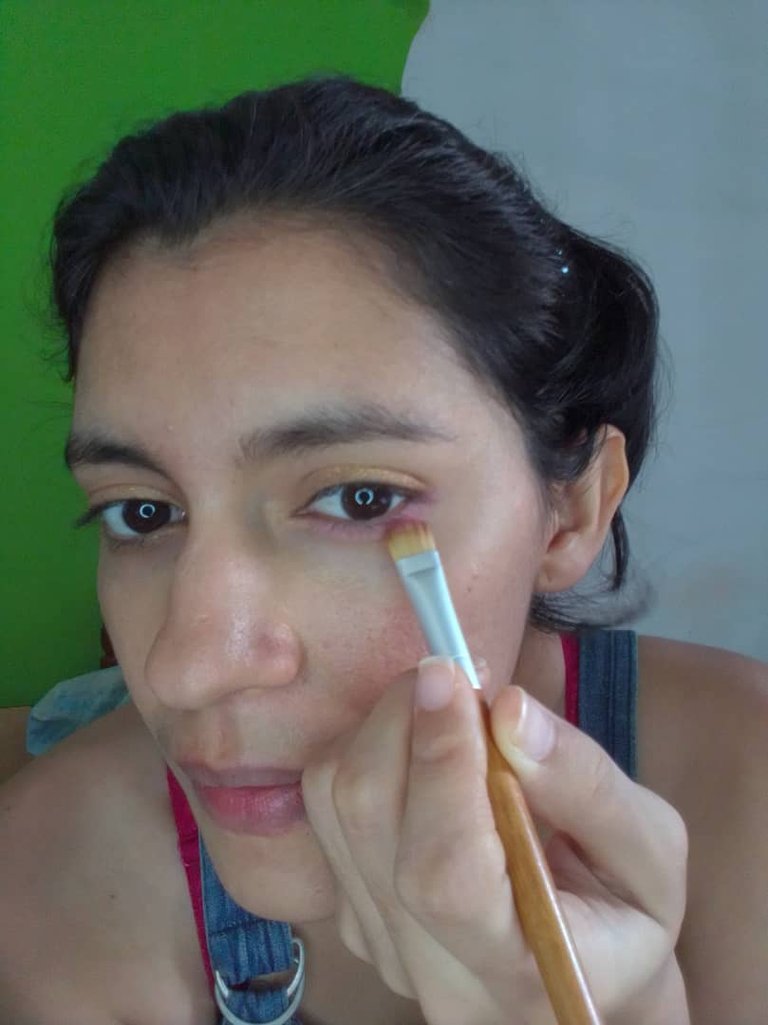
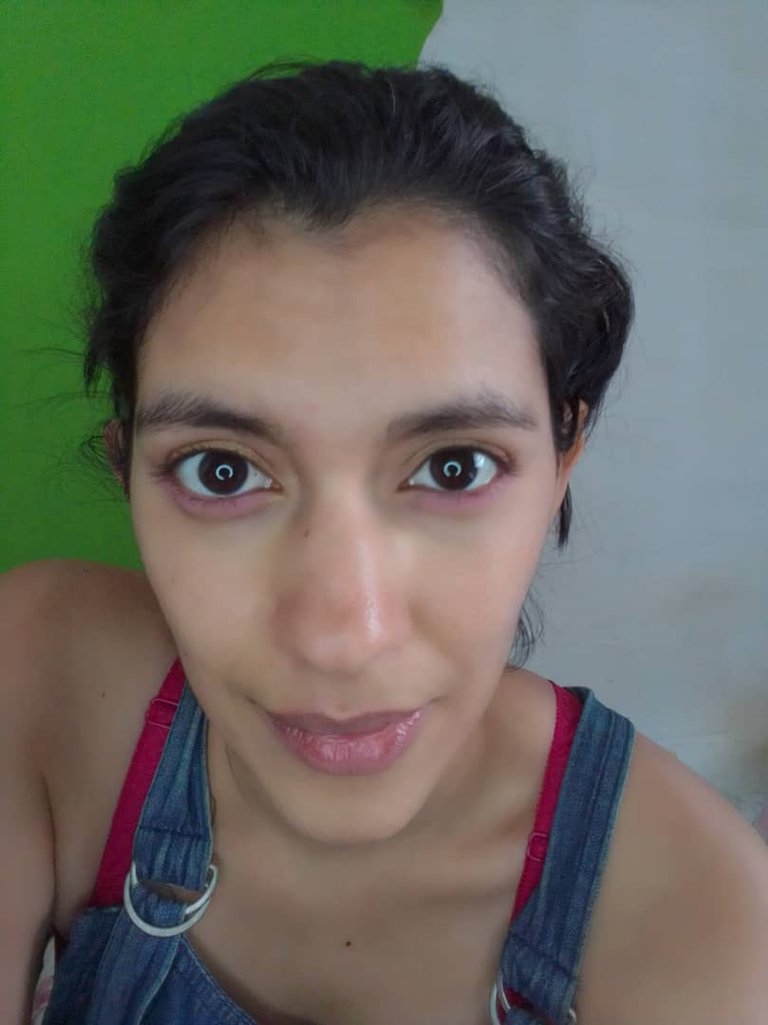
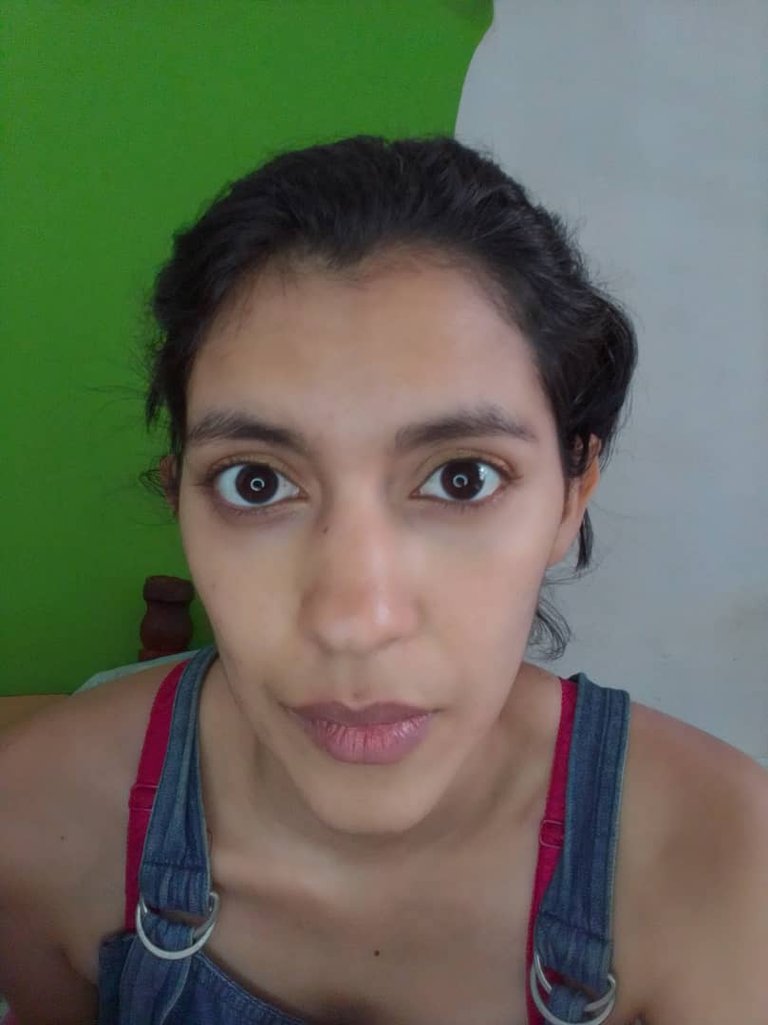
On the lower eyelid I used a flat brush with tight bristles to deposit the pink colour, if necessary, reapply the colour until it is perfectly visible.
En el parpado inferior empleé una brocha plana de cerdas apretadas para depositar el color rosa, si es necesario, reaplica el color hasta que sea perfectamente visible.
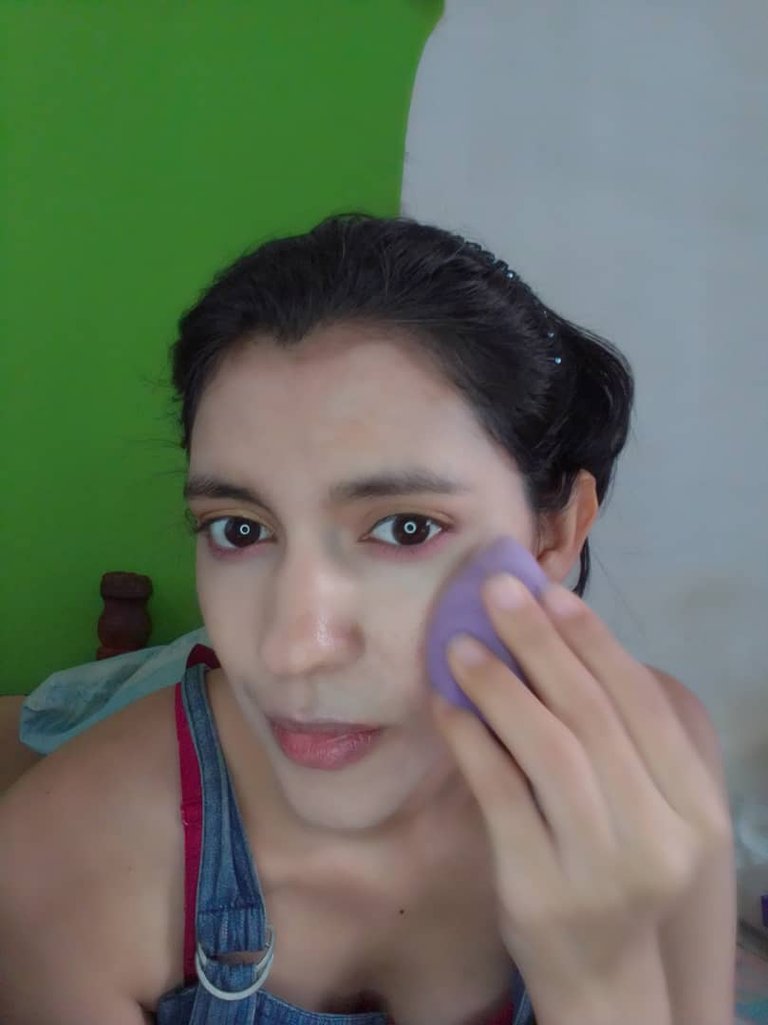
There were still more steps to do on the eyes, however, we have to apply make-up to the skin so that the rest of the eye make-up would not be hidden. In my case, I like to apply the foundation with beautyblender and sponges (always wet of course), I dot the foundation in areas and then blend with the sponges so that no patches of make-up are left behind.
Todavía había más pasos por hacer en los ojos, sin embargo, debíamos hacer primero la piel para que luego no quedara oculto el resto del maquillaje de los ojos. En mi caso, me gusta poner la base con beautyblender y esponjas (siempre húmedas por supuesto) distribuyo con puntos la base por áreas y enseguida difumino con las esponjas para que no se hagan parchos de maquillaje.
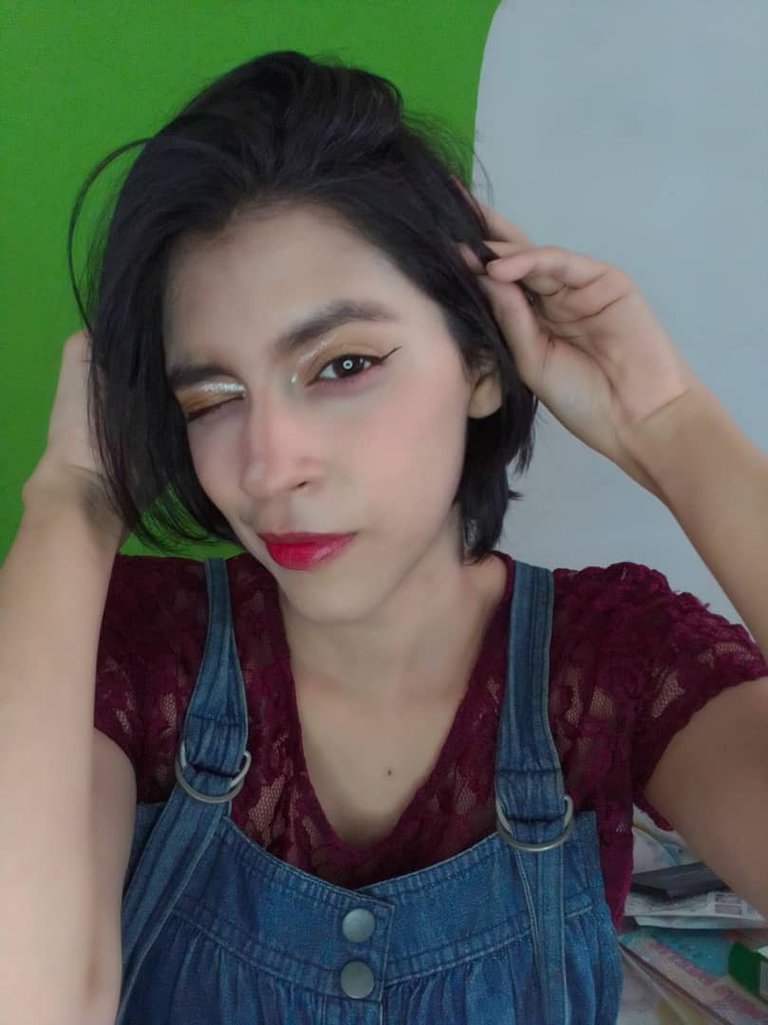
Then I applied the blush, which Koreans apply from side to side of the face, even on the nose, for a healthier, more youthful look.
Después puse el blush, el cual las coreanas aplican de lado a lado de la cara, incluso sobre la nariz, esto para una apariencia más saludable y juvenil.
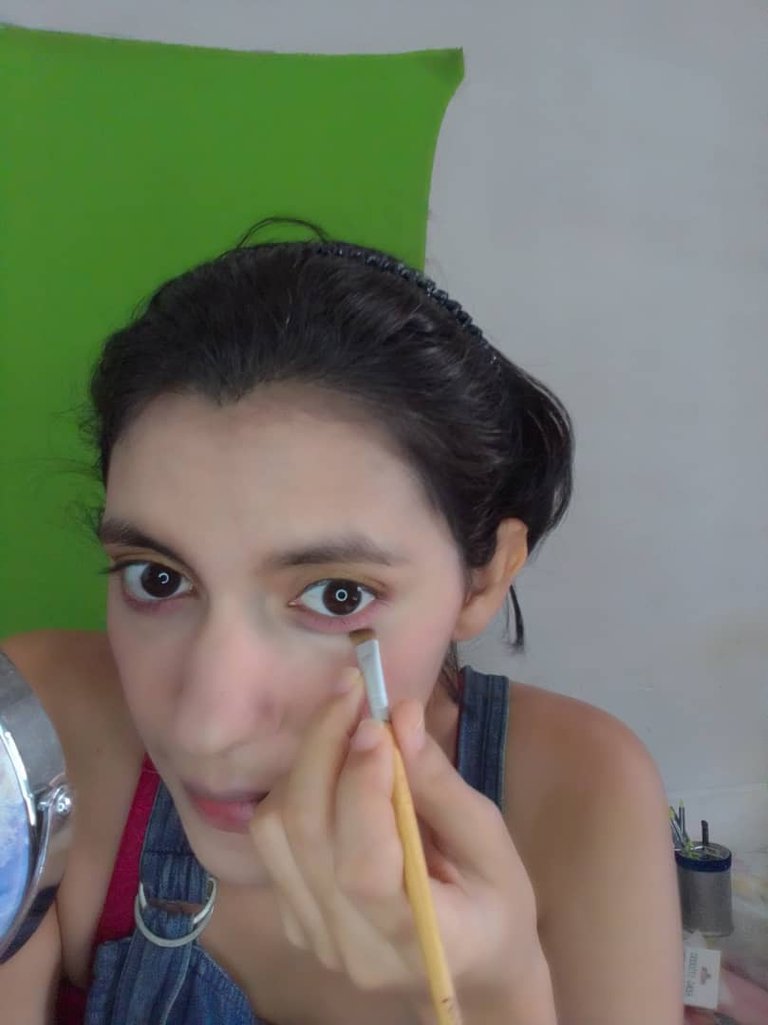
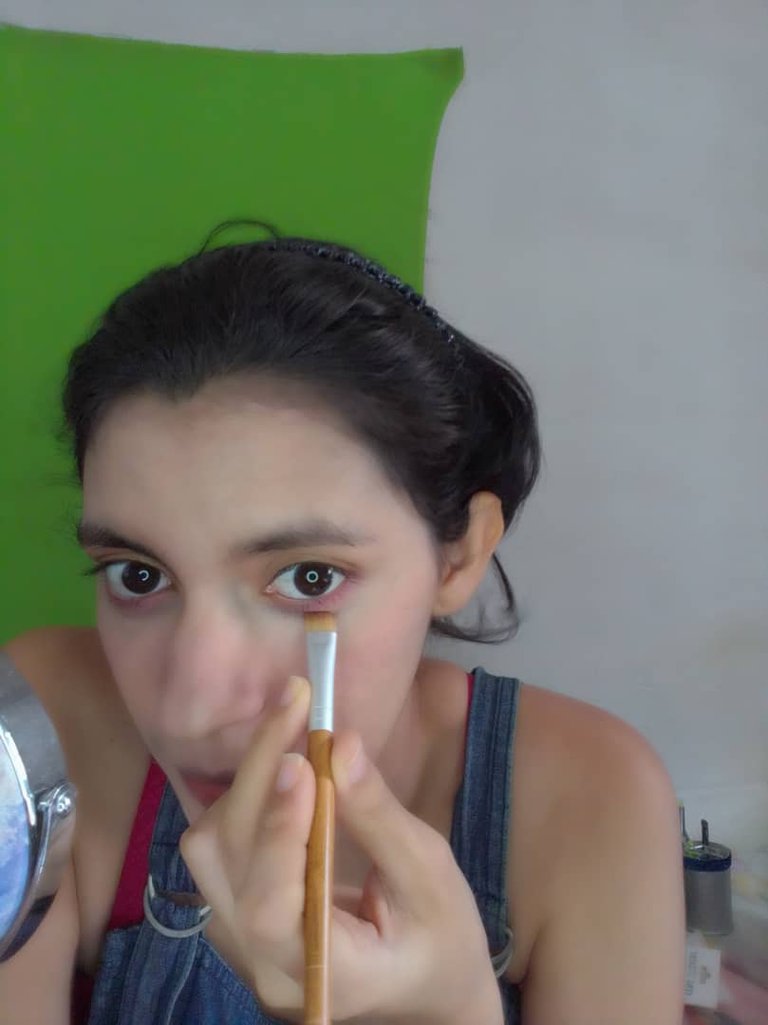
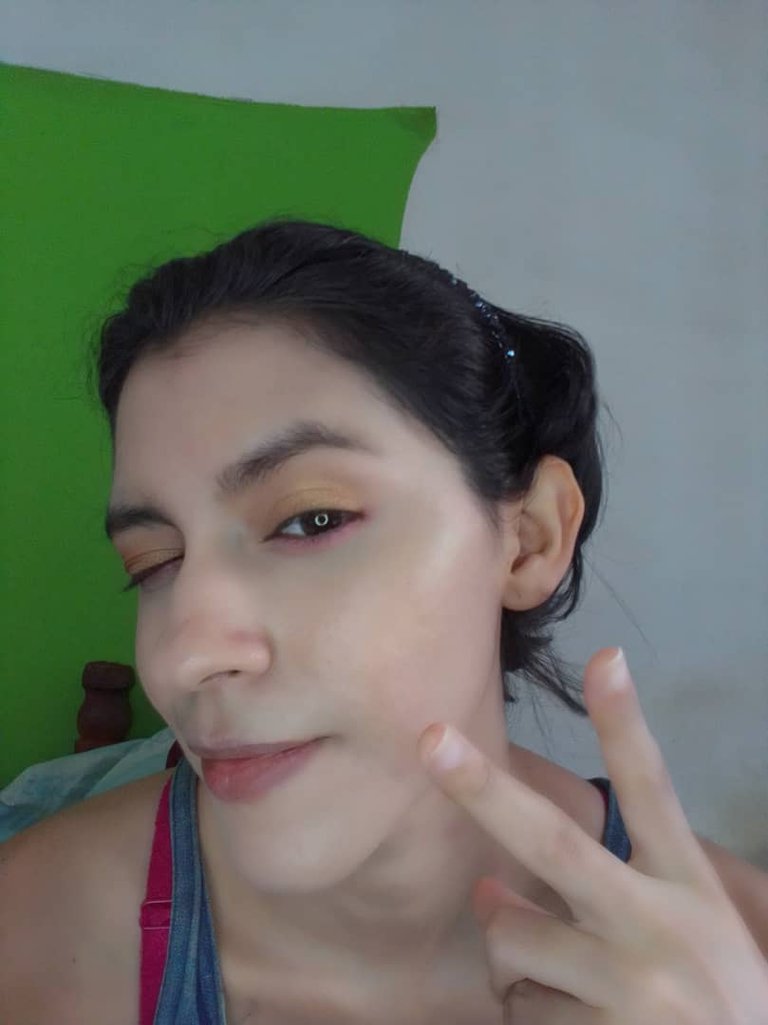
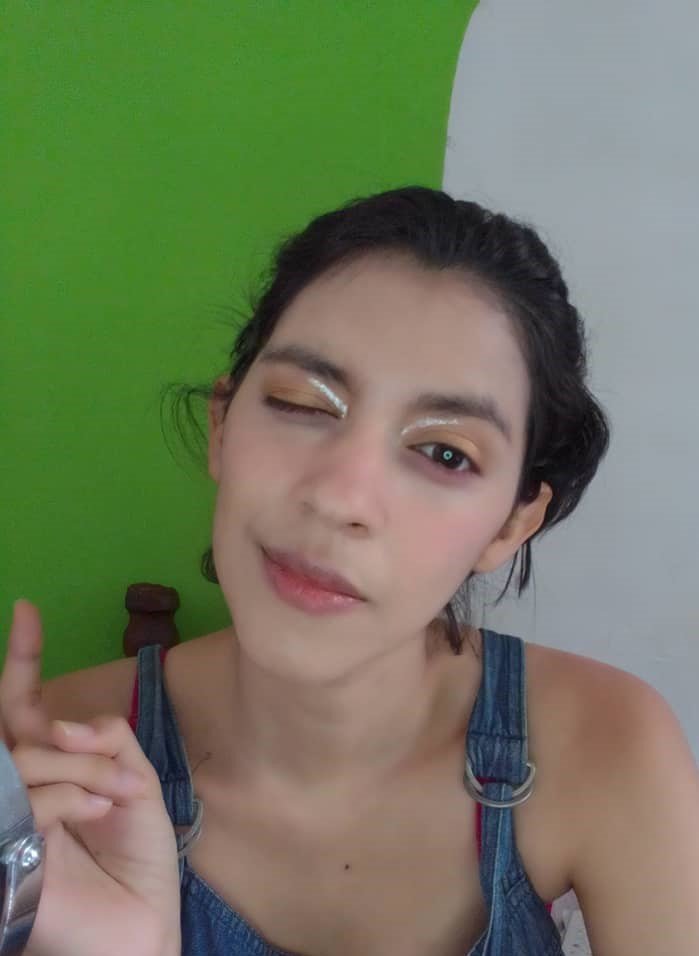
It's time to do the Aegyo salt (Korean technique to draw the lower eyelid as its double eyelid, it's not very visible if not nonexistent) in my case because I'm a westerner obviously it's visible, however highlighting it looks nice and at the end of the day it wouldn't be a Korean makeup tutorial if I don't show how to do the Aegyo salt. It's usually done with bronzer, but as I don't have any, I do it with eyebrow mousse and it looks just as good, but for the camera, it doesn't look good for going out because it's dark and noticeable, you should use a powder bronzer if you want to use it for going out in the street.
Llegó el momento de hacer el Aegyo sal (técnica coreana para dibujarse el parpado inferior ya que como su doble parpado, es poco visible por no decir inexistente) en mi caso por ser occidental obviamente se ve, sin embargo resaltarlo queda bonito y al final de cuentas no sería un tutorial de maquillaje coreano si no muestro como hacer el Aegyo sal. Se suele hacer con broncer, pero como no tengo, lo hago con mousse de cejas y queda igual de bien, eso sí, para la cámara, no queda bien para salir por ahí porque queda oscuro y es notorio, tú usa un broncer en polvo mejor si quieres usarlo para salir a la calle.
I also use the same brush I use on the eyebrows, the beveled one, I just took a little bit of product and I marked the beginning of the lower eyelid from the corner of the eyelid to a little bit past the middle of the eye, then I blended it with a flat brush (these are usually used to apply product, but they work for me to blend in only one direction) so you will see the Aegyo sal marked but blurred.
Uso también la misma brocha que uso en las cejas, la biselada, solo tomé un poco de producto y marqué el inicio del parpado inferior desde la esquina del lagrimal hasta un poquito pasado de la mitad del ojo, después lo difuminé con una brocha plana (estas suelen ser para aplicar producto, pero a mi me funcionan para difuminar en una sola dirección) así se verá el Aegyo sal marcado pero difuminado.
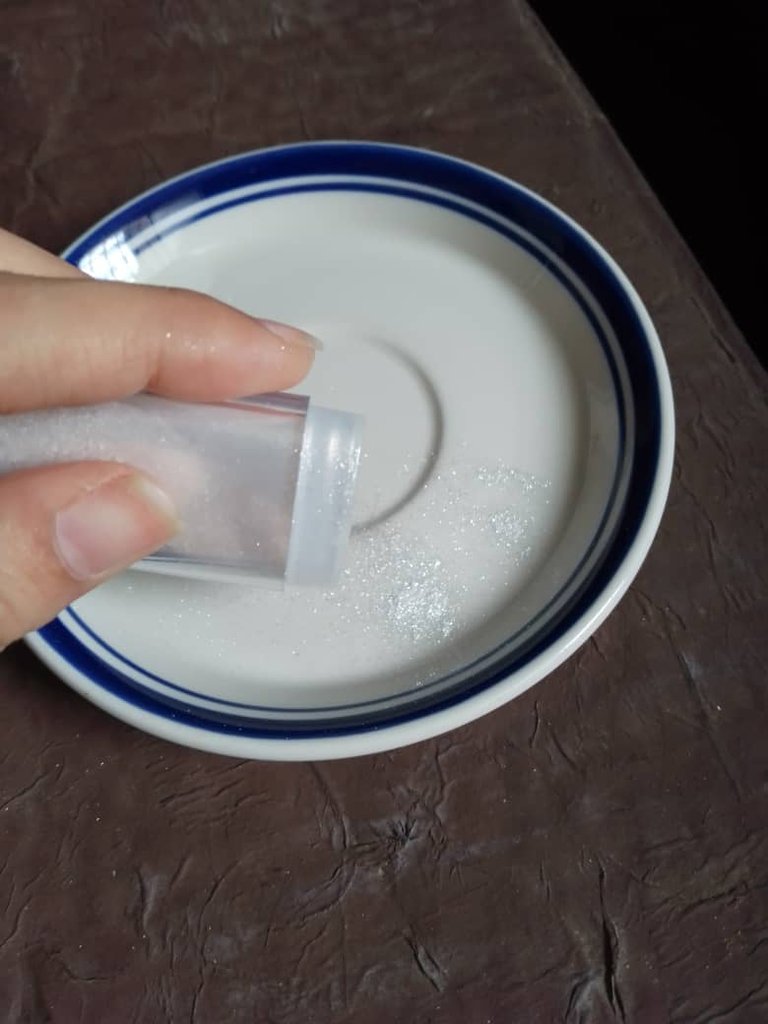
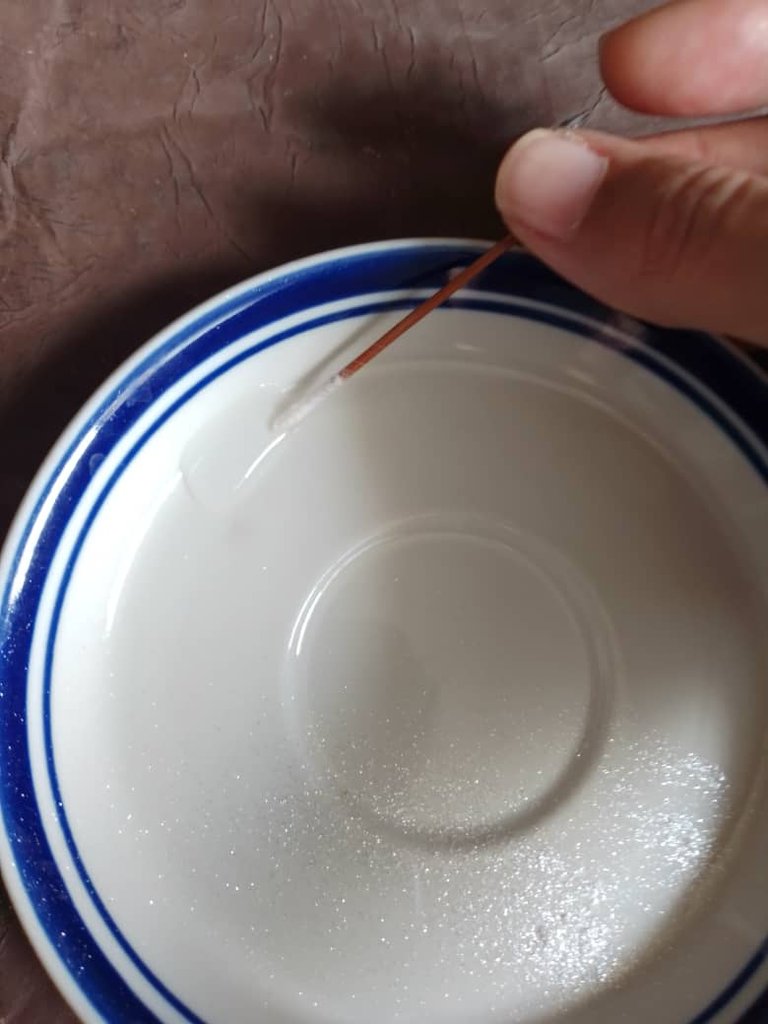
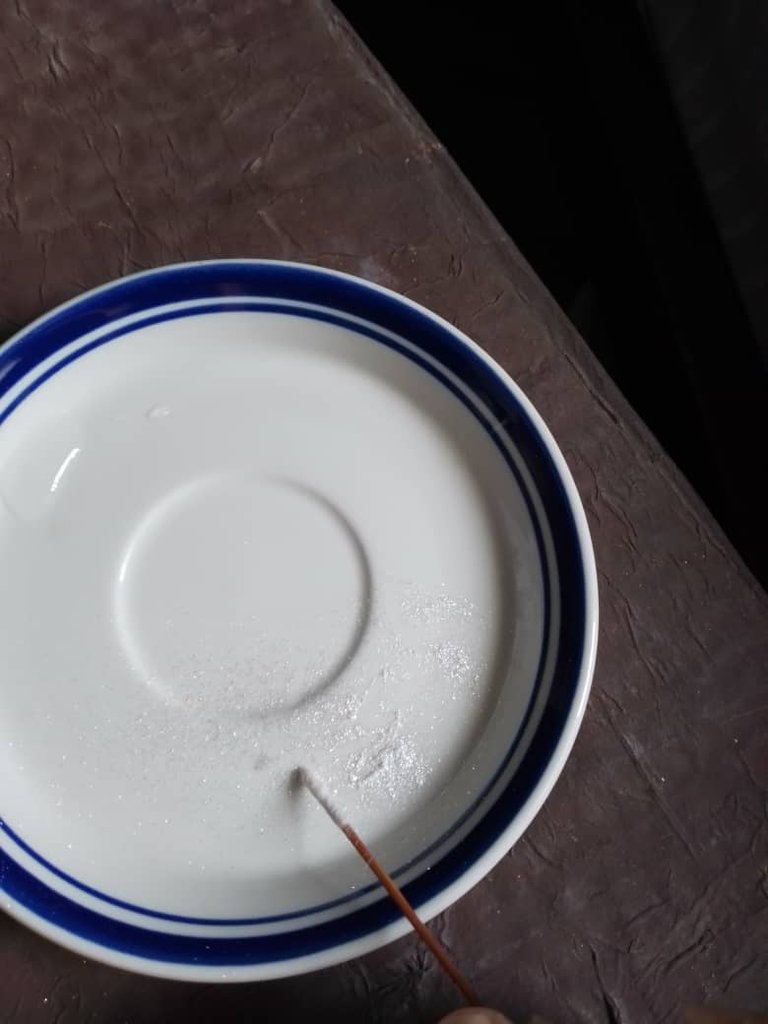
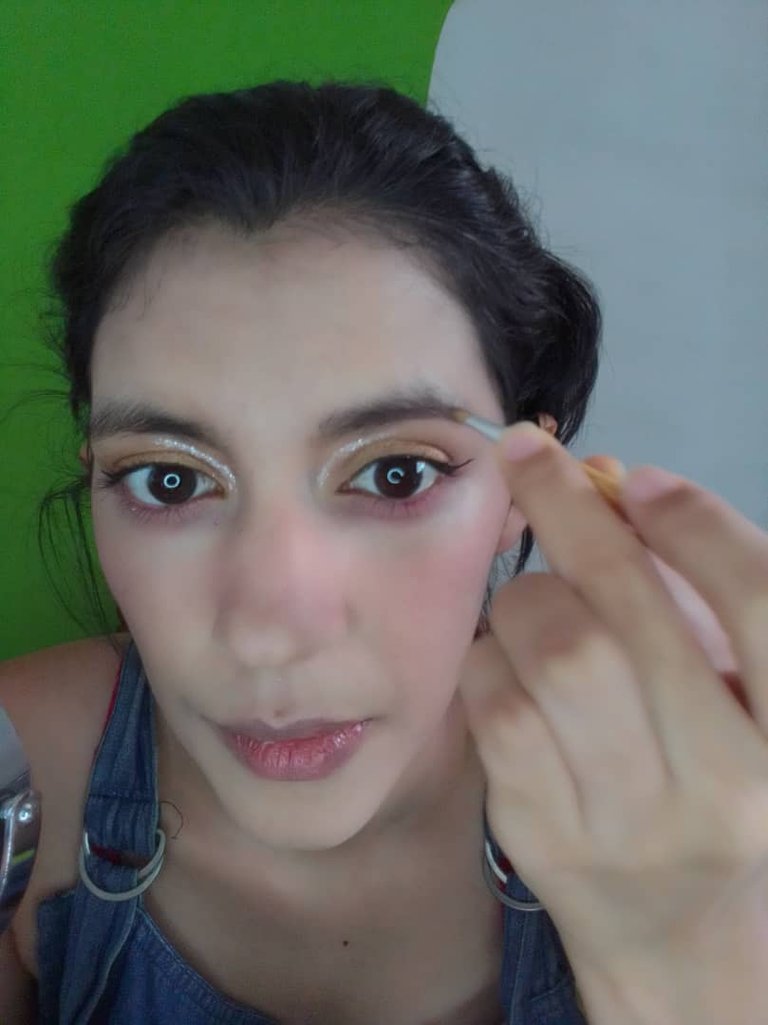
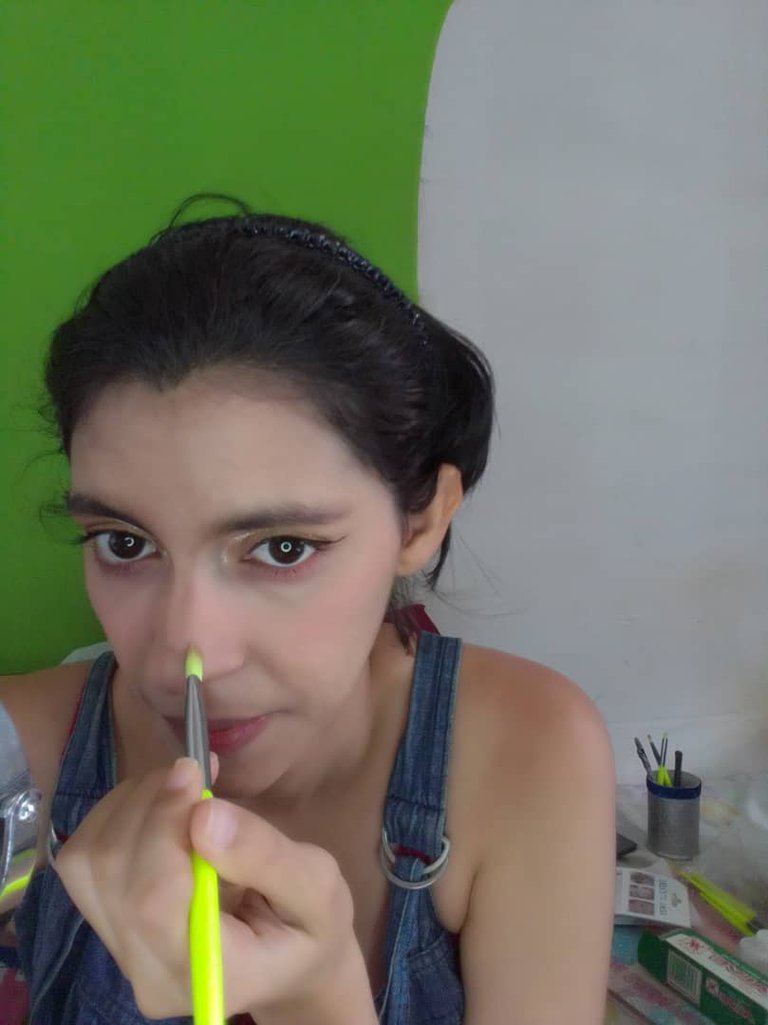
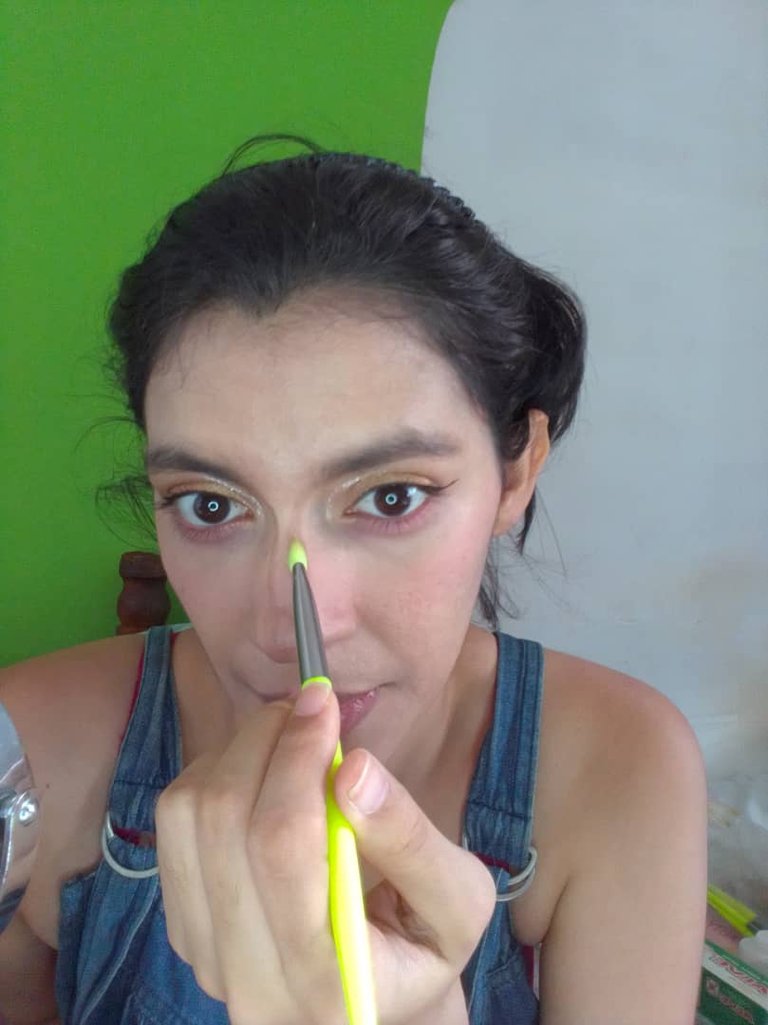
I know that there are satin or glitter eyeliners to make eye decorations, however I don't have one and I won't buy one if I can make my own in three steps, if like me you don't have one don't worry, take a toothpick, wrap it a bit with cotton wool, on a plate put a little bit of fairy dust (if you want it in colours and you don't have it you can mix it with pigment from your eyeshadows) wet the cotton of the toothpick, take pigment from the fairy dust and voila, you will have a "glittler eyeliner" applicator.
Sé que existen los delineadores satinados o con glitter para hacer adornos en los ojos, sin embargo no tengo y no compraré uno si puedo fabricármelo en tres pasos, si como yo no tienen uno no se aflijan, tomen un palillo de dientes, envuélvanlo un poco con algodón, en un plato pongan un poquito de polvo de hadas (si lo quieren de colores y no tienen lo pueden mezclar con pigmento de sus sombras de ojos) humedezcan el algodón del palito, tomen pigmento del polvo de hadas y voila, ya tendrán un aplicador de "delineador con glittler"
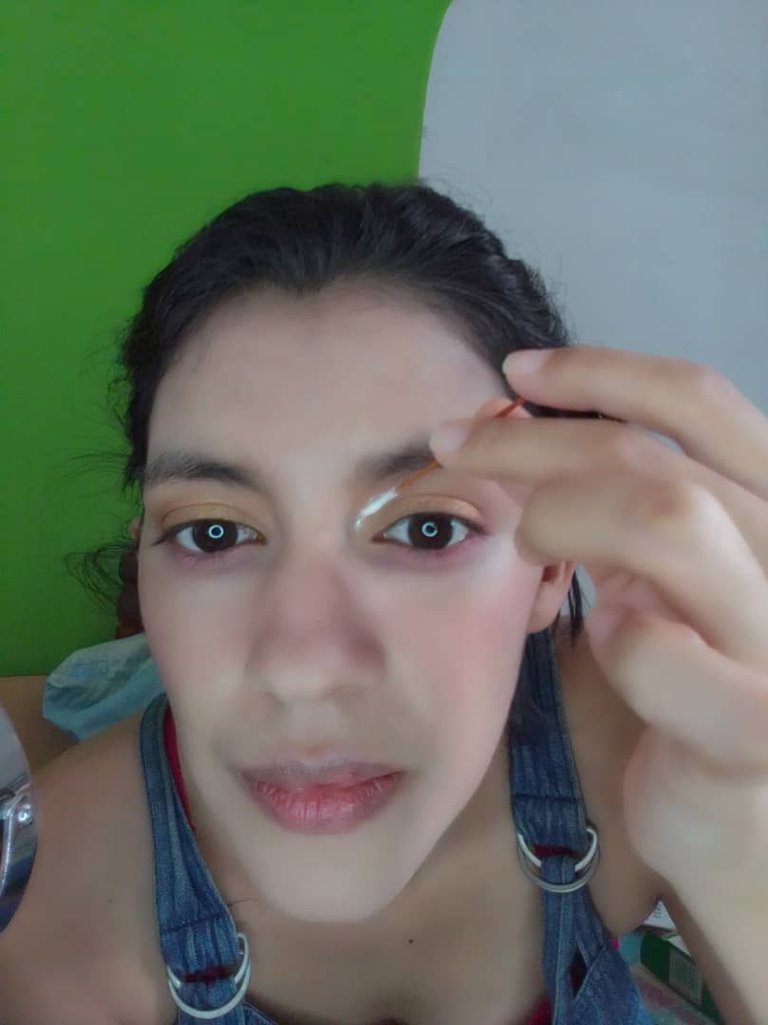
Once our "applicator" is loaded with product, we just have to make the stroke we want on our eye, in my case I did this one.
Una vez que nuestro "aplicador" está cargado con producto, solo tenemos que hacer el trazo que queramos sobre nuestro ojo, en mi caso hice este.
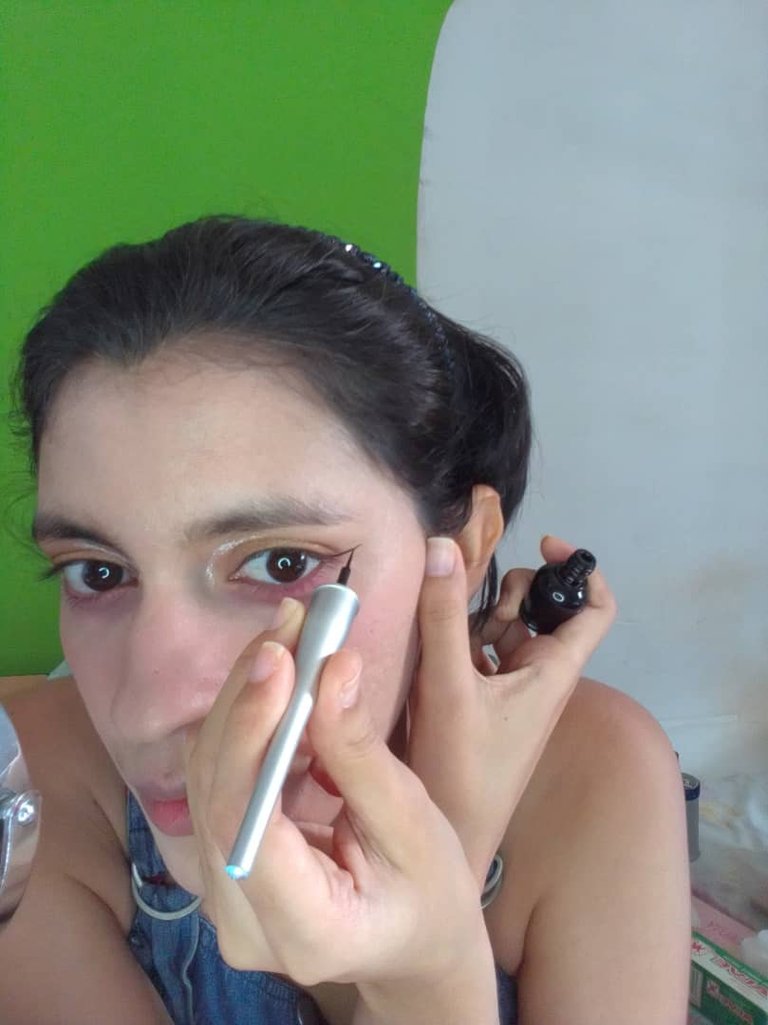

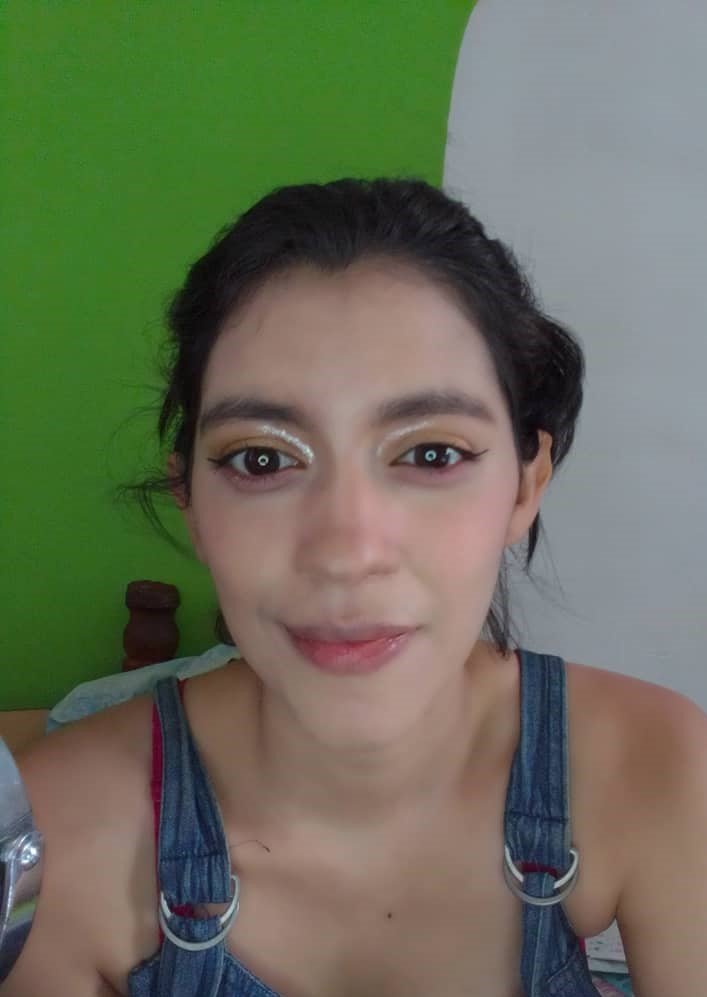
Now we do the eyeliner. My way of doing it is to follow the line of my eye (being open) and then fill in from the top. I don't like to make it huge because in my opinion it looks vulgar, it's a matter of taste.
Ahora hacemos el delineado. Mi forma de hacerlo es seguir el trazo de mi ojo (estando abierto) y después relleno desde la parte superior. No me gusta hacerlo enorme porque en mi opinión se ve vulgar, cosas de gustos.
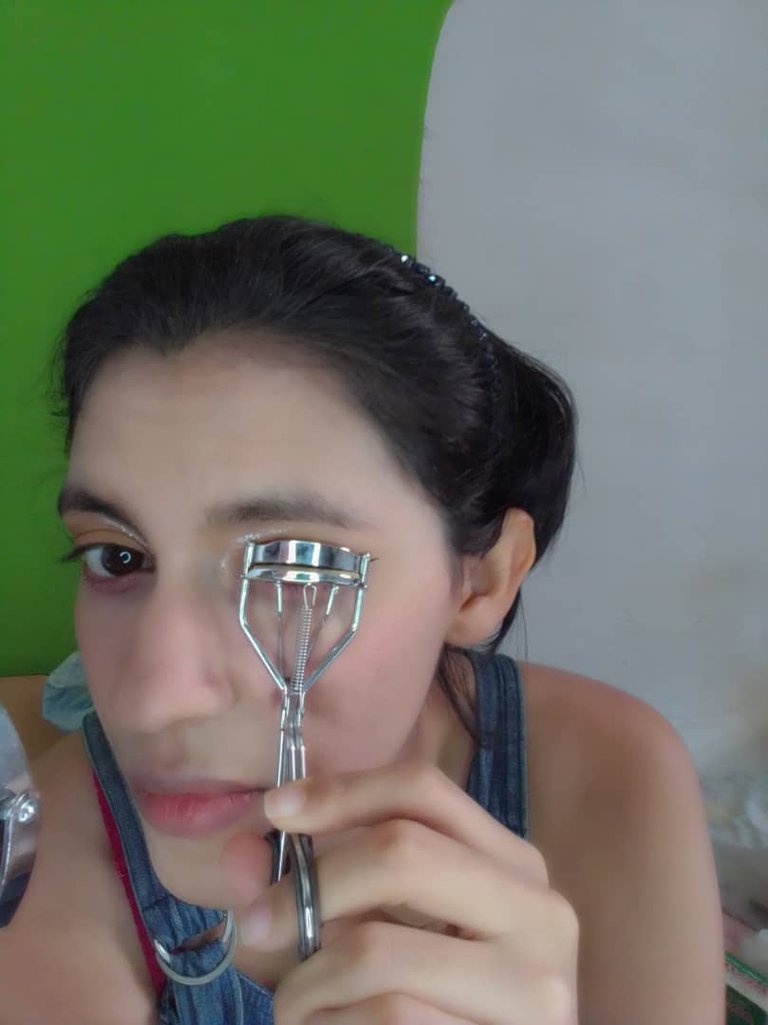
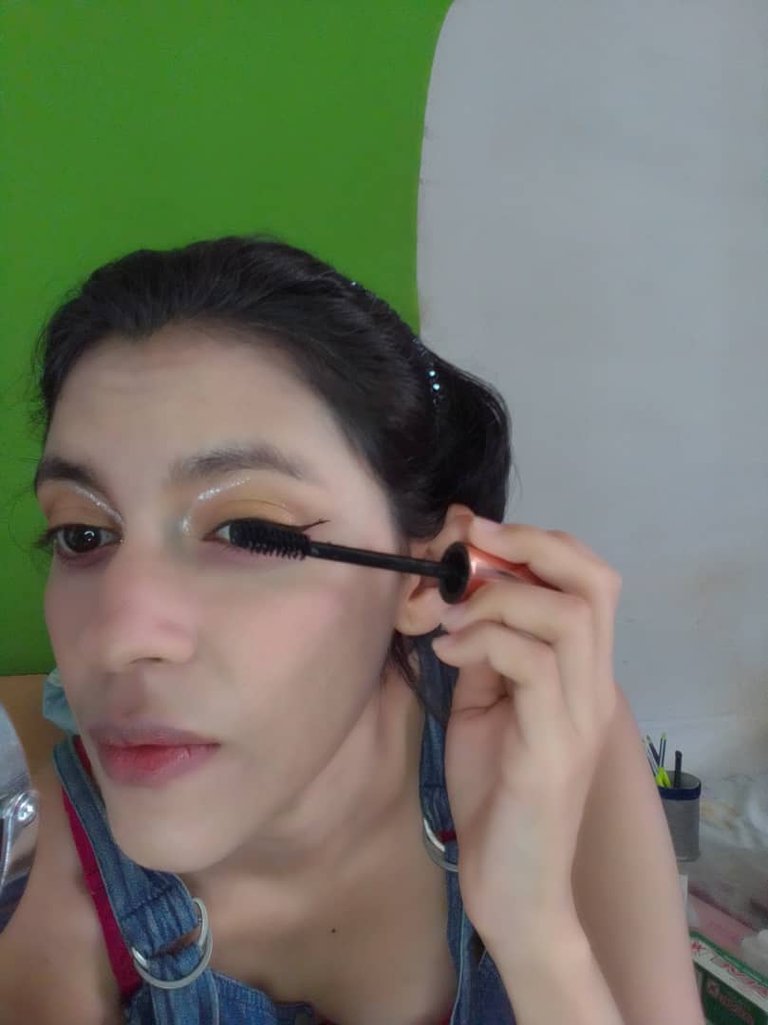
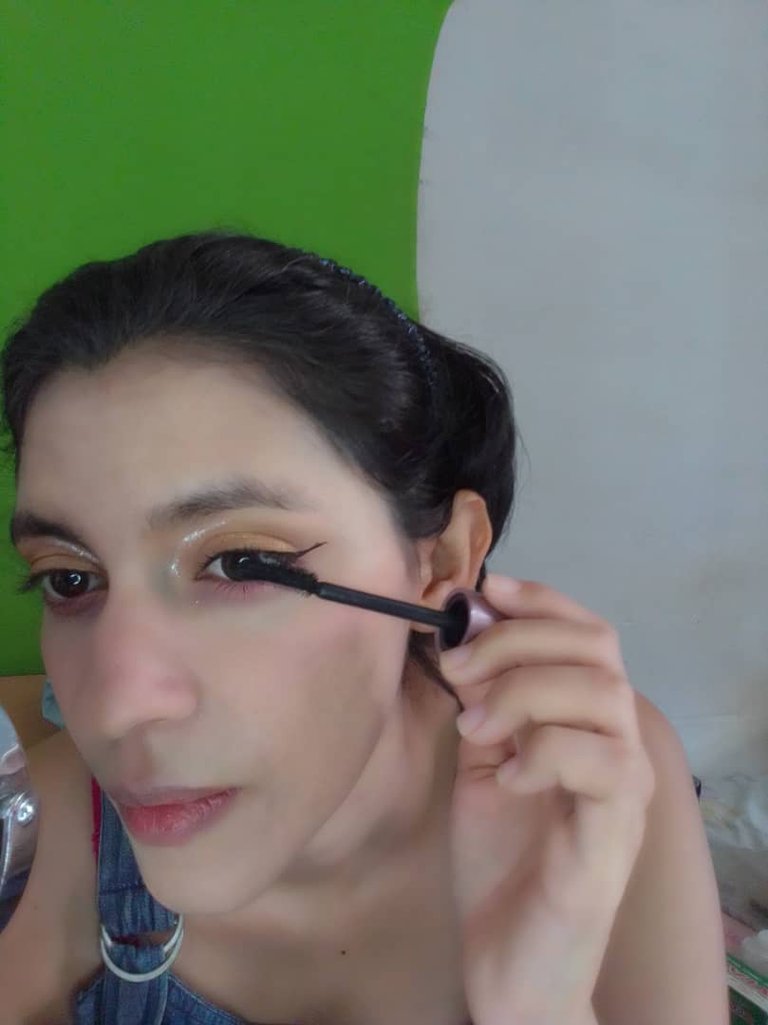
Now it's time to curl the lashes and put mascara, usually Koreans use brown mascara for everyday and black for events, I always use black no matter what, so I used that colour. The second brush doesn't have mascara on it, I use that one to separate my lashes a bit after I put on mascara.
Ahora es tiempo de rizar las pestañas y poner mascara de perstañas, usualmente las coreanas utilizan rimel marron para el diario y negro para eventos, yo siempre uso negro sin importar que, asi que usé ese color. El segundo cepillo no tiene mascara de pestañas, ese lo uso para separar un poco las pestañas luego de ponerme la máscara de pestañas.
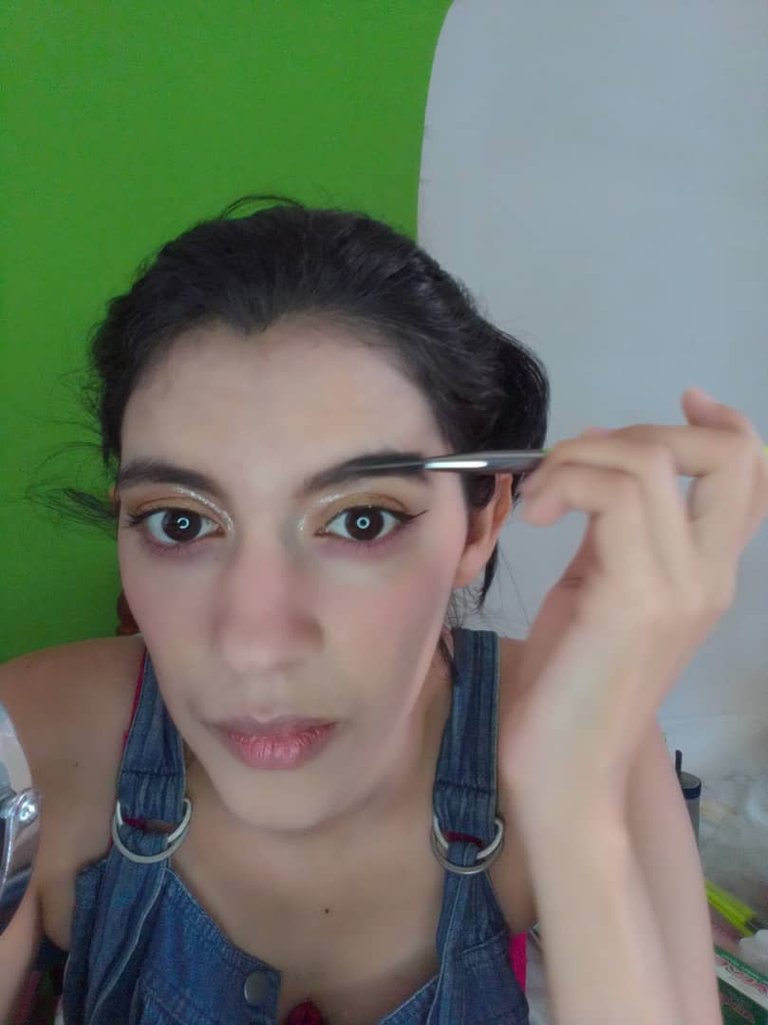
When it's time for the eyebrows, it's simply a matter of putting mousse on the eyebrows and filling in any holes, then blending with an eyebrow brush. In Korea the standard is to make them as straight as possible.
Hora de las cejas, simplemente es cosa de poner mousse en las cejas y rellenar algún hoyo, posteriormente difuminar con un cepillo para cejas. En Corea el standar es hacerlas lo más rectas posibles.
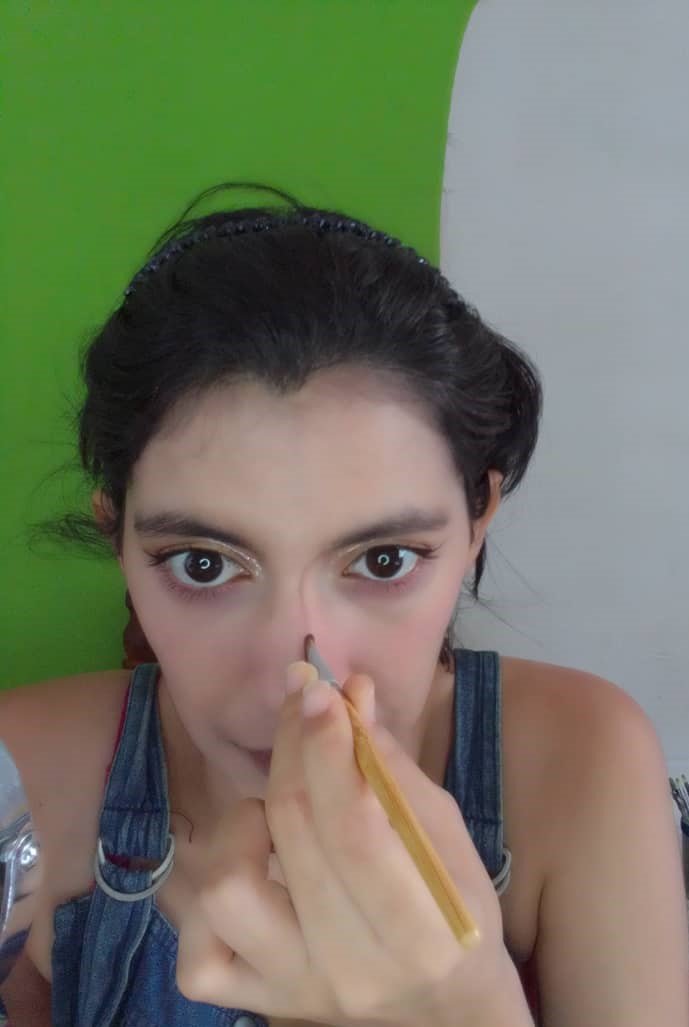
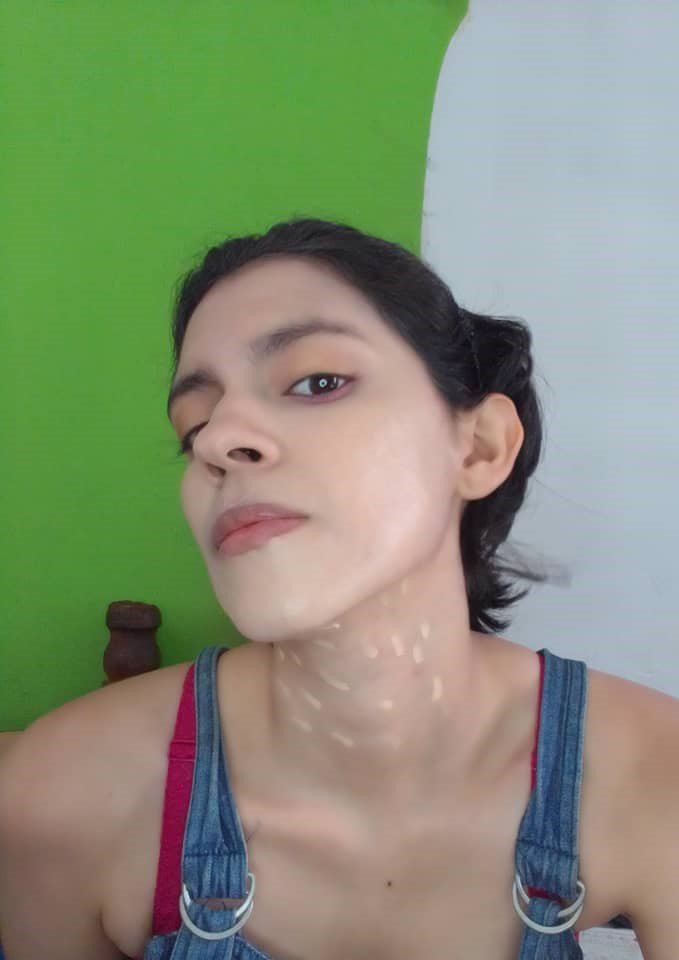
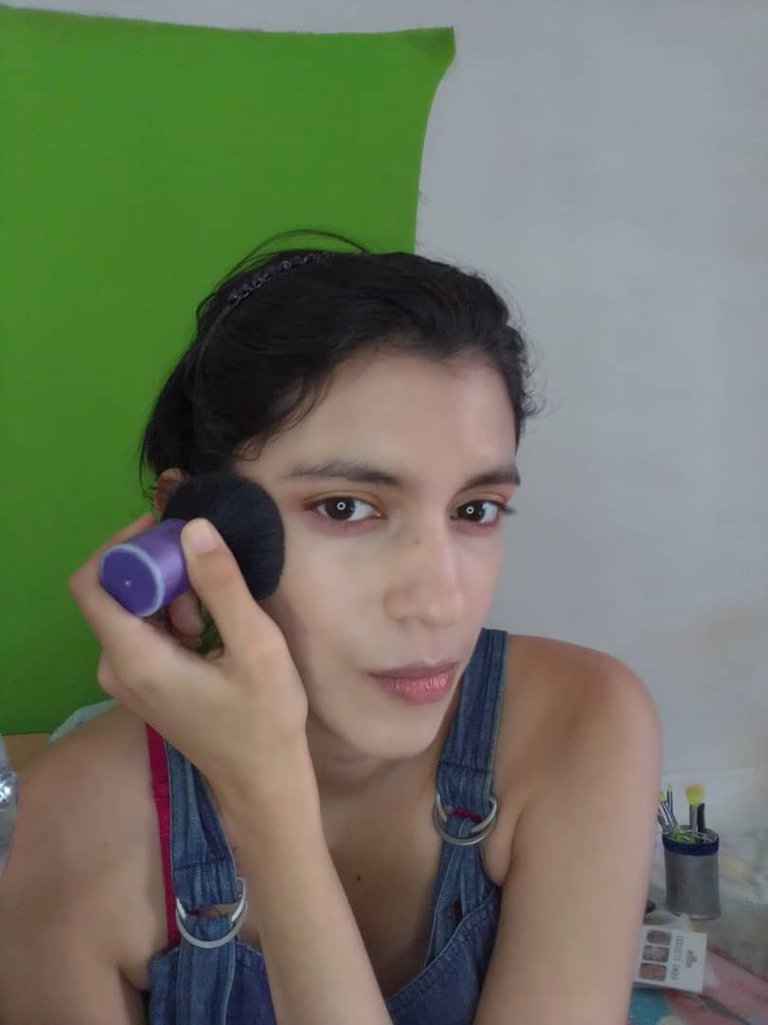
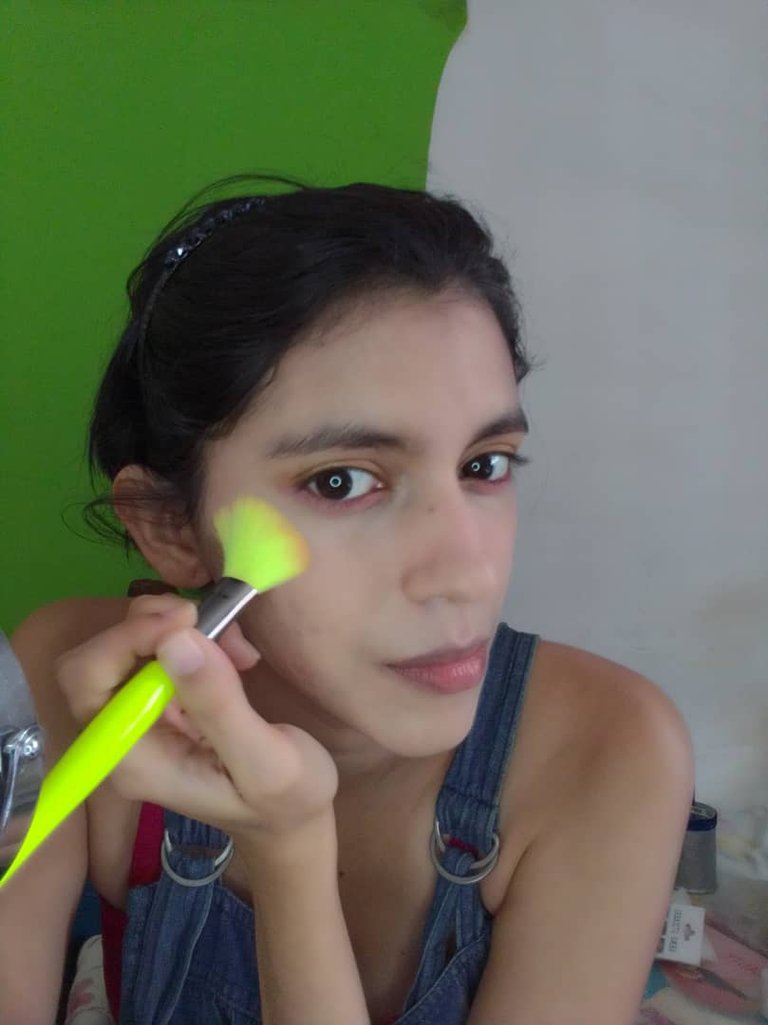
Now it's time to contour. Koreans usually contour their face on the sides to make it more angular, also the neck, I will only contour my nose. As I told you I do the contouring with the eyebrow mousse and the bevel brush, it's as simple as drawing two parallel lines on the nose (the closer together the thinner the nose) you can put on the tip of the nose if you want to make it shorter and draw a circle a little bit higher.
Ahora es tiempo de hacer el contorno. Las coreanas suelen contornear su rostro de los lados para hacerlo más anguloso, también el cuello, yo solo me contornearé la nariz. Como les dije yo me hago el contorno con el mousse de cejas y la brocha biselada, es tan simple como dibujar dos líneas paralelas en la nariz (mientras más juntas más delgada la nariz) puedes poner en la punta de la nariz si quieres hacerla más corta y dibujar un circulo un poco más arriba.
Once our new nose is drawn, we just have to blend it, with a flat brush with slightly loose bristles we go over the lines on themselves until blurring them.
Una vez que ya está dibujada nuestra nueva nariz solo hay que difuminarla, con una brocha plana de cerdas un poco sueltas repasamos las líneas sobre si mismas hasta difuminar.

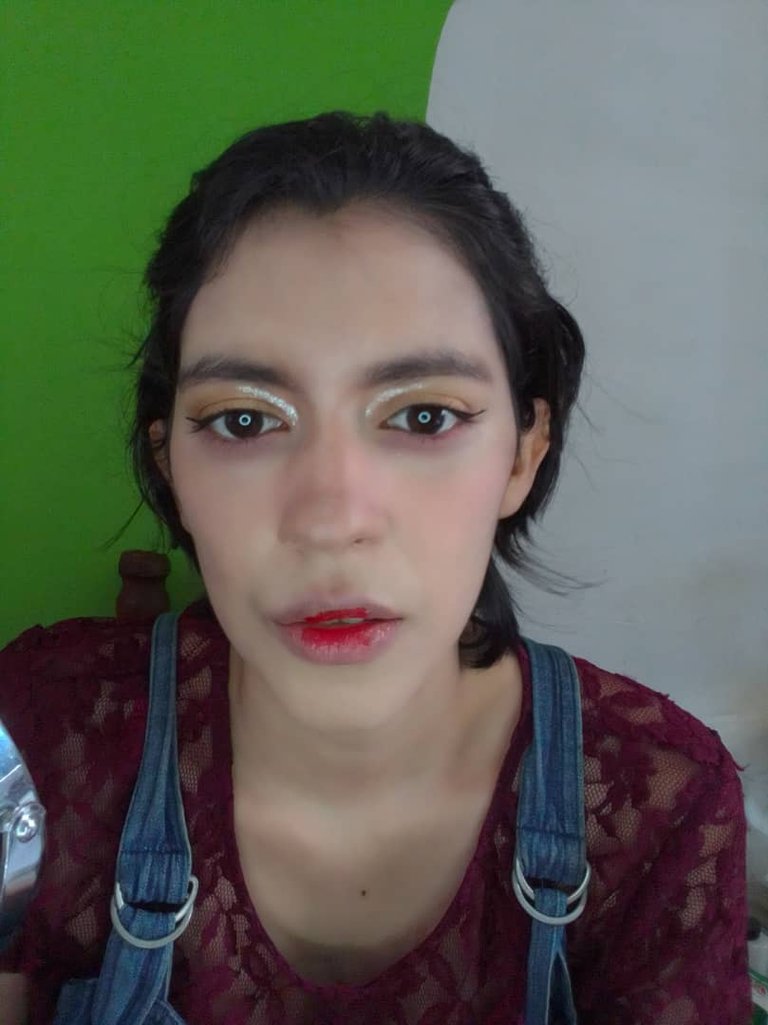
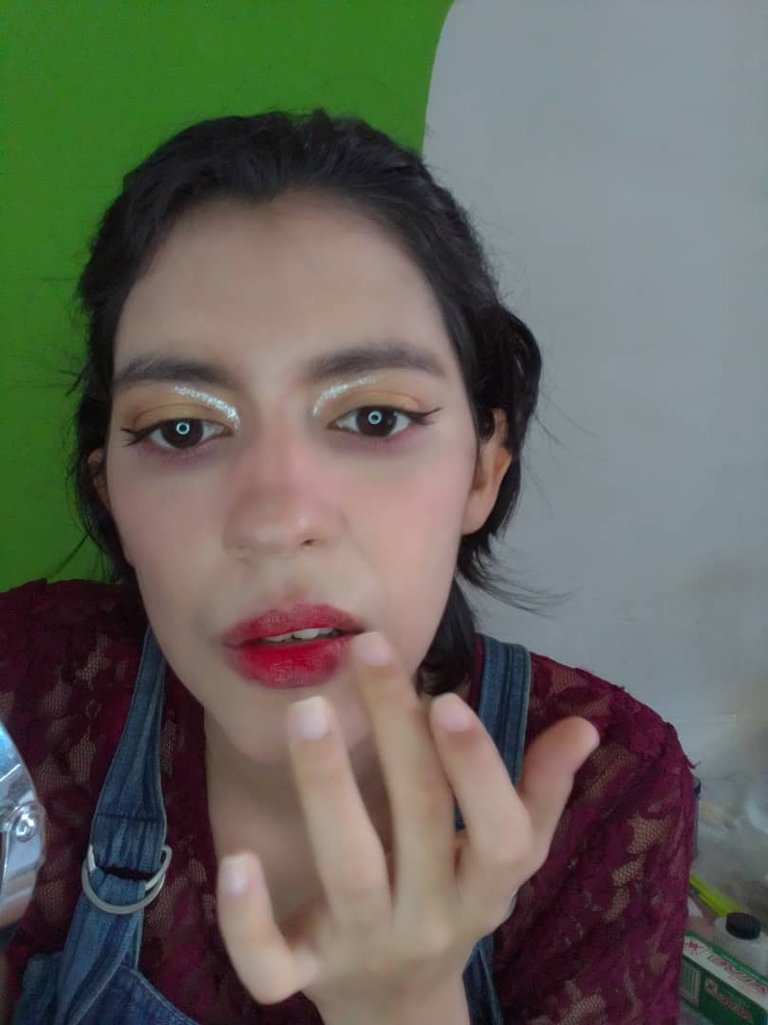
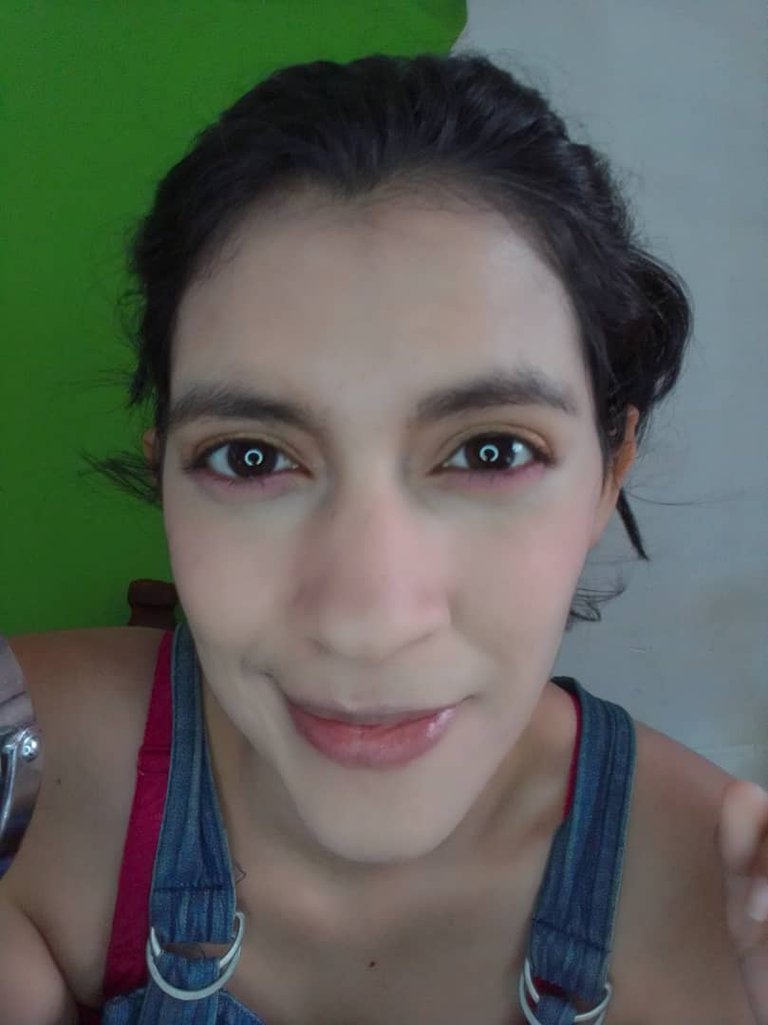
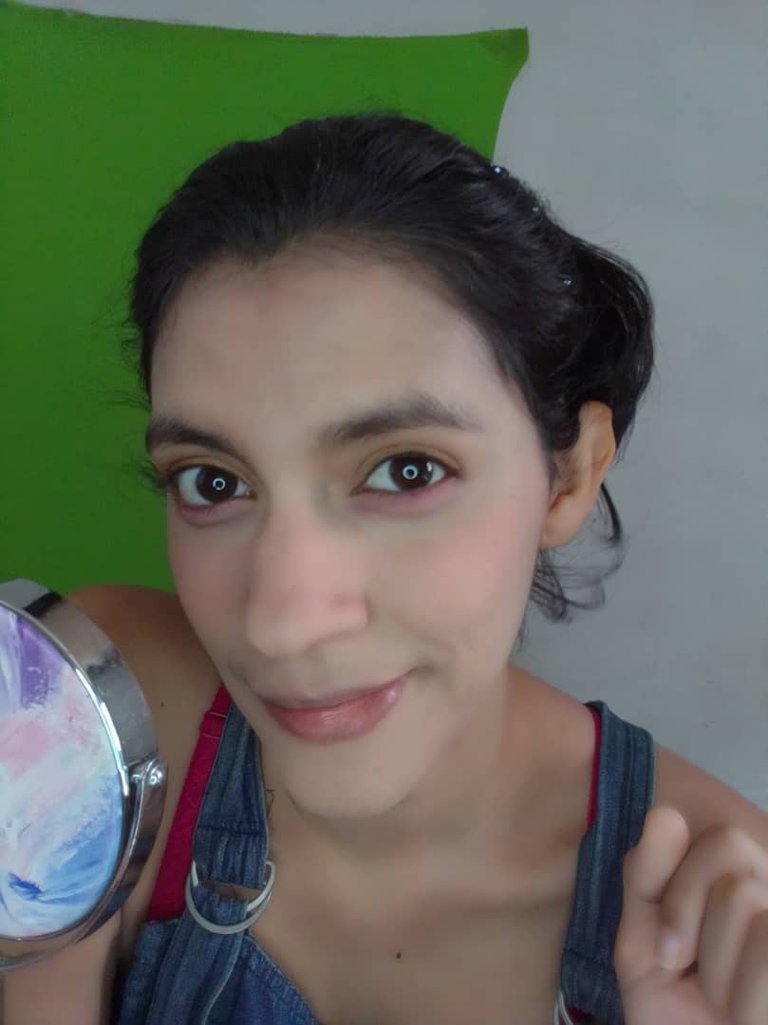
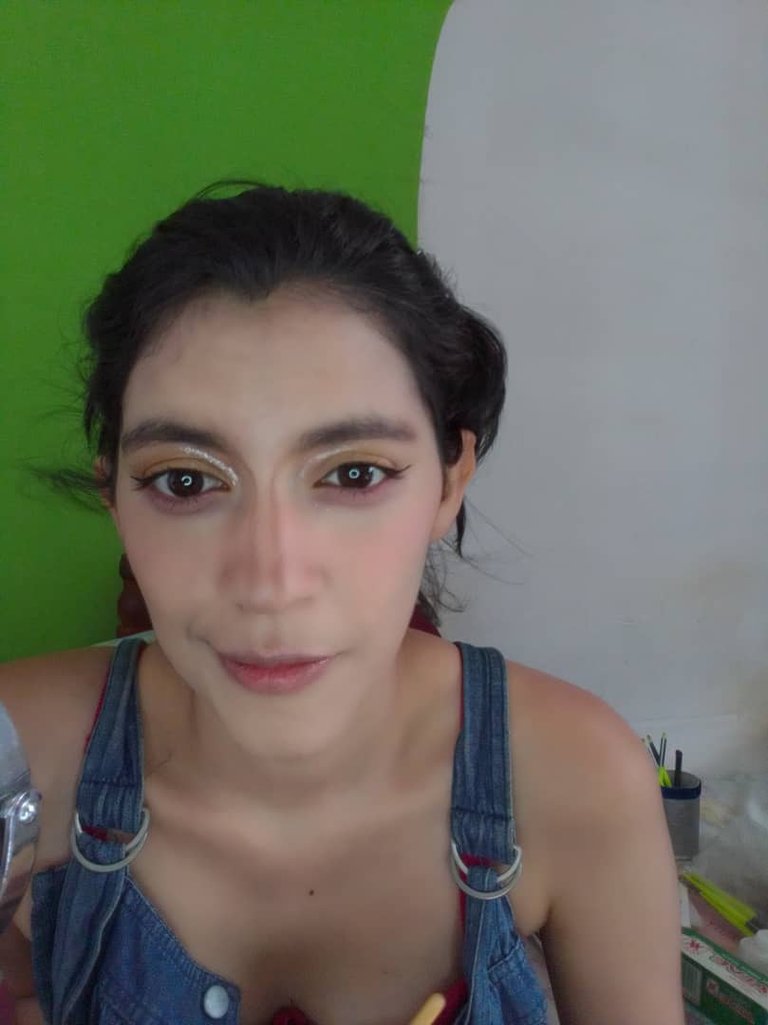
Now let's go with the lips, in this case we will use a lip ink and an earth lipstick (earth lipsticks are those whose texture looks like moonsand, yes, the one of the toy and that is usually blurred) The ink is usually put only on the inside of the lips and is blurred outwards, in the way you see in the photos, it is better to blend it with a finger (at least I like that result better).
Ahora vamos con los labios, en este caso usaremos una tinta labial y un labial de tierra (los labiales de tierra son unos cuya textura parece arena moonsand, si, la del juguete y que se suele difuminar) La tinta suele ponerse solo en el interior de los labios y se difumina hacia afuera, de la forma que ven en las fotos, es mejor difuminarla con un dedo (al menos me gusta más ese resultado)
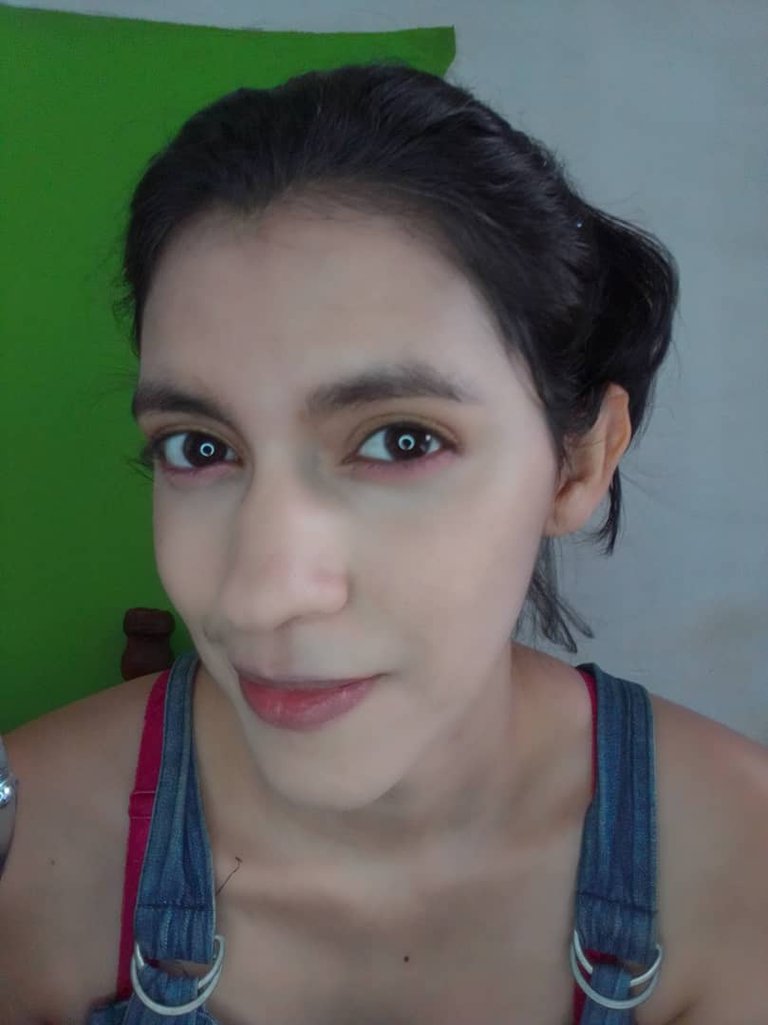
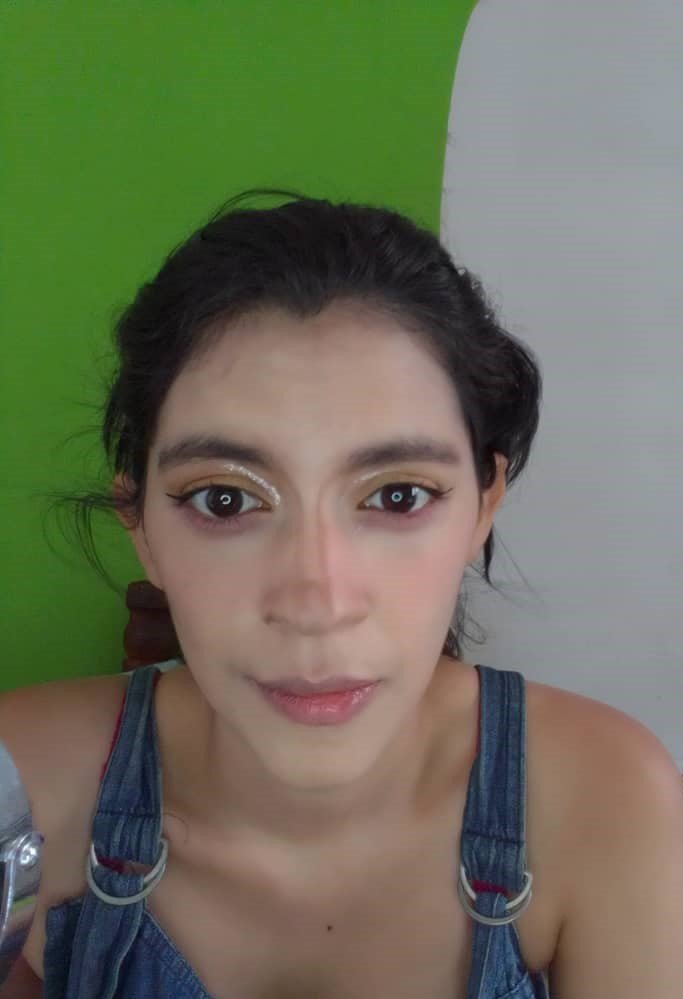
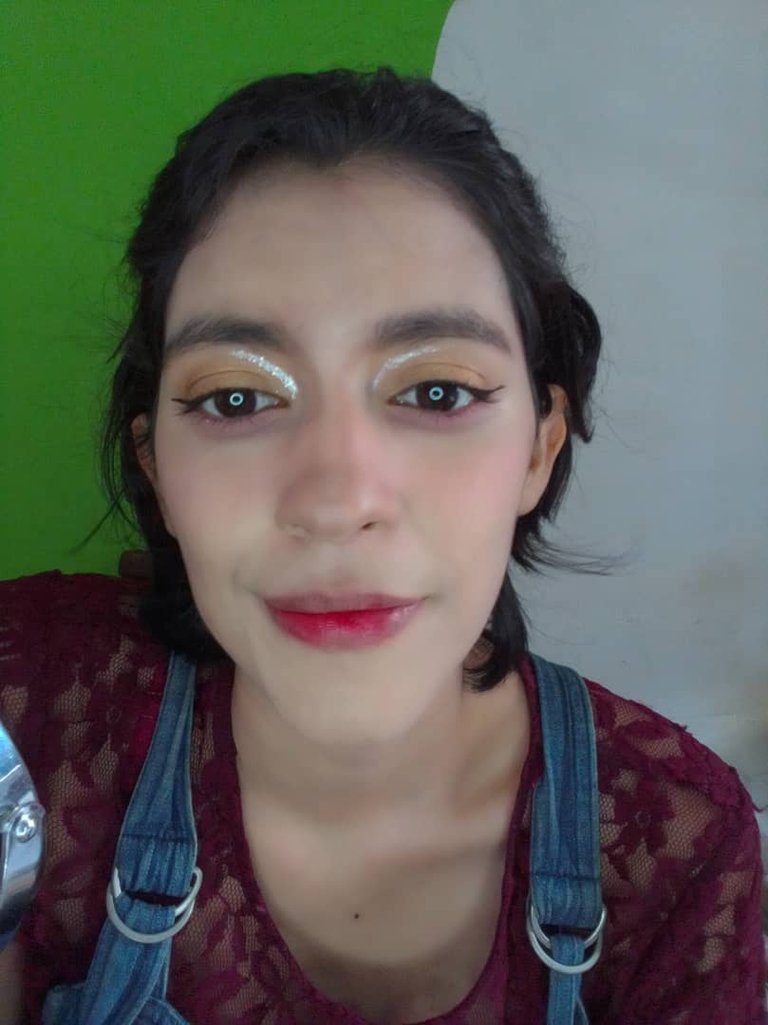
Then just apply the earth lipstick, blend and this is the final result:
Luego solo ponemos el labial de tierra, difuminamos y este es el resultado final:
And well, people, that's all for today's post, I hope you liked it. Thank you very much as always for supporting my work, I welcome new readers, I love you all very much, I send you a hug and I'll see you in another post.
Y bueno, gente, esto ha sido todo por el post de hoy, espero que les haya gustado. Muchas gracias como siempre por apoyar mi trabajo, le doy la bienvenida a los nuevos lectores, les quiero mucho a todos, les envío un abrazo y ya nos encontraremos en otro post
The cover and farewell image were made in Canva. The rest of the images belong to me and were taken with my phone, a ZTE Blade A51.
La imagen de portada y despedida las realicé en Canva. El resto de imágenes me pertenecen y las tomé con mi teléfono, un ZTE Blade A51
Es un maquillaje súper sutil y bonito. Te quedó genial ✨
Muchas gracias :3
¡Felicitaciones!
Estás participando para optar a la mención especial que se efectuará el domingo 28 de abril del 2024 a las 8:00 pm (hora de Venezuela), gracias a la cual el autor del artículo seleccionado recibirá la cantidad de 1 HIVE transferida a su cuenta.
¡También has recibido 1 ENTROKEN! El token del PROYECTO ENTROPÍA impulsado por la plataforma Steem-Engine.
1. Invierte en el PROYECTO ENTROPÍA y recibe ganancias semanalmente. Entra aquí para más información.
2. Contáctanos en Discord: https://discord.gg/hkCjFeb
3. Suscríbete a nuestra COMUNIDAD y apoya al trail de @Entropia y así podrás ganar recompensas de curación de forma automática. Entra aquí para más información sobre nuestro trail.
4. Visita nuestro canal de Youtube.
Atentamente
El equipo de curación del PROYECTO ENTROPÍA
Muchas gracias por el apoyo
excellent tutorial, looking cute in those overalls, oh men do makeup in Korea, that must be why they look like Ken from Barbie
thank you very much, yes, they are not all but there are some, but they also have natural beauty.
hehe yeah not all but yeah, natural beauty is everything
Congratulations @bethyjade! You have completed the following achievement on the Hive blockchain And have been rewarded with New badge(s)
Your next target is to reach 1000 posts.
You can view your badges on your board and compare yourself to others in the Ranking
If you no longer want to receive notifications, reply to this comment with the word
STOPCheck out our last posts: