![InShot_20210418_020728684[1].jpg](https://images.hive.blog/DQmdGbqkChMiCorau3FeeMgC81oWBSCdzpa5dom2XwLWJdy/InShot_20210418_020728684[1].jpg)
Hello to all the MakeUp Power community, I'm here again to share with you my experience doing a sunset inspired makeup <3 I decided to do it because I love to watch when the sun goes down, at sunset, and the blue sky turns into an orange-yellow color, it's my obsession. I hope you like it. Without further ado, let's get started:
Hola a toda la comunidad de MakeUp Power, nuevamente me topo por acá para compartirles mi experiencia al realizar un maquillaje inspirado en un atardecer <3 Decidí llevarlo a cabo debido a que me encanta observar cuando cae el sol, al atardecer, y el cielo azul se tiñe de un color naranja- amarillo, es mi obsesión. Ojalá y les guste. Sin más que decir empecemos:
.png)
- Cosmetics to be used -
- Cosmetics to be used -Cosméticos a utilizar: 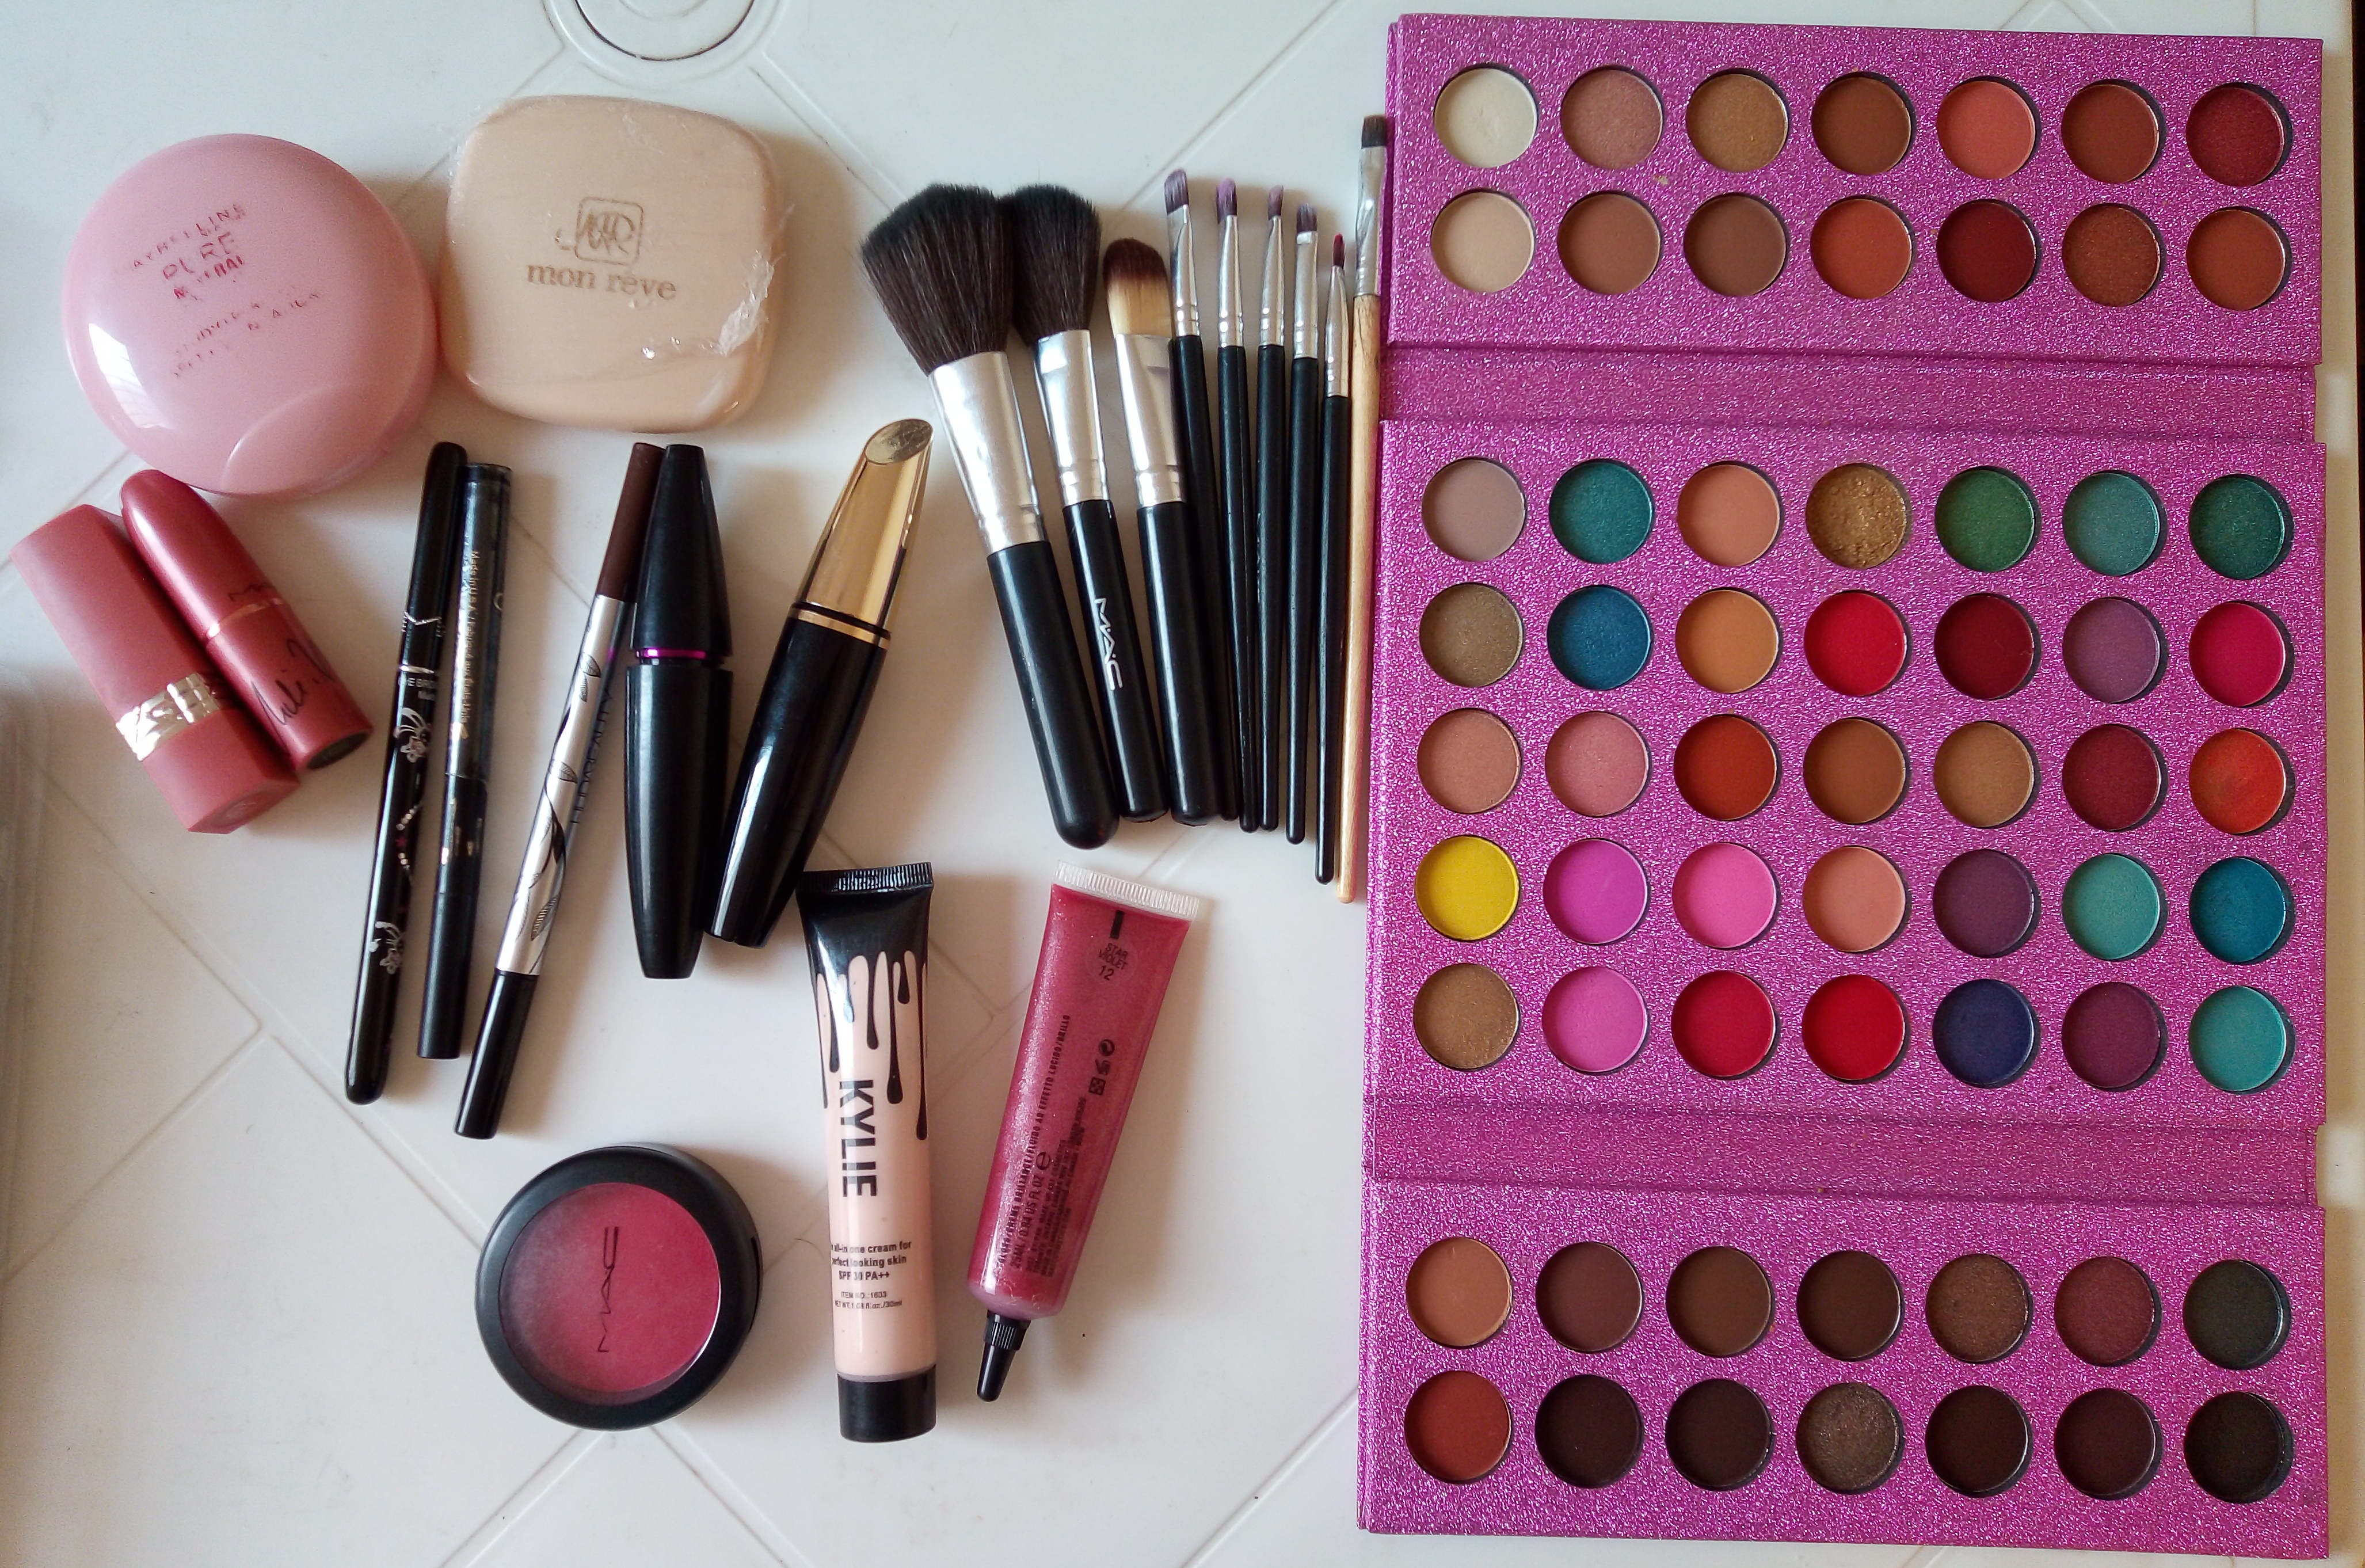
Fotografía capturada desde mi teléfono Honor7
- Process -
- Process -Proceso The first step consists in the preparation of our mobile eyelid, so I applied an amount of concealer on the upper part of the mobile eyelid (worth the redundancy), then I used a white crayon on the lower part which is more glued to it. Next, I proceeded to expand with a dry sponge all the concealer and crayon (combine them), we can also use a soft brush.
Then, we start with the use of the shadows, so, first I started with the orange shadow, this should be placed throughout our basin, thus expanding it with a blending brush, after that, I took the yellow shadow from the Beauty Glazed palette, blending it with the orange shadow.
In this way, I applied a black shadow with a synthetic brush, creating a triangle on the outer part of our eye, likewise, we took the yellow shadow and dabbed it on the tear trough, without reaching the middle of our eye, then we took the orange shadow and put it together with the yellow shadow.
Next, we place our brown shadow, we will put it between the black and orange shadow, everything must be well blurred. Then, with a little bit of brown color we are going to mark the edge of the black shadow that is at the tip of our eye. It will look like this:
El primer paso consiste en la preparación de nuestro párpado móvil, por lo que, apliqué una cantidad de corrector en la parte superior del párpado móvil (valga la redundancia), luego utilicé un creyón blanco en la parte de abajo que es más pegado a la misma. Seguidamente, procedí a expandir con una esponjita seca todo el corrector y creyón (combinarlos), también podemos utilizar una brocha suave.
Luego, comenzamos con la utilización de las sombras, por lo que, primero empecé con la sombra naranja, esta debe ser colocada en toda nuestra cuenca, expandiéndola así con una brocha de difuminar, posterior a ello, tomé la sombra amarilla de la paleta Beauty Glazed, difuminándola con la sombra naranja.
De esta manera, apliqué una sombra negra con una brocha sintética, creando un triangulo en la parte externa de nuestro ojo, asimismo, tomamos la sombra amarilla y en toquesitos lo colocamos en el lagrimal, sin llegar a la mitad de nuestro ojo, después tomamos la sombra naranja y la juntamos con la sombra amarilla.
Seguidamente, colocamos nuestra sombra marrón, la pondremos entre la sombre negra y naranja, todo debe estar bien difuminado. Ya luego, con un poco de color marrón vamos a ir marcando la orilla de la sombra negra que esta en la punta de nuestro ojo. Quedando de la siguiente manera:
Fotografía capturada desde mi teléfono Honor7
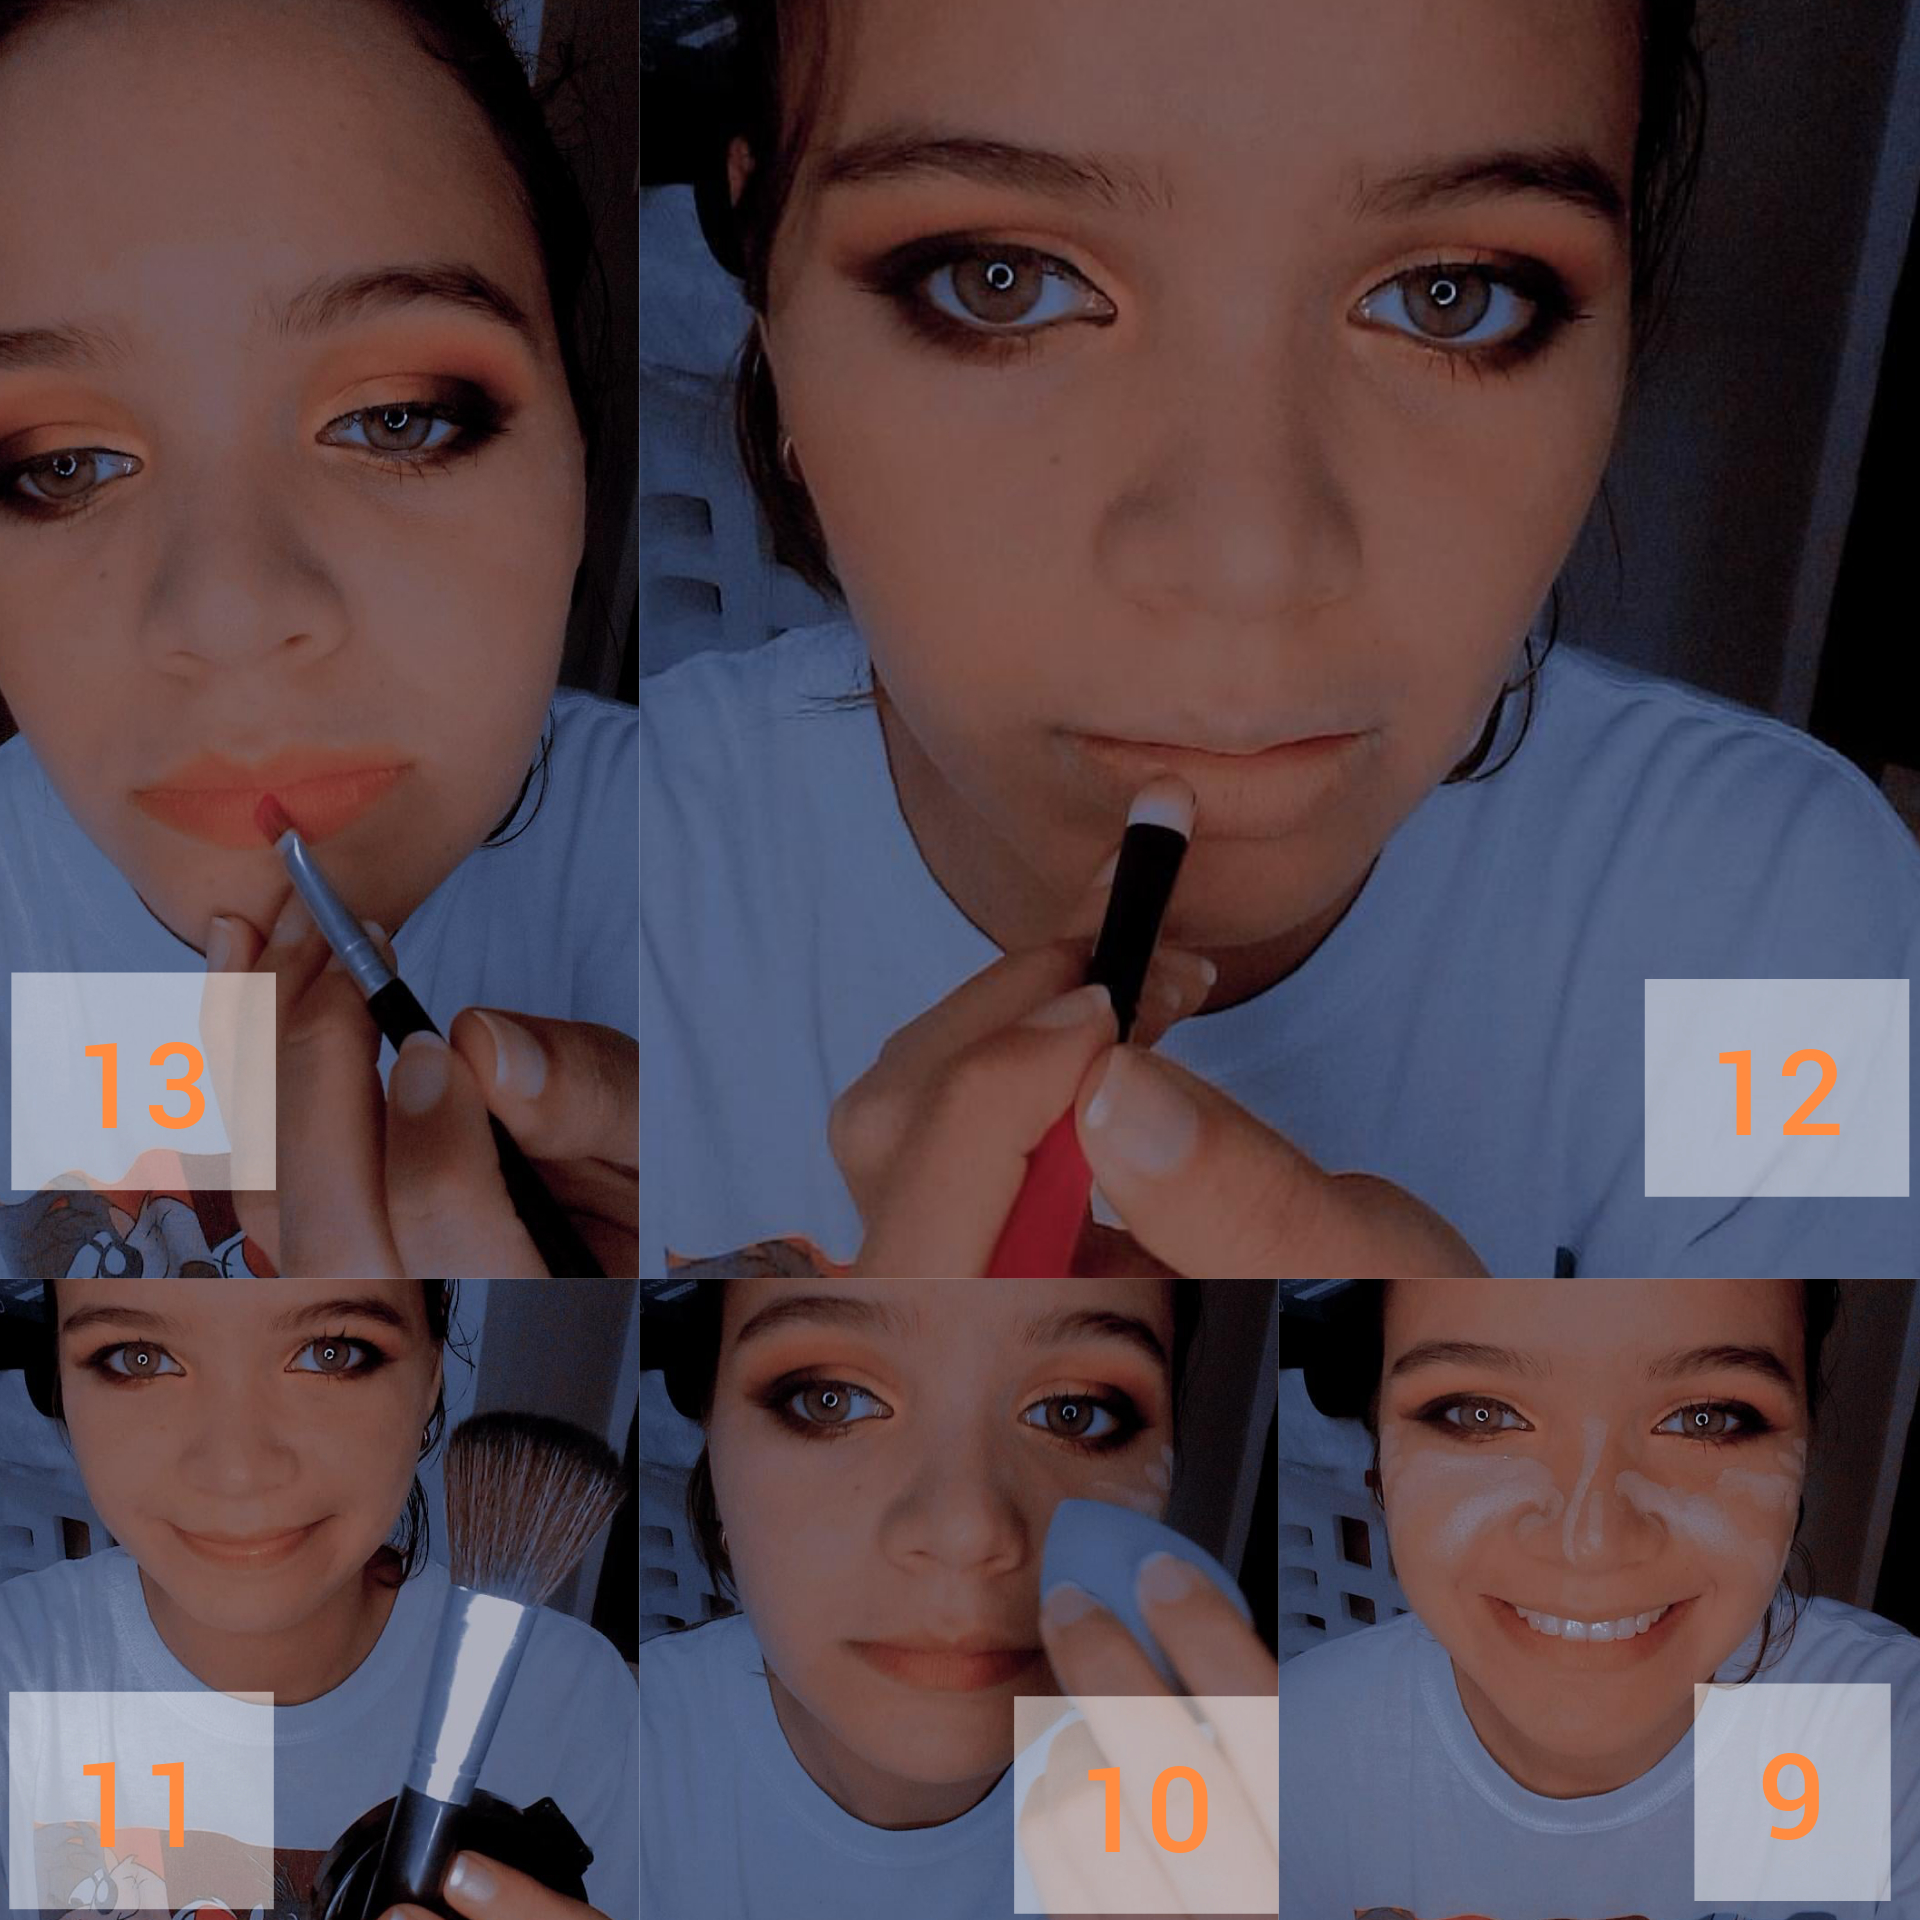
Continuing, we perform the same process on the lower part of our eye applying the colors yellow, orange, brown and black, and then blending very well.
Continuando, realizamos el mismo proceso en la parte inferior de nuestro ojo aplicando los colores amarillo, naranja, marrón y negro, para después difuminar muy bien.
Fotografía capturada desde mi teléfono Honor7
Continuing, we create with a black pencil a line on our inner part of the eye and with the eyeliner we create a kind of thin line on the outer part of our eyelashes. Then, we use our mascara to complete the eye makeup.
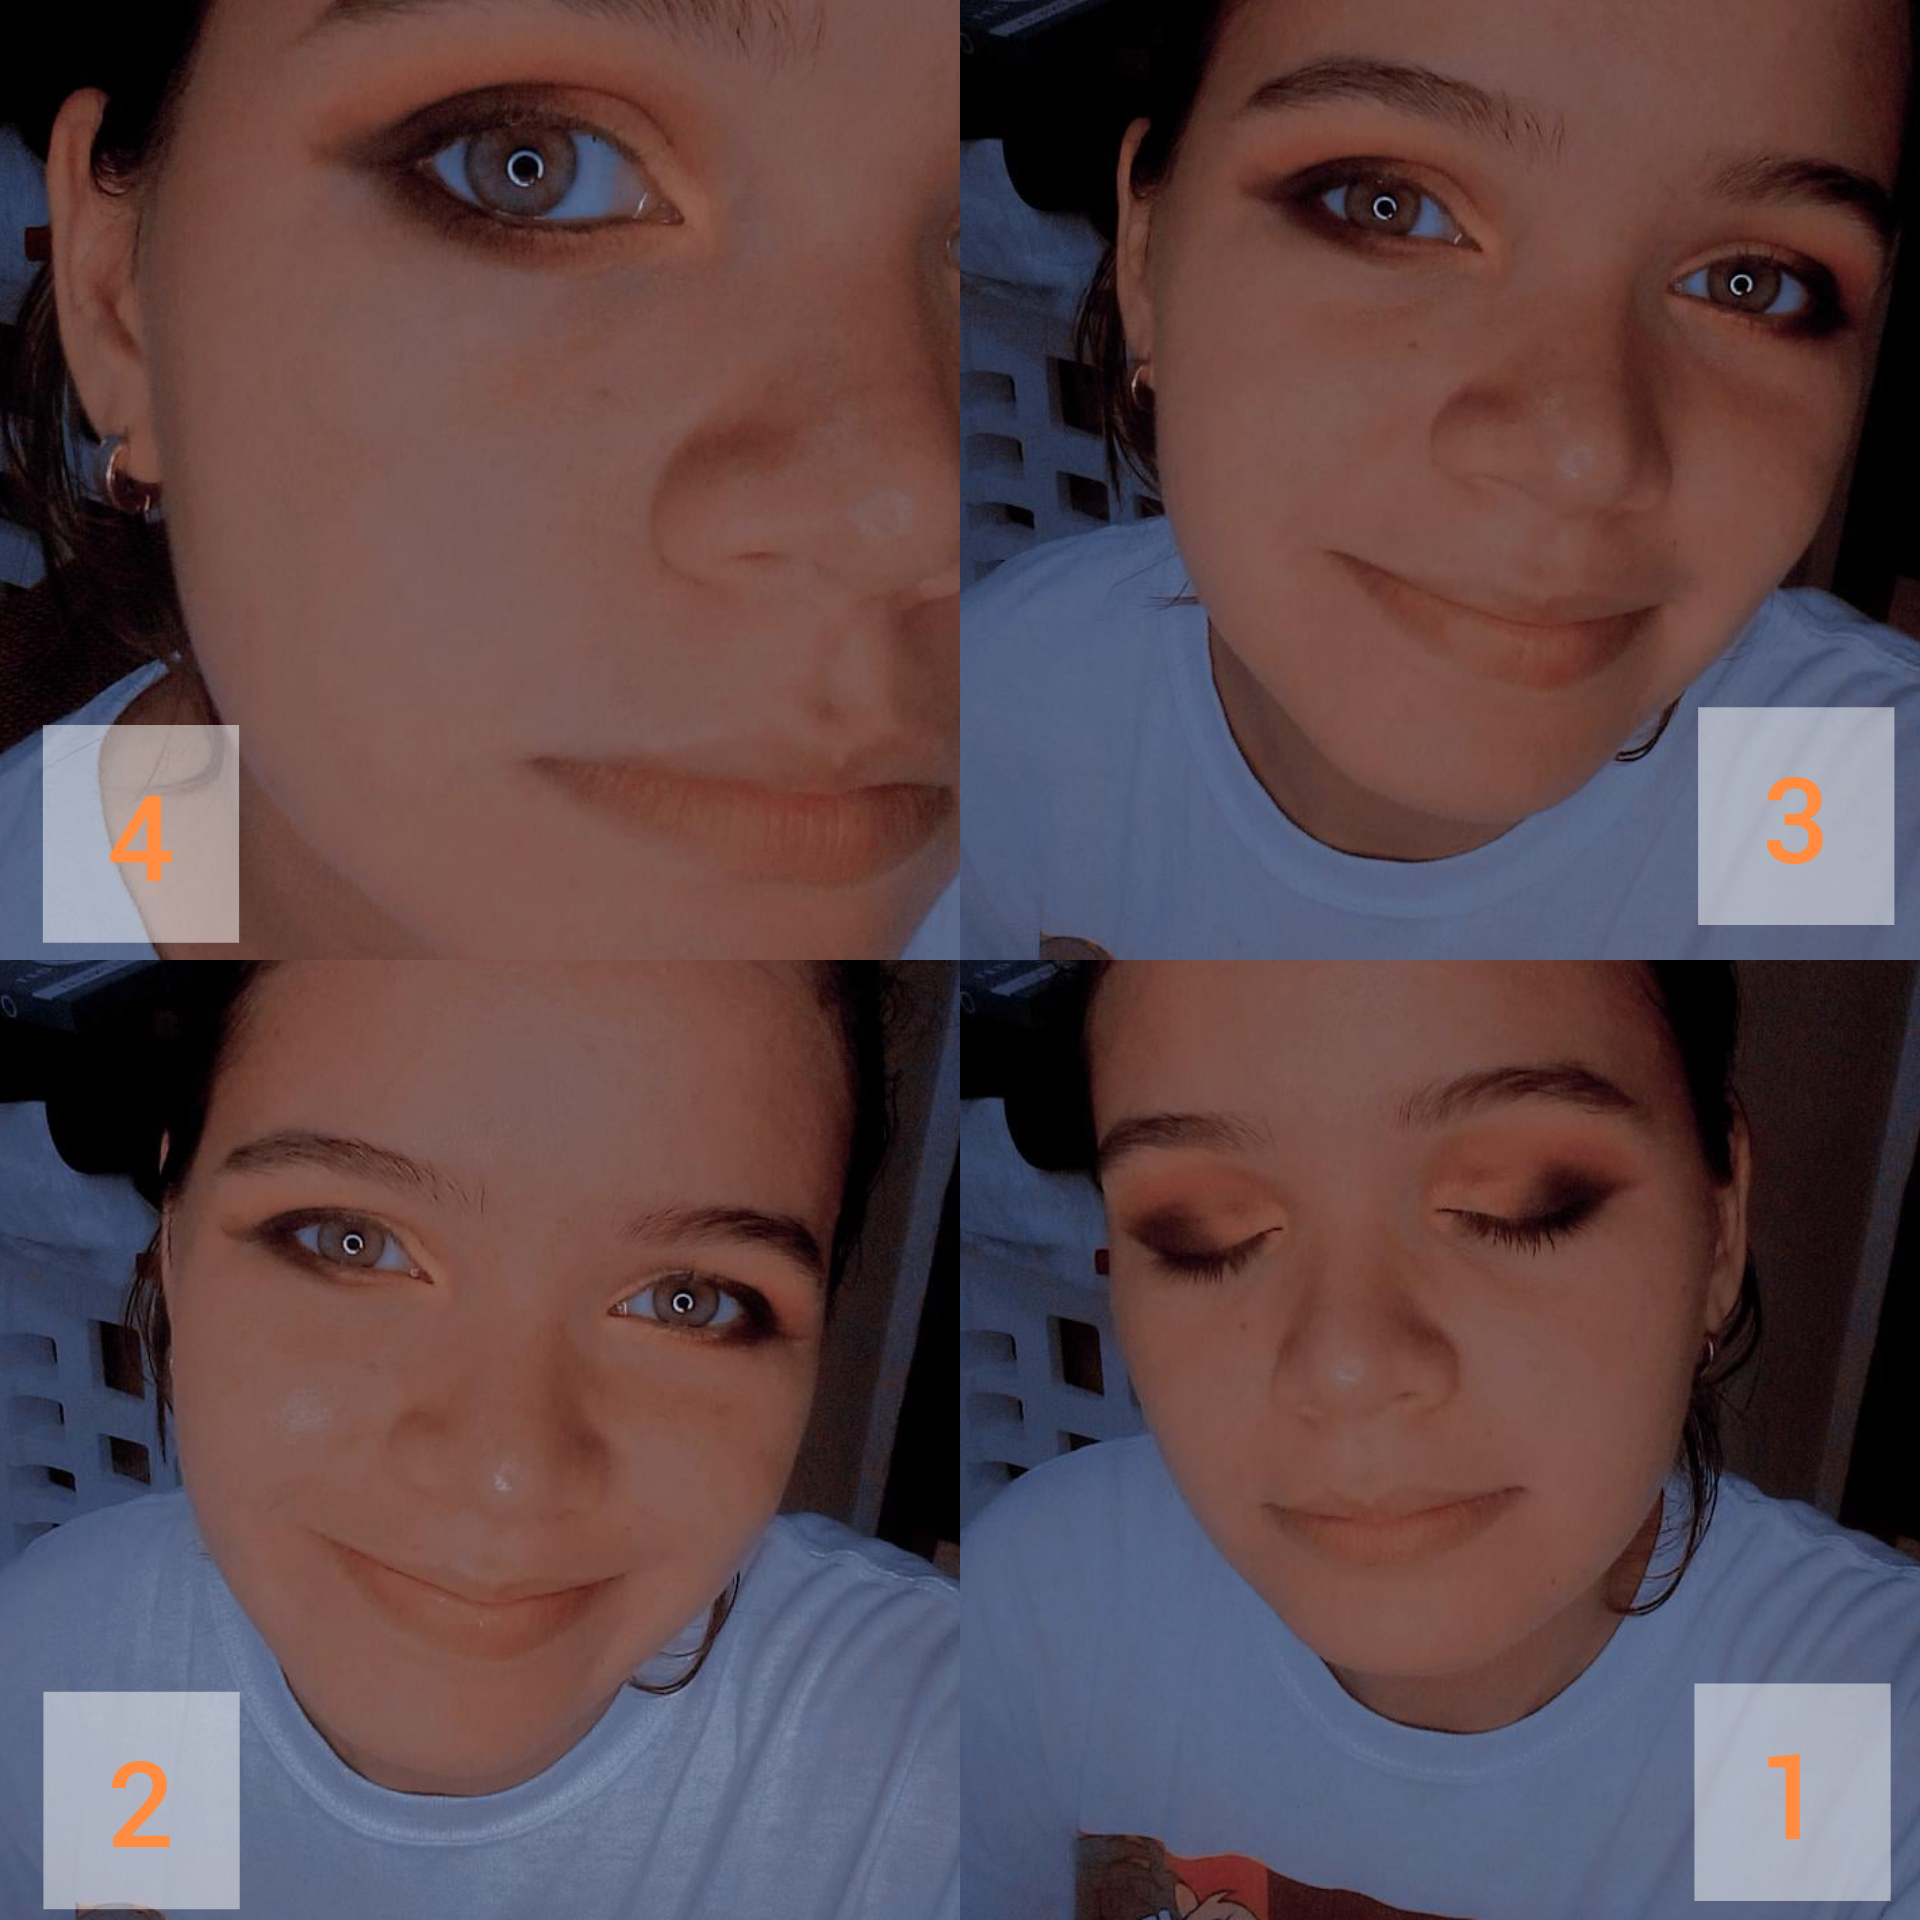
Photo captured from my Honor7 phone /
Fotografía capturada desde mi teléfono Honor7
Fotografía capturada desde mi teléfono Honor7
Dando continuidad, creamos con un lápiz negro una línea en nuestra parte interna del ojo y con el delineador creamos una especie de línea fina en la parte exterior de nuestras pestañas. Luego, utilizamos nuestra máscara de pestañas para completar el maquillaje en los ojos.
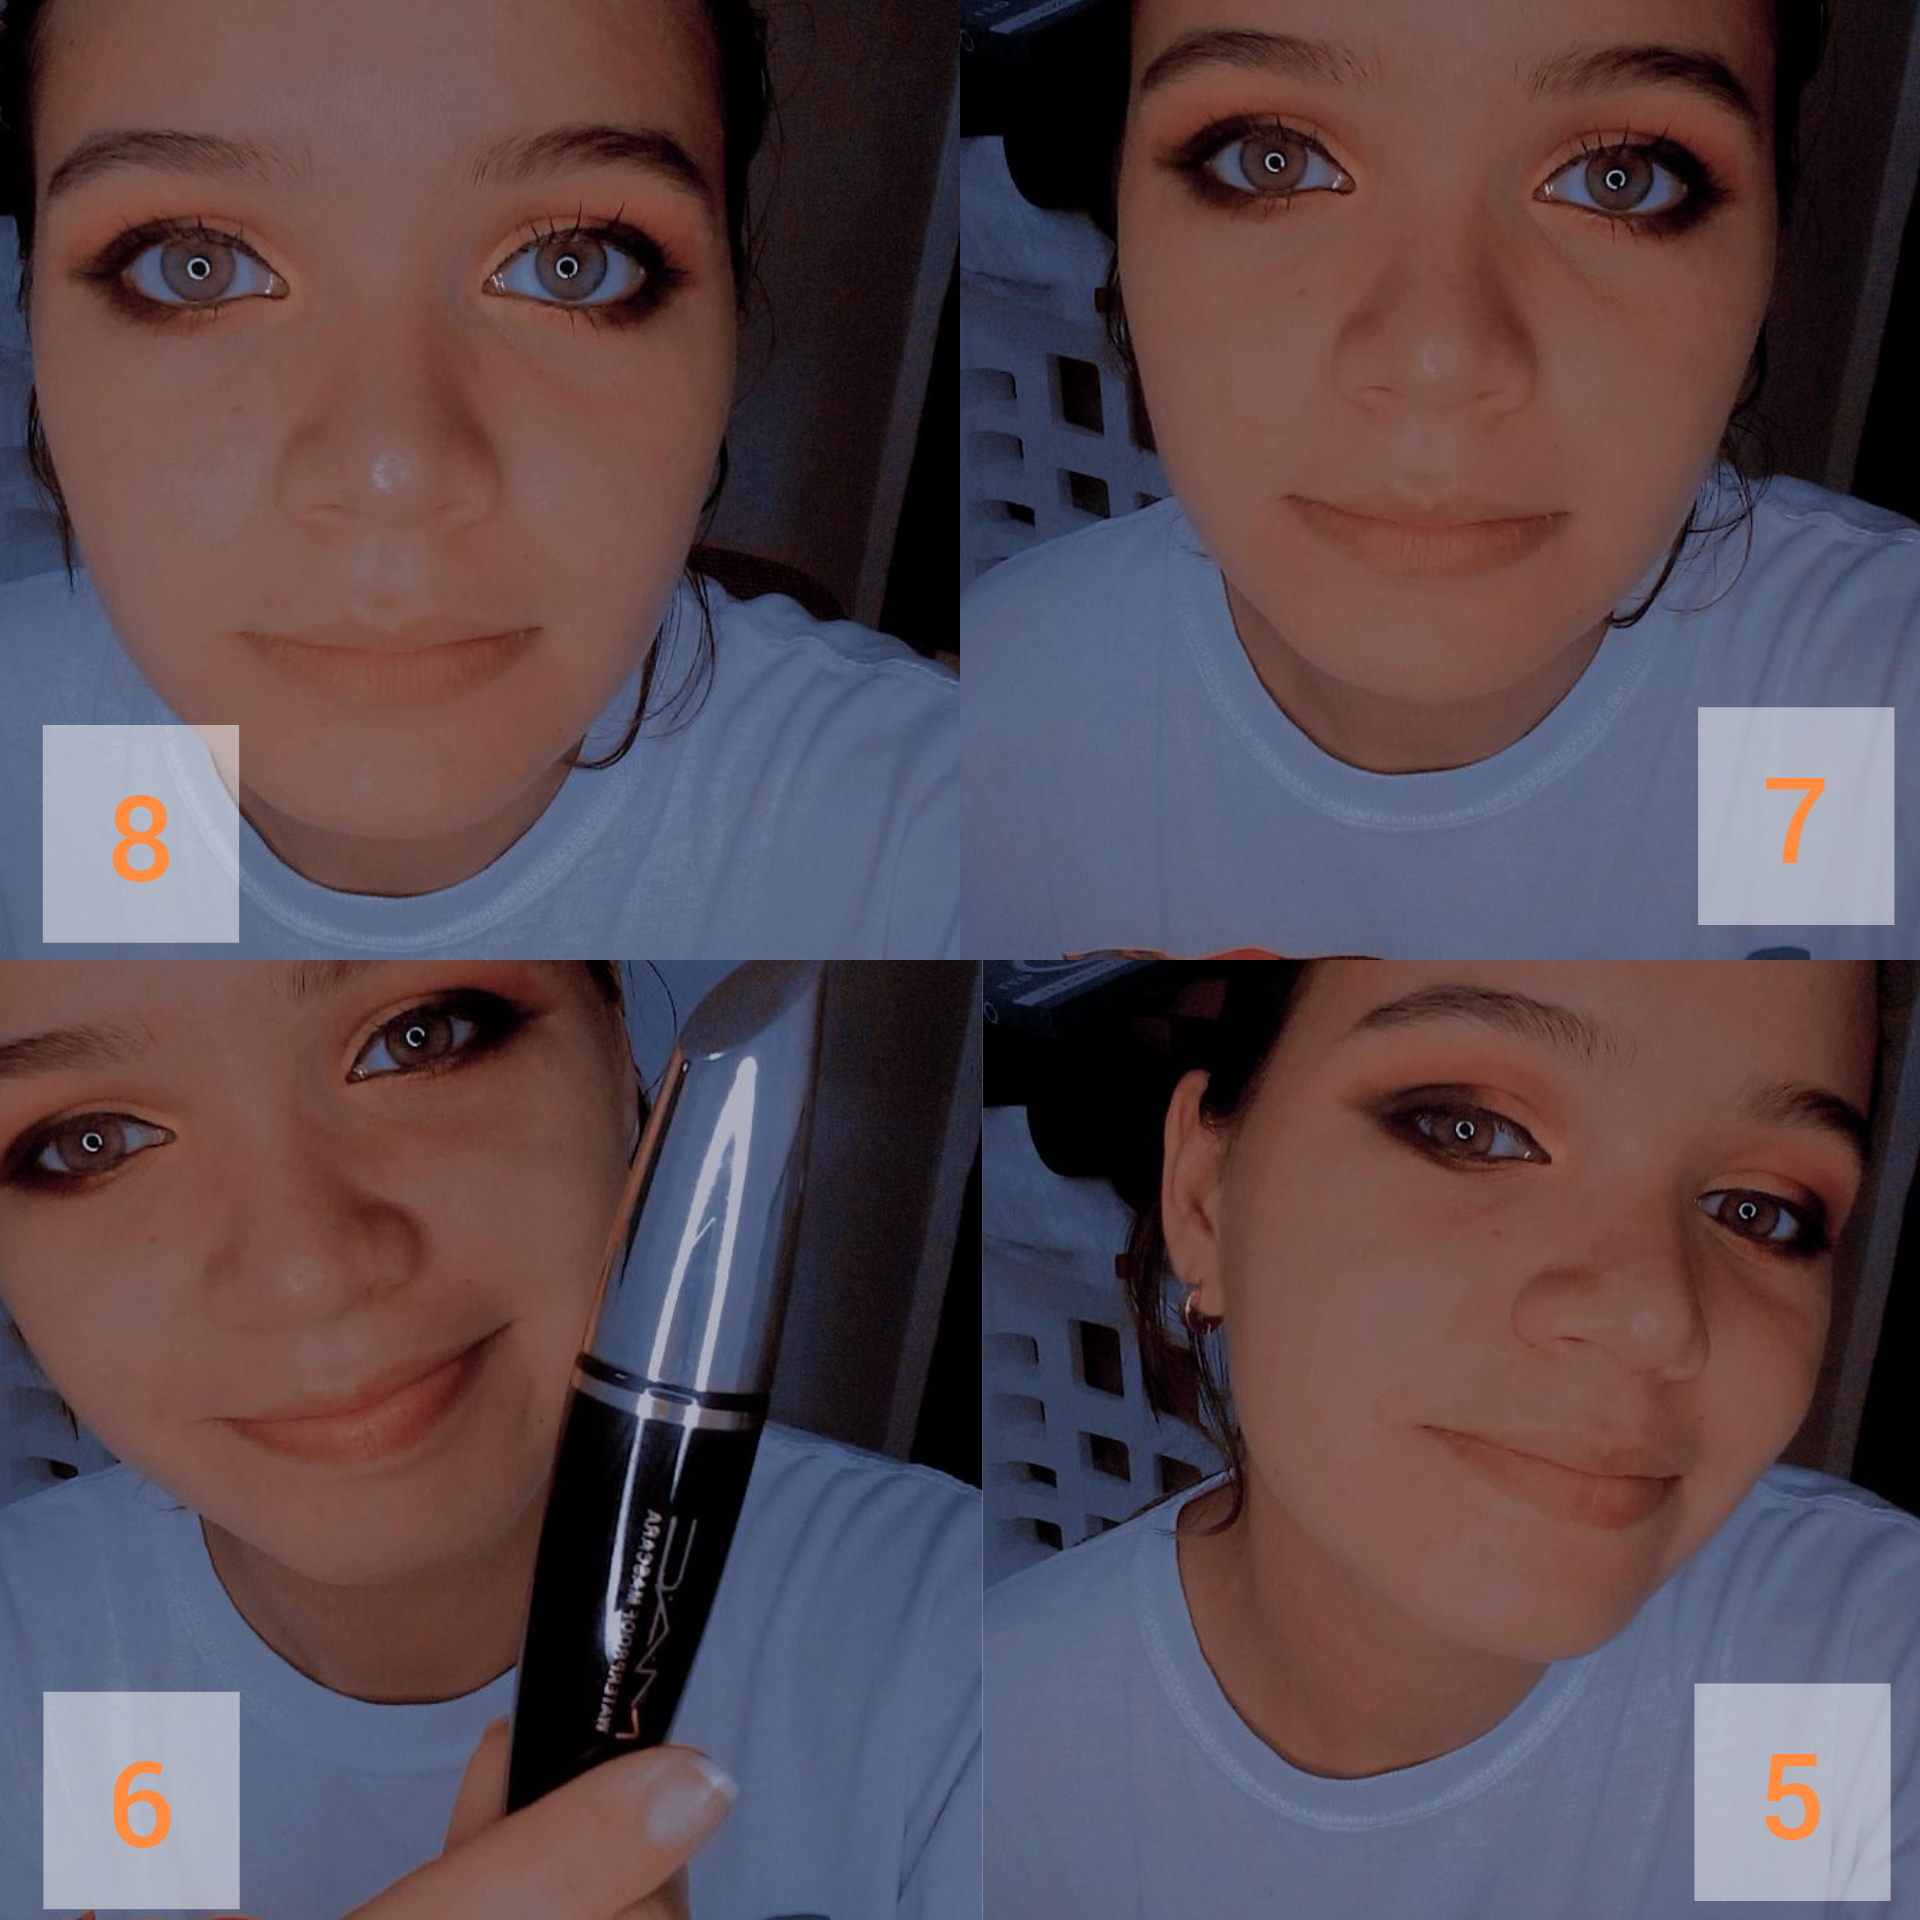
Photo captured from my Honor7 phone /
Fotografía capturada desde mi teléfono Honor7
Fotografía capturada desde mi teléfono Honor7
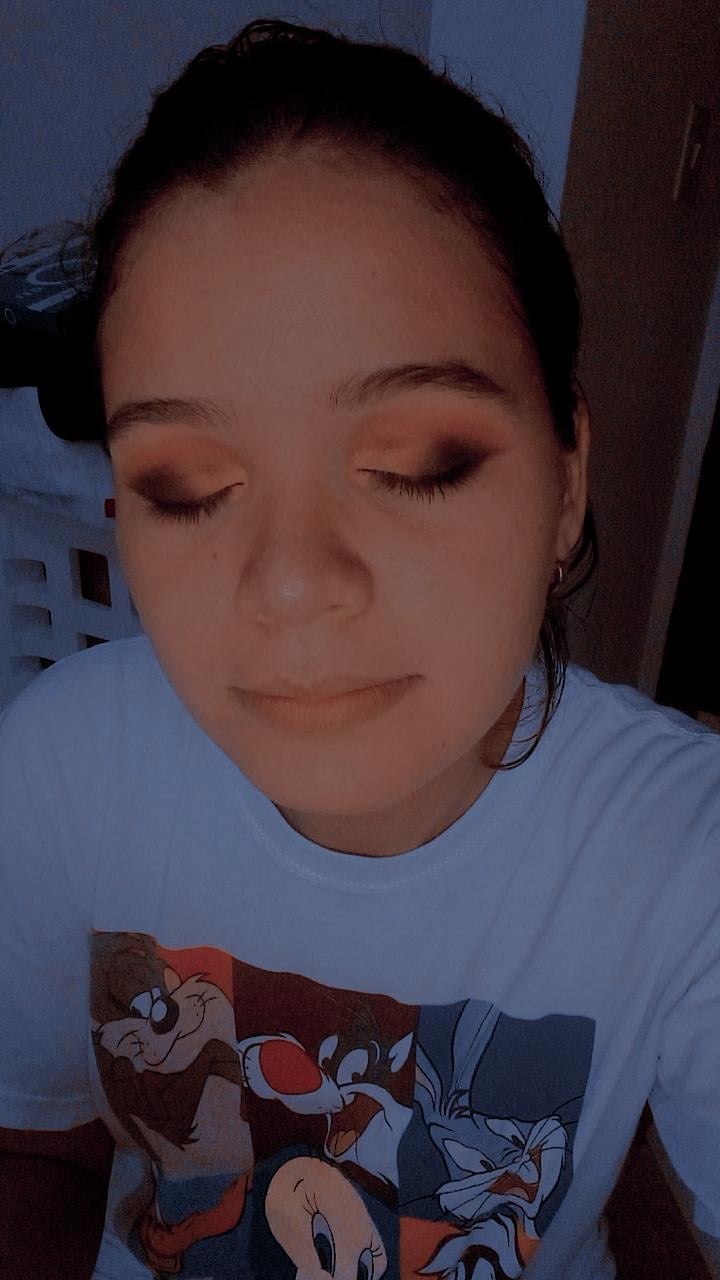
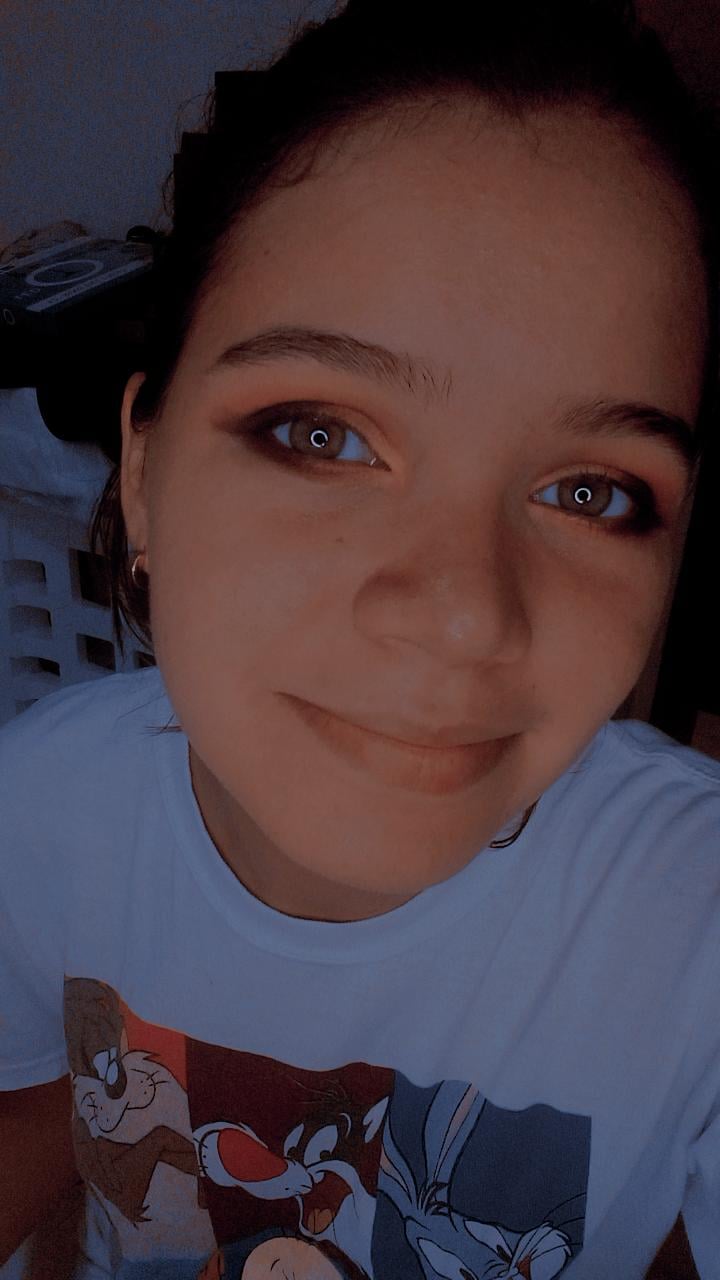
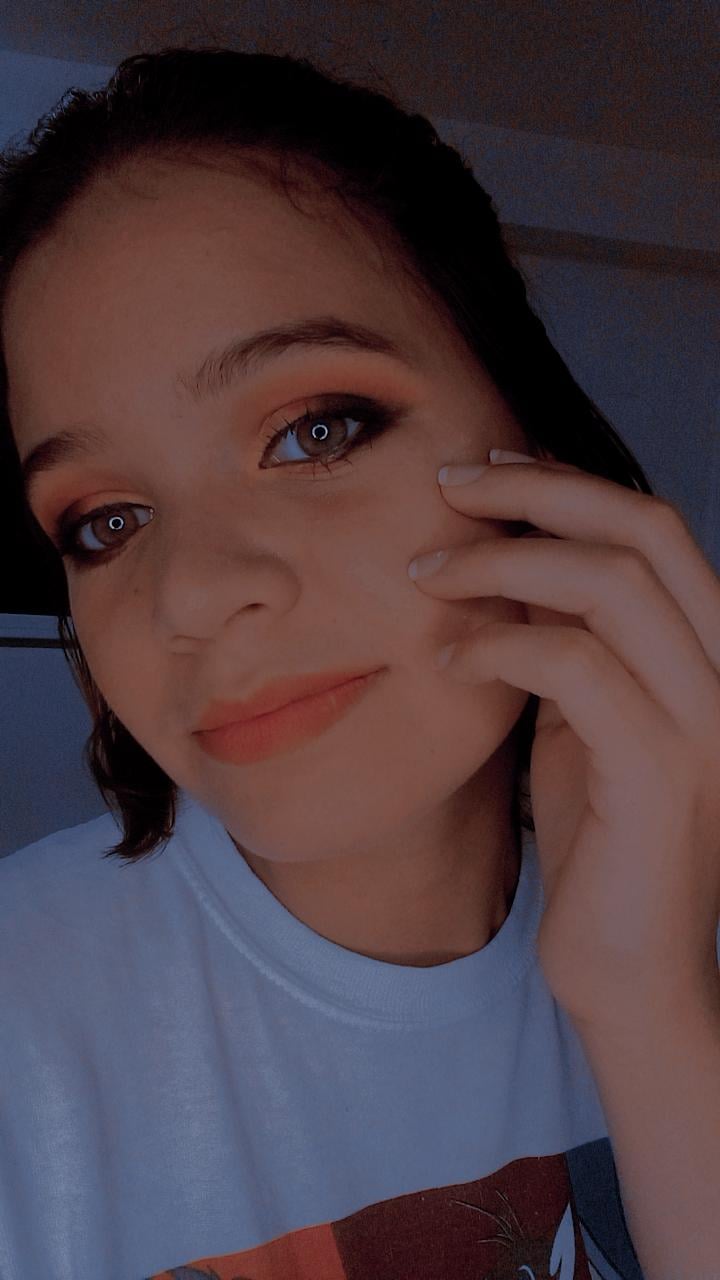
Finally, we close with the application of the right one, so we can seal it with our pressed powder. After that, we use a little blush and orange lipstick, in my case I first used concealer on my lips and then applied my lipstick. and that's it!!!<3
Finalmente, cerramos con la aplicación del correcto, para así cellarlo con nuestro polvo compacto. Después de ello, utilizamos un poco de rubor y labial naranja, en mi caso utilicé primero corrector en mi labios y luego apliqué mi labial. ¡¡Y listo!!<3
Fotografía capturada desde mi teléfono Honor7
Fotografía capturada desde mi teléfono Honor7
Thank you so much for making it this far! Until next time
¡Muchas gracias por llegar hasta aquí! Hasta una próxima oportunidad

SOURCE / FUENTE
@freidimar18 Que lindo te quedó 😊💕
Muchísimas gracias @naty16 ❣️
¡¡Saludos!!
te quedo espectacular! el difuminado de colores de naranja marron y negro me encanto muy lindo! ❤️ saludos
Hola @saravm82. Muchísimas gracias por tu comentario, poco a poco voy aprendiendo :)
Saludos, y un gran abrazo virtual <33