
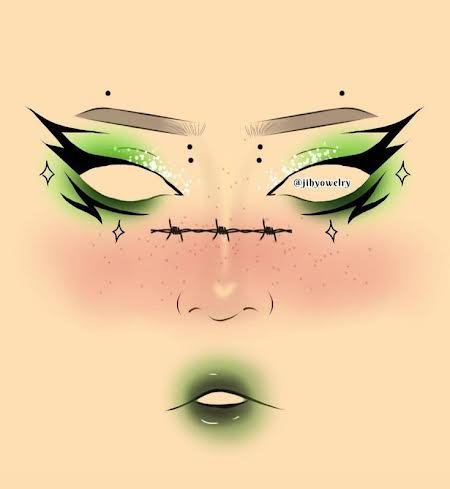
Acompáñenme por este hermoso makeup.
Come with me for this beautiful makeup.
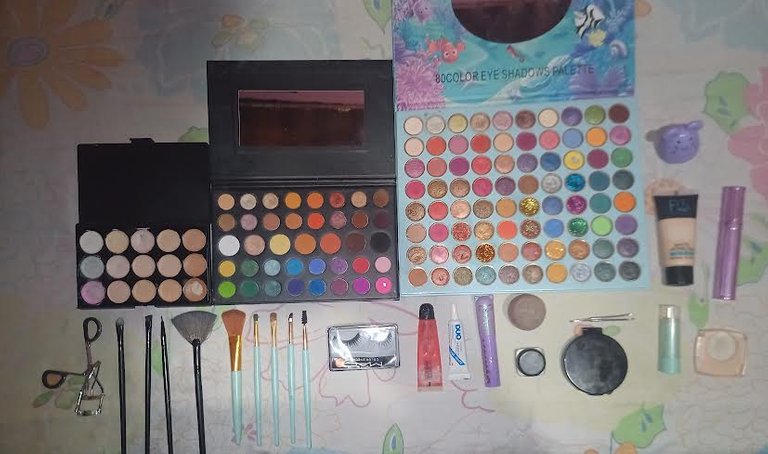
ELEMENTOS A USAR// ELEMENTS TO BE USED:
- Base.
- Sombra verde, plateado, negro.
- Pomada para cejas.
- Esponja.
- Delineador negro.
- Pintura labial verde y negro, por supuesto nuestro gloss.
- Rizador de pestañas.
- Esponja.
- Iluminador.
- Brochas.
- (Entre otros elementos).
- Base.
- Green, silver, black shades.
- Eyebrow ointment.
- Sponge.
- Black eyeliner.
- Green and black lipstick, of course our gloss.
- Eyelash curler.
- Sponge.
- Illuminator.
- Brushes.
- (Among other elements).
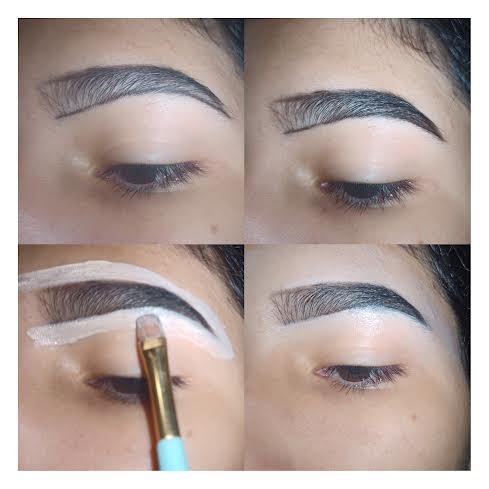
1 PASO: CEJAS// 1 STEP: EYERBROWS
We start by doing our line, above and below our eyebrows, we paint from the middle to the end, after that we will blur the lines well by combing up and down the eyebrows, we comb a little at the beginning and finish with our base blurring it very well.
2 PASO: MAQUILLAJE// 2 STEP: MAKEUP
We continue with our makeup, we apply foundation / concealer on the entire eyelid and distribute it well, we take the green shadow and distribute it on the side of the eyelid, at the bottom and above the basin, creating a wind movement in the shadow, then we contrast and darken a little with the black tone, on the front of the eyelid we apply the silver shadow, once the makeup is finished we will illuminate our tear...

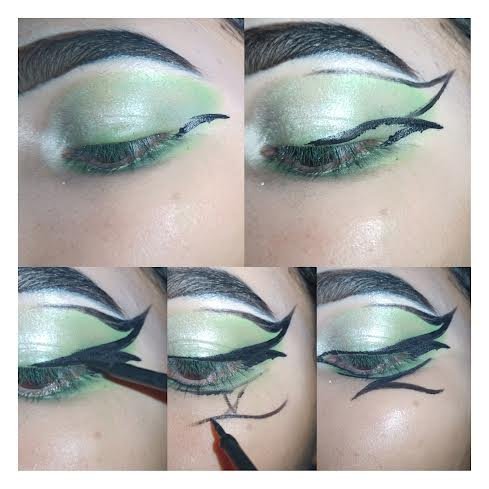
3 PASO: DELINEADOs // 3 STEP: DELINEATIONs.
For our eyeliner, we take our black eyeliner and we make a little tails or eyeliner, making a sketch first so that it is safe. (This eyeliner is for a droopy eyelid).
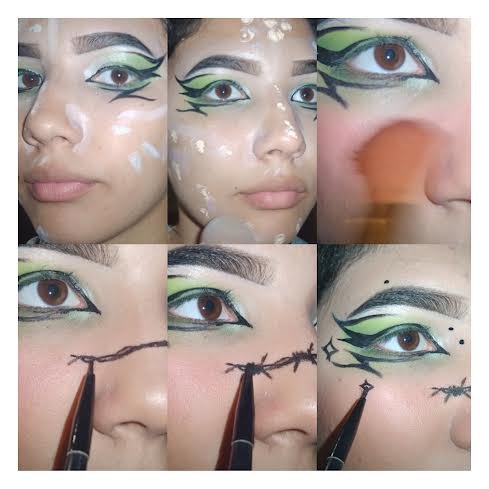
4 PASO: CARA // 4 STEP: FACE.
I applied concealers to cover blemishes, spots and even out certain areas, added foundation, concealer for dark circles and sealed with powder, added mascara, blush and started drawing on my face, first a few (I did this step with a lot of patience).
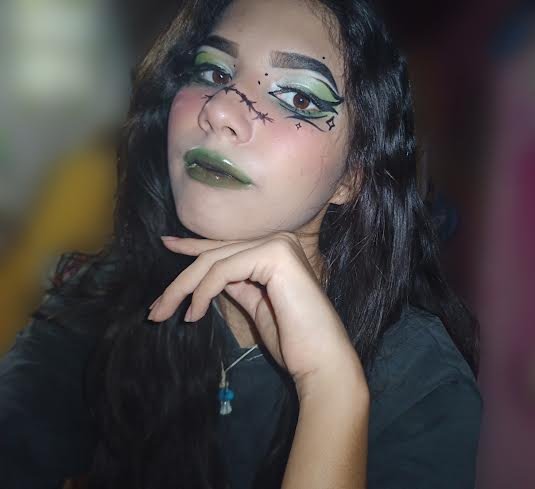
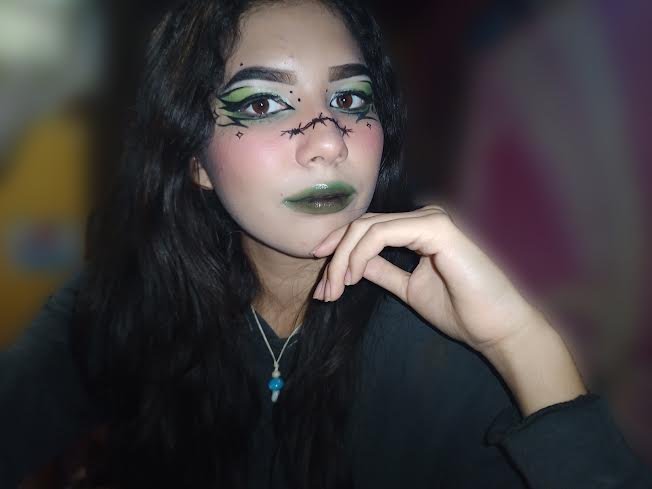
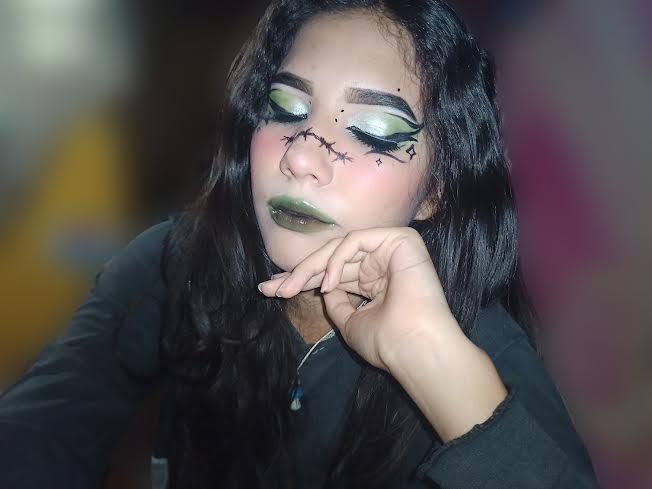
este fue nuestro resultado.
This was our result.
RESULTADO// RESULT:
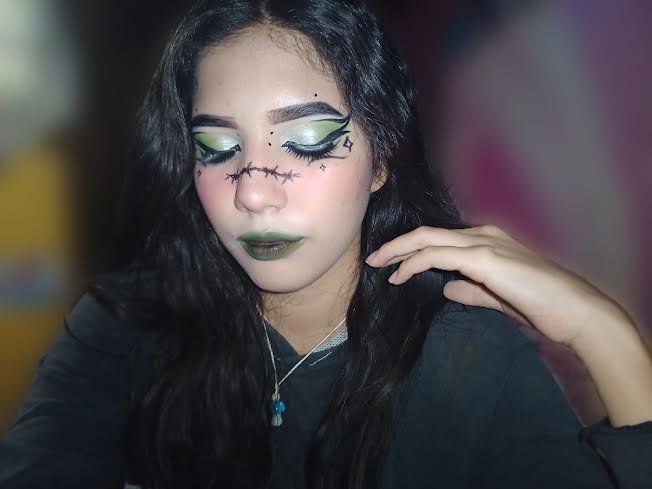
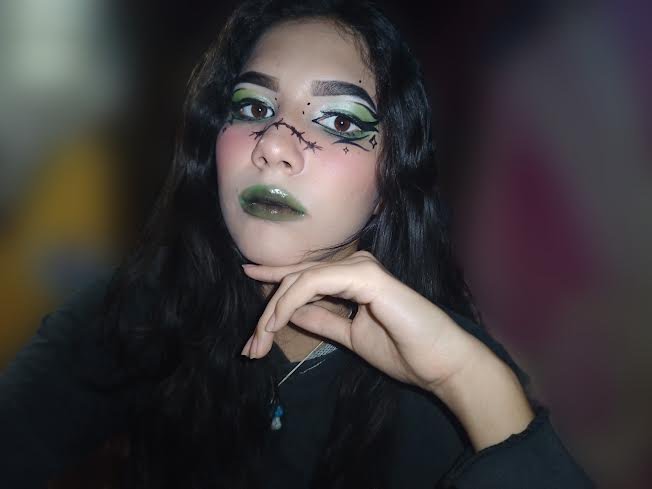
Gracias por acompañarme en este recorrido espectacular, espero lo hayan disfrutado tanto como yo, que se hayan divertido mucho, cuídense mucho, si saldrán usen su tapabocas, o si no quédense en casita creando maravillosos estilos, que tengan un hermoso día y sin más que decir me despido. Adiós.!!
Thank you for joining me on this spectacular tour, I hope you enjoyed it as much as I did, have fun, take care of yourselves, if you go out use your mask, or if not stay home creating wonderful styles, have a beautiful day and without more to say I say goodbye. Goodbye!
Thank you for sharing this amazing post on HIVE!
Your content got selected by our fellow curator @priyanarc & you just received a little thank you via an upvote from our non-profit curation initiative!
You will be featured in one of our recurring curation compilations and on our pinterest boards! Both are aiming to offer you a stage to widen your audience within and outside of the DIY scene of hive.
Join the official DIYHub community on HIVE and show us more of your amazing work and feel free to connect with us and other DIYers via our discord server: https://discord.gg/mY5uCfQ !
If you want to support our goal to motivate other DIY/art/music/homesteading/... creators just delegate to us and earn 100% of your curation rewards!
Stay creative & hive on!
Increíbles y muy hermosos tus delineados, necesito tu secreto, para delinearme y maquillarme tan bonito. Sigue adelante, eres una artista en desarrollo
Gracias Amiga, me alegra mucho que te guste mi desarrollo en el maquillaje ❤️ mi consejo para los delineados (que he aprendido con el tiempo) es ver el tipo de párpado que tenemos ( si es normal o caído, más largo o más corto, si miramos al frente, en que posición queda la cuenca y el párpado) para en el momento en que delineamos el ojo quede lo que nosotros buscamos, suena complicado pero créeme que es muy fácil y lograrás todos los delineados extravagantes ❤️, espero te sirva mi ayuda 😊✨
No pues, muchisimas gracias. Practicare para lograr creaciones tan hermosas como las tuyas, mucho pero mucho exito para tiii