
El maquillaje es sin duda alguna un arte, una forma de expresión. Desde hace semanas que conseguí esta hermosa comunidad dedicada al mundo del makeup, habia querido unirme a alguno de sus retos, y que mejor entrada triunfal que con una de mis combinaciones favoritas, maquillaje y golosinas.
Makeup is undoubtedly an art, a form of expression. For weeks that I got this beautiful community dedicated to the world of makeup, I had wanted to join one of their challenges, and what better triumphal entry than with one of my favorite combinations, makeup and sweets.
Esta semana el reto corresponde a crear un makeup look inspirado en tu chucheria / golosina favorita. En mi caso, soy amante del chocolate en todas sus presentaciones, y aunque mis favortios en la vida son los Ferrero Rocher y los Hershey´s, me fui por los milka de oreo, que bueno actualmente se han convertido en una obsesión para mi. Elegí esta golosina, no solo porque es deliciosa, si no porque los colores del empaque son tan hermosos que puso a volar mi imaginación en seguida. Ahora que saben en que me he inspirado y porqué, es hora de pasar al mini tutorial, así que sin más preámbulos...
This week the challenge is to create a makeup look inspired by your favorite candy. In my case, I am a lover of chocolate in all its presentations, and although my favortios in life are the Ferrero Rochers and the Hershey's, I went for the oreo milka, which, well, they have now become an obsession for me. I chose this treat, not only because it is delicious, but because the colors on the packaging are so beautiful that it immediately set my imagination running wild. Now that you know what I was inspired by and why, it's time to move on to the mini tutorial, so without further ado ...

He de confesarles, que ir tomando fotos del proceso de maquillaje, me costó un mundo. Normalmente llego con una idea general del look, y luego solo me dejo llevar por lo que vaya fluyendo en el momento, es por eso, que parar para tomar la foto comenzó a estresarme un poco llegado a un punto. Sin embargo, creo que obtuve imágenes bastante complementarias, para que entiendan mi explicación.
I have to confess that taking photos of the makeup process cost me a world. Normally I arrive with a general idea of the look, and then I just let myself get carried away by what is flowing in the moment, that is why stopping to take the photo began to stress me a little at a point. However, I think I got pretty complementary images, so you understand my explanation.
1-. El primer paso consiste en el skincare. Aplica una cremita hidratante adecuada para tu tipo de piel, esto hará que el maquillaje se vea mucho mejor.
2-. El segundo paso, va a depender de lo que mas se acomode a ti. Por lo general a mi me gusta empezar con los ojos, puesto que si me mancho, o daño algo, puedo quitarlo sin arruinar la base.
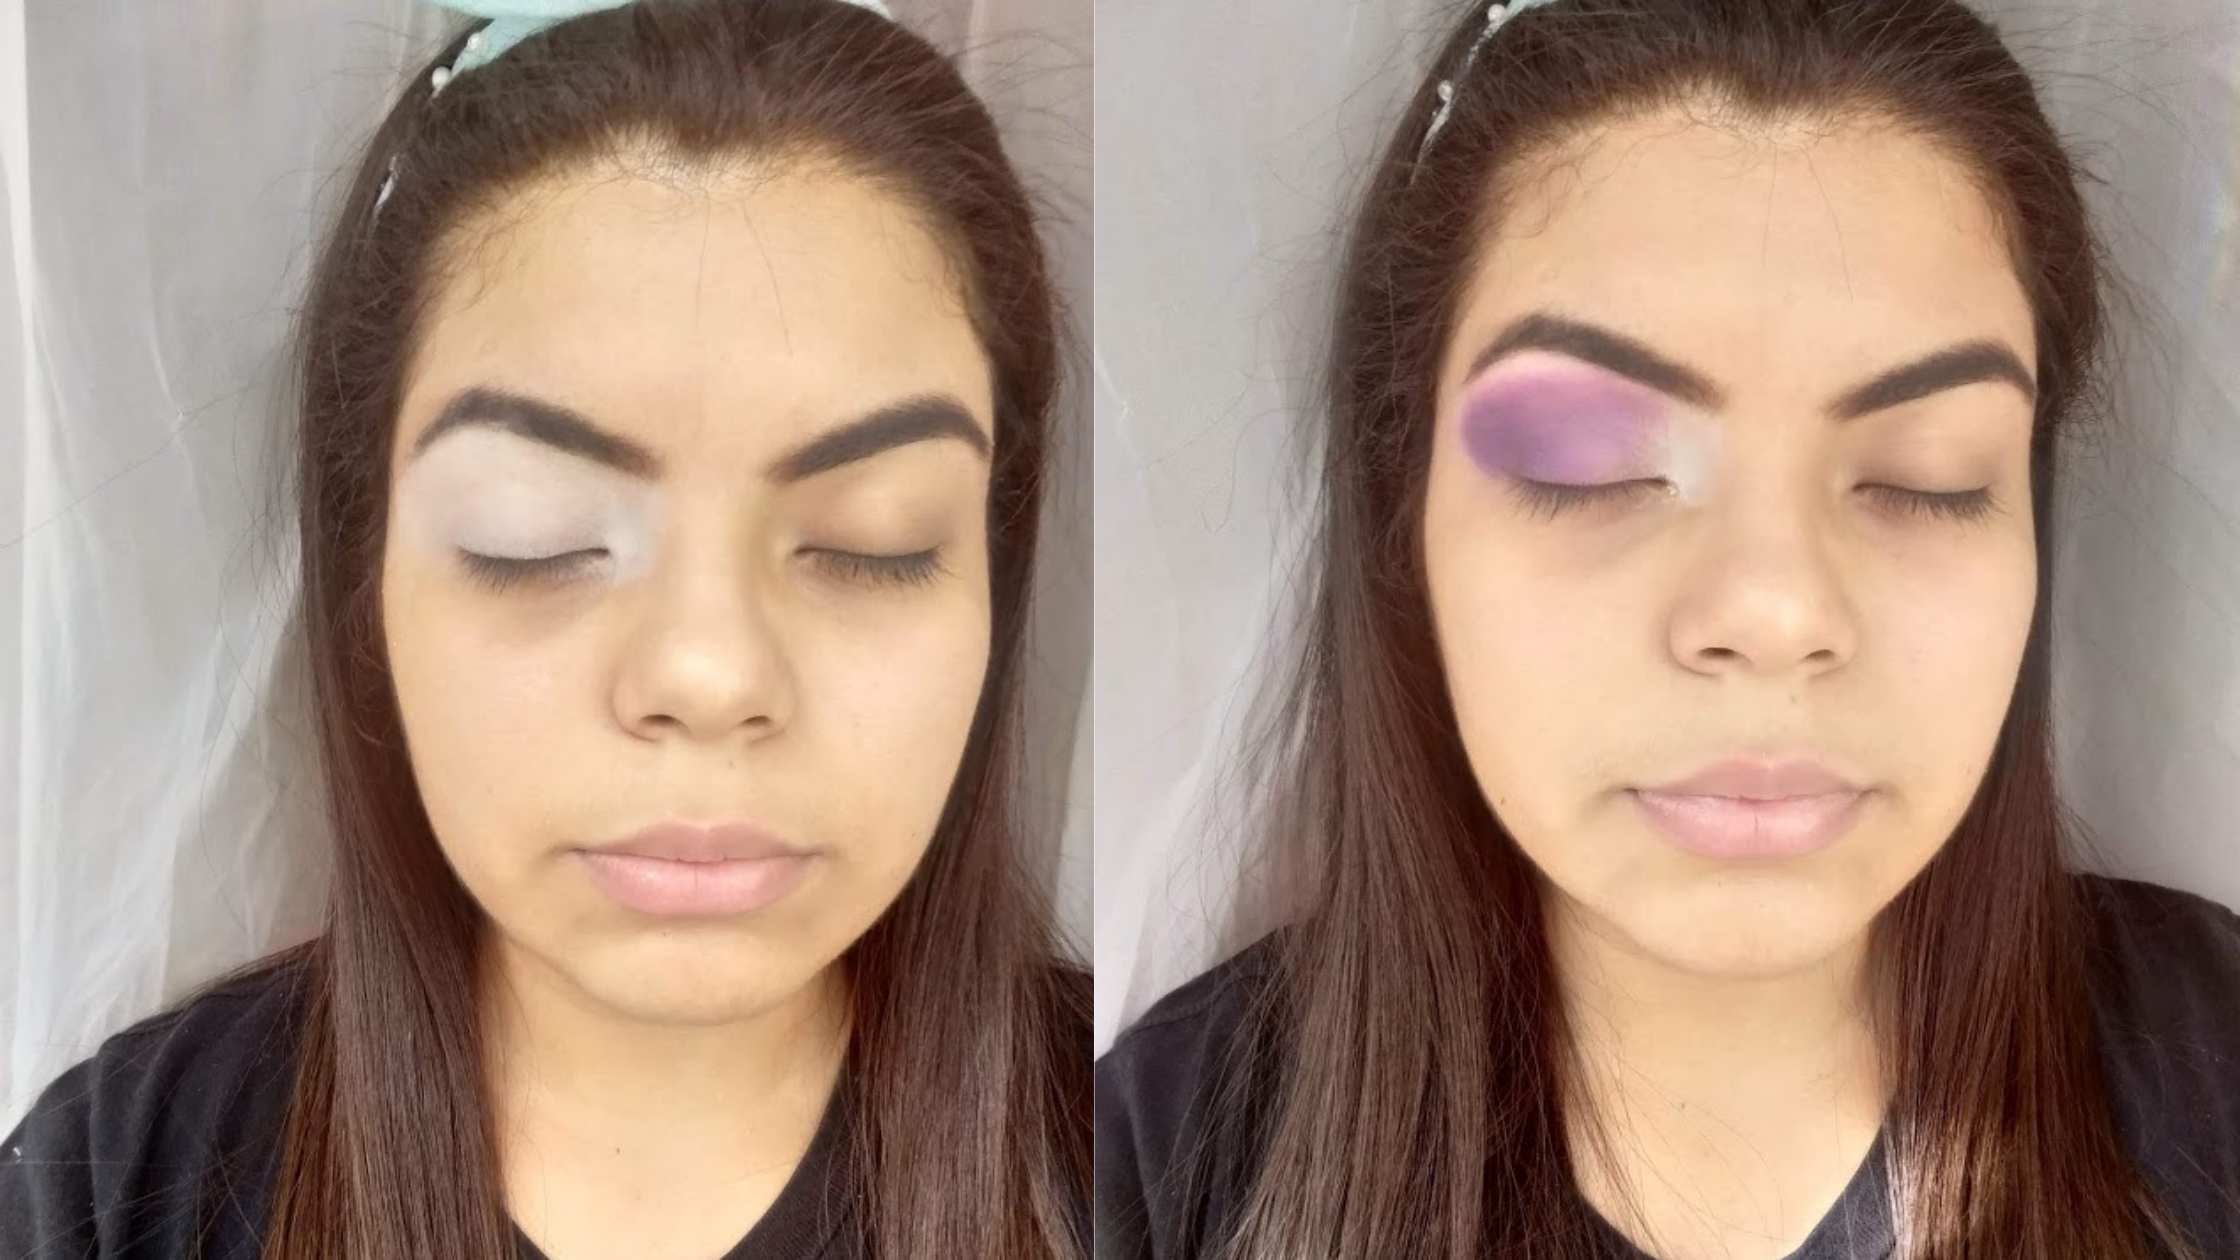
3-. Como este maquillaje tiene colores bastante fuertes, coloqué un primer de color blanco como base, luego lo sellé con una sombrita del mismo color, de modo que me cree un lienzo sólido y liso para comenzar a poner color.
1-. The first step is skincare. Apply a suitable moisturizer for your skin type, this will make the makeup look much better.
2-. The second step will depend on what best suits you. In general, I like to start with the eyes, since if I get stained, or damage something, I can remove it without ruining the base.
3-. Since this makeup has quite strong colors, I applied a white primer as a base, then I sealed it with a shadow of the same color, so that it creates a solid and smooth canvas for me to start adding color.
.png)
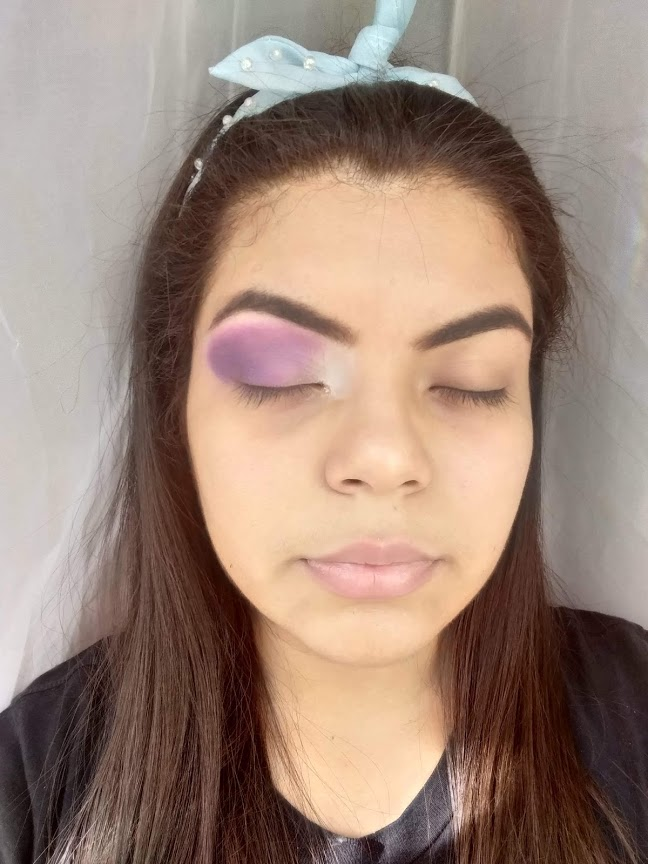
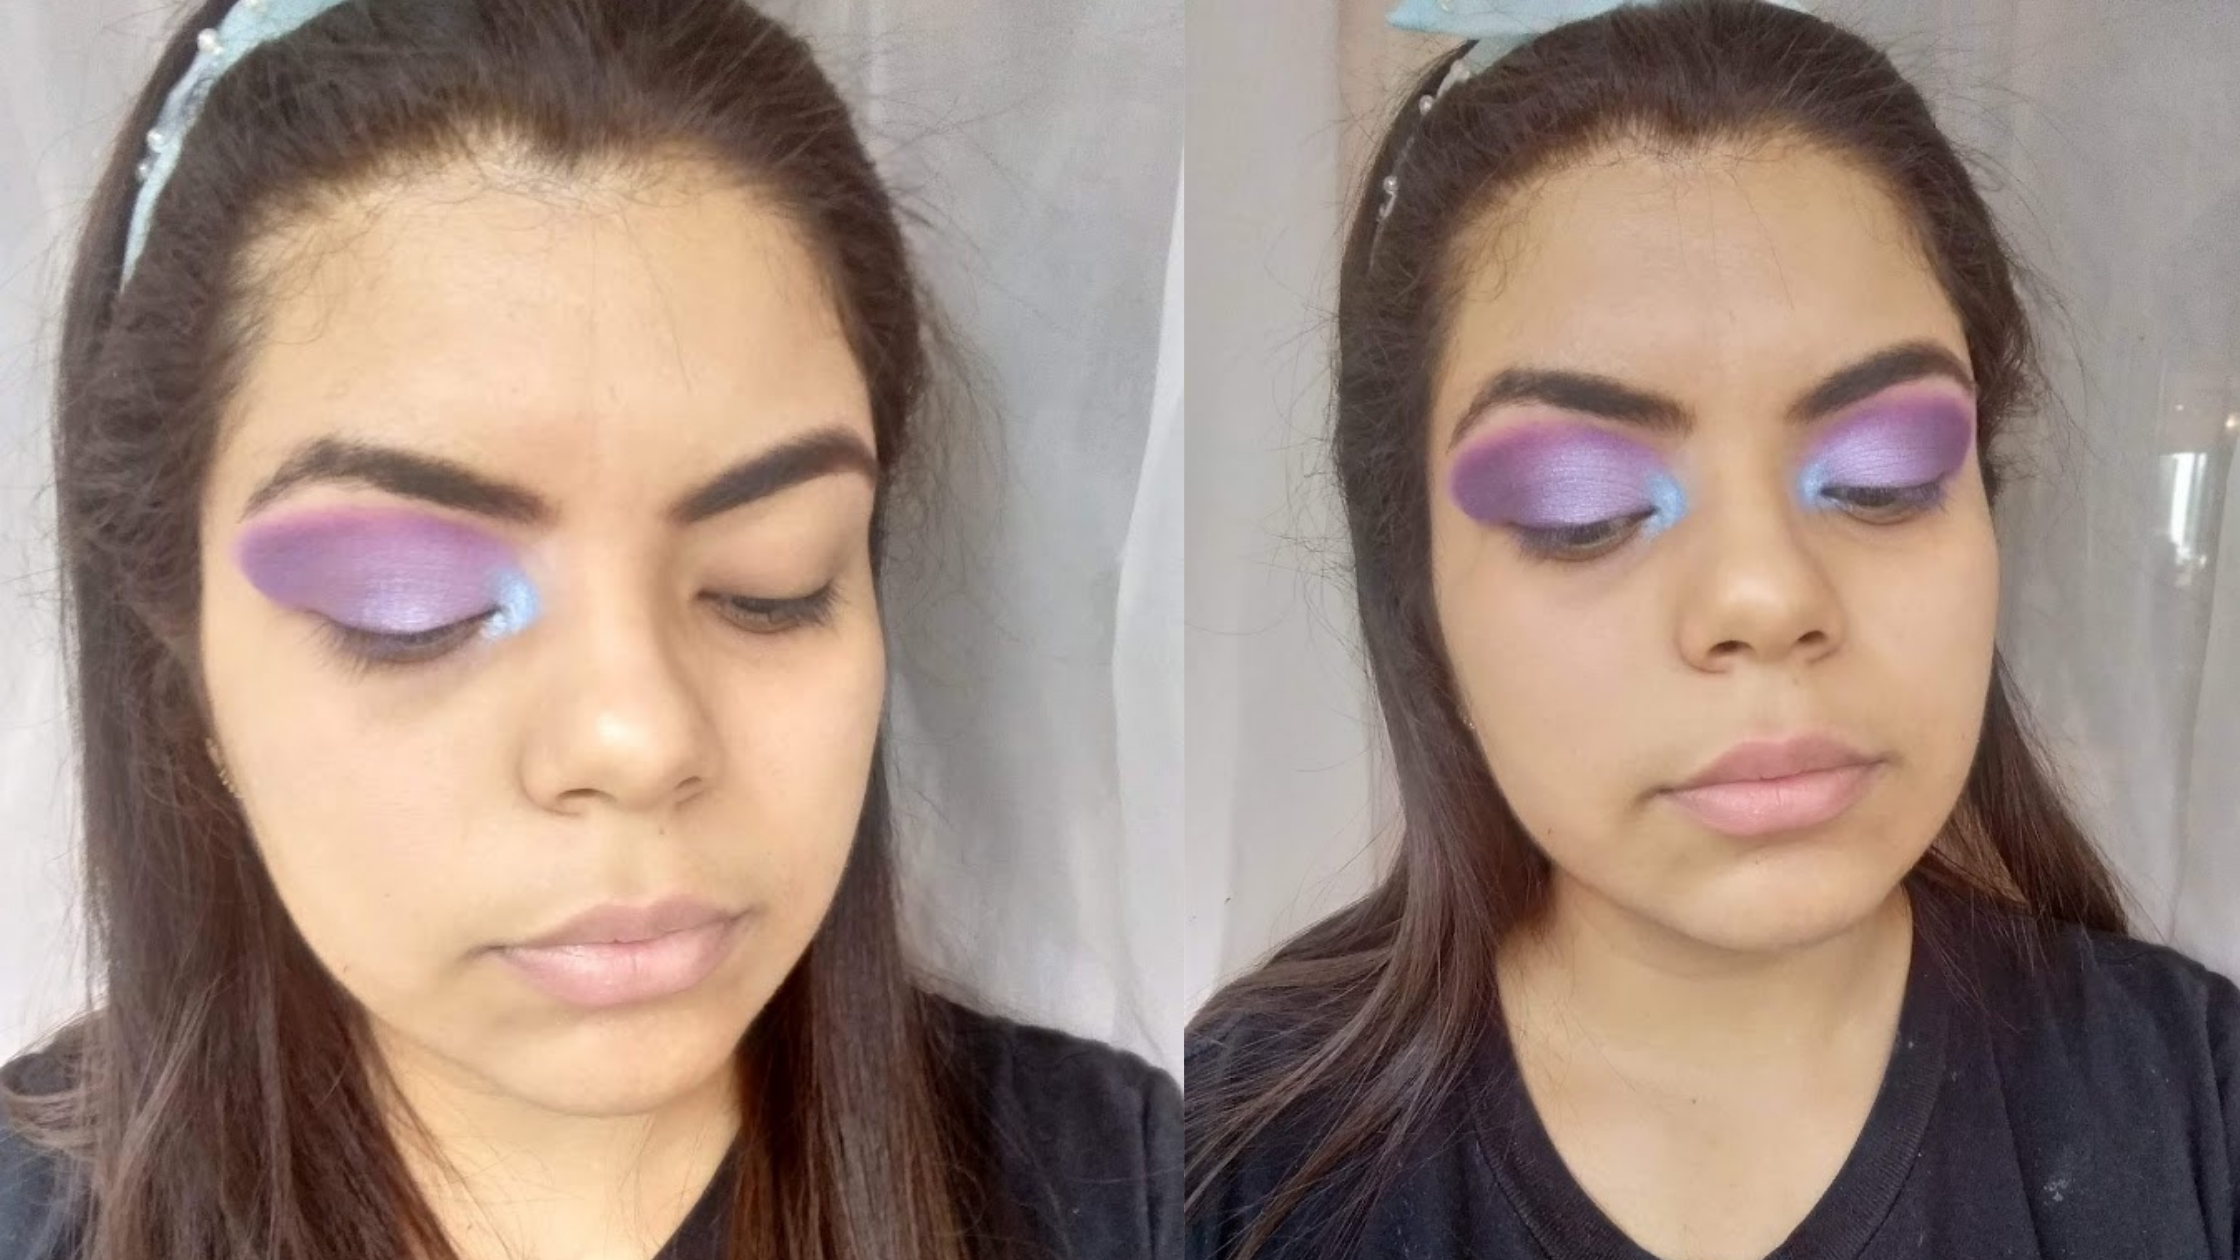
4-. Si quieres que tus colores se vean super vibrantes, te recomiendo que inicies colocando el color deseado con un lapiz. Esto fue precisamente lo que yo realicé, con un lápiz morado coloque la primera capa de color y lo difumine.
5-.Una vez que tienes la capa de color vas a sellarla con una sobra del mismo color, y recuerda nunca dejes de difuminar, lo mas importante para que el maquillaje te quede profesional y con un bonito acabado, es difuminar y difuminar hasta el cansancio.
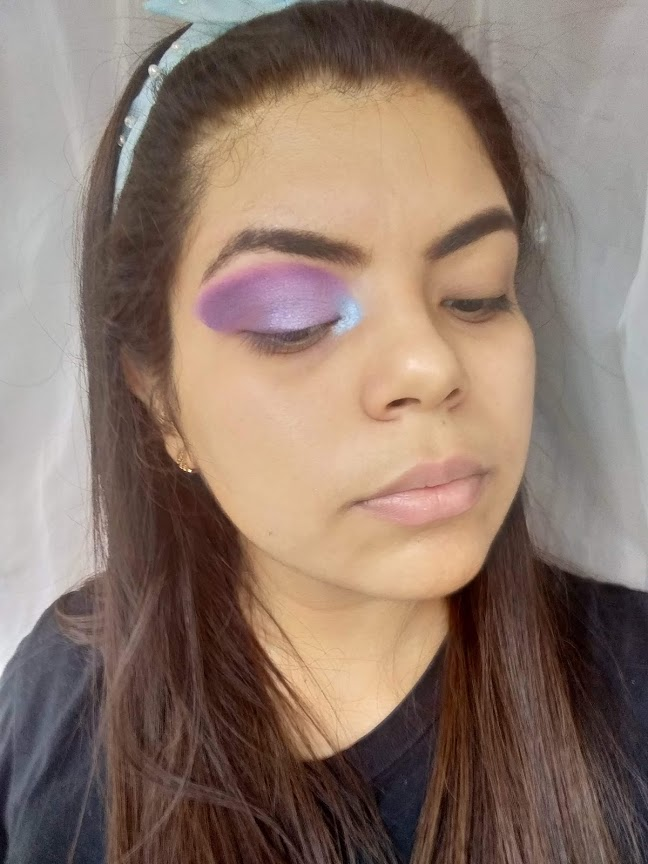
6-.Después de que conseguí el tono deseado, pase a colocar un tono de lápiz morado mucho más claro, un lila, en todo lo que era el párpado móvil, más hacia la parte de el lagrimal. Al igual que en los pasos anteriores selle el lila, con una sombra del mismo color, solo que en este caso, la sombra lila, tenía acabado metálico.
7-.Lo siguiente que hice, fue dedicar unos minutos a difuminar, muy pero muy bien la unión entre los dos tonos de morado. Luego, inspirandome en el empaque del Milka de Oreo, que tiene lineas azul claro, coloqué un poco de sombra azul metálizada en el lagrimal a modo de iluminador, para aportar un poco de luz y otro tono a la mirada.
4-. If you want your colors to look super vibrant, I recommend that you start by placing the desired color with a pencil. This was precisely what I did, with a purple pencil, place the first layer of color and blend it.
5-. Once you have the color layer you are going to seal it with a leftover of the same color, and remember never stop blurring, the most important thing so that your makeup looks professional and with a beautiful finish, is to blur and blur to the fatigue.
6-.After I achieved the desired tone, I went on to place a much lighter purple pencil tone, a lilac, in everything that was the mobile eyelid, more towards the part of the tear duct. As in the previous steps, seal the lilac, with a shadow of the same color, only in this case, the lilac shadow, had a metallic finish.
7-. The next thing I did, was to spend a few minutes to blur, very, very well the union between the two shades of purple. Then, inspired by the packaging of the Milka de Oreo, which has light blue lines, I placed a little metallic blue shadow on the tear duct as an illuminator, to bring a little light and another tone to the look.
.png)
8-.Por último difume las cositas que me parecian que le faltaba, afine los detalles, limpie todo el pigmento que cayó sobre mi rostro, puse máscara de pestañas y me fui directo al rostro.
9-.En el rostro olvide por completo ir tomando fotos. Pero básicamente agregue base, corrector, rubor y listo, no hice contorno ni nada por el estilo.
10-.Para los labios coloqué un lapiz delineador color nude, y sobre este coloqué un lip gloss transparente.
11-.Una vez terminado el rostro, maquillje la linea de agua inferior de los ojos con el mismo degradado y técnica que realice en la parte de arriba, es decir, primero lapiz y luego sombra.
12-.Como toque final, agregué unas piedritas de decoración en el lagrimal, como una especie de detallito, no tiene nada que ver con el empaque, pero siento que le aporto un toque diferente al look final.
8-. Finally, blur the little things that I thought was missing, refine the details, clean all the pigment that fell on my face, I put mascara and went straight to the face.
9-. In the face completely forget to take photos. But basically add foundation, concealer, blush and voila, I didn't contour or anything like that.
10-. For the lips I placed a nude colored eyeliner pencil, and on this I placed a transparent lip gloss.
11-.Once the face is finished, make up the lower water line of the eyes with the same gradient and technique that you do on the top, that is, first pencil and then shadow.
12-. As a final touch, I added some decorative pebbles in the tear duct, as a kind of detail, it has nothing to do with the packaging, but I feel that I add a different touch to the final look.
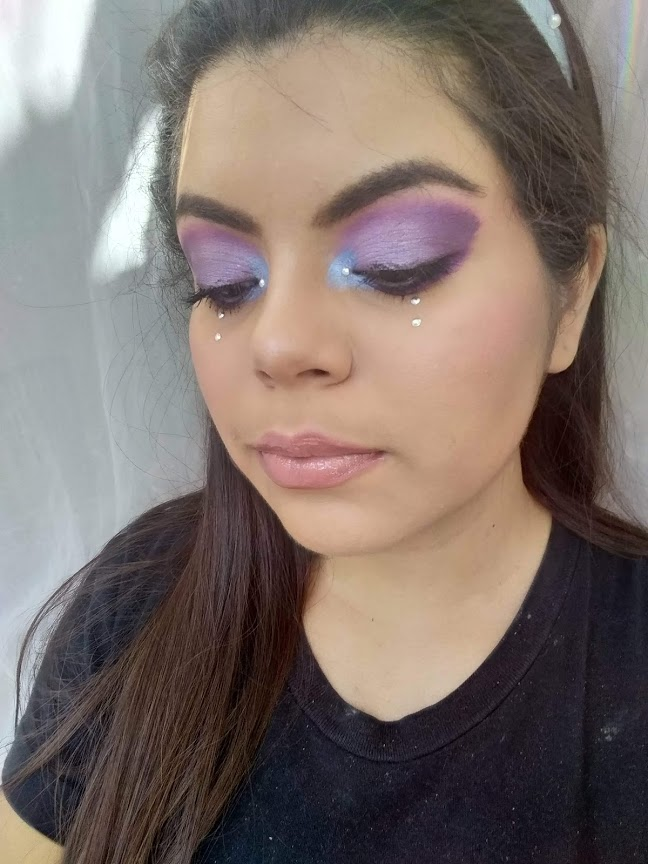
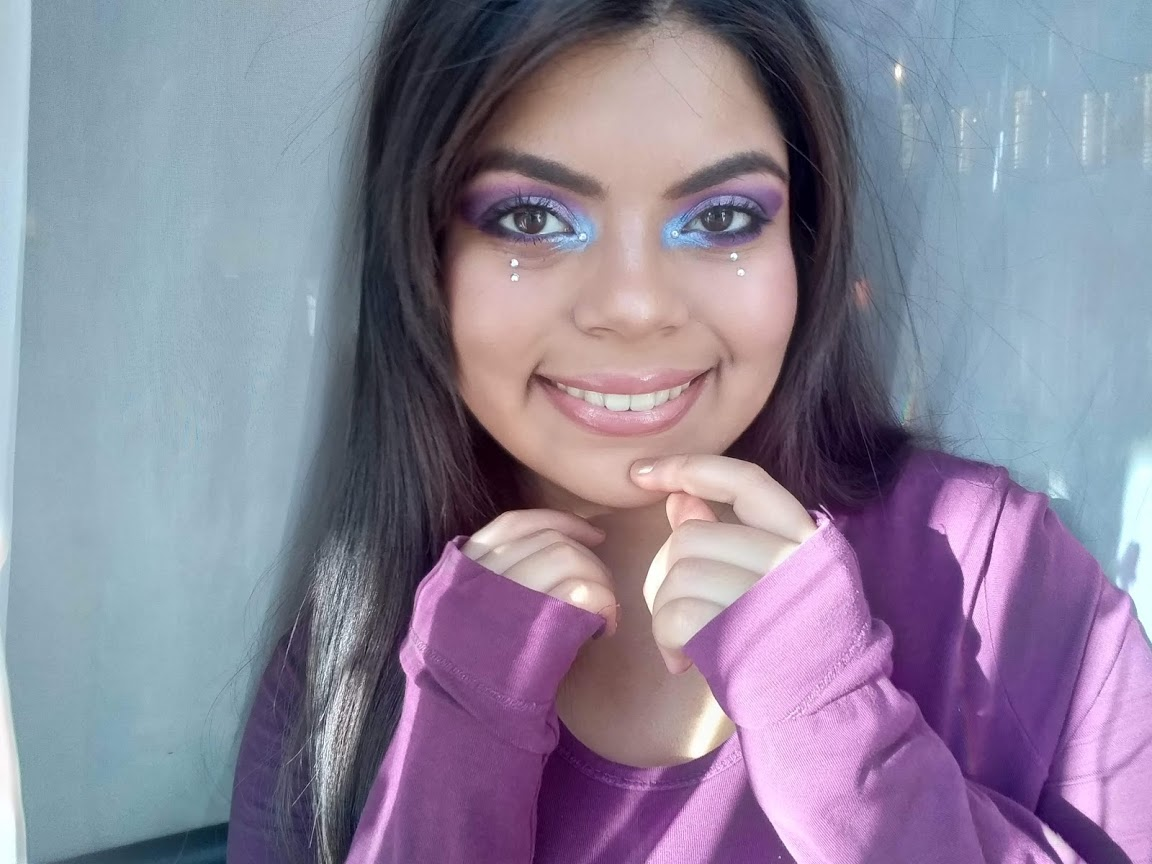
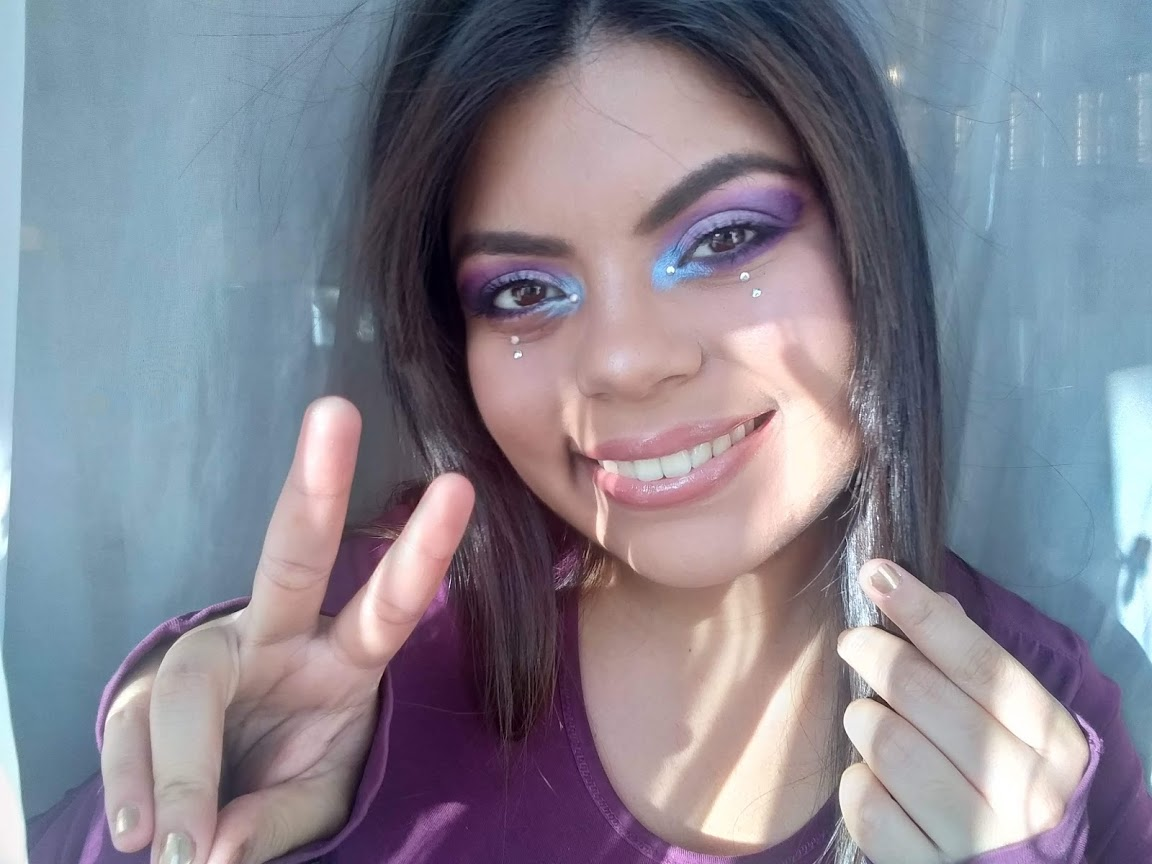
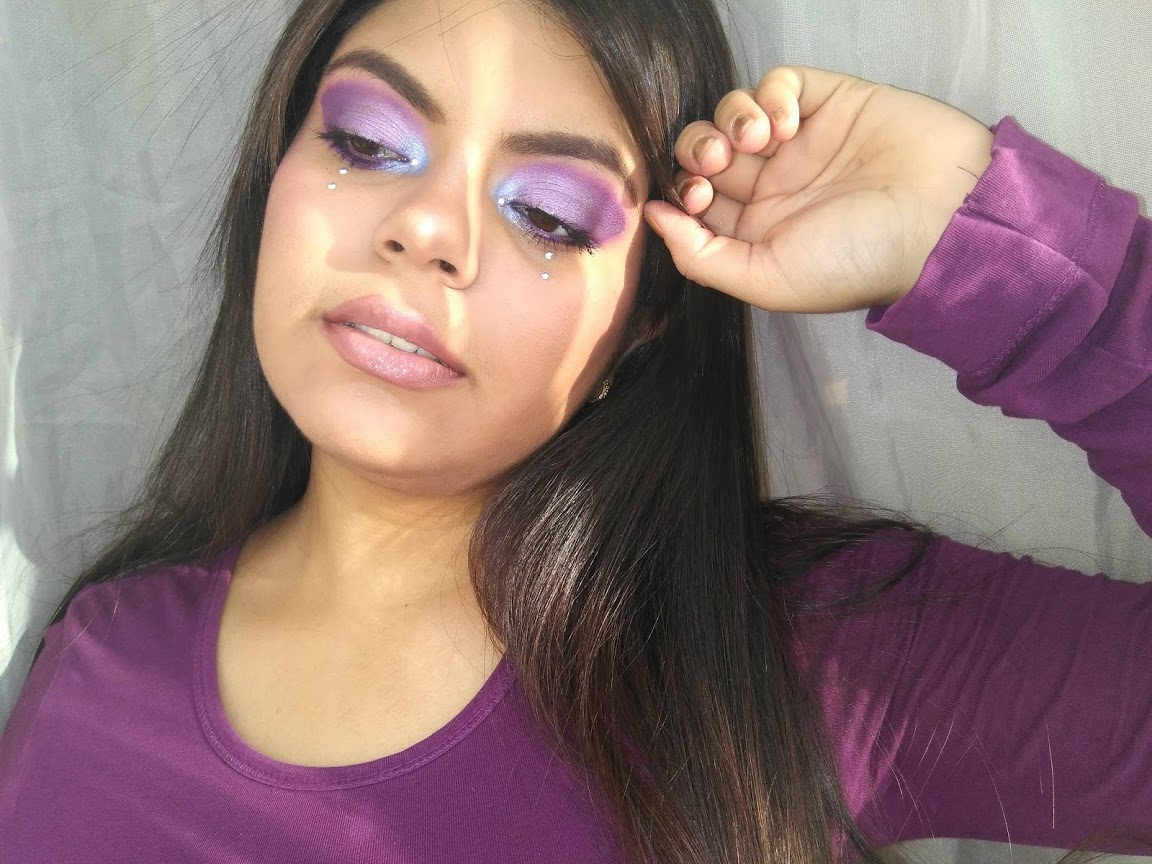
Finalmente, para obtener fotos bonitas del maquillaje, me arreglé un poco el cabello, me cambié la camisa y pasé a la sesión de fotos. acá les muestro un poquito del look final. Cuentenme que les pareció el look final y si lo amaron tanto como yo.
Finally, to get pretty photos of the makeup, I did my hair a bit, changed my shirt, and went on to the photoshoot. here I show you a little bit of the final look. Tell me what you thought of the final look and if you loved it as much as I did.
NOTA: Las fotos fueron tomadas con un T-Movile Rev Plus, ninguna tiene filtro ni edición.
NOTE: Photos were taken with a T-Mobile Rev Plus, none are filtered or edited.
Esa versión de Oreo Milka no la conocía, me encantaron los colores demasiado.
😍😍😍😍
Es súper delicioso, combina dos de mis cosas fav en la vida chocolate y oreos jajaja tienes que probarlo. Gracias por tu bonito comentario, saludos y un gran abrazo!!