Este post es bilingüe / This post is bilingual
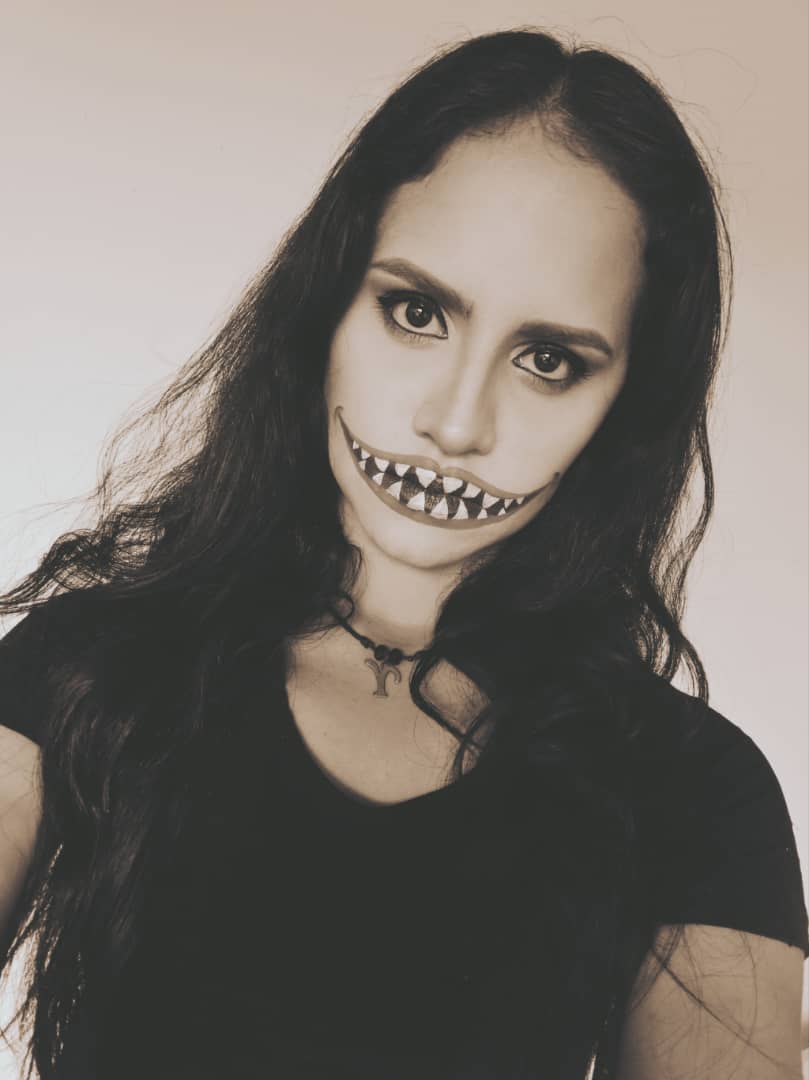
Hola familia #Hive... Espero que todos estén súper bien, el día de hoy estamos de espanto.
Sé que comené un poco tarde con los look de Halloween, jajajaja, pero lo importante es que comencé, jajajaja!
Me animé a hacerlo después de ver tantos maquillajes increibles, de verdad me impresiona todo el talento y la creatibidad que hay en Hive. Hay looks muy variados, desde los más sencillos a los más elaborados, pero todos muy lindos.
Hello #Hive family... I hope everyone is super well, today we're in the spooky mood.
I know I started a little late with the Halloween looks, hahahaha, but the important thing is that I started, hahahaha!
I was encouraged to do it after seeing so many incredible makeup looks, I'm really impressed with all the talent and creativity that there is in Hive. There are very varied looks, from the simplest to the most elaborate, but all very cute.
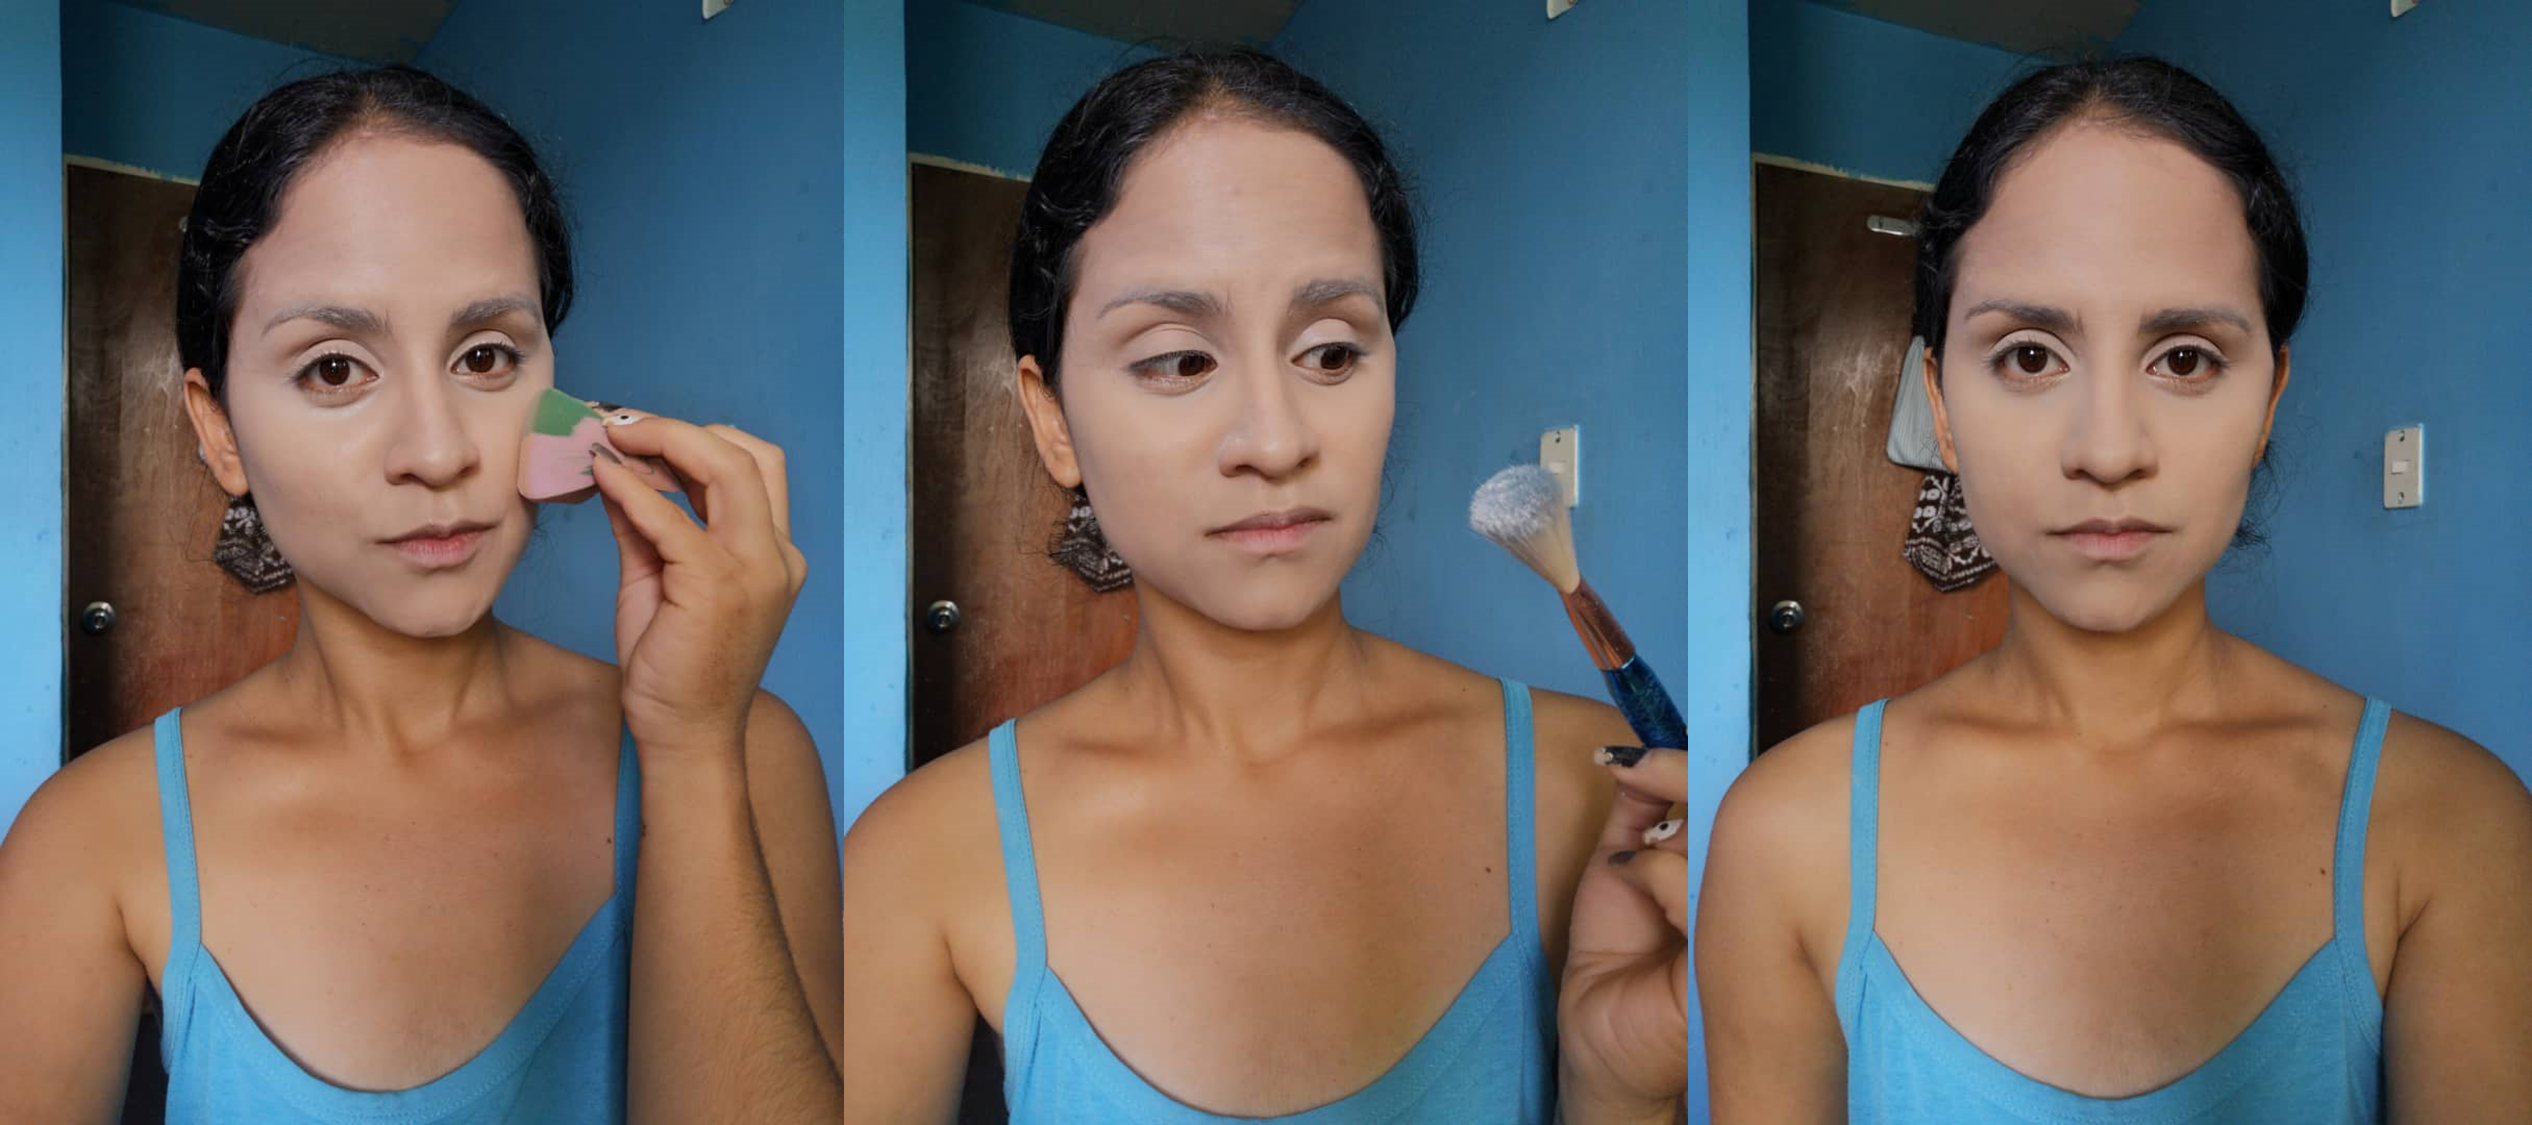
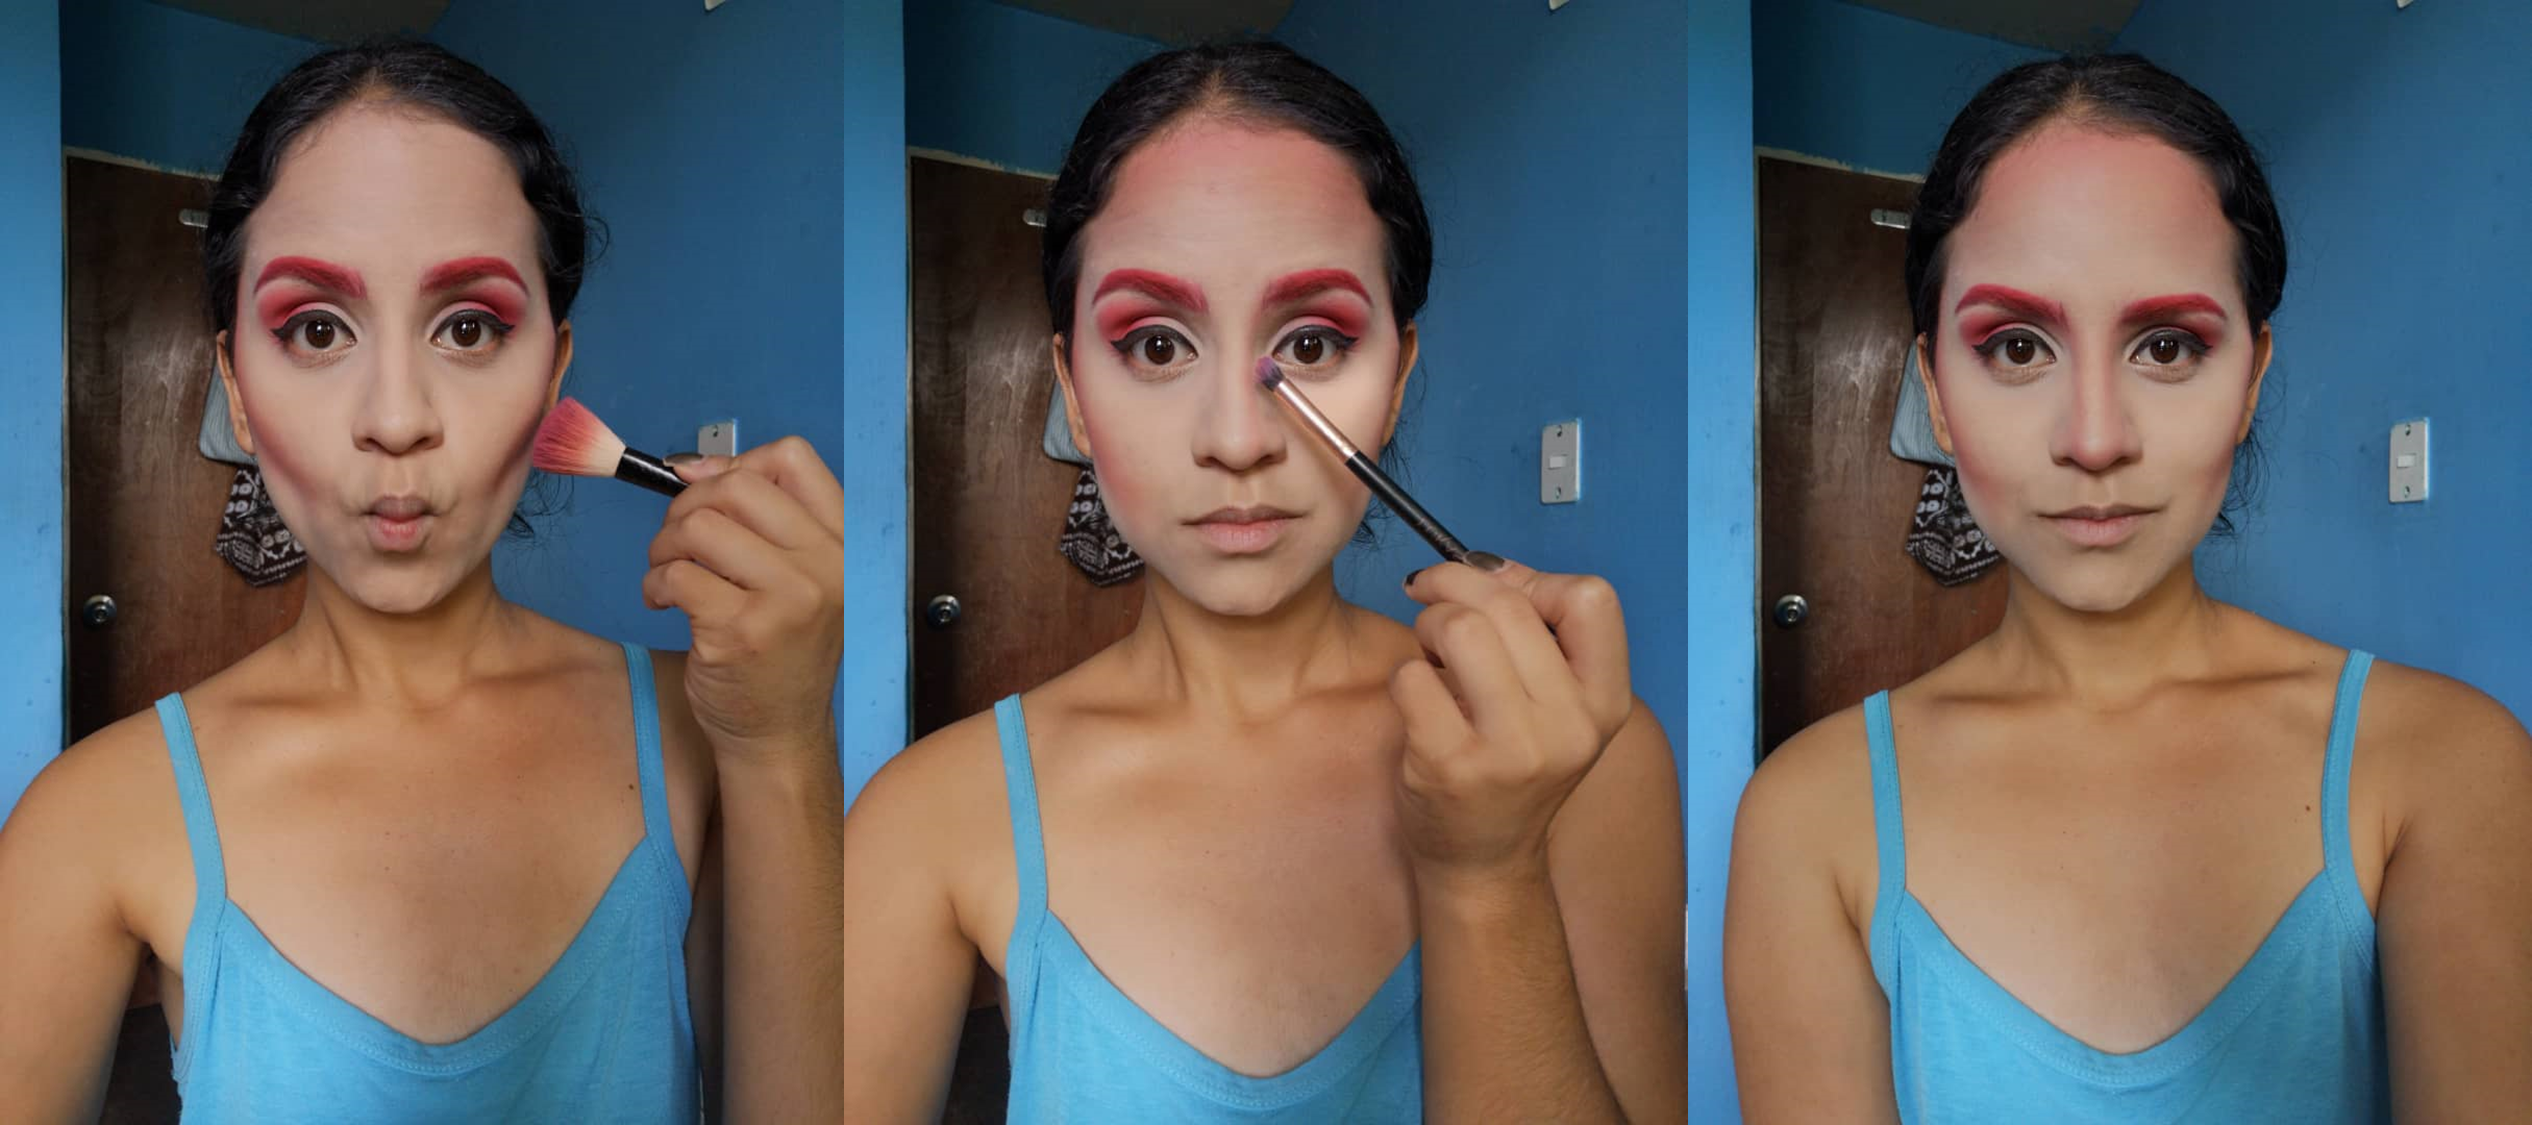
Para comenzar con este look de halloween, no inicié con las cejas, jajajaja!
En esta oportunidad comencé directamente con el rostro, utilizando una base mucho más clara de mi tono de piel, la cual sellé con un polvo suelto blanco.
Para este look voy a cambiar mis cejas de color, asi que también apliqué base sobre ellas.
To start with this halloween look, I didn't start with the eyebrows, hahaha!
This time I started directly with the face, using a foundation much lighter than my skin tone, which I sealed with a white loose powder.
For this look I'm going to change my eyebrows color, so I also applied foundation on them.
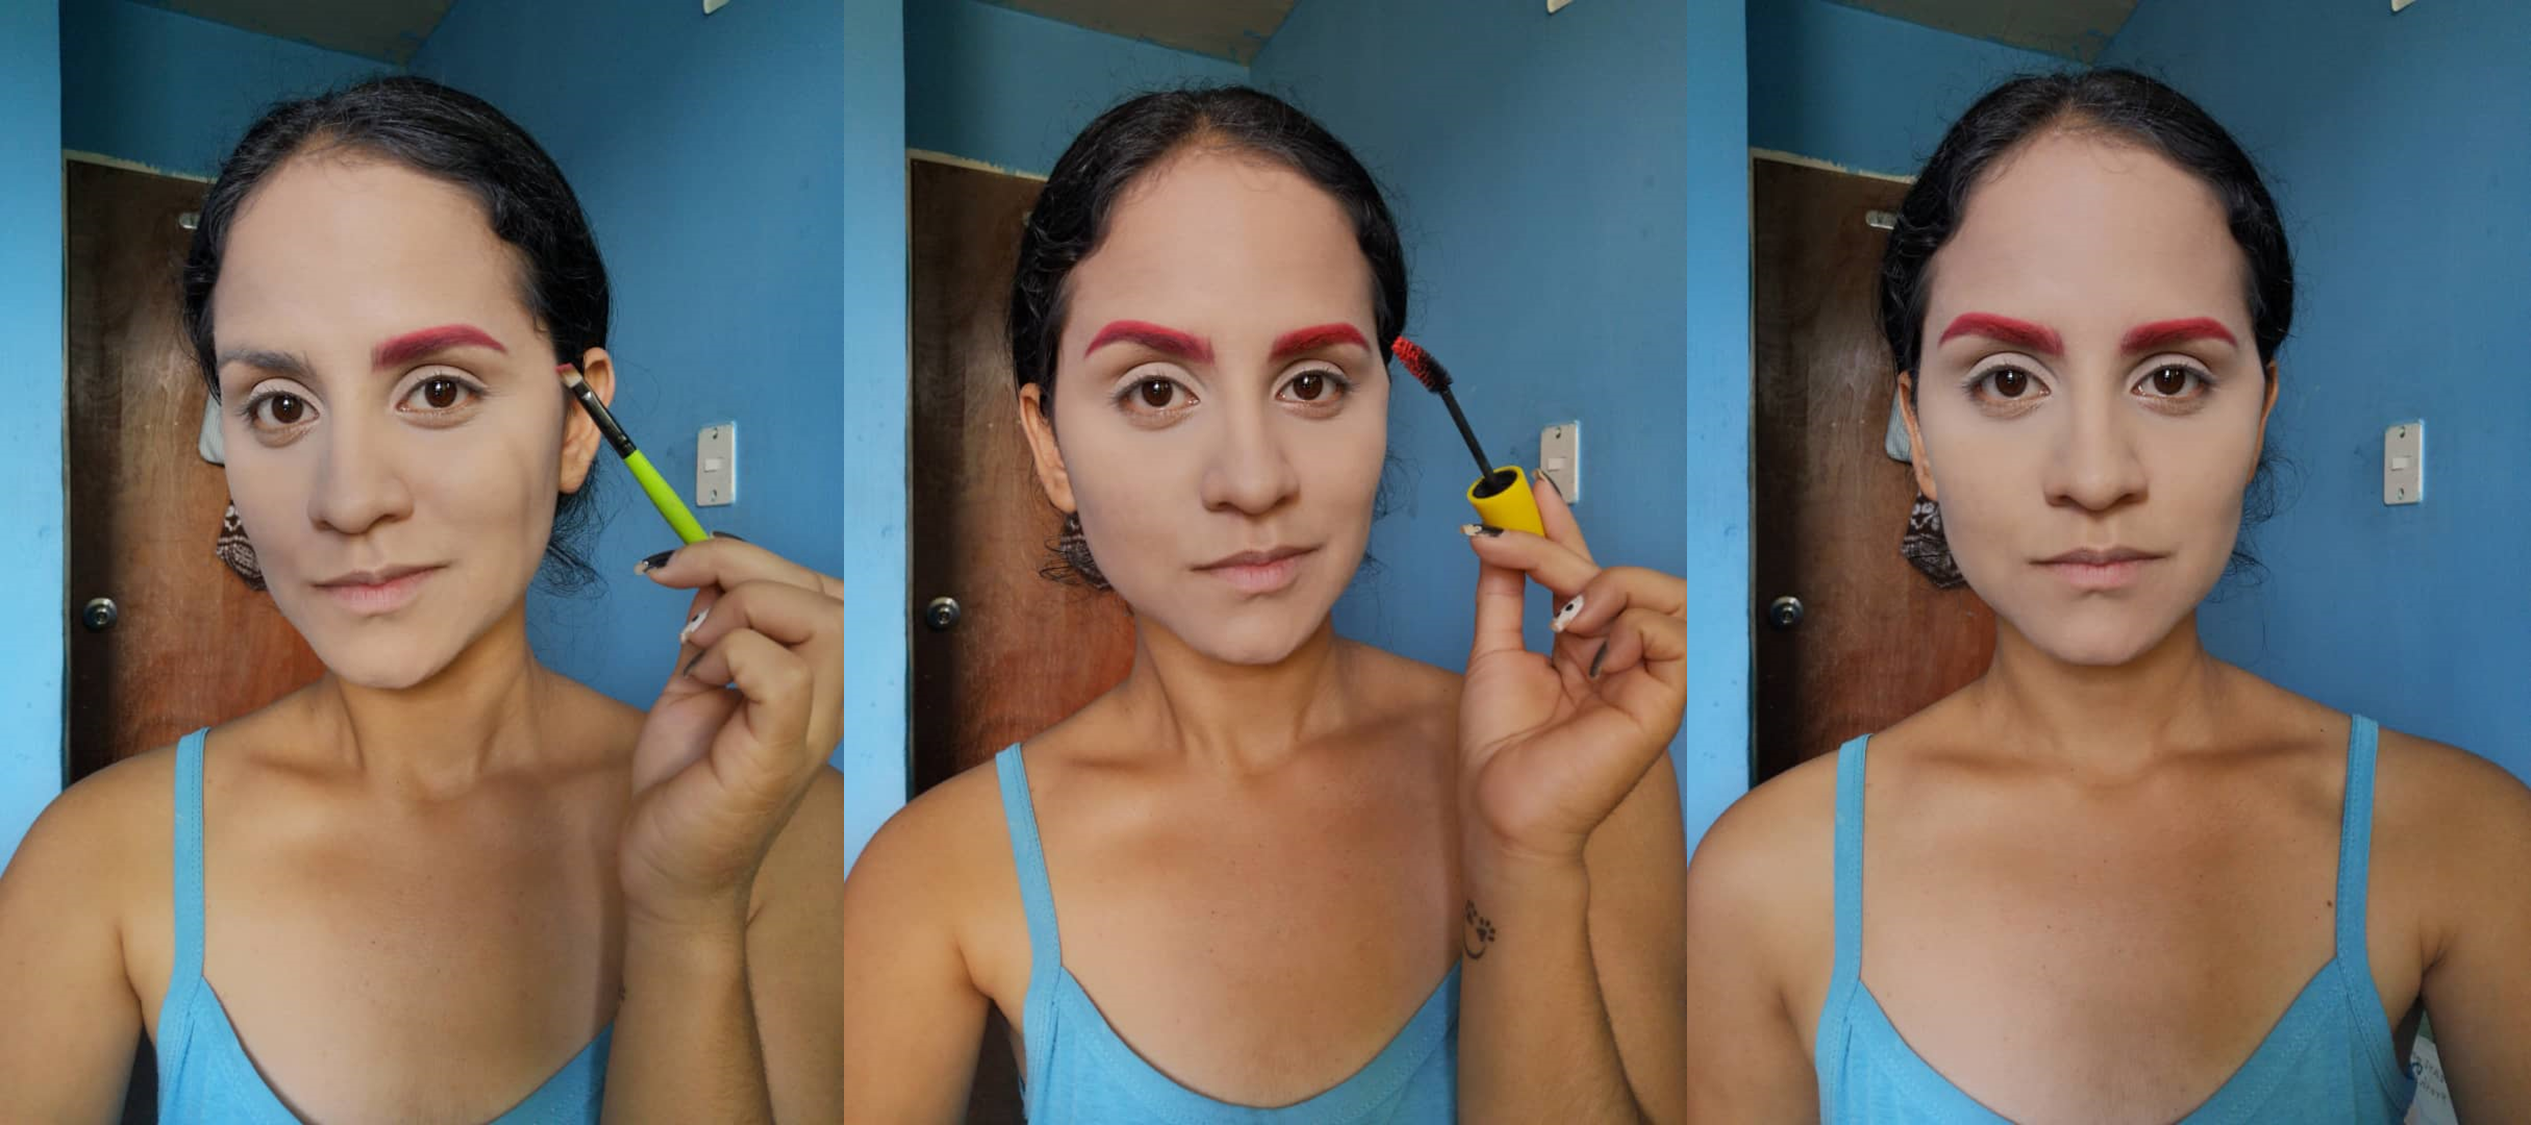
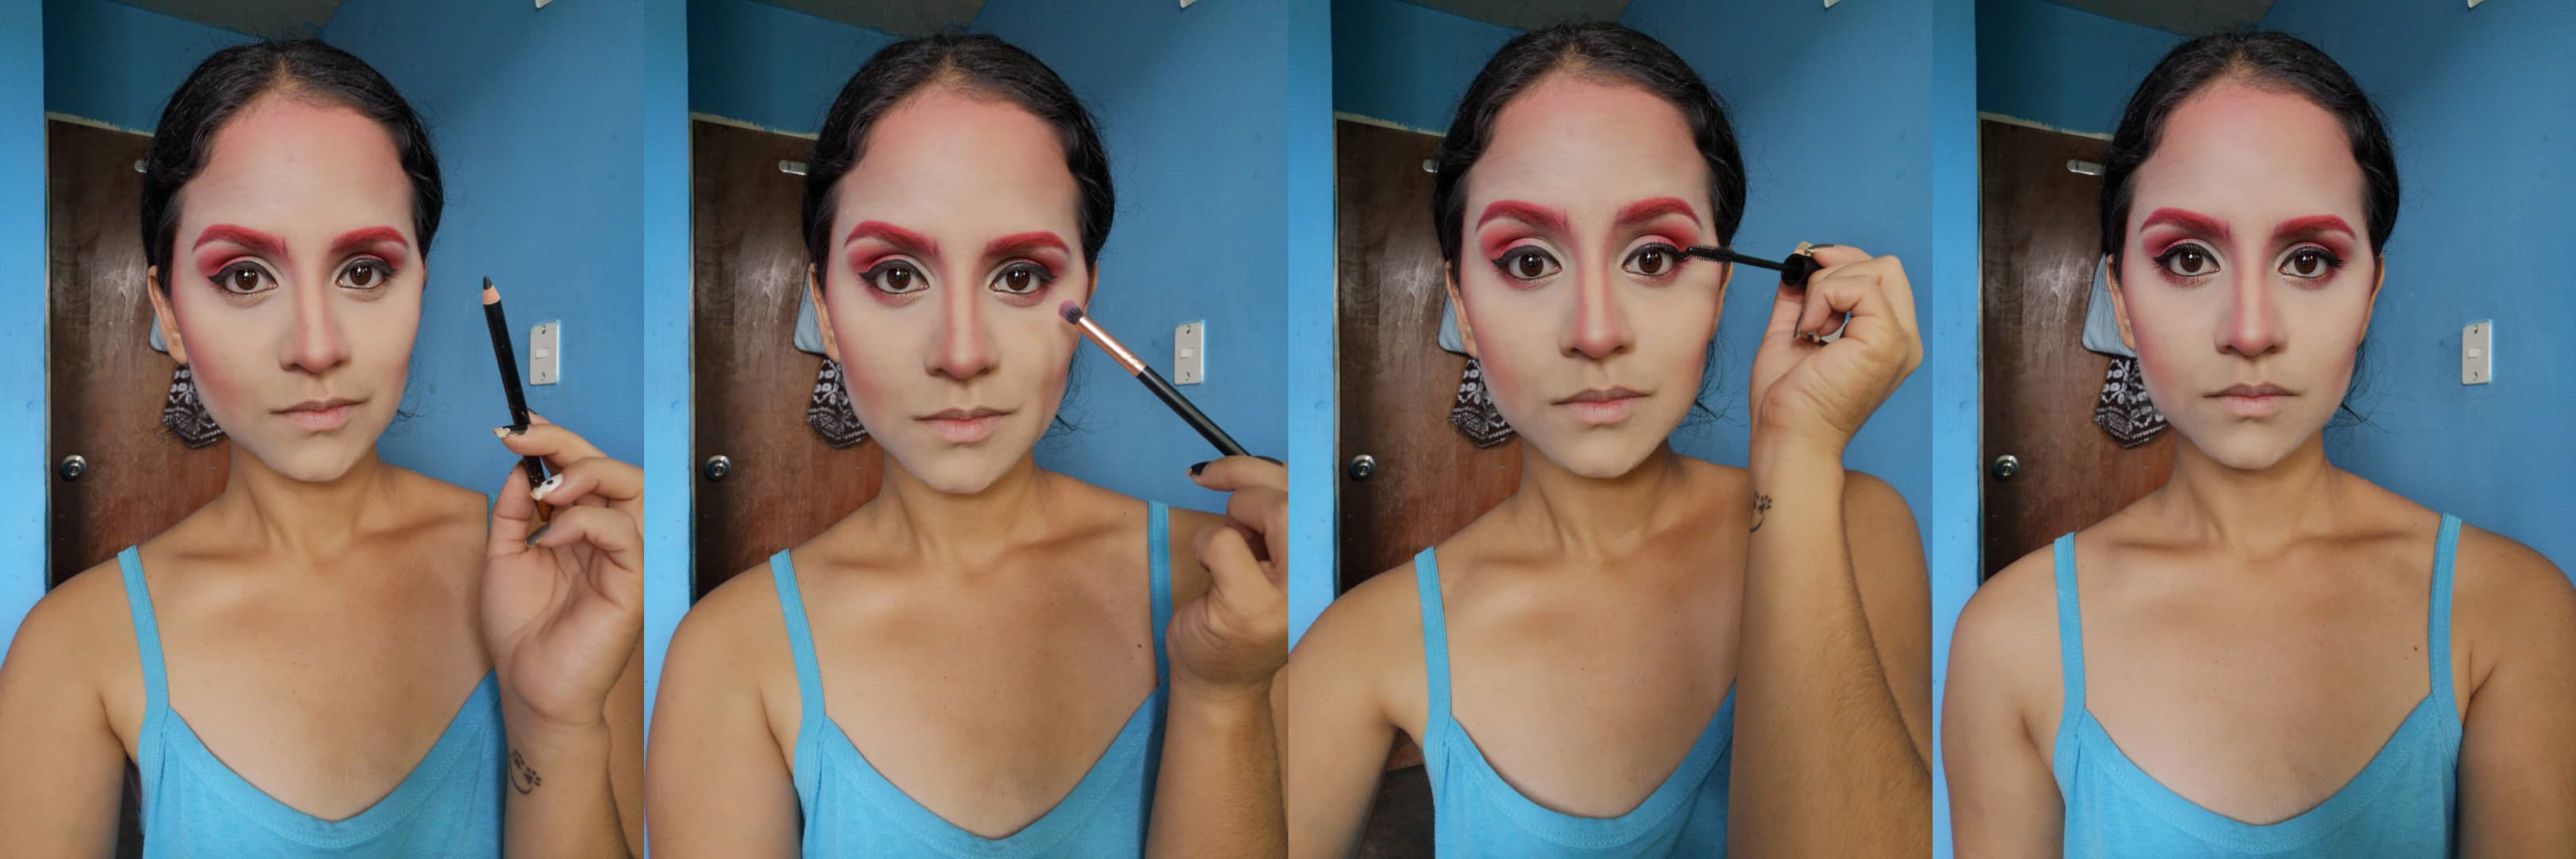
Como les mencioné, para este maquillaje, voy a cambiar el tono de mis cejas, las voy a hacer rojas.
Primero hice la forma con un poco de sombra roja, con mucho cuidado para no dañar la base blanca, y luego, rellené usando la misma sombra.
Por último, se notaba mucho el contraste entre la sombra roja y los pelitos negros, asi que tome un poco de pintura rojo con un aplicador de máscara de pestañas, y pinte de poco a poco los pelitos, igualmente con mucho cuidado para no macharme.
As I mentioned, for this makeup, I'm going to change the tone of my eyebrows, I'm going to make them red.
First I made the shape with some red shadow, being very careful not to damage the white base, and then, I filled in using the same shadow.
Finally, the contrast between the red shadow and the black hairs was very noticeable, so I took some red paint with a mascara applicator, and painted a little bit at a time on the hairs, also very careful not to crush them.
Para los ojos, apliqué una sombra roja, solo en la zona externa del ojo, difuminando hacia dentro y culminando de forma circular. Luego realicé un delineado de gato negro.
For the eyes, I applied a red shadow, only on the outer area of the eye, blending inwards and finishing in a circle. Then I applied a black cat eyeliner.

Luego pasé nuevamente al rostro, utilizando un rubor rosado para contornearlo, al igual que la nariz.
Then I moved on to the face again, using a pink blush to contour it, as well as the nose.
Para terminar con los ojos, apliqué un lápiz negro en la línea de agua inferior, la misma sombra rojo en los párpados inferiores y máscara de pestaña negra.
To finish with the eyes, I applied a black pencil on the lower waterline, the same red shadow on the lower lids and black mascara.
Hasta aquí, van a estar de acuerdo conmigo en que parece un maquillaje bastante bonito, de fantasia quizas, pero... Lamento confirmarles que no es asi, como pudieron ver en la foto principal, es un maquillaje un tanto tenebroso.
Así que vamos a pasar a hacer nuestra enorme y tenebrosa sonrisa.
Lo primero que vamos a hacer, es la silueta de lo que seria el fondo de nuestra nueva boca, para ello vamos a utilizar un poco de corrector claro y sombra negra. Para este paso, vamos a abarcar nuestros labios y vamos a llevar la silueta hasta la zona de los cachetes.
Para hacer los labios utilicé un poco de sombra roja mezclada con agua micelar y un pincel bastante finito. Con este método realicé los dientes pero con sombra blanca.
Up to this point, you will agree with me that it looks like a pretty nice make-up, maybe fantasy, but.... I'm sorry to confirm that it's not, as you could see in the main picture, it's a rather scary makeup.
So let's move on to making our big scary smile.
The first thing we are going to do, is the silhouette of what would be the bottom of our new mouth, for this we are going to use some light concealer and black shadow. For this step, we are going to cover our lips and we are going to take the silhouette to the cheeks area.
To do the lips I used some red shadow mixed with micellar water and a fairly fine brush. With this method I made the teeth but with white shadow.


Por último, lo único que hice, fue hacer unos medios circulos al final de la sonrisa, y con un poco de sombra marrón dí profundidad, para hacer el efecto de que efectivamente nos estamos riendo.
Finally, the only thing I did, was to make some half circles at the end of the smile, and with a little brown shadow I gave depth, to make the effect that we are indeed laughing.
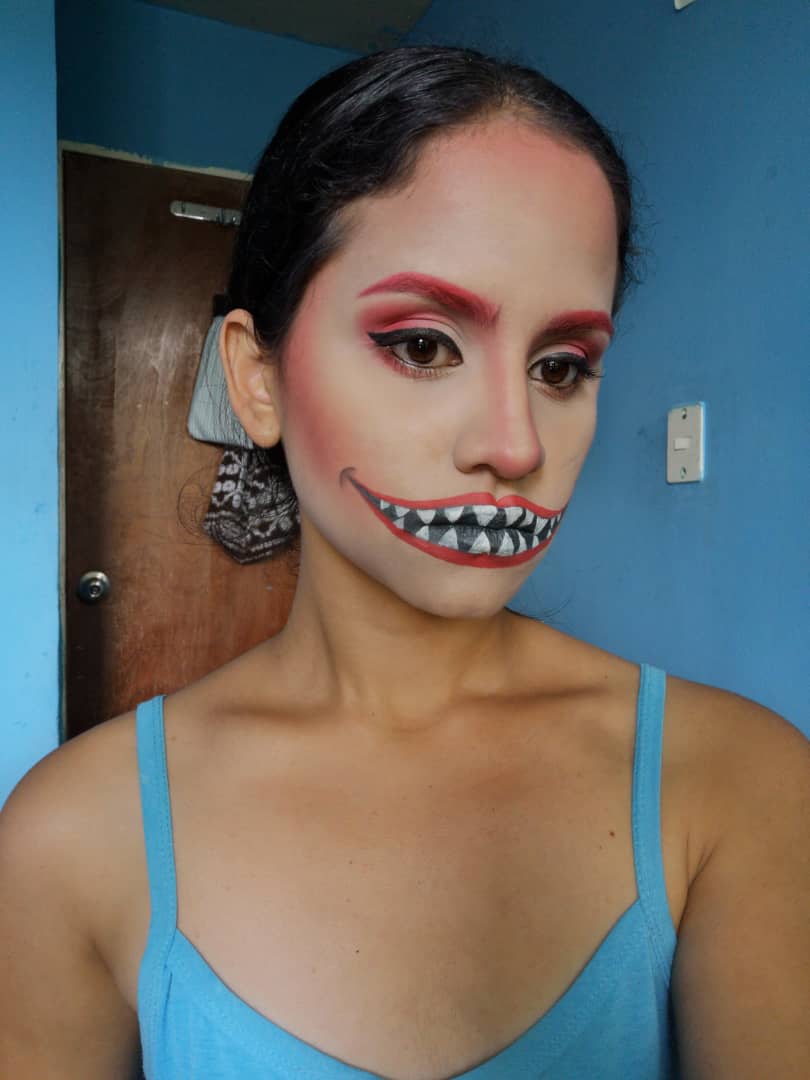
Así termina nuestro maquillaje aterrador, perfecto para una noche de terror con amigos y familia, de seguro nadie va a olvidar tu sonrisa después de esa noche, los quiero, les mando un beso enorme y nos vemos en el siguiente post.
So ends our scary makeup, perfect for a night of terror with friends and family, for sure no one will forget your smile after that night, I love you, I send you a big kiss and see you in the next post.
.jpeg)
Todas las fotos son de mi propiedad
All photos are my property
Gracias por visitar mi blog
Thank you for visiting my blog
Hi Yulsy! This is a great tutorial and your Instagram is so much fun! The teeth look so real and I love how red your eyebrows are and how good that looks with the eye shadow!
Me encanta que te guste... Gracias por visitar mi instagram y por tu comentario!!!
Por supuesto que me ha gustado, ¡tu arte es increíble!
Thank you for sharing this post on HIVE!
Your content got selected by our fellow curator semarekha & you received a little thank you upvote from our non-profit curation initiative. Your post will be featured in one of our recurring curation compilations which is aiming to offer you a stage to widen your audience within the DIY scene of Hive.
Next time make sure to post / cross-post your creation within the DIYHub community on HIVE and you will receive a higher upvote!
Stay creative & hive on!