
Buenas Tardes a toda la comunidad de Geek Zone y a quien esté leyendo este post, hoy voy a darle continuidad a como crear un juego usando Game Maker 8.1 y si aún no tienes idea de cómo iniciar o si sabes un poco, pero crees que solo existe un método…te recomiendo que veas la primera parte (realmente hay más de una forma de lograr algo con este programa)
Creando videojuegos con Game maker 8.1 #1 [La base]
Esta vez vamos a hacer que el entorno sea amigable a la vista añadiendo un fondo, el entorno de las plataformas, y configurando la cámara

Good afternoon to the entire Geek Zone community and to whoever is reading this post, today I am going to give continuity to how to create a game using Game Maker 8.1 and if you still have no idea how to start or if you know a little, but you think that it only exists a method… I recommend you to see the first part (there is really more than one way to achieve something with this program)
Creating video games with Game maker 8.1 #1 [The base]
This time we are going to make the environment visually friendly by adding a background, the platform environment, and setting up the camera.
Antes de iniciar debo confesar algo, después de haber publicado el post anterior y mientras iniciaba esta segunda parte, noté un error visual al momento de que el personaje se moviera así que…antes de iniciar con lo que corresponde en este post, les mostraré como arreglar ese pequeño error
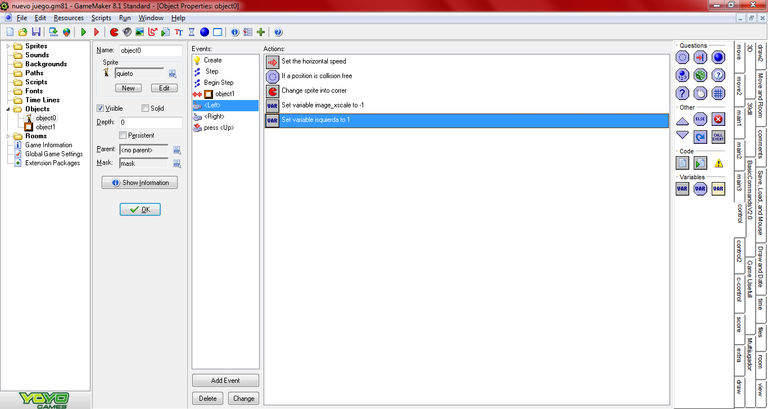
Para iniciar, crearemos 2 variables las cuales se nombré “isquierda” y “derecha” y se ubicaron en el evento de presionar izquierda/derecha respectivamente
Before starting I must confess something, after having published the previous post and while starting this second part, I noticed a visual error when the character moved so... before starting with what corresponds to this post, I will show you how fix that little bug
To start, we will create 2 variables which I named “left” and “right” and were placed in the event of pressing left/right respectively
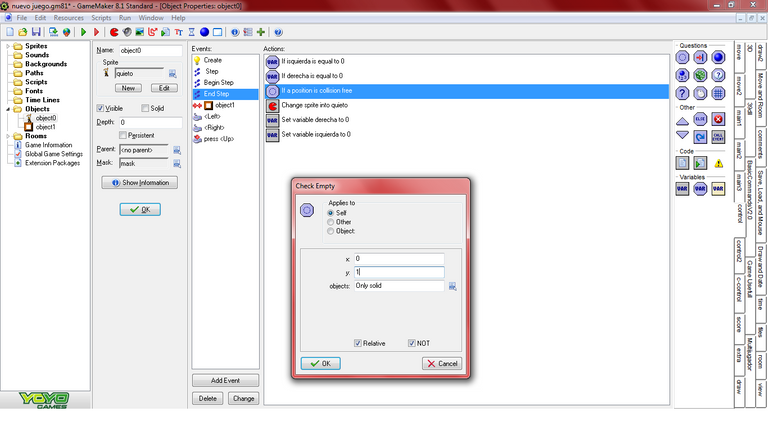
Esto de por si no hace nada, pero al añadir en End_step un par de condicionale podremos dar la orden que regrese al Sprite de quieto SOLO si no se está presionando ninguna de las 2 teclas además de estar en contacto con el suelo. Al final se añadió un comando para que estos valores se reseteen y en este caso el orden de los comandos tiene mucha importancia
This in itself does nothing, but by adding a couple of conditionals in End_step we can give the order to return the Sprite from still ONLY if neither of the 2 keys is being pressed in addition to being in contact with the ground. At the end a command was added so that these values are reset and in this case the order of the commands is very important
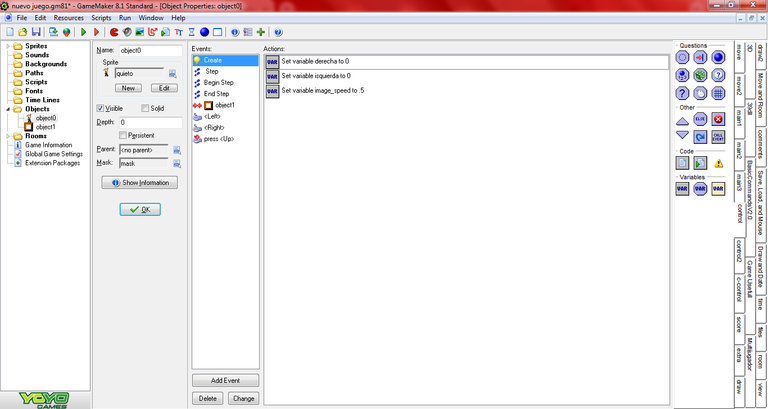
Se podría dejar así, pero generaría un error de variable no existente así que dicho reseteo de valores debe ser añadido en el evento Create.
It could be left like this, but it would generate a non-existing variable error, so that value reset must be added in the Create event.
Con esto ya tendríamos el error solucionado así que podremos pasar al verdadero propósito, el entorno. Primero que nada, hay que conseguir tiles y backgrounds y existen varias formas de conseguirlos, la primera opción es crearlos por tu propia cuenta, la segunda es usar los que el mismo game maker te otorga y una tercera opción es buscarlos en terceras fuentes lo cual fue mi caso con Spriters Resource y tileset del Sonic advance 3
With this we would already have the error solved so we can move on to the real purpose, the environment. First of all, you have to get tiles and backgrounds and there are several ways to get them, the first option is to create them on your own, the second is to use the ones that the same game maker gives you and a third option is to search for them in third sources which it was my case with Spriters Resource and Sonic advance 3 tileset
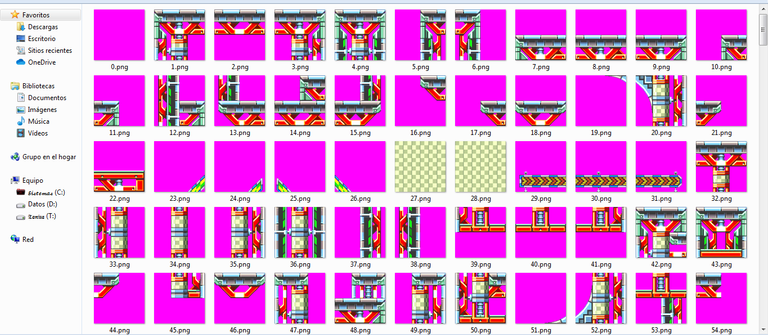
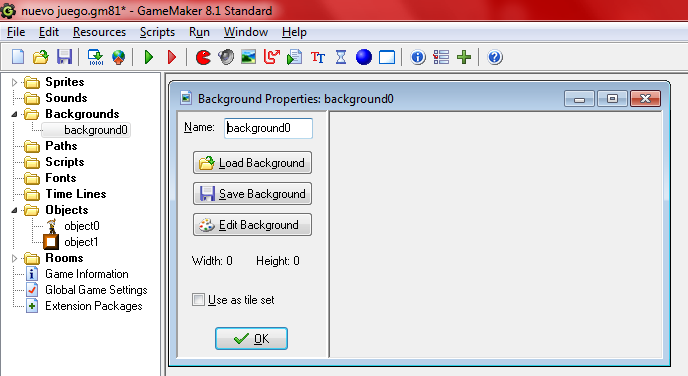
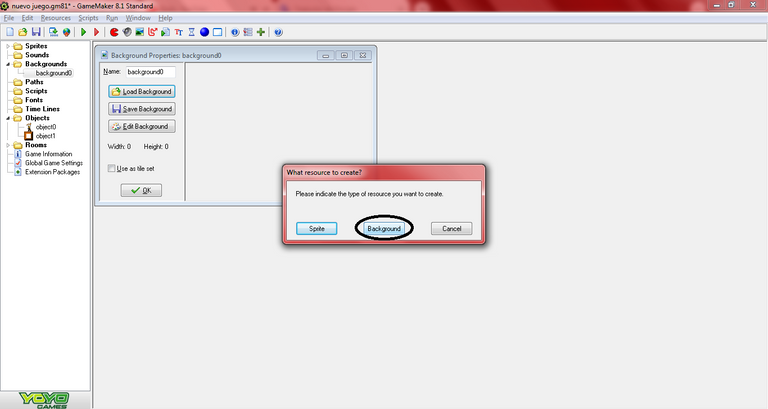
Para empezar a instalarlos hay un método rápido y uno lento, el lento es ir creando plantillas en blanco e ir pegando, el método rápido es simplemente arrastrar los tileset desde la carpeta donde los tenga y ponerlos en el gamemaker (importante marcar como background
To start installing them there is a fast method and a slow one, the slow method is to create blank templates and paste them, the fast method is simply to drag the tileset from the folder where you have them and put them in the gamemaker (important to mark as background
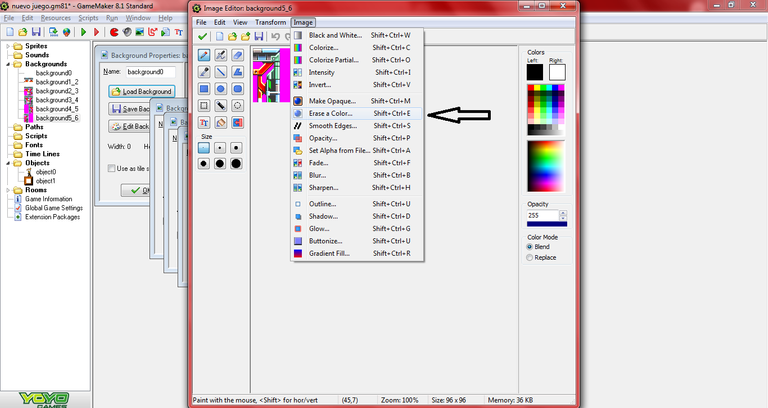
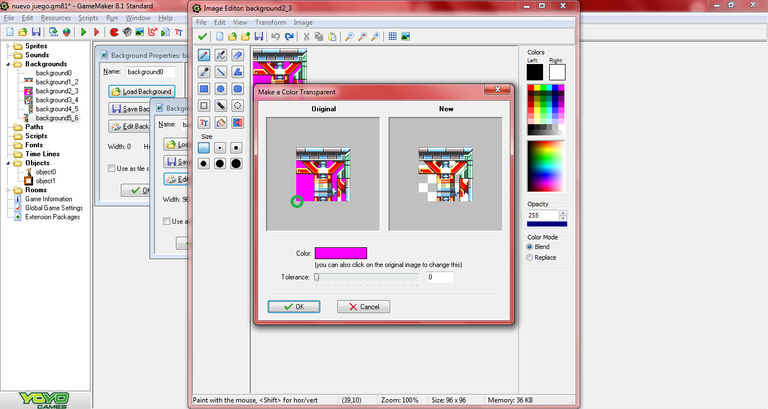
Algo muy importante es asegurarse que el fondo esté quitado y game maker tiene una opción para eso, además, si el color a eliminar está en la esquina inferior izquierda…no tendrás que seleccionarlo al momento de usar el “Erase a Color”
Something very important is to make sure that the background is removed and game maker has an option for that, also, if the color to be removed is in the lower left corner… you will not have to select it when using the “Erase a Color”
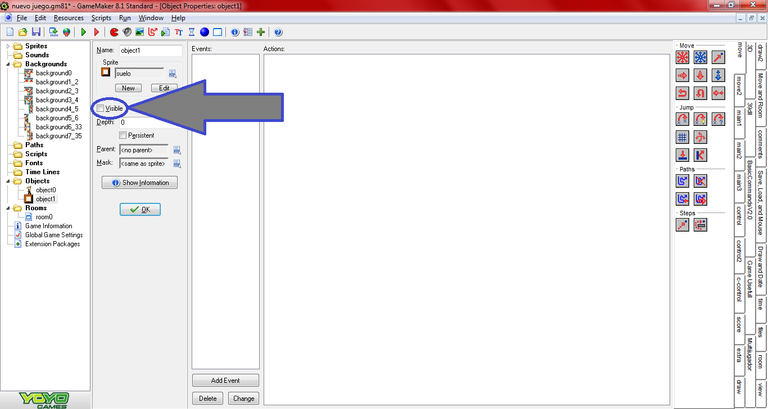
Con los tiles ya instalados, solo quedaría añadirlos a la room. En esta ocasión no usaremos object,sinó la opción tiles la cual es muy similar a object, solo no se asusten si sale por debajo de los bloques de paredes, con quitarles el visible en su opción de object se resolverá el problema al momento de correr el juego
With the tiles already installed, all that remains is to add them to the room. This time we will not use object, but the tiles option which is very similar to object, just don't be scared if it comes out below the wall blocks, removing the visible in your object option will solve the problem when running the game
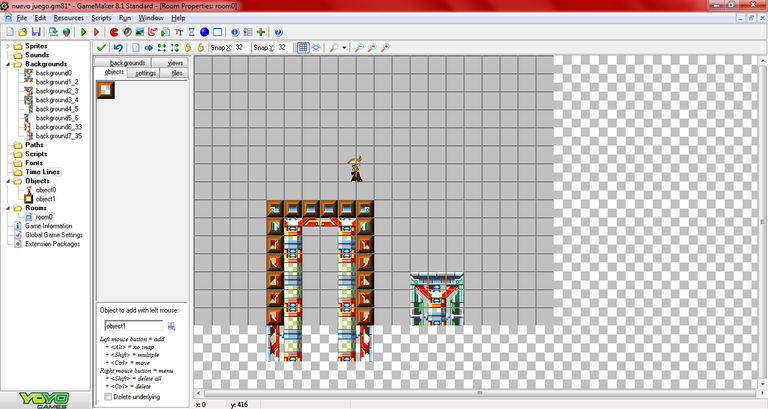
Ahora, al momento de hacerlo correr se notará que, en lugar de los clásicos bloques, tendremos unas plataformas más decentes, pero no se engañen, solo donde pusieron los bloques (aunque ahora no se vean) será superficie sólida
Now, when making it run, you will notice that, instead of the classic blocks, we will have more decent platforms, but don't be fooled, only where you put the blocks (although you can't see them now) will be a solid surface
Certainly this chapter is getting long and I still have some important points to cover so I am going to divide this post into two parts and I will publish the continuation as soon as possible
Thank you very much for reading this post, and have a nice day
![]()
El separador se hizo con Power Point
El Traductor de Google fue utilizado para el dialogo en inglés
Screen to Gif fué la herramienta que hizo posible los gifs usados
Se les agradece a Dimps y Techokami por hacer posible los tileset y background utilizados en el futuro juego
uy que genial te felicito por este trabajo, de verdad que me gustaría en algún momento crear mi propio video juego seria algo mágico, pero pues tengo que tener tiempo y dedicación pero me encantaría.
Que bueno que te haya gustado del post y espero que en algún momento tengas esa oportunidad de crear tu propio juego y te quede bien
muy interesante, no habia visto una app tan amigable para crear juegos. Me parece genial, gracias por compartirla.
Saludos y exitos 😃
bueno saber que le gustó el programa y espero que en un futuro pueda usarlo y crear sus propios juegos, muchas gracias por comentar