Versión En Español.
Saludos comunidad de Home Solutions, soy un participante nuevo, así que me presento, mi nombre es Miguel Cambar, diría que soy una persona multifacética, pues desempeño muchas labores, entre ellas está relacionada a la publicación del día de hoy.
Vivo en un sitio llamado Cabimas, perteneciente al estado Zulia-Venezuela, esta zona se caracteriza por ser llana y pantanosa, razón muchas de las zonas residenciales antes eran pantanos e incluso actualmente todavía cumplen su función de humedal, las casas constantemente sufren grietas en el suelo o techo, esto es lo que ha sucedido en mi casa, a pesar de la gravedad de la situación se les puede dar tratados suficientes para arreglar los daños.
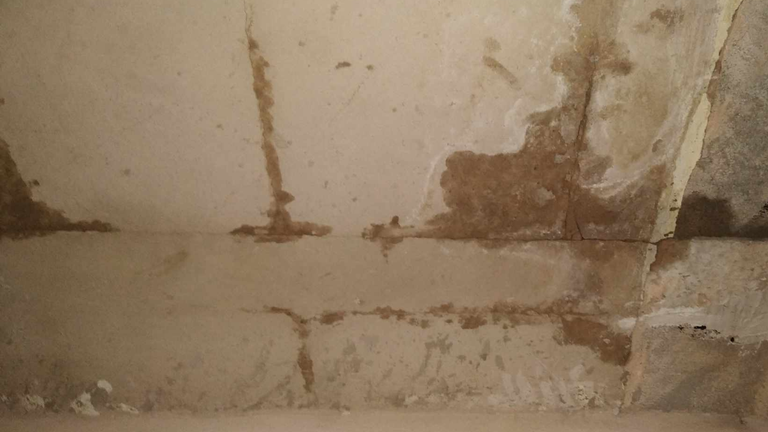
En la siguiente imagen se puede apreciar como el techo, permitiendo así la presencia de goteras.
Para llevar a cabo este trabajo se tuvo que hacer en dos etapas, la primera es tratar de ubicar la grieta en el techo y la segunda fase es curar la misma.
Etapa 1: Descubrir la grieta.
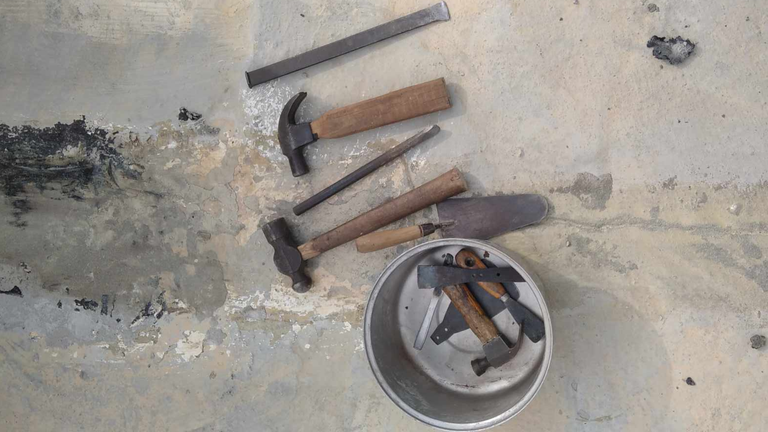
En este caso luego de mediciones según las extensiones de la pared, pude tomar un cálculo el lugar aproximado donde pudiera estar la grieta en el techo, una vez en el lugar trasladé las herramientas que consideré indispensables para ponerme manos a la obra.
No hubo tanta búsqueda ya que la grieta se podía ver a simple vista, sin embargo me di cuenta que ya se le hizo trabajos de mantenimiento anteriormente, observando esto decidí ahondar ya que todo indicaba que sobre la placa de concreto estaba una capa de cemento que buscaba eliminar desniveles, en efecto, decidí romper la plantilla.
Al llegar a la placa original me conseguí con la grieta, en la imagen se puede ver sobre la línea dibujada en rojo.

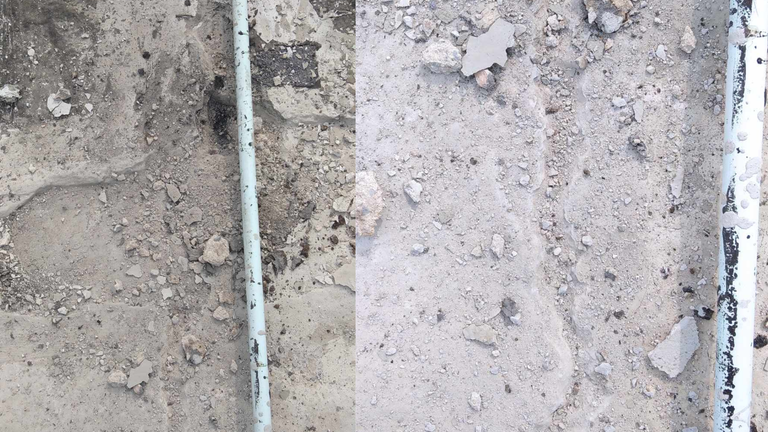
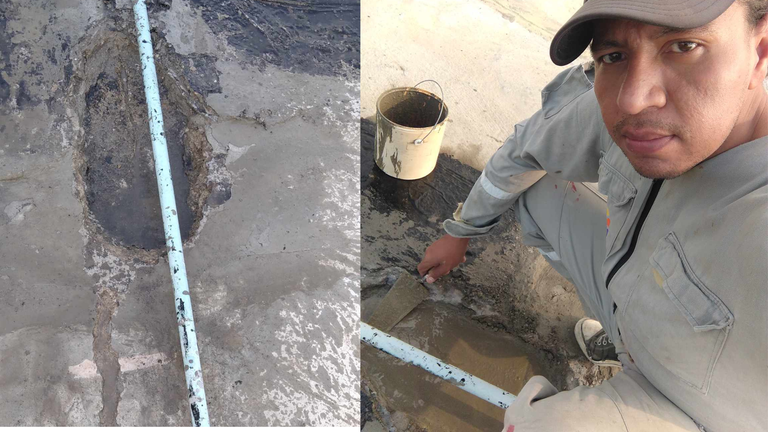
Una vez ubicada la grieta decidí expandir rompiendo alrededor de la misma para cerciorarme que no hubiese otras grietas presentes, realizado esto y solo consiguiente un solo problema decidía perforar un poco la grieta, en la imagen la persona que me ayuda es mi padre.

Etapa 2: Curado.
Para esta fase hice uso de los siguientes materiales, arena gris para concreto cerca de 10 kilos combinado con cerca de 5 kilos de cemento, agua, cuchara de construcción para batir, llanas.
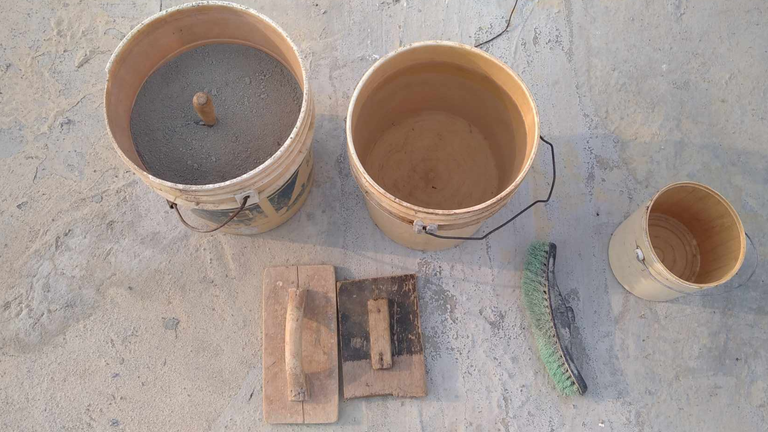
En la imagen pueden ver que ya está el concreto con la arena listo para la mezcla, coloqué agua y una parte de la mezcla la preparé muy ligera, de tal manera que el concreto penetre sobre la grieta lo más que se puede, después se preparó el resto y procedí a vaciar.
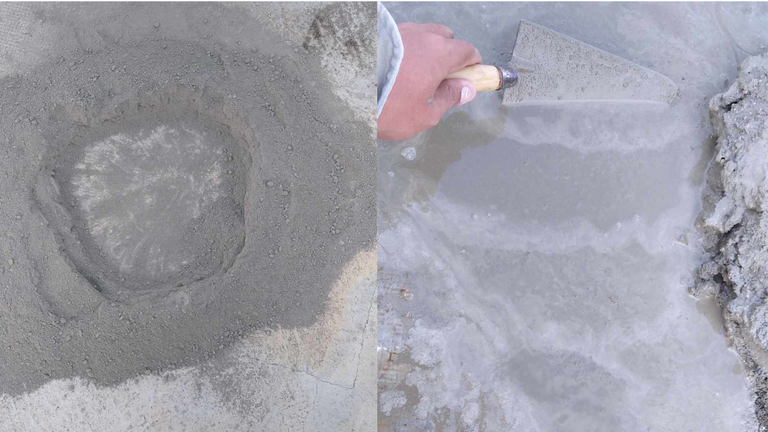
Para el vaciado primero remojé de agua el sitio, para limpiar el polvo o tierra que pidiera impedir al materia adherirse, luego de ello vacié el concreto aguado seguido de otra capa más sólida, con la ayuda de la cuchara de construcción me puse a nivelar.
El resultado fue el siguiente:

Si llegaste a este punto, quisiera agradecerte por tomar un tiempo y leer sobre este post, espero que esto te haya gustado y te sea de información de utilidad, espero seguir coincidiendo con ustedes, hasta una próxima ocasión
English Version.
Greetings Home Solutions community, I am a new participant, so I introduce myself, my name is Miguel Cambar, I would say that I am a multifaceted person, because I perform many tasks, among them is related to today's publication.
I live in a place called Cabimas, belonging to the state of Zulia-Venezuela, this area is characterized by being flat and swampy, reason many of the residential areas were swamps before and even currently still fulfill its function of wetland, the houses constantly suffer cracks in the floor or roof, this is what has happened in my house, despite the seriousness of the situation can be given sufficient treaties to fix the damage.
In the following image you can see how the roof, thus allowing the presence of leaks.
To carry out this work had to be done in two stages, the first is to try to locate the crack in the ceiling and the second phase is to cure it.
Stage 1: Discovering the crack.
In this case after measurements according to the extensions of the wall, I could take an estimate of the approximate place where the crack could be in the ceiling, once in the place I moved the tools that I considered indispensable to get down to work.
There was not so much search since the crack could be seen with the naked eye, however I realized that maintenance work had already been done previously, observing this I decided to delve deeper since everything indicated that on the concrete plate was a layer of cement that sought to eliminate unevenness, in effect, I decided to break the template.
When I got to the original plate I found the crack, in the image you can see the line drawn in red.
Once the crack was located I decided to expand by breaking around it to make sure that there were no other cracks present, once this was done and only consequently only one problem I decided to drill a little bit the crack, in the picture the person helping me is my father.
Stage 2: Curing.
For this phase I made use of the following materials, gray sand for concrete about 10 kilos combined with about 5 kilos of cement, water, construction spoon to beat, trowels.
In the picture you can see that the concrete with the sand is ready for mixing, I placed water and prepared a part of the mixture very light, so that the concrete penetrates over the crack as much as possible, then I prepared the rest and proceeded to pour.
For the pouring I first soaked the site with water, to clean the dust or dirt that asked to prevent the material from adhering, after that I poured the watered concrete followed by another more solid layer, with the help of the construction spoon I started to level.
The result was as follows:
If you got to this point, I would like to thank you for taking some time and reading about this post, I hope you liked this and found it useful information, I hope to continue to agree with you, until next time.
Posted Using InLeo Alpha
Posted Using InLeo Alpha
Congratulations @miguelc88! You have completed the following achievement on the Hive blockchain And have been rewarded with New badge(s)
Your next target is to reach 5000 upvotes.
You can view your badges on your board and compare yourself to others in the Ranking
If you no longer want to receive notifications, reply to this comment with the word
STOPCheck out our last posts:
Excelente trabajo de reparación, en las casas es muy importante mantener el buen estado del techo pues esas grietas y goteras pueden con el tiempo causar más problemas en diferentes áreas de casa. Te felicito por hacerte cargo de este aspecto y solucionarlo. Saludos ☺️
Saludos Irene, pues si, las casas necesitan mantenimiento preventivo, lo que normalmente uno no hace más allá de pintar, lavar, atender la casa significa extender su vida util.
Excelente trabajo, reparar las filtraciones es vital para proteger el hogar. Gracias por compartir. Un post muy útil para la comunidad.
Hola @doriangel, lo mismo pensé y por eso quise compartir este post en este sitio, muchas gracias por tu apreciación.
Cambar Fila en la inspección , quedo nítido
Ese es el maestro de obra, yo solo soy el chalan.
Gran trabajo el que hiciste aquí Miguel! En casa está sucediendo algo parecido, peri debido a la presencia de raíces de grandes árboles creciendo debajo
Hola @yetsimar en mi casa sucedió algo parecido, tratamos de varias formas impedir el acceso a la casa, lamentablemente tuvimos que retirar el árbol ya que iba a inutilizar un tanque de agua subterráneo.
Hola amigo hiciste un excelente trabajo de reparación en tu hogar, maravilloso porque es muy importante arreglar los techos y así evitar goteras... Bendiciones 🙏