Last night I managed to visit my favourite cave in the Peak District I now know as Windy Knoll. (For years it seems I've been naming it wrong). Normally I turn up to a location mostly with no idea what I'm going to shoot; I get a buzz out of making it up as I go along. But last night I had a plan!
I've been experimenting with masking off parts of an image using lens filter adapters. The original purpose for the adapters is to enable conversion to fit larger filters on smaller thread lenses. The lens I was using last night, a Sony FE 20mm f1.8 has a 67mm filter thread. Piling several filter adapters on the lens, I can get down to 27mm which leaves a small hole in the middle of the frame in which to add lightpainting.
The idea with using filter adapters is to fill the central part with light then remove the filter adapters and add more lightpainting.
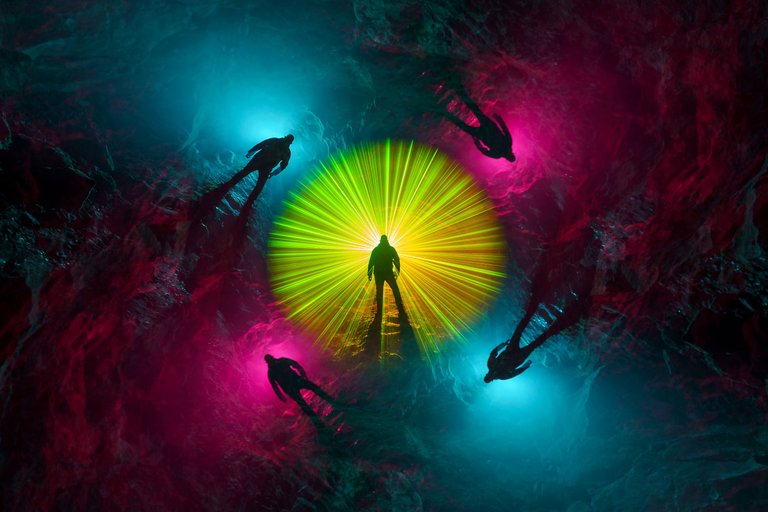
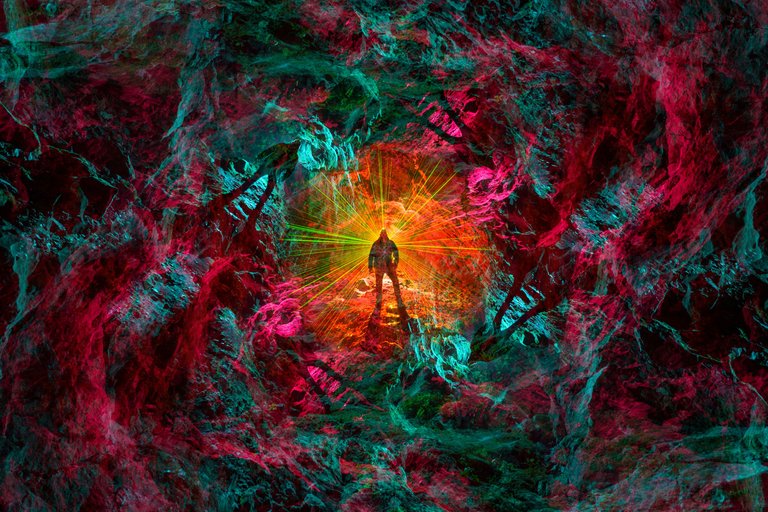
Rotating in the Windy Knoll Cave
This shot was made by masking off the central part of the frame as explained above, then removing the adapters in complete darkness. I then pan the camera across the frame slightly and rotate the camera to a 45 degree angle. Panning the camera is a little bit of guesswork but I try to use a reference point in the place I'm shooting.
Then it's simply a case of rotating the camer 4 ways using alternate pink and blue gels. The gels in this case weren't really gels; I was using the bottle ends from Morrison's Supermarket fabric conditioner bottles. It seems that Morrisons don't realise how fluorescent their fabric conditioner is!
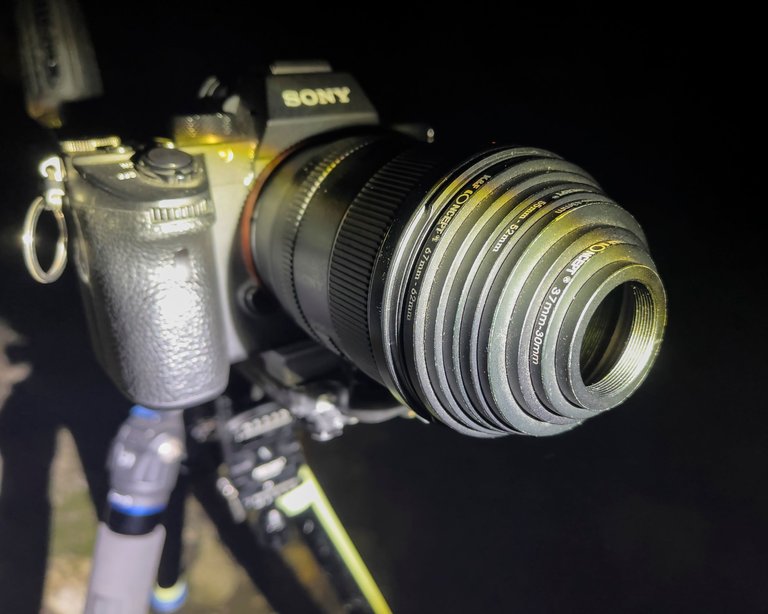
The Filter Adapters
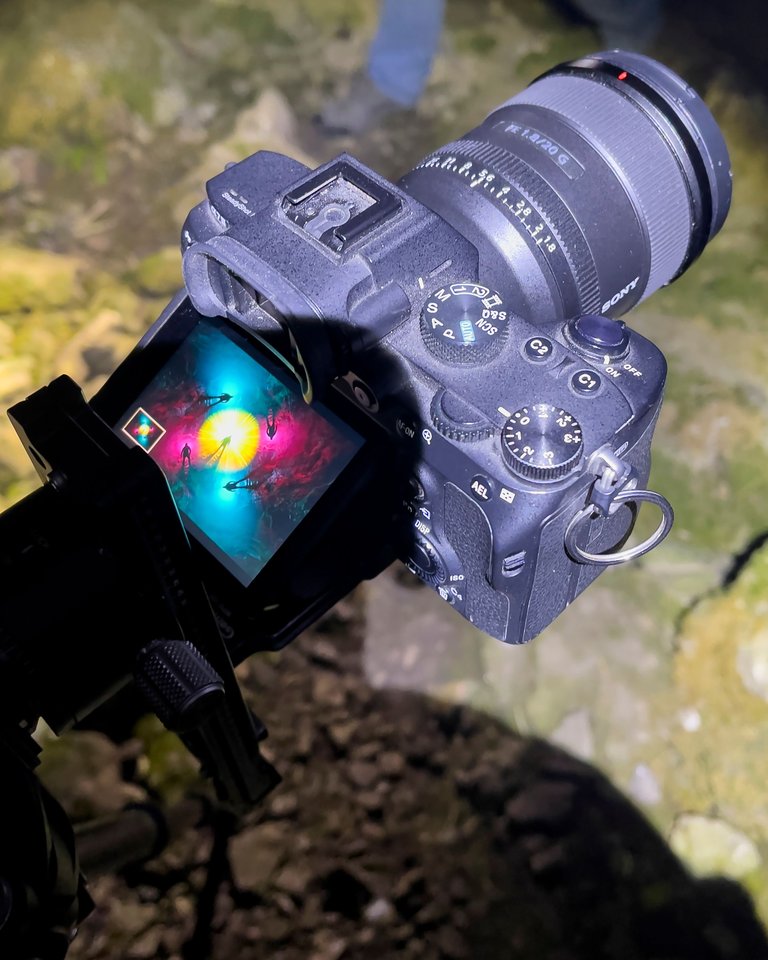
I almost always forget to shoot behind the scenes images but last night I made an effort. This is the stack of filter adapters creating the smaller hole in the frame:
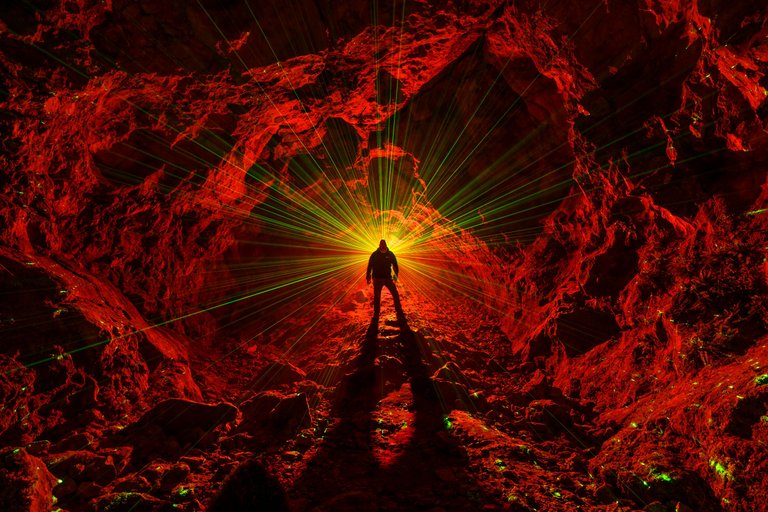
Test Shot 1
To make the featured image, first I have to light the central part of the frame. I used smoke pellets to make the lasers appear in the frame. For a test shot, the textures in the cave looked epic!
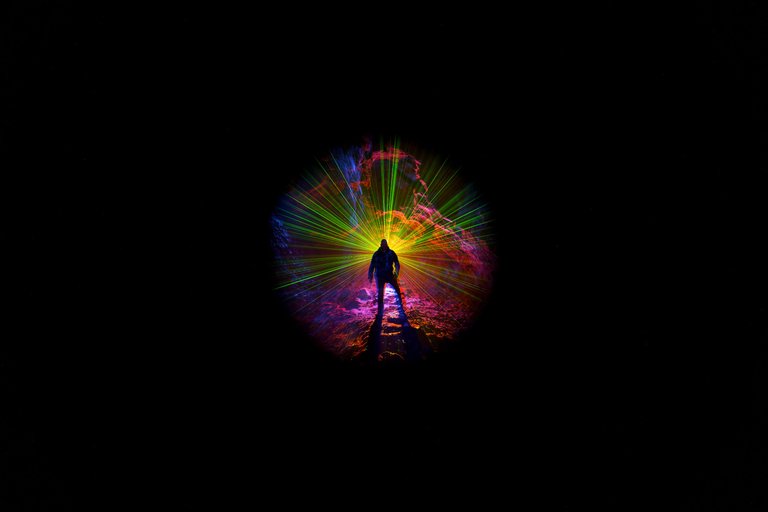
Test Shot 2
I then made a test shot using the filter thread adapter.
The blanked off parts are effectively unexposed parts of the digital image sensor and these are the parts I can add more light to at a later stage of the photograph. The trick is to not add more lighting which inadvertently overwrites what you've already lit. To achieve this you may have to change the lighting direction to make certain parts of the frame darker or maybe reposition the camera so as not to overwrite already exposed parts.
Paranoid
After all these years of lightpainting, I still feel compelled to say that my images are created in one photographic exposure. Several of my lightpainting colleagues have experienced the same disbelief. We really do create lightpainting images in one exposure as this image testifies!
Side note: I really should clean my camera!
Epic but Colourful Fail
Sometimes it's good to show the failures and like everything in life nothing is perfect. Here I didn't pan the across the frame enough and there wasn't enough smoke in the air to create background seperation behind the subject. The colour combination will be tried again!
About me:
I usually specialise in shooting lightpainting images but occasionally dabble in urbex and artistic model photography. I'm always on the lookout for someone to collaborate with; please don't hesitate to get in touch if you'd like to create art.
Social Media
https://www.facebook.com/fastchrisuk
https://www.flickr.com/photos/fastchris/

Lightpainting is a photographic technique in which exposures are made by moving a hand-held light source while taking a long exposure photograph, either to illuminate a subject or to shine a point of light directly at the camera, or by moving the camera itself during exposure. Nothing is added or removed in post processing.
If you would like to see more lightpainting please give the Lightpainters United Community a follow and you will be introduced into the illuminating world of light painting!
If you want to see more examples of lightpainting, feel free to check out these guys:
Mafu Fuma | Oddballgraphics | FadetoBlack | DAWN | Mart Barras | Stefan Stepke | Nikolay Trebukhin | Lee Todd | Stabeu Light | Maxime Pateau | Stephen Sampson | lightandlense | Neil Rushby | L.A.C.E.
Join us at Discord

Wow Chris, that's very impressive what you've conjured up there. 🪄 Very nice results with great structures and color mixtures. 😎
Thanks mate, I'm trying to come up with different colour combinations lately, not always getting it right. That last failed shot colour combination will be revisited!
I'm excited to see what comes out.
Great set of photos. I like the colours.
Yay! 🤗
Your content has been boosted with Ecency Points, by @stepko.
Use Ecency daily to boost your growth on platform!
Support Ecency
Vote for new Proposal
Delegate HP and earn more