Bienvenidos
Primero que nada reciban un gran abrazo y saludos desde venezuela HOY quiero compartir parte de mi pasatiempo y vamos a aprender a realizar uno zarcillo práctico, caballero que me lee también puede realizar uno de esto como regalo idea a una hija esposa, prima, tía, alguna dama especial así que empecemos
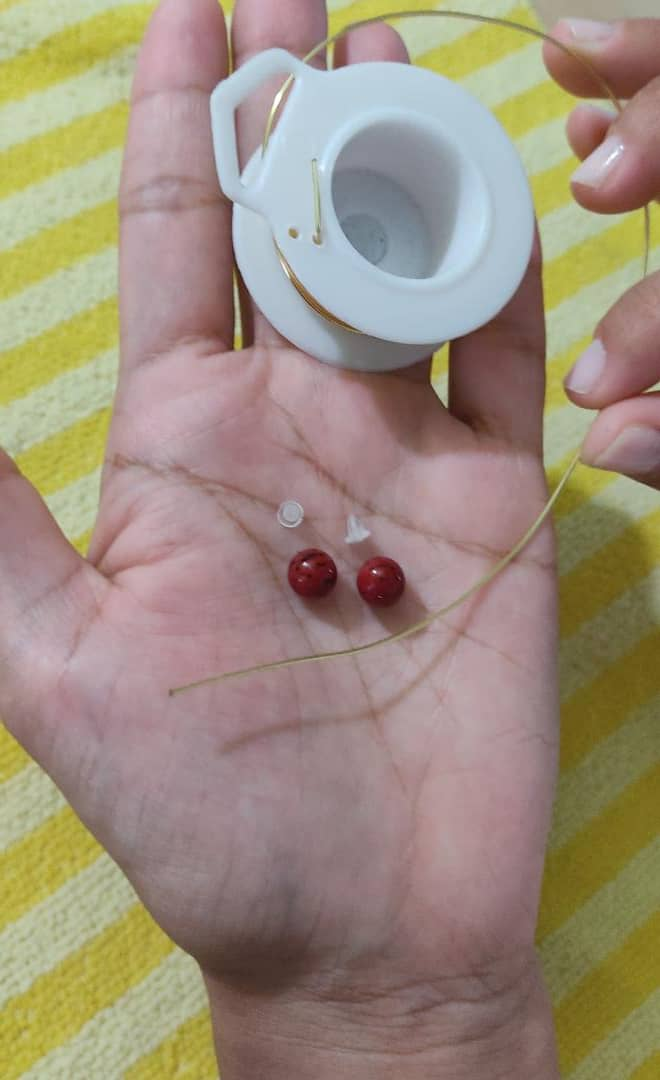
Materiales:
- Perlas de su preferencia con orificio en el centro
- Alambre N° 20 se puede conseguir en mercería
- Tapitas de gomas para zarcillos pueden ser ya utilizadas
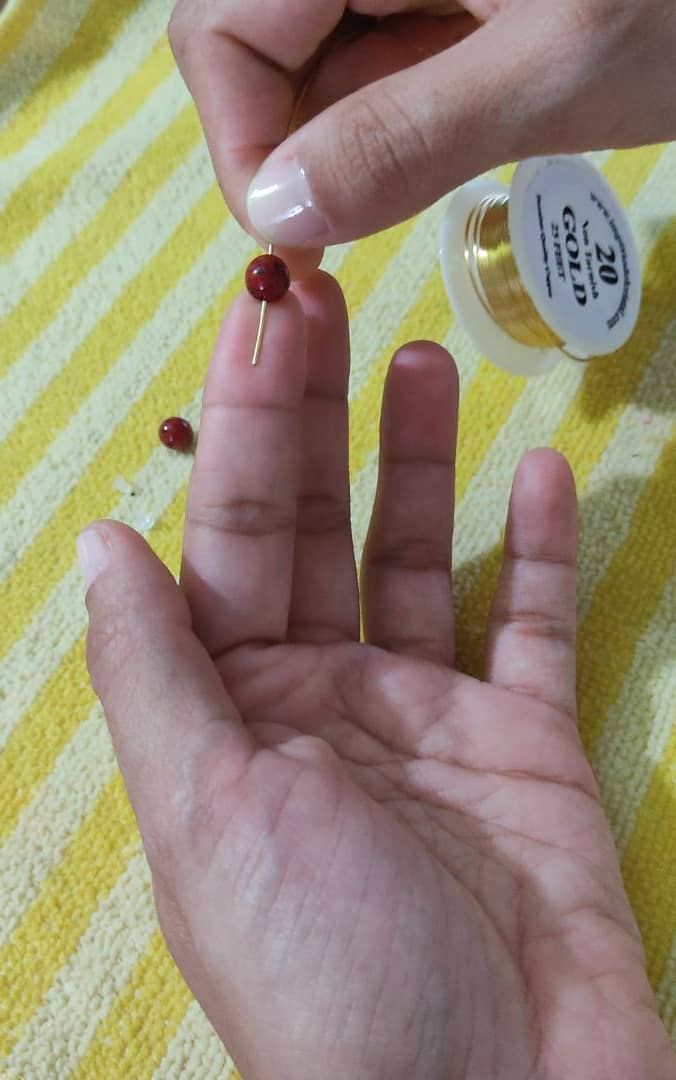
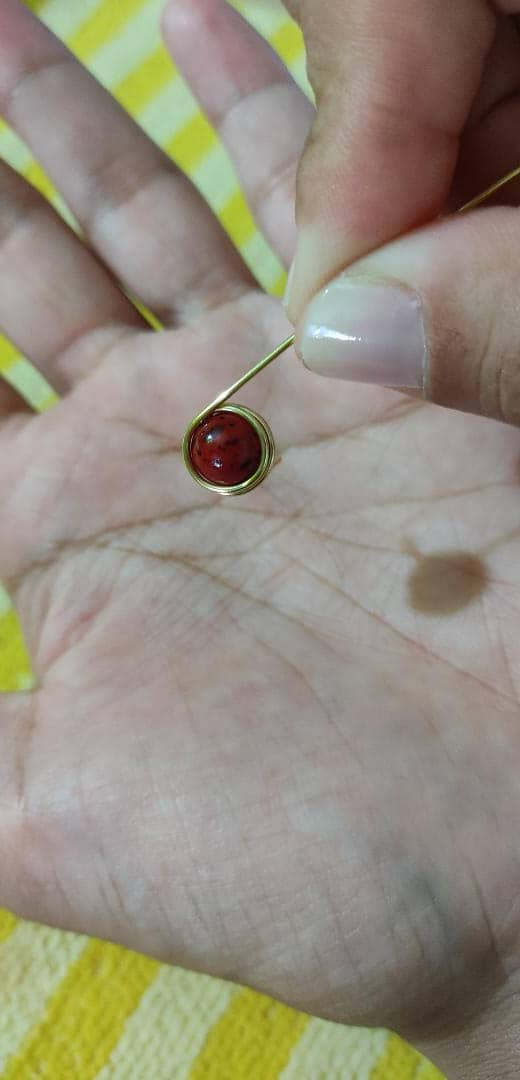
Introducimos la perlita en el alambre de esta manera:
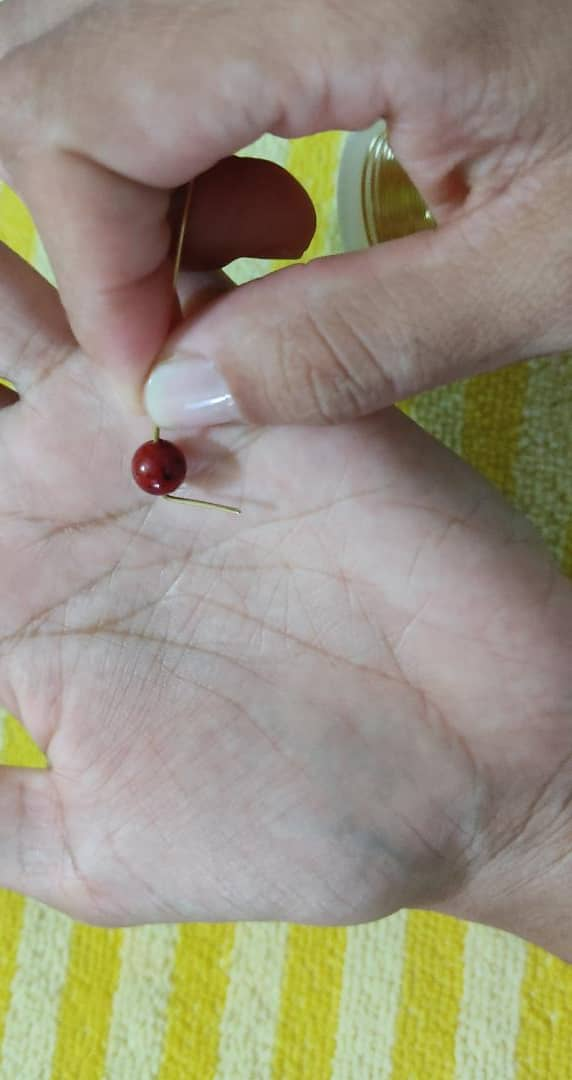
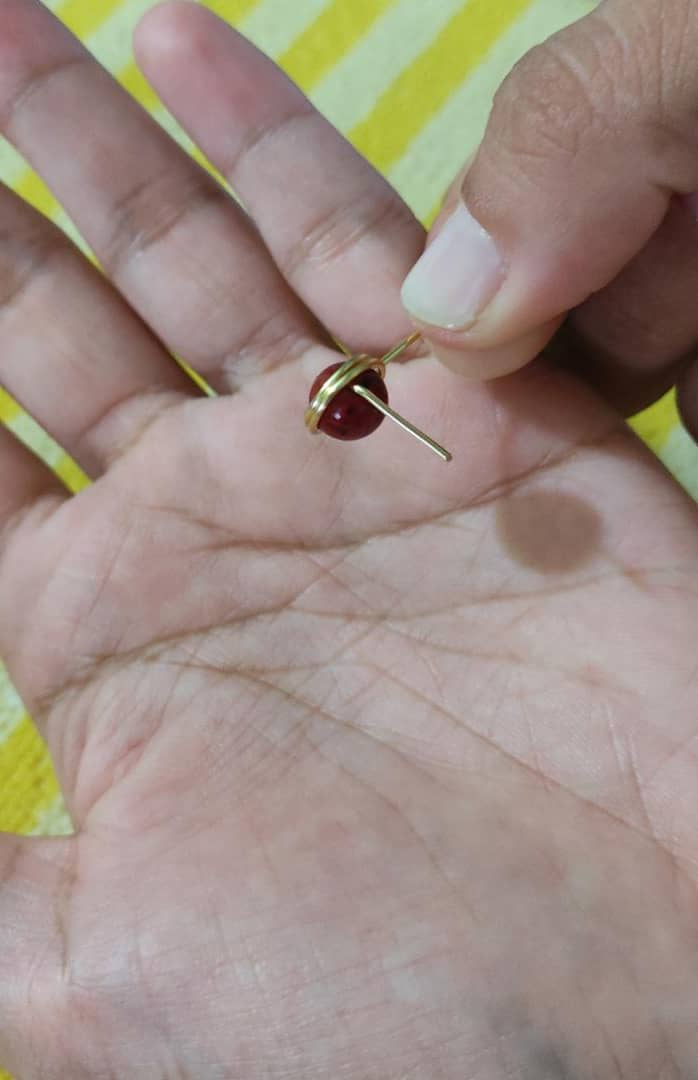
Luego doblamos de esta manera como para realizada la parte que va dentro de la oreja.
Inmediatamente comenzamos a girar el alambre por el borde de la perla dándole dos hasta llegar a la parte debajo del zarcillo
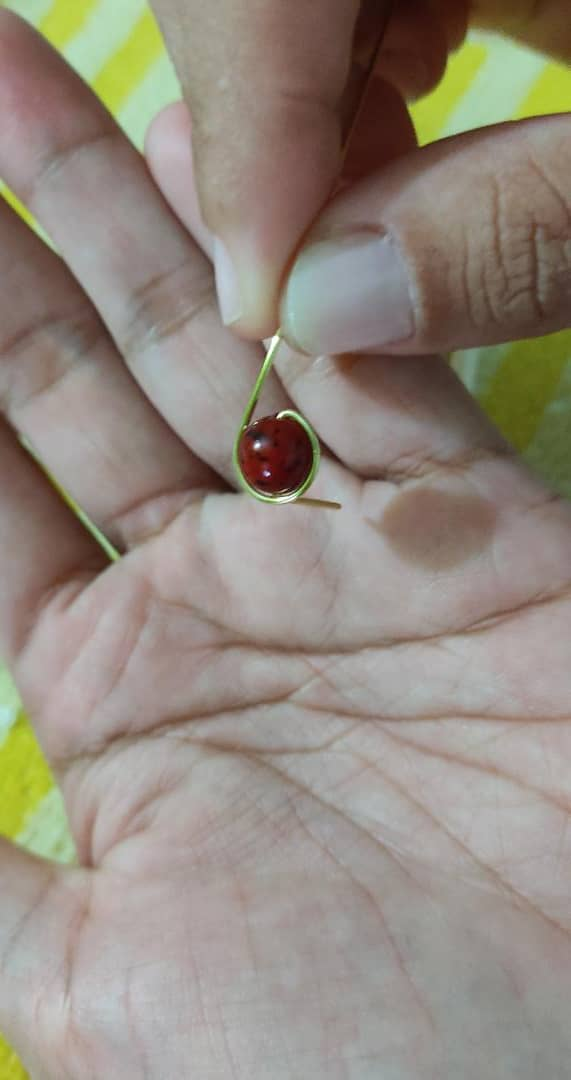
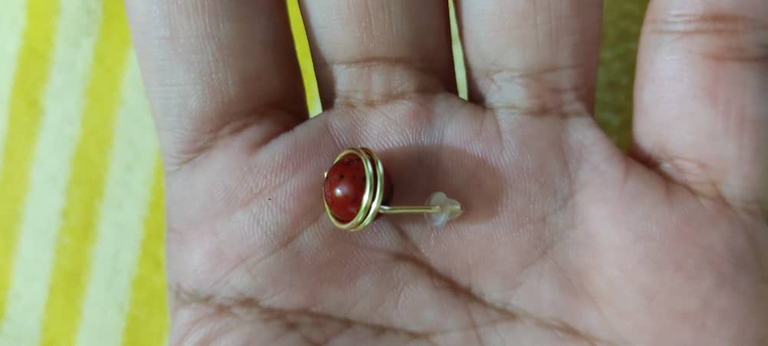
Te quedara de esta manera
En ambos lados y cortas el resto
Colocas la tapita o goma
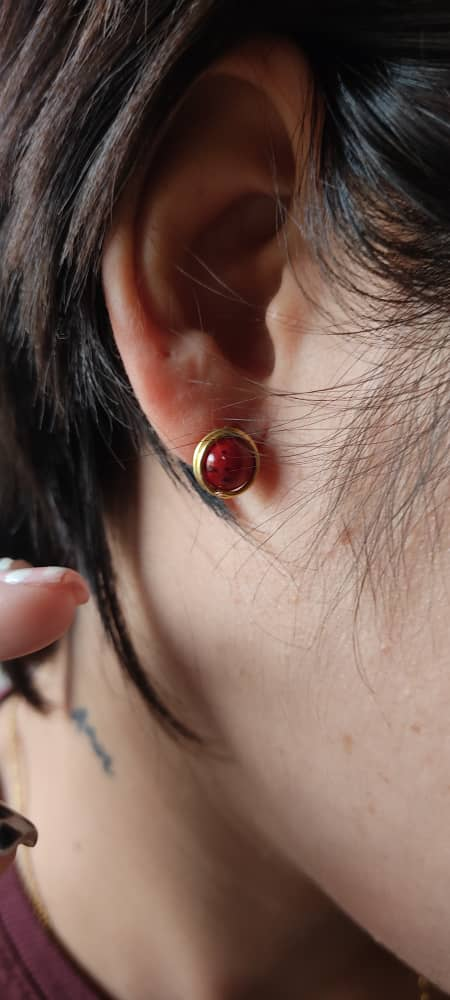
y así queda puesto.. super fácil..
Si les gusto déjenme un comentario para colocar mas post y realizar muchos accesorios super fáciles..
Cámara: Xiomi Note 9S
Fotos: De mi autoría
Traductor: https://www.deepl.com/es/translator
Welcome
First of all receive a big hug and greetings from venezuela TODAY I want to share part of my hobby and we will learn how to make a practical tendril, gentleman who reads me can also make one of this as a gift idea to a daughter, wife, cousin, aunt, some special lady so let's get started...
We will learn how to make a practical tendril, gentleman who reads me can also make one of this as a gift idea to a daughter, wife, cousin, aunt, some special lady so let's start...
Materials:
We introduce the perlite into the wire like this:
Then we bend in this way as to make the part that goes inside the ear.
Immediately we begin to twist the wire along the edge of the bead giving it two until we reach the part under the tendril.
It will look like this
On both sides and cut the rest
Place the rubber band
and that's it... super easy...
If you like me leave me a comment to put more post and make many super easy accessories...
Camera model: Xiomi Note 9S
Photos: By me
Translator: https://www.deepl.com/es/translator
Congratulations @yoreily! You have completed the following achievement on the Hive blockchain and have been rewarded with new badge(s) :
Your next payout target is 50 HP.
The unit is Hive Power equivalent because your rewards can be split into HP and HBD
You can view your badges on your board and compare yourself to others in the Ranking
If you no longer want to receive notifications, reply to this comment with the word
STOPTo support your work, I also upvoted your post!
Oh, the results look beautiful. I saw some of the type accessories like this in a shop. That's great you can make it for yourself :)
Si. Super facil de hacer.. gracias por tu apoyo saludos ..
The rewards earned on this comment will go directly to the person sharing the post on Twitter as long as they are registered with @poshtoken. Sign up at https://hiveposh.com.