
Lightroom presets are all around us, you might love them as a 1 click solution to your batch editing needs or you might think that they are useless and all the photos where one was used look the same. Still, the truth is they are here to stay and maybe we should start thinking of how to integrate them a professional our workflows as more than crutches for the following Instagram post.
Why are so many presets just bad?
Fundamentally a preset is just a way to store settings and copy them from one photo to another. A tool, just like a hammer can build a house or smash a window and I do have a feeling at least some imaginary windows were smashed after purchasing low-quality presets from other photographers online that promised a certain look and brought just a copy of their settings from their viral image. This can serve an educational purpose along with their original file and maybe a video detailing why they processed the image a certain way but as a stand-alone preset it holds little to no value because you are not going to shoot the same image in the same light with the same camera. Selling presets is an easy way to milk some money from beginners that don’t know any better but the worst part about this is the number of bad habits a newbie can develop while working with such presets.
Integrating presets in the workflow
Thinking of presets as one-click solutions is lazy and bad for the final result. After putting more thought into it, I started rethinking my approach, and after learning about the color grading process that colorists from the movie industry use I reorganized my workflow and completely changed my vision of presets. First, they correct the shot, composite things, and then the color grade is one final pass. So why don’t we do the same and use presets more like output LUTs?
My first step was reordering the panels in the Develop module. It makes a lot more sense to first correct what I shot and then start applying a color grade. Lens corrections, crops, and transforms come first and the settings in the basic panel will only be used to create a neutral starting point with low contrast and good white balance that will allow me to create a great color grade afterward.
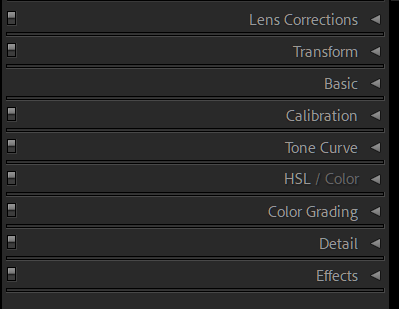
I don’t think any of these settings should be part of a preset. The settings that will take my image to a good neutral starting point will not be the same for your image so why copy them? We might be both raising the shadows to get more details but there is no one size fits all answer here and saving stuff like lens correction is outright stupid unless you only have 1 camera + lens combo that you use on absolutely all of your shots.
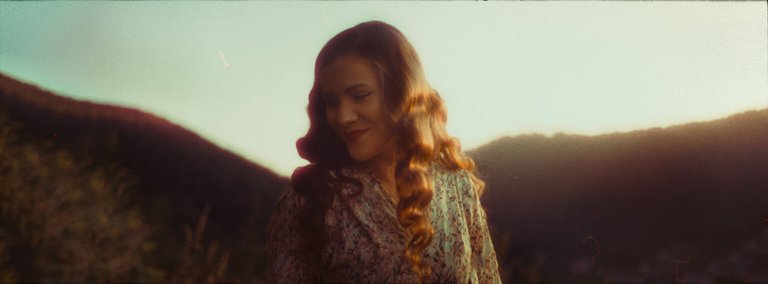
Now the color grading fun beings. Everything I do from now on can be saved and will make sense as a preset. I’ll use the curves panel to define my black point and my white point and define the amount of contrast I want to reintroduce into the image. The HSL will be my main tool for tonal adjustments, and even reduce the number of shades that are visible in my final shot. And in the end, I’ll keep the color grading wheels as a final, look-defining, setting.
By creating presets this way you will generate a library of looks that are more broadly applicable to your work and even help you achieve a more consistent look through a photoshoot while giving you more latitude to adjust the starting point and get more details out of your raw files.
Now regarding local adjustments, you would be tempted to say they don’t have a place in any preset but here we have a giant asterisk. With the introduction of the AI masks like select subject/sky in the more recent versions of Lightroom, it makes some sense to start including them in presets but we do have to keep in mind that every once in a while the selection will fail. If you are both the creator and the user of the preset you clearly know what’s happening, but for those of you planning to sell/distribute them online, I would advise this kind of targeted tweaks to be saved as a separate file along the general LUT-like preset.
The reposted from my photography blog https://vmoldo.com/blog/
Congratulations @vmoldo! You have completed the following achievement on the Hive blockchain and have been rewarded with new badge(s):
Your next payout target is 1000 HP.
The unit is Hive Power equivalent because post and comment rewards can be split into HP and HBD
You can view your badges on your board and compare yourself to others in the Ranking
If you no longer want to receive notifications, reply to this comment with the word
STOPSupport the HiveBuzz project. Vote for our proposal!