By Canadian Renegade
I had to take an unplanned hiatus this week because I have been spending so much time getting our vegetable garden in the ground and starting my nursery operation. This year, my main goal for the nursery is to get more familiar with the plants and techniques that will work for my site and within the level of time and labour I can manage with all of my other obligations.
What is an Air Pruning Bed?
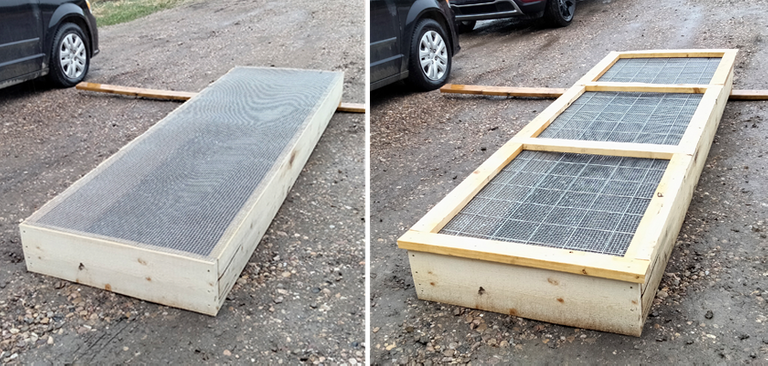
One of the projects I have been working on is called an Air Pruning Bed. It is basically a large wooden bed that is raised off the ground with one big difference over conventional beds: layers of progressively smaller mesh are used to support the soil but allow it to be open to the air. When the tap root of the tree or shrub growing in this bed reaches the bottom of the bed they dry out and self prune. This sends a signal to the the plant to send out new lateral roots which results is a bushier, more dense root structure.
Tree or bush seeds planted in this type of bed can be packed in densely. One seed every 3-4" in both directions is totally fine. This means that the bed will hold and grow out hundreds of seedlings to 1-year plants.
Other than healthier roots, the big benefit to growing in an air prune bed occurs in the fall. Once you get a small area of soil removed from the bed you can then start removing the trees one at a time from the side which cuts down on the labor of digging. Additionally, removing the trees this way reduces the level of damage to the roots if it was to be dug out from the ground.
Some versions of air prune beds even make provisions to remove the sides of the beds to make the tree removal even easier. In this version, I didn't bother designing in removable sides. Getting the project finished while using the minimum purchased materials I could was most important to me.
Materials:
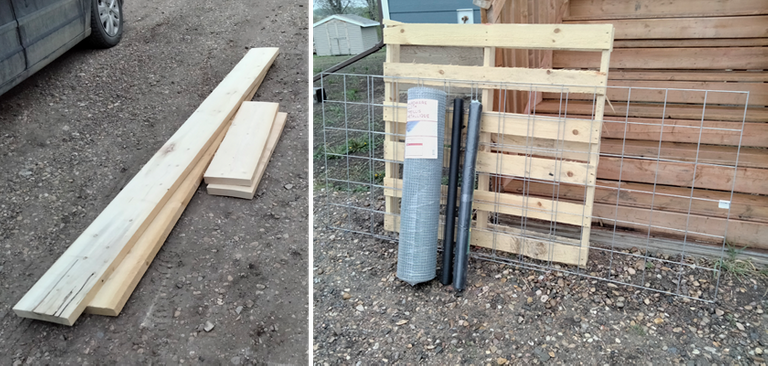
- 2'x10'x16' Rough Cut Lumber
- 3'x10' Fiberglass Bug Screen (shade cloth is probably better)
- 3'x10' Hardware Cloth
- Two 3.5'x7' Welded Wire Mesh
- Eight 2"x4"x8' (Salvaged)
- 3" and 4" Deck Screws
- Staples
- Eight Cinder Blocks
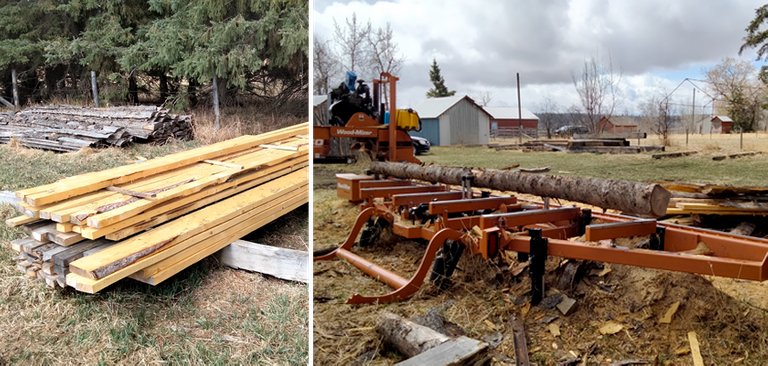
The Rough cut lumber was something I was able to source from a neighbor. The price of lumber is absolutely insane right now so buying local made so much more sense to save some money. The 2x4"s I was able to salvage from jobsite dumpsters at work. Everything else was purchased but a lot of it I either already had from previous projects or I will be using again on a different project this year.
Tools:
- Cordless Driver
- Sawzall with Metal Blade
- Hammer Tack
- Sliding Miter Saw (A cordless or corded circular saw would work fine too)
- Wire Cutters
- Utility Knife
Assembly:
The assembly is pretty straightforward for this project. Like I mentioned earlier, I could have complicated the project by making it easier to take the sides off but I don't think it is necessary and the goal this year is to just trial this method of propagation.
The first step was cut the 16' 2x10" boards down to size. This was rough cut lumber and there were some imperfections so I tried to get the best sections of the wood I could for the build. I ended up with two boards that were 116.5" and two boards that were 36". Since the 36" boards will be screwed to the ends of the longer boards I had to subtract the width of the boards from 120" so the assembled length would end up being 120"
Then I screwed the sides of the bed together with the 4" deck screws. This was actually the most difficult part of the project because the ground was uneven and the boards had a bit of the twist to them, however, I managed to get them fairly even. The final outside dimension of the bed was now 120"x36".
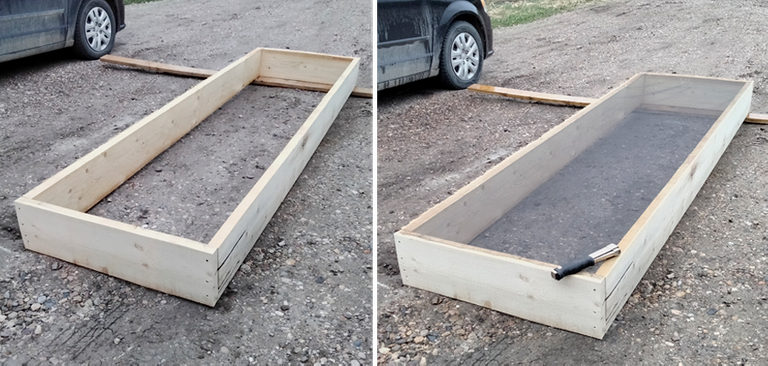
Time to staple on the bug screen. Shade cloth would probably have been a better option but I couldn't find any on short notice. We don't use it much this far north. I considered landscape fabric but I was worried the weave would be a bit too tight and not allow enough free flow of air. I cut the bug screen to length with the utility knife.
Next, I needed to staple the hardware cloth on the frame. Keep in mind, the staples are only really there to tack everything down temporally. Further reinforcement will follow.

The hardware cloth is a bit tricky to handle because it has a memory and wants to stay coiled up. It would have been hard to measure because of this feature. I started unrolling it at the end of the bed and doing my best to keep it straight and continued to unroll it while stapling it. Then, when I reached the other end, I cut it with the wire cutters and finished stapling the last few inches.
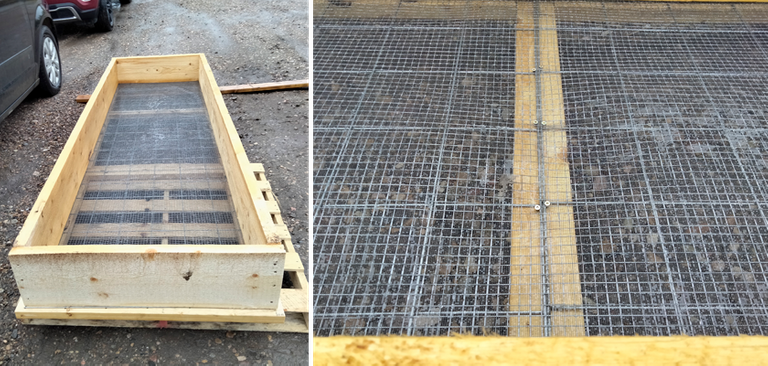
The third layer of the bottom of the air prune bed is 6" welded wire mesh. This might seem unnecessary to have so many layers but it is important to have substantial support to hold up the large volume of soil this frame will hold. The sheets of this mesh come in an odd size: 3.5'x7'. I decided to make one piece 3'x7' and the other 3'x3' to get me the 3'x10'that I needed.
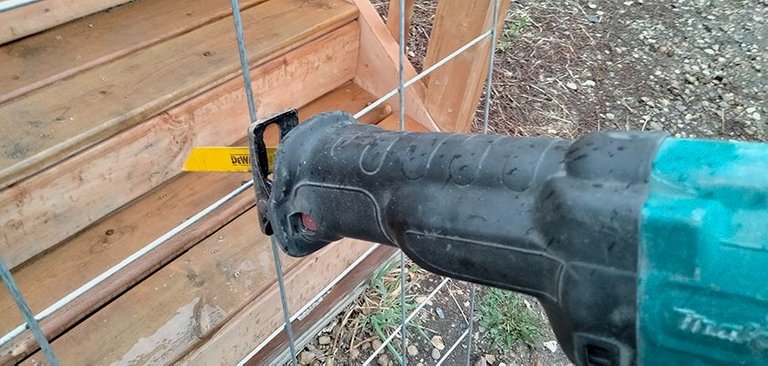
I'm not sure how cement contractors cut this stuff but I was going to use my cordless grinder until I realized that all by cutting wheels were worn out. I also tried a hack saw and that wasn't really working. I ended up using a Sawzall with a metal blade.
The welded wire mesh was then secured by sandwiching it to the bed with the 2x4's. I screwed it in with a liberal amount of 3" deck screws. I had originally wanted to rip the 2x4's in half to make them the same width as the boards but my brother was still borrowing my table saw so I just left them as is.
Lastly, once I set up the bed and fill it with the soil I will add eight cinder blocks to support the joints where the ends of the 2x4"s meet. If I was to only use four cinder blocks, one at each corner, I feel that eventually the support for the bottom of the bed would fail prematurely.
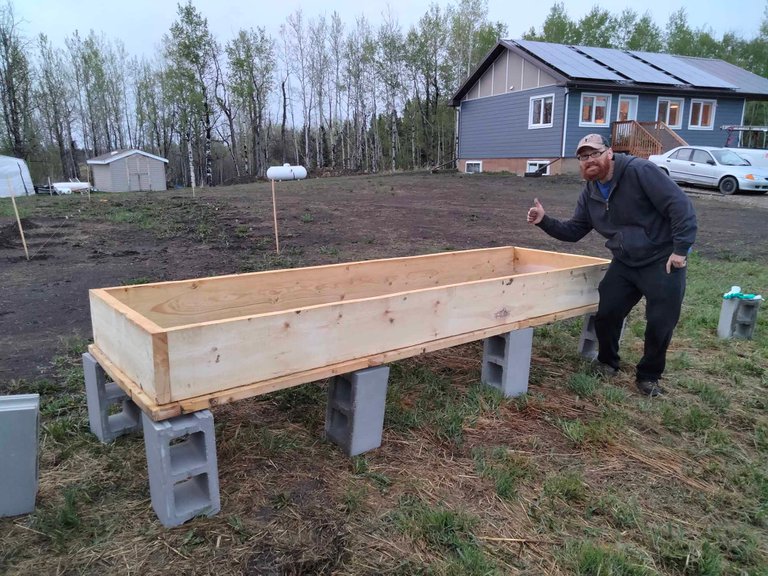
I just set the bed up temporally for this "finished" picture. In part two I will be putting it in it's semi-permanent summer location and filling it with soil. But this gives a good idea what it will look like. Make sure to check out part two of this article!

Oh wow. This is why I'll never be a serious gardener - that's way to complicated for me, but I totally admire the science and the effort - a far remove from my 'bung it in the ground and let's see' gardening efforts! Love your work!
Never heard of this and will be very interested in finding out how well it works for you.
I have never come across these before! Always so much to learn.
Your post has been featured in the Lotus Garden newsletter, which will be published tomorrow.
You've been curated by @minismallholding for Natural Medicine's homesteading newsletter, supporting gardeners, permaculturalists, foragers, environmentalists and other earth centred relationships with the earth.
CommunityIIDiscord
Congratulations @canadianrenegade! You have completed the following achievement on the Hive blockchain and have been rewarded with new badge(s) :
Your next target is to reach 64000 upvotes.
You can view your badges on your board and compare yourself to others in the Ranking
If you no longer want to receive notifications, reply to this comment with the word
STOPCheck out the last post from @hivebuzz:
Support the HiveBuzz project. Vote for our proposal!