Holaaa... Saludos, espero se encuentren muy bien y hayan pasado un excelente fin de semana.
Hoy les mostraré como elaborar un hermoso cuadro para que decores cualquier espacio en tu hogar u oficina, fácil y rápido.
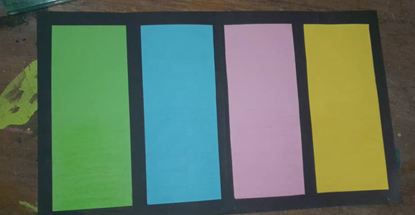
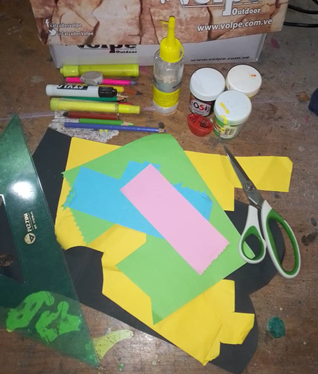
Recortamos a medidas la cartulina que tomaremos como fondo, y a su vez las que irán en cada espacio. Luego marcamos en la cartulina de fondo los cuadrados donde vamos a colocar las cartulinas de colores para que nos quede todos prolijos.
We cut out the cardboard that we will use as background, and the cardboard that will go in each space. Then we mark on the background cardboard the squares where we are going to place the colored cardboard so that they are all neat.

Procedemos a pegar cada color en su lugar correspondiente (Si desean pueden tapar cada union con teipe para que no se vayan a pasar de la linea).
We proceed to glue each color in its corresponding place (If you wish, you can cover each joint with tape so that they do not go over the line).
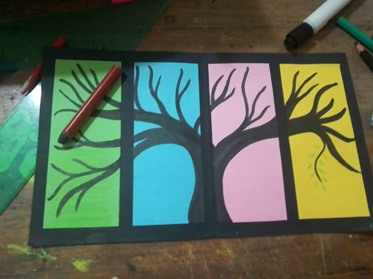
Luego con la ayuda de un lapiz, marcaremos el boceto del arbol que vamos a ilustrar. Y con el marcador negro lo repasamos para crear el tronco.
Then with the help of a pencil, we will mark the sketch of the tree that we are going to illustrate. And with the black marker we go over it to create the trunk.
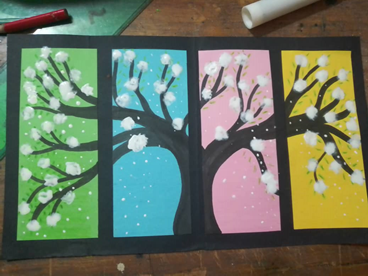
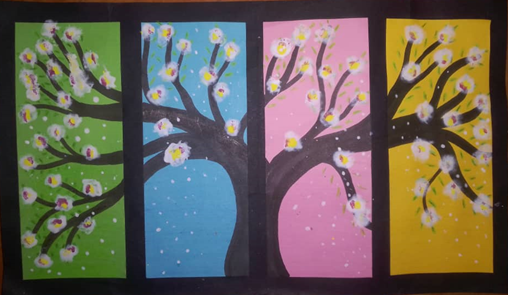
Con la pintura blanca y la ayuda del pincel crearemos flores en los copos de las ramas y donde crean necesario, tambien marcaremos ciertos puntos para crear un efecto de nieve.
With the white paint and the help of the brush we will create flowers on the flakes of the branches and where necessary, we will also mark certain points to create a snow effect.
Con la pintura amarilla y la rosada (colores que yo elegi) pintaremos el centro de nuestras flores.
With the yellow and pink paint (colors I chose) we will paint the center of our flowers.
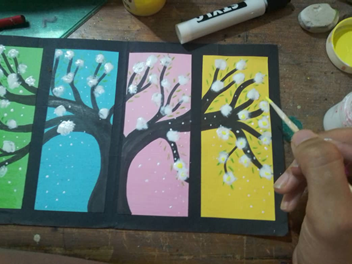 Y LISTO, tenemos un lindo cuadro que podemos colocar como decoración en cualquier espacio de nuestro hogar u oficina. / AND READY, we have a nice picture that we can place as decoration in any space of our home or office.
Gracias por haber tomado el tiempo de leer mi publicación, deja tu comentario abajo. Espero te sirva de inspiracion y puedas crear tu propio producto (no olvides etiquetarme).
Thank you for taking the time to read my post, leave your comment below. I hope it will inspire you to create your own product (don't forget to tag me).
Hasta la próxima...
See you next time...

Indeed that's nice for decoration. Thanks for sharing the process @siendocreativos
Si amiga, y hay muchas cosas faciles que podemos hacer para decorar. Seguire publicando mas opciones
Your content has been voted as a part of Encouragement program. Keep up the good work!
Use Ecency daily to boost your growth on platform!
Support Ecency
Vote for Proposal
Delegate HP and earn more
Muchas gracias por su apoyo<3