
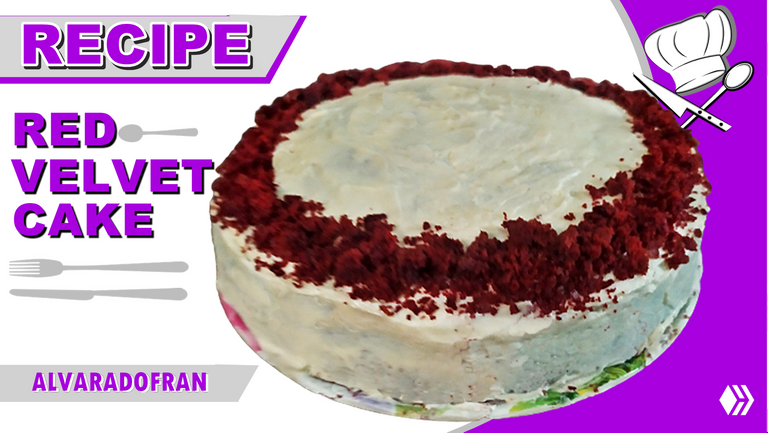
¡Hola Hivers! Me emociona compartir con ustedes la preparación de mi primer pastel de Red velvet, en esta oportunidad quise probar una mezcla para tortas de estas que venden en los supermercados, escogí la marca Belly Crocker. No suelo usar este tipo de mezclas, pero la verdad es que ahorran un montón de tiempo ya que son sencillas de preparar y la marca utilizada me dejo muy satisfecha con el resultado.
Hi Hivers! I'm excited to share with you the preparation of my first Red velvet cake, this time I wanted to try one of these cake mixes that are sold in supermarkets, I chose the Belly Crocker brand. I don't usually use this kind of mixes, but the truth is that they save a lot of time because they are easy to prepare and the brand used left me very satisfied with the result.
En mi opinión es un muy buen producto por un precio accesible, en Venezuela lo puedes conseguir desde 3.5 dólares la caja. Así que si tienes un antojo de torta y no quieres salir a comprar una lista larga de ingredientes esta opción es ideal para ti.
In my opinion, it is a very good product for an affordable price, in Venezuela you can get it from 3.5 dollars a box. So if you have a craving for cake and don't want to go out and buy a long list of ingredients this option is ideal for you.

INGREDIENTES
INGREDIENTS
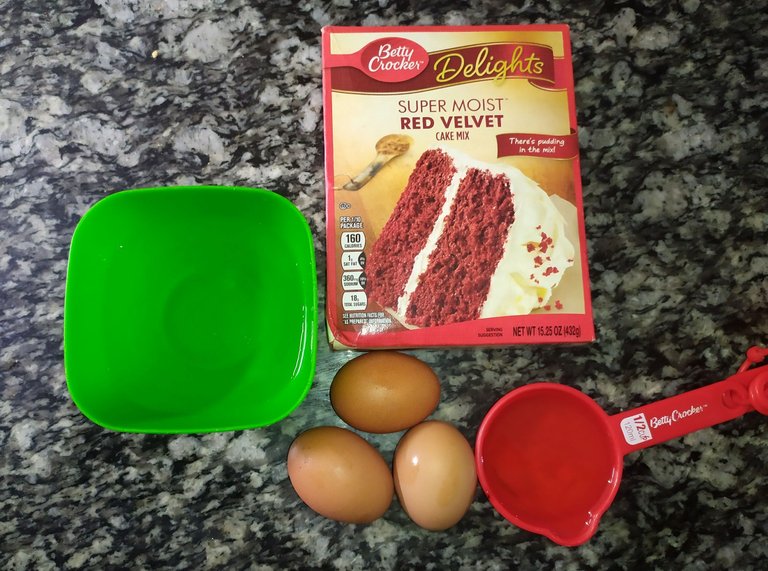
| Ingredientes: |
|---|
| 1 caja de mezcla para torta Red Velvet Super Moist® de Betty Crocker® |
| 3 huevos |
| 120 ml de aceite |
| 100 ml de agua o leche liquida |
| Ingredients: |
|---|
| 1 box Betty Crocker® Red Velvet Super Moist® cake mix |
| 3 eggs |
| 1 pint (120 ml) oil |
| 120 ml of water or liquid milk |
CARACTERISTICAS
CHARACTERISTICS
| TIEMPO DE PREPARACION | CANTIDAD | DIFICULTAD |
|---|
| 1 hora | 8 porciones grandes | Fácil |
| PREPARATION TIME | QUANTITY | DIFFICULTY |
|---|
| 1 Hour | 8 slices | Easy |
PROCEDIMIENTO
PROCEDURE
PASO 1
STEP 1
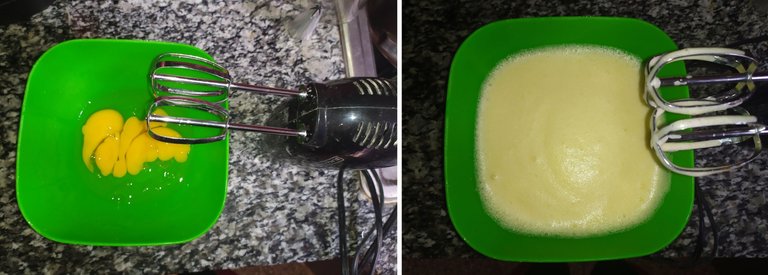
En un bol grande, vertemos los 3 huevos y vamos a batir hasta obtener un punto de letra, no sabes que es el punto de letra, ya te lo explico consiste en batir los huevos hasta que la mezcla doble su volumen y aclare su color y se le llama así porque con una cuchara con algo de la misma mezcla podemos tratar de escribir algo y se mantendrá por unos segundos en la superficie la del batido.
In a large bowl, we pour the 3 eggs and we will beat until we get a letter point, you do not know what is the letter point, I'll explain it is to beat the eggs until the mixture doubles its volume and lighten its color and it is called so because with a spoon with some of the same mixture we can try to write something and it will remain for a few seconds on the surface of the beaten.
PASO 2
STEP 2
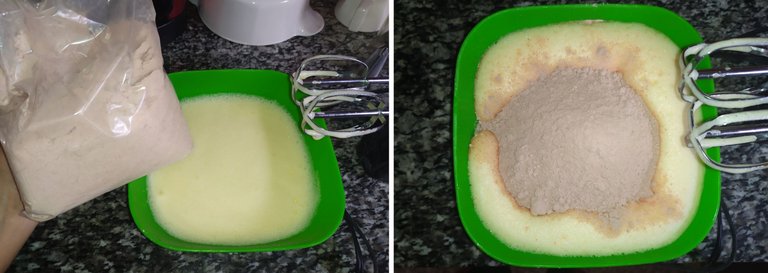
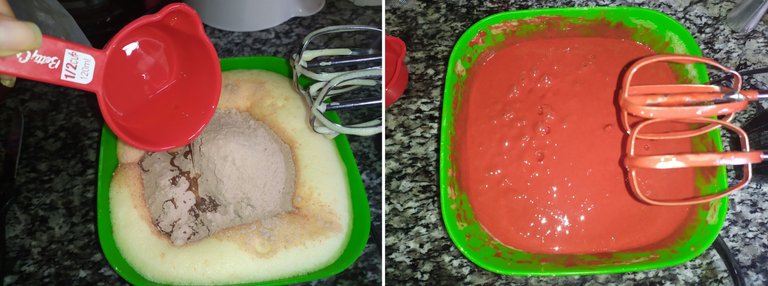
Tomamos la harina preparada y vertemos en su totalidad en la mezcla de los huevos, luego se agrega el aceite y el agua que puede sustituirse por leche líquida si lo prefieres. Procedemos a mezclar todos los ingredientes hasta que todo esté bien integrado y tengamos una mezcla con un tono rojo bien definido.
We take the prepared flour and pour it all into the egg mixture, then add the oil and water, which can be replaced by liquid milk if you prefer. We proceed to mix all the ingredients until everything is well integrated and we have a mixture with a well defined red tone.
PASO 3
STEP 3
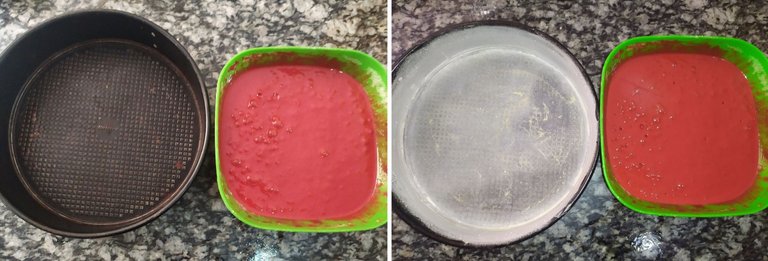
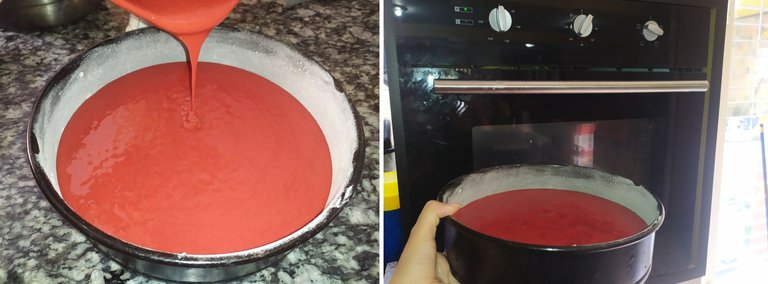
En un molde previamente enharinado o cubierto de papel para hornear vamos a verter la mezcla, llevaremos al horno precalentado a 180 grados durante 45 minutos. Yo utilice un molde de 24 cm para toda la mezcla. Pero puedes usar dos más pequeños si lo prefieres.
Pour the mixture into a previously floured or baking paper-covered mold and bake in a preheated oven at 180 degrees for 45 minutes. I used a 24 cm mold for the whole mixture. But you can use two smaller ones if you prefer.
PASO 4
STEP 4
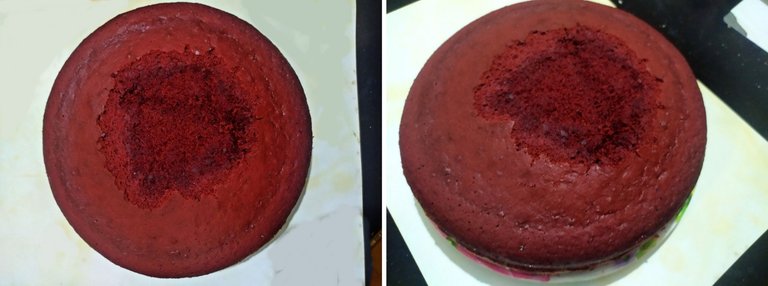
Retiramos del horno, dejamos enfriar para desmoldar, recuerda para decorar o rellenar es importante que el ponqué este completamente frio. Si tu ponqué no quedo totalmente recto en la superficie cortamos el sobrante hasta dejar plano, yo reservare estos restos ya que los usare como parte de la decoración.
Remove from the oven, let cool to unmold, remember to decorate or fill it is important that the cake is completely cool. If your cake is not completely straight on the surface cut the excess until it is flat, I will reserve these remains as I will use them as part of the decoration.
PASO 5
STEP 5
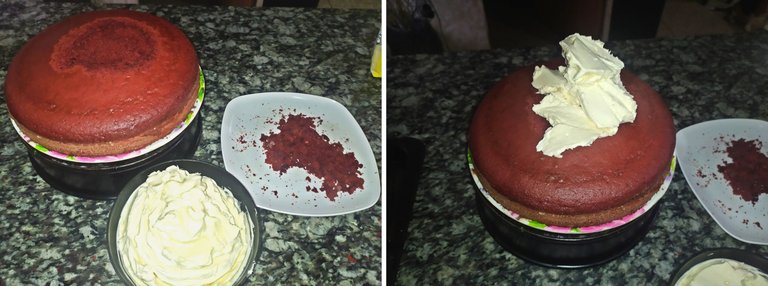
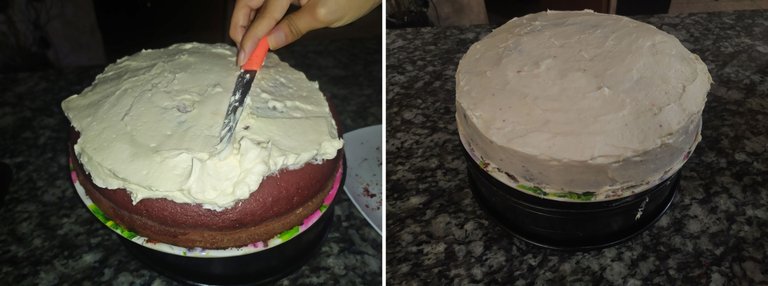
Para el relleno y cobertura usaremos un frosting de queso crema te dejare el link de mi receta a final de este post. Yo no quise rellenarla, pero si deseas hacerlo debes cortar a la mitad el biscocho y separar los 2 discos cubrir con la crema y colocar la otra parte arriba. Luego se procede a hacer la cobertura agregaremos una cantidad suficiente y con ayuda de una espátula cubriremos todas las superficies de manera uniforme hasta dejar todo plano.
For the filling and topping we will use a cream cheese frosting, I will leave you the link to my recipe at the end of this post. I didn't want to fill it, but if you want to do it you must cut the cake in half and separate the 2 discs, cover with the cream and place the other part on top. Then proceed to make the topping, add a sufficient amount and with the help of a spatula cover all surfaces evenly until everything is flat.
PASO 6
STEP 6
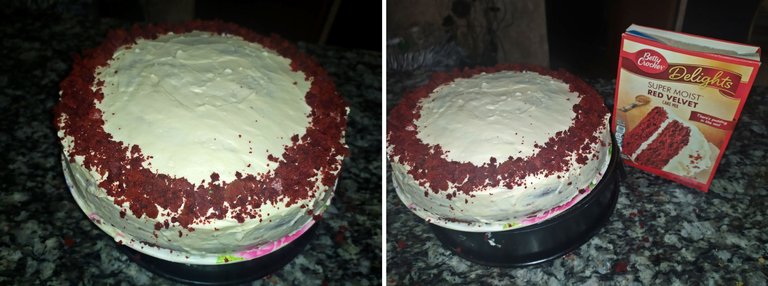
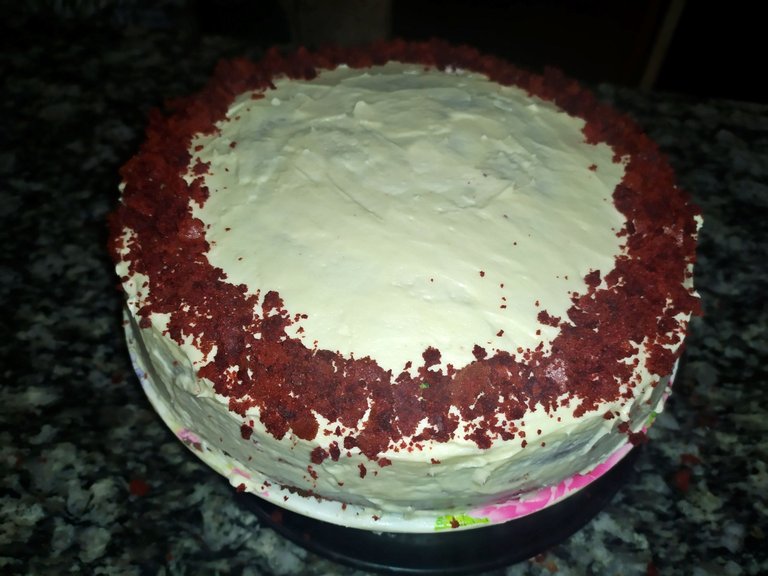
Con el sobrante de biscocho que quedo se hacen unas migajas y estas se agregan en el borde de toda la torta, como decoración final. Esta es solo una idea sencilla para decorar, puedes usar boquillas y dar formas en toda la superficie, o cubrir toda la superficie con las migajas, en fin, deja volar tu creatividad con la decoración de tu pastel.
With the leftover cake crumbs are made and these are added to the edge of the whole cake, as a final decoration. This is just a simple idea to decorate, you can use nozzles and give shapes all over the surface, or cover the entire surface with crumbs, in short, let your creativity fly with the decoration of your cake.
¡Listo a disfrutar!
Ready for enjoy!
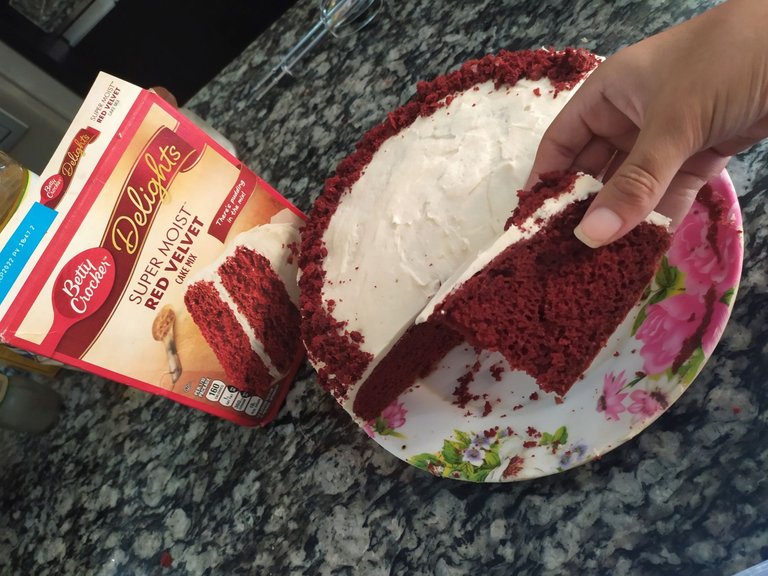
Hasta aquí la receta de hoy, esta torta estaba tan divina que desapareció en 2 días😅 espero puedan hacerla y compartirla con su familia. Que tengan excelente día.
So far today's recipe, this cake was so divine that it disappeared in 2 days😅 I hope you can make it and share it with your family. Have a great day.

Naguara amiga, se ve súper delicioso 🤤 te quedó muy hermoso el pastel. Excelente post❤️
Hola Ivanny! Ay gracias por tu comentario y por tomarte el tiempo de ver mi post, saludos! 😁
Ay , que delicia esta torta.
Hola Randolph! Gracias por tu comentario, esta torta es de mis favoritas después de la tres leches.
No vale, las tres leche de coco, es riquísima.