Hello dear Hivers,
Many things must be mentioned in this post because a lot of things happened during the process of creating this blue dessert :))
First, when we saw the blue dessert contest, we said okay let's participate, we'll make an interesting healthy blue dessert. The most important thing we had in mind is that we wanted to create a blue dessert with natural food coloring, not the one that you can find in the grocery store. But this is where the fun began. We learned so much about the pH sensitivity of the natural blue food coloring, the baking soda, the acidic environment of the food, and many other things we didn't know a lot about. So, we are grateful for this contest, it was a real adventure! We had so much fun inventing a new recipe that will be blue, with only natural and healthy ingredients. Some people told us, it was impossible, but we did it, and yes, it is possible! It was challenging, but the challenge gave a boost to our creativity and imagination!
So, first, we started researching how to obtain blue color. We thought of blueberries or purple sweet potatoes, and we tried to mix the blueberry natural food coloring with different foods, but it turned out to be more purple than blue. It's because the color pigments of this natural blue coloring are pH sensitive when they meet acidic foods, their color change into purple or pink. Then we found out that adding baking soda will contribute to turning the purple color into blue. So, soda is the magic ingredient that neutralizes the acidity and stabilizes the blue color. But we were still facing challenges, even though we tried to color different foods, everything was turning purple even if we added soda. But we kept trying until we got it right!
So next, we tried it with red cabbage! When you start boiling the red cabbage, the color of the water is blue! Yay! We were so happy and excited for our success :)) But, when we mixed it with some other ingredients it was again purple. We added just a small amount of soda to the natural blue coloring we got from the red cabbage, and we finally did it! However, we were very careful with the choice of ingredients, because the baking soda is doing its magic, but it won’t give you the desired results if you mix it with products that are high in acid (like lemon juice). So, we learned that lemon juice and some dairy products were not a choice for our dessert. We also discovered that we have to use just a tiny amount of soda, because the taste may be salty and not at all pleasant. We were also worried about the taste of the cabbage, but we added just a small amount from the natural food coloring, so it didn't taste like cabbage at all!
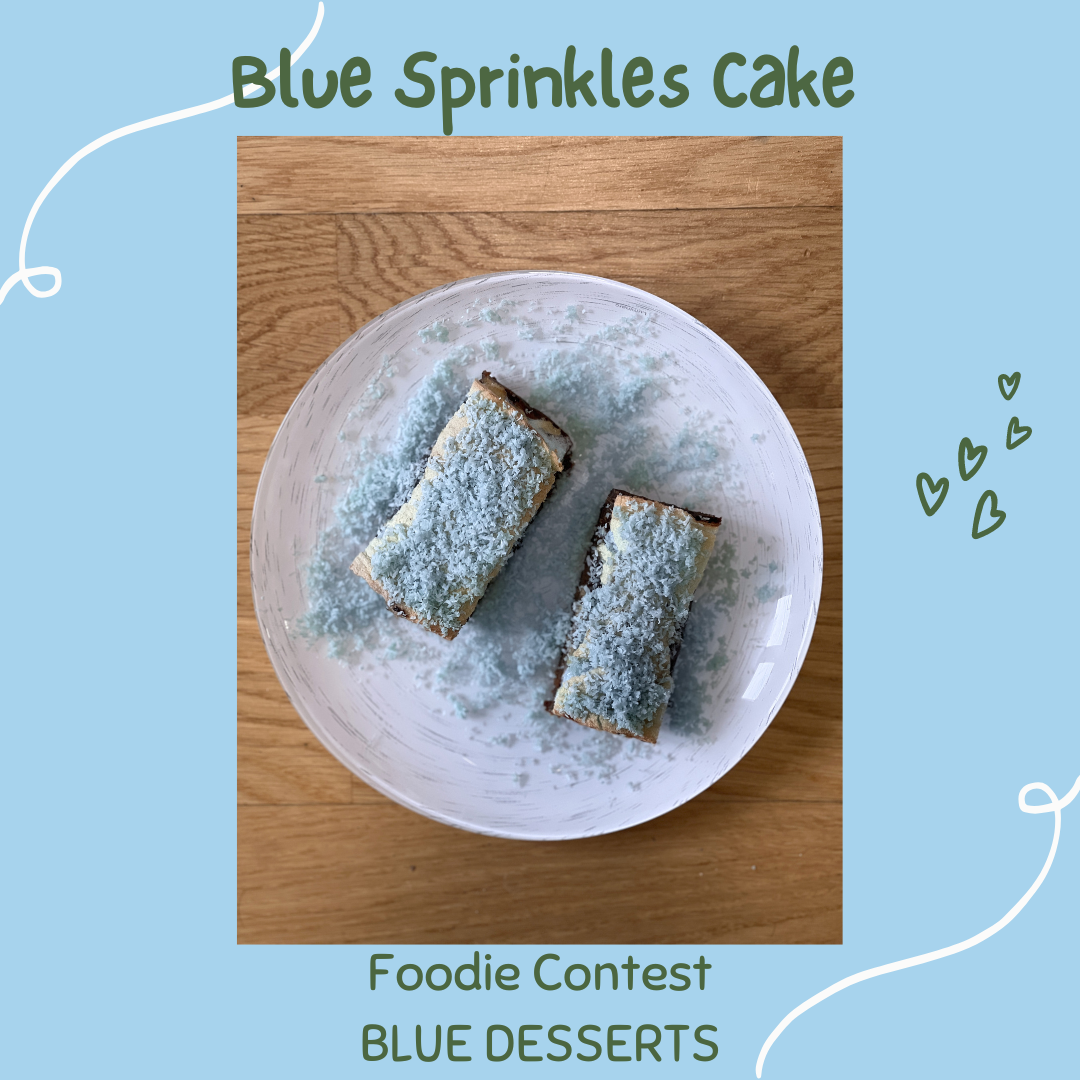
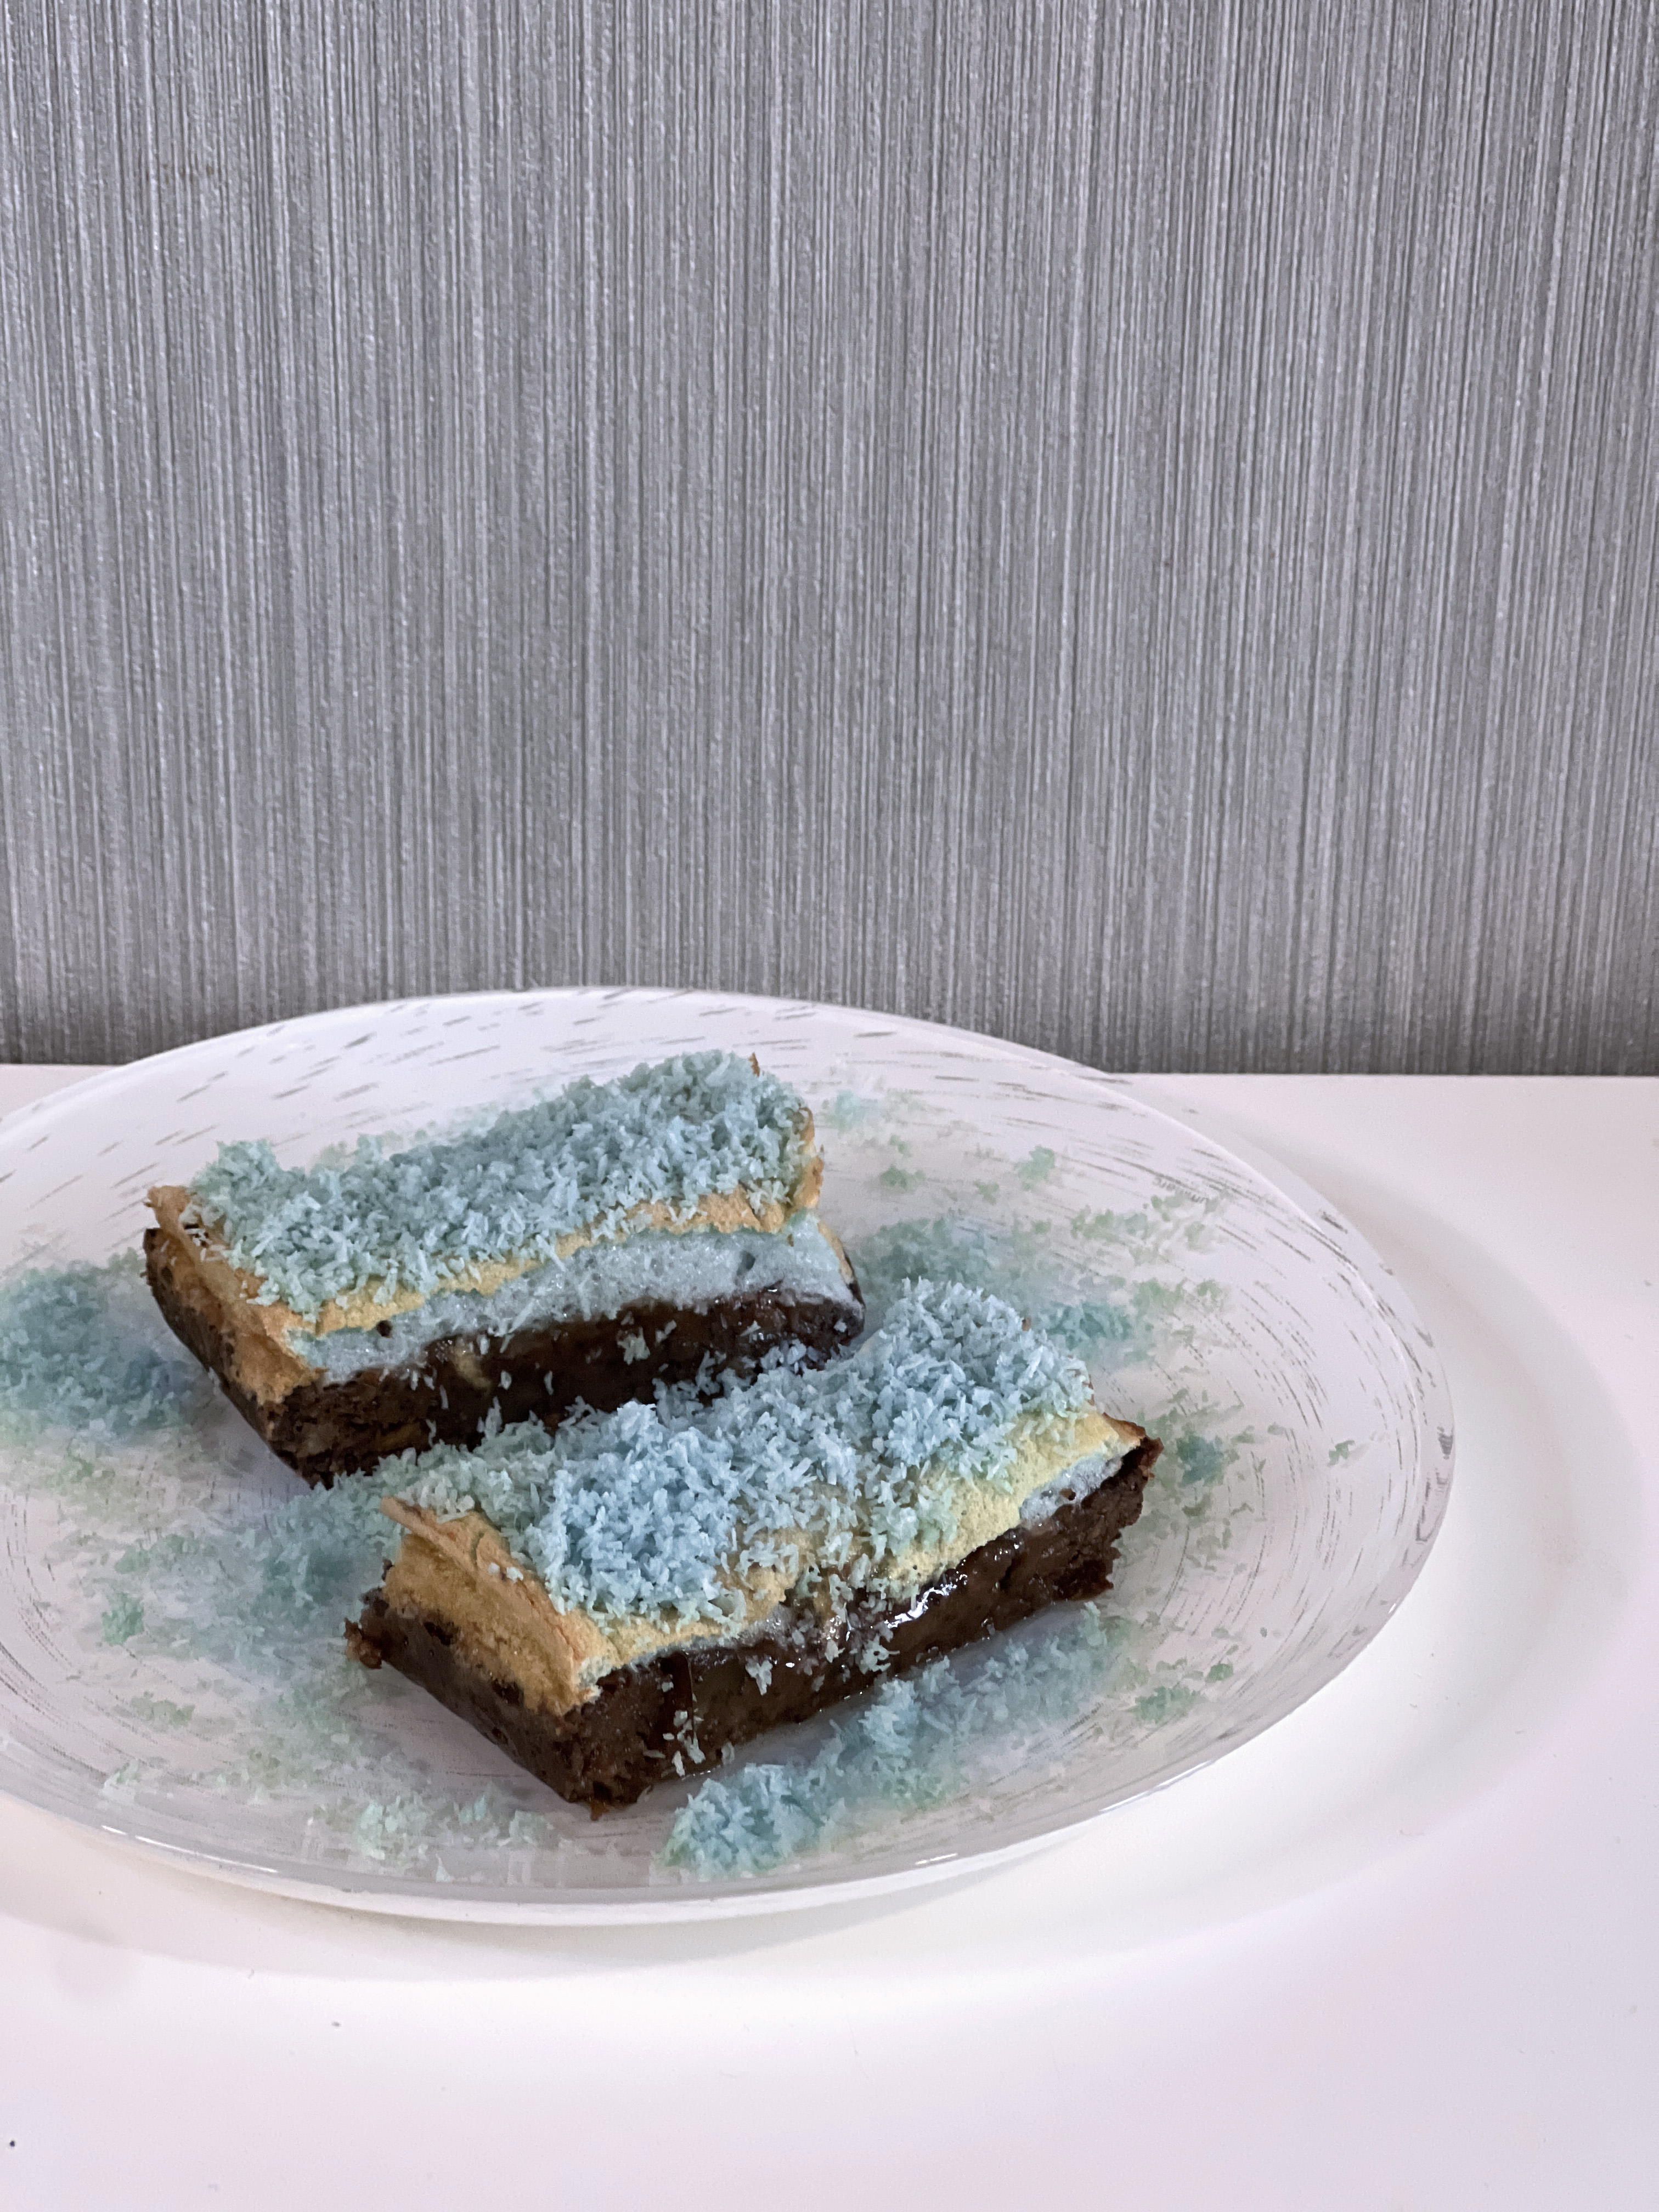
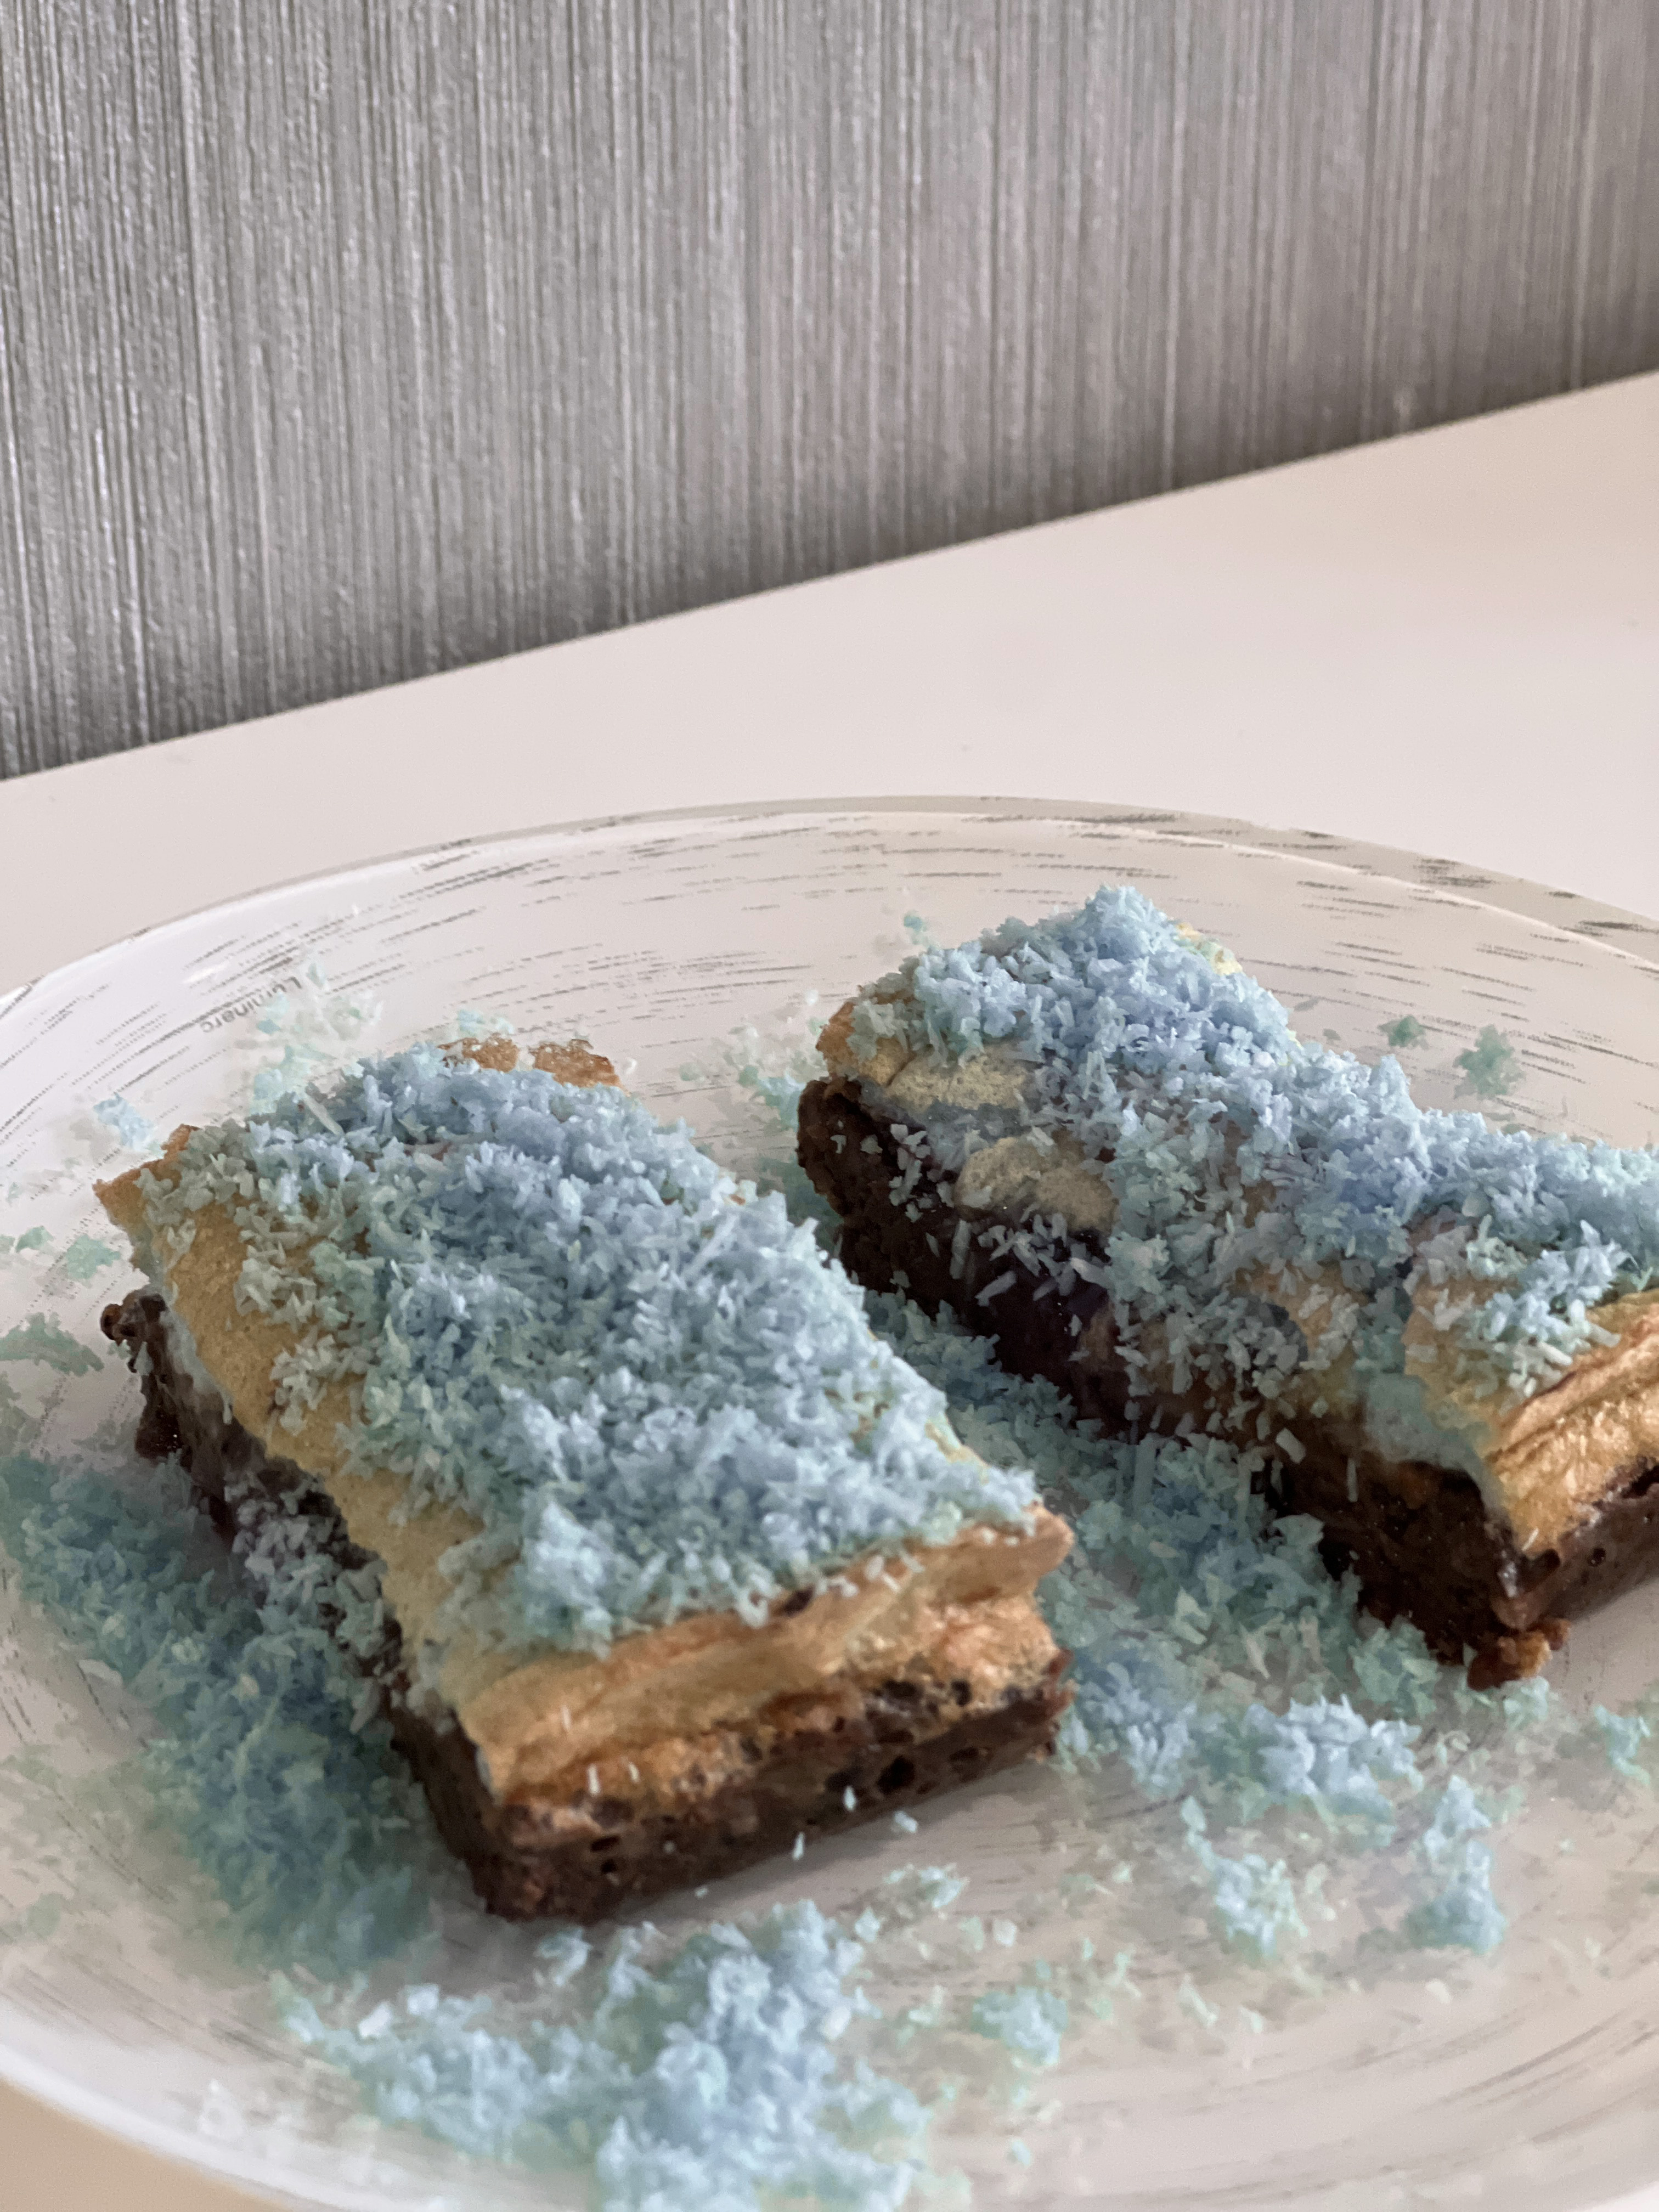
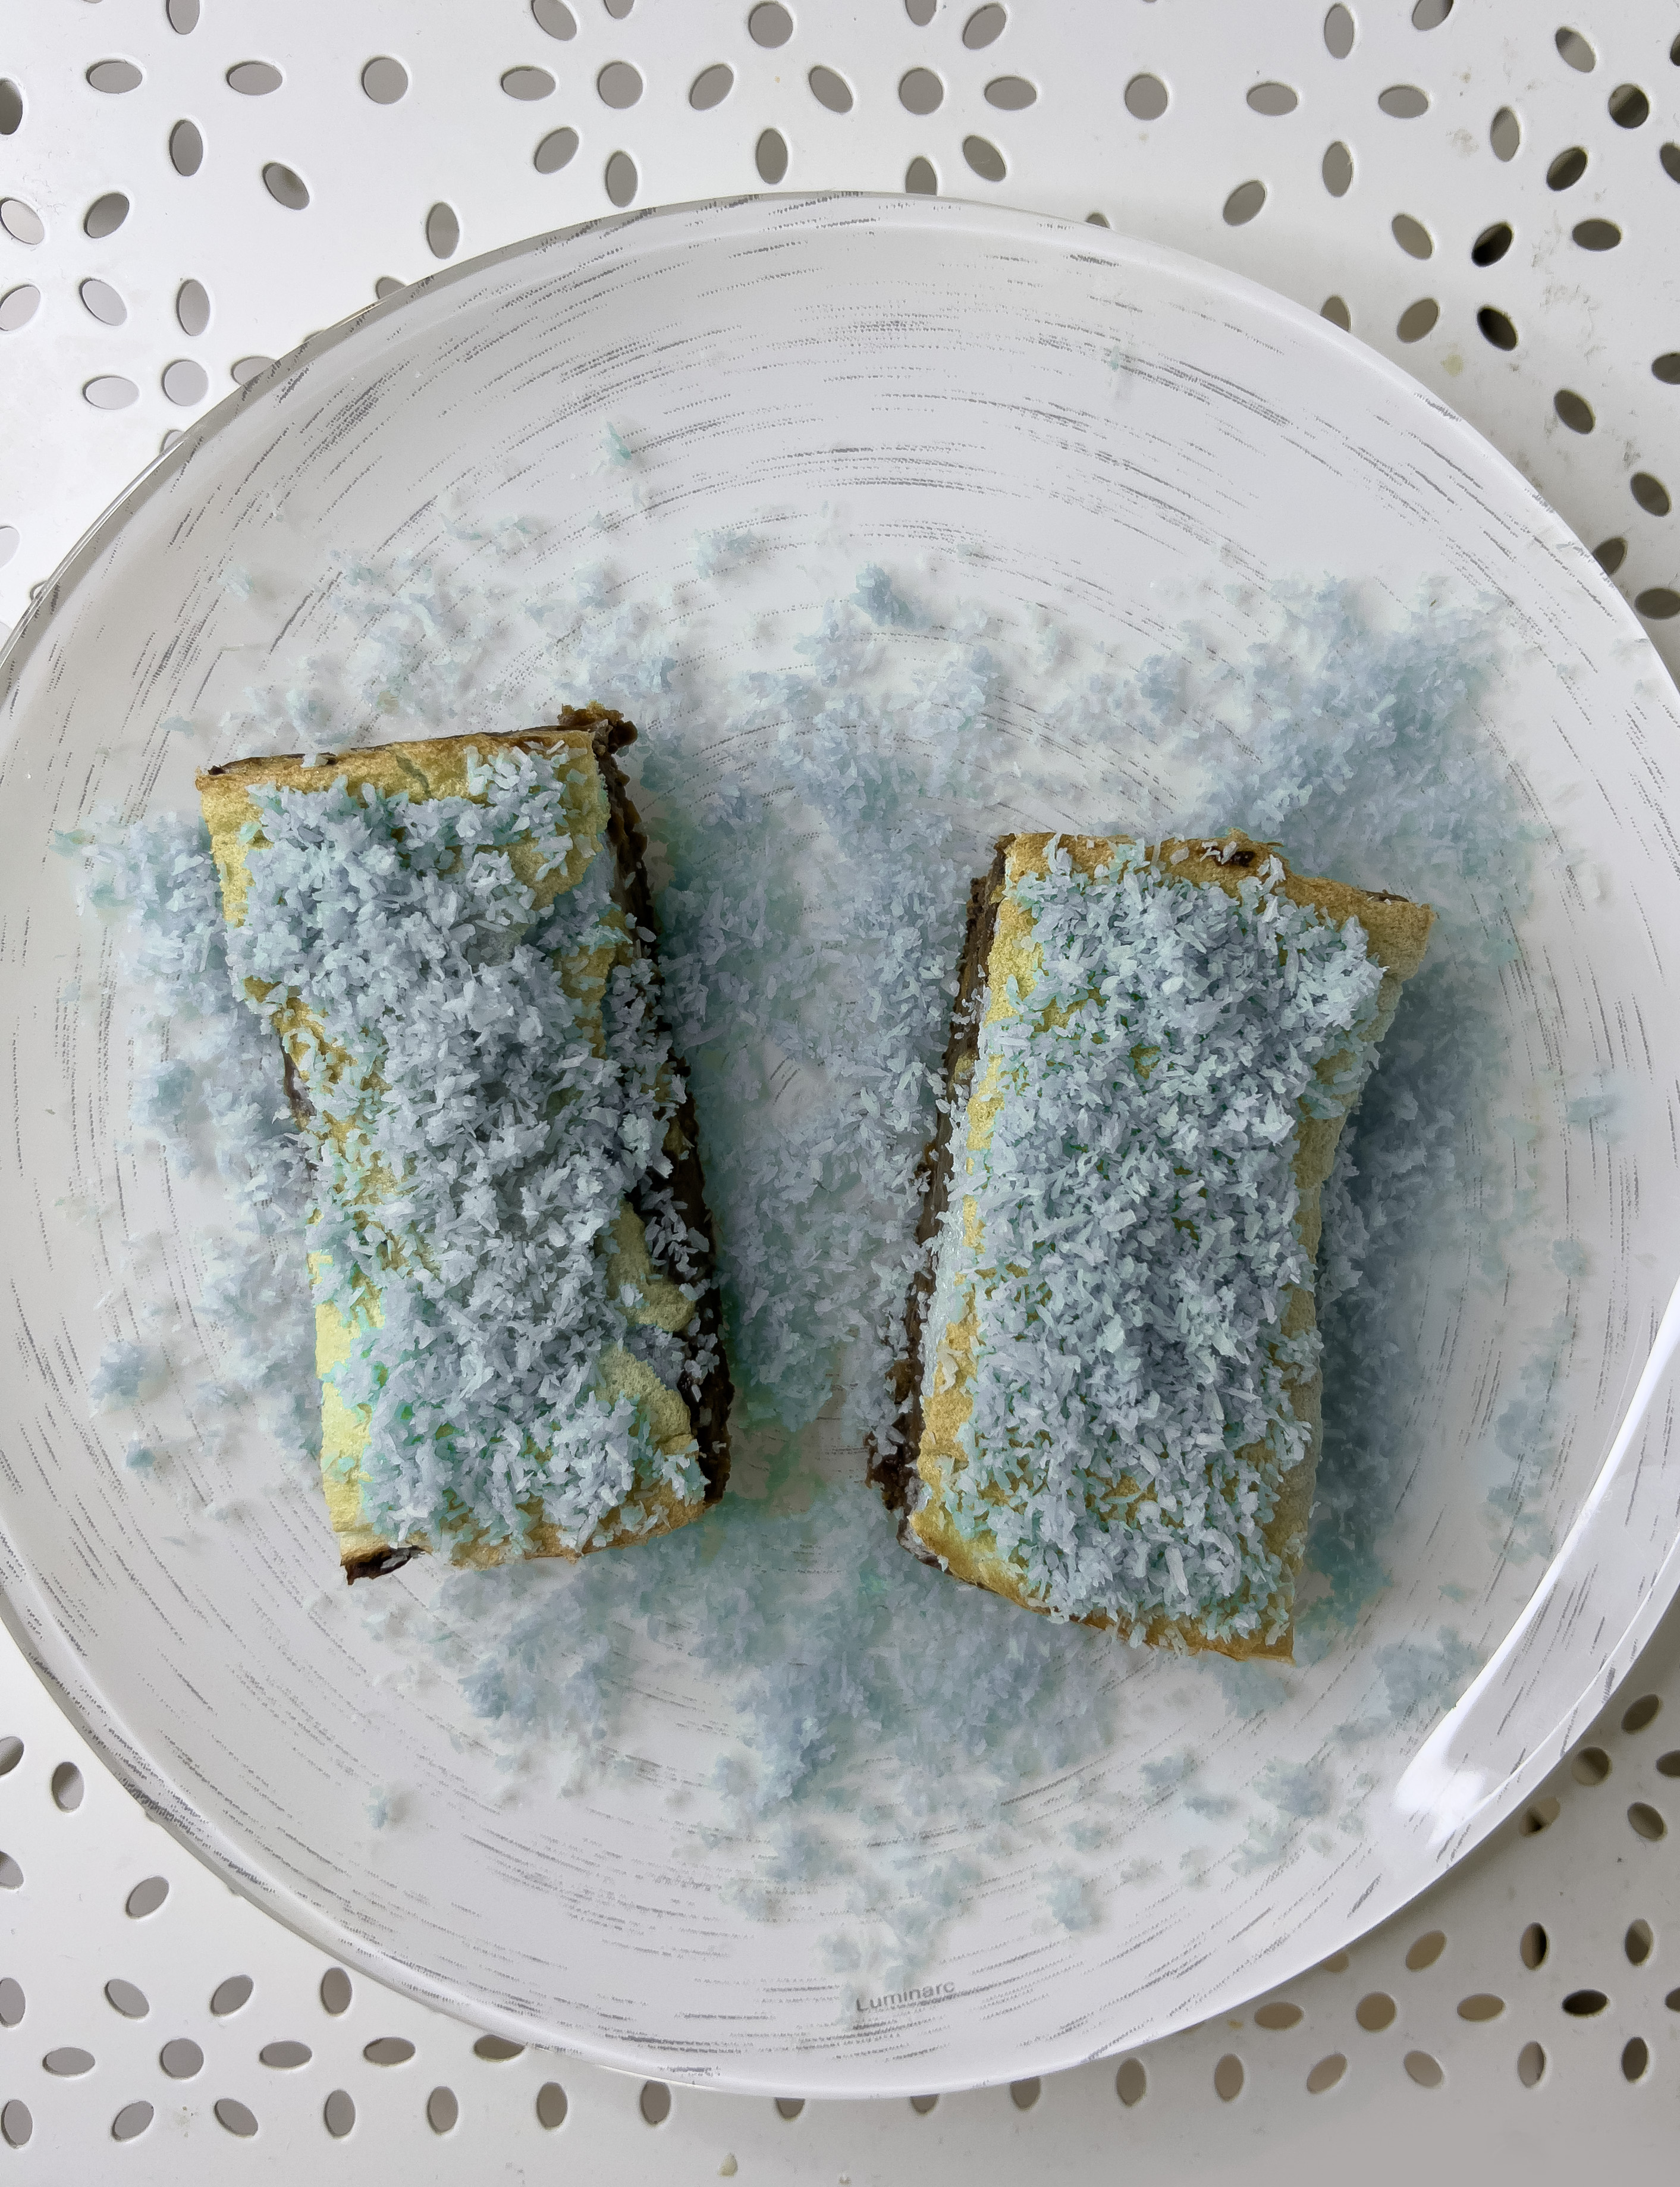
We had a lot of attempts with different types of desserts and we came up with this one because no damage to the color could be done, the egg whites, and the stevia, mixed with the blue coloring kept the blue color as it is. We tried mixing it with different nuts and dairy products, but the result was - purple color. So, the safest way was to separate the egg whites, the stevia, and the natural blue coloring, from the base cake which must contain nuts. We decided that we can go with the blue color at the top, separated from the acidic foods :)) A final touch for decoration and extra sweetness was added at the end by coloring the coconut flour blue :) The flavor of this cake is sweet thanks to the dates and the banana, but also crunchy because of the poppy seeds and the peanut butter which contains peanut pieces in it. The top part of the cake melts in your mouth, giving a sort of freshness to the bite. And the coconut is there to give another dimension to the taste. We really love the combination of dates, peanut butter, and coconut, making it a perfect tasty bite.
Okay, so now let's jump into the recipe! We are so excited to share with you the final product of our 2 days long journey :)) Eli was even sleep deprived for two nights, thinking about the ingredients she can try coloring so that we keep the blue color without adding extra soda :))
Let’s start with the natural blue coloring:
Ingredients:
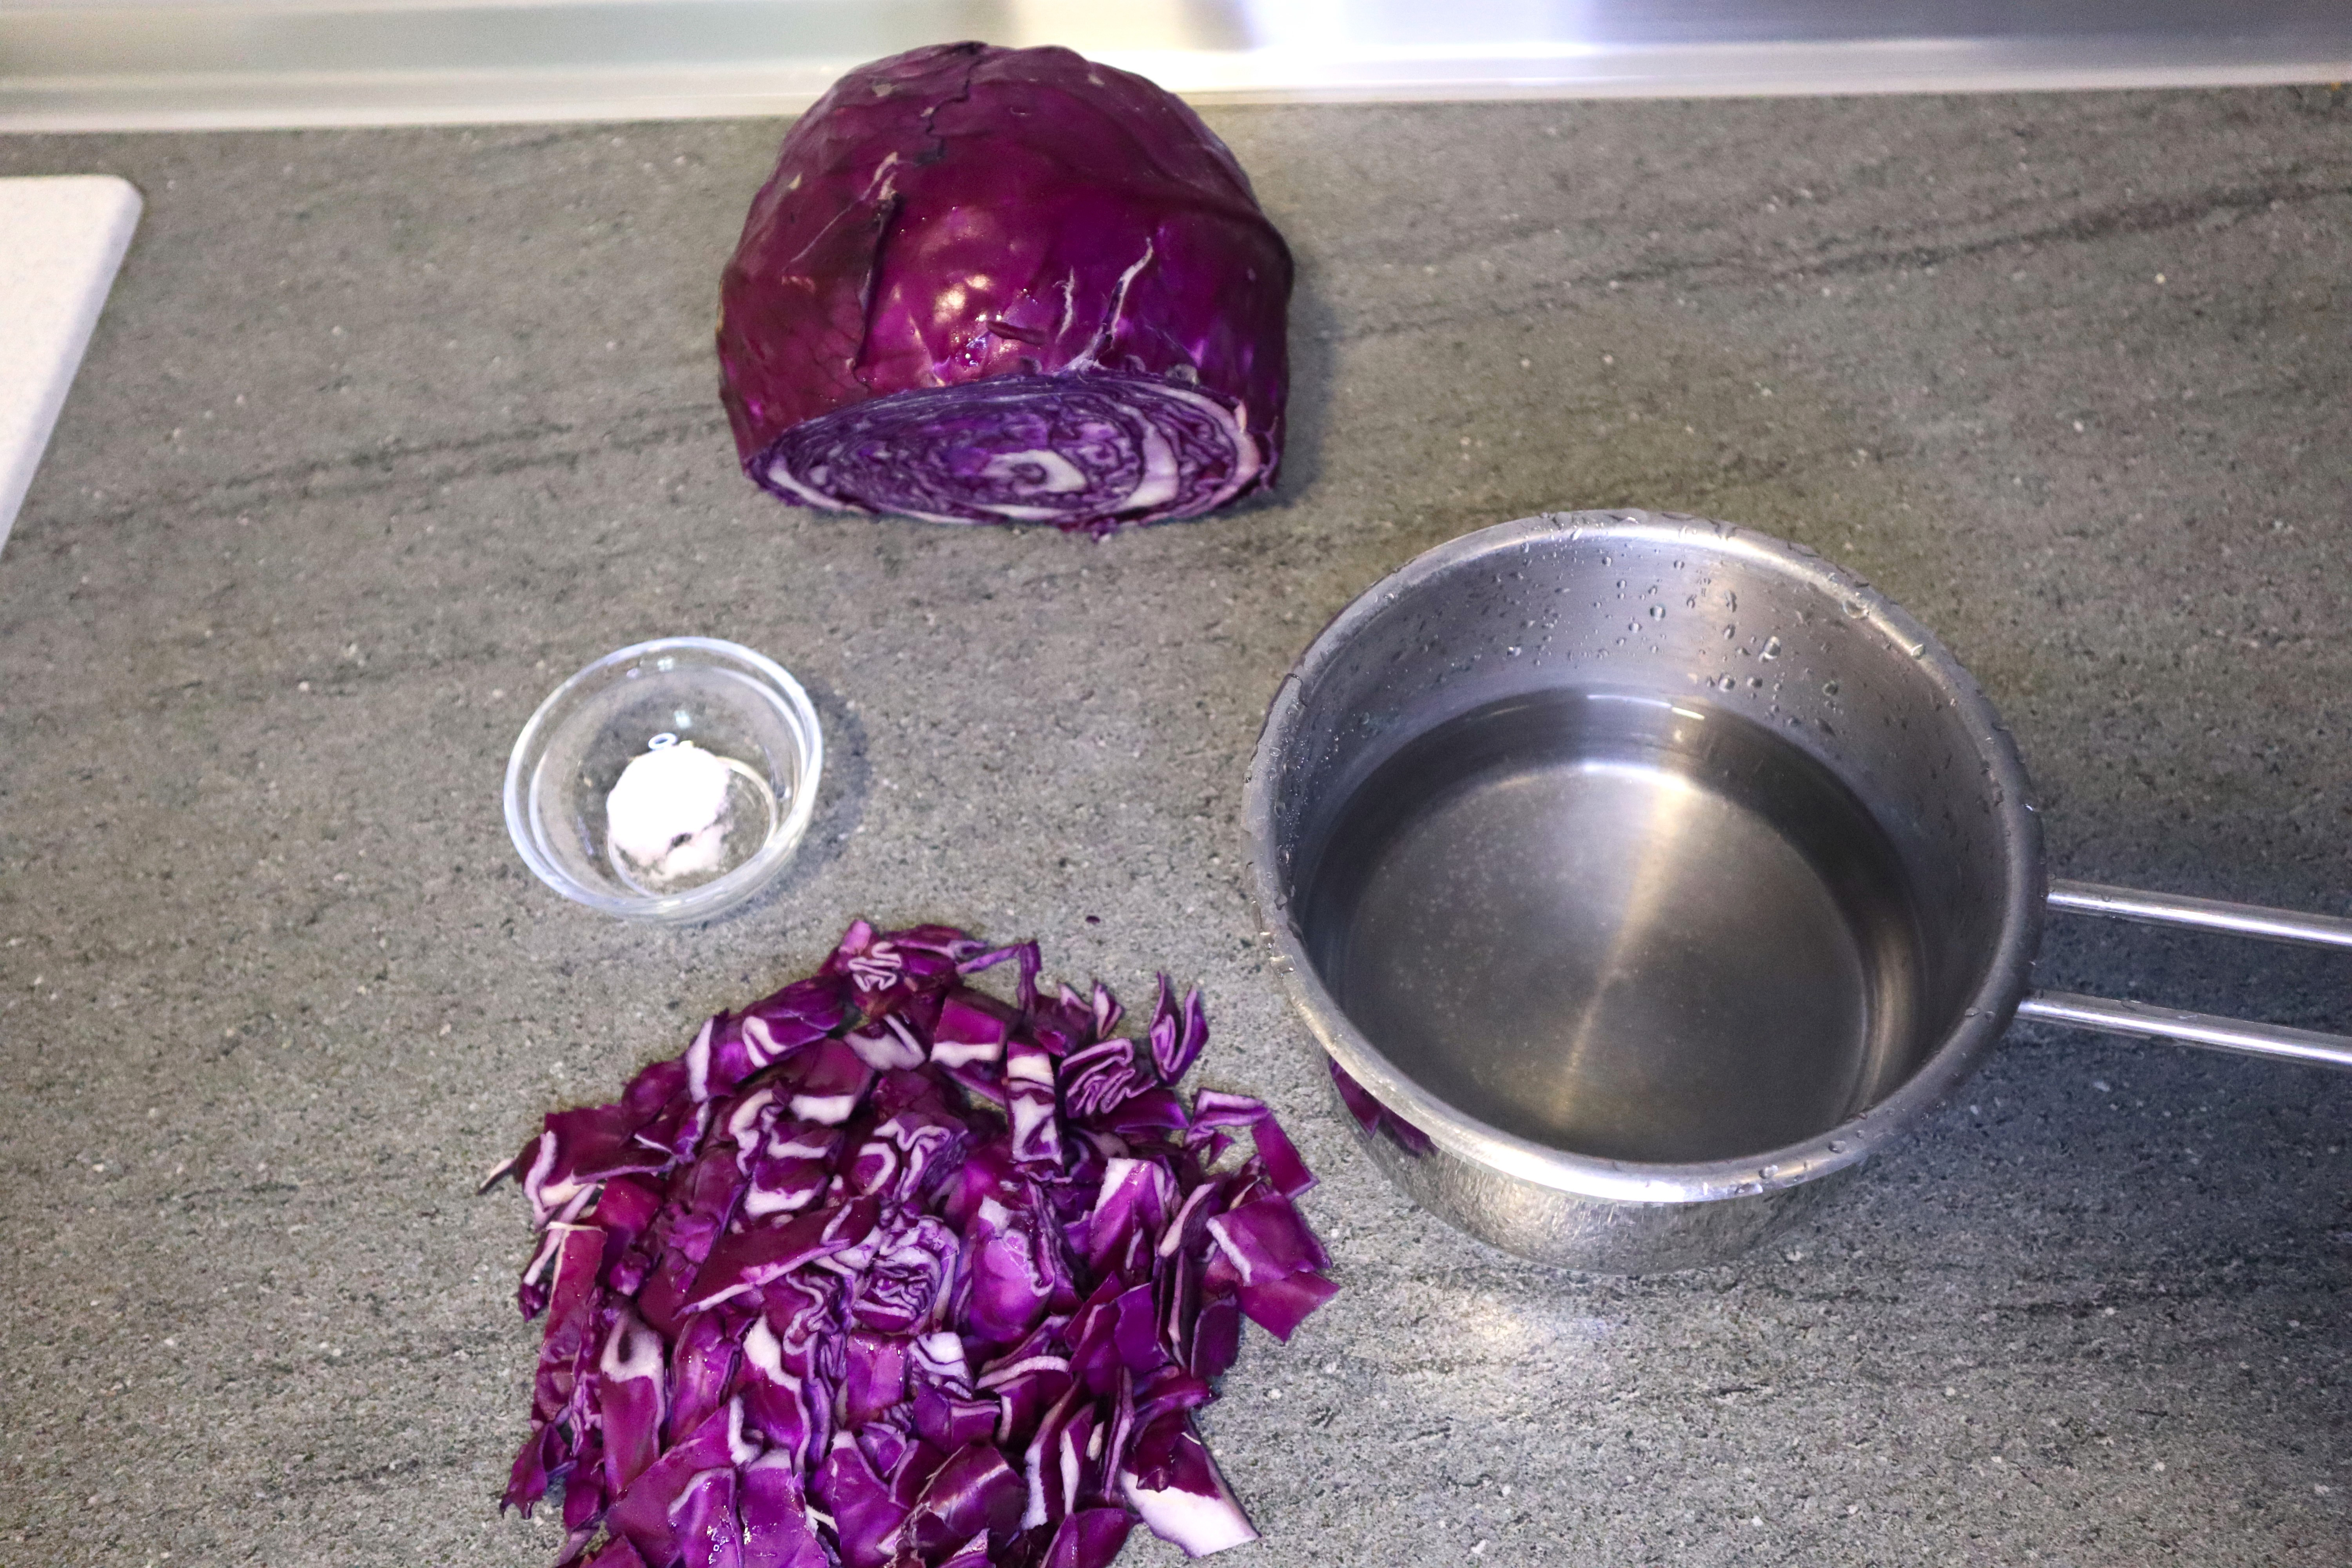
Few stripes of red cabbage
400 ml of water
¼ teaspoon of baking soda
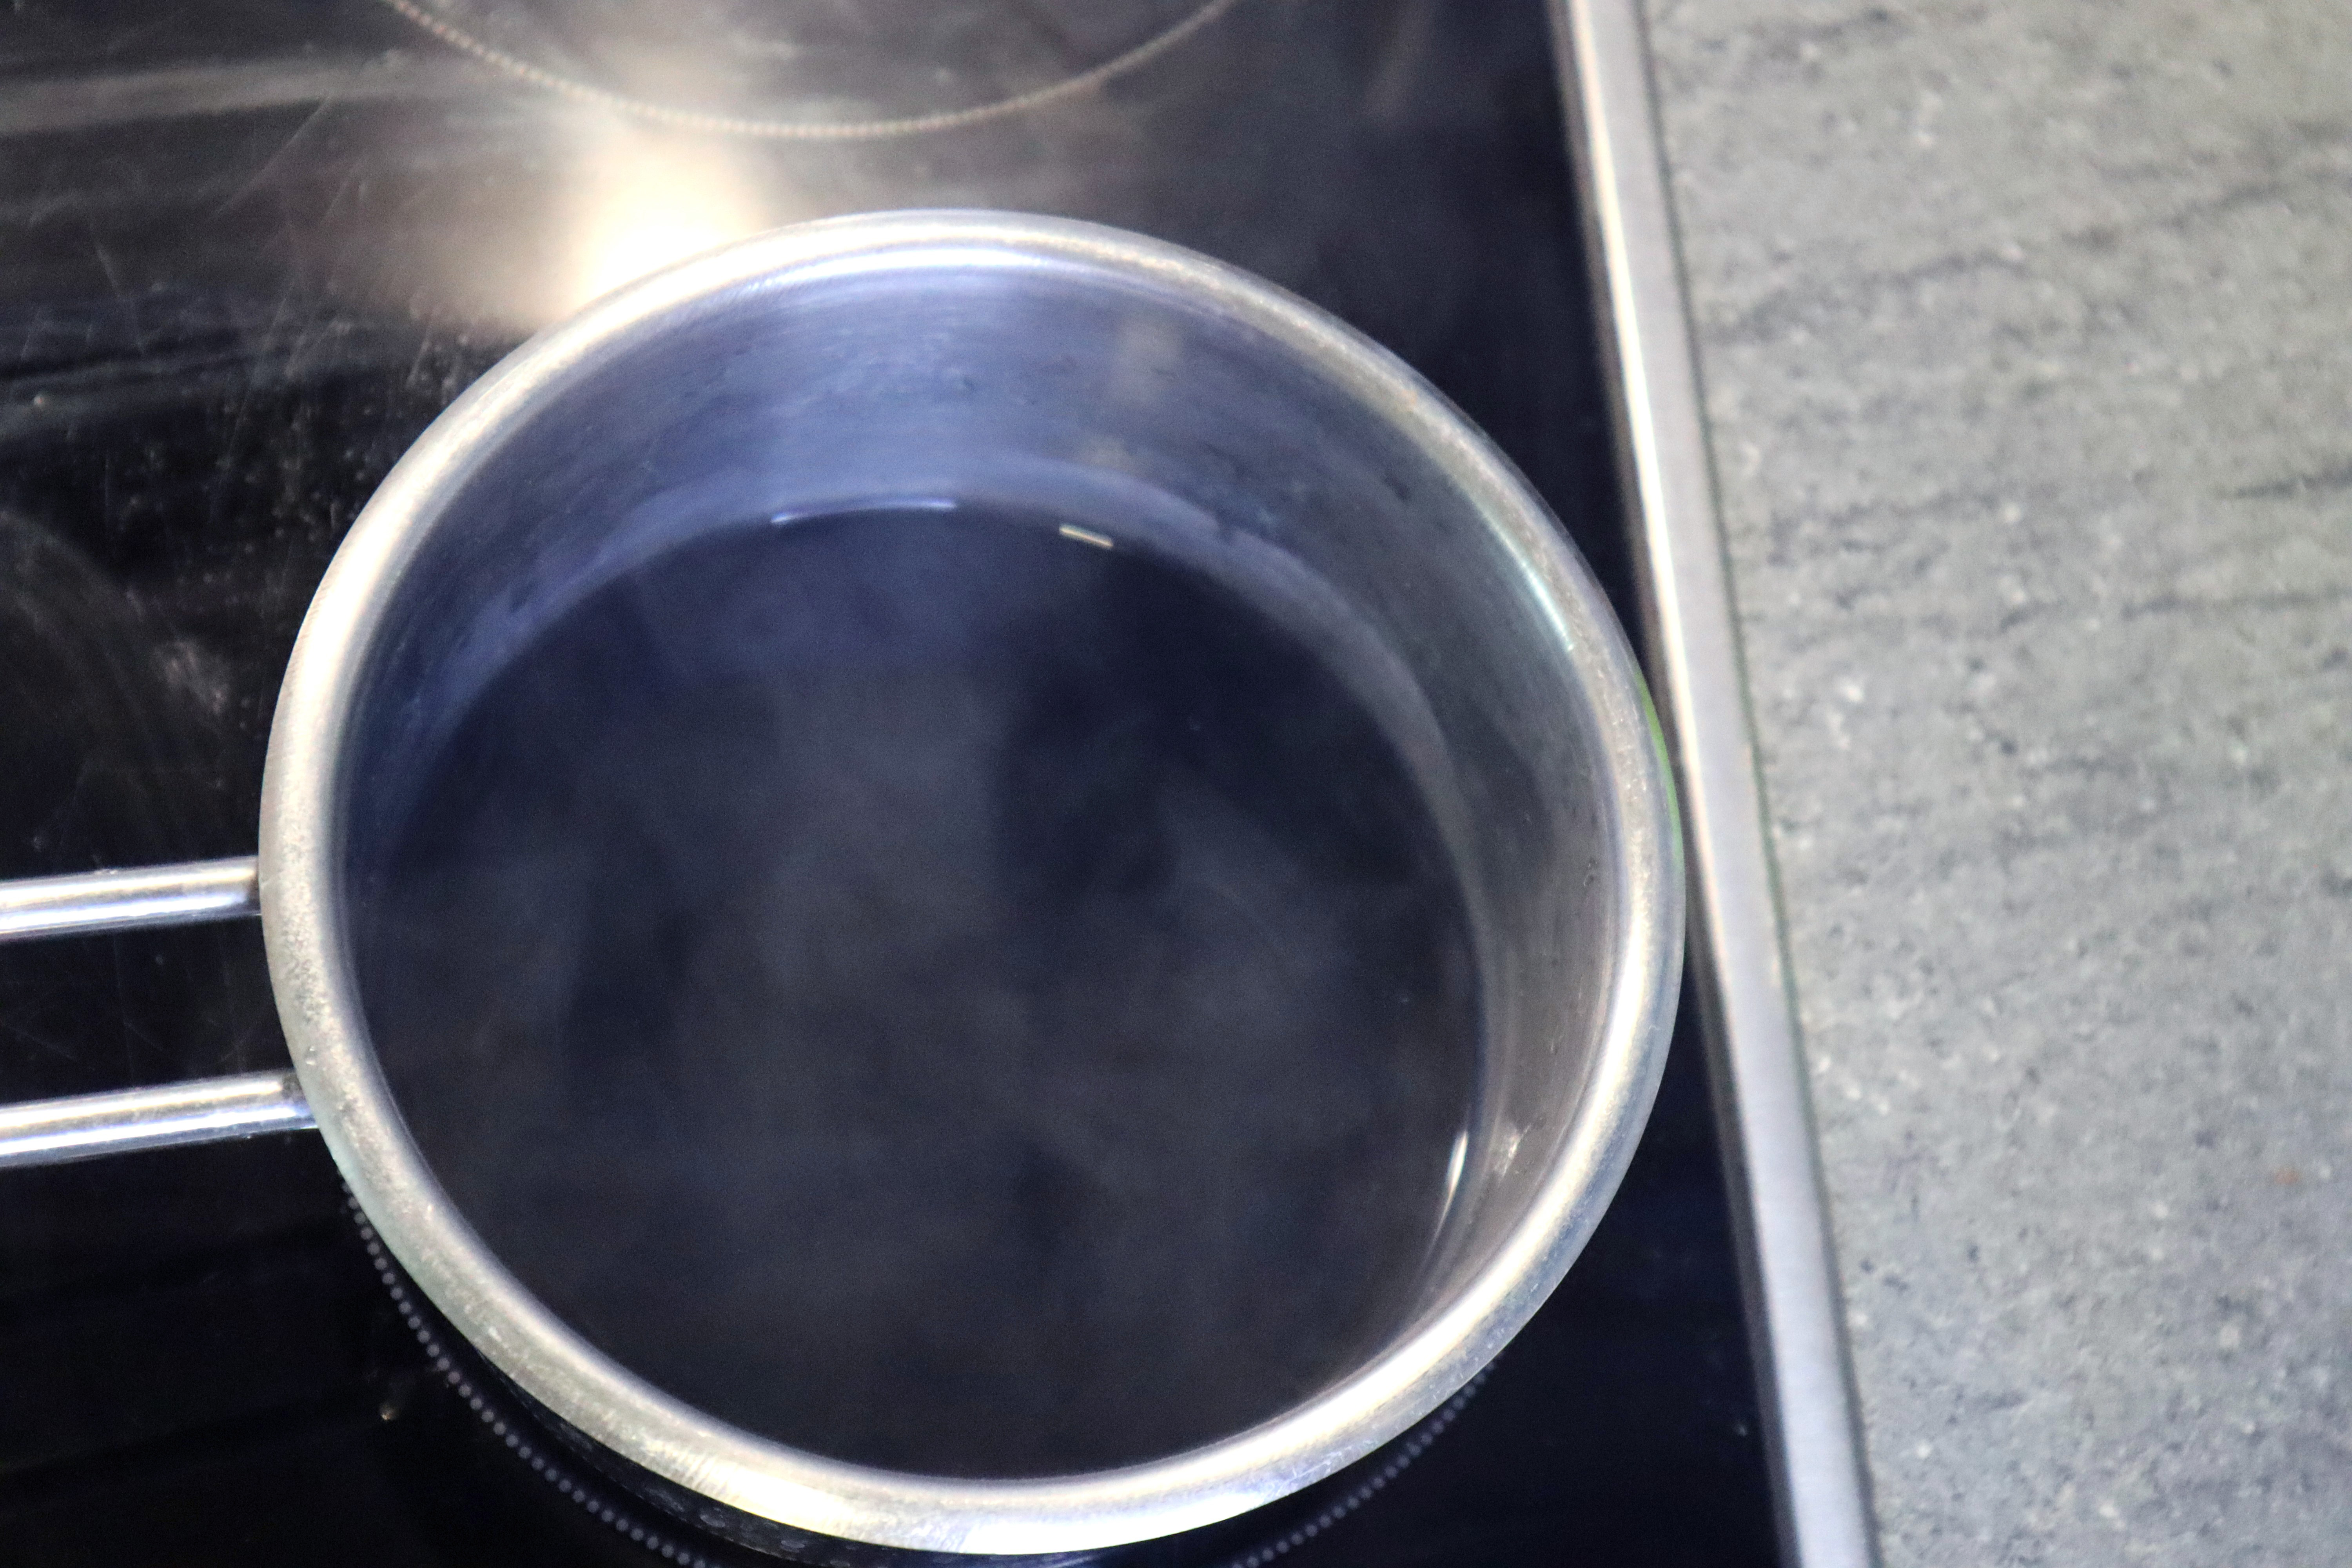
First start by roughly chopping the stripes of red cabbage. Put the chopped red cabbage in a pot and cover it with water. If you need more water to cover the cabbage, feel free to add some more.

Wait for the cabbage to start boiling. Once it starts boiling, you will notice the blue water.
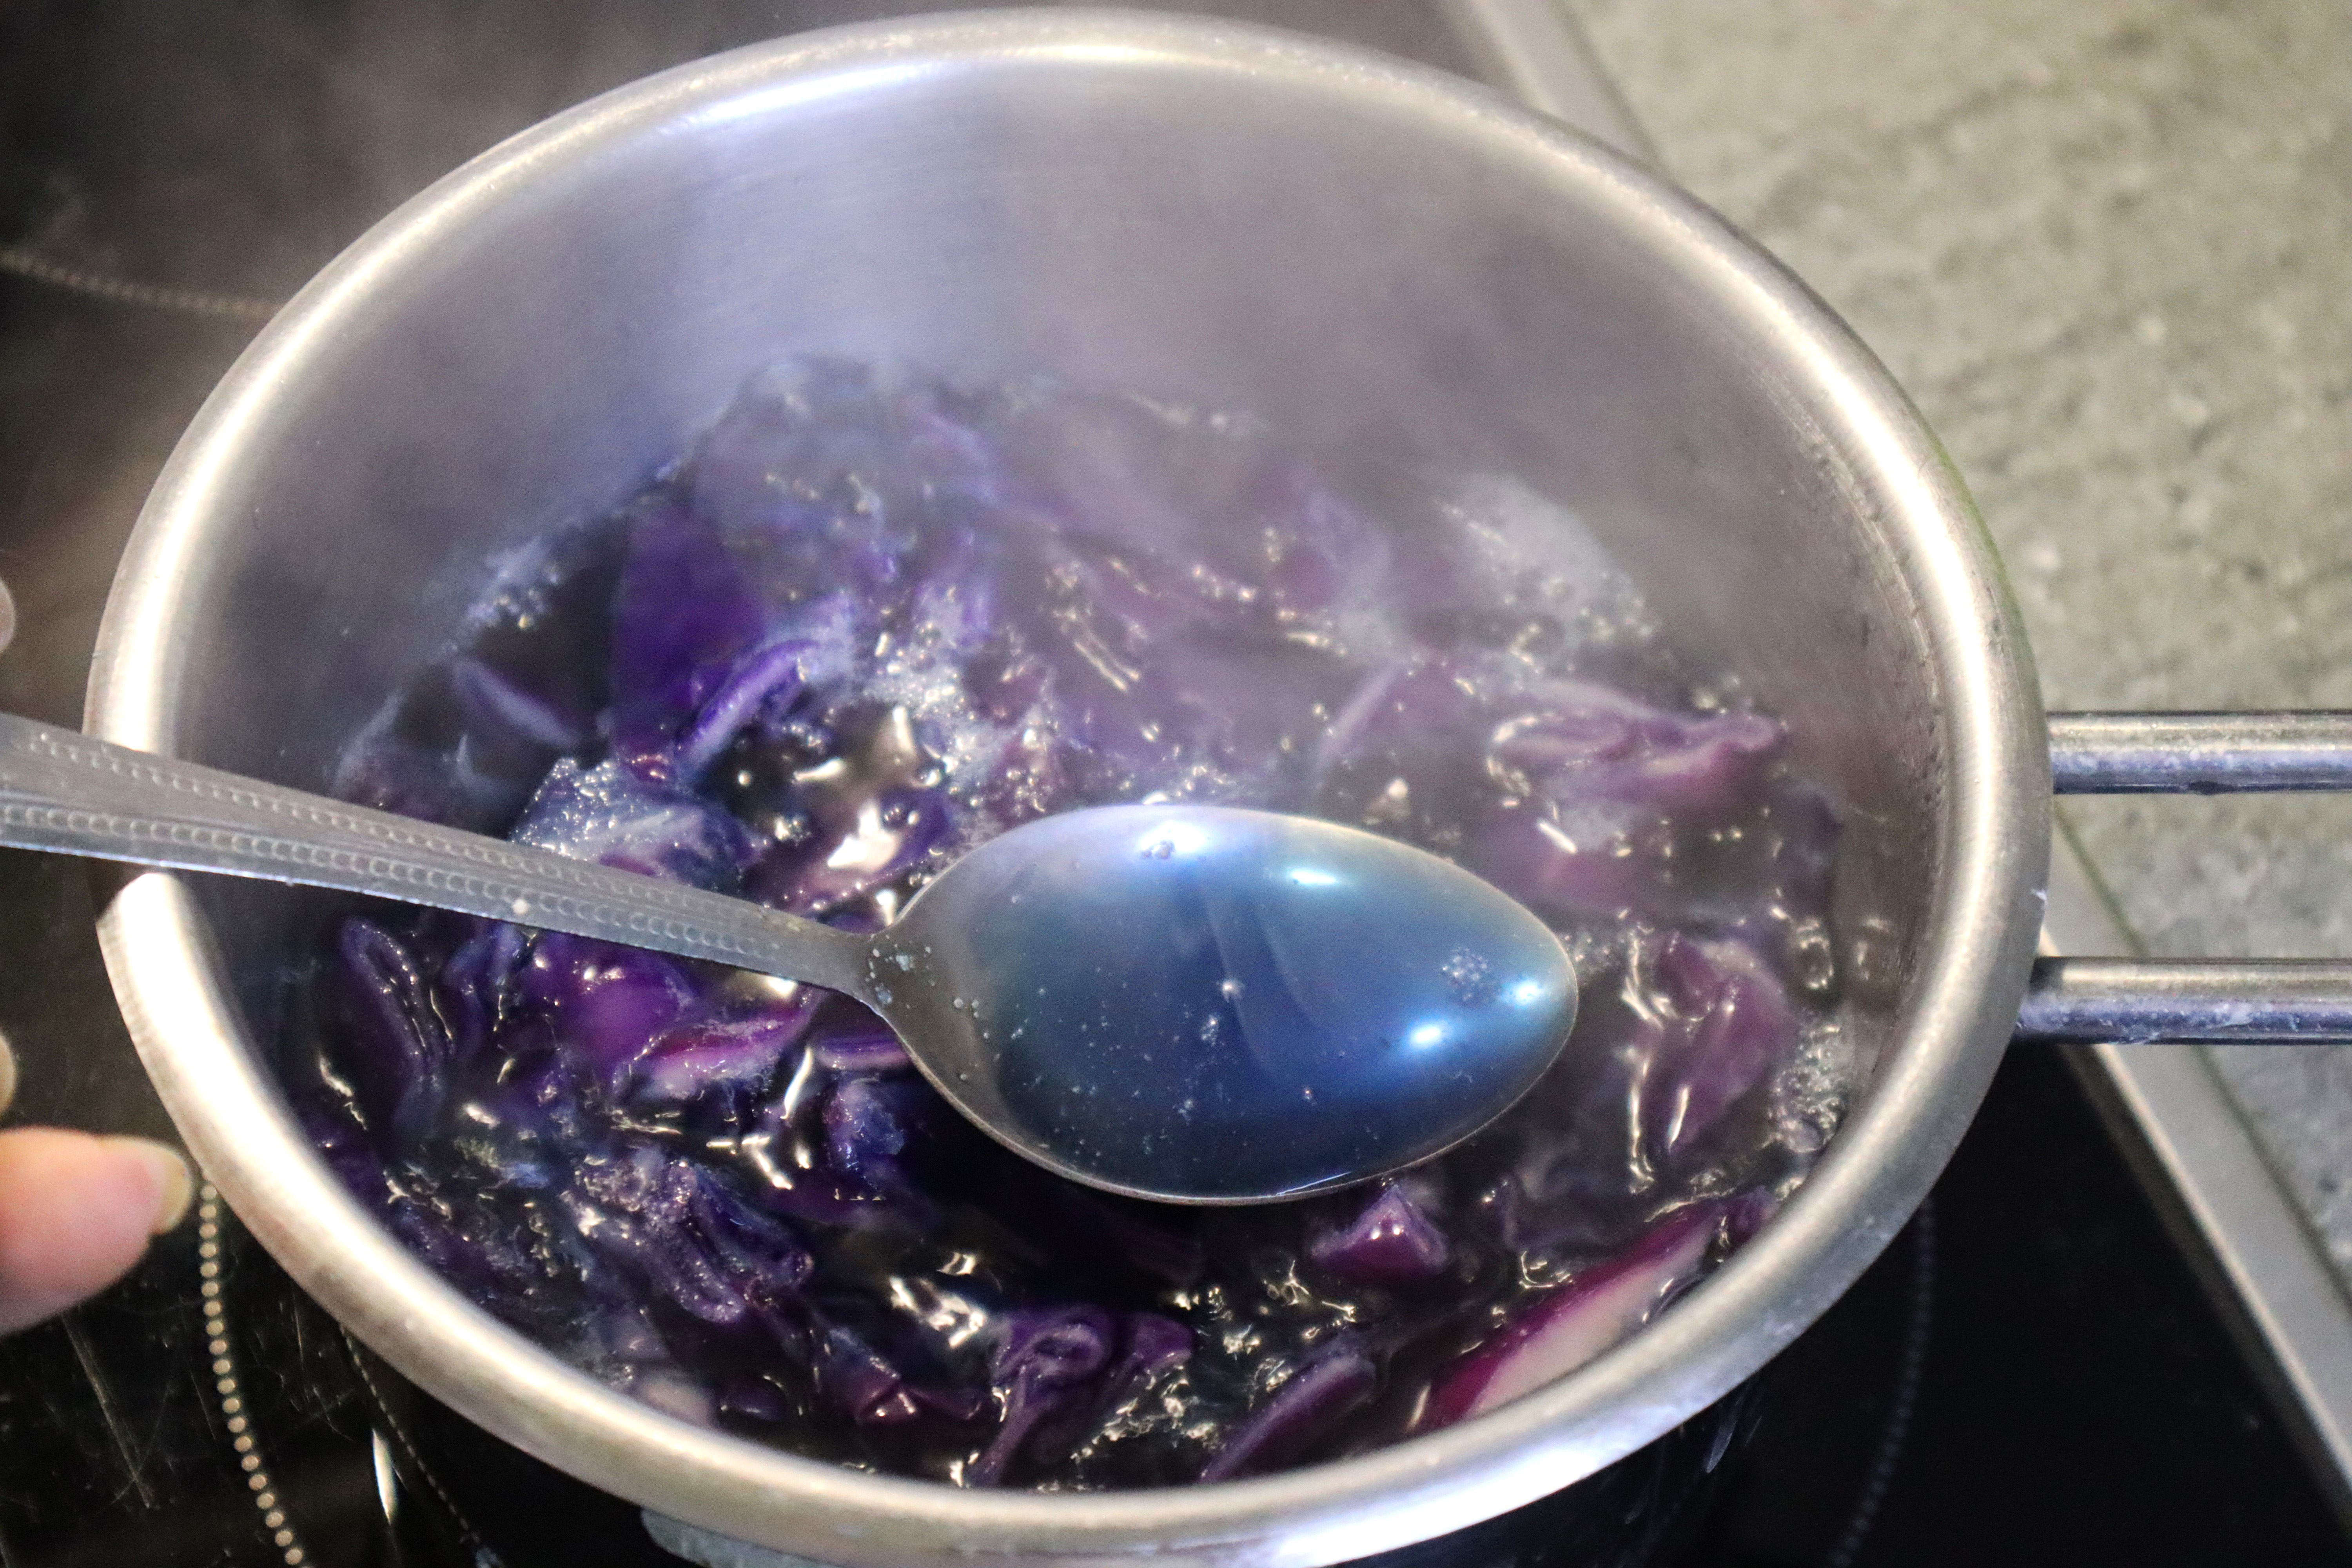
Simmer for another 10 minutes on medium heat.
Now, strain out the red cabbage, and continue simmering for another 20 minutes or more, until you get the syrupy consistency.

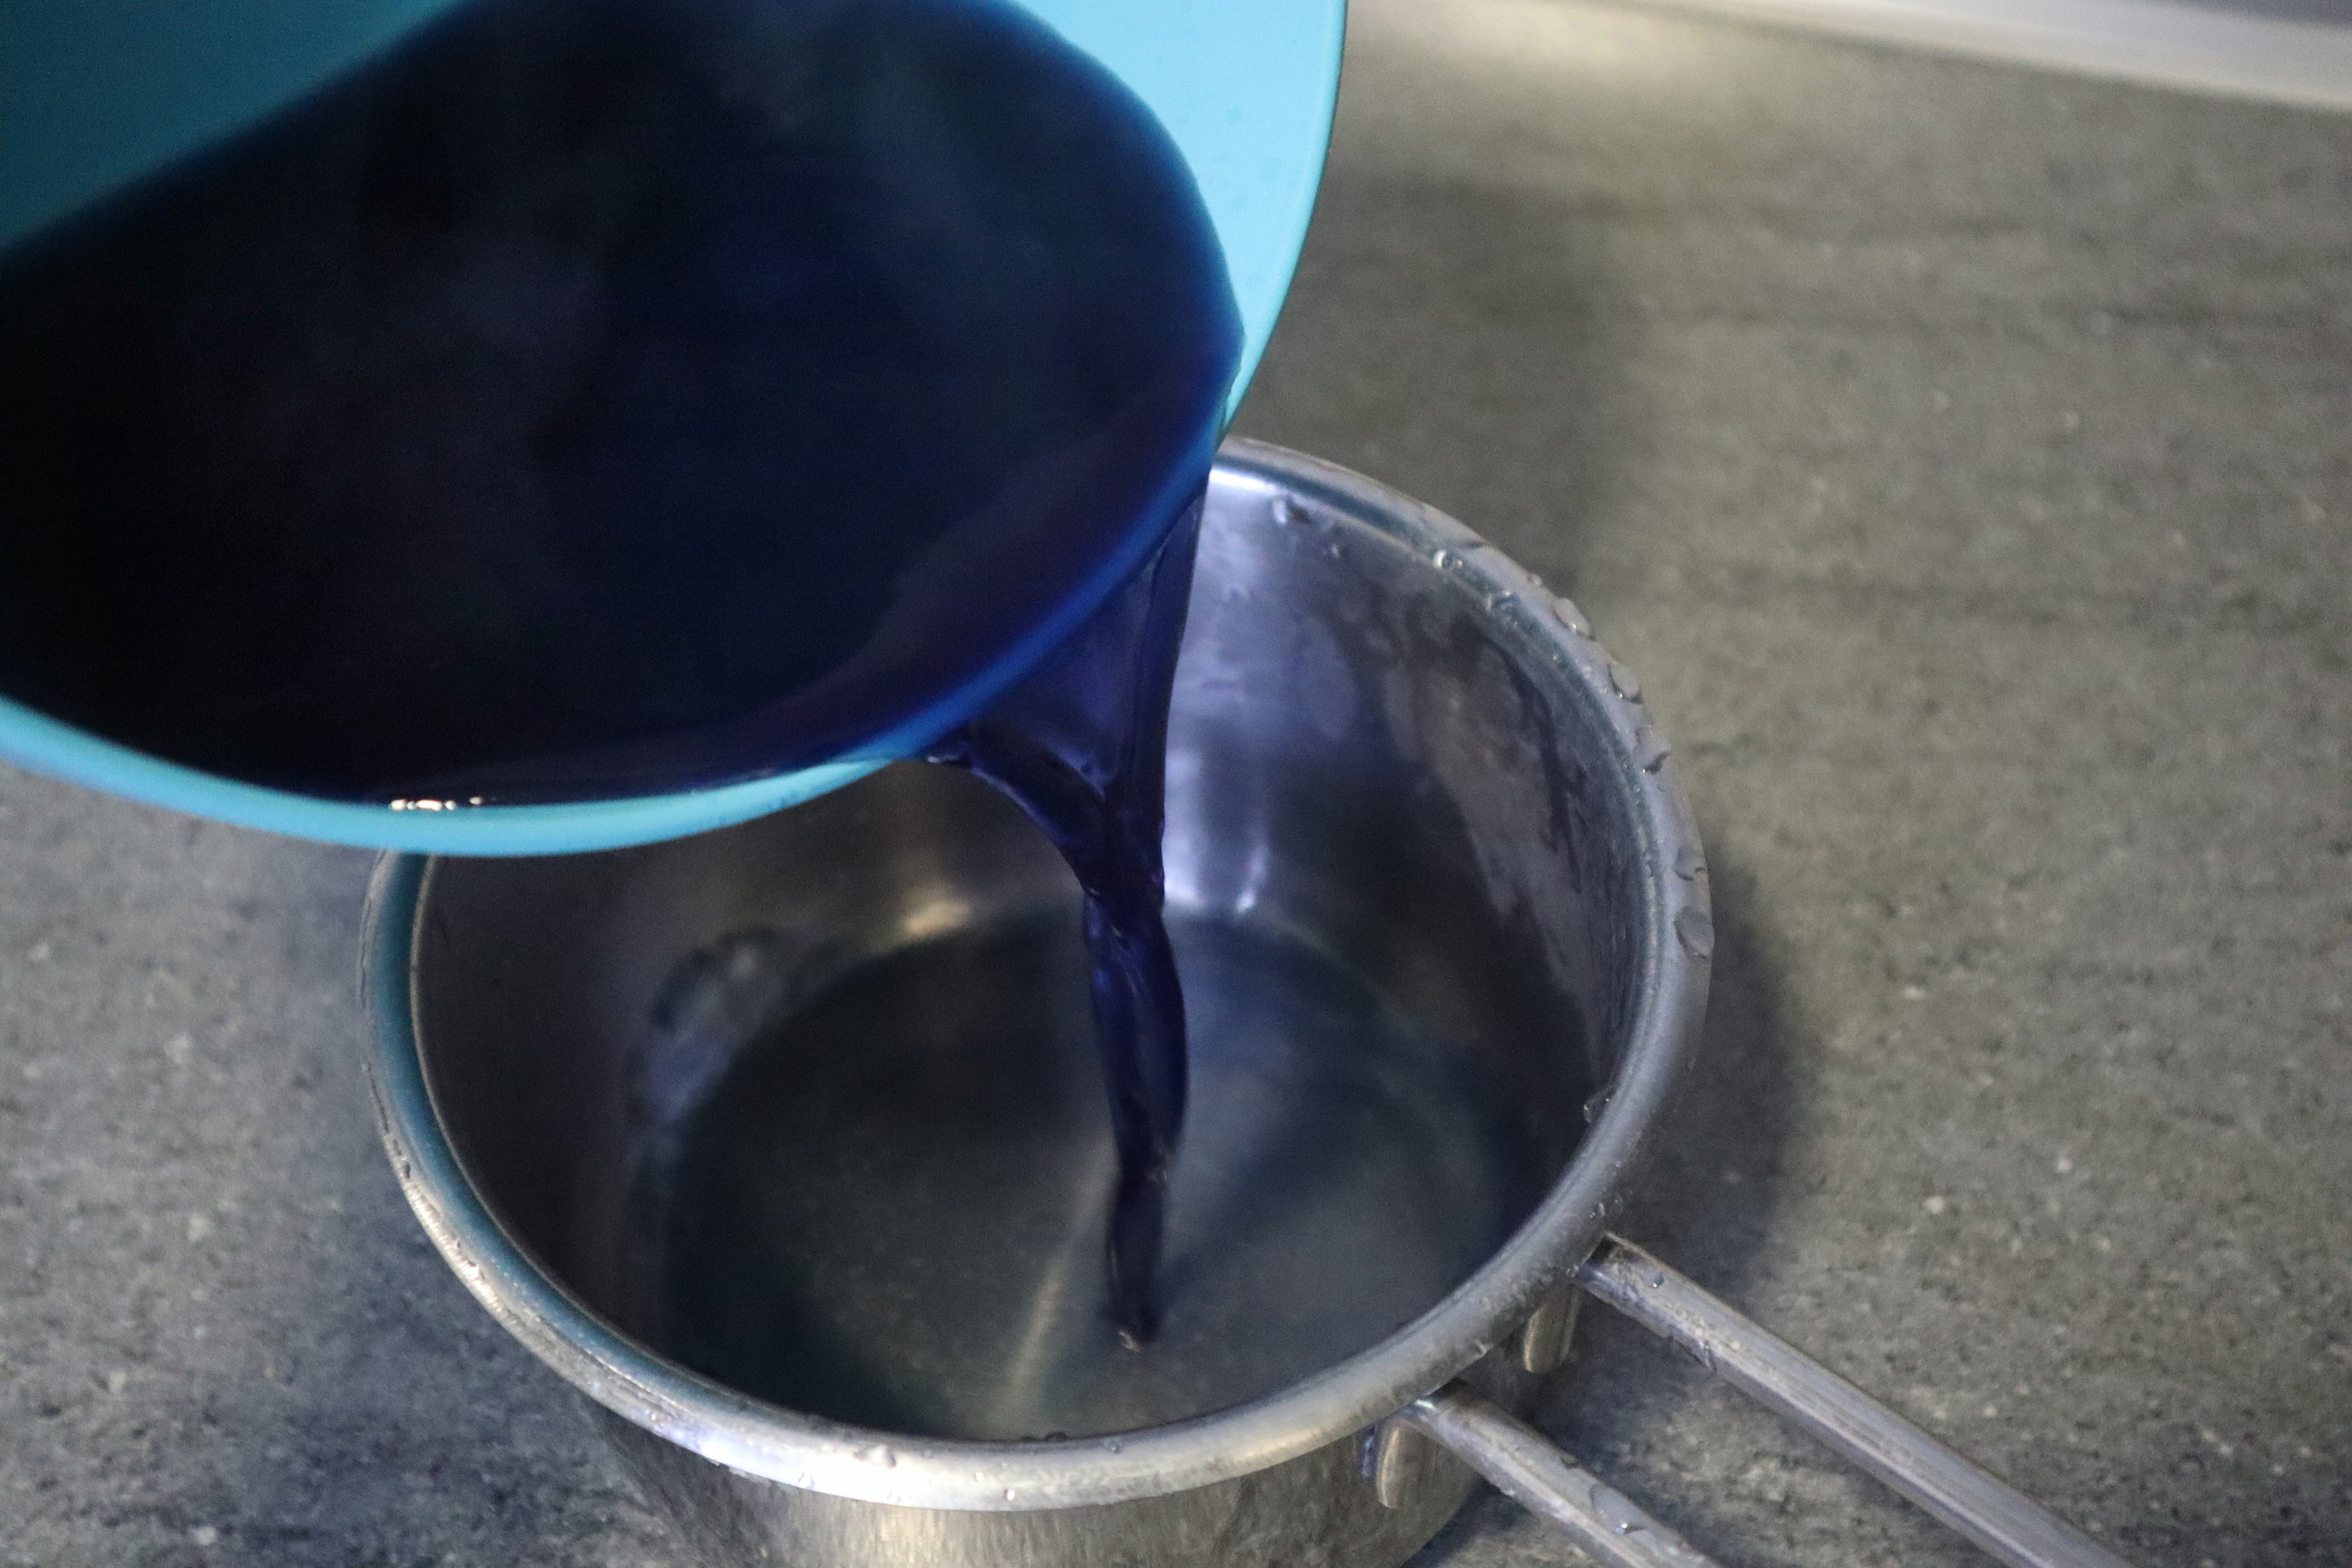
Remove the pot from the stove and add a small amount of soda. Be careful not to add too much, because the food coloring will be salty, and we don’t want a salty dessert 😊
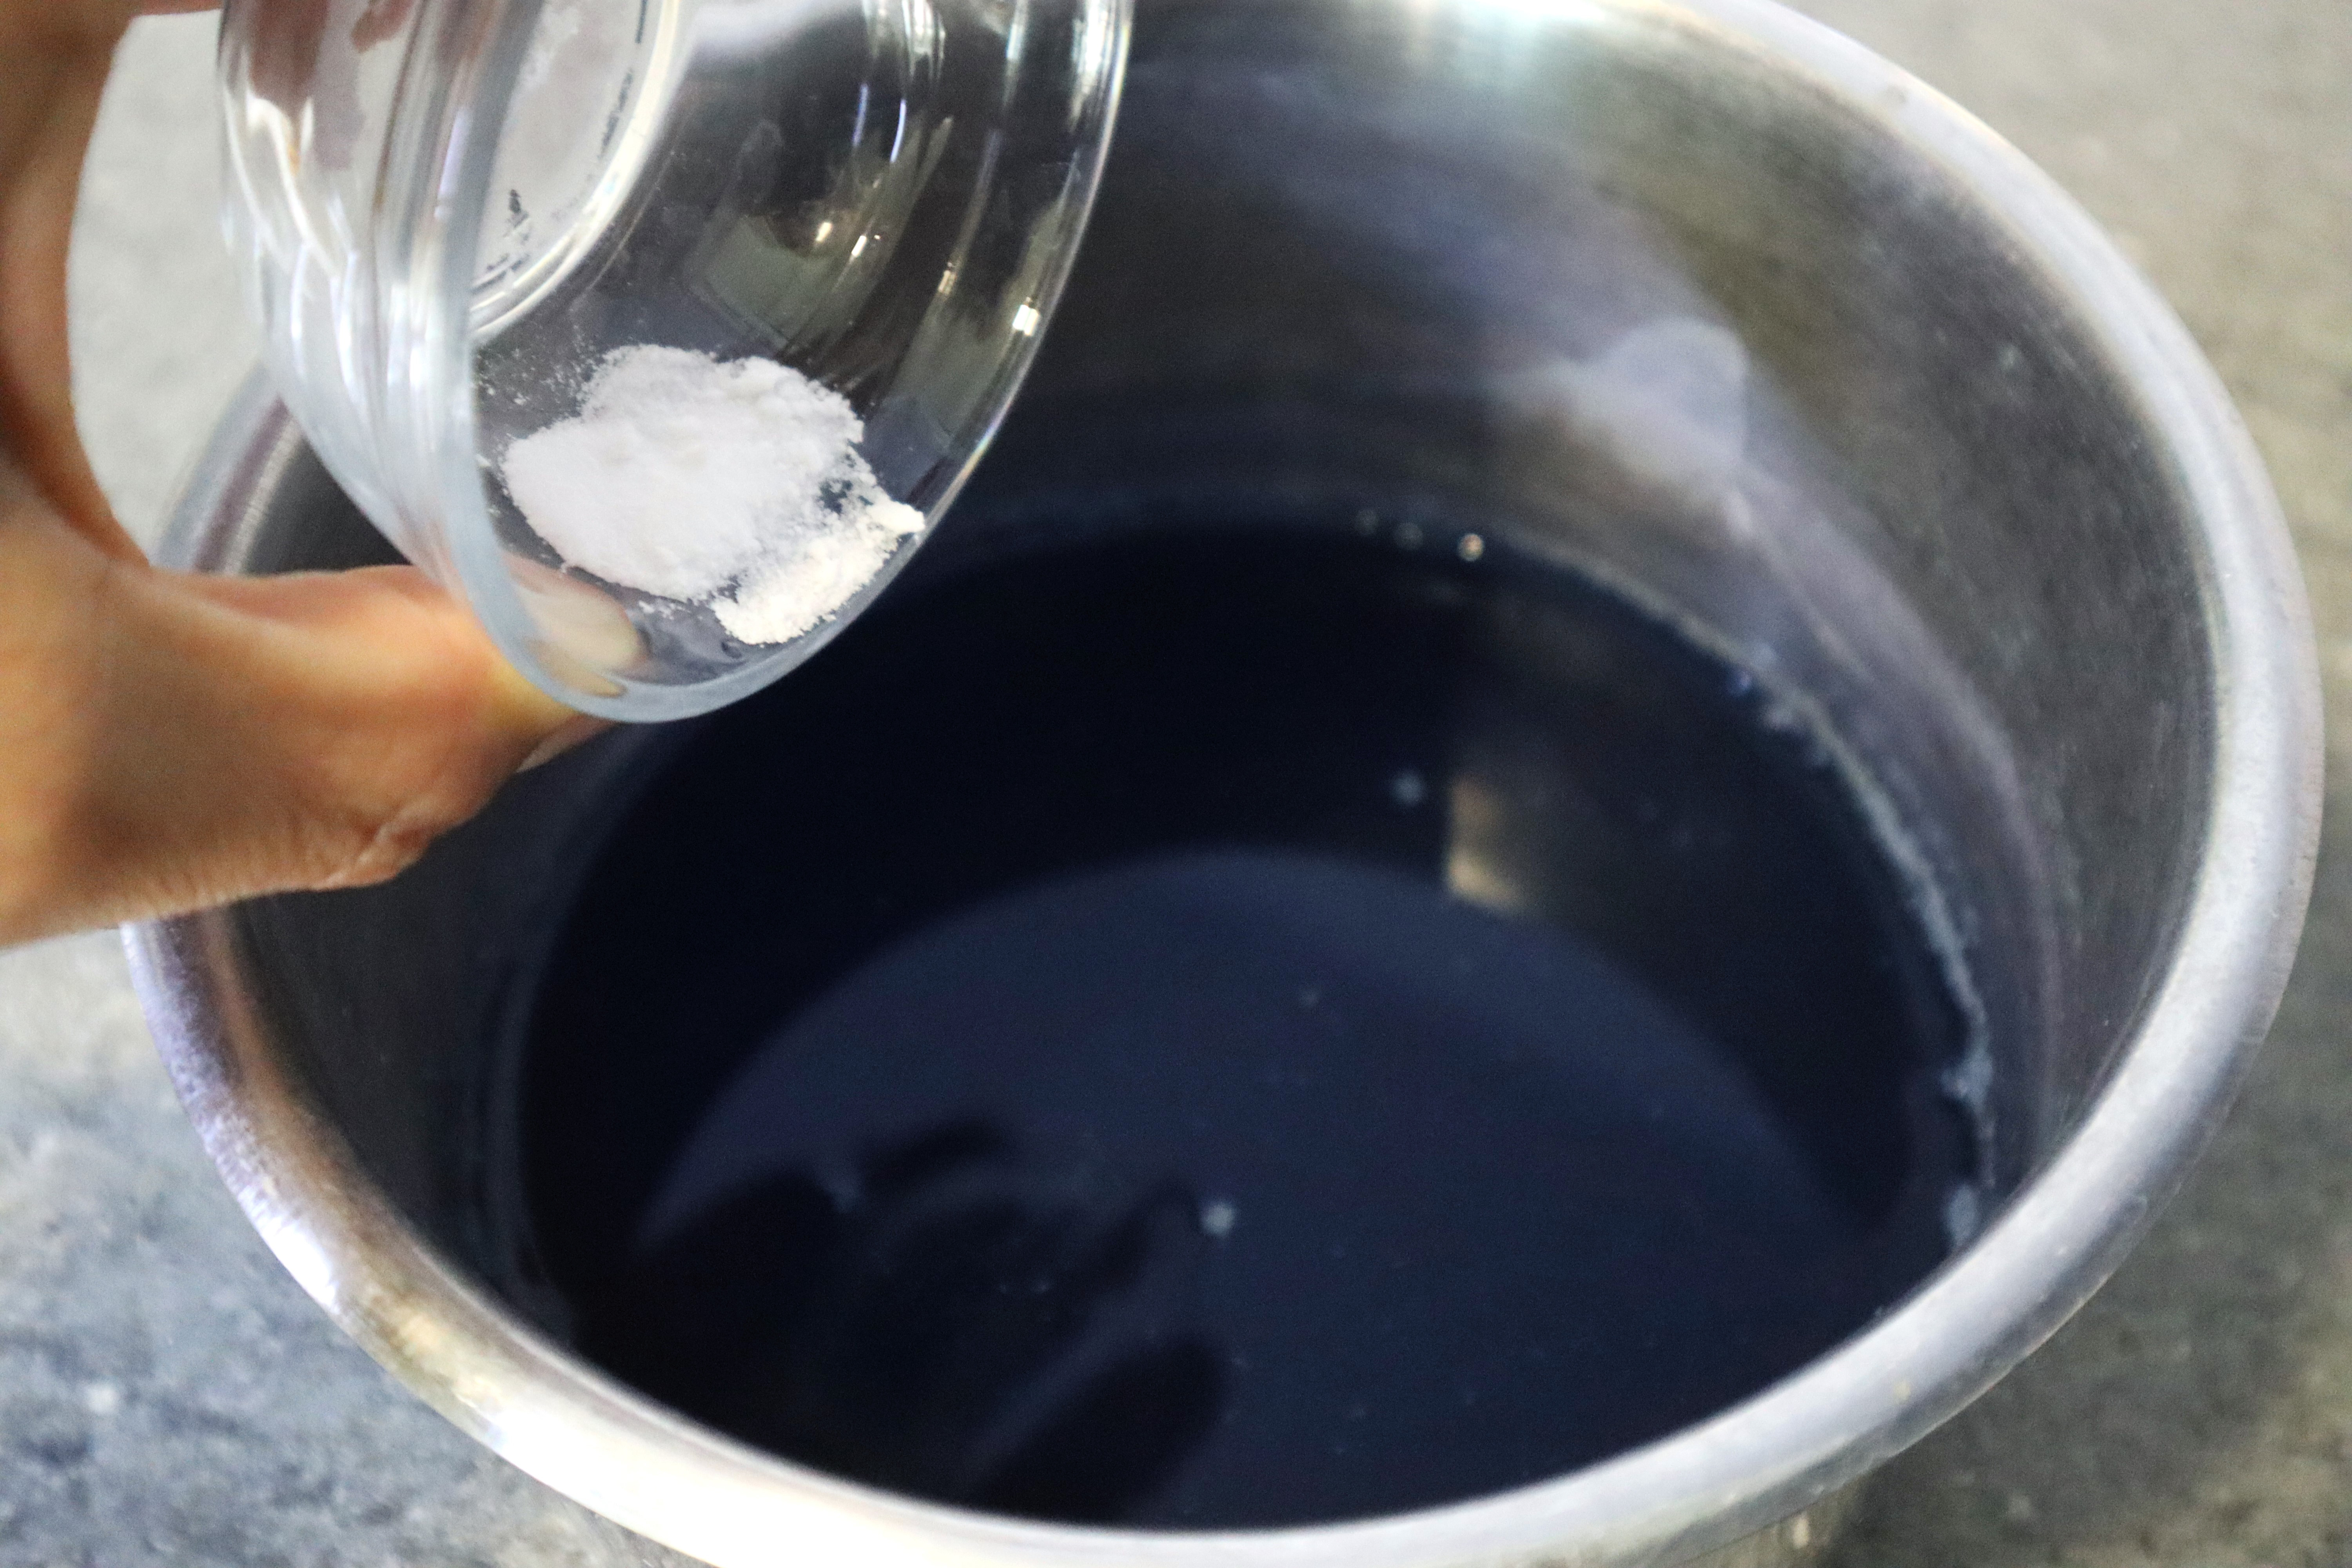
Add just enough for the soda to make its magic – neutralizing the acidity and stabilizing the blue color.
Next, let’s continue with the cake.
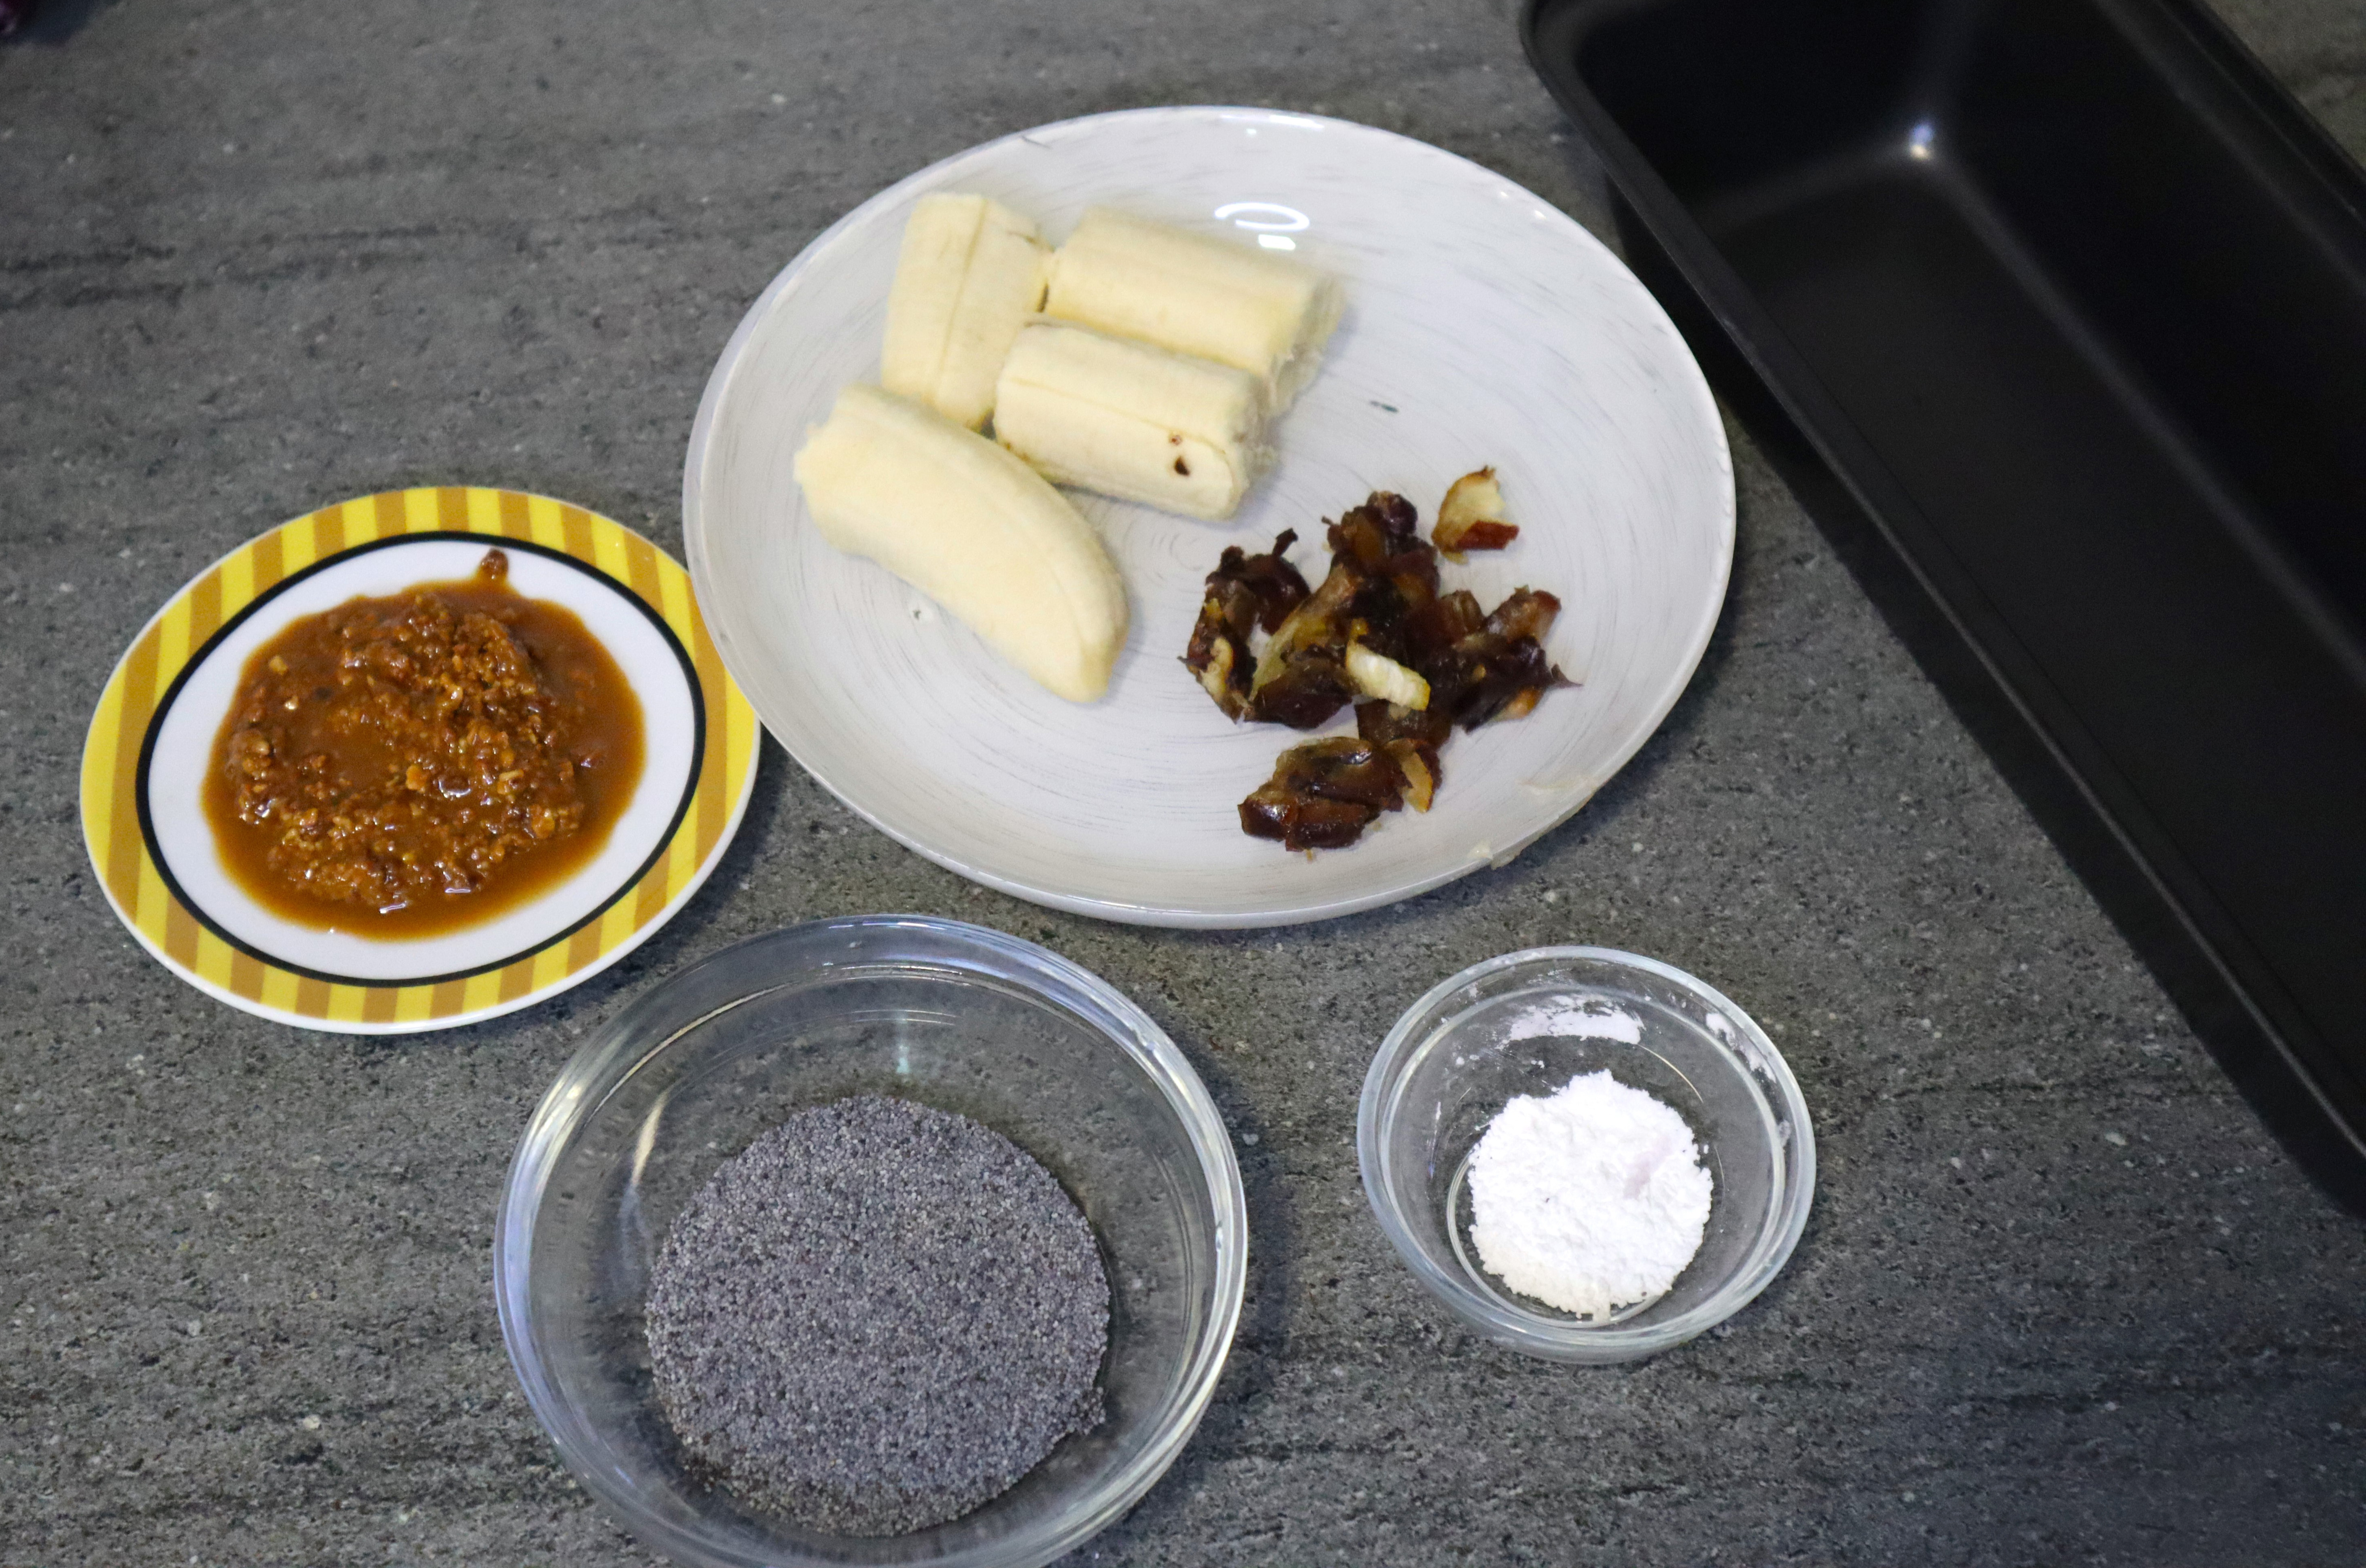
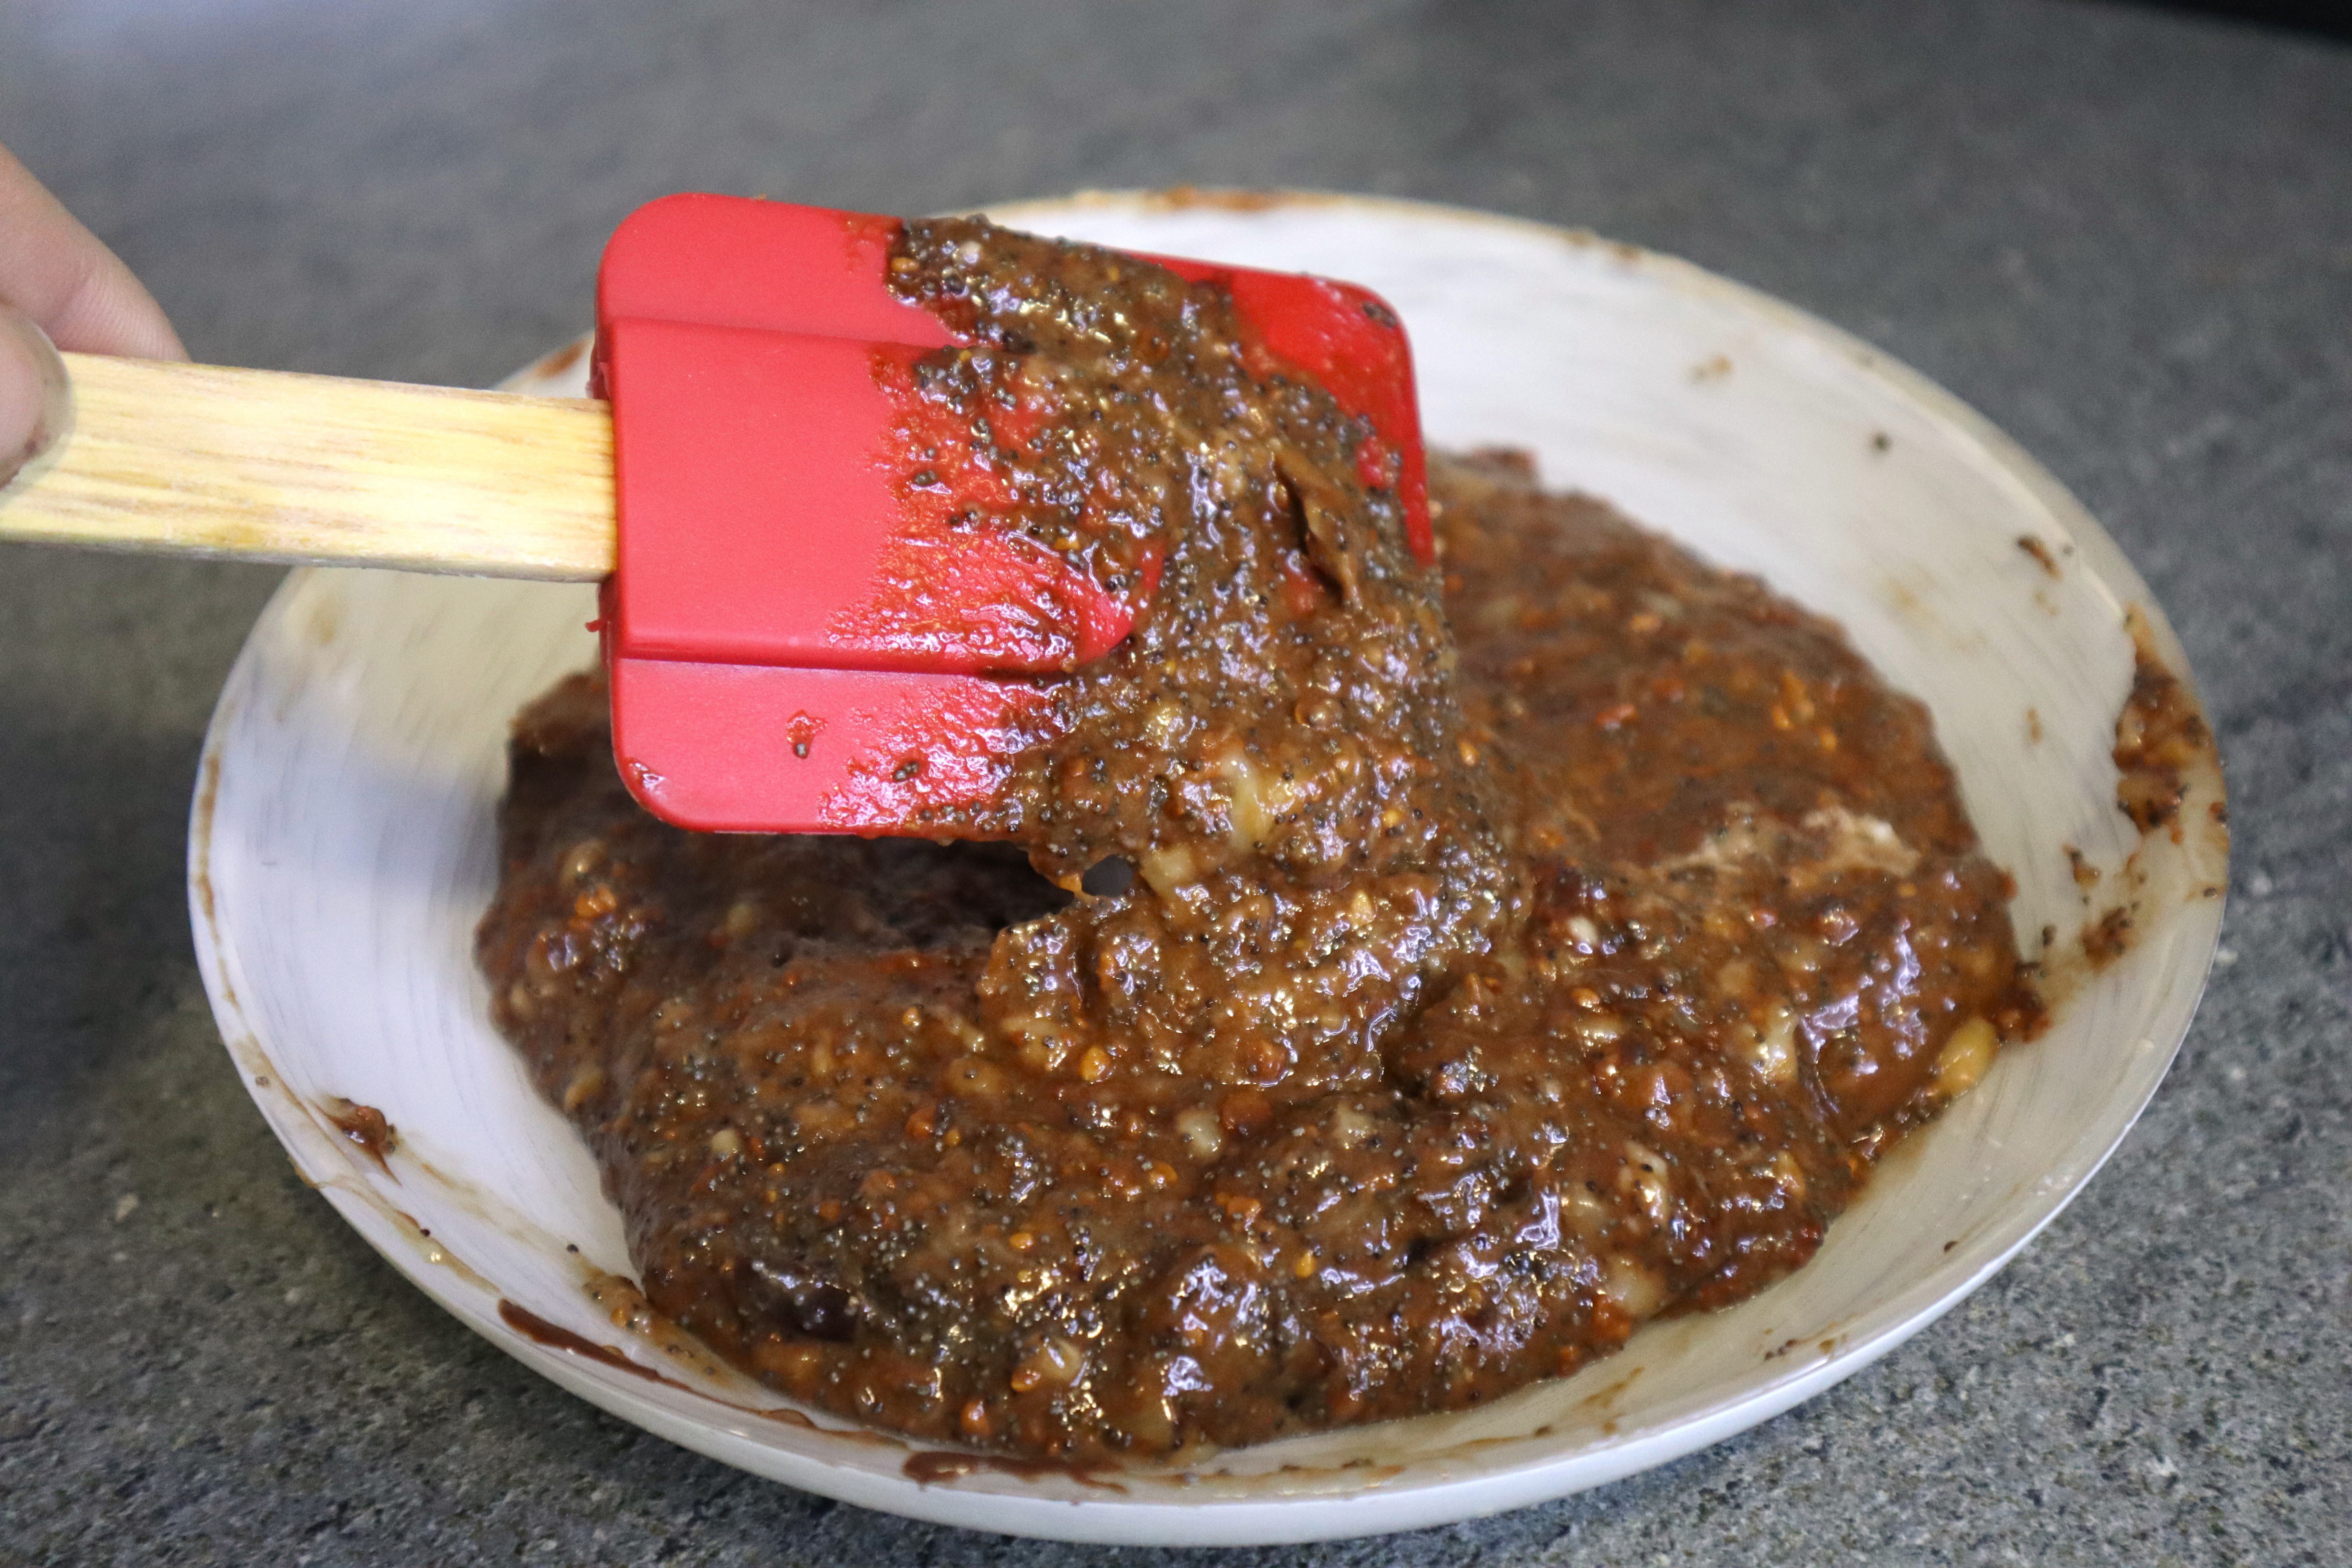
Ingredients:
1 large or 2 small bananas (the best are ripe bananas)
3 chopped dates
3 tbsp of poppy seeds
2 tbsp of peanut butter (the peanut butter we use is not creamy, but with small peanut pieces inside. The creamy one is also great for this recipe)
½ tsp baking powder
20 grams of melted dark chocolate (We forgot it in the microwave, that’s why it’s not shown in this photo, you’ll see it in the next photos)
Preheat the oven to 180 degrees. Mash the banana with a fork. Mix it together with the chopped dates.
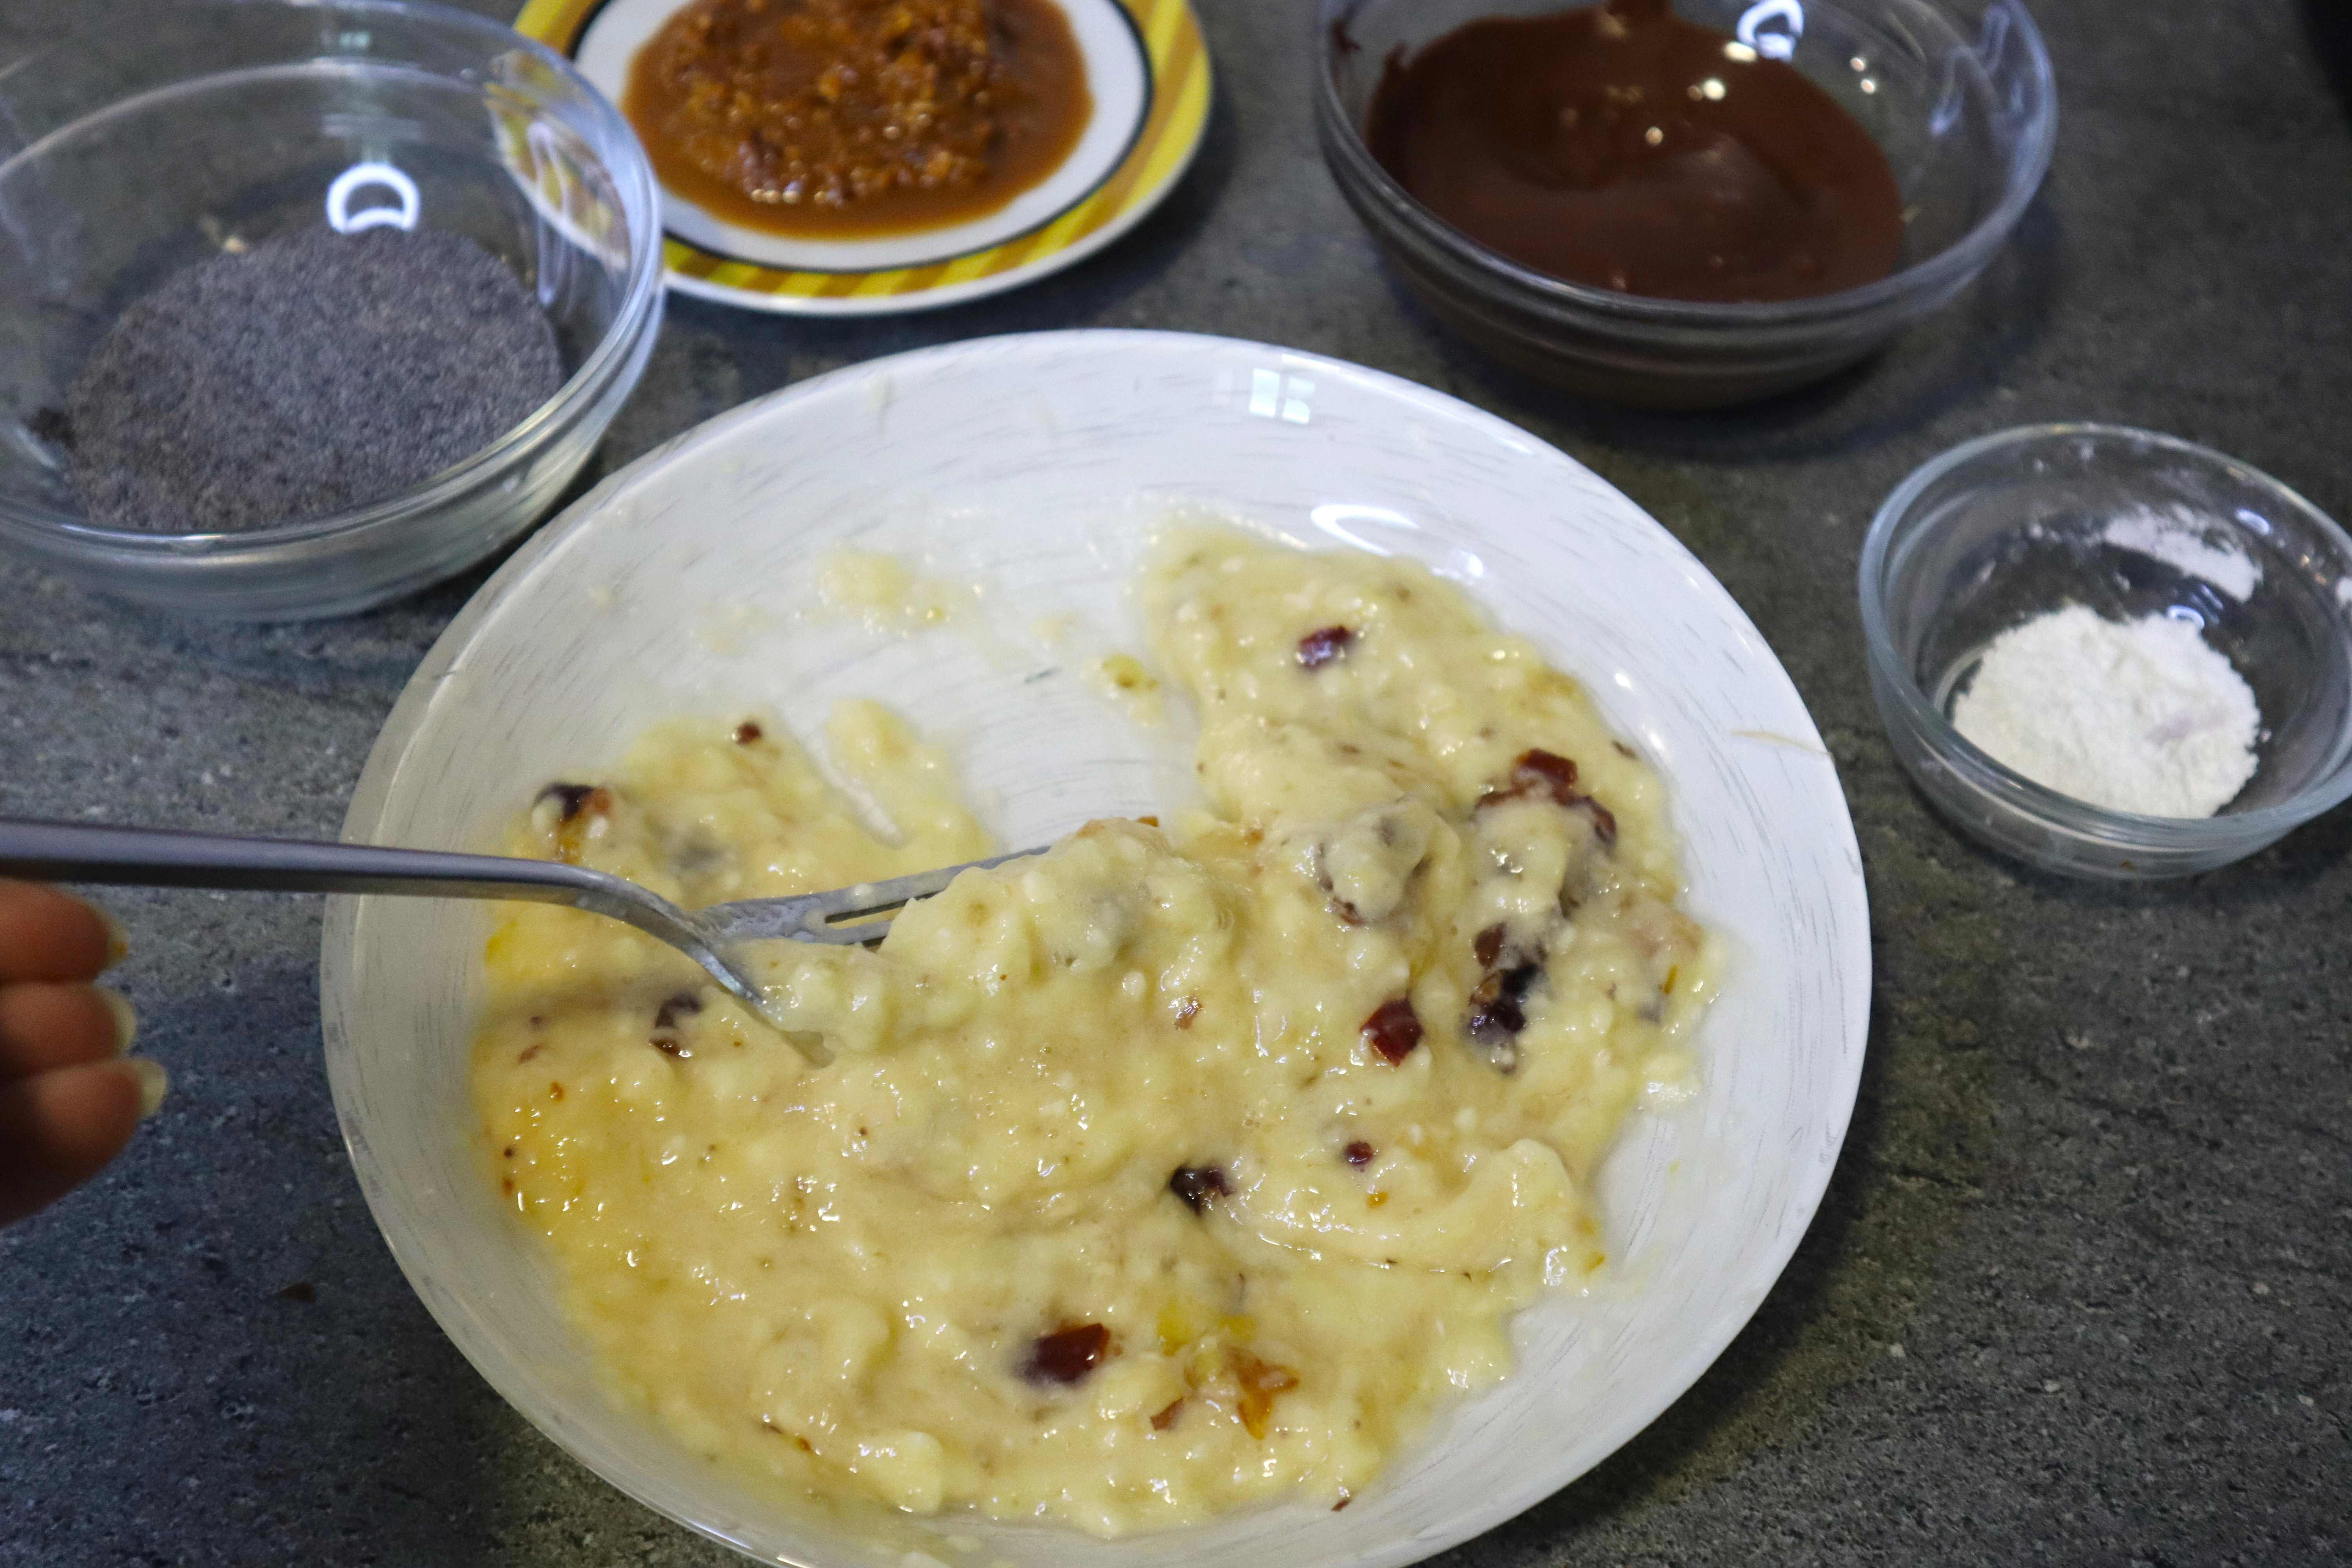
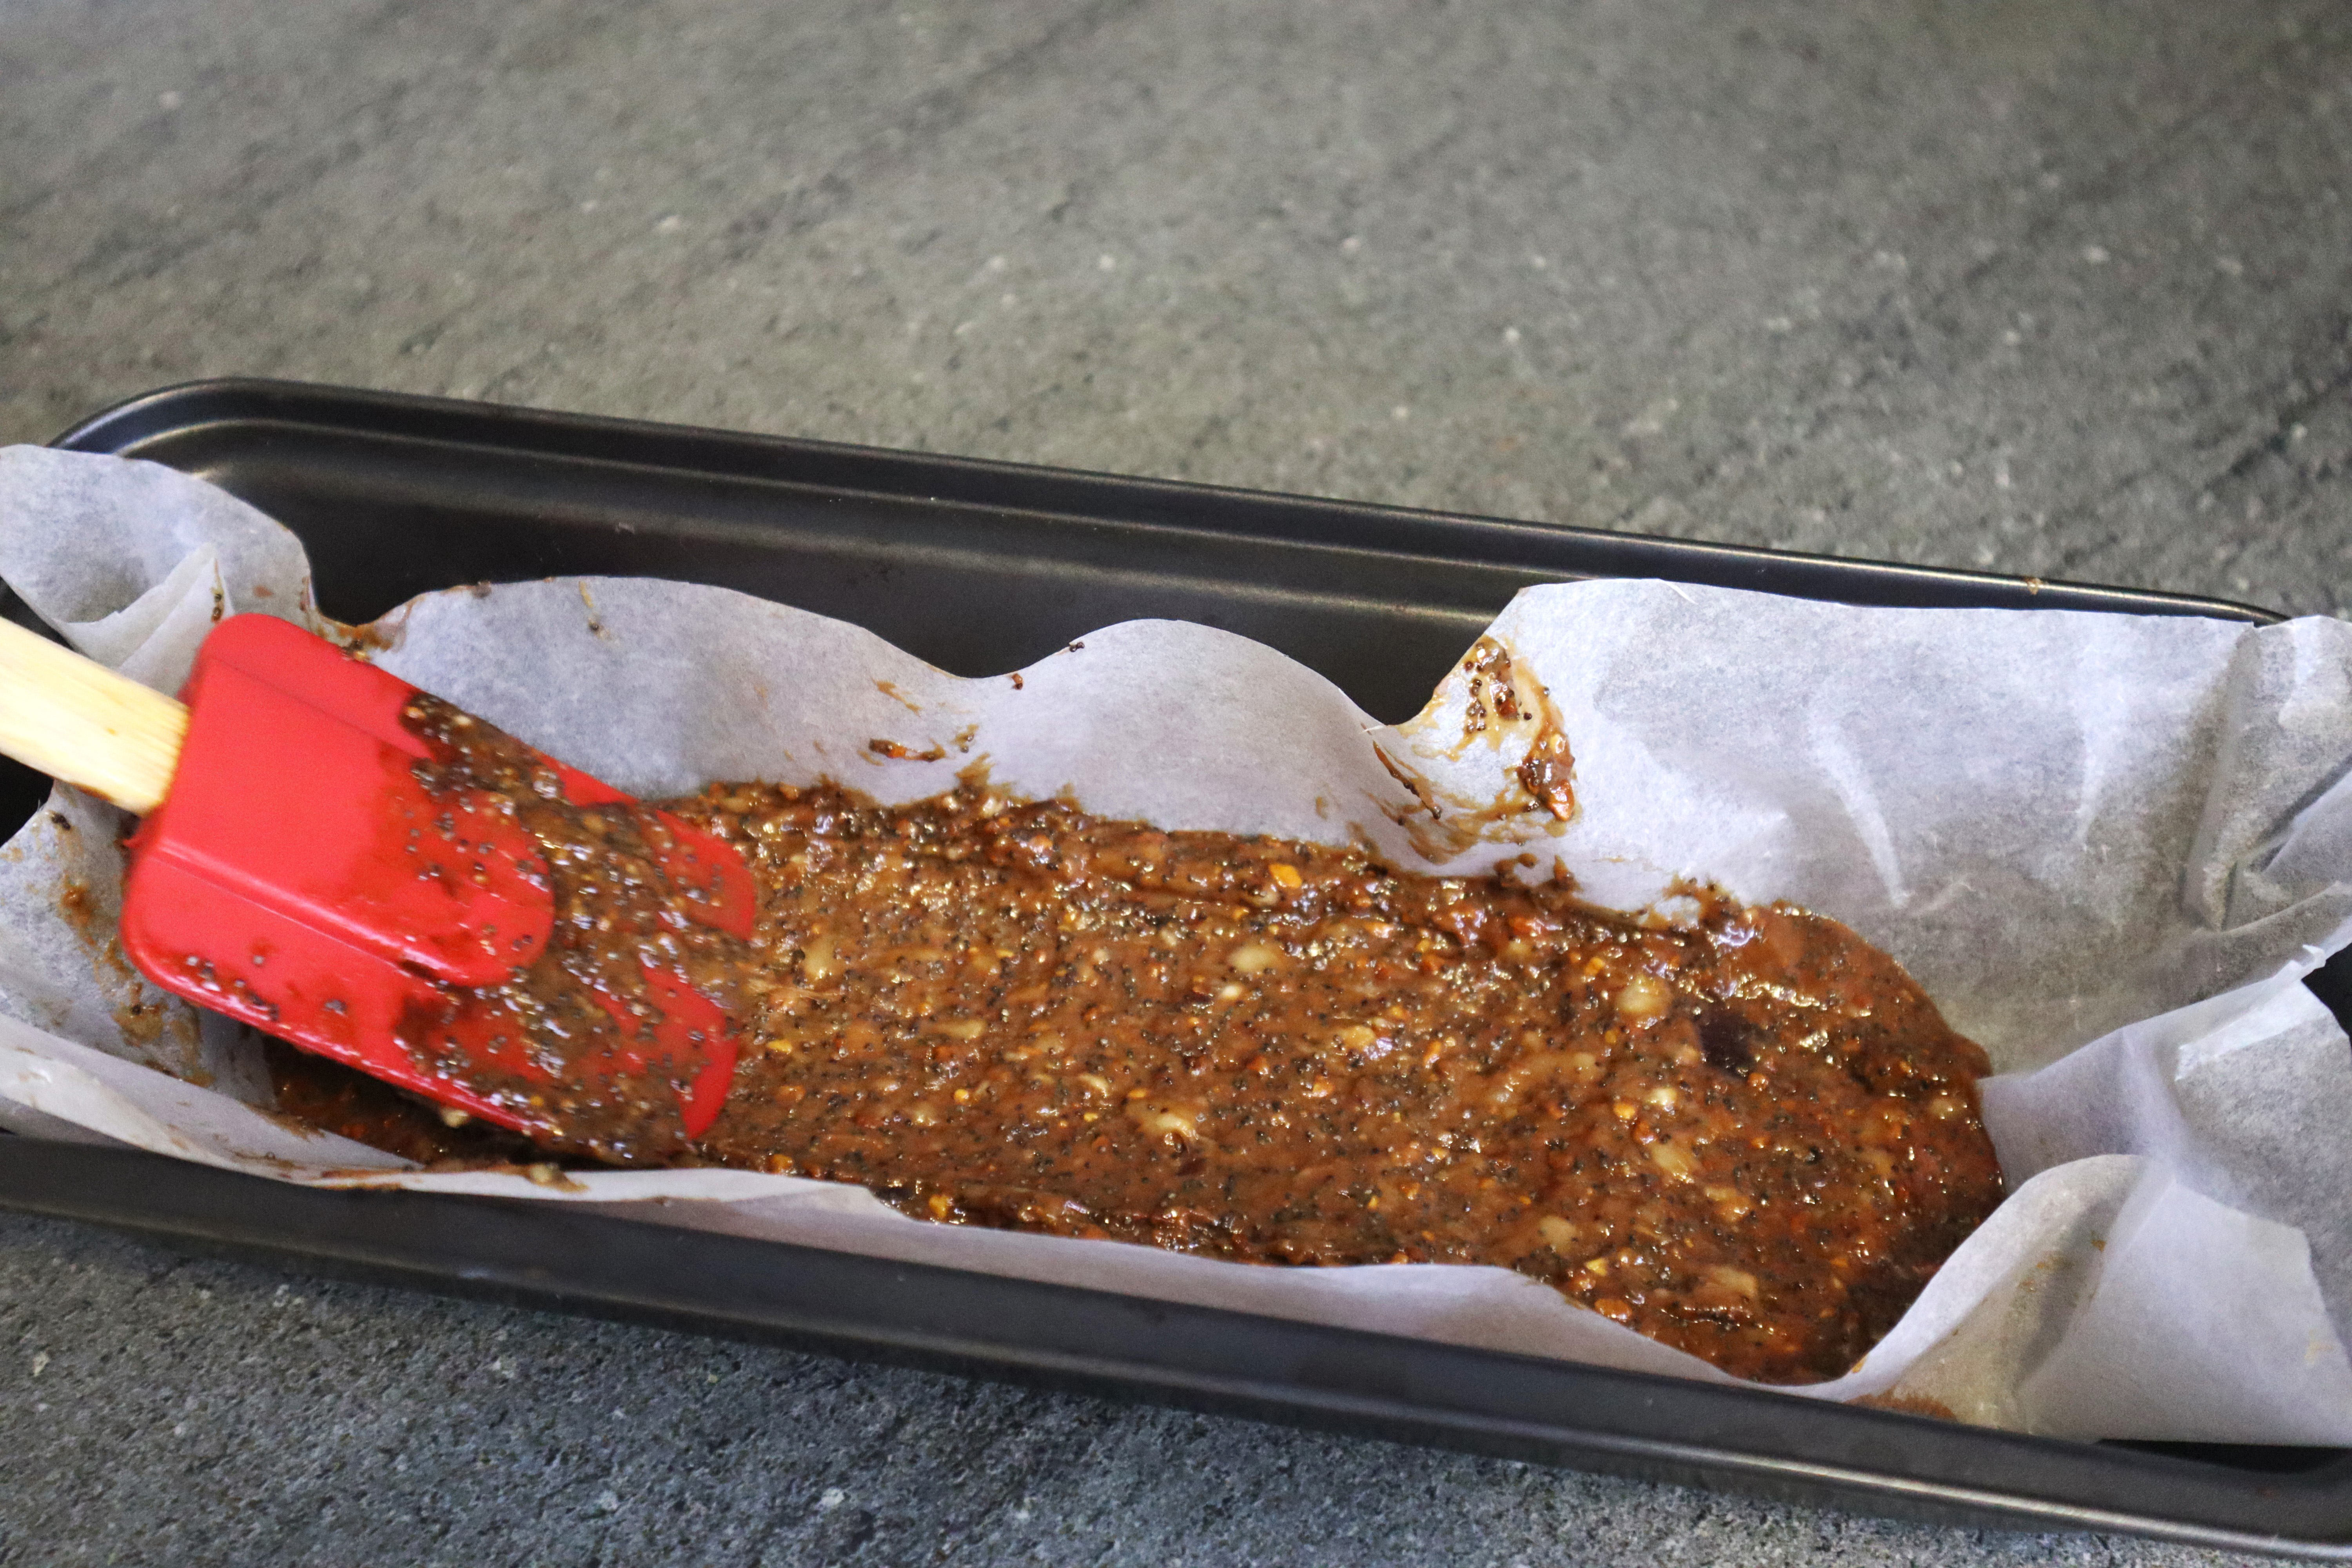
Then add all the ingredients and mix them together until you get a nice creamy mixture (as shown in the photo below).
Pour it into a bread pan.
Now it’s time for the blue part of the cake 😊

For this part you’ll need:
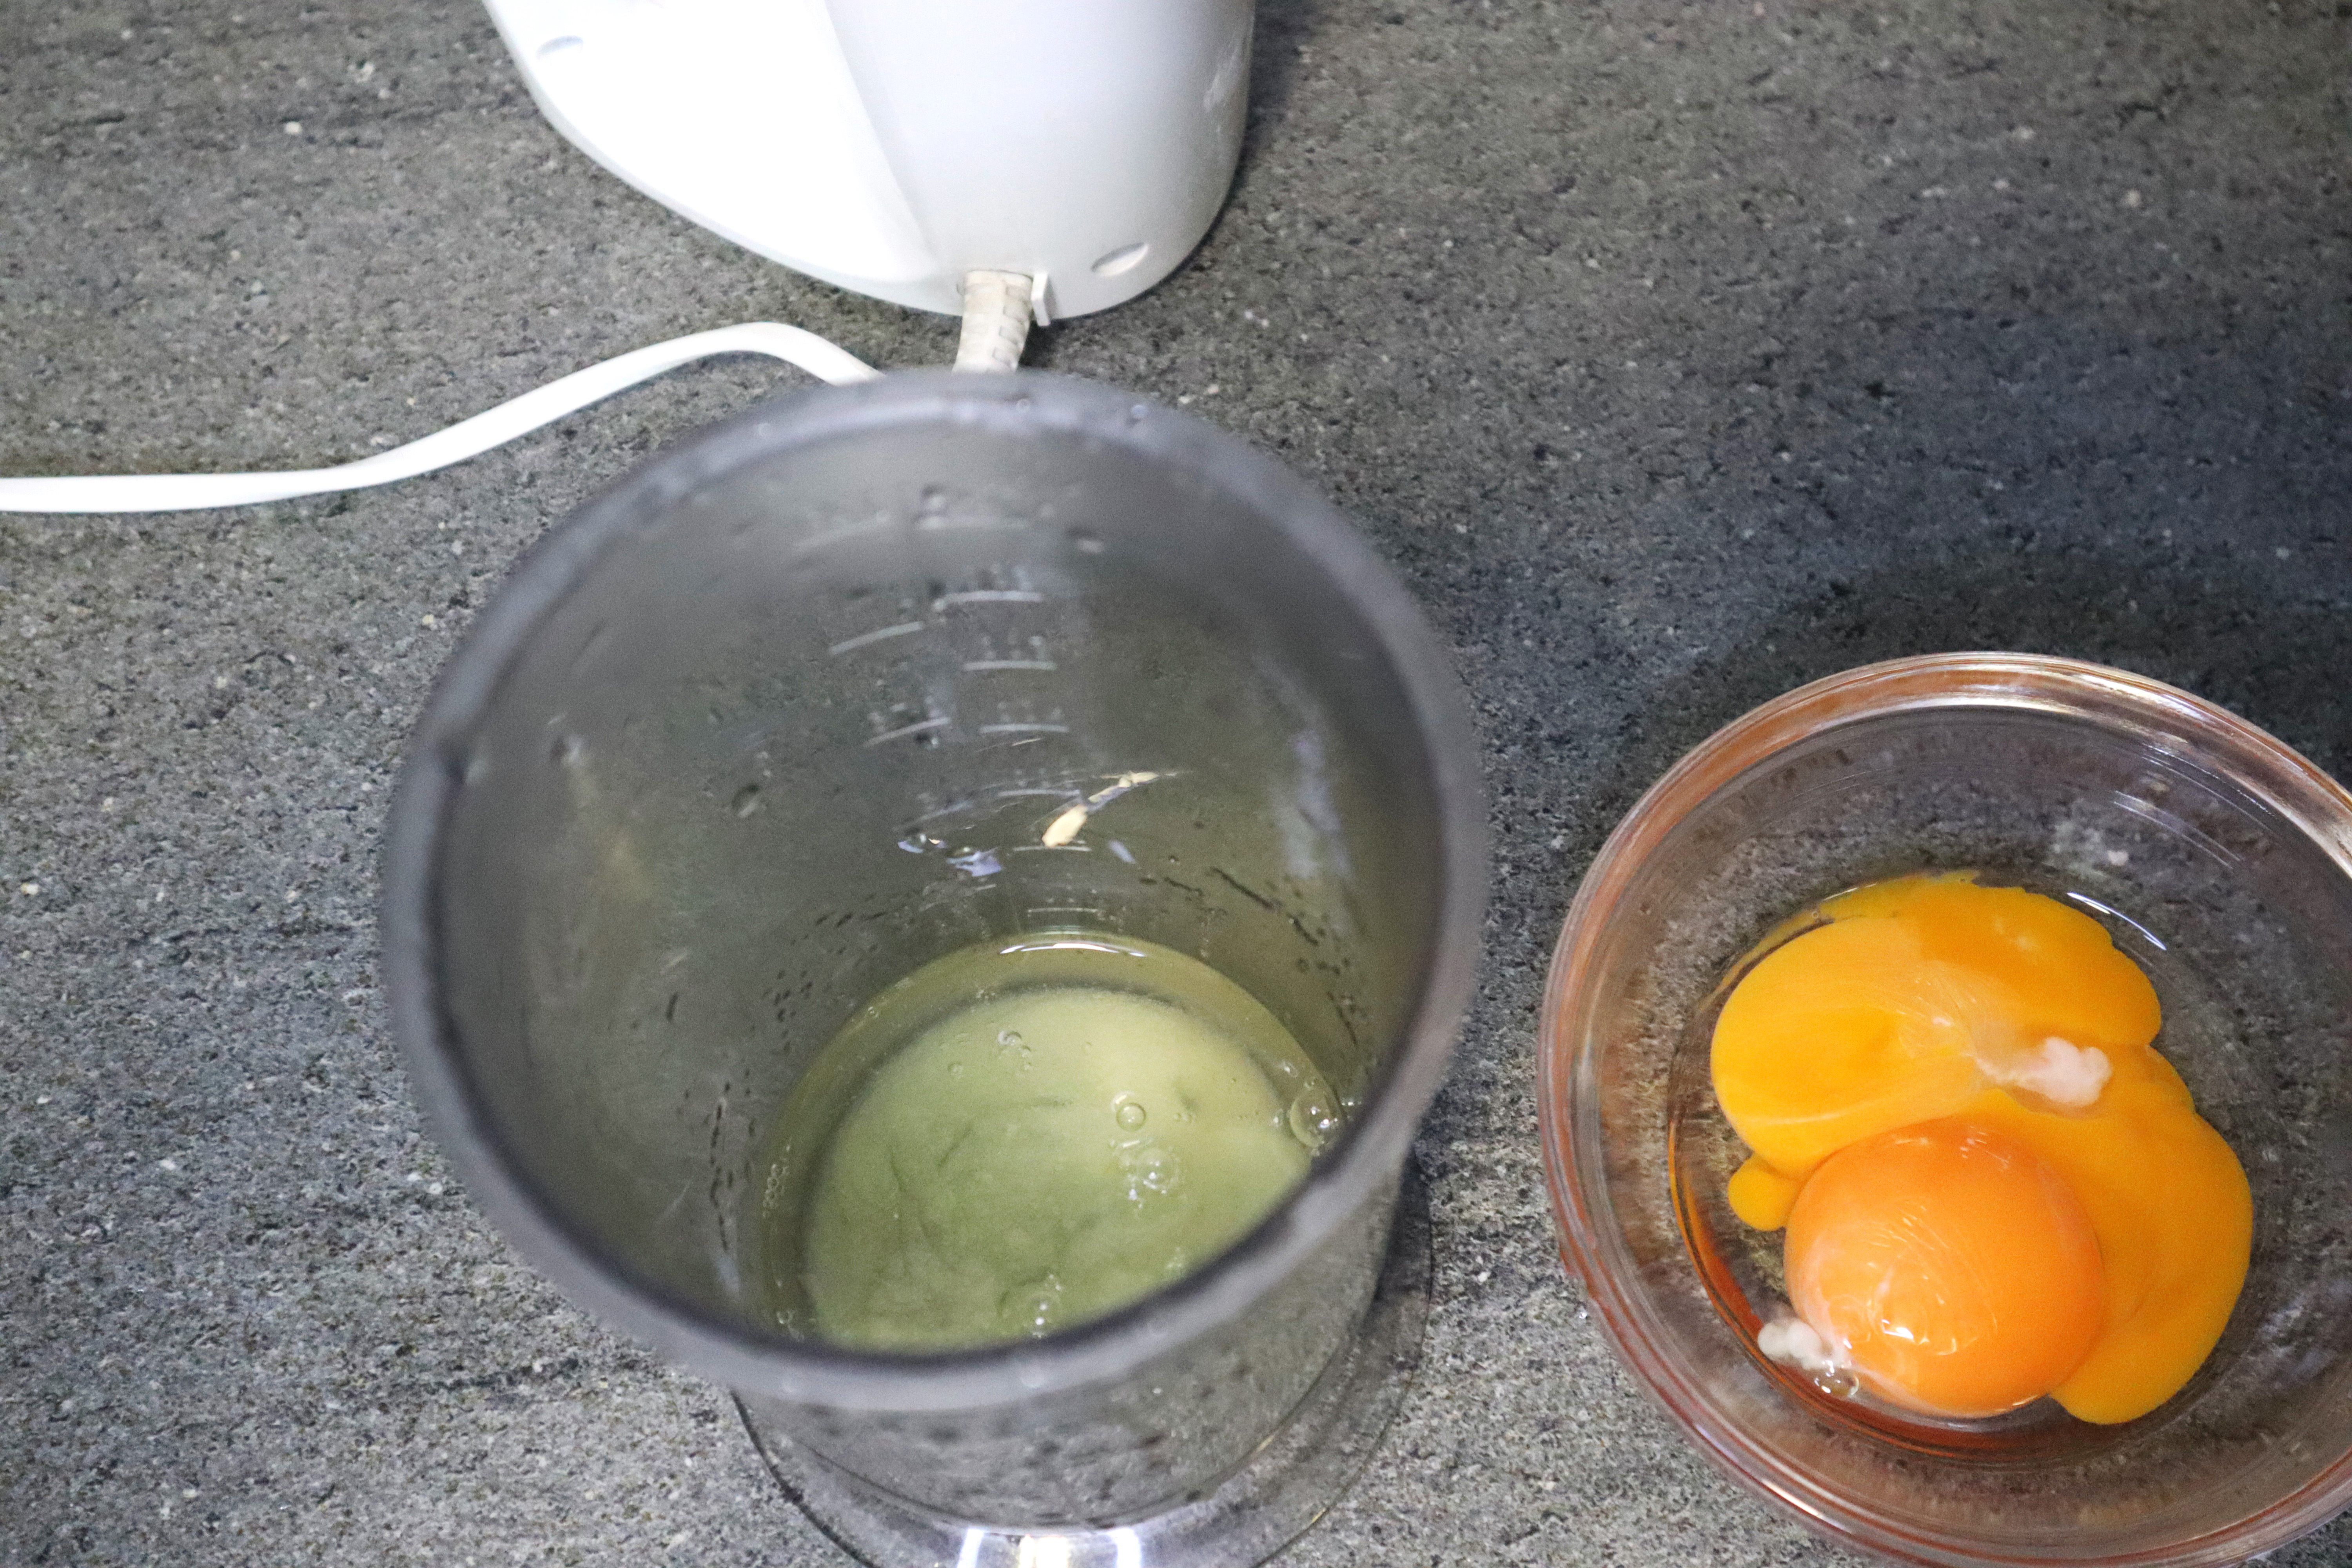
2 egg whites
1 tbsp of stevia
1 tbsp of natural blue food coloring (be careful with the amount of the blue coloring, because it has a little bit of a cabbage taste).
Separate the white eggs from the yolks and place them in a large mixing bowl.
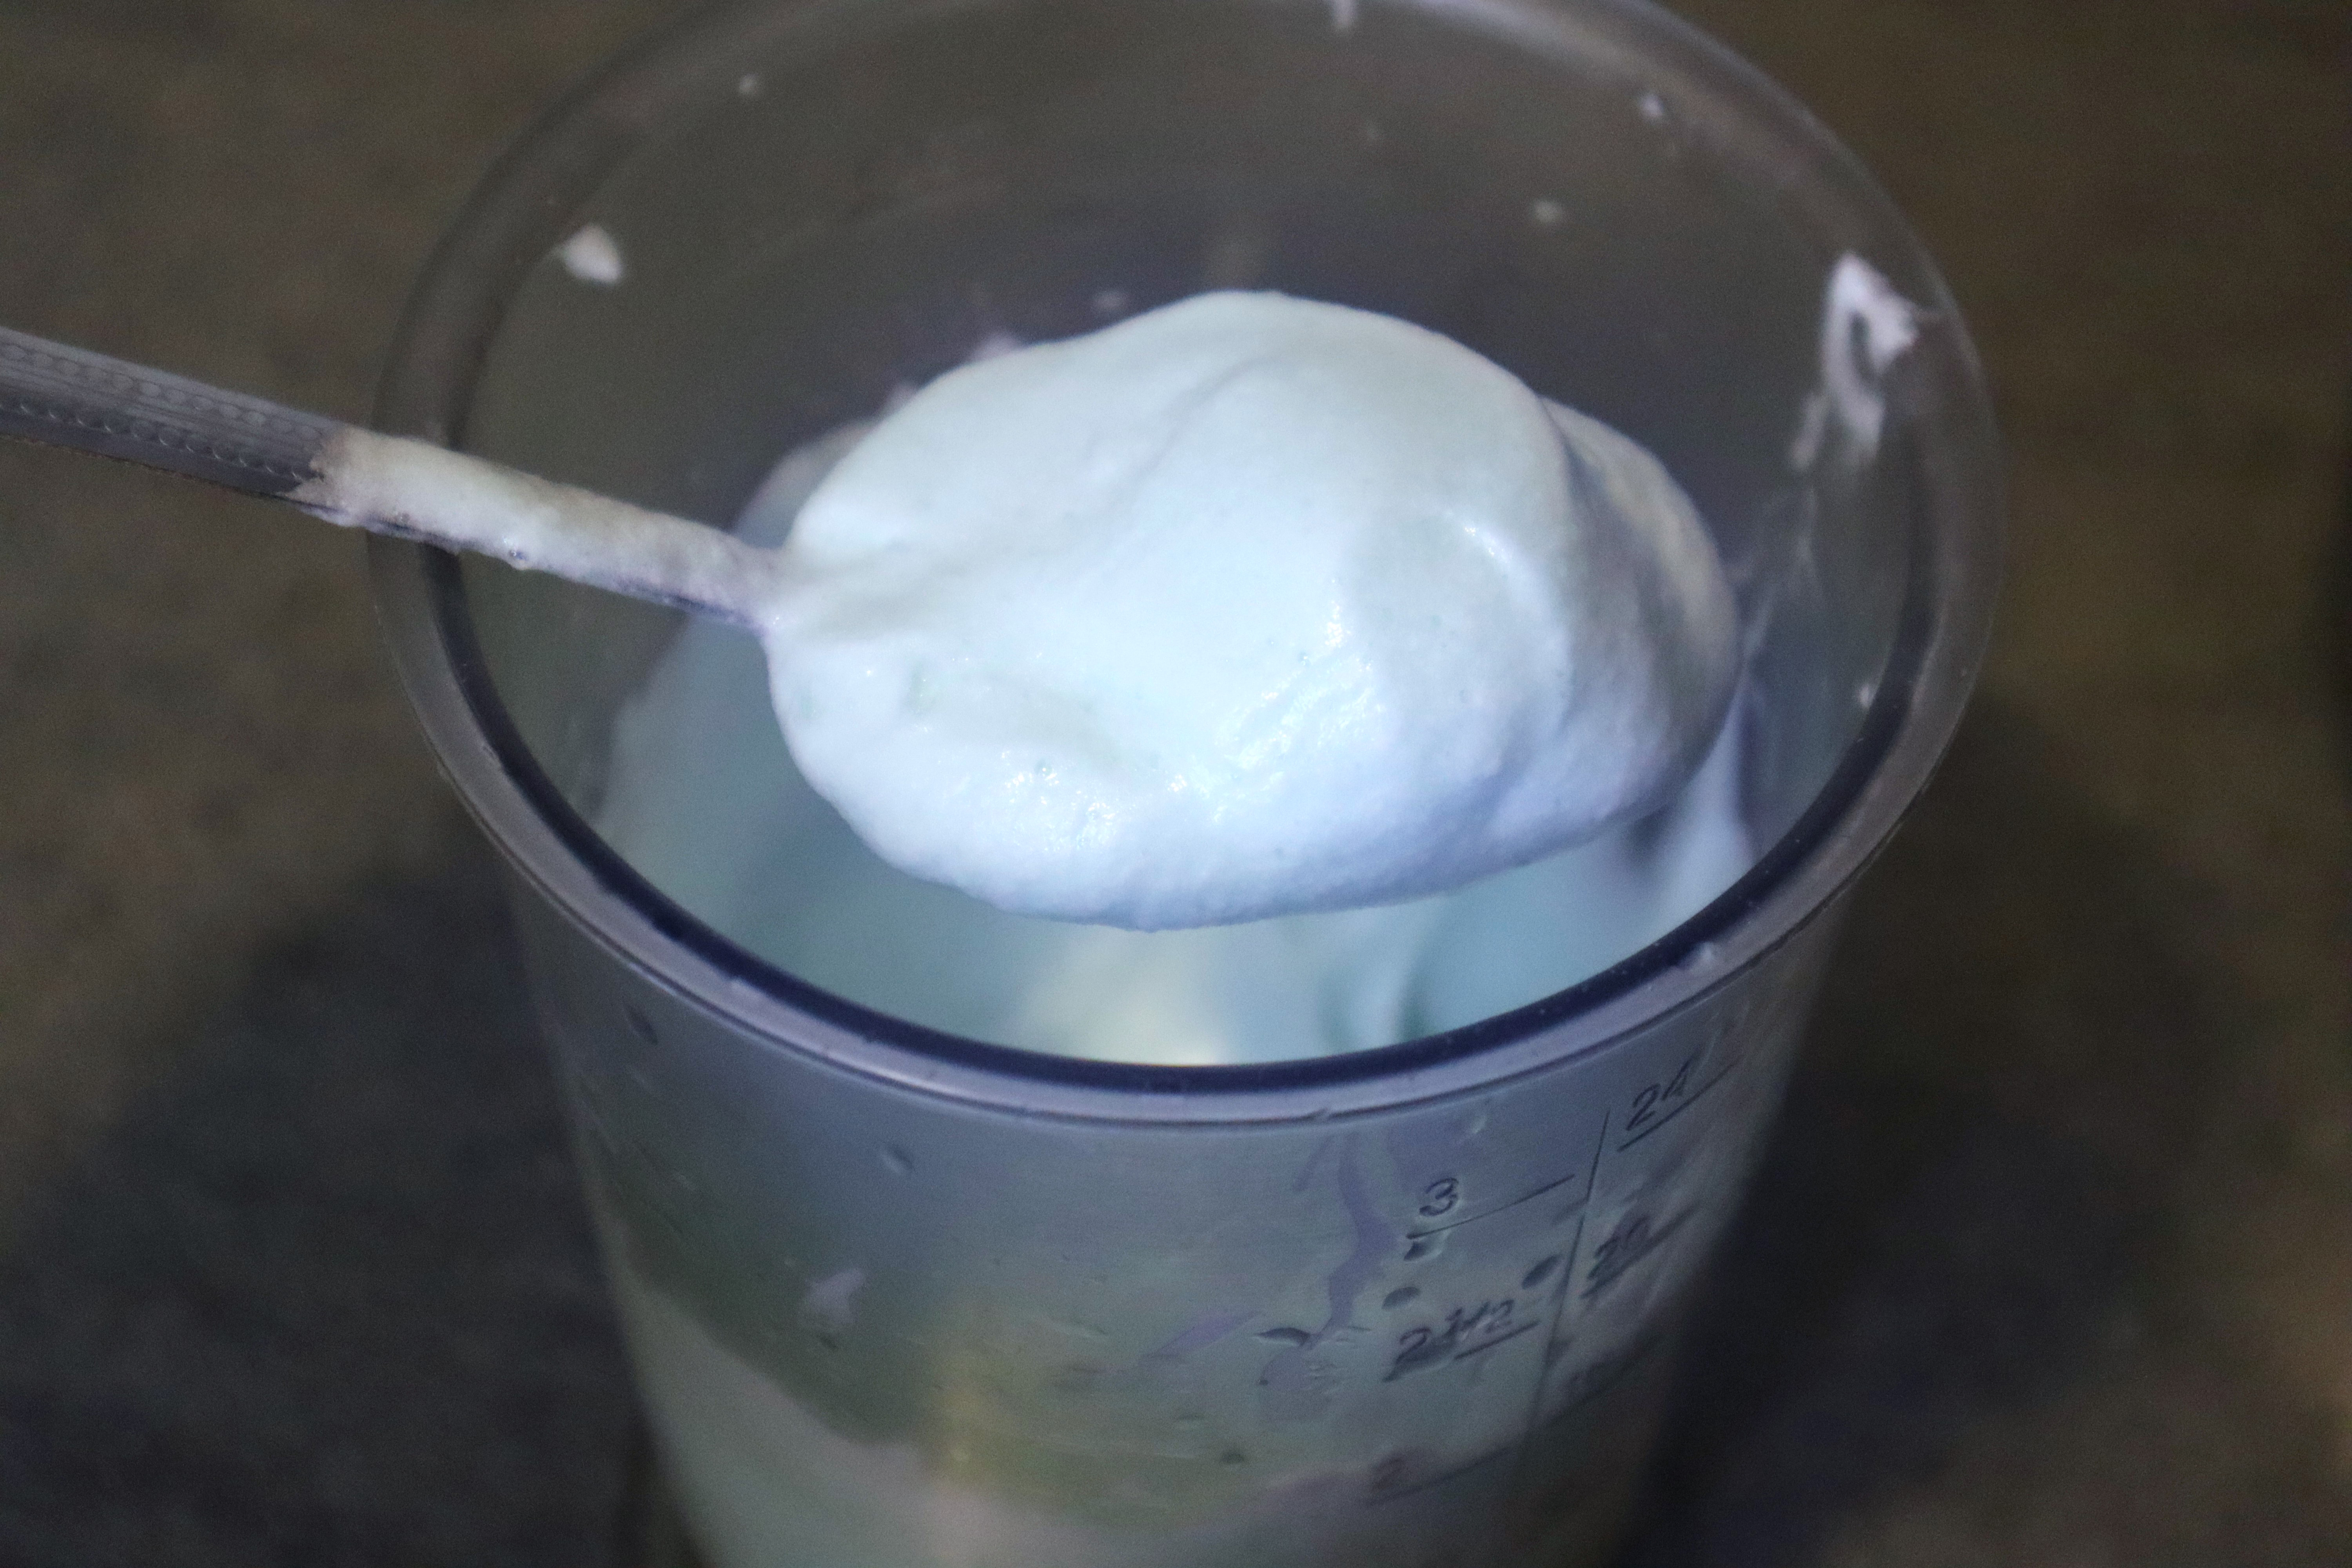
Place the egg whites in the bowl together with the stevia and using an electric mixer, beat the egg whites on high speed until they form stiff peaks.
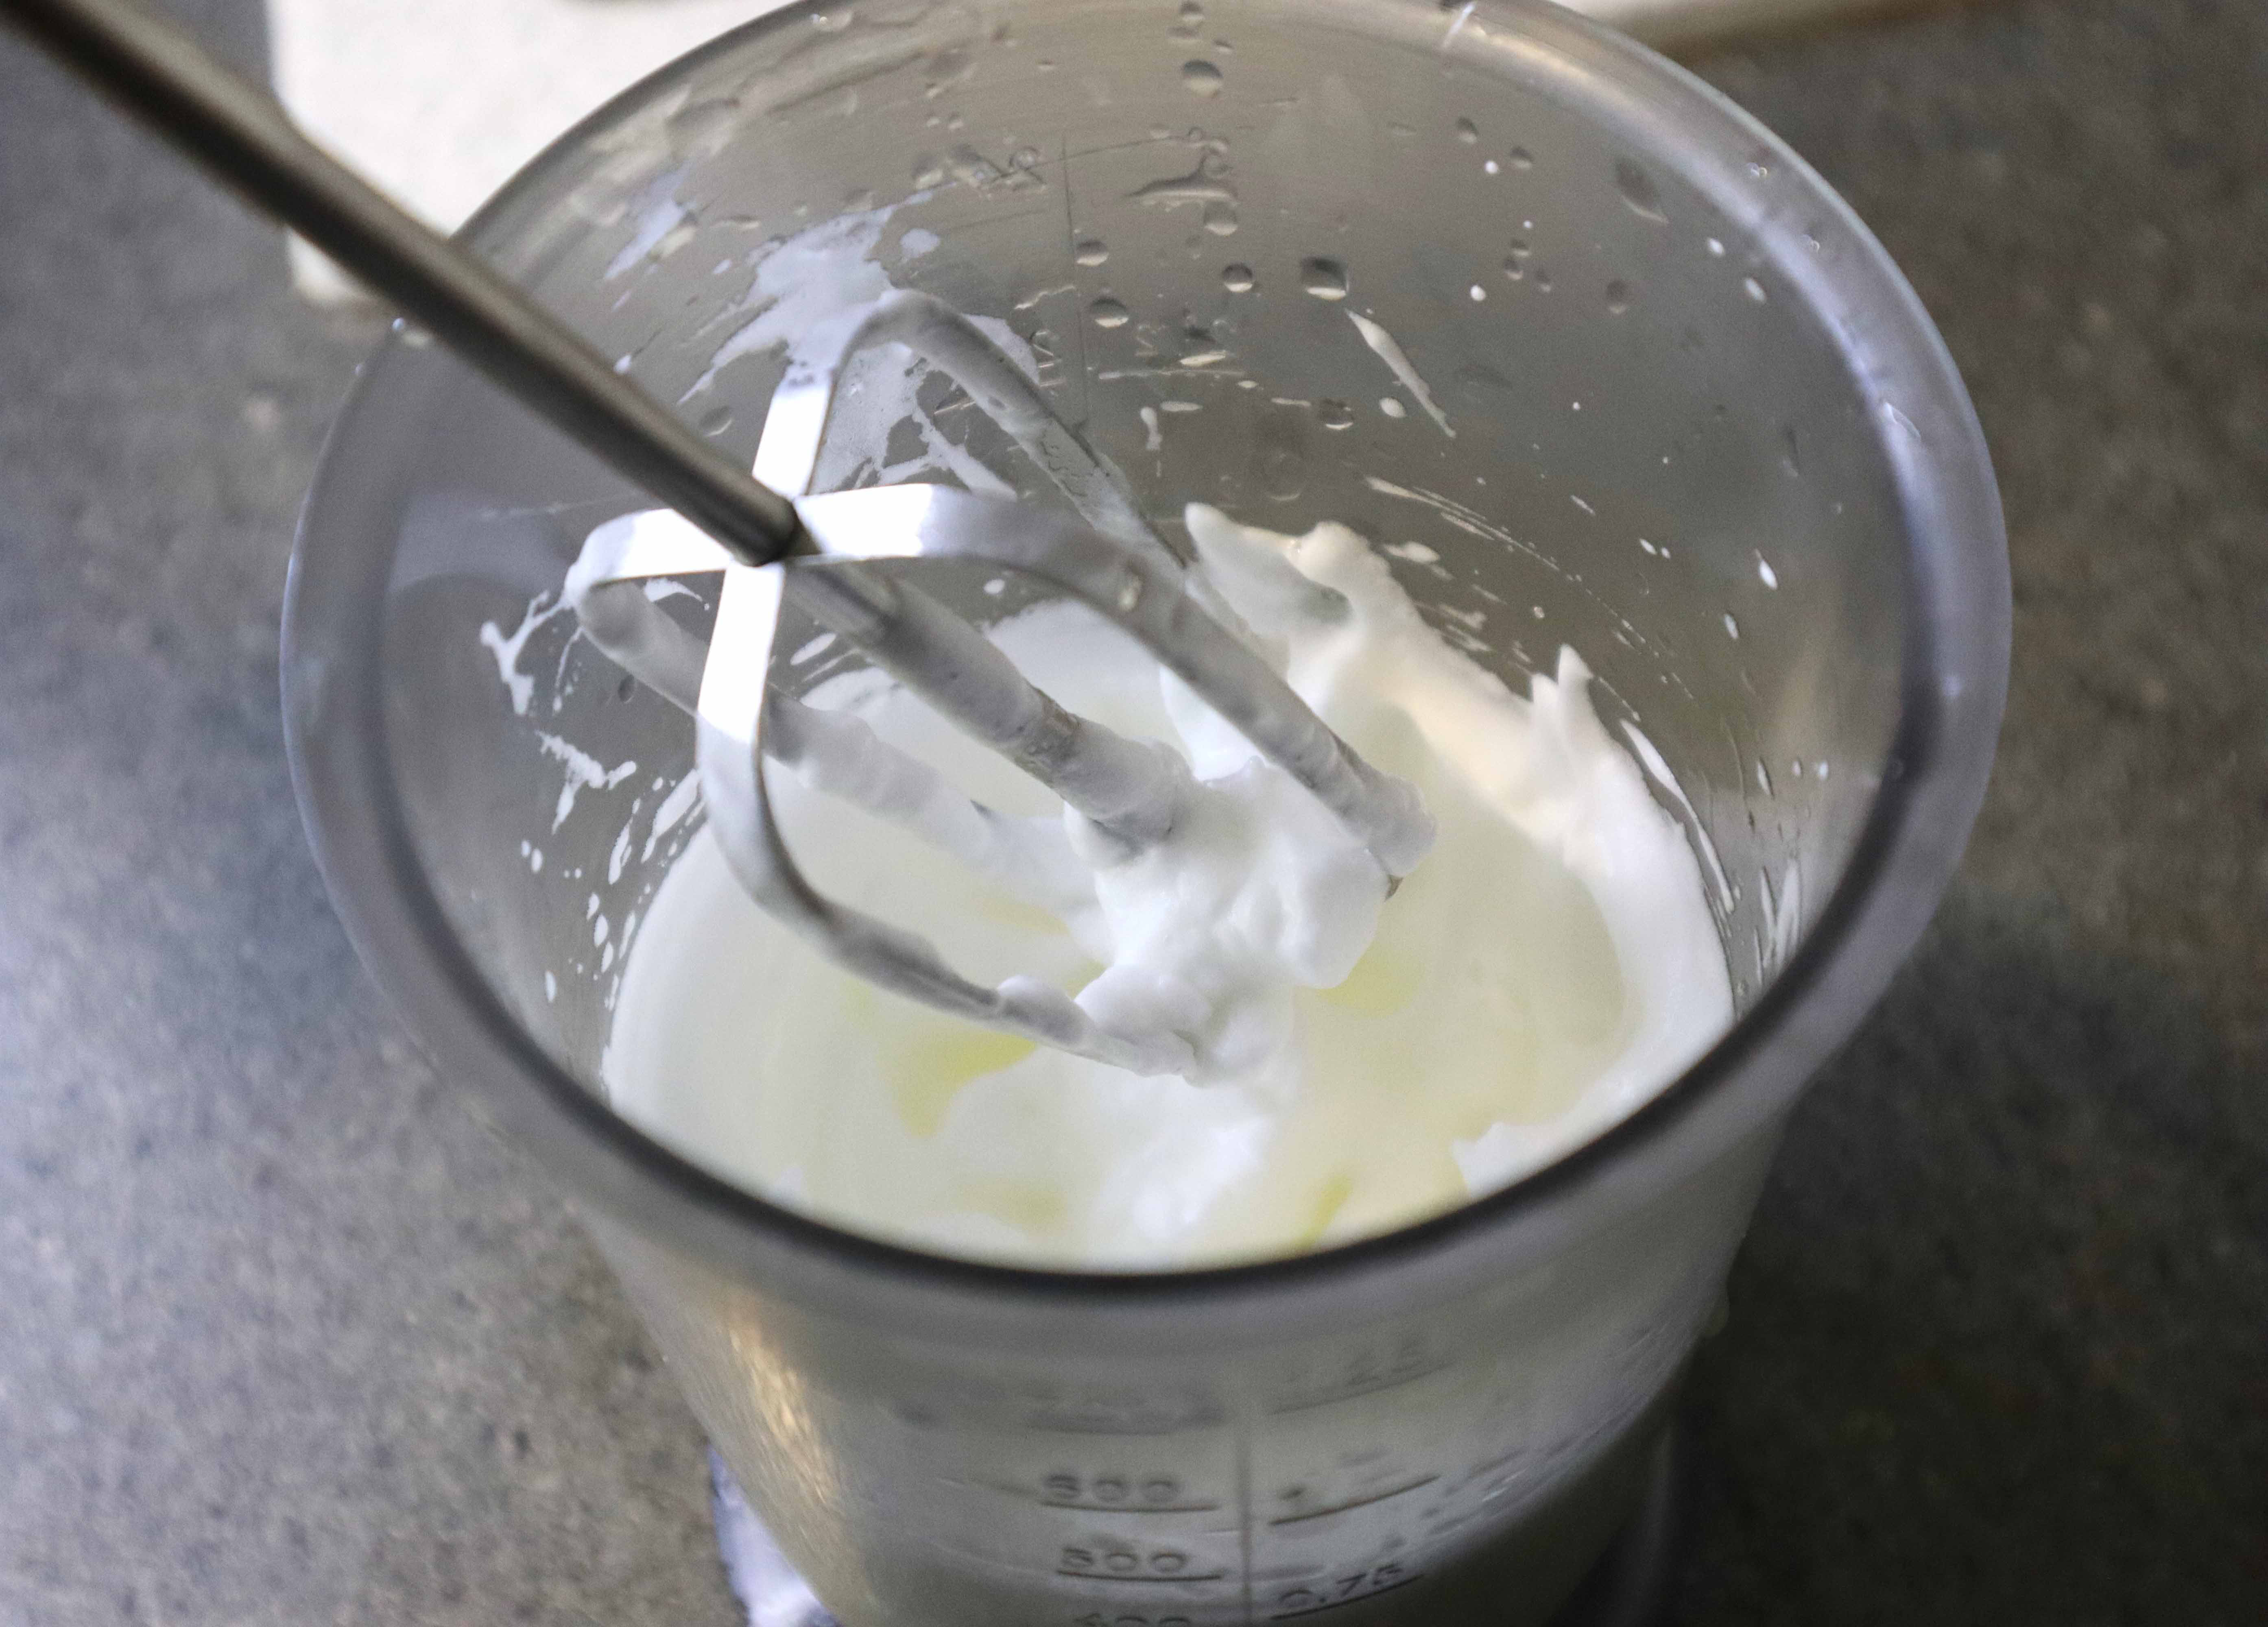
The egg whites should have a light and fluffy texture, similar to that of whipped cream. This texture is easily achieved when using an electric mixer.

Now comes the fun part. Add 1 tbsp natural blue food coloring to the egg whites and stir it. It will turn light blue.
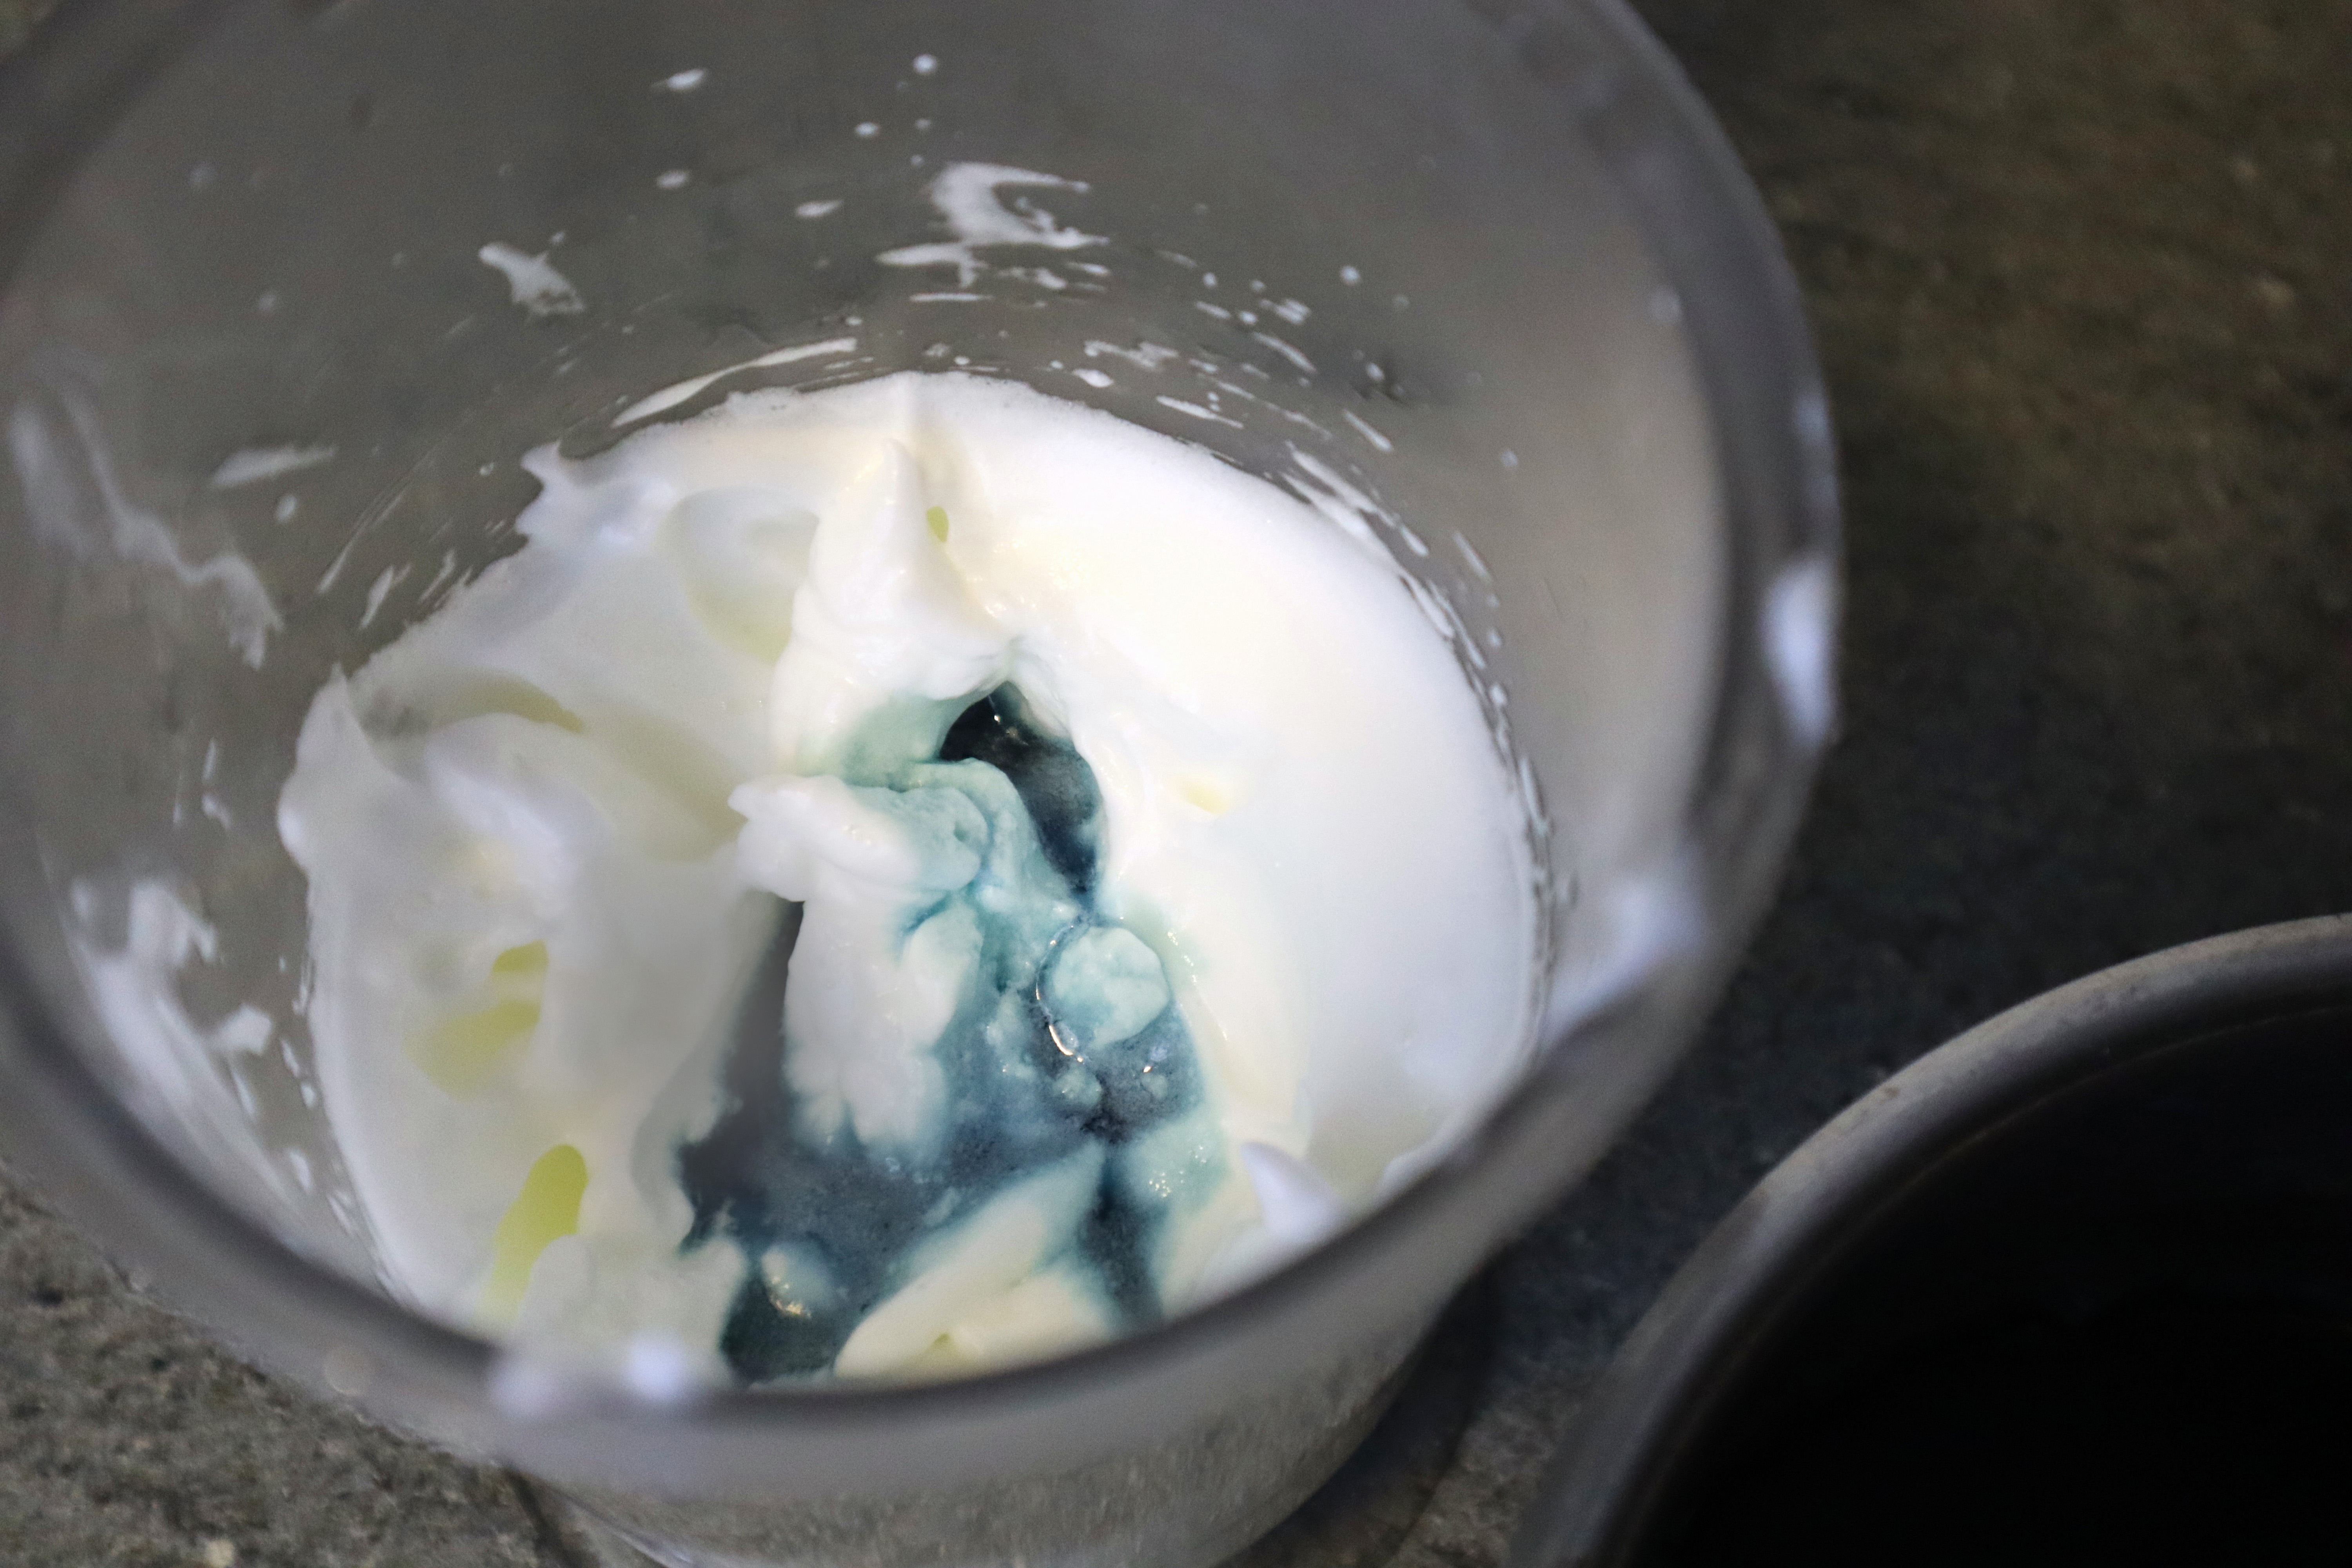
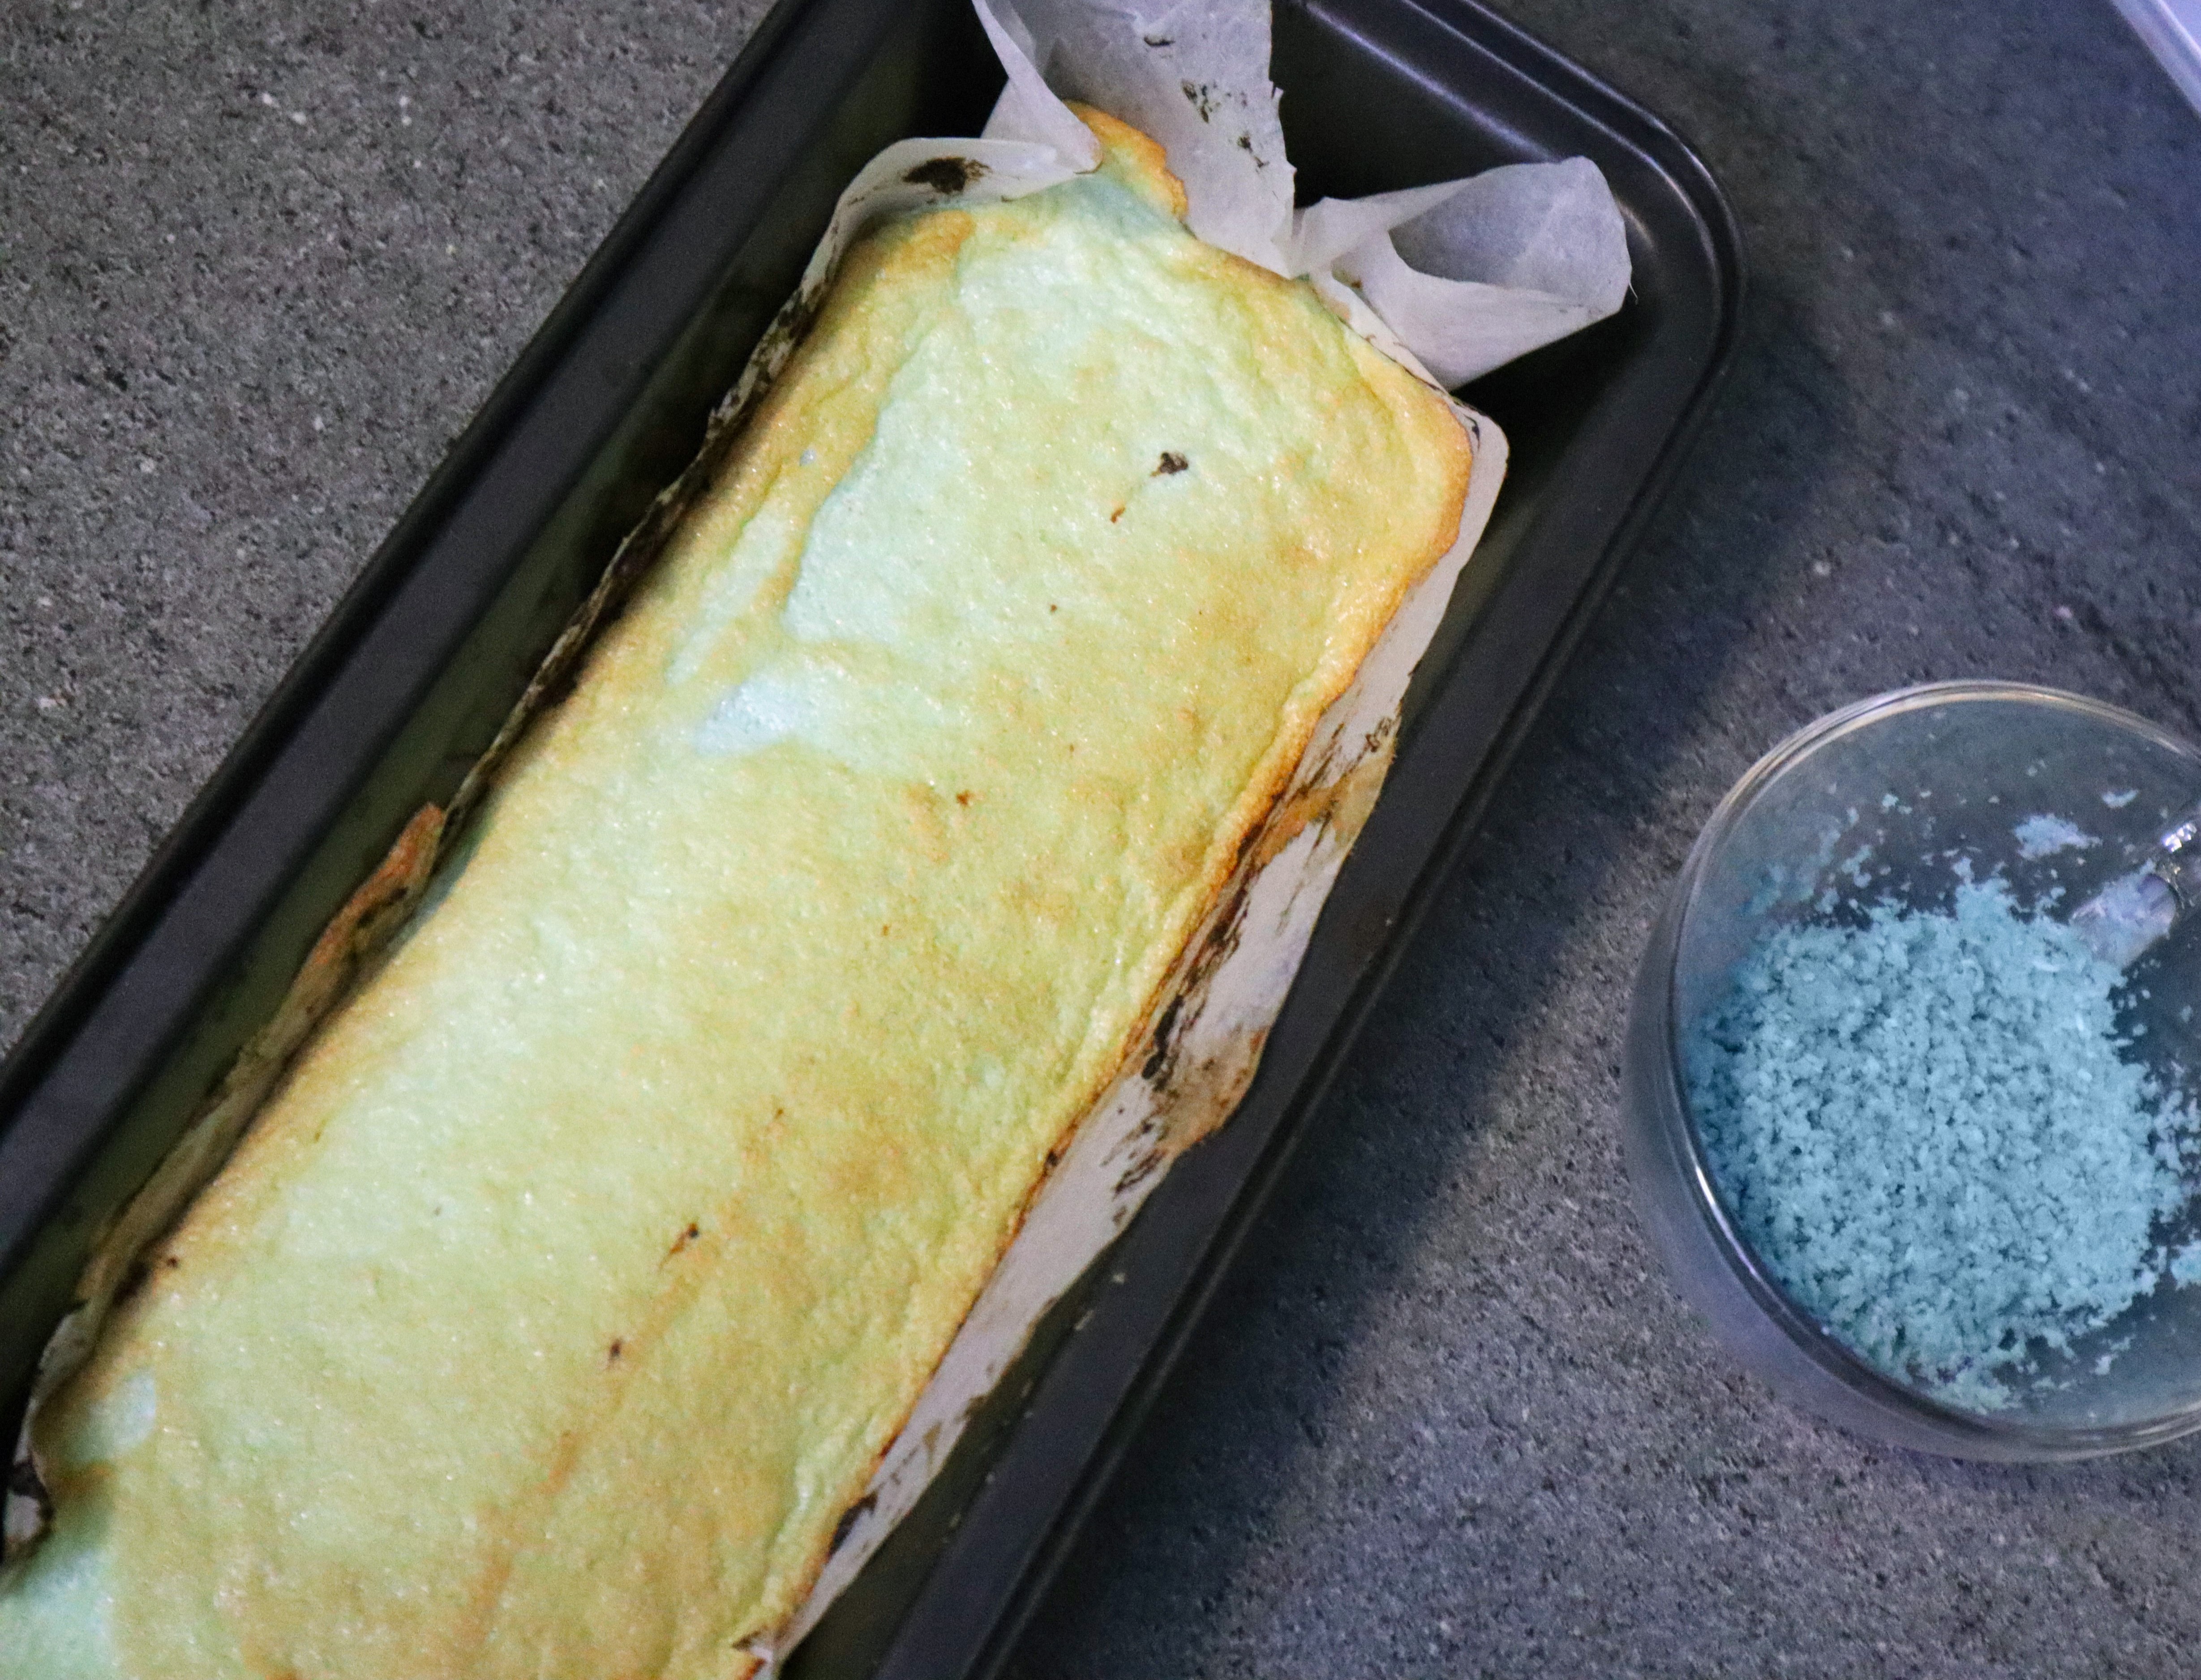
If you want darker blue, add more coloring, but it may taste like cabbage, so be careful. Pour it over the cake and place it into the oven for about 20-25 minutes.

Take it out of the oven and wait for the cake to cool just a little bit.
The final touch and the decoration
Ingredients:
4 tbsp of coconut flour
½ tbsp of natural blue food coloring
Few grains of soda
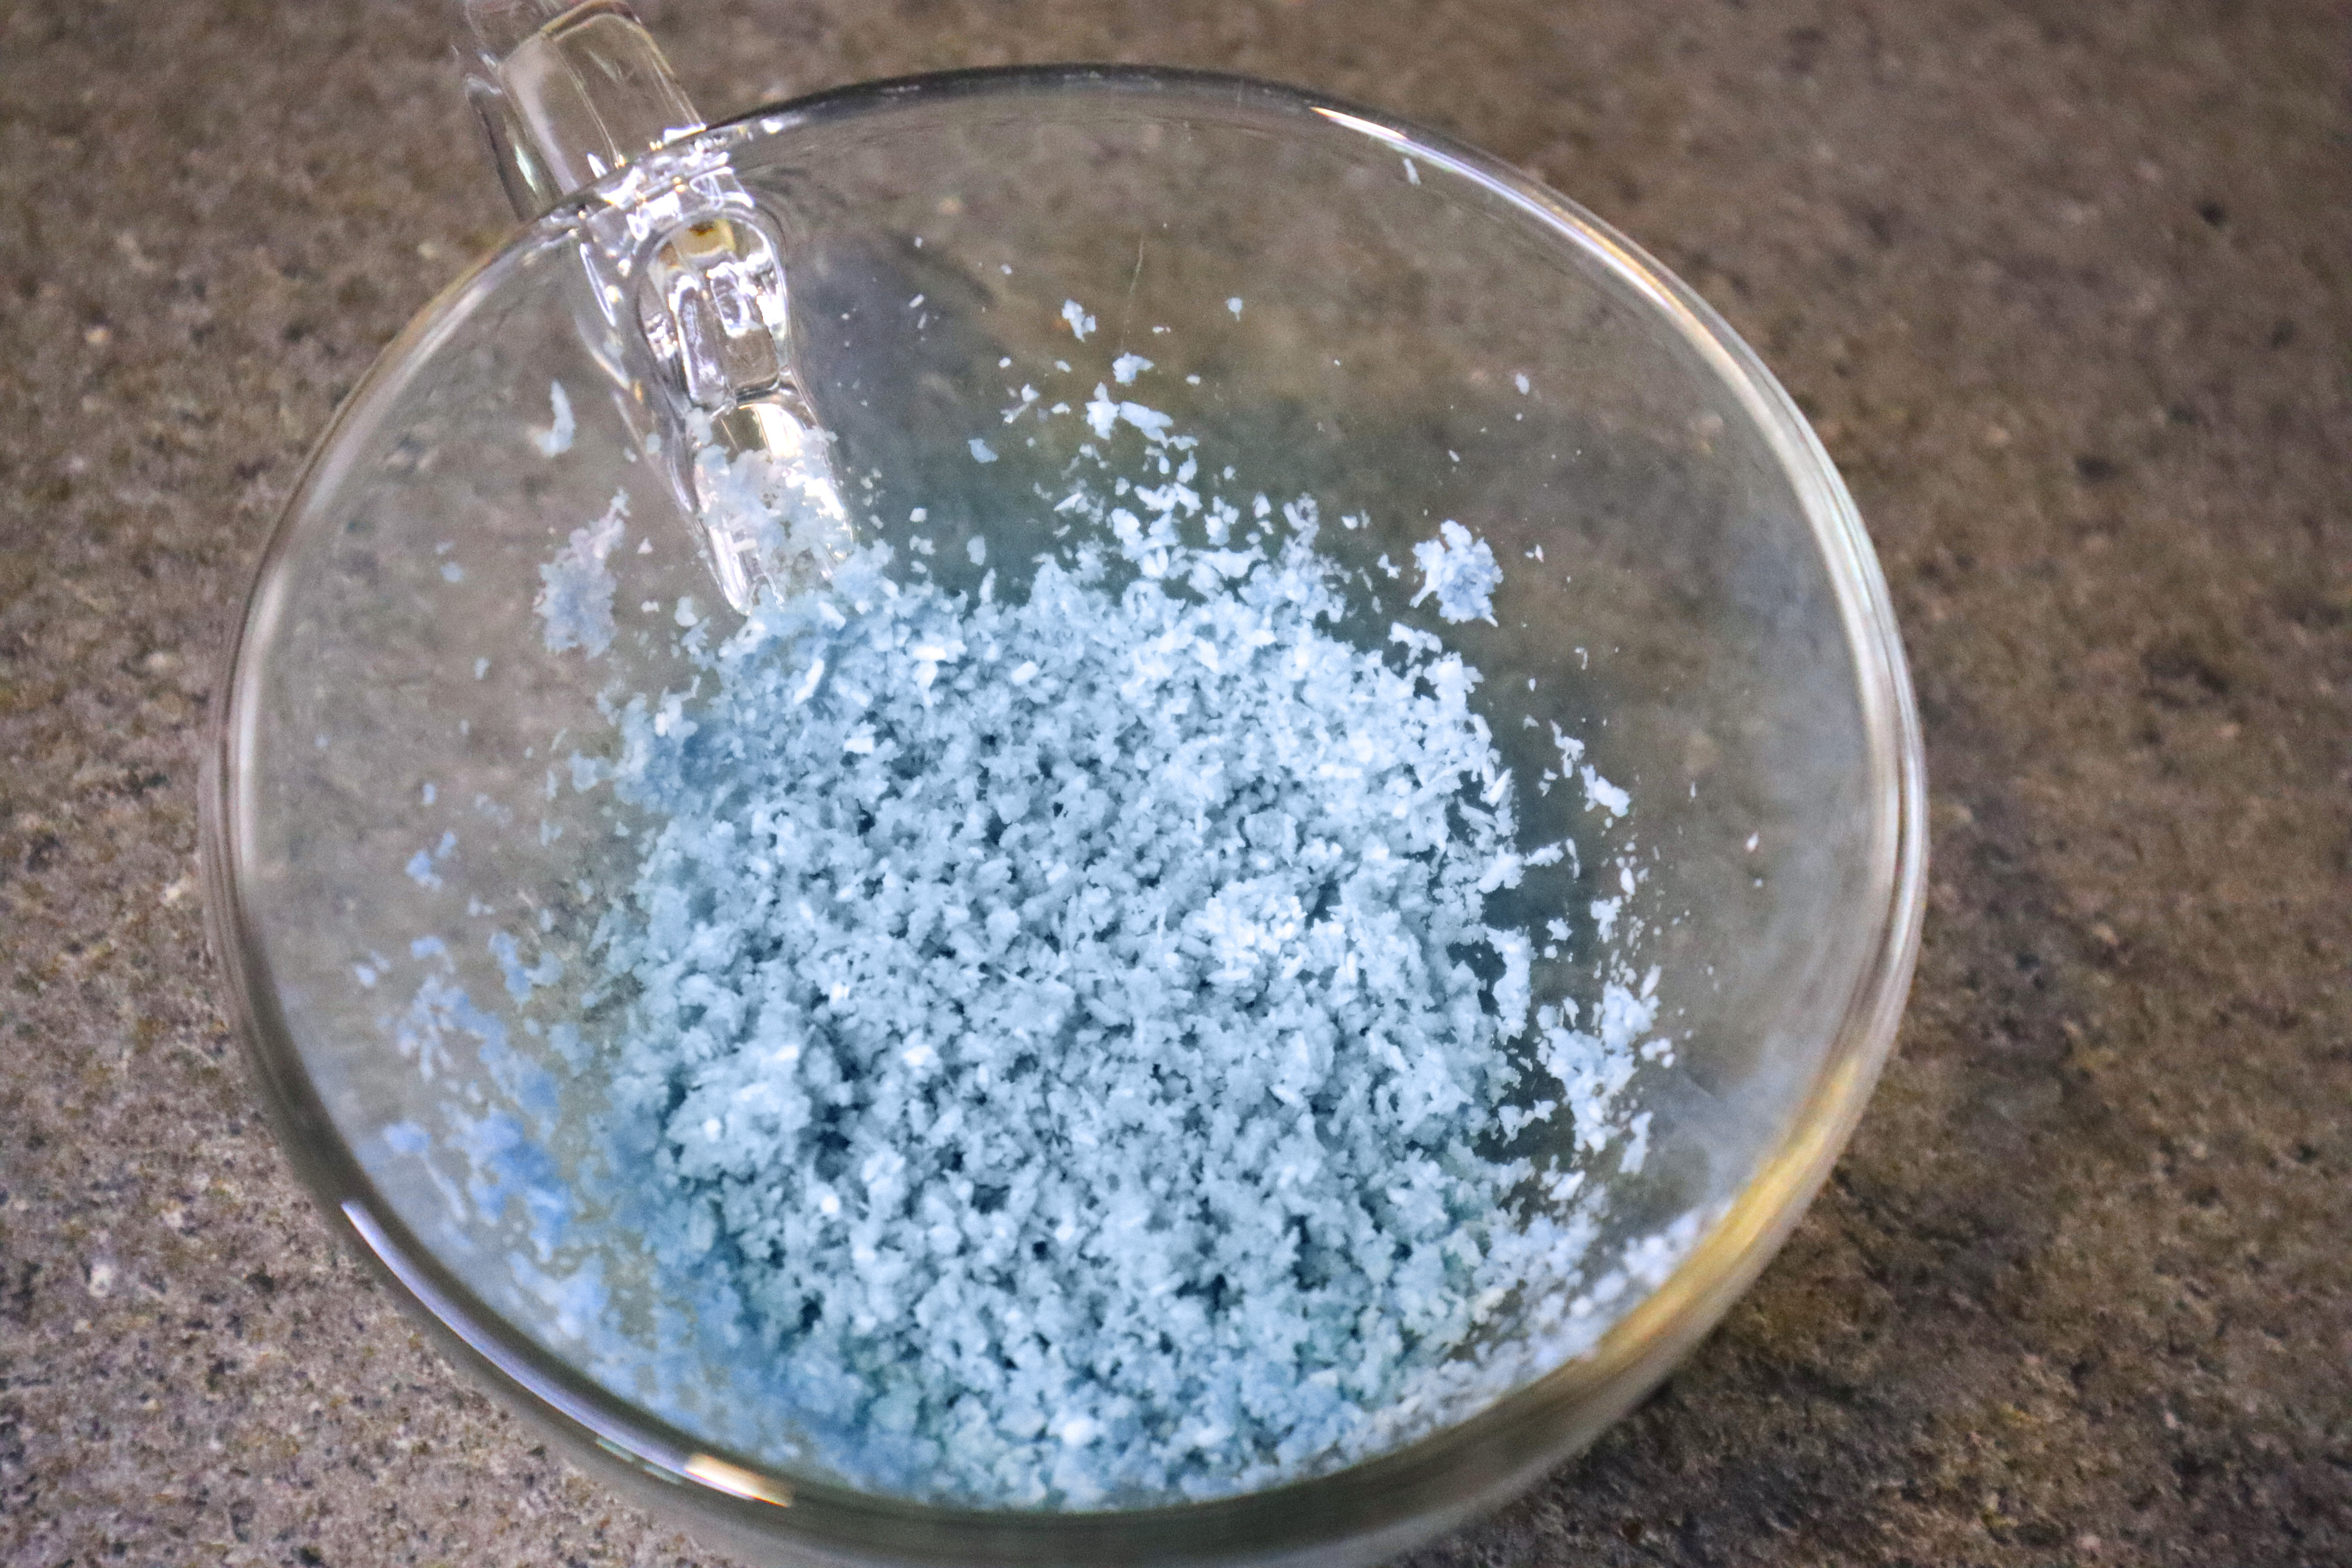
Mix these 3 ingredients, paying extra attention to the amount of soda, just a few grains are enough. Decorate your cake by sprinkling some blue coconut over the cake slice.

You will get 6 cake slices from these ingredients, if you want more, you can double the dose.
And voila! The cake is ready! Enjoy the crunchy and sweet taste with a little bit of coconut flavor. Yummy!
Uuh where is the blue dessert contest? This dessert looks really yummmi and you was really creative 😍😍
The contest is created by @foodiesunite 😊 The cake was very tasty, not a single slice left 😄
Hi @noemilunastorta
Here is the contest https://peakd.com/hive-120586/@foodiesunite/foodie-contest-blue-desserts
Hi @easy.eats
This post is great, a very creative recipe; however, could you add photos of the two of you cooking to the post? If you look at our community rules and see the contest rules, that requirement is made.
Thank you.
Sorry, we misunderstood that part of the contest rules. We thought that at least 5 of the photos should illustrate the preparation process of the recipe... 😒🙈 We don't have that type of photo, so next time we'll read more carefully 😌
Any post you publish in this community must be accompanied by a minimum of three photos making the recipe; not only with the finished dish, not only with the ingredients in hand, but also doing the processes required in the recipe. If you want to include more photos where you appear cooking the dish, then you are welcome.
Please keep this in mind for future posts in this community.
We also recommend that you carefully read the community guidelines of any community you post to.
Greetings.
Thank you for your guidance and your valuable advice! After reading the guidelines it's more clear of what is expected and how our future posts shared in the community should look like ☺
good process of experimentation with the natural color of the cabbage, I congratulate you, the dessert looks delicious
Thank you @yole It took us a lot of time to get there :))
The color looks wonderful. Very creative. I loved the pictures. Thanks for sharing
!VSC
@chacald.dcymt has sent VSC to @easy.eats
This post was rewarded with 0.1 VSC to support your work.
Join our photography communityVisual Shots
Check here to view or trade VSC Tokens
Be part of our Curation Trail
@chacald.dcymt ha enviado VSC a @easy.eats
Éste post fue recompensado con 0.1 VSC para apoyar tu trabajo.
Únete a nuestra comunidad de fotografía Visual Shots
Consulte aquí para ver o intercambiar VSC Tokens
Se parte de nuestro Trail de Curación
Thank you! We had a lot of fun and we learned many new things 😊Thanks for dropping by 🤗
Congratulations @easy.eats! You have completed the following achievement on the Hive blockchain And have been rewarded with New badge(s)
Your next target is to reach 100 upvotes.
You can view your badges on your board and compare yourself to others in the Ranking
If you no longer want to receive notifications, reply to this comment with the word
STOPCheck out our last posts:
Support the HiveBuzz project. Vote for our proposal!