.png)
.png)
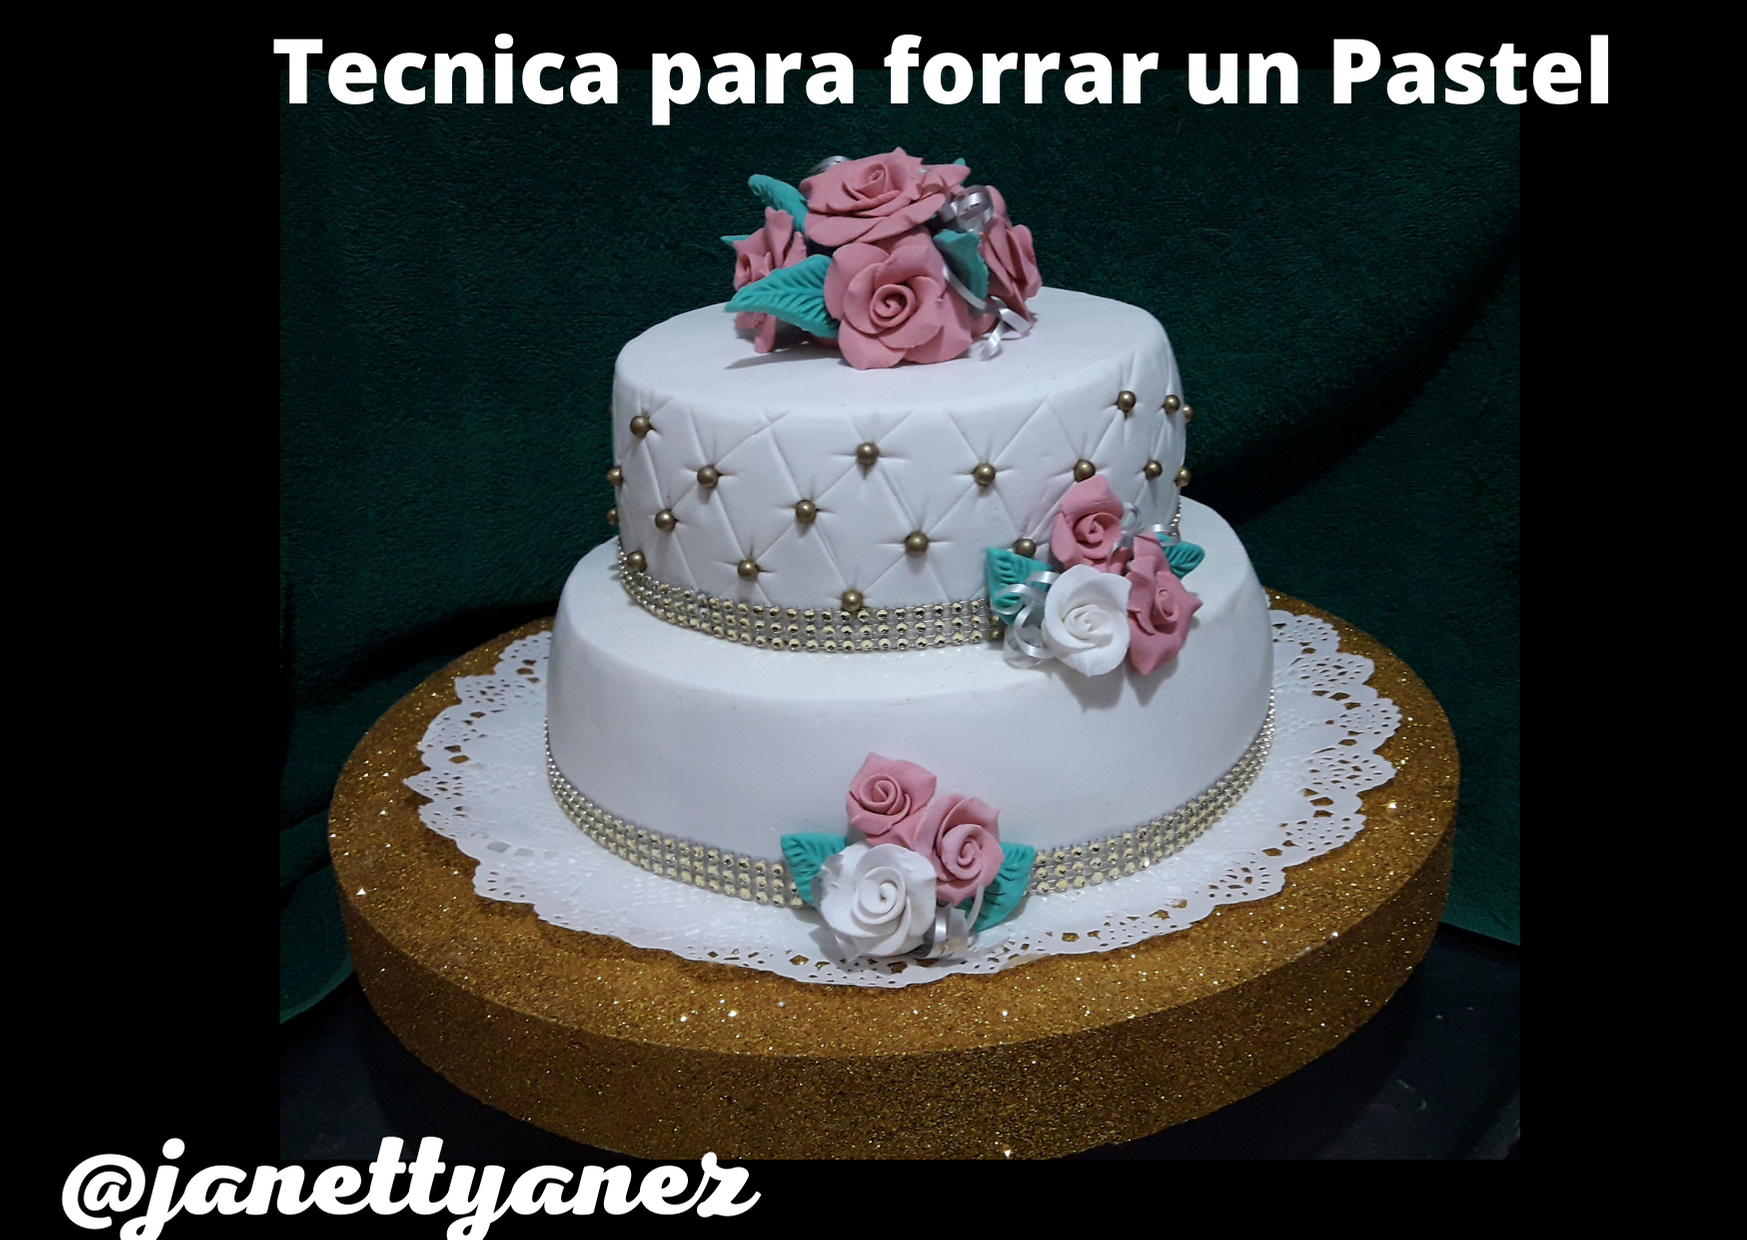
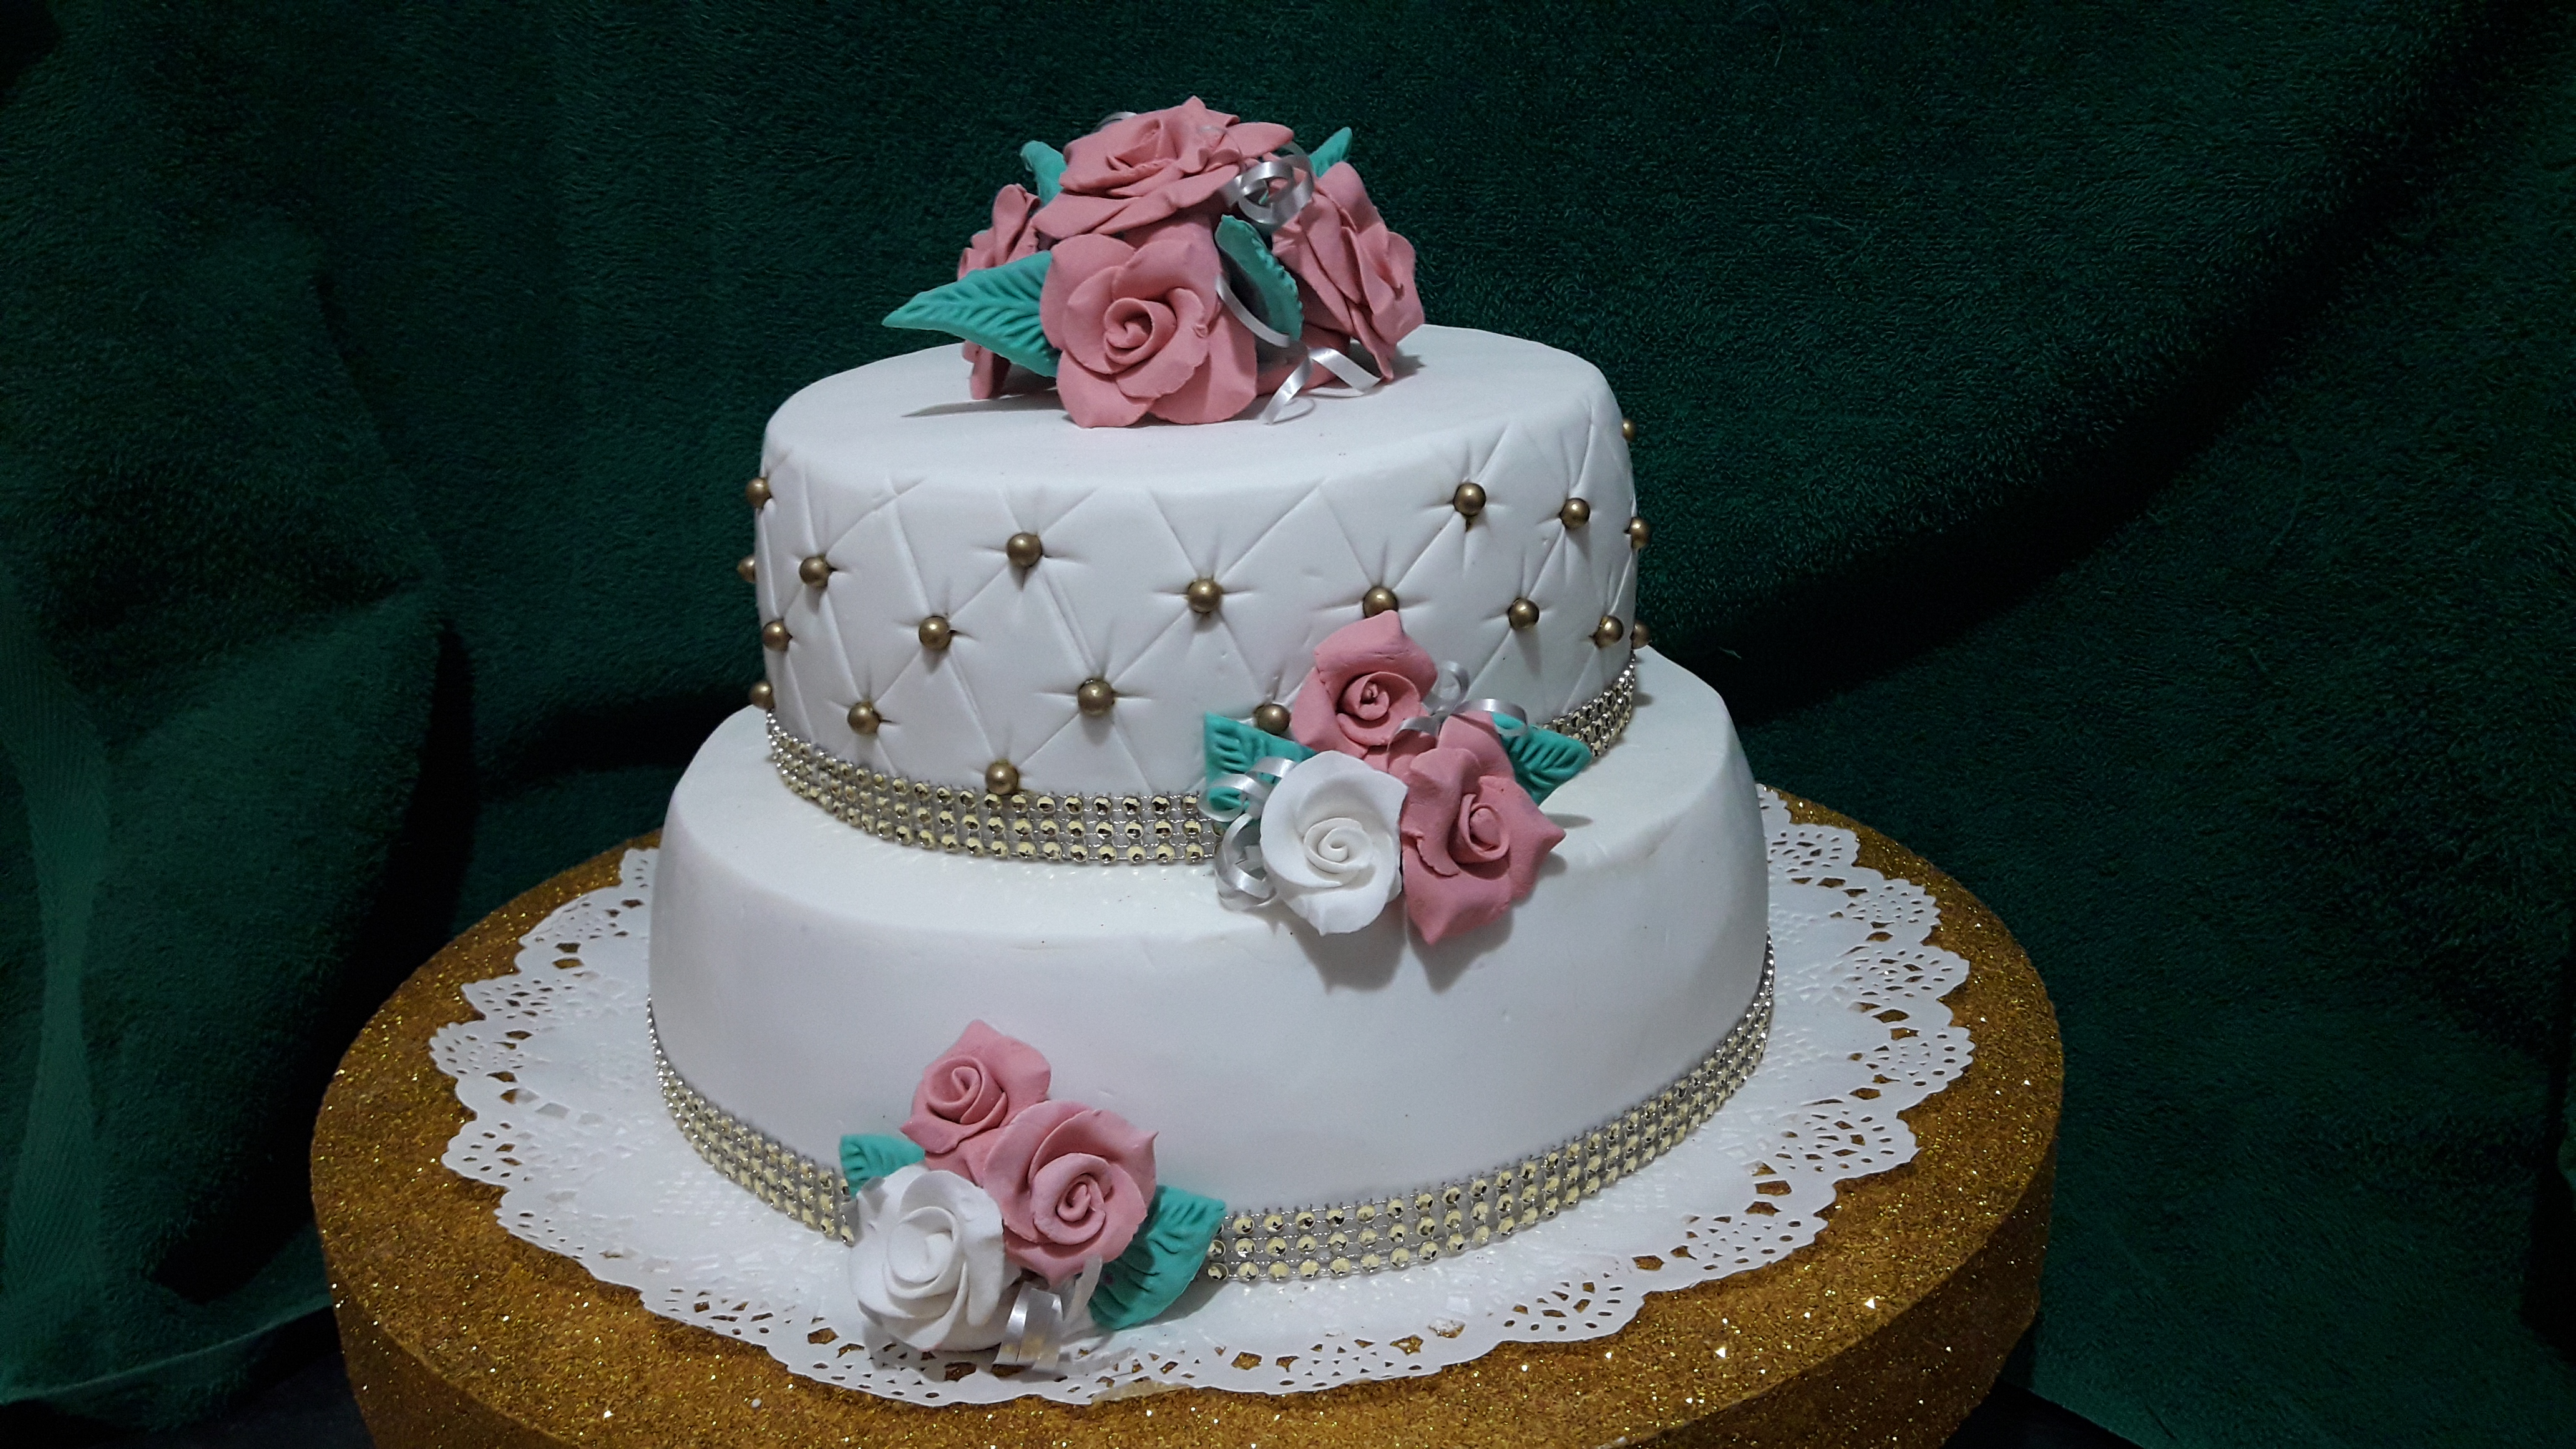
Today I bring you an explanation of how to cover a cake with fondant with the perfect finish technique, one of the most used in professional baking to achieve the best image of your cake.
.png)
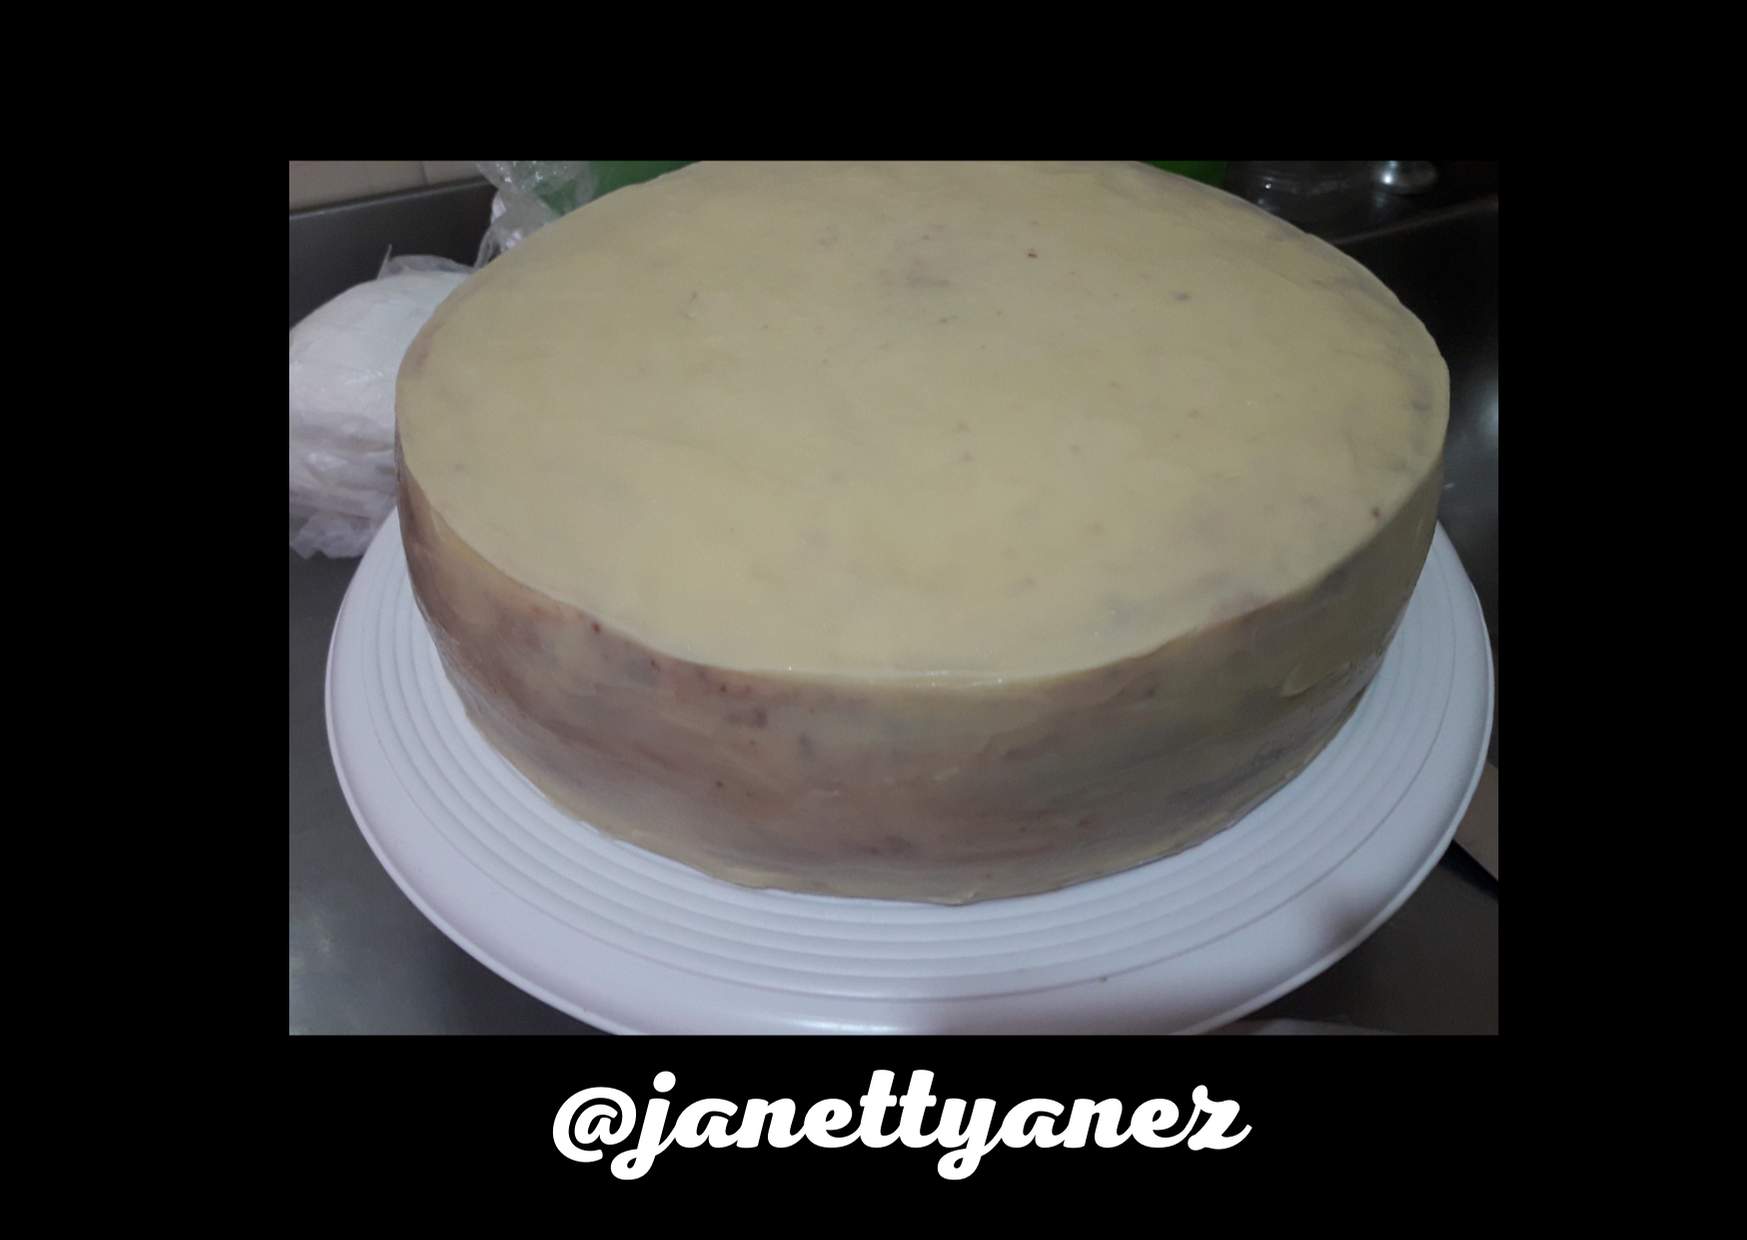
We are going to use a previously ganache cake, this time with white chocolate ganache, which was previously refrigerated for 6-8 hours, so that its consistency is firm and allows us to manipulate it for decoration.
.png)
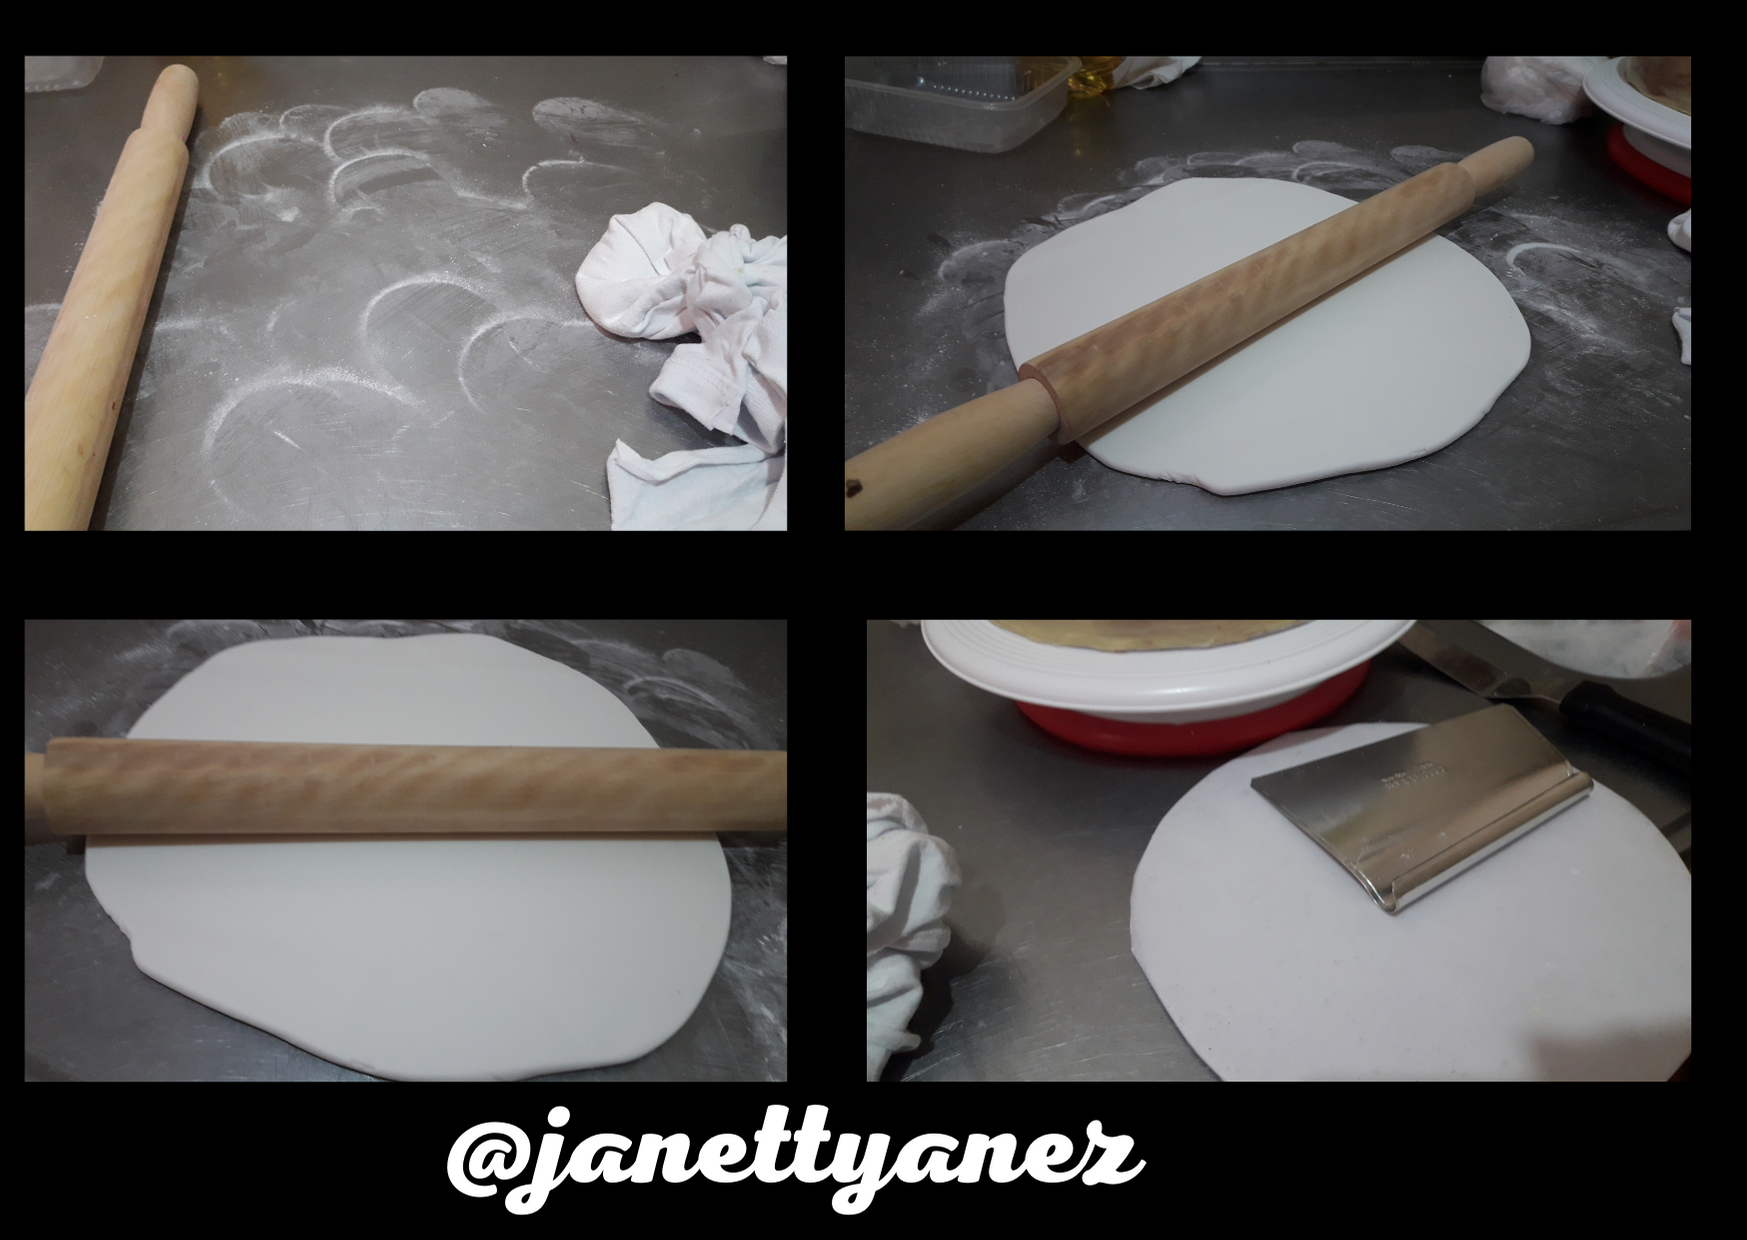
Paso 1:
Una vez amasada la pasta para cubrir pasteles que se obtenga una contextura suave y elastica, se procede a dispersar fécula de maíz en un mesón, para ello se recomienda colocar la fécula en un paño de algodón muy delgado que permita que la fécula salga en forma muy discreta.
Seguidamente se procede a medir el diametro de la superficie superior de la torta, luego se estira la masa de la pasta con un rodillo, hasta obtener un circulo con medida que superen por 2 o 3 cm la obtenida previamente.
Por último se recorta en forma circular para luego colocarla con mucho cuidado sobre el biscocho.
Step 1:
Once kneaded the dough to cover cakes to obtain a soft and elastic texture, proceed to disperse corn starch on a counter, for this, it is recommended to place the starch on a very thin cotton cloth that allows the starch to come out in a very discreet way.
Next, measure the diameter of the upper surface of the cake, then stretch the dough with a rolling pin until you obtain a circle measuring 2 or 3 cm larger than the one previously obtained.
Finally, it is cut out in a circular shape and then carefully placed on the cake.
.png)
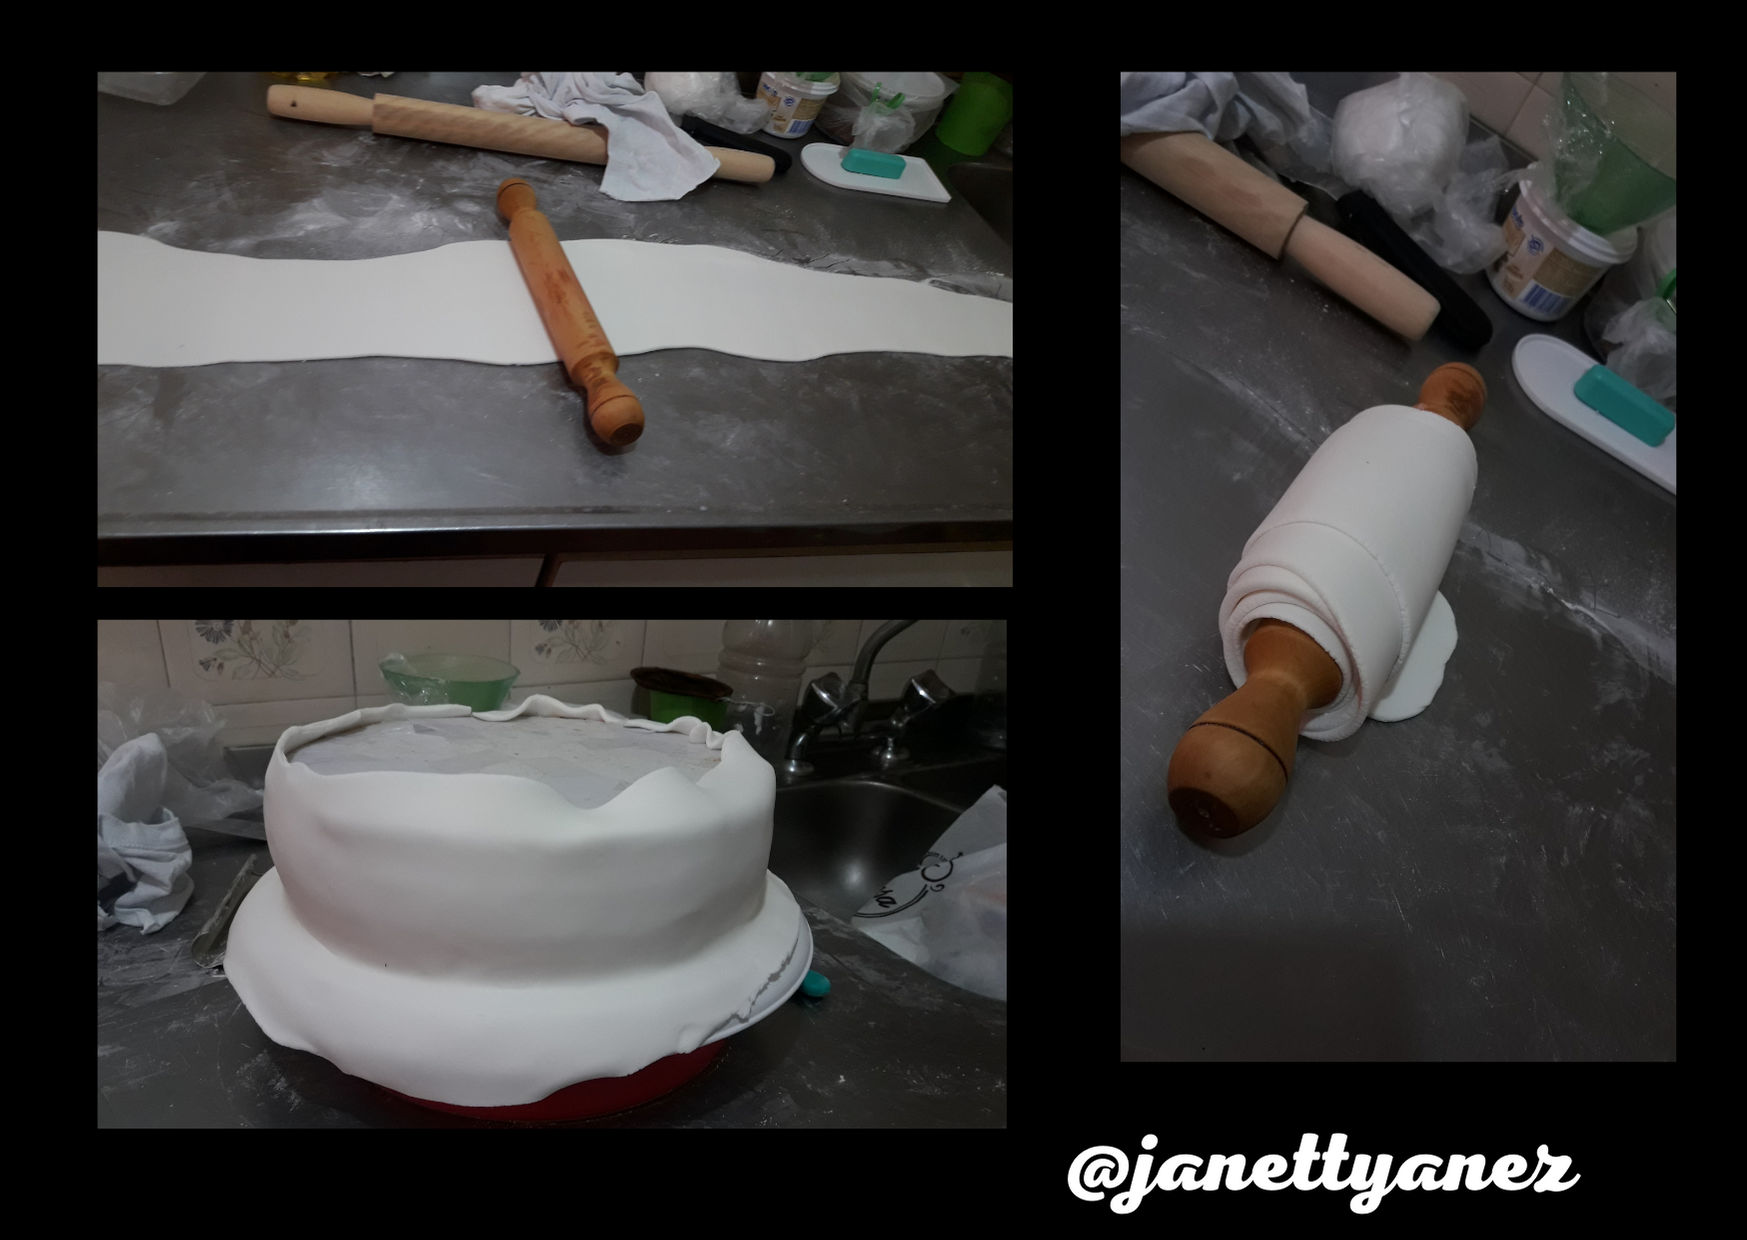
Paso 2:
Una vez estirado la pasta sobre el biscocho se procede a estirar con el alisado y la mano con mucho cuidado hasta que quede totalmente lisa.
Luego en un cartón cuyo diametro debe ser identico al del biscocho se le esparce fécula de maíz suficiente para que no se pegue la pasta.
Con este cartón se coloca sobre el biscocho para proceder a voltearlo con sumo cuidado.
Esto es para que quede en parte inferior del biscocho la pasta y proceder a forrar el borde.
Step 2:
Once the dough has been stretched over the cake, proceed to stretch it with the smoother and the hand very carefully until it is completely smooth.
Then on cardboard whose diameter should be identical to that of the cake, spread enough corn starch so that the dough does not stick.
This cardboard is then placed on top of the cake and carefully flipped over.
This is so that the pastry remains on the bottom of the cake and lines the edge.
.png)
Paso 3:
Luego se procede a medir el borde alrededor del biscocho tanto de largo como de alto, con estas medidas se estira una pasta para cubrir el alrededor del biscocho.
Luego se va colocando con sumo cuidado pasando la mano y luego el alisador.
Una vez obtenido el alisado, con una paleta se preciona el borde del biscocho de forma tal que quede totalmente pegado.
Luego se corta con mucho cuidado el borde sobrante superior y luego lo que sobre el la parte inferior, para luego voltear e pastel.
Step 3:
Then proceed to measure the border around the biscuit both in length and height, with these measurements a pastry is stretched to cover the surrounding of the biscuit.
Then you place it very carefully by hand and then with the smoother.
Once the pastry is smoothed, the edge of the cake is pressed with a trowel so that it is completely stuck together.
Then carefully cut off the top edge of the cake and the excess on the bottom, and then turn the cake over.
.png)
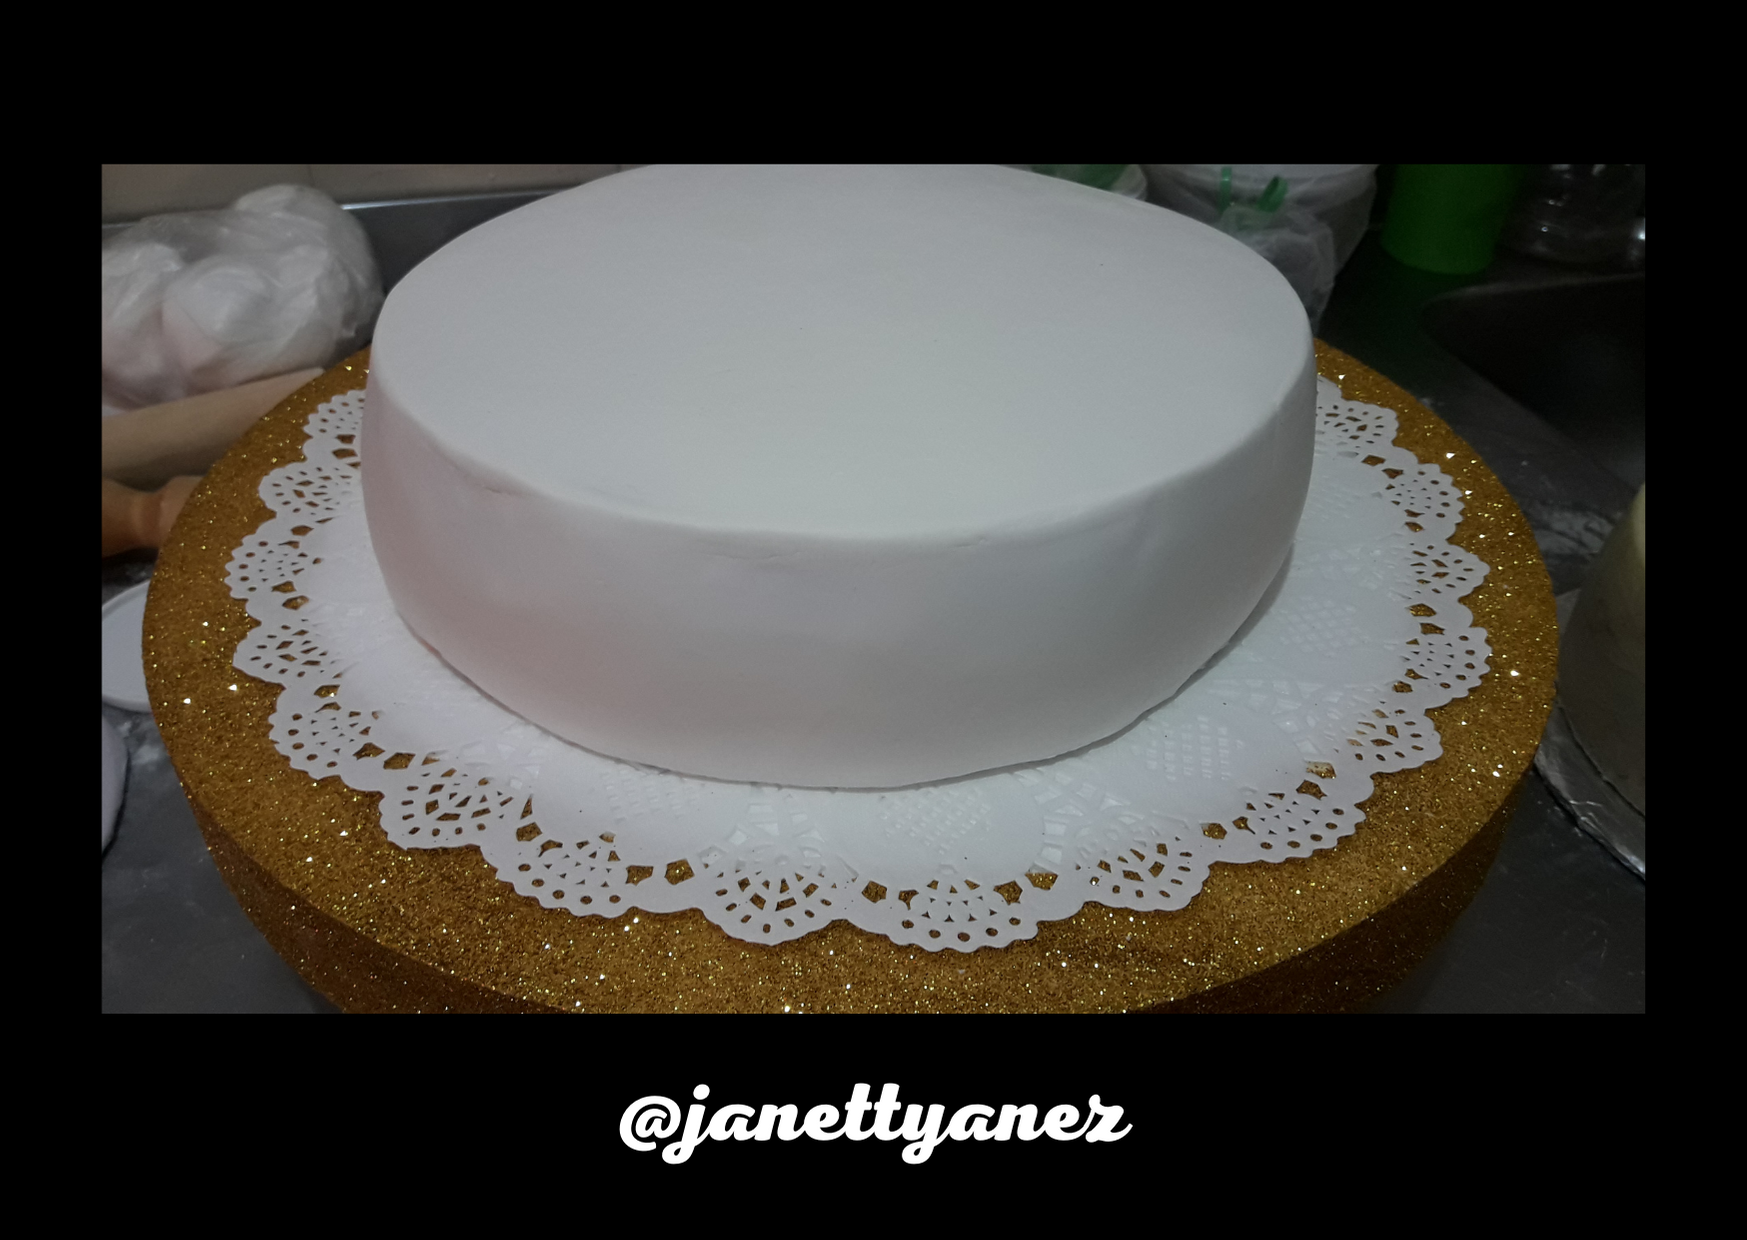
Paso 4:
Una vez que se voltea se coloca sobre la base que se utilizará para terminar la decoración.
Luego se sigue alisando con la mano y el alisador hasta lograr el acabado perfecto de los bordes.
Step 4:
Once it is turned over it is placed on the base that will be used to finish the decoration.
Then continue smoothing with your hand and the smoother until the edges are perfectly finished.
.png)
All the images are my own and the collages were made with the Canva application, as well as the separator and the farewell banner.

Hi janettyanez,
Visit curiehive.com or join the Curie Discord community to learn more.
Thank you for your support.
Quedo muy bonito! Definitivamente hacer y decorar un pastel es todo un arte! Una pregunta: las flores se pueden comprar ya hechas?. Felicitaciones por tu trabajo
Hola @lespecial17
Gracias, las flores las venden pero yo las hago, puede ver mi publicación:
Rosas para Tortas con pastapara Flores// Roses for Cakes with paste for Flowers [ESP-ENG].
Proximamente publicaré otro tipos de flores.
Gracias por tu visita, saludos.
Uyyy pero que rico se ve! y esta muy bien explicado, provoca intentarlo hacer en estos días.
Si te animas hacerlo, publica y me etiquetas por favor.
Gracias por tu visita y comentario.
Saludos.
que rica torta
Gracias @luciannis
Saludos.
Hola querida @janettyanez, felicitaciones por la receta y explicación datallada del procedimiento para forrar un pastel con acabado perfecto, te quedo precioso!
Gracias por compartir tus conocimientos y experiencias, es muy útil para los principiantes en elaboracion de pasteles como yo, aun cuando lo hago sólo para la familia.
Exitos, alegrias y prosperidad en todas tus actividades
Saludos
Hola @raizayanez
Muchas gracias por tu visita y comentario.
Saludos
Que hermoso trabajo, se nota la dedicación y la practica que haz adquirido. Te felicito, me encanta lo perfecto que se ve su textura. Saludos!
Hola @yole
Gracias por tu visita y comentario amiga.
Saludos
muy hermoso-felicidades.
Hola @sarix
Muchas gracias por tu visita y comentario.
Saludos
Hermoso pastel, felicitaciones, quedo muy lindo.