ENGLISH
Hello community!! how are they?; How was your day?. I hope that very good! Around here it is a bit gray and cold, but it is normal in the SOUTH of south america.
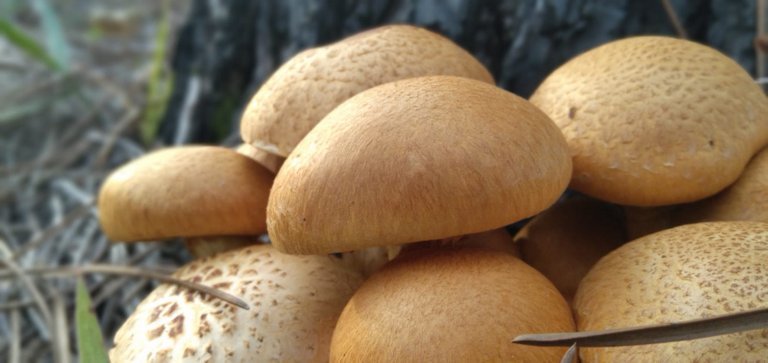
Today I want to tell you about my recipe for probiotic canned wild mushrooms. A few days ago we went to the forest with a friend, as I mentioned in another post, and we were collecting edible mushrooms called GYMNOPILUS SPECTABILIS.
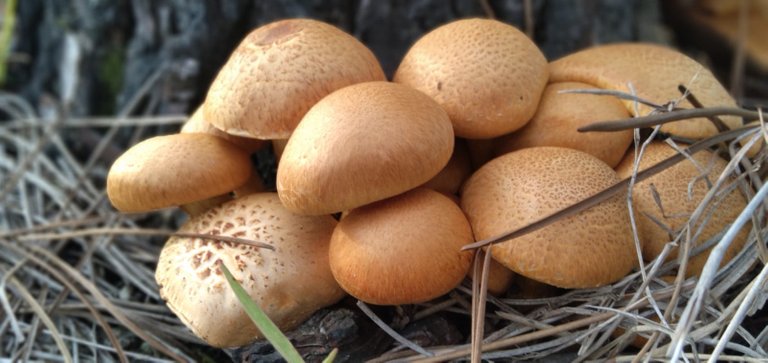
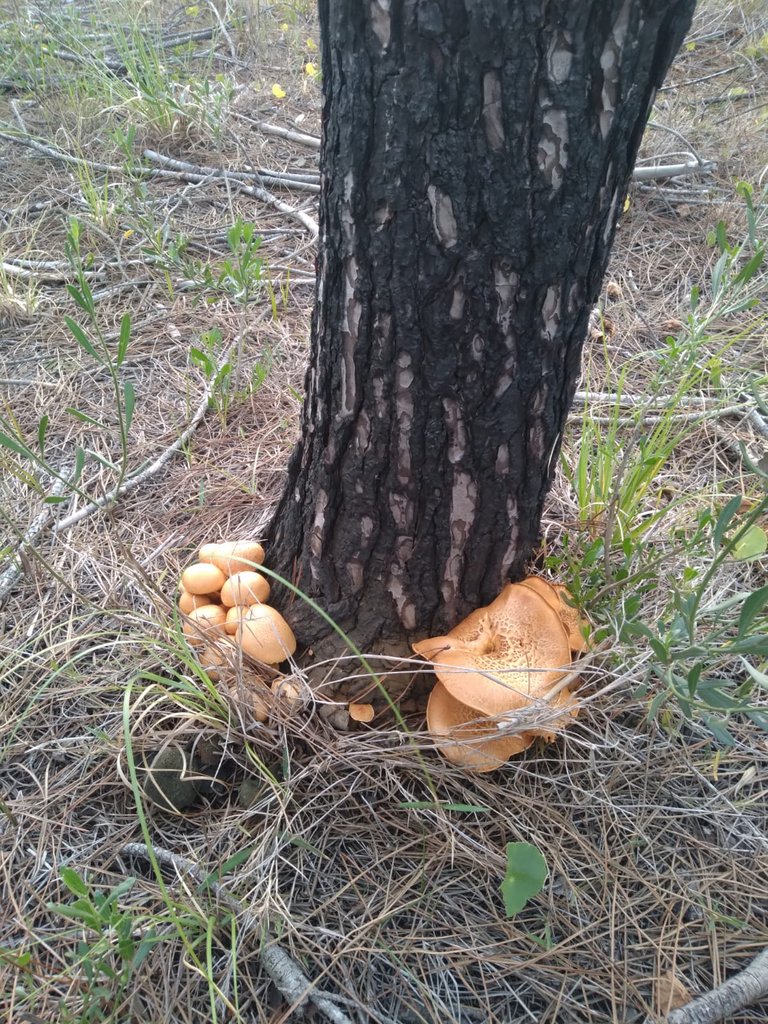
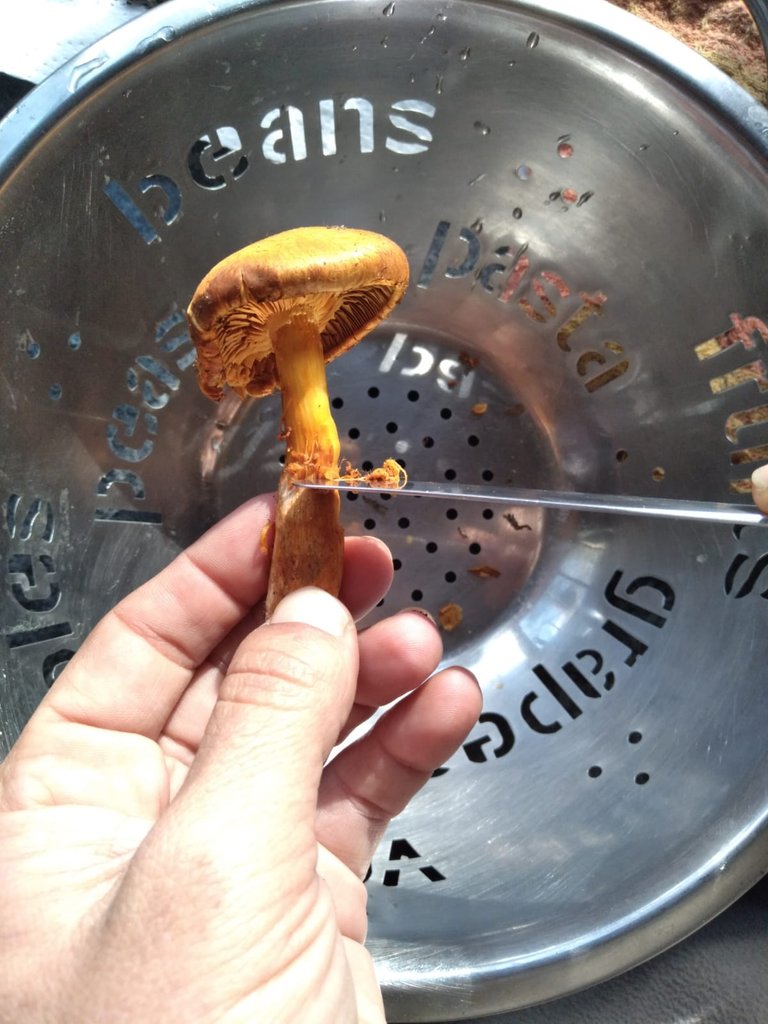
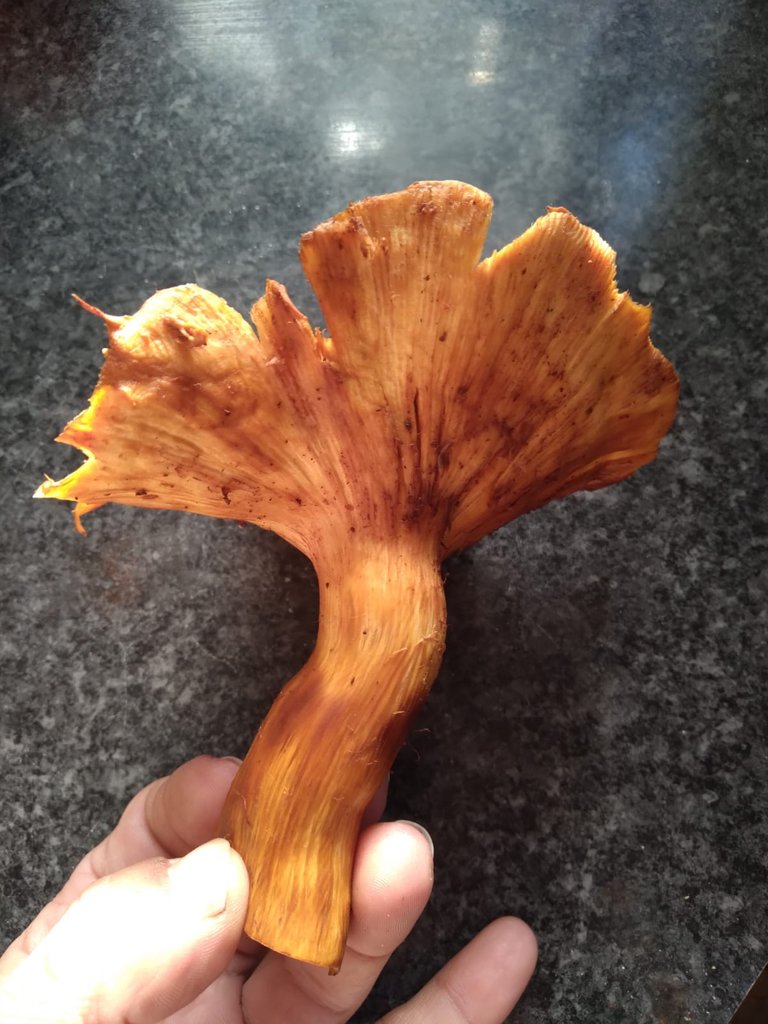
We can identify them by their ocher-orange color, and of course where they are located, at the foot of a generally eucalyptus tree, since they are the fungi that grow on its wood whether it is alive or dead.
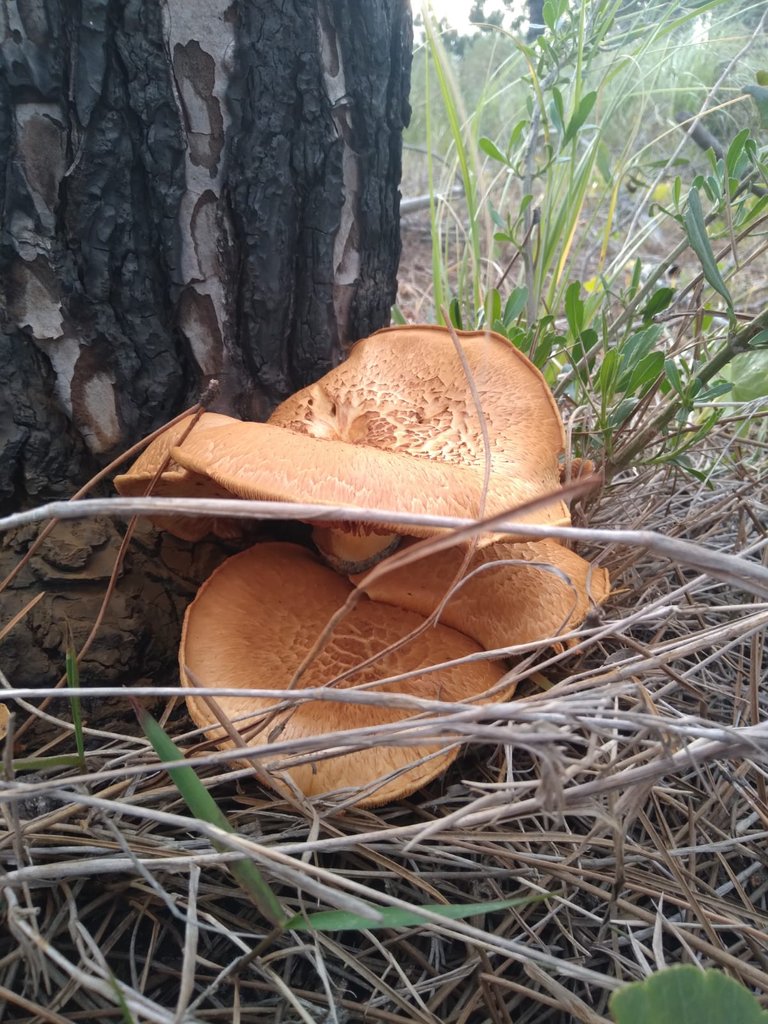
They are generally concentrated in clusters, their cap is rounded when they are young, and it flattens as they grow or age. The diameter of the hat ranges from 5 cm to 20 in diameter and its trunk can be 5 cm thick and up to 10 cm high.
In this area of the Gold Coast of Uruguay, in native forests or plantations from many years ago where there are: pines, eucalyptus and acacias, and in autumn is where we find more quantity and variety of fungi.
Culinarily they do not have a very attractive taste since they are quite bitter, they are known in Asia or Europe as the laughing fungus since if you eat it raw it causes hallucinations, but here in Uruguay, these mushrooms are widely consumed in the goats. After a process, they are preserved and are delicious. I can assure you!!
Let's go to my recipe:
INGREDIENTS
- Collect 1 to 2 kg of mushrooms
- Water required quantity
- Lemon 1
- Salt and pepper to taste
- Garlic to taste
- Rosemary, bay leaf, parsley, thyme, etc.
- 1 liter bottle previously sterilized.
- Alcohol vinegar or kefir vinegar 250ml
- Oil 100ml
PREPARATION
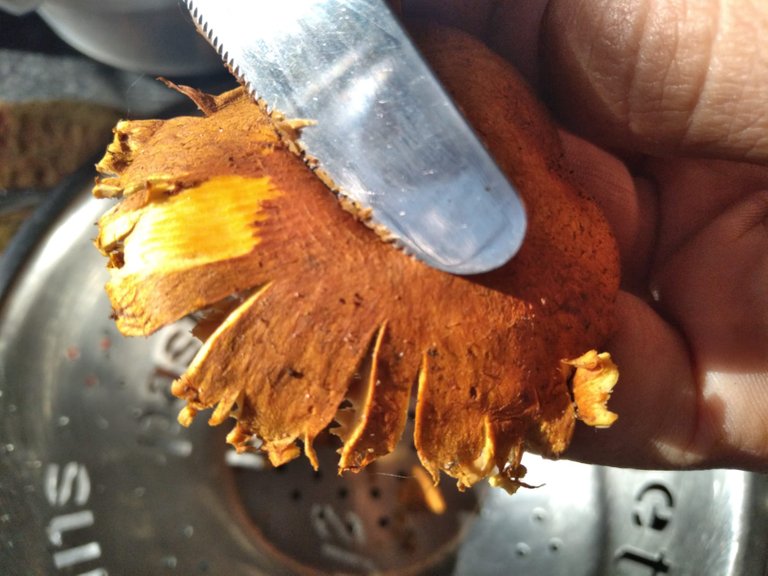
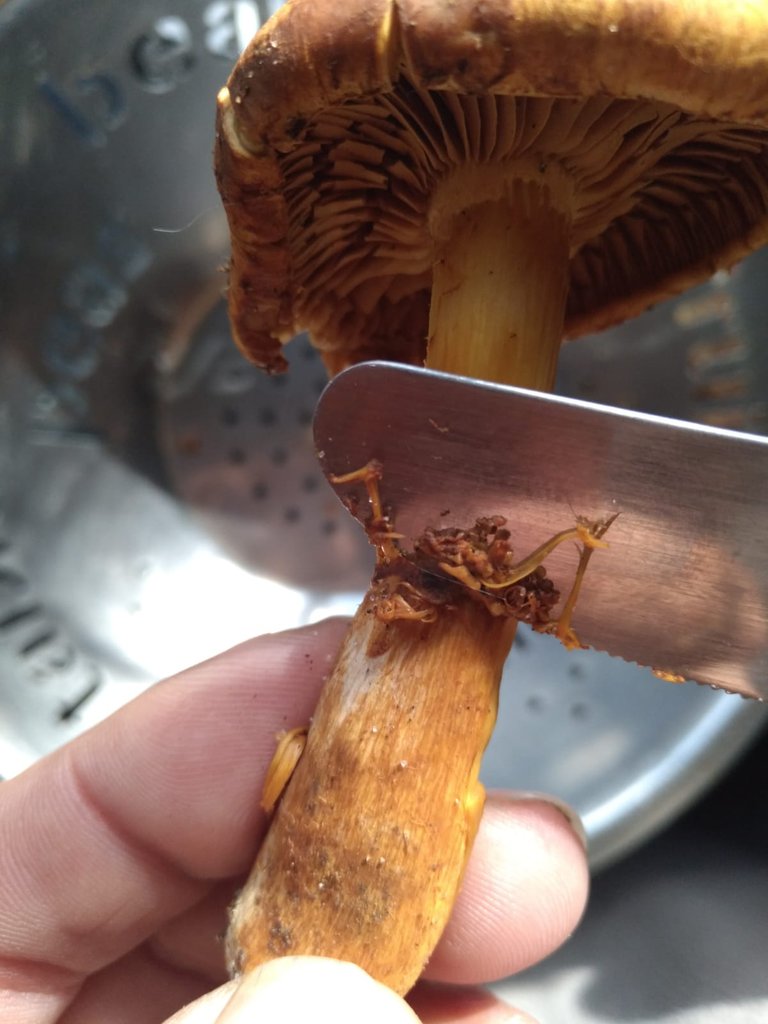
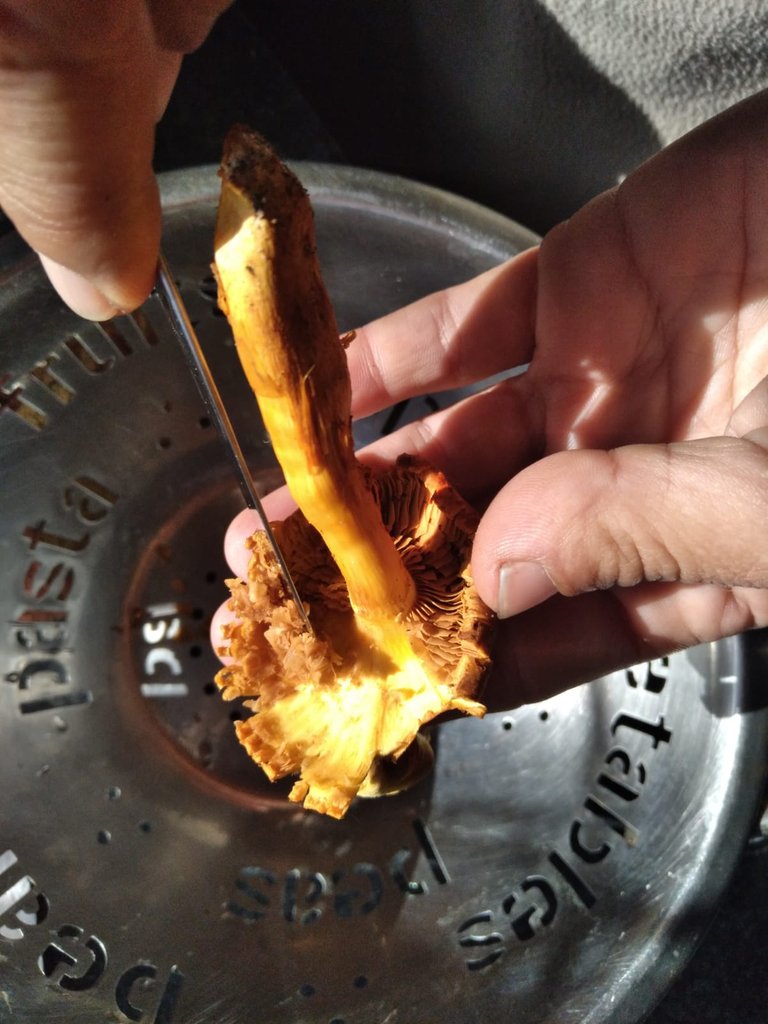
- Step 1- Once you have the mushrooms you will have to clean them, they cannot be washed, according to the recipe they gave me, so you can use a brush and a steel knife. Cleaning consists of gently removing the outer film that covers the entire fungus until it is completely clean. I recommend wearing gloves because otherwise their hands are yellow. I leave my photos so you can see how they look.

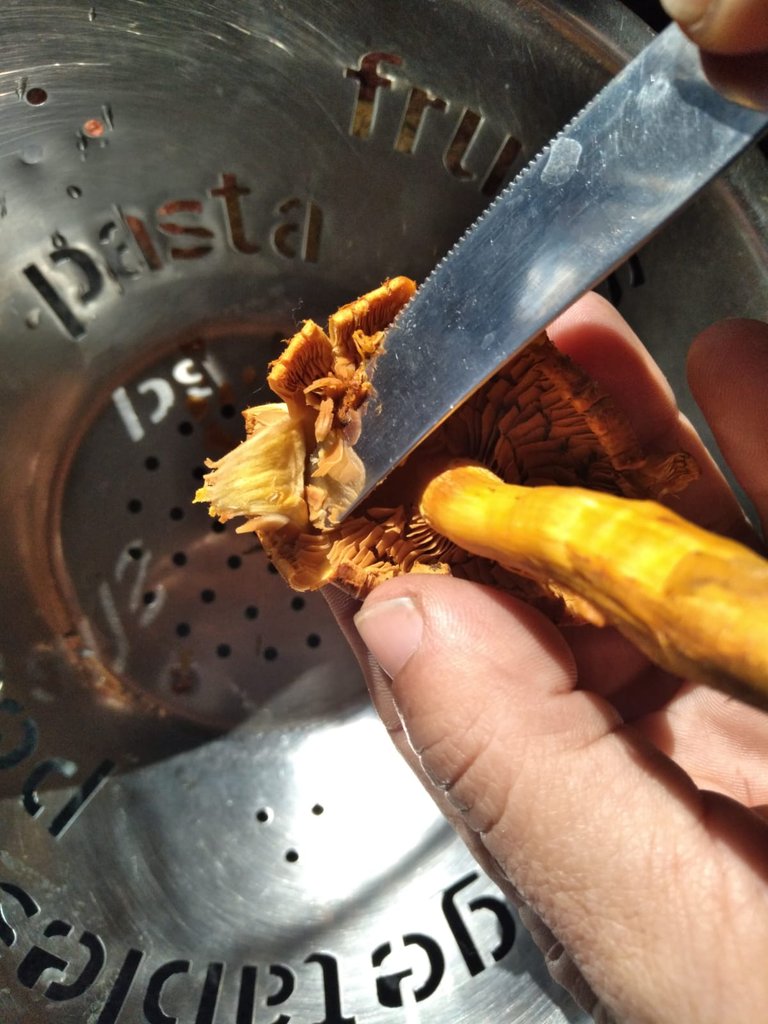
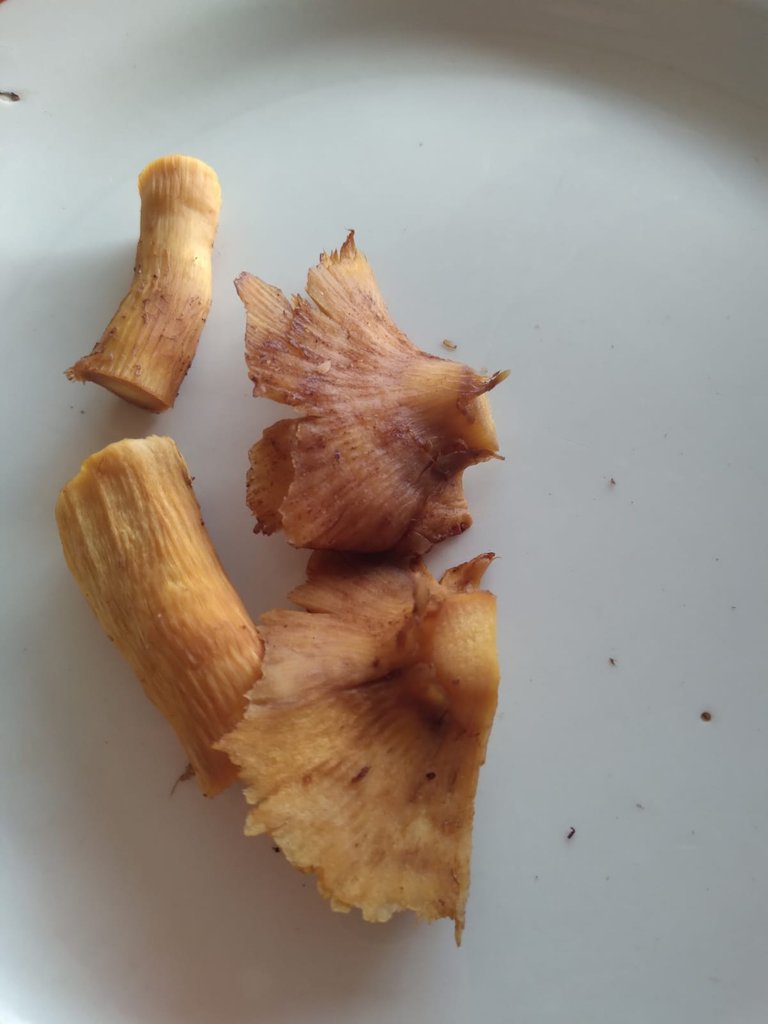
- Step 2- When you have cleaned all of them, cut them into similar sizes. There are some very young mushrooms, and others that are already very large, and as they say, the bigger, the older, and the older, the more bitter they get.
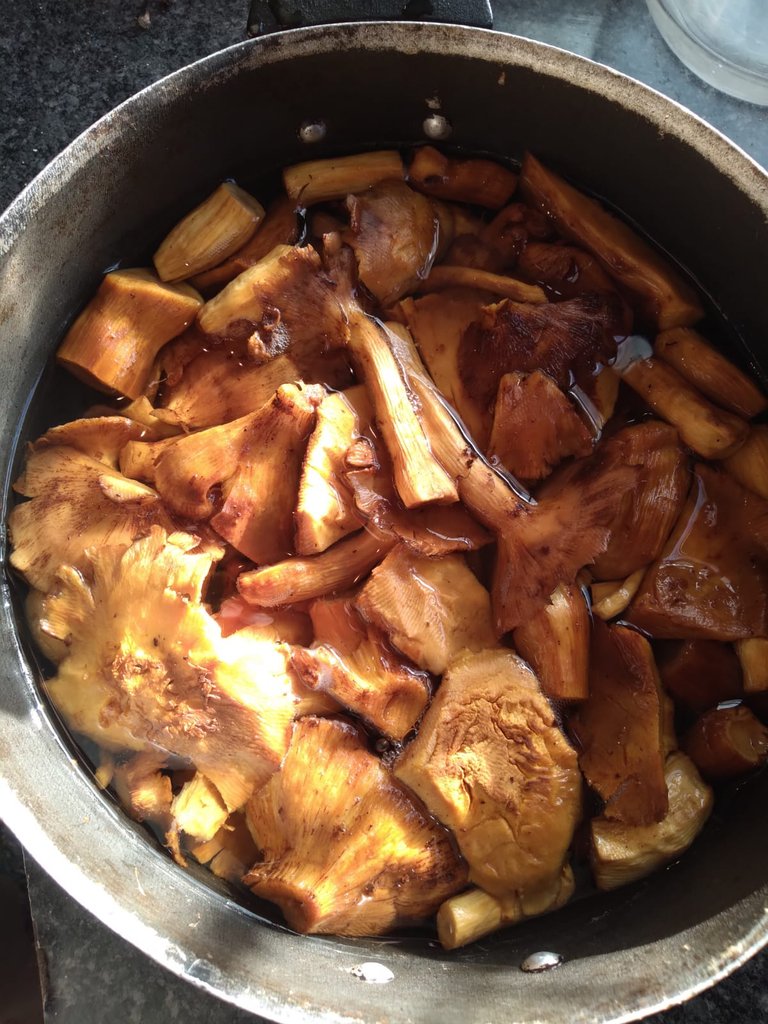
- Step 3- Place them in a pot with water and put them on the fire for 30 minutes. Then strain and repeat the process for another 30 minutes. Each time the water will come out with less yellowish color, and that is that the bitter characteristic of this fungus is disappearing.
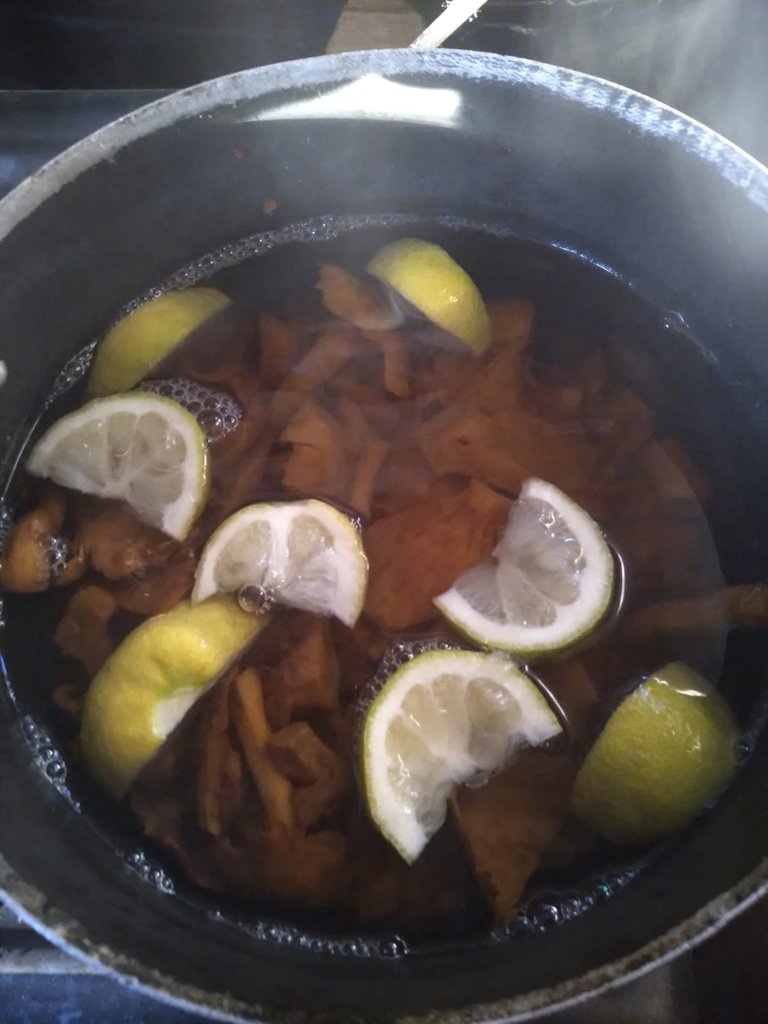
- Step 4- Strain again and this time you can add vinegar or lemon to the water, I prefer with lemon, I cut it into quarters, squeeze it a little and leave it to cook, add salt and pepper to taste and let it cook 30 more minutes and strain it. By this time the mushroom will be more tender and less bitter.
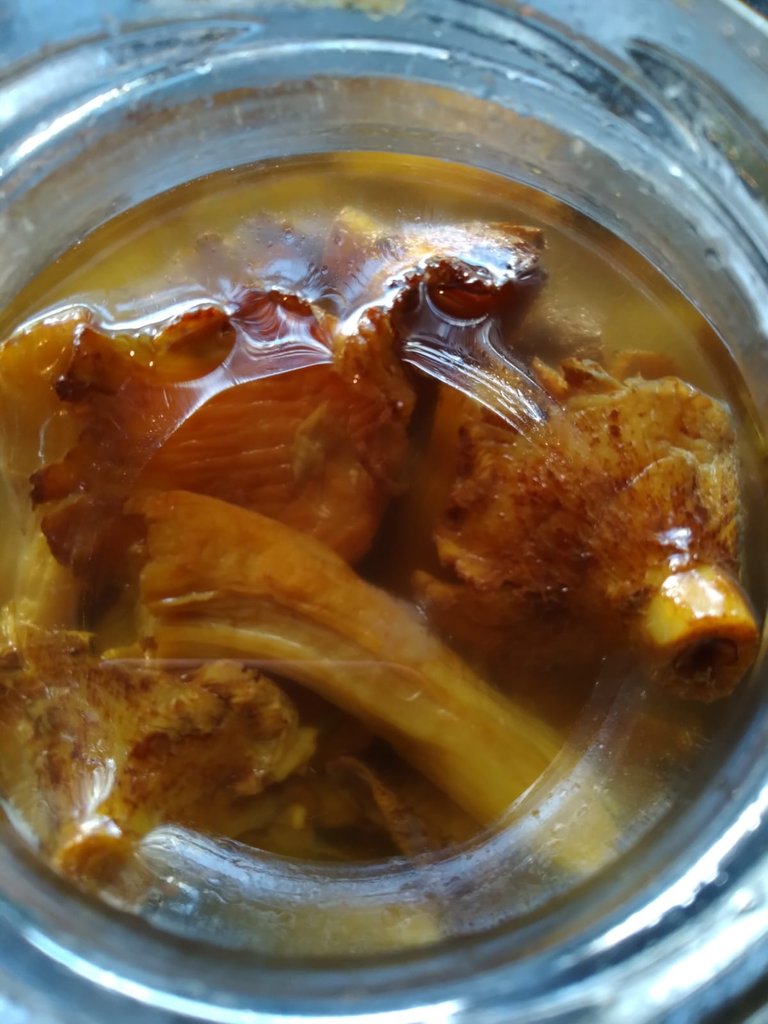
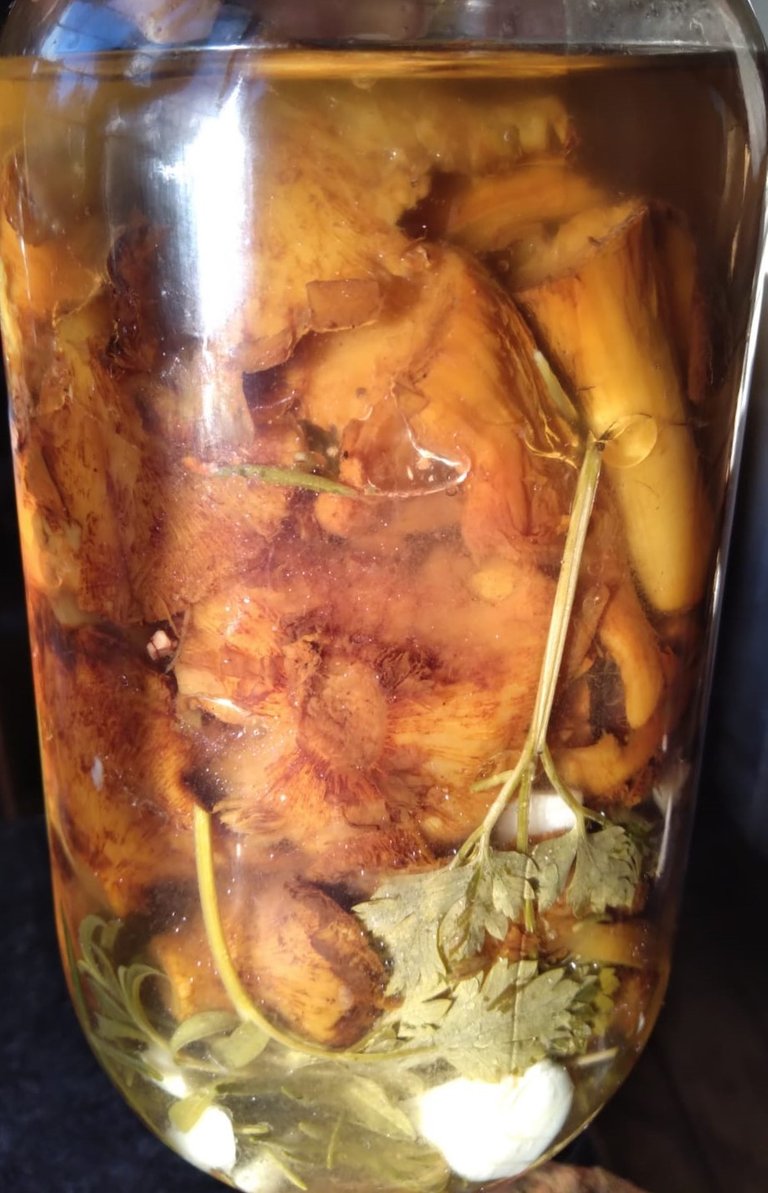
- Step 5- Once they have cooled, remove the lemon slices, place in a previously sterilized jar: the garlic cut into pieces, the branches of rosemary, thyme, parsley, etc. the aromatic herb that you like, and introduce the mushrooms to the edge of the jar. Then add the vinegar, I use kefir vinegar, which is made simply by letting the water kefir pass for more than a month, the water becomes so acidic that it becomes a probiotic vinegar. Then, when it comes into contact with the mushrooms, it fills them with life, and any bitter trace disappears.
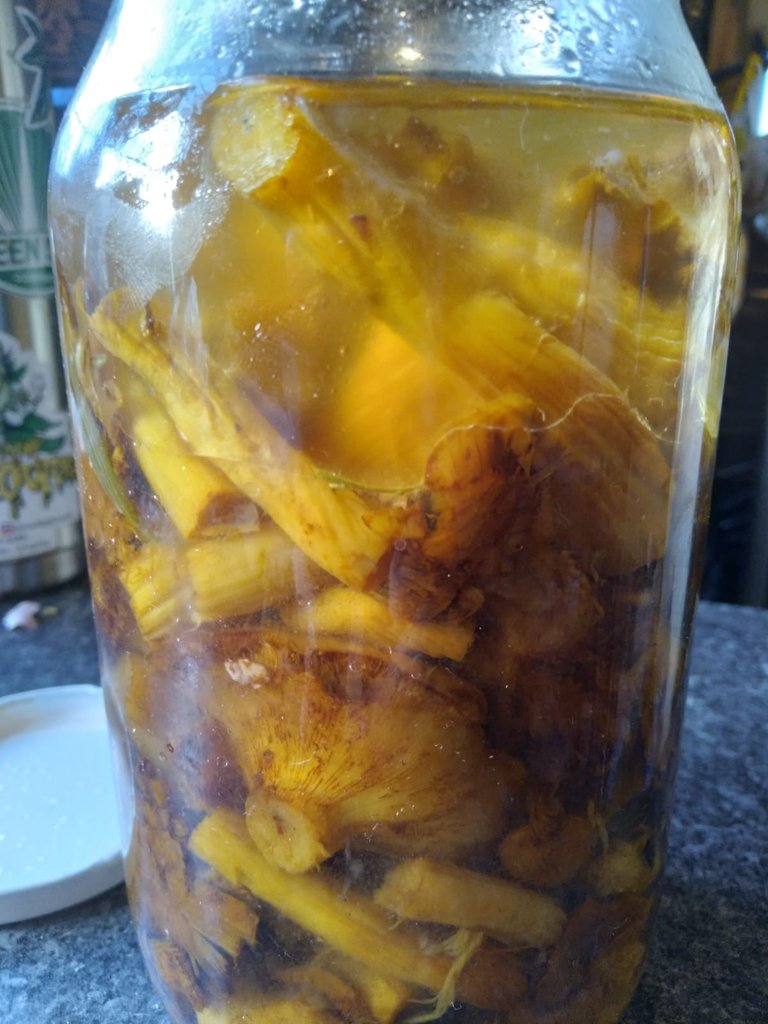
- Step 6- Finally add the oil on top of everything to avoid any type of mold, and leave it for 21 days in a cool, dry and dark place.
- After 21 days you will be able to consume your canned probiotic mushrooms.
IMPORTANT NOTE: Keep in mind that it is a preparation that, as it has probiotics, it is recommended not to cook them because it would kill all types of living beneficial microorganisms that it contains, so it is preferable to keep it and consume it at room temperature. It can last for years in your cupboard, if you do not expose it to the sun, extreme heat or metal elements, especially aluminum.
I hope you like it, if there is this kind of mushroom in your area, and you dare to collect them and make your own preserve, I hope you tell me how it turned out!
Here are some sources that I consulted:
- http://turismorocha.gub.uy/sabores-de-rocha/productos/de-la-tierra/hongos-silvestres
- https://www.elheraldo.com.ar/noticias/176308_en-los-eucaliptos-hay-hongos-y-hongos.html
https://contenidos.ceibal.edu.uy/fichas_educativas/_pdf/ciencias-naturales/reino-de-los-hongos/003-el-hongo-del-chivito.pdf *https://www.todouruguay.net/hongo-de-eucaliptus/
Have a great day!! See you in the next post!! Hugs!!
mimi05
ESPAÑOL
Hola comunidad!! ¿cómo están? ;¿qué tal su día?. Espero que muy bien! Por aquí está un poco gris y frío, pero es normal en el SUR de américa del sur.
Hoy quiero contarles mi receta de hongos silvestres en conserva probiótica. Hace unos días fuimos al bosque con una amiga, como conté en otro post y estuvimos recolectando hongos comestibles llamados GYMNOPILUS SPECTABILIS.
Los podemos identificar por su color ocre-naranja, y claro por donde están ubicados, al pie de un árbol generalmente de eucalipto, ya que son los hongos que crecen en su madera así esté viva o muerta.
Se concentran generalmente en racimos, su sombrero es redondeado cuando son jóvenes, y se va aplanando a medida que van creciendo o envejeciendo. El diámetro del sombrero va desde los 5 cm a los 20 de diámetro y su tronco puede llegar a tener 5cm de espesor y hasta 10cm de alto.
En esta zona de la Costa de Oro de Uruguay, en bosques nativos o plantaciones de muchos años atrás donde hay: pinos, eucaliptus y acacias, y en otoño es donde más cantidad y variedad de hongos encontramos.
Culinariamente no tienen un sabor muy atractivo ya que son bastante amargos, se los conoce en Asia o Europa como el hongo de la risa ya que si lo comes crudo provoca alucinaciones, pero aquí en Uruguay, estos hongos son muy consumidos en los chivitos. Luego de un proceso, se conservan y quedan deliciosos. Lo puedo asegurar!!
Vamos a mi receta:
INGREDIENTES
- Recolectar de 1 a 2 kg de hongos
- Agua cantidad necesaria
- Limón 1
- Sal y pimienta a gusto
- Ajo a gusto
- Romero, laurel, perejil, tomillo, etc.
- Frasco de 1 litro previamente esterilizado.
- Vinagre de alcohol ó vinagre de kéfir 250ml
- Aceite 100ml
PREPARACIÓN
- Paso 1- Una vez que tengas los hongos habrá que limpiarlos, no se pueden lavar, según la receta que me pasaron, asique puedes usar un pincel y un cuchillo de acero. La limpieza consiste en sacar delicadamente la película exterior que recubre todo el hongo hasta dejarlo completamente limpio. Les recomiendo usar guantes porque sino les quedan las manos amarillas. Les dejo mis fotos para que vean cómo quedan.
- Paso 2- Cuando ya hayas limpiado todos, córtalos en tamaños similares. Hay algunos hongos muy jóvenes, y otros ya muy grandes, y según dicen, mientras más grandes, mas viejos, y mientras más viejos, más amargos se ponen.
- Paso 3- Colocarlos en una olla con agua y ponerlos en el fuego durante 30 minutos. Luego colar y repetir el proceso durante 30 minutos más. Cada vez el agua saldrá con menos color amarillento, y es que se está yendo ese amargo característico de este hongo.
- Paso 4- Vuelve a colar y esta vez puedes agregarle al agua vinagre o limón, yo prefiero con limón, lo corto en cuartos, lo exprimo un poquito y lo dejo en la cocción, le agrego sal y pimienta a gusto y lo dejo cocinando 30 minutos más y colarlo. Para este entonces el hongo ya estará más tierno y menos amargo.
- Paso 5- Una vez que se enfriaron, quitar las rodajas de limón, colocar en un frasco antes esterilizado: los ajos cortados en trozos, las ramas de romero, tomillo, perejil, etc. la hierba aromática que te guste, e introducir los hongos hasta el borde del frasco. Luego agregar el vinagre, yo utilizo vinagre de kéfir, que se hace sencillamente dejando pasar más de un mes el kéfir de agua, el agua se acidifica tanto que se convierte en un vinagre probiótico. Entonces al entrar en contacto con los hongos los llena de vida, y cualquier vestigio amargo desaparece.
- Paso 6- Por último agregar el aceite por encima de todo para evitar cualquier tipo de moho, y dejarlo por 21 días en un lugar fresco, seco y oscuro.
- Pasados los 21 días ya podrás consumir tus hongos probióticos en conserva.
NOTA DE IMPORTANCIA: Ten en cuenta que es una preparación que al tener probióticos se recomienda no cocinarlos porque mataría todo tipo de microorganismo vivo benéfico que contenga el mismo, por eso es preferible conservarlo y consumirlo al temperatura ambiente. Puede durar años en tu alacena, si no lo expones al sol, al calor extremo o a elementos metálicos, más que nada a los de aluminio.
Espero les guste, si en su zona hay de esta clase de hongos, y se animan a recolectarlos y hacer su propia conserva, espero me cuenten cómo les quedó!!
Les dejo algunas fuentes que consulté:
- http://turismorocha.gub.uy/sabores-de-rocha/productos/de-la-tierra/hongos-silvestres
- https://www.elheraldo.com.ar/noticias/176308_en-los-eucaliptos-hay-hongos-y-hongos.html
https://contenidos.ceibal.edu.uy/fichas_educativas/_pdf/ciencias-naturales/reino-de-los-hongos/003-el-hongo-del-chivito.pdf *https://www.todouruguay.net/hongo-de-eucaliptus/
Que tengan un excelente día!! Nos vemos en el próximo post!! Abrazos!!
mimi05
Wow that's really cool. I never thought of probiotic mushrooms.
I thought you might like a couple of tips re presenting dual language posts - check them out here
Muchas gracias!!
Thank you!!
Hola @mimi05, sería idóneo que indicases al final del post, qué equipo de fotografía utilizaste para tomar las fotos (celular o cámara), indicando su modelo y marca. Saludos.
Eso qué valor aporta al post? Eso va a modificar en algún punto mi post? Pudiste fijarte si era genuino o no? Con eso deberia alcanzarte ya que tu fuiste la que hizo silenciar mi anterior post. Si estas buscando otra excusa para bajar mi publicación te cuento que mi teléfono es un Samsung A01 y con él tomé TODAS LAS FOTOS. Lo puedes comprobar en cualquier buscador. Alguna otra duda @sirenahippie??
I was not the one who silenced your previous post @mimi05, it was you for being a PLAGIARATOR. And with regard to requesting that you indicate what equipment was used for the photographs, it is something common in Hive, do not take it personally, rather you should be grateful that it is oriented to you, as you should also be grateful, that I did not immediately resort to a Hive Watcher , That if it had been different, and perhaps it would not have been bad, because at no time was I rude to you, rather I provided you with information so that you can optimally carry out your post, because perhaps due to your lack of knowledge of the platform there will be things that still you do not know. Also, I'm doing my job as a curator here also at Foodies Bee Hive, it's my job, it's not personal.
And no, I have not yet verified the veracity and authenticity of your publication, but I will, it is my job. Hopefully you can learn certain basic rudiments inherent to post writing in Hive, perhaps that will do very well for you on the platform, because that is the idea of this ecosystem, that we all live together and contribute positive things, not copied or plagiarized content. You have a good day. Greetings.
Note: Please put the information related to your equipment at the end of your post, you could do something like this: "Source of the images: All the photos in this publication are my own and were taken with a Samsung A01 phone", for example.
Yo no fui quien silenció tu post anterior @mimi05, fuistes tú por ser una PLAGIADORA. Y respecto a solicitar que indiques qué equipo fue utilizado para las fotografías, es algo común en Hive, no te lo tomes personal, más bien deberías agradecer que se te está orientado, como también deberías agradecer, que no recurrí de inmediato a un Hive Watcher, eso si hubiera sido diferente, y quizás no hubiera estado mal, pues en ningún momento fui grosera contigo, más bien te facilité información para que realizaces de forma óptima tus post, pues quizás por tu falta de conocimiento de la plataforma existirán cosas que aún desconoces. Además, estoy haciendo mi trabajo como curadora aquí también en Foodies Bee Hive, es mi trabajo, no es personal.
Y no, aún no he verificado la veracidad y autenticidad de tu publicación, pero lo haré, es es mi trabajo. Ojalá puedas aprender ciertos rudimentos básicos inherentes a la elaboración de post en Hive, quizás con eso te vaya muy bien en la plataforma, pues esa es la idea de este ecosistema, que todos convivamos y aportemos cosas positivas, no contenido copiado, plagiado. Que tengas un buen día. Saludos.
Nota: Por favor coloca el dato relativo a tu equipo al final de tu post, podrías hacer algo como esto: "Fuente de las imágenes: Todas las fotos de esta publicación son de mi autoría y fueron tomadas con un teléfono Samsung A01", por ejemplo.
No me parece que un buen curador deba tratar a las personas de esta manera. Usuario bloqueado.
El mundo es libre, usted puede pensar lo que quiera. Saludos @linkxdx
Did they make you laugh? These have hallucinogens in them, I assume the boiling twice removes some of that toxin right?
That's right, i boiled it 3 times to eat, Because these mushrooms are bitter, and boiling them takes away that flavor and toxicity, after that they are delicious.
Hi mimi05,
Visit curiehive.com or join the Curie Discord community to learn more.
Thank's!! Im excited!!
Congratulations @mimi05! You have completed the following achievement on the Hive blockchain and have been rewarded with new badge(s) :
Your next target is to reach 2500 upvotes.
You can view your badges on your board and compare yourself to others in the Ranking
If you no longer want to receive notifications, reply to this comment with the word
STOPIn a glance, this look like eggs 😆
Si, es cierto!
Yes is true!
Muchas gracias @prm4031 me emociona saber que hay personas como tú que aprecian el trabajo que uno hace. Y realmente no lo siento como un trabajo, sino como un placer. Asique es un placer tenerte entre mis contactos también! Muchísimas gracias por tu voto!! !LUV
@prm4031, you were given LUV from @mimi05. About LUV: https://peakd.com/@luvshares http://ipfs.io/ipfs/QmUptF5k64xBvsQ9B6MjZo1dc2JwvXTWjWJAnyMCtWZxqM