

First I explain how to start your sourdough:
1- In a jar you put flour (whatever you have).
2- Add the same amount of water as flour.
3- Stir until you get a thick but well integrated dough.
4- Let it rest with the jar covered in a warm place in the house (this depends on the conditions in which you live).
5- Repeat steps 1 to 3 every day until you observe that bubbles are formed, it has grown at least twice the initial size and the dough acquires an sour smell.
When your dough is ready you can use it as long as it is well active (I will tell you how to know later) or you can store it in the refrigerator. In this case, you should take it out of the refrigerator a couple of days before using and feeding it (steps 1 to 3).
Some people suggest refreshing it, for which you discard 😵 a good portion of sourdough and feed it again. This "discard" is precisely what you can use for many recipes. Adding sourdough to your recipes brings flavor nuances and nutrients from natural fermentation 💚. If you do not refresh the sourdough, it becomes more acidic, which can alter the fermentation process. However, I suggest you to test what you like and how to adjust your recipes.
Now let's get to the pizza.
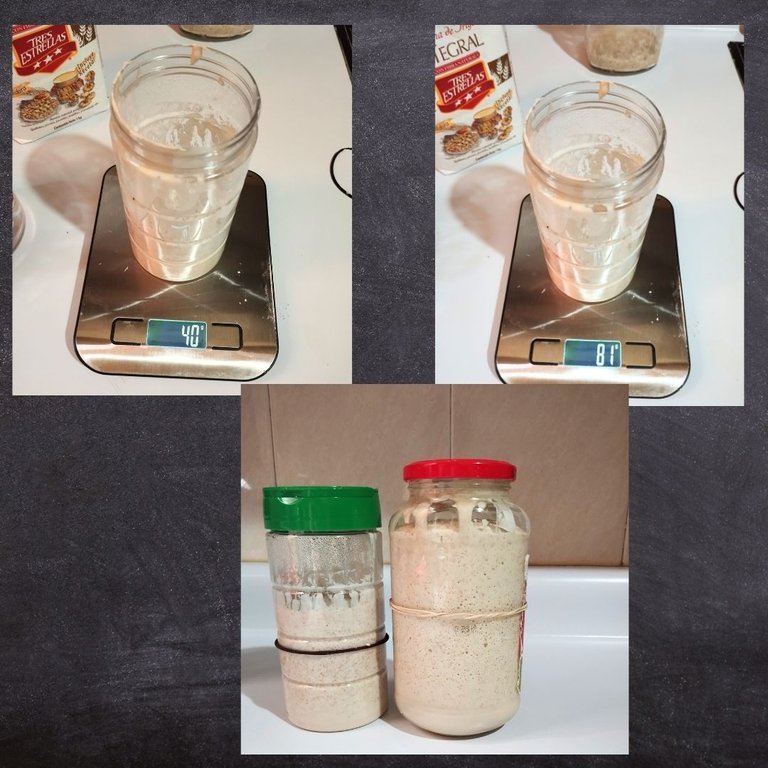
The first thing I did was to activate my sourdough, which had been out of the refrigerator since the night before. To do this I added water and flour in equal parts to the sourdough and after mixing well I let it rest for several hours, as I had already explained. In the picture you can see that I placed a rubber band at the initial level of the sourdough when I fed it, that allows me to check when it has grown double or triple.
📝You will be able to identify that it is very active because you will notice that the dough wants to escape from the jar 😆 and will have many bubbles.
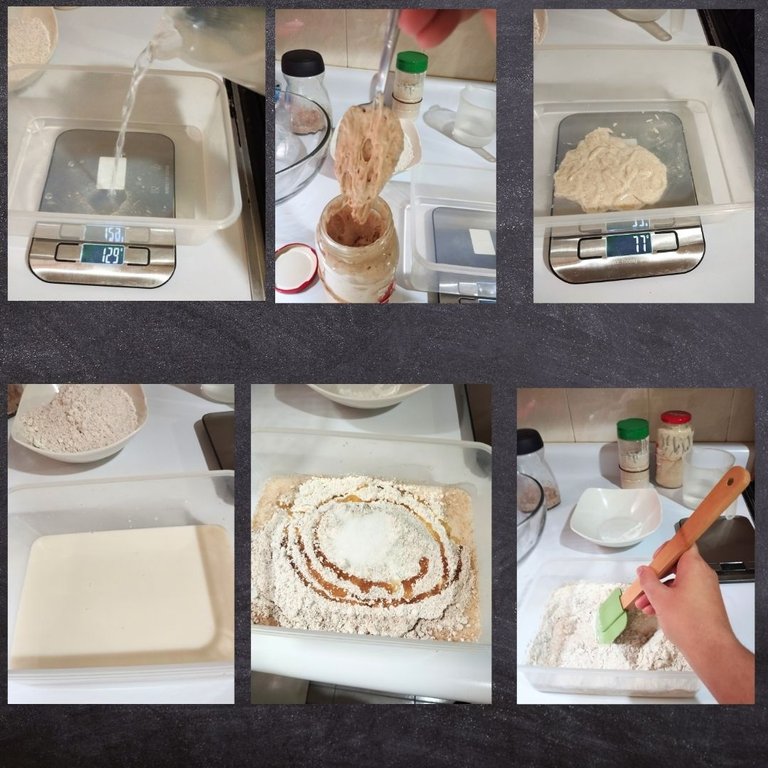
Then I put 2 parts water and 1 part sourdough in a bowl and mixed it well until the sourdough was diluted. To this milky liquid I added three parts of flour, salt and oil. All the ingredients are well integrated but without kneading and let it rest covered for an hour.
📝The water-sourdough-flour ratio can be modified to obtain a more or less hydrated dough. In my short experience very hydrated doughs are difficult to handle, so I recommend using 2 parts water-1 part sourdough-3 parts flour, but I'm sure you will find the formula that best suits you.
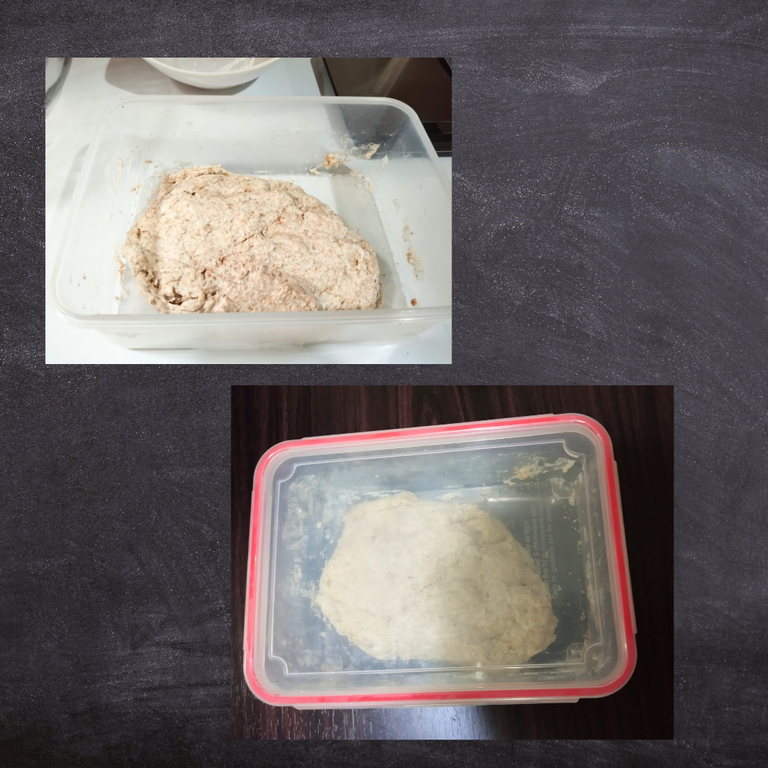
After that time you can knead it a little with your hands until you get a homogeneous dough and cover it again. According to the recipe I checked, this dough can be refrigerated for several days and then used, but I wanted the pizza for the next day, so I let it ferment for about 18 hours.
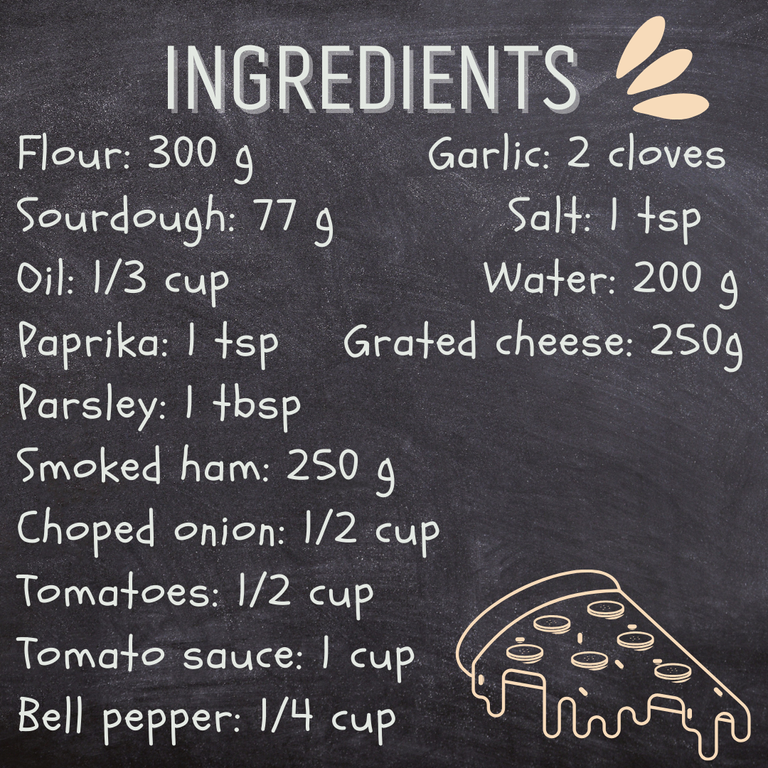
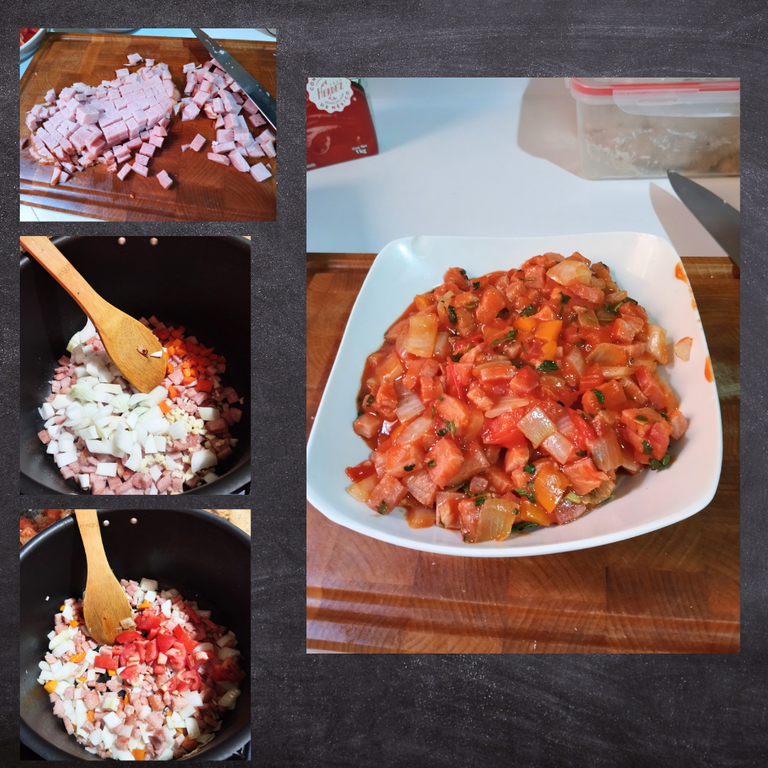
For the topping of this pizza I sautéed the meat until it was lightly browned, added the onion, garlic and bell pepper, stirring for 3 minutes. Then I added the diced tomato, tomato sauce, salt, paprika and parsley. I let it reduce until it had a thick consistency.
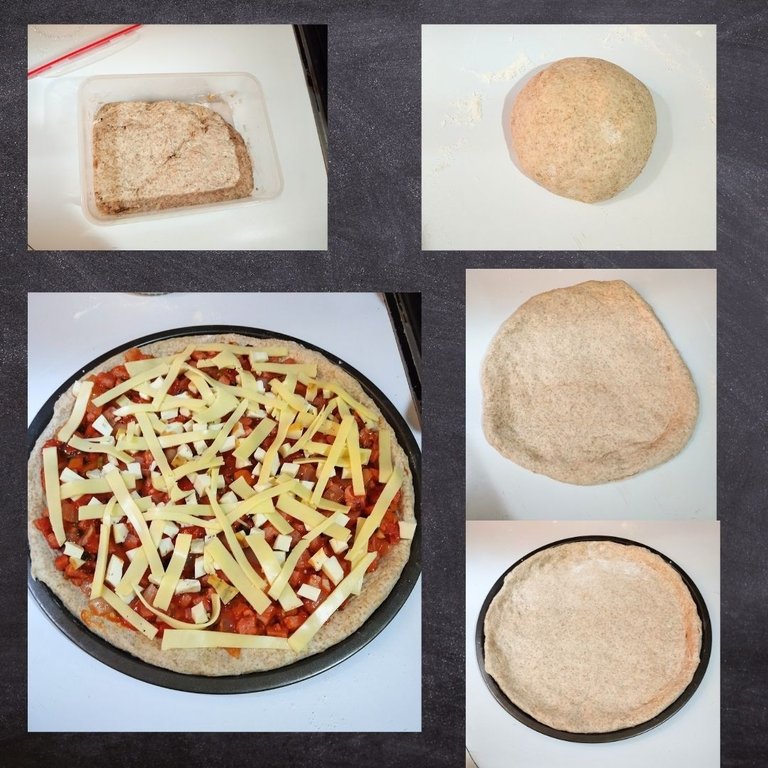
After the sauce was cold I began to assemble the pizza. I put the dough on a floured surface and formed a ball with it. Carefully I began to stretch it with my hands, trying not to degas it. As the dough was sticking a little to the table, I finished stretching it on the tray where I was going to cook it. This tray was previously floured. When I finished forming the pizza, I added the sauce and spread the cheese. In this case I used two types of cheese because there is never enough cheese 😂.
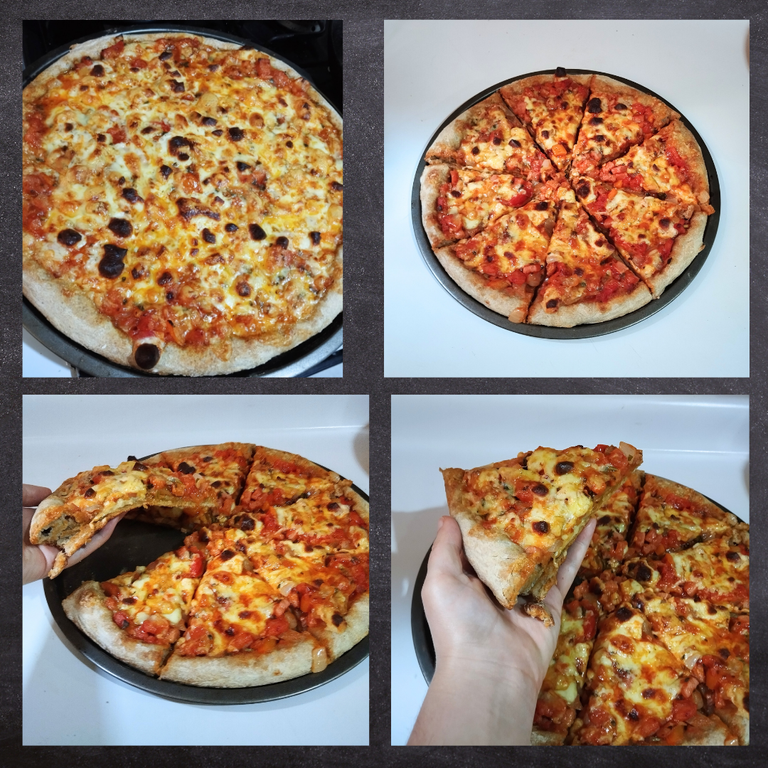
I baked it in the oven at 180 degrees for 15 minutes and when I took it out I let it rest for a few minutes before cutting it and eating it. I hope the pictures speak for themselves, but anyway I will tell you that it was delicious. The sour taste of the sourdough came out quite a bit (because I used the first sourdough I had made, which is very mature), but I love that taste.
I hope you liked the recipe and are encouraged to start your sourdough. I'm still trying to make a decent bread and will tell you everything I do with sourdough.
See you in another recipe!!!!
📸 from my Redmi Note 12
Image editing and dividers with canva, own design
Translation with deepl


Hola foodies 🐝!!
Desde hace ya bastante tiempo estoy viendo información sobre la masa madre, los buenos panes que se pueden hacer con ella y todos los beneficios para el paladar y la salud. La mayoría de los videos que había visto hacían parecer que el asunto es complejo, pero me armé de valor y empecé mi propia masa madre.
La verdad es que hacer la masa fue fácil, pero la elaboración del pan me ha derrotado un poco. Así que he buscado qué otras recetas puedo hacer con masa madre y he encontrado bastantes, para mi sorpresa. Hoy les quiero contar cómo hice mi primera pizza desde cero (hasta ahora @gornat era quien las hacía siempre con levadura granulada). Allá vamos.
Primero les explico cómo empezar su masa madre:
1- En un frasco pones harina (la que tengas)
2- Agregas la misma cantidad de agua que de harina
3- Remueves hasta obtener una masa espesa pero bien integrada
4- Dejas reposar con el frasco tapado en un lugar cálido de la casa (esto depende de las condiciones en que vivas)
5- Repetir los pasos 1 al 3 cada día todos los días hasta que observes que se forman burbujas, ha crecido al menos el doble del tamaño inicial y la masa adquiere un olor ácido.
Cuando tu masa esté lista la puedes usar siempre que esté bien activa (luego te comentaré cómo saberlo) o puedes guardarla en el refrigerador. En este caso, deberás retirarla del refrigerador un par de días antes de usarla y alimentarla (pasos del 1 al 3).
Algunas personas sugieren refrescarla, para lo cual se descarta 😵 una buena porción de masa madre y se alimenta nuevamente. Este "descarte" es precisamente el que puedes usar para muchas recetas. Agregar masa madre a tus recetas le aporta matices de sabor y nutrientes provenientes de la fermentación natural 💚. En caso de que no refresques la masa madre, esta se torna más ácida, lo que puede alterar el proceso de fermentación. No obstante te sugiero que vayas probando qué te gusta y cómo ajustar tus recetas.
Ahora sí vamos a la pizza.
Lo primero que hice fue activar mi masa madre, que estaba desde la noche anterior fuera del refrigerador. Para ello agregué agua y harina en partes iguales a la masa madre y después de mezclar bien dejé reposar varias horas, como ya te había explicado. En la imagen puedes ver que coloqué una banda elástica en el nivel inicial de la masa madre cuando la alimenté, eso me permite chequear cuándo ha crecido el doble o triple.
📝Sabrás identificar que está muy activa porque notarás que la masa se quiere escapar del frasco 😆 y tendrá muchas burbujas
Luego en un recipiente puse 2 partes de agua y una parte de masa madre, lo mezclé bien hasta diluir la masa madre. A este líquido de apariencia lechosa le puse tres partes de harina, la sal y el aceite. Todos los ingredientes se integran bien pero sin amasar y se deja reposar tapado por una hora.
📝 La relación de agua-masa madre-harina la puedes modificar para obtener una masa más o menos hidratada. En mi corta experiencia las masas muy hidratadas son difíciles de manejar, por eso recomiendo usar 2 partes de agua-1 parte de masa madre-3 partes de harina, pero seguro encontrarás la fórmula que mejor te acomode.
Al cabo de ese tiempo se puede amasar un poco con las manos, hasta obtener una masa homogénea y se vuelve a tapar. Según la receta que consulté esta masa se puede refrigerar varios días y luego usarla, pero yo quería la pizza para el día siguiente, así que la dejé fermentar por 18 horas, aproximadamente.
Para el topping de esta pizza puse a saltear la carne hasta que estuvo ligeramente dorada, agregué la cebolla, ajo y pimiento, revolviendo por 3 minutos. Posteriormente agregué el tomate en cuadritos, la salsa de tomate, sal, paprika y perejil. Dejé reducir hasta que tomó una consistencia espesa.
Después de que la salsa estuvo fría comencé a armar la pizza. Puse la masa sobre una superficie enharinada y formé una bola con ella. Cuidadosamente comencé a estirarla con las manos, tratando de no desgasificarla. Como se me pegaba un poco la masa a la mesa la terminé de estirar sobre la bandeja en que la iba a cocinar. Esta bandeja estaba previamente enharinada. Cuando terminé de formar la pizza, le agregué la salsa y esparcí el queso. En este caso usé dos tipos de queso porque nunca es suficiente queso 😂.
Cociné en el horno a 180 grados durante 15 minutos y al sacarla la dejé reposar unos minutos antes de cortarla y comerla. Espero que las imágenes hablen por sí mismas, pero de todas maneras les diré que estaba deliciosa. Salió bastante el sabor ácido de la masa madre (porque usé la primera masa madre que había hecho, que está muy madura), pero a mí me encanta ese sabor.
Espero que les haya gustado la receta y se animen a empezar su masa madre. Sigo intentando hacer un pan decente y les contaré todo lo que haga con masa madre.
Nos vemos en otra receta!!!!
📸 desde mi Redmi Note 12
Edición de imágenes y divisores canva, diseño propio
Traducción con deepl
Confirmo, Estaba muy buena!
Jejejejej
Congratulations @mita3! You have completed the following achievement on the Hive blockchain And have been rewarded with New badge(s)
Your next target is to reach 3000 upvotes.
You can view your badges on your board and compare yourself to others in the Ranking
If you no longer want to receive notifications, reply to this comment with the word
STOPCheck out our last posts: