Let's take a little break from my b&w photos and talk bread tonight.
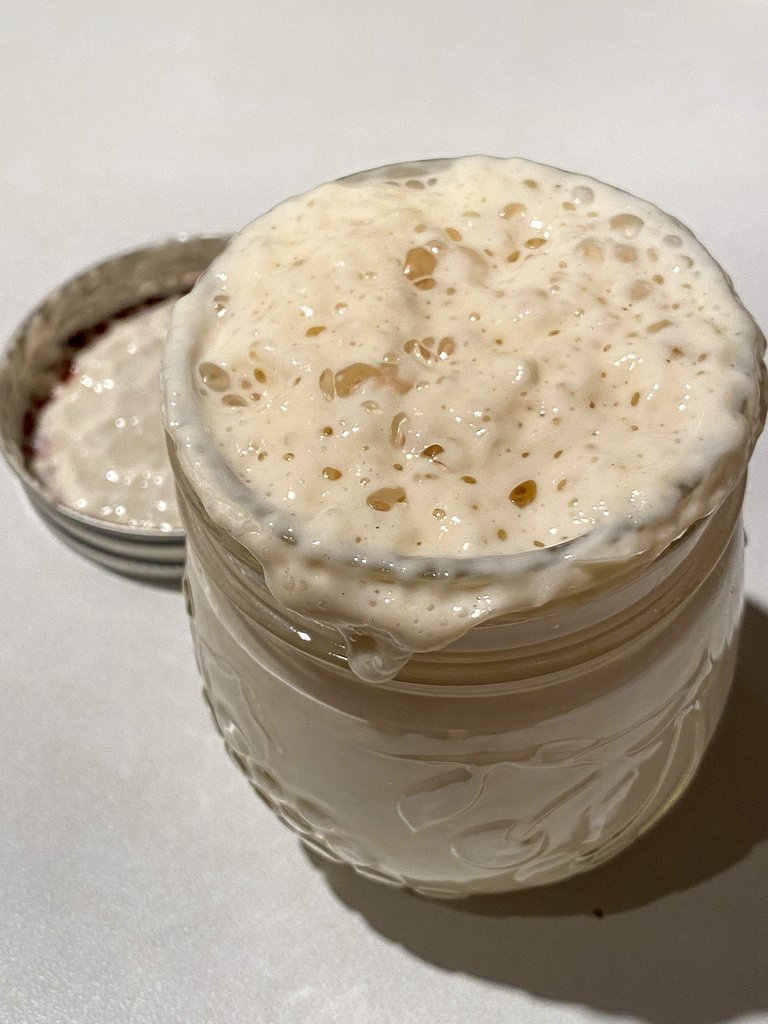
This morning started for me with baking, not bread-making, mind you, because that really starts some time ago. At least yesterday, longer if you count making your sourdough starter.
You may, of course, make same-day bread once you have your starter or are using yeast, but I prefer to let the dough ferment overnight to get a little more of that typical sourdough flavor.
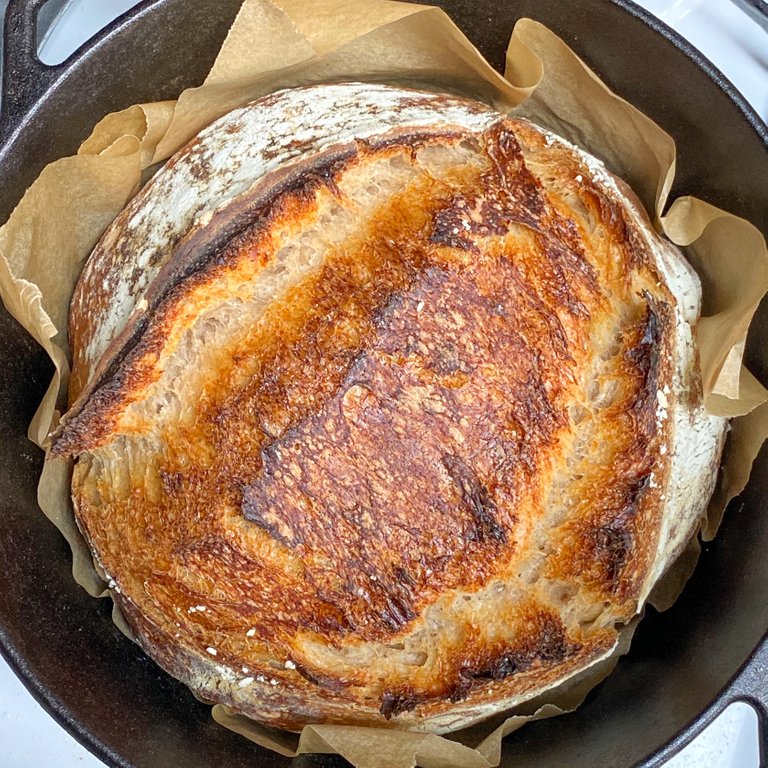
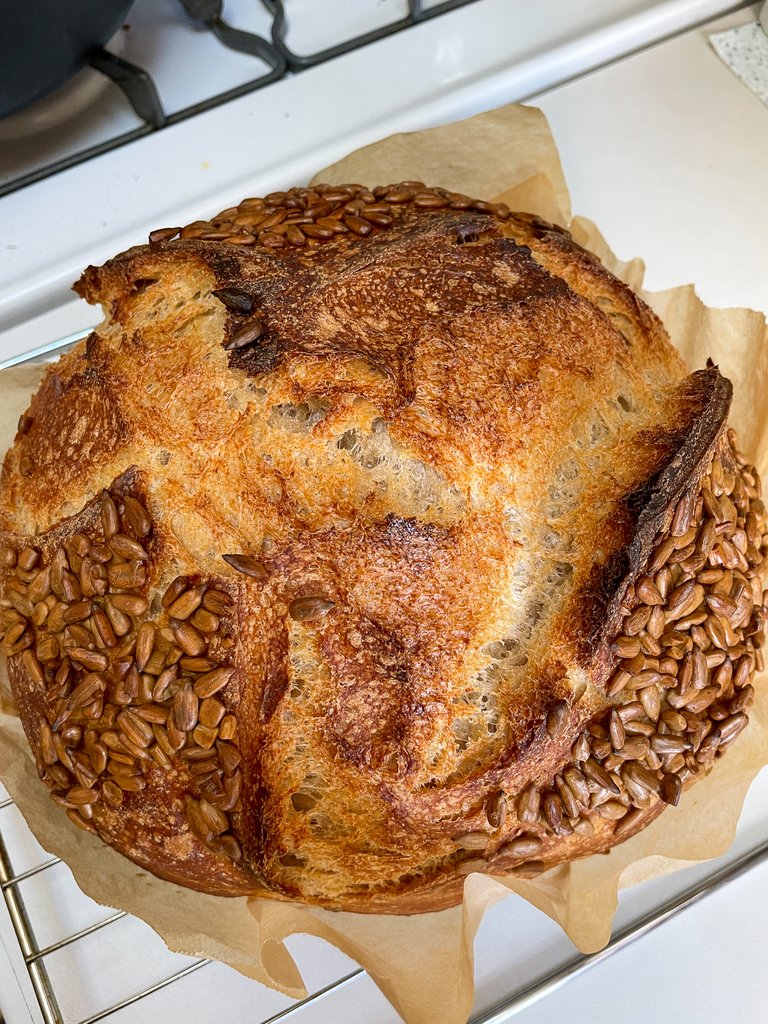
By the way you may notice that the photos below are not of the same bread, but the breads are all made with the (more or less) same recipe. You know, I'm a baker, a human, not someone to stick to each letter of a recipe 😉. Well, at least not 100 %. In baking it is important to adhere to some proportions, otherwise you may end up with disaster or a happy accident.
In any case, this is my tried and proven recipe for a sourdough bread:
- 150 g levain or sponge made of
- 50 g sourdough starter
- 50 g water
- 50 g whole wheat flour
384 g warm (not hot) water - avoid chlorine like the pest!
290 g bread flour or all purpose flour
290 g whole wheat flour
14 g salt
20 g water optional to mix in the salt
To get a little more sour into the sourdough I usually mix the warm water with the flour on night #1 and just let it sit covered on the counter.
In the morning of day #2 I will make the levain by mixing the ingredients and let them sit somewhere a little warm. I found that the oven with the oven-light turned on, nothing else, works marvelous!
Once the levain has grown, for mine about 3 - 4 hours later, I will mix the levain with the water/flour mixture. Find your inner child and squeeze the mix - a lot. It won't look very coherent at this stage, but don't worry.
Important - then let it sit covered for maybe 15 minutes.
After that add the salt maybe with the aid of a little warm water by squeezing or kneading it in. With the salt in, I dump the whole dough on your counter and start my 'slap and fold' session. Hubby calls it 'beating the dough'.
I don't have a KitchenAid or equivalent heavy mixer for kneading dough, so the slap-and-fold method works wonders. Side note: If you have to work through some anger issues it works well, too 😋.
Take one side of that blob of dough, pull it towards you - it stretches and fold it over to the other side and then... lift the whole blog off the counter and slab it full force on to the counter, pull it towards, stretch, fold, slap - repeat, repeat, repeat. After a few times, you should see a visual change in the dough, looking much more coherent, less crumbly.
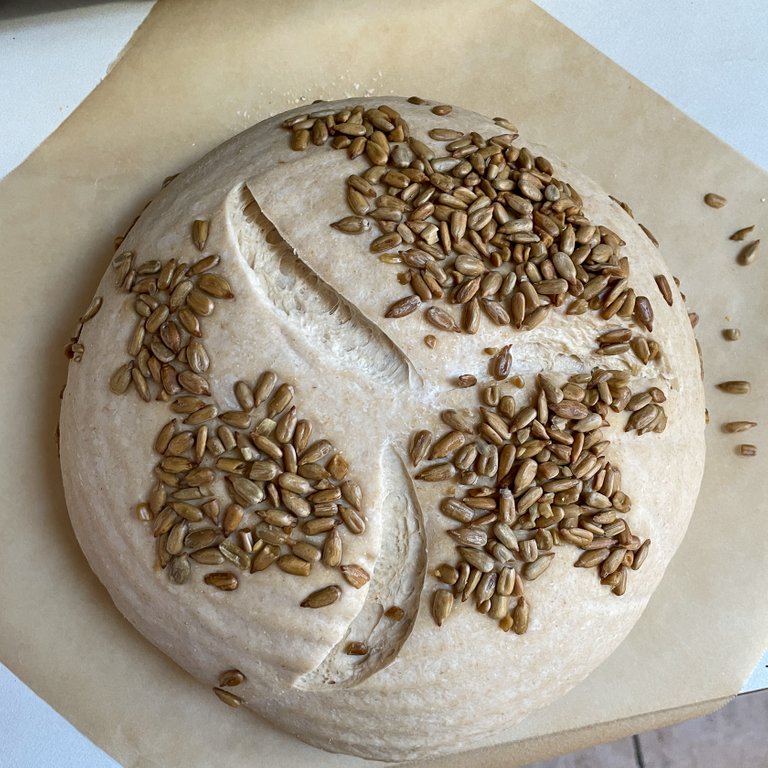
This is when you put it back into its bowl, cover it and put it in a warm place - said oven with the light on for example. Set a timer for 30 minutes. When it goes off do a round of 'stretch-and-fold' i.e. take one end of the dough, pull it up and then fold it over, turn the bowl a quarter and repeat all the way around, cover again and come back in 30 minutes. Repeat this maybe 4 or 5 times. Then the dough is ready.
That last time after forming it drop it into a banneton or bowl, cover it so it doesn't dry out and put it in the fridge overnight.
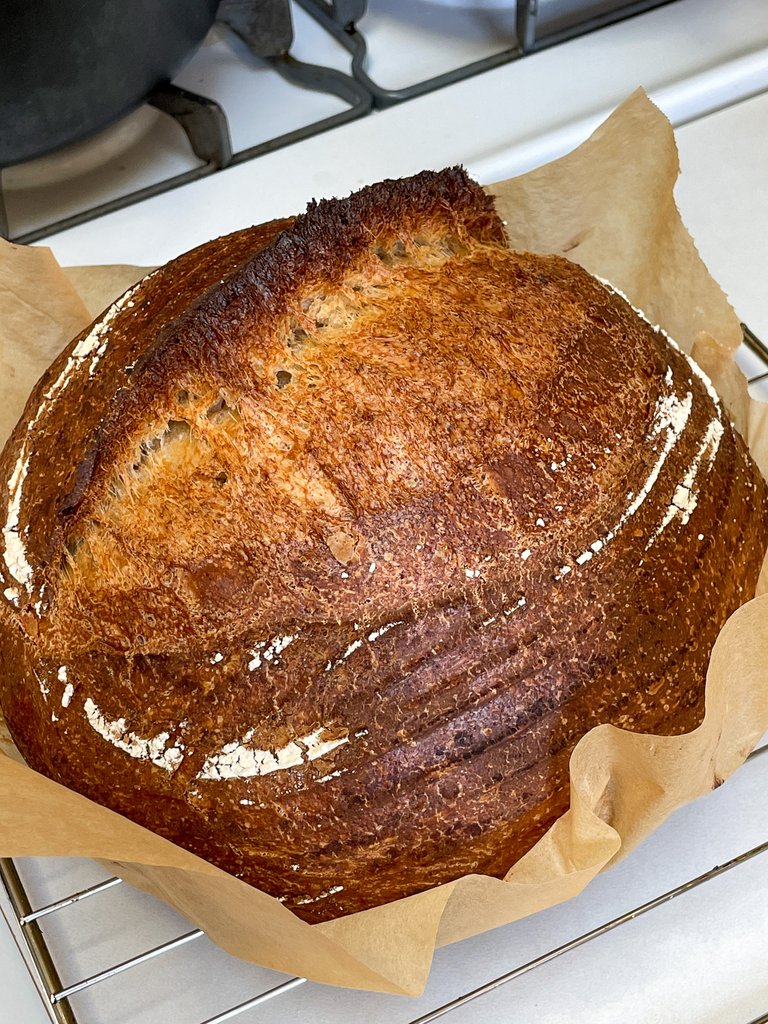
The next morning heat your oven to 500 °F, yup - you read that right! I am actually using a Dutch oven, which is a cast iron, extremely heavy pot, that I put immediately into the oven to heat as well. It gets very, very hot and works extremely well for bread baking.
After pre-heating the oven 30 minutes, I prepare baking paper with some corn flour sprinkled on it, take the dough out of the fridge and invert it on to the baking paper. Using a razor blade I cut the skin on top and then place the baking paper with the dough into the Dutch oven - very carefully, because it is hot.
Immediately into the oven it goes. I am using a water sprayer to pump some water onto the dough and oven walls, supposedly it helps the dough spring - not sure if that is myth or for real, but - it doesn't hurt. I put the lid on the pot and set the timer again for 30 minutes.
At that time I remove the lid, reduce the heat to 450 °F, spray some more water on to the bread and set the timer again for 30 minutes. Usually after maybe 25 minutes I check the inner temperature of the bread with a thermometer. Once it has reached 208 or 209 °F it is done.
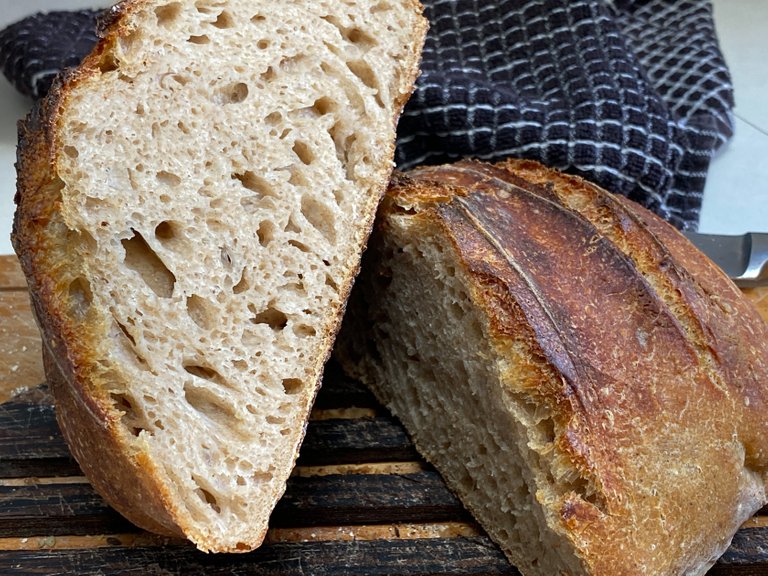
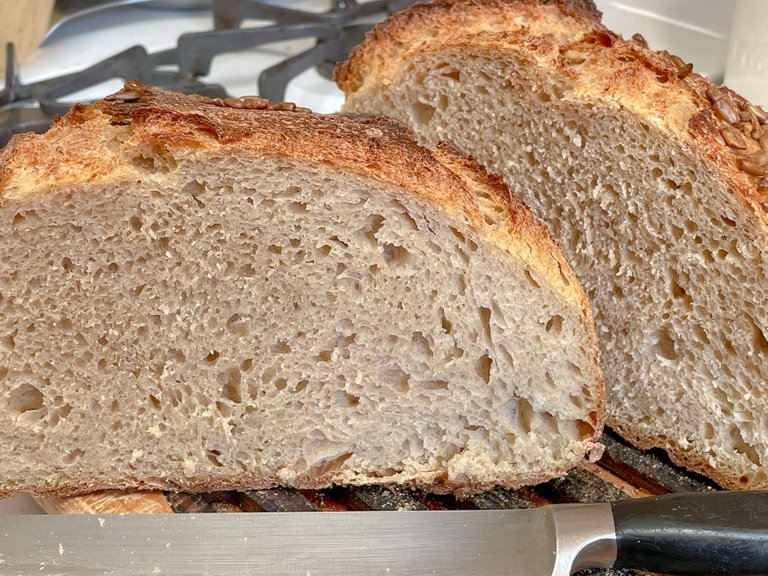
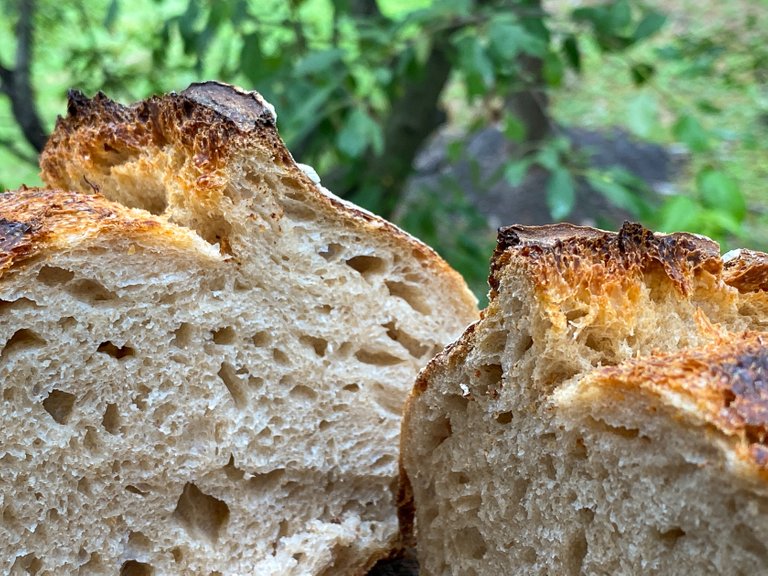
Take it out of the oven and place it on a cooling rack. Let it cool. Seriously - I know how hard it is to not cut that yummielicious smelling bread right now, but please wait. The bread needs a little more time and, trust me, it is pretty hard to cut when it is this fresh, too.
After about an hour - go for it! Cut it in half an admire your handy work 😃. I am certain everyone around will want to have a bite of your bread.
I for one cannot wait until tomorrow morning to have another slice.

i love bread.😋 that looks really tasty.
I do, too and I am going to have a slice in just a few minutes
The bread is nice, you did a great job and the details you have are explanatory. Thumbs up
Thank you very much. Making sourdough bread is a little involved and definitely has a learning curve, but it is very rewarding - literally 😀
Congratulations @oceanbee! You have completed the following achievement on the Hive blockchain and have been rewarded with new badge(s) :
Your next target is to reach 200 upvotes.
Your next target is to reach 1250 upvotes.
You can view your badges on your board and compare yourself to others in the Ranking
If you no longer want to receive notifications, reply to this comment with the word
STOPCheck out the last post from @hivebuzz: