Como bien saben yo soy un amante de las galletas y cómo le he comentado en otras oportunidades mis galletas favoritas son las polvorosas las galletas de mantequilla y las tipo pastas secas.
Poco a poco he ido aprendiendo a realizarlas, les puedo decir que no se me ha hecho nada fácil pues he tenido que hacer la receta varias veces hasta que doy con los ingredientes y cantidades adecuados para lograr esas texturas que tanto me gustan.
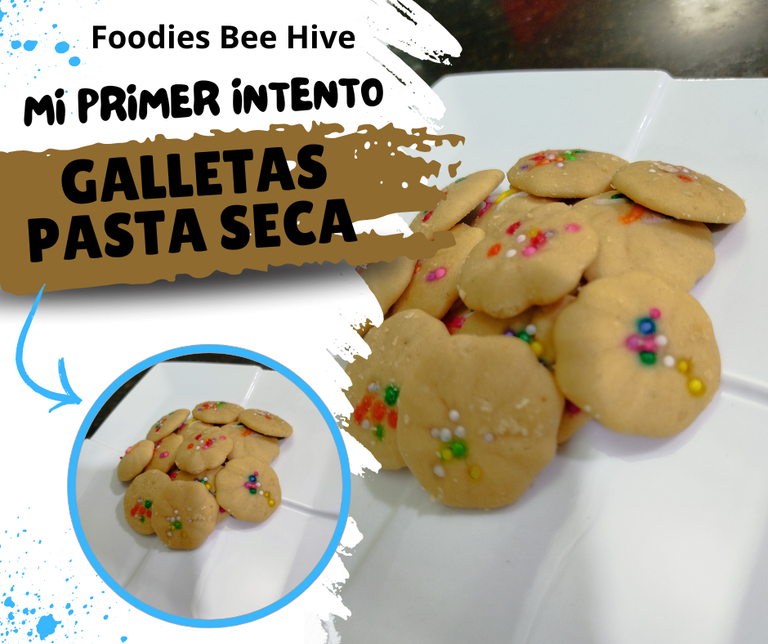
Unas de las que se me ha hecho más difíciles es las tipo pasta seca; hoy les quiero mostrar una receta que me parecía muy adecuada en cuanto a cantidades e ingredientes las hice y me quedaron súper bien pero al momento de hornear no sé qué pasó que las galletas perdieron más sin embargo quedaron súper ricas; por su sabor tan delicioso es que me atrevo a compartirles estos ingredientes y paso a paso...
INGREDIENTES:
100gr de mantequilla
75gr de azúcar
1 cucharada de vainilla
1 huevo
100gr de harina todo uso
60gr de Maicena
1 pizca de sal
Chispas y lluvia para decorar
Horno a 180° C por 8min

PASO A PASO:
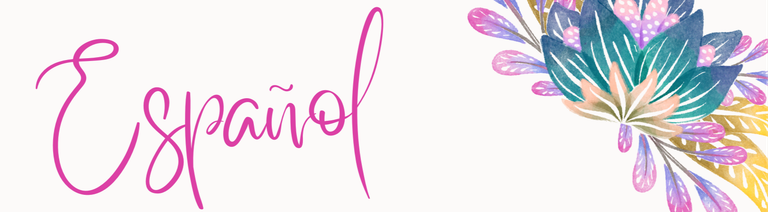
Inicié pesando todos mis ingredientes; luego coloqué en un bol la mantequilla el azúcar mezcle muy bien con una paleta después agregué el huevo y la vainilla mezclando e incorporando todos los ingredientes.

Ahora agregué todos los ingredientes secos, la harina de trigo todo uso y la maicena, mezclando muy bien con ayuda de una paleta hasta formar una masa bastante suave.

Preparé las bandejas con un poco de mantequilla y harina, coloqué la mezcla en una manga pastelera con la boquilla que tengo acá en casa; realmente no sé de qué tamaño es pero me funcionó.
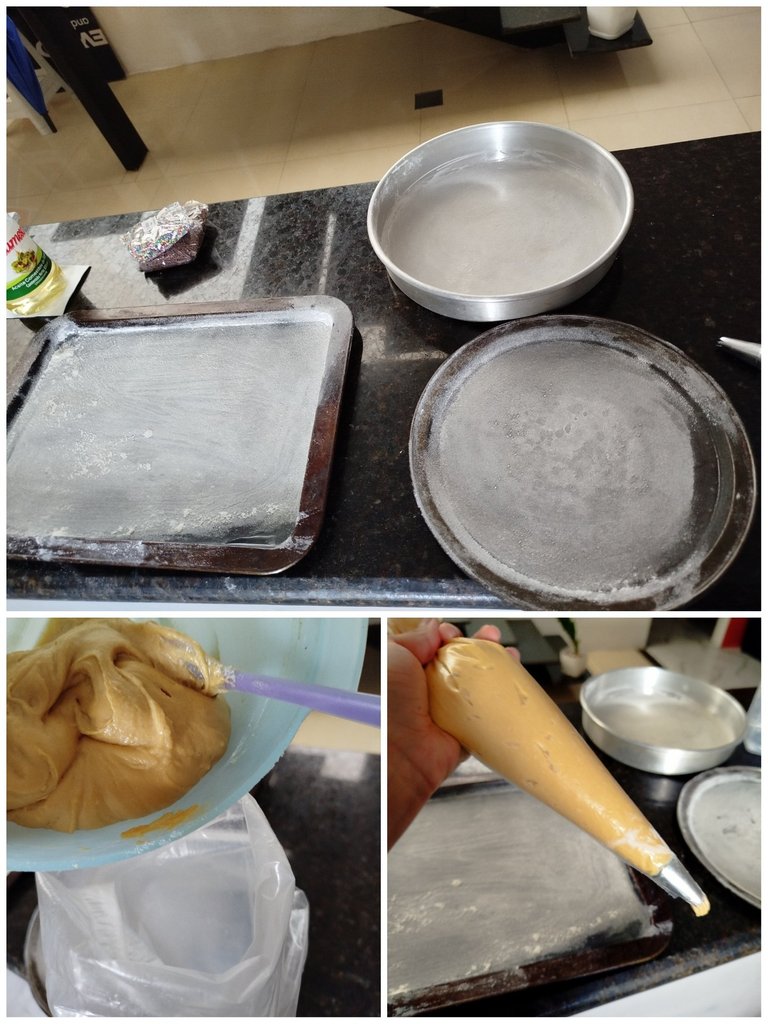
Fui haciendo las formitas paso a paso hasta que se me terminó la mezcla de la manga.
Ahora humedecí mis dedos en un poquito de agua y fui aplanando el centro de las galletitas para luego ir colocándole las chispas y lluvias que quería utilizar.

Al tener todo listo, lleve al horno que lo tenía previamente caliente y cuando empezaron a cocinarse, se fueron aplanando (sinceramente creo que me faltó refrigerarlas)
Pero como la receta no lo dcía yo no lo hice....
En fin quedaron así aplanaditas pero muy deliciosas; a mi esposo y niños le encantó...

Creanme que no me daré por vencida y seguiré intentando hasta lograr mi mezcla ideal...

Ustedes han hecho este tipo de galletas?
Los leo 🌿
Un abrazo y Feliz Inicio de Mes ❤️
Portada editada con Canva
Fotografías de mi propiedad
Traductor DeepL*

As you well know, I’m a huge fan of cookies, and as I’ve mentioned before, my favorites are crumbly cookies, butter cookies, and shortbread-style cookies.
I’ve gradually learned how to make them, and I can tell you it hasn’t been easy—I’ve had to make the recipe several times until I found the right ingredients and measurements to achieve those textures I love so much.
One of the hardest types for me has been the dry pastry cookies; today I want to share a recipe that seemed just right in terms of quantities and ingredients. I made them and they turned out great, but when I baked them, I don’t know what happened—the cookies lost some of their shape, yet they were still super delicious. Because of their amazing flavor, I’m confident enough to share these ingredients and the step-by-step process with you...
INGREDIENTS:
100g butter
75g sugar
1 tablespoon vanilla extract
1 egg
100g all-purpose flour
60g cornstarch
1 pinch of salt
Sprinkles and chocolate chips for decoration
Bake at 180°C for 8 minutes
STEP-BY-STEP:
I started by weighing all my ingredients; then I placed the butter and sugar in a bowl and mixed them very well with a spatula. Next, I added the egg and vanilla, mixing and incorporating all the ingredients.
Next, I added all the dry ingredients—all-purpose flour and cornstarch—and mixed them thoroughly with a spatula until a fairly smooth dough formed.
I prepared the baking sheets with a little butter and flour, then transferred the mixture to a pastry bag fitted with the nozzle I have here at home; I’m not really sure what size it is, but it worked for me.
I made the shapes step by step until I ran out of the mixture in the piping bag.
Now I dampened my fingers with a little water and flattened the center of the cookies, then added the sprinkles and decorations I wanted to use.
Once everything was ready, I put them in the preheated oven, and as they started to bake, they began to flatten out (honestly, I think I should have refrigerated them first).
But since the recipe didn’t say to, I didn’t do it....
Anyway, they turned out a bit flat but very delicious; my husband and kids loved them...
Believe me, I won’t give up and I’ll keep trying until I get my ideal mixture...
Have any of you made this kind of cookie?
I’d love to hear from you 🌿
Hugs and have a great start to the month ❤️
Cover edited with Canva
Photos owned by me
DeepL Translator*
Para ser un primer intento se ve que te quedaron muy bien..