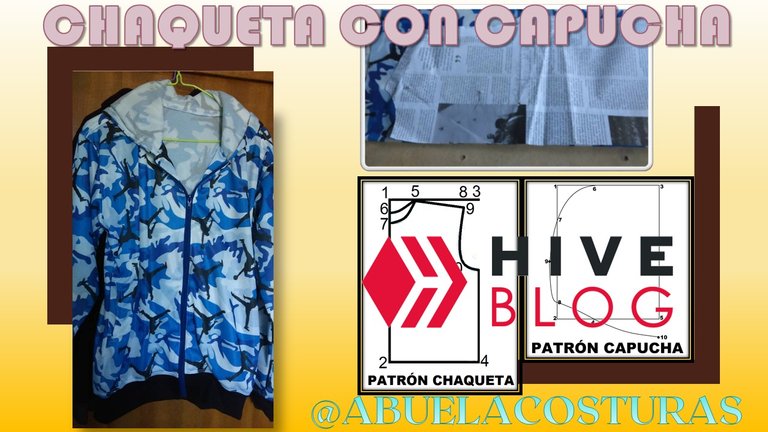
Hola, amigos y colegas costureros de #NeedlWorkMonday, tenía ya varias semanas sin traerles material para ayudarles en la confección, pero ya mis vacaciones terminaron (jajaja!) y vuelvo con ustedes a traerles material fresco, que espero puedan disfrutar realizando, para sus seres queridos y para sus empredimientos económicos.
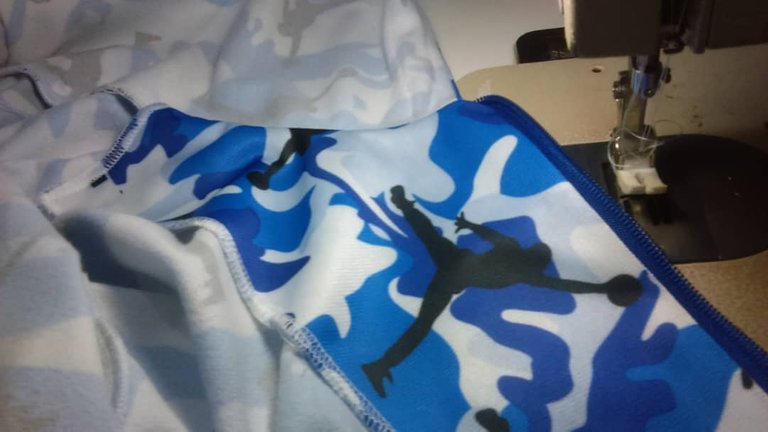
En esta ocasión les he traído una hermosa chaqueta, con cierre y capucha, la cual realicé para mi nieto y quedó súper contento. Espero que igual puedan llevar alegría a alguien más a tomar esta guía y hacer sus propias chaquetas :).
¡Manos a las tijeras!
Hello, friends and sewing colleagues of #NeedlWorkMonday, I had several weeks without bringing you material to help you in sewing, but my vacation is over (hahaha!) and I'm back with you to bring you fresh material, which I hope you can enjoy making, for your loved ones and for your economic endeavors.
This time I have brought you a beautiful jacket, with zipper and hood, which I made for my grandson and he was very happy. I hope you can also bring joy to someone else to take this guide and make their own jackets :).
Hands to the scissors!
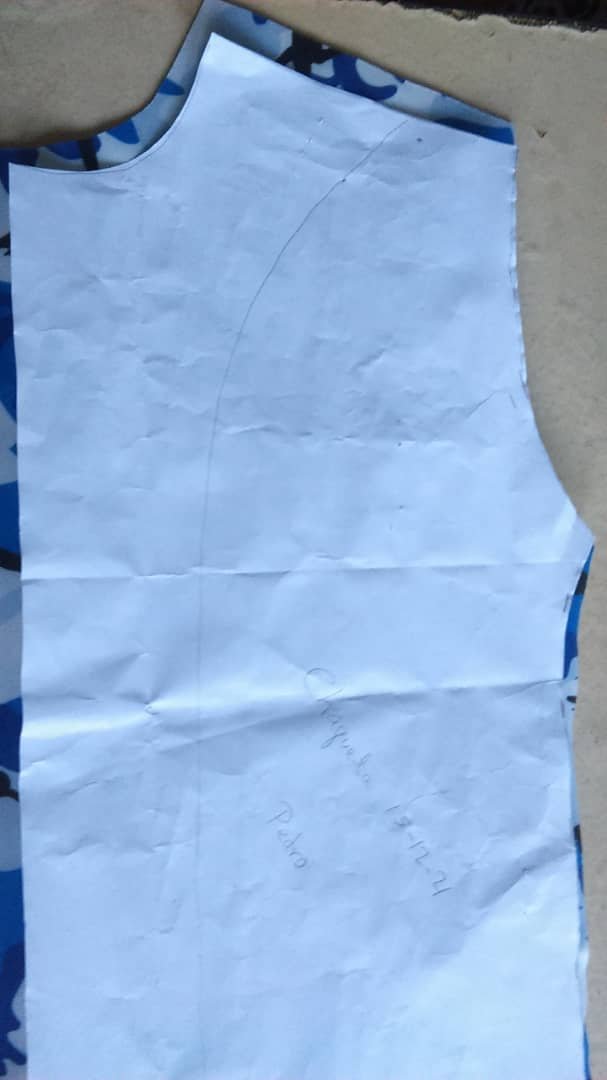
1-Del 1 al 2 marcamos el largo de la franela (0,65 cm). 2-Del 1 al 3 y 2 al 4, tomamos una 1/4 parte del contorno de pecho (25 cm). 3-En la recta del 1 al 3, a 10 cm del punto, marcamos el punto 5, que es el ancho del cuello. 4-Del 1 al 2, a 3 cm del punto 1 para la parte trasera, marcamos el punto 6 (largo de cuello trasero, y, a 10 cm del punto 1 para la parte delantera, marcamos el punto 7 (largo de cuello delantero). NOTA: El patrón trasero es igual al delantero, solo el largo del escote es de 2 cm. 5-Unimos con líneas curvas los puntos 5 y 6 para marcar el escote trasero y 5 y 7 para marcar el escote delantero. 6-A partir del punto 5 marcamos el punto 8, ancho del hombro (11 cm). 7-Desde el punto 5, 2,5 cm hacia abajo, marcamos el punto 9 (caída del hombro). 8-A partir del punto 9, 21 cm hacia abajo, marcamos el punto 10 (largo de la sisa). 9-Unimos con línea curva los puntos 9 y 10, prolongándola hasta la recta 3-4. NOTA: Este patrón se realiza luego de haber unido las partes delantera y trasera de la franela. 1-Marcamos el punto 1, bajamos 23 cm y marcamos el punto 2 (largo de la manga), del 1 a la derecha marcamos el punto 3 (ancho de la manga), esta medida la obtenemos midiendo el contorno de la sisa. 2-Del punto 3, 6,5 cm hacia abajo marcamos el punto 4 (caída de la manga). 3-Del punto 2, hacia la derecha marcamos el punto 5 (ancho de la manga), tomamos la mitad de la medida del contorno del brazo. 4-Unimos con línea recta 1 y 4, 4 y 5, buscamos la mitad de 1 y 4, desde ese punto subimos 1 cm y marcamos el punto 6. 5-Unimos con curva abierta hacia arriba 1 y 6, y con curva abierta hacia abajo 6 y 4 y con línea recta 4 al 5 y 5 al 2. 1-Tomamos la medida de la altura, de un hombro al otro, pasando la cinta sobre la cabeza, se puede agregar más cm según su gusto, para el ancho medimos escote delantero y trasero (sumamos). 2-Trazamos un rectángulo, del 1 al 2 altura, del 1 al 3, suma de los escotes, del 2 al 4 escote trasero y de 4 al 5 escote delantero. 3-Del 1 al 3 medimos 5 cm y marcamos el punto 6, del 2 hacia arriba medimos 2,5 cm y marcamos el punto 8. 4-Buscamos el punto medio de 7 y 8, salimos 1 cm y marcamos el punto 9. 5-Del 5 hacia abajo prolongamos la recta 2,5 cm, punto 10. 6-Unimos con líneas curvas 6, 7, 9, 8, 4 y 10. 5-2 mangas. 2-Unimos por los hombros delantero y trasero. 6-Coser cinta al ruedo,también debe medir menos que el ruedo. 8-Unimos las piezas para la capucha, luego las colocamos derecho contra derecho, cosemos, volteamos y pasamos costura por la parte frontal para introducir un cordón. No debemos olvidar hacer los ojales o aros para sacar el cordón. 10-Terminar con una costura por todo el contorno de la chaqueta. Finalmente pueden ver como queda la chaqueta completa, cómoda, moderna y buena ante el frío. Si se la hace a su hijo, seguro le alegrará mucho (siempre me gusta invitar a compartir en familia y confeccionar para la familia ;-] ). ¡Hasta una próxima puntada!Trazado del patrón, parte delantera / Pattern layout, front side:
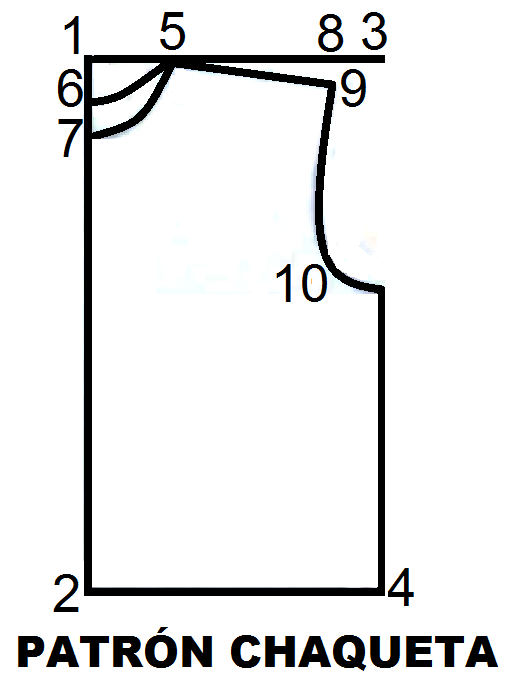
From 1 to 2 we mark the length of the T-Shirt (0,65 cm).
From 1 to 3 and 2 to 4, we take a 1/4 part of the chest contour (25 cm).
On the line from 1 to 3, 10 cm from the point, we mark point 5, which is the width of the neck.
From 1 to 2, 3 cm from stitch 1 for the back, we mark stitch 6 (back neck length, and, 10 cm from stitch 1 for the front, we mark stitch 7 (front neck length).
NOTE: The back pattern is the same as the front, only the length of the neck is 2 cm.
We join with curved lines points 5 and 6 to mark the back neckline and 5 and 7 to mark the front neckline.
From point 5 we mark point 8, shoulder width (11 cm).
From point 5, 2.5 cm down, we mark point 9 (shoulder drop).
From point 9, 21 cm down, we mark point 10 (armhole length).
Join points 9 and 10 with a curved line, extending it to straight line 3-4.
Mangas / Sleeves:
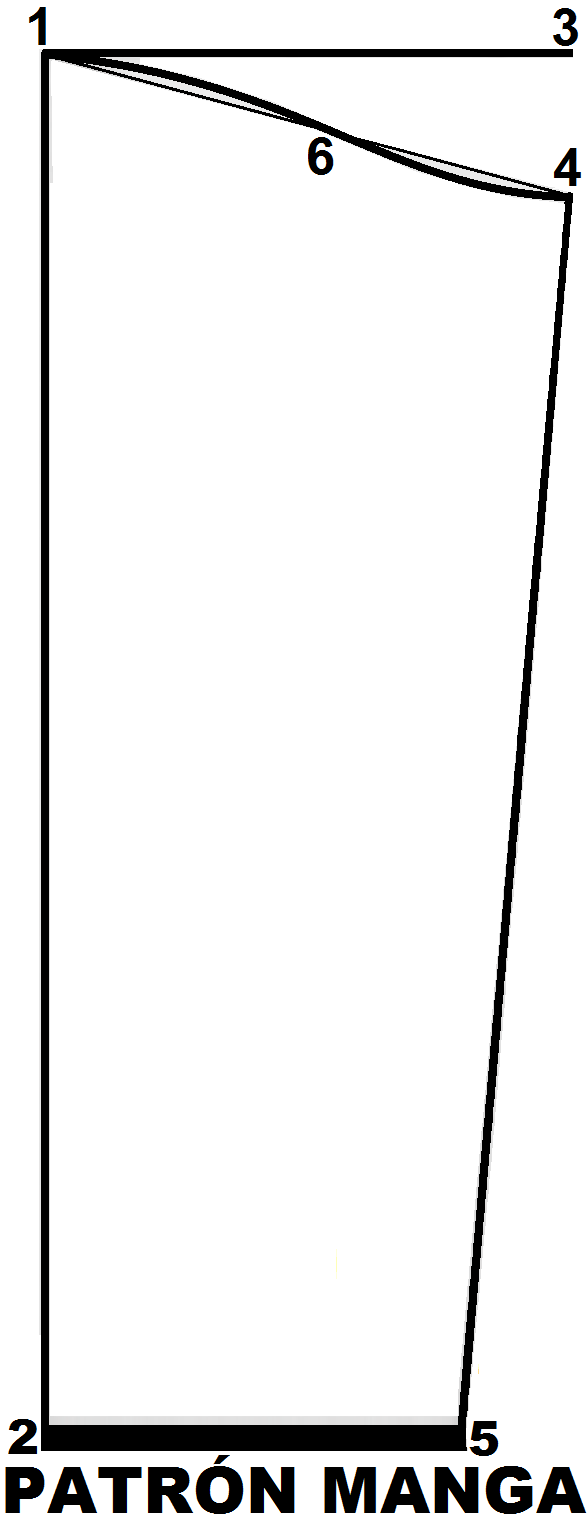
NOTE: This pattern is made after having joined the front and back parts of the T-shirt.
We mark point 1, go down 23 cm and mark point 2 (sleeve length), from 1 to the right we mark point 3 (sleeve width), this measurement is obtained by measuring the contour of the armhole.
From point 3, 6.5 cm down we mark point 4 (sleeve drop).
From point 2, to the right we mark point 5 (sleeve width), we take half the measurement of the arm circumference.
We join with a straight line 1 and 4, 4 and 5, we look for the middle of 1 and 4, from that point we go up 1 cm and we mark point 6.
We join with open curve upward 1 and 6, and with open curve downward 6 and 5 and with straight line 4 to 5 and 4 to 2.
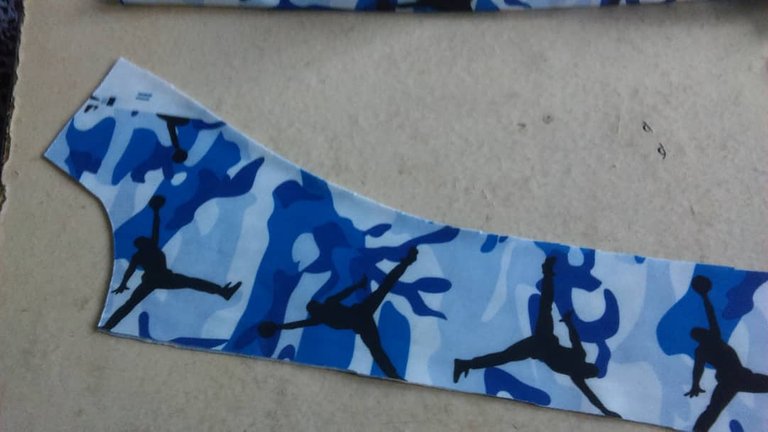
Capucha / Hood:
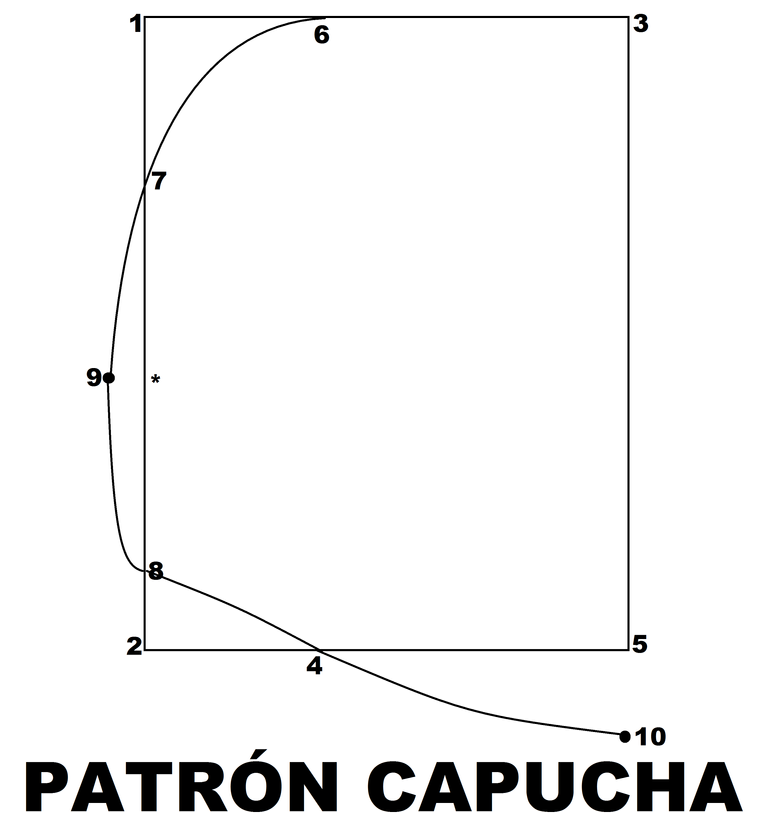
We measure the height, from one shoulder to the other, passing the tape over the head, you can add more cm according to your taste, for the width we measure the front and back neckline (we add).
Draw a rectangle, from 1 to 2 height, from 1 to 3, sum of the necklines, from 2 to 4 back neckline and from 4 to 5 front neckline.
From 1 to 3 we measure 5 cm and mark the point 6, from 2 upwards we measure 2.5 cm and mark the point 8.
Find the middle point of 7 and 8, go out 1 cm and mark the point 9.
From 5 down we extend the straight line 2.5 cm, point 10.
We join with curved lines 6, 7, 9, 8, 8, 4 and 10.Corte de las piezas / Cutting of the pieces:
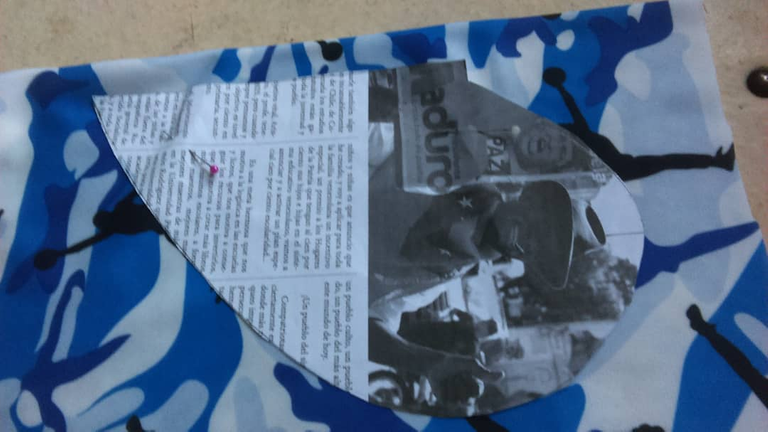
1-Cortamos 2 piezas delanteras.
Cut 2 front pieces.
2-2 vistas delanteras.
2 front views.
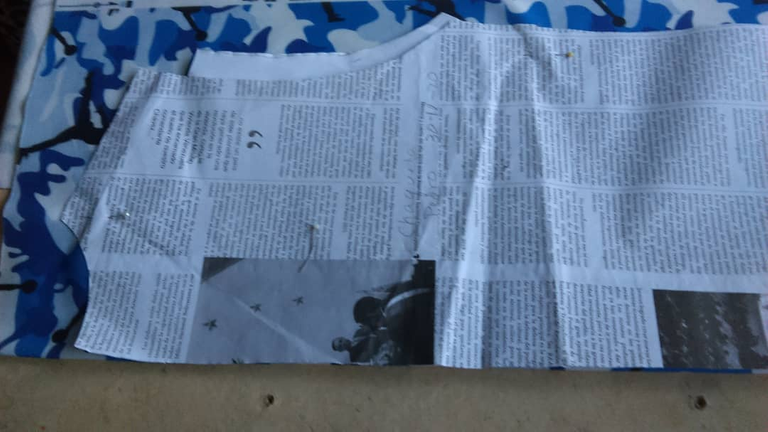
3-1 pieza trasera.
1 rear piece.
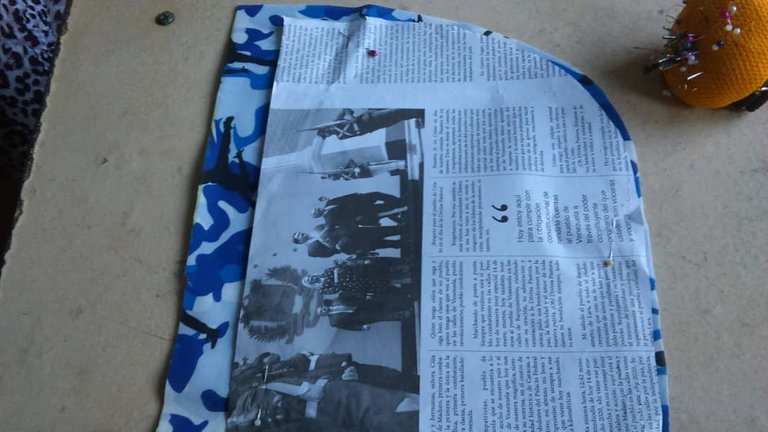
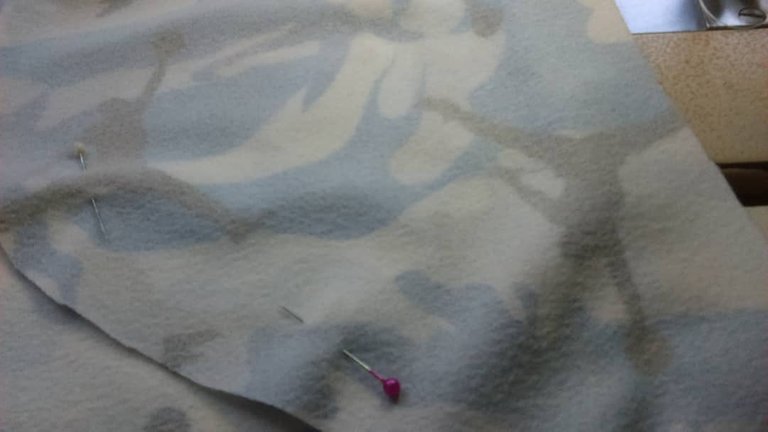
4-4 piezas para la capucha.
4 pieces for the hood.
2 sleeves.
6-En rib cortamos 2 cintas para los puños y una para el ruedo.
In rib we cut 2 ribbons for the cuffs and one for the hem.
7-4 piezas para los bolsillos.
4 pieces for the pockets.
Confección / Tailoring:
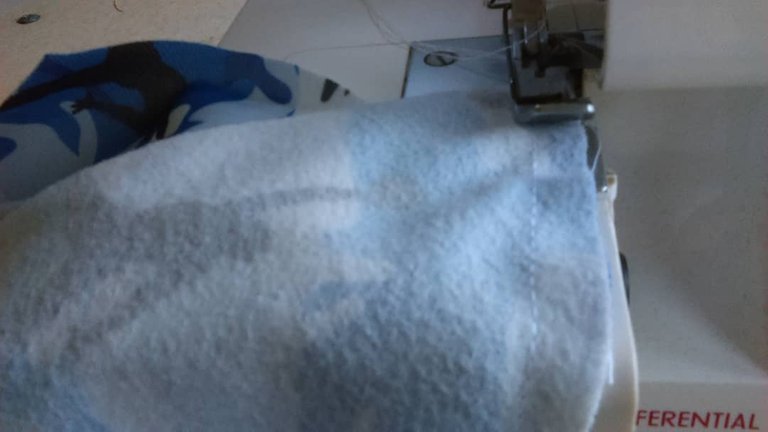
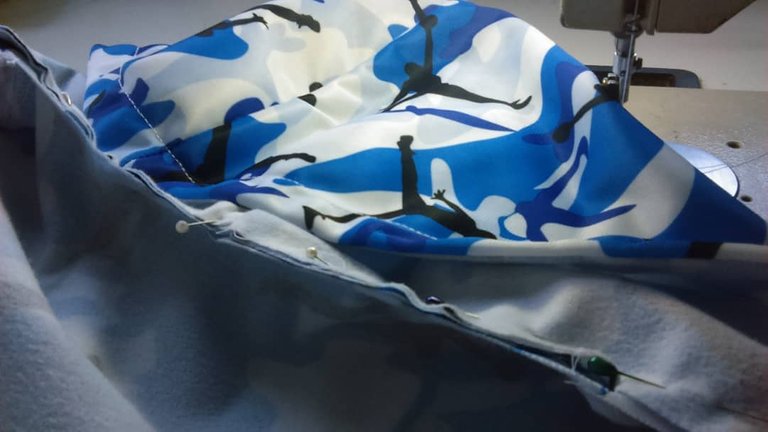
1-Cosemos los bolsillos a la parte delantera, volteamos, repisamos para un mejor acabado y cerramos.
Stitch the pockets to the front, turn over, smooth them for a better finish and close them.
We sew the front and back shoulders together.
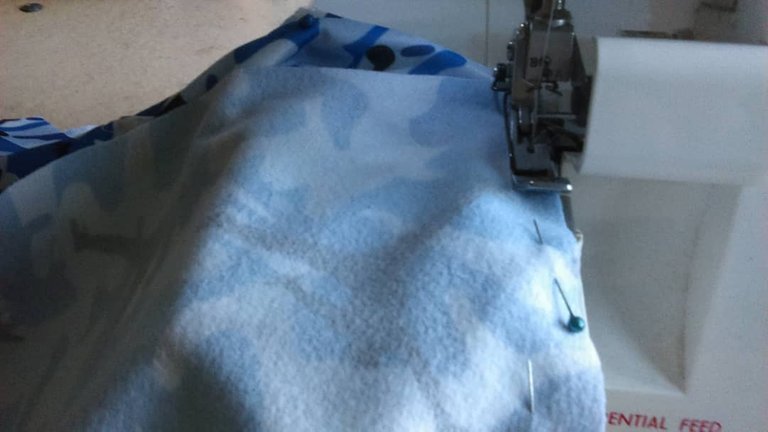
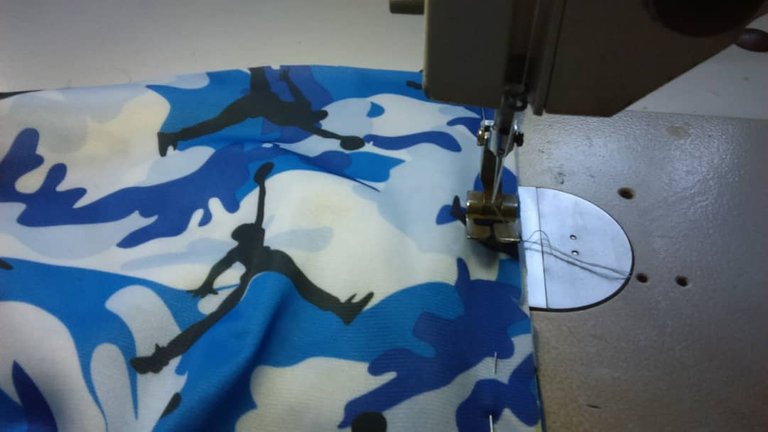
3-Cosemos las mangas.
Stitch the sleeves.
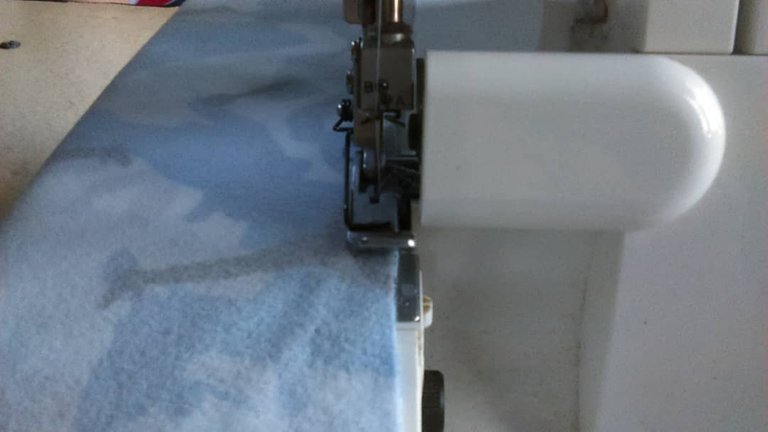
4-Cerramos las mangas y el costado.
Close the sleeves and the side.
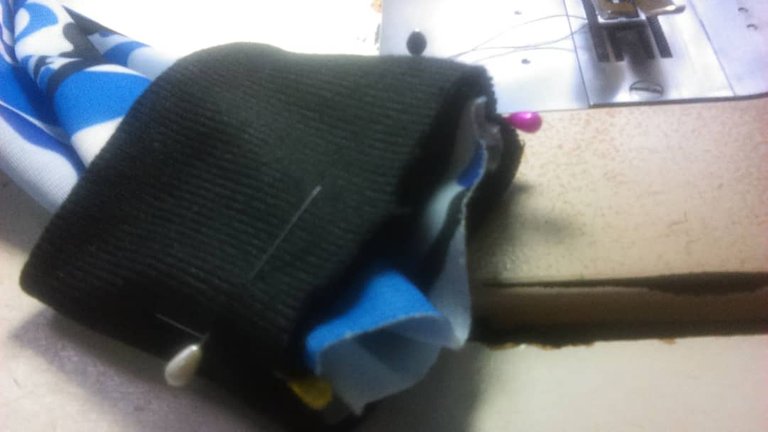
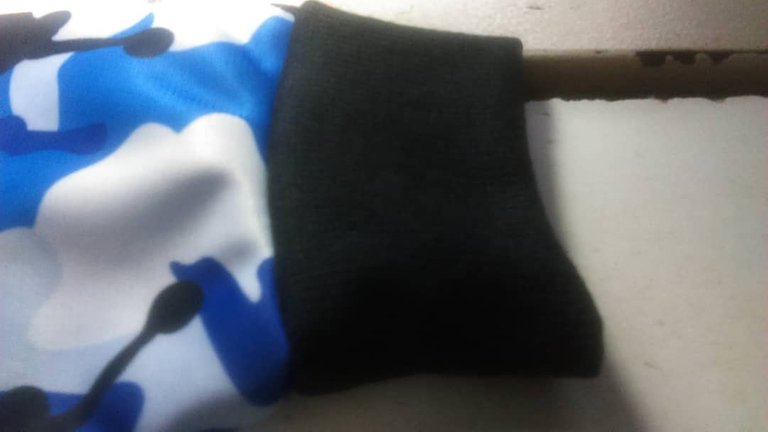
5-Cosemos las cintas a los puños,estas cintas deben medir 3/4 partes del puño,repisar las costuras.
Stitch the tapes to the cuffs, these tapes should measure 3/4 parts of the cuff, sew the seams.
Stitch the ribbon to the hem, it should also measure less than the hem.
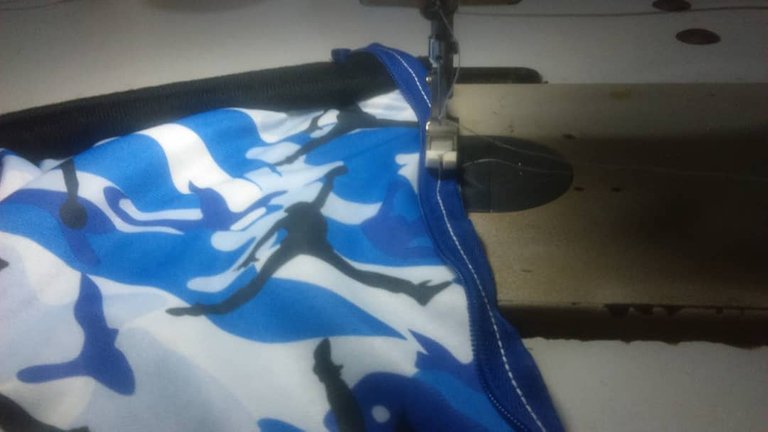
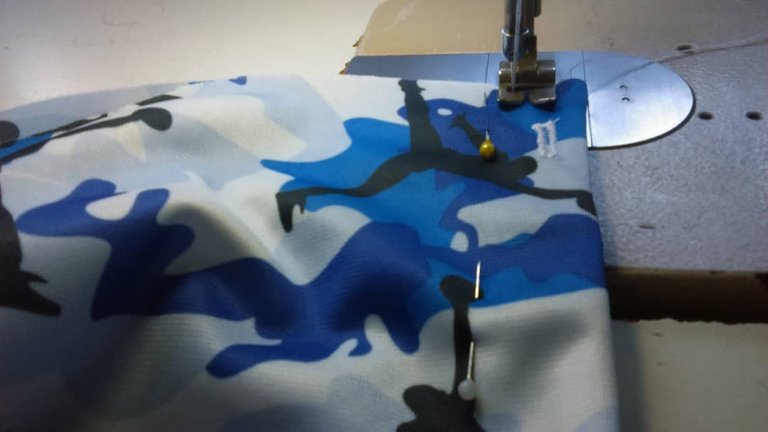
7-Cosemos el cierre, colocamos las vistas.
Stitch the zipper, place the views.
Join the pieces for the hood, then place them right sides together, sew, turn over and sew through the front part to introduce a cord, do not forget to make the eyelets or rings to remove the cord.
9-Coser la capucha ya elaborada por el escote,empezando por la parte central.
Sew the hood already made by the neckline, starting from the central part.
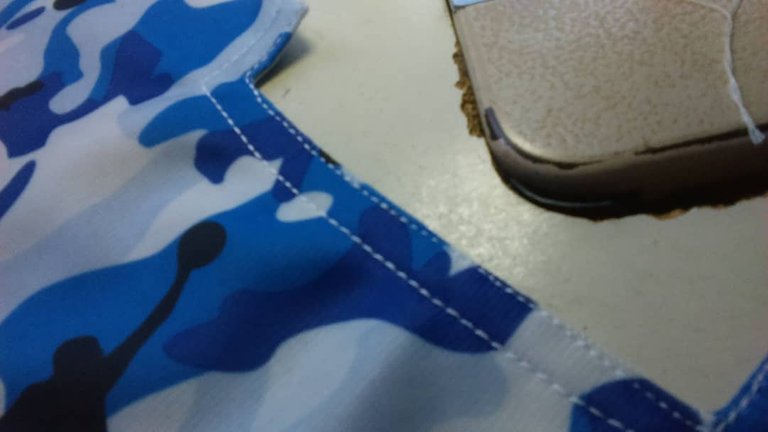
Finish with a seam all around the jacket.

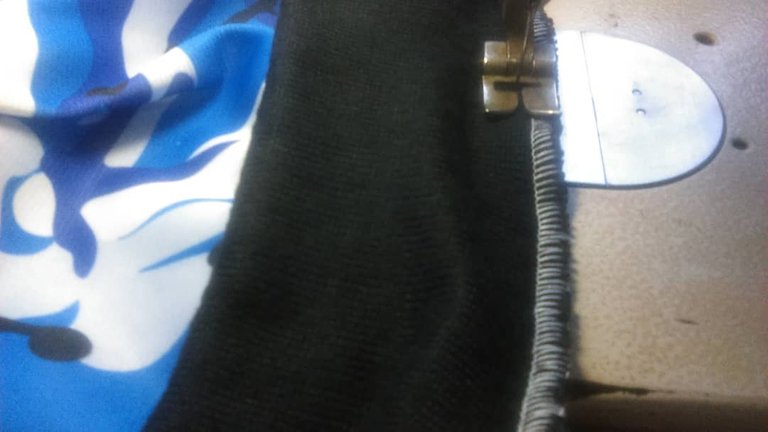
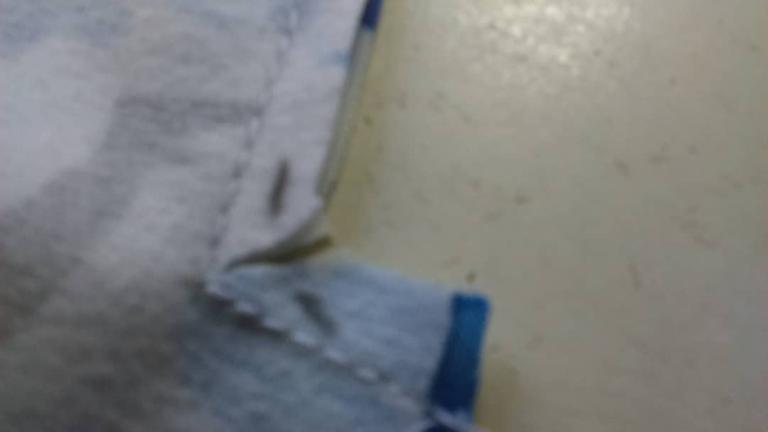
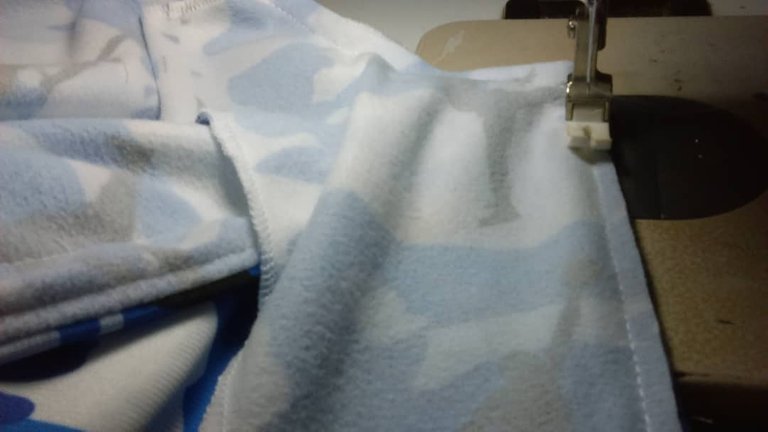
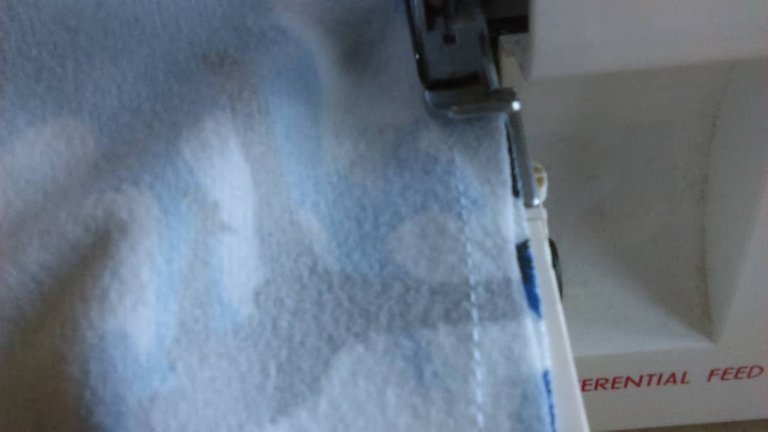
11-Terminar la parte del ruedo volteando y repisando la costura.
Finish the hem part by turning over and facing the seam.
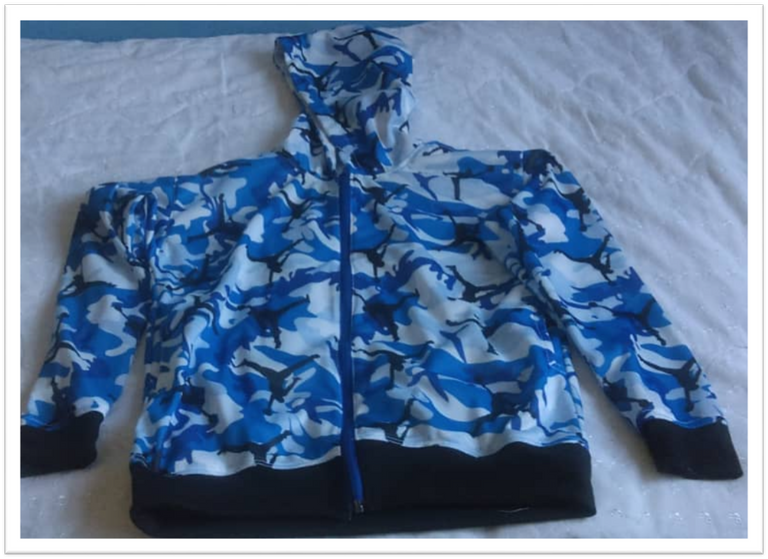
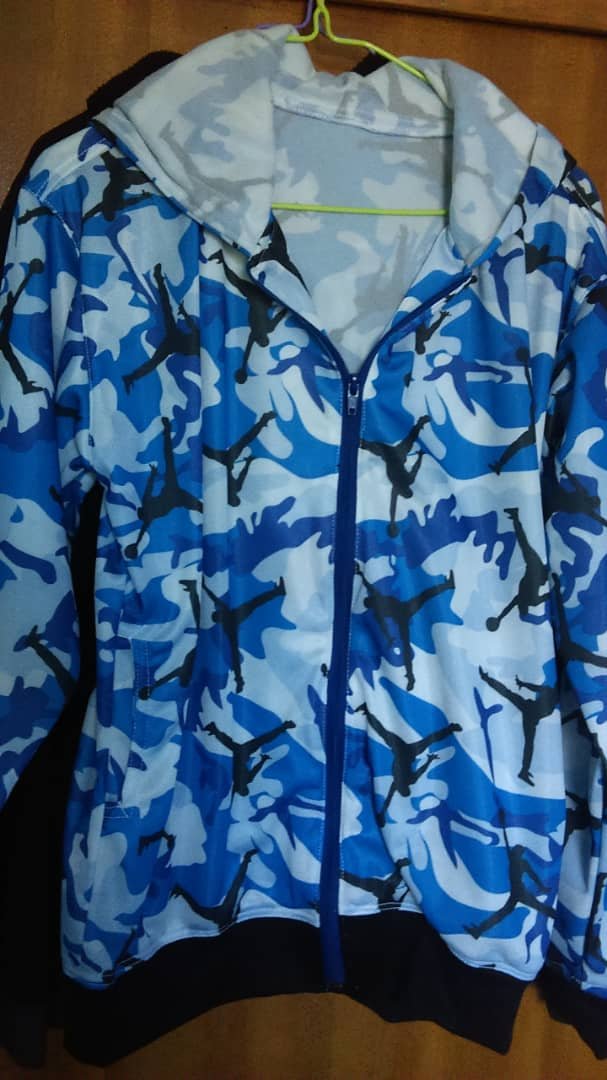
Finally you can see how the jacket looks complete, comfortable, modern and good against the cold. If you make it for your son, I'm sure he'll be very happy with it (I always like to invite to share with the family and make it for the family ;-]). ) Until the next stitch!
This step after steps you’ve provided is to guileful thanks for sharing I must say the one you made looks so cute thanks for sharing 😊
Que linda se ve :3 , me encantan este tipo de camperas
Pues ahí tienes el patrón, lo que te falta es ponerte manos a las tijeras :)
I don't know how to make a hoodie but you have done a nice job with this one and I love the color specially.
Congratulations @abuelacosturas! You have completed the following achievement on the Hive blockchain and have been rewarded with new badge(s):
Your next target is to reach 100 replies.
You can view your badges on your board and compare yourself to others in the Ranking
If you no longer want to receive notifications, reply to this comment with the word
STOPCheck out the last post from @hivebuzz:
Support the HiveBuzz project. Vote for our proposal!