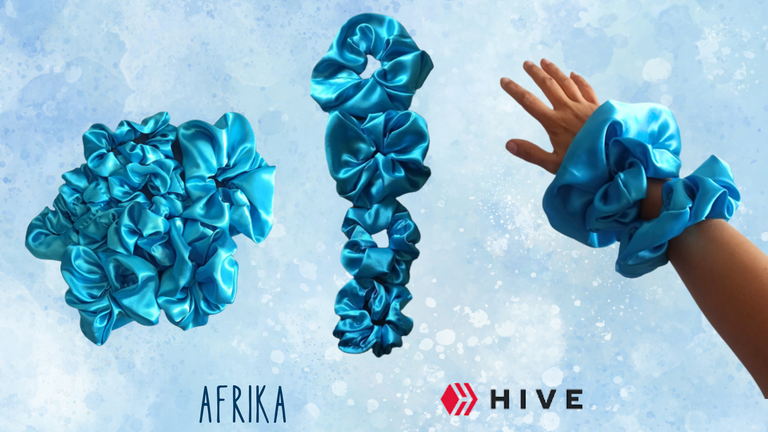
Muy buen jueves hivers, espero estén pasando una semana tranquila y entregados a los que les apasiona. Hoy, les traigo un tutorial que está en tendencia, les hablo de los scrunchies de seda, han ganado su popularidad por el material que ayuda con el frizz en ela cabello, los puedes encontrar de diferentes tamaños: pequeño (s), mediano (M), large (L), extra large (XL), este último es el más usado por el público por lo versátil y llamativo lo que le da un plus al outfit del día.
Bueno hivers, hoy les enseño como hacer los scrunchies de seda, primero es muy sencillo, ideal para quienes empiezan en la costura y también como oportunidad de negocio porque es un accesorio muy útil que nunca está demás, por ejemplo yo los vendo al mayor, a partir de 4 piezas o por docenas, si te animas tú puedes sacar tu cuentas y hacerlo rentable para ti, también puedes hacerlos como regalo o uso personal.

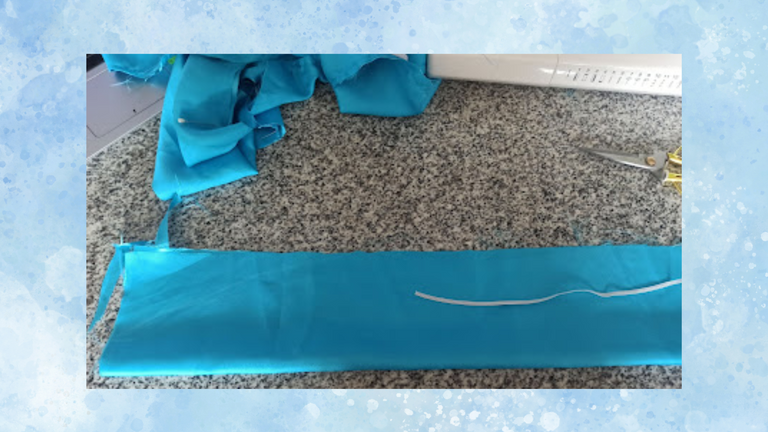
Para hacer los scrunchies de seda necesitas: elástico, tela de seda, tijeras, hilo, alfileres, aguja y maquina de coser, aunque a mano también es factible. Aquí te doy el primer tip, para sacar la medida primero tomas el elástico y lo rodeas por tu muñeca como una pulsera, le sumas 1 cm como margen de costura o unión. Esa medida la multiplicas por 4 y ese será el largo para marcar en la tela de seda, para el ancho tu decides que tanto según la talla de scrunchie de seda decides hacer.
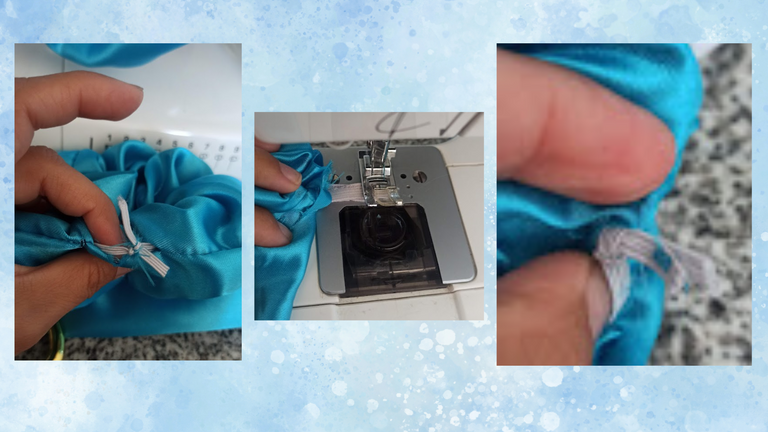
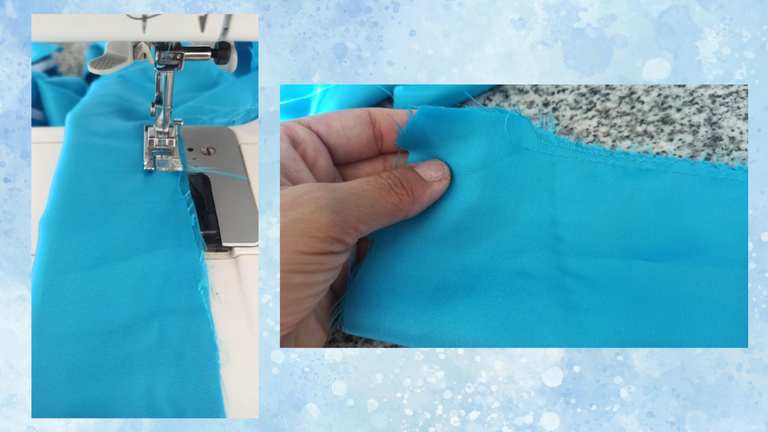
Con ayuda de alfileres doblas tu seda por la mitad, enfrentando los derechos y pasas una costura recta un puntada en zig zag pequeña, dejando sin coser unos 2 cm de cada lado. Ahora le das la vuelta dejando la costura por dentro. Siguiente paso, con ayuda de alfileres juntas los bordes como indica la foto, uniendo los derechos y todo alrededor. Con mucho cuidado pasamos por la máquina de coser haciendo la primera unión del scrunchie de seda.
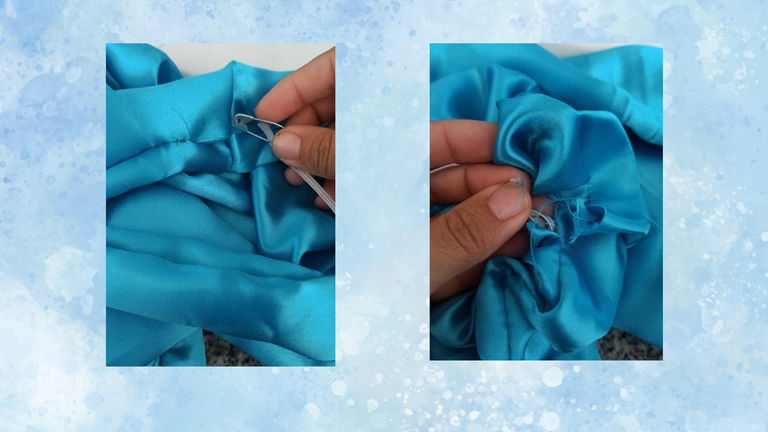
El siguiente paso es guardar la más reciente costura, y por la abertura sujetar un extremo del elástico a la banda de seda y con otro alfiler pinchamos el otro extremo y lo atravesamos por todo el canal, mientras arrugas. Al encontrarse las dos puntas del elástico puedes 1: hacer un nudo, 2: hacerle unas puntadas en zig zag o 3: si eres como yo usar las dos técnicas para asegurar el elástico.
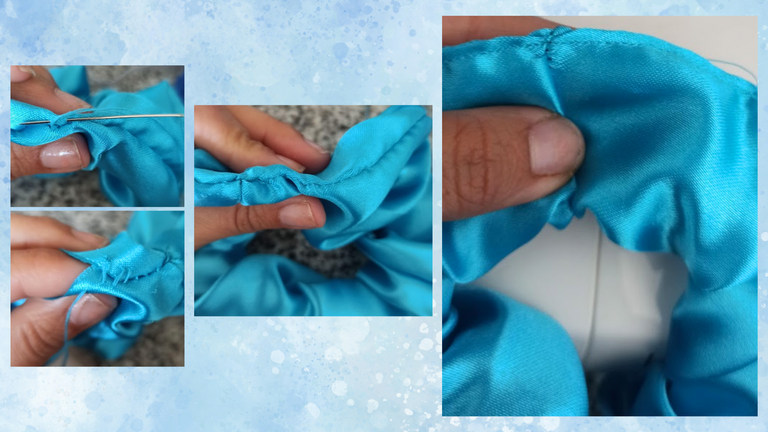
Último paso y los dos tips de costura protagonistas de este tutorial, para cerrar el scrunchie de seda hay dos formas; la primera, con costura escondida, doblando los bordes y haciendo la costura paso a paso cómo está en la imagen, atraviesas la aguja desde adentro, luego vas recto por el costado o lado contrario de donde empezaste y vas estirando tu costura, así se cierra todo el scrunchie. Segunda técnica, mi favorita, por lo práctico y rápido, con ayuda de alfileres juntas los bordes hacia adentro de tu scrunchie de seda y pasas un costura recta pequeña por toda la orilla.

@africablr
The process of the making is straight forward and easy to understand.
You have done a great work.
Thanks for the explanation dear
Hey, thanks a lot, i'm glad you got it.
Saludos @afrikablr, te quedó muy lindo el proyecto y los pasos muy bien explicados, la tela de seda no es de mis favorita solo la he cosido dos veces y me tocó descoser la pieza, es muy resbaladiza.
Feliz y bendecido día!
Hola Belkys, te recomiendo pegarle al pie de la maquina de coser un pedazo de cinta adhesiva para papel. ME cuentas como te fue. GRacias por tu tiempo-
Ok muchas gracias por la información amiga, la tendré presente par futura costuras, luego te cuento el resultado.
para eso estamos <3
Esto es tan bonito y hermoso, me acordé de que hice algunos de esos hace algunas veces y se lo di a algunos de mis amigos como regalo y el realmente lo apreció.
Gracias @afrikablr por compartir el tutorial paso a paso de su hermosa creatividad.
Que bonita tu por compartir tu recuerdo ❤️
Te quedaron muy lindas, el color es espectacular. Ahora entiendo porque mi hija me pedía que le hiciera unas pero precisamente con este material, yo le hice unas tejidas que quedaron muy lindas pero ella las quería de seda jaja.
Gracias por el dato. Saludos!
Gracias a ti, espero verlas ❤️😊