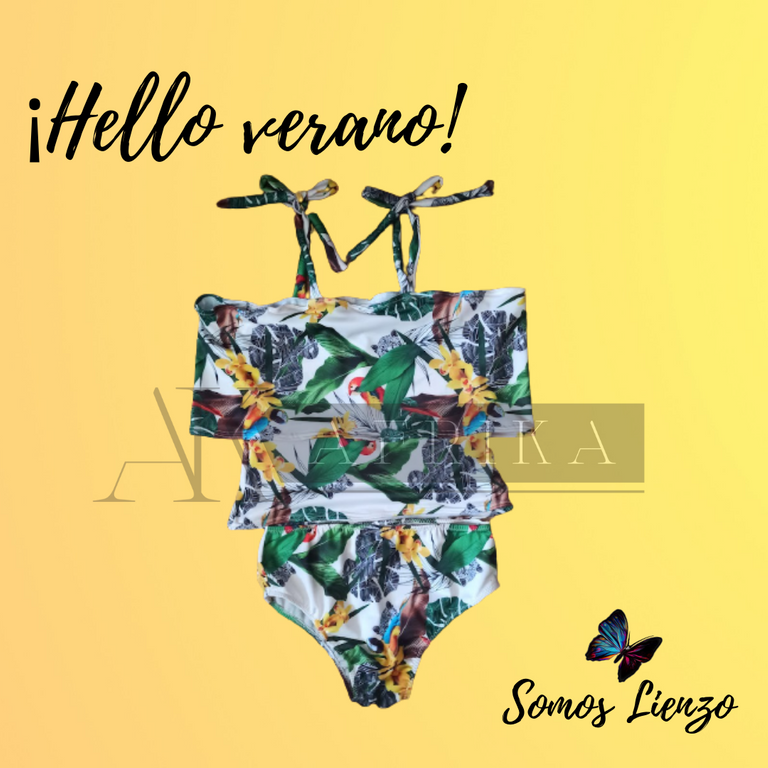
Feliz lunes de @needleworkmonday, hoy les traigo un super traje de baño, corte bardot, u hombros libre por el modelo de la parte superior, la cual puede ser usada para múltiples ocasiones en distintos outfits y no solo como bañador. Yo ya estoy en esta onda porque en Chile se acerca el verano finalmente, así que vamos a manos a la tela, necesitarás 70cm de lycra y 65 de tela para forro, hilo, elástica, tijera, maquina de coser, el patrón me lo puedes pedir en los comentarios dejando tu mail, o fácil tomando 2 piezas que te gusten de guardarropa con este modelo, recuerda que al ser tela elasticada debes reducir de 3cm a 5cm aprox de las medidas bases.
Happy @needleworkmonday Monday, today I bring you a super swimsuit, bardot cut, or free shoulders by the model of the top, which can be used for multiple occasions in different outfits and not only as a swimsuit. I'm already in this wave because in Chile summer is finally approaching, so let's get to the fabric, you will need 70cm of lycra and 65 of lining fabric, thread, elastic, scissors, sewing machine, the pattern you can ask me in the comments leaving your email, or easy taking 2 pieces that you like in your closet with this model, remember that being elastic fabric you must reduce from 3cm to 5cm approx. of the base measures.
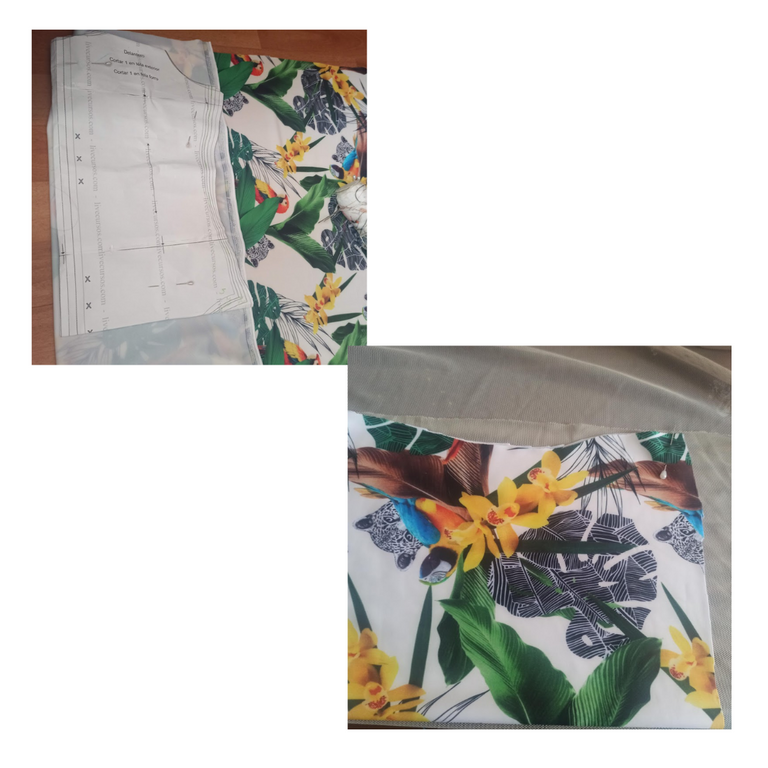
Primero, cortamos las piezas necesarias, 2 para el top en la tela de diseño y 2 en el forro, 2 para la panty y 2 más para el forro, cortamos 4 cintas de 5 cm x 25 cm aprox (dependiendo de tu medida para unir en lazo ambos hombros) y una más larga para el volado del top, esta medida es la suma de tu espalda mas 20 cm o si la quieres más arruchada aumentas lo necesario, el largo también lo decides, yo lo hice de unos 15 cms.
First, we cut the necessary pieces, 2 for the top in the design fabric and 2 in the lining, 2 for the panty and 2 more for the lining, we cut 4 ribbons of 5 cm x 25 cm approx (depending on your measurement to join in loop both shoulders) and a longer one for the flounce of the top, this measurement is the sum of your back plus 20 cm or if you want it more ruffled you increase the necessary, the length also you decide, I did it of about 15 cms.
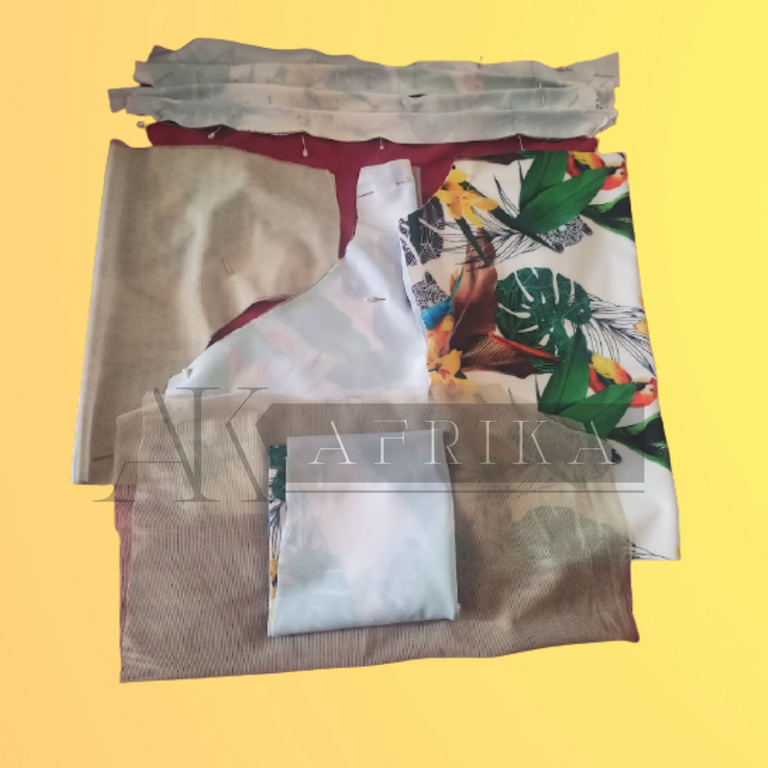
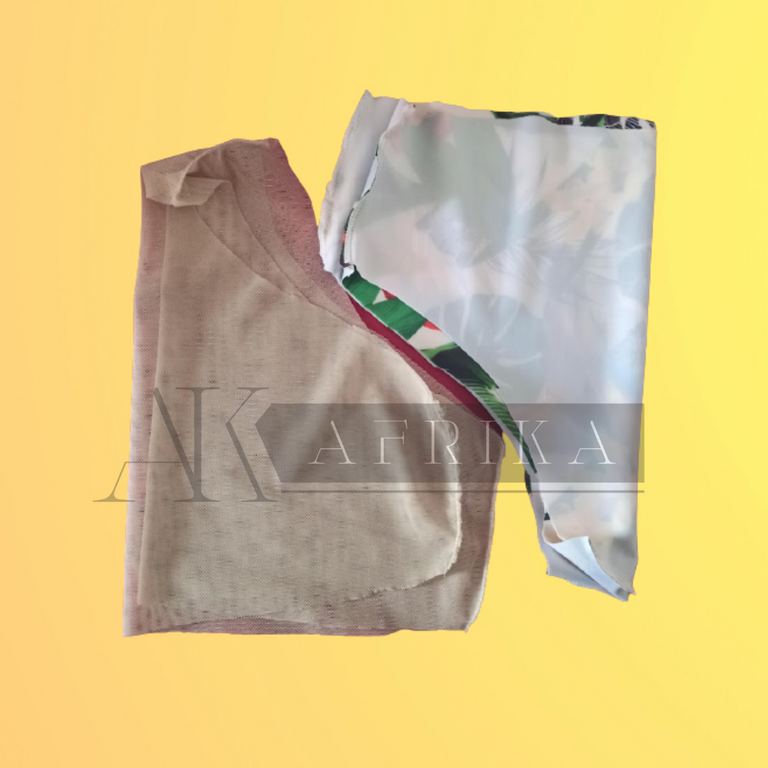
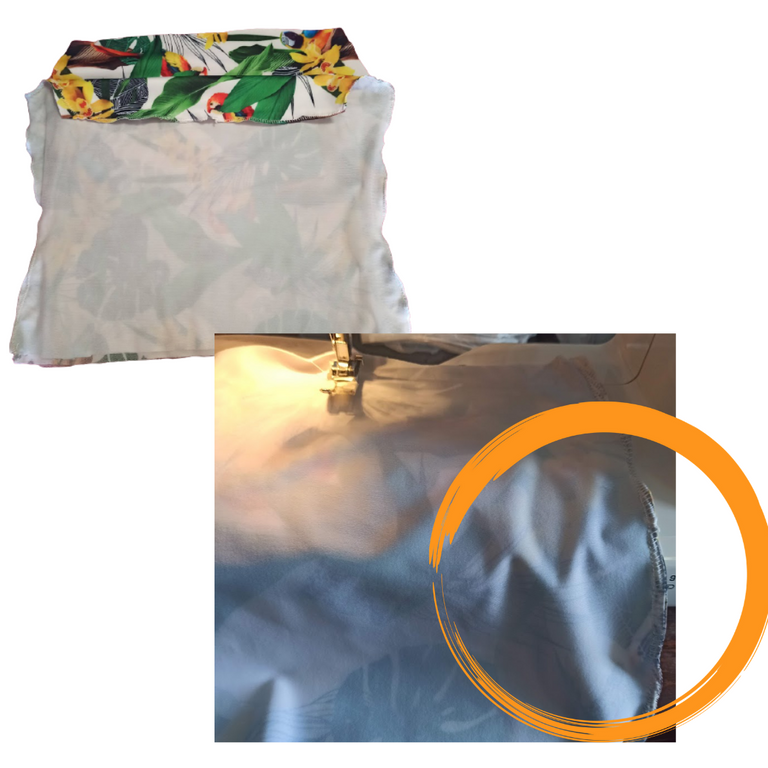
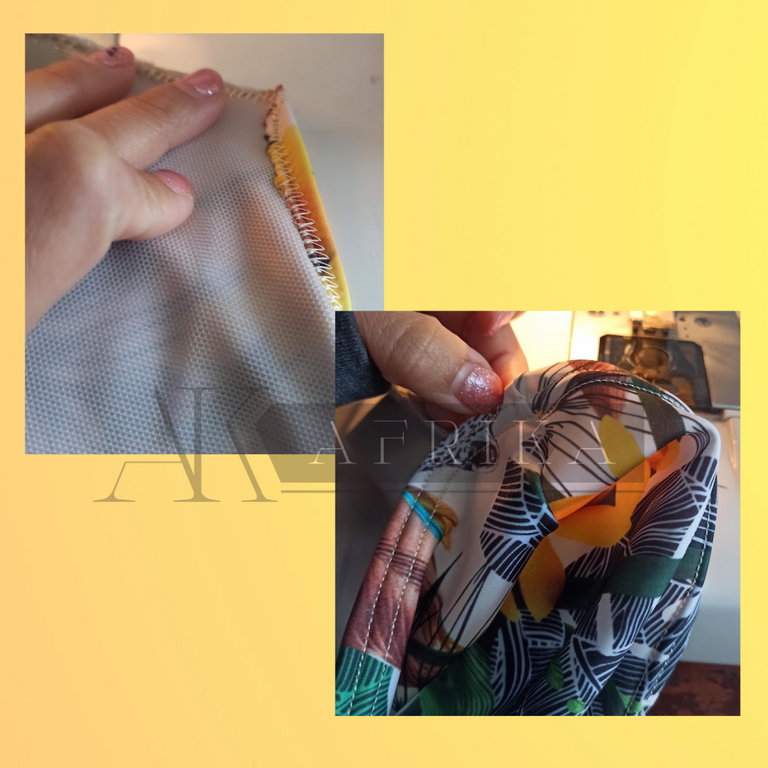
Ahora unimos primero las partes por separado, es decir, las piezas del panty primero en la tela de diseño, luego unimos las telas de forro, igual con las del top, como indica la foto. Luego, enfrentamos las costuras como en la imagen, a esto se le llama costura escondida dando un acabado más profesional, ahora procedemos a pegar la elástica por los alrededores con puntada zigzag, estirando unos 3 cms. Y cose los bordes visibles, el ruedo del top y el área de las mangas o sisas. Sigue el procedimiento en las imágenes.
Now we first join the parts separately, that is, the panty pieces first in the design fabric, then we join the lining fabrics, the same with the top, as shown in the picture. Then, we face the seams as in the picture, this is called hidden seam giving a more professional finish, now we proceed to glue the elastic all around with zigzag stitch, stretching about 3 cms. and sew the visible edges, the hem of the top and the sleeves or armholes area. Follow the procedure in the pictures.
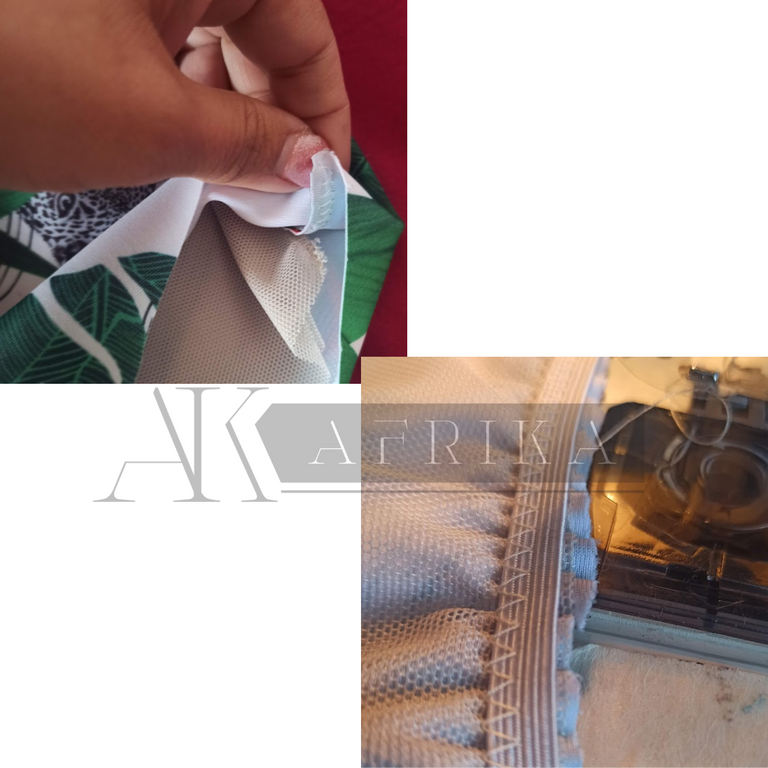
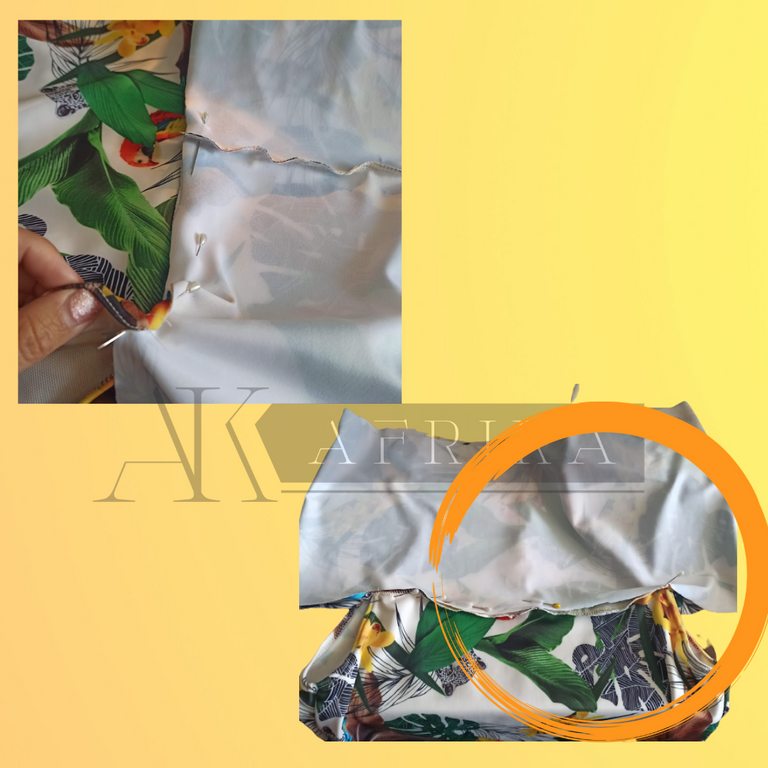
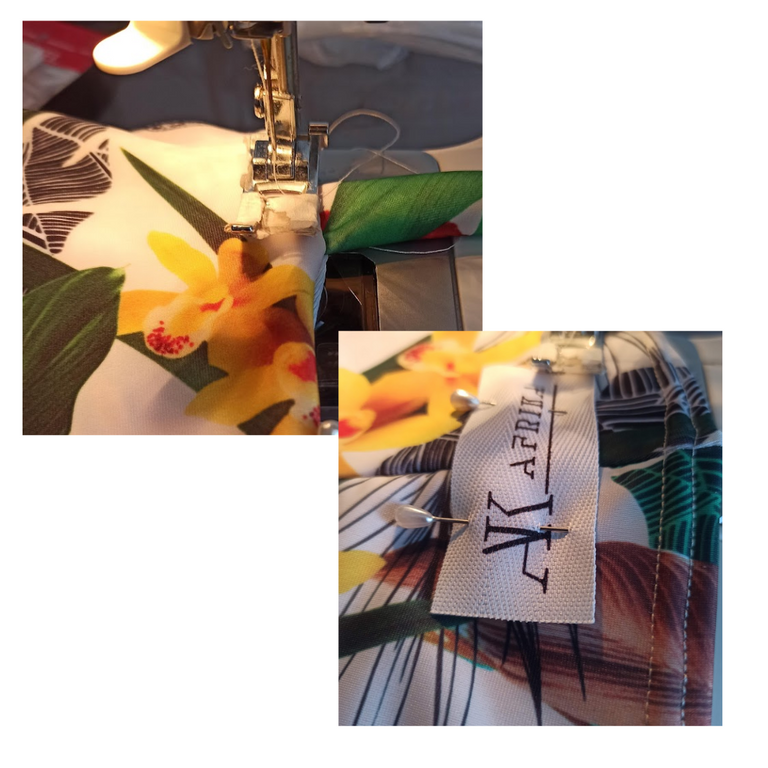
Ya la panty está lista, vamos con el top. Unimos el volado y cosemos su ruedo o la parte inferior, también las cintas que unirán en lazo los hombros. Una vez listos, con ayuda de alfileres ubicamos el volado en la parte superior del top al igual que los tirantes, tal como indica la foto y pasamos una primera costura en zig zag, estirando un poco para darle mayor flexibilidad a la pieza y luego un segundo zig zag por el derecho para darle el acabado prolijo que merece, y taraaaan, listo nuestro bañador multiuso.
Now the panty is ready, let's go to the top. We join the ruffle and sew its ruffle or the lower part, as well as the ribbons that will join the shoulders in a bow. Once ready, with the help of pins we place the ruffle at the top of the top as well as the straps, as shown in the photo and we sew a first zig zag seam, stretching a little to give more flexibility to the piece and then a second zig zag on the right side to give it the neat finish it deserves, and taraaaan, our multipurpose swimsuit is ready.

Graaaaaaaaaaaaaaaaaaciaaaaaaaaaaaaaaaaaaaaaaaaaaaaaaaas
Que lindo que te quedó este traje de baño, mi máquina apenas quiero coser una tela un poco resbalosa ya se enloquece 😅. Me gusta que tengas etiquetas de tu marca, eso le da un toque muy profesional ❤️. Te felicito 😘.
Aaaah graaaaaaacias 🦋😸. Te vendrán los éxitos y tendrás otra maquinita ❣️🦋
Quedé enamorada de los colores, muy atrevido!!! Me encanta, además tu marca es genial! Bello te quedó
Bella tuuuuuuu, muchas gracias por pasarte por acá 🦋❣️
The rewards earned on this comment will go directly to the person sharing the post on Twitter as long as they are registered with @poshtoken. Sign up at https://hiveposh.com.
Beautiful thanks
Thank you for comming :)
Your welcome