Muy buen martes hivers y amantes de las puntadas, estuve de vacaciones casi todo el mes y ya hoy vuelvo a la or que paga las cuentas por ahora hasta que Hive y mi arte lo hagan en su totalidad ¿el sueño no? Bueno, como por primera vez desde que migré deje crecer mi cabello, algo así como un cierre de ciclo, pero al revés. Porque mi cabello ya venía maltratado y sufrió fuerte el choque del agua chilena, algo muy común, también que me costaba mucho no pasarme tijera y tener el estilo Anna Wintour, pero bueno acá esta la melena en crecimiento y tornándose plateada con las canitas, esa es otra cosa que ando procesando, aunque desde los 16 me han salido, ahora son más, me está gustando, ya veremos si no invento y me hago un cambio de look.
Happy Tuesday hivers and stitch lovers, I was on vacation almost all month and already today I return to the or that pays the bills for now until Hive and my art do it in full, the dream is not? Well, for the first time since I migrated I let my hair grow, something like a closing of the cycle, but in reverse. Because my hair had already been mistreated and suffered the shock of the Chilean water, something very common, also it was very hard for me not to use scissors and have the Anna Wintour style, but well here is my hair growing and turning silver with the gray hair, that's another thing I'm processing, although since I was 16 I've had more, now there are more, I'm liking it, we'll see if I don't invent and make me a change of look.
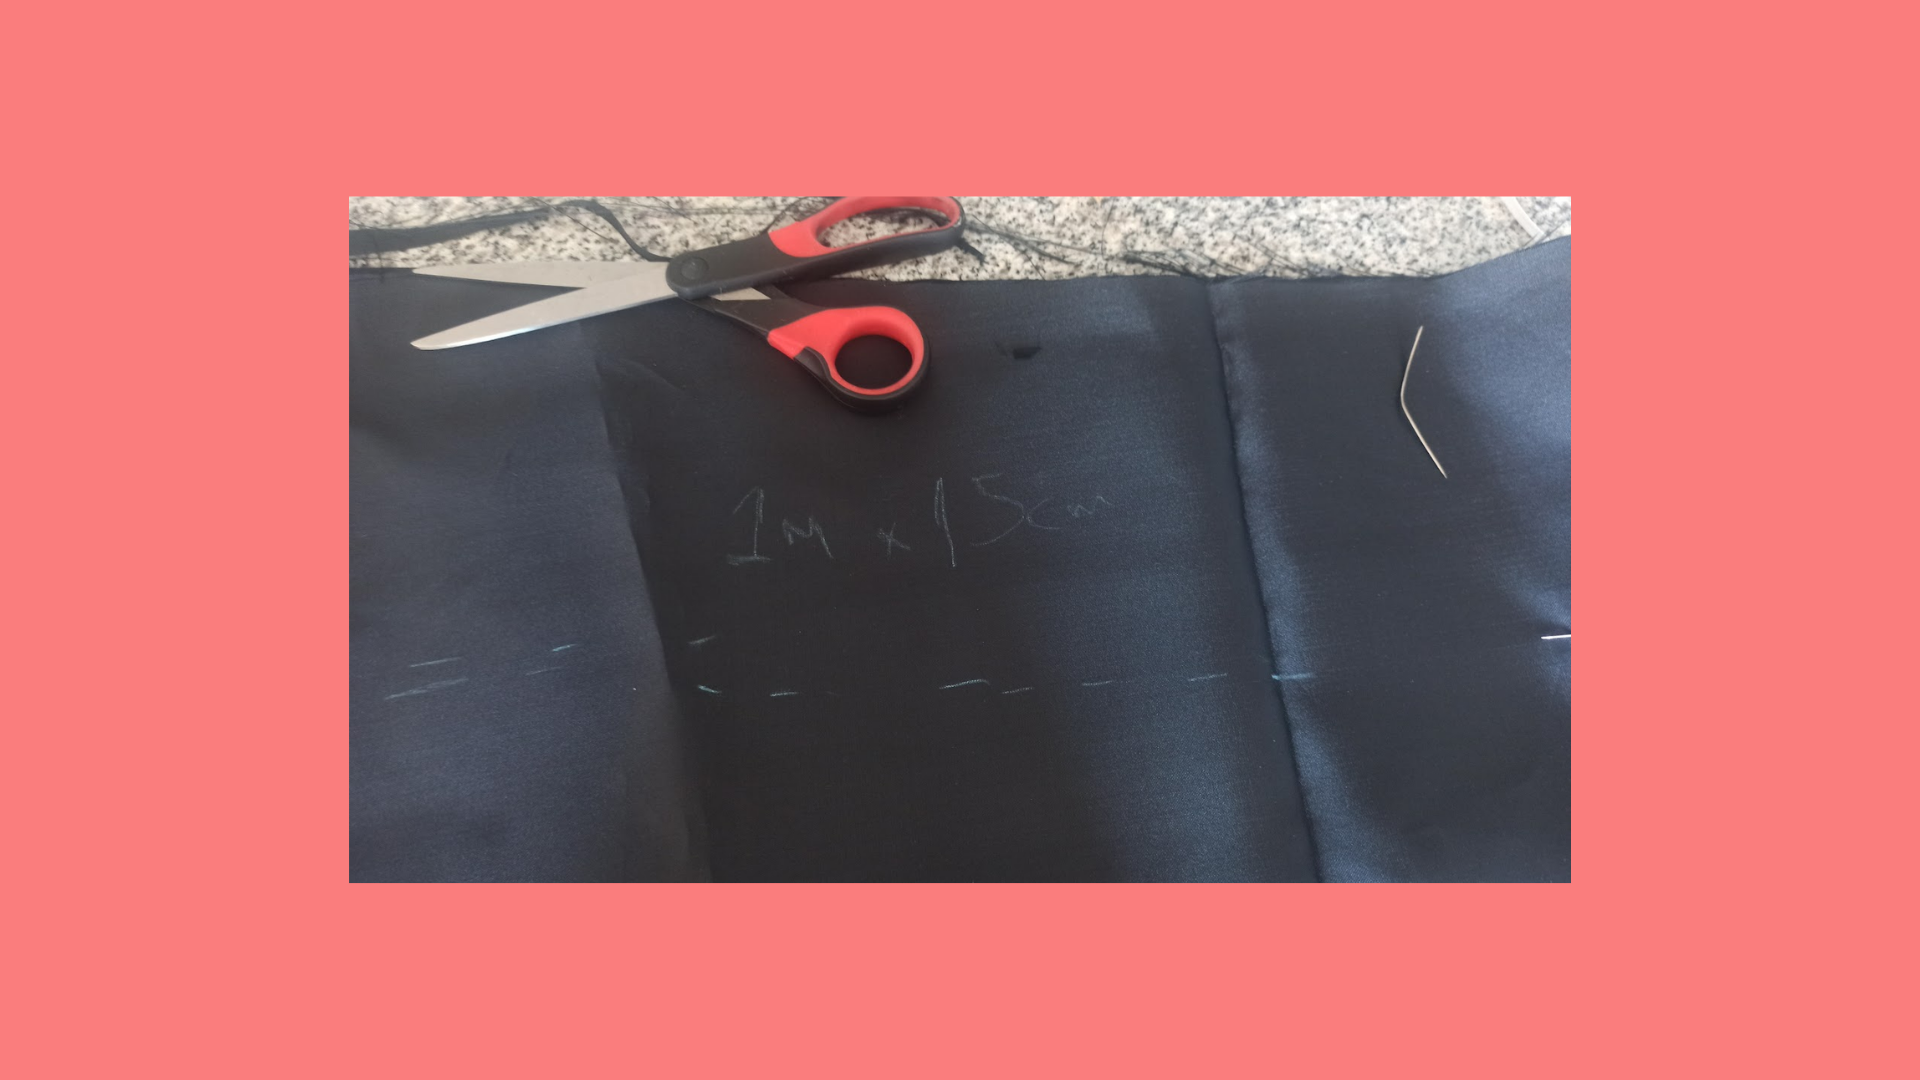
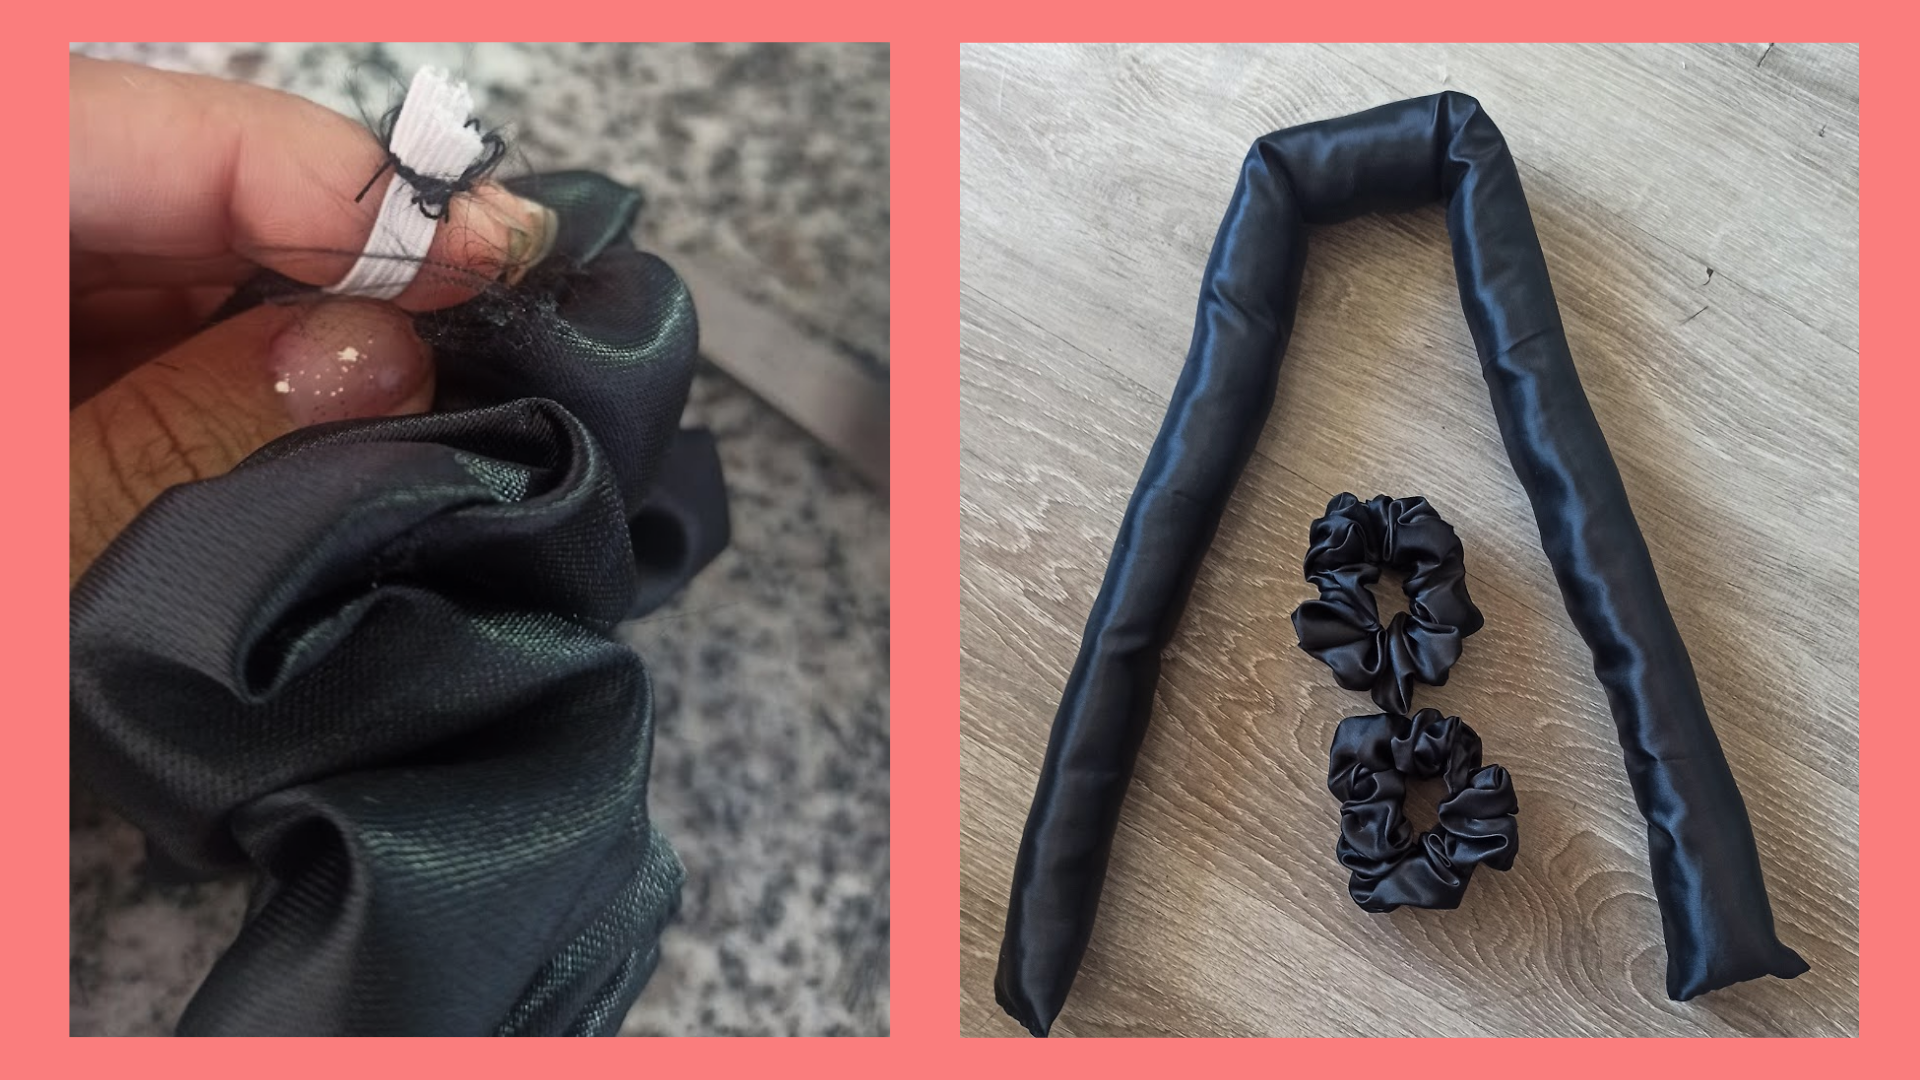
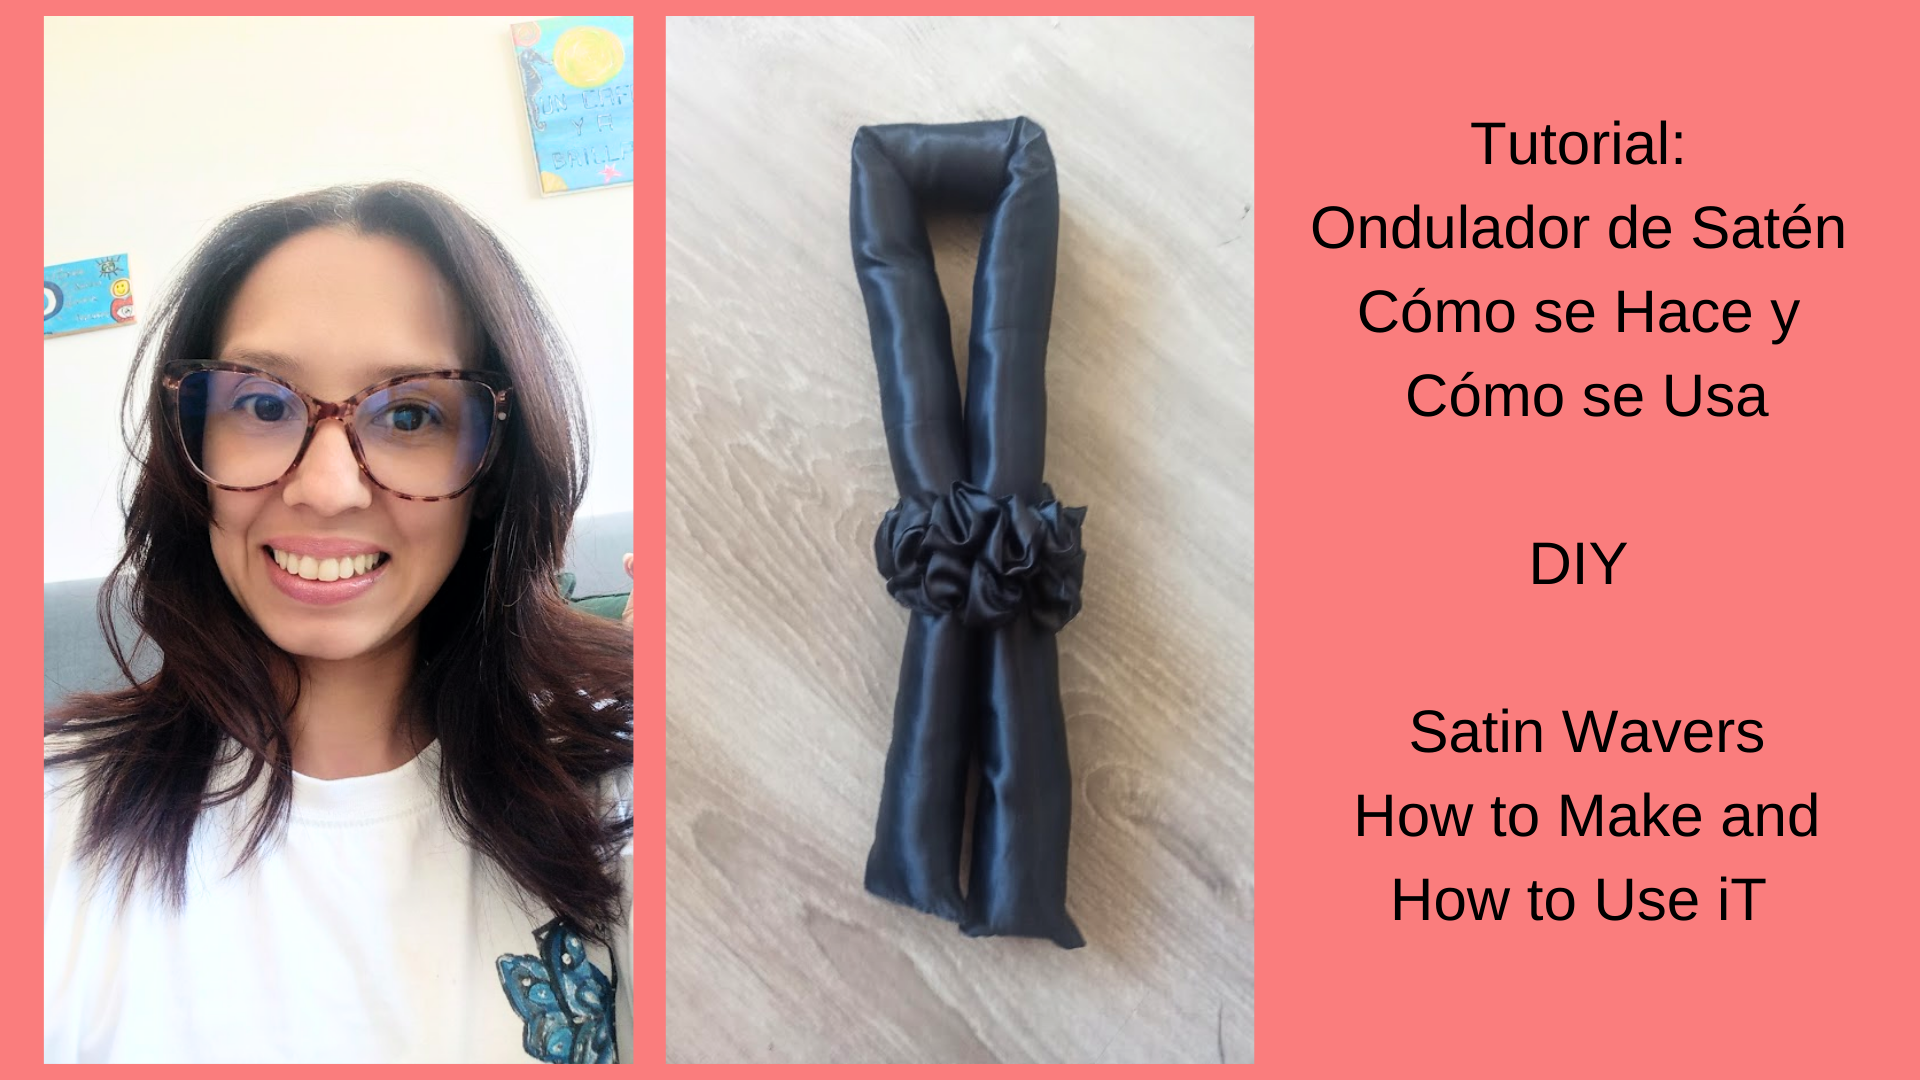
Bueno, al punto de hoy, como quiero volver linda al trabajo, pensé en hacerme unas ondas y así decidí hacer el ondulador de satin sin calor, lo venía viendo desde hace mucho por todos los medios digitales, la verdad no estaba segura que funcionara. Primero les voy a dar el tutorial de como hacerlo y luego cómo usarlo. Así que manos a las telas, para esto necesité: tela satinada, elástica, hilo, aguja, máquina de coser, tijeras, cinta métrica, tiza para marcar, algodón de relleno y alfileres, para esta ela es importante siempre quemar las orillas te puedes ayudar directamente con el encendedor o usas una vela.
Well, today's point, since I want to go back to work, I thought about making some waves and so I decided to do the satin waving without heat. I've been seeing it for a long time on all the digital media, the truth is I wasn't sure if it would work. First I'm going to give you the tutorial on how to do it and then how to use it. So hands to the fabrics, for this I needed: satin fabric, elastic, thread, needle, sewing machine, scissors, measuring tape, marking chalk, cotton stuffing and pins, for this one it is important to always burn the edges you can help directly with the lighter or use a candle.
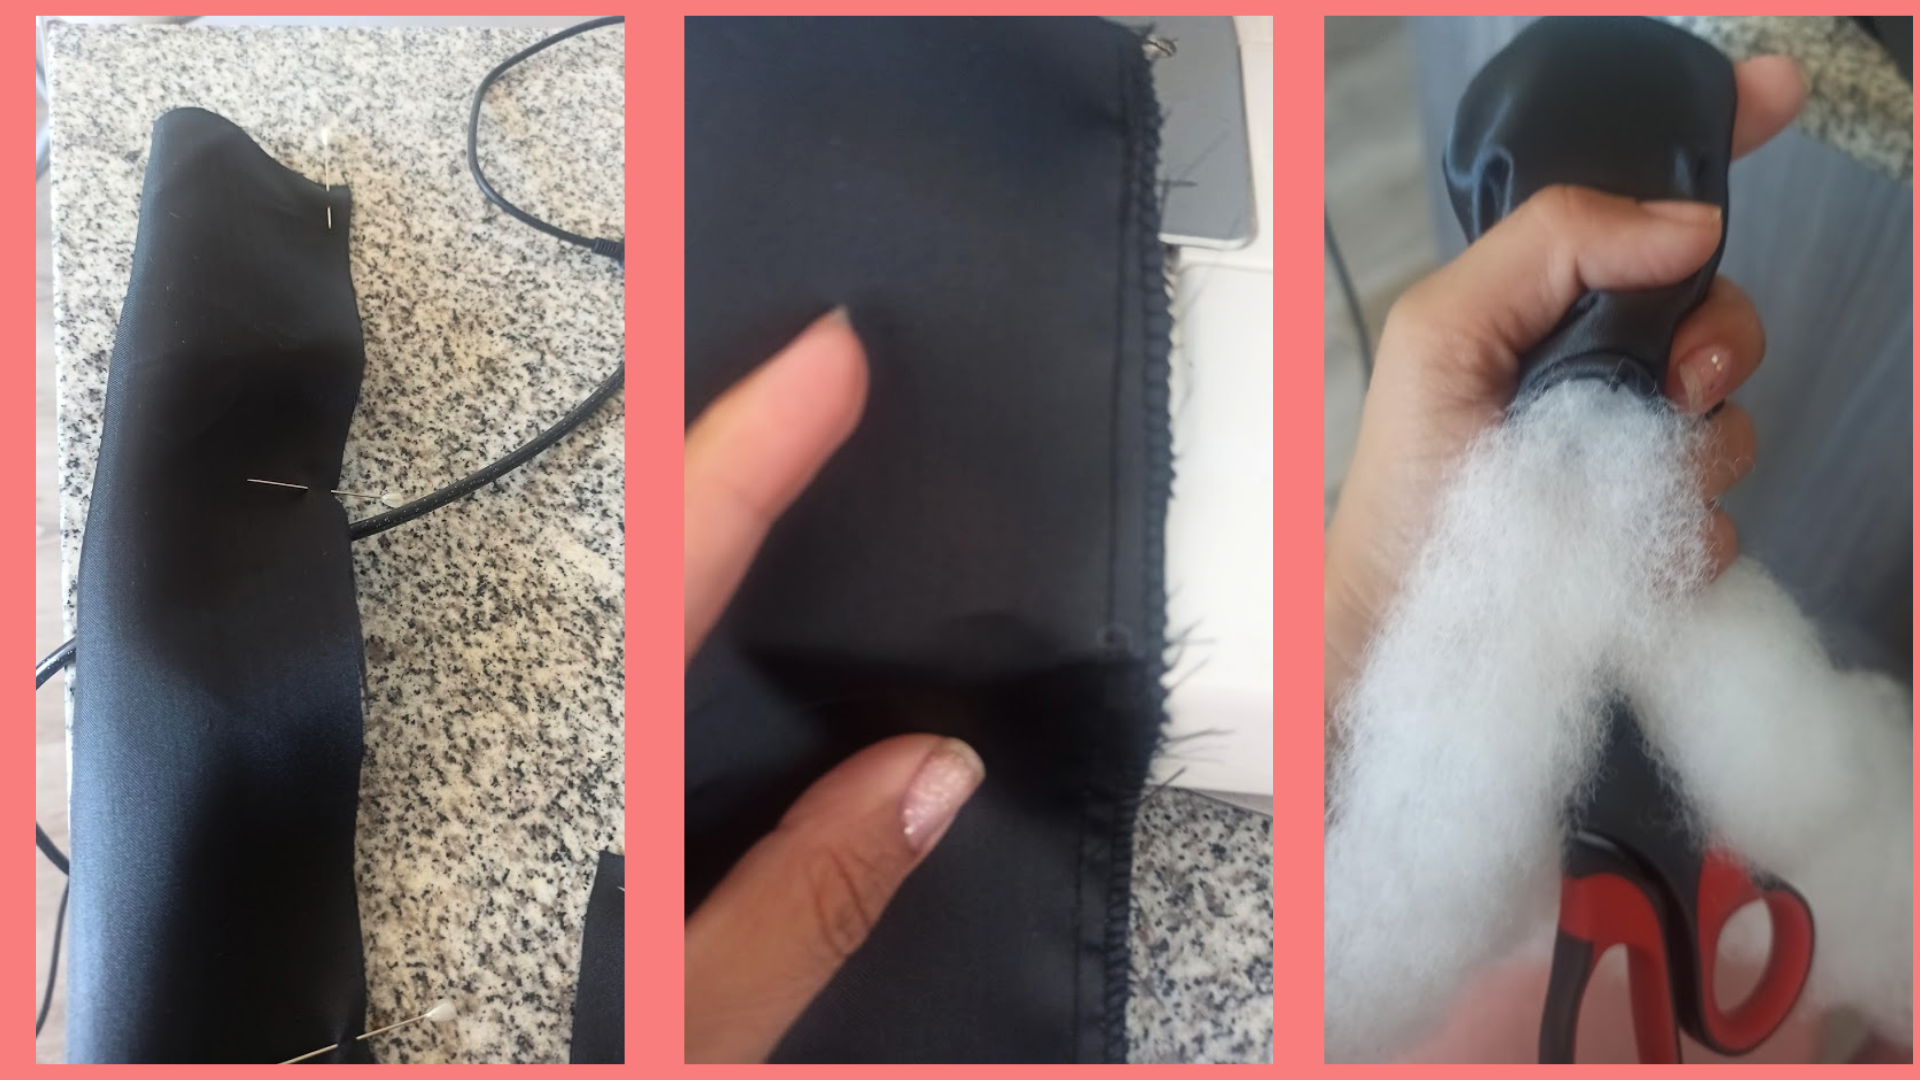
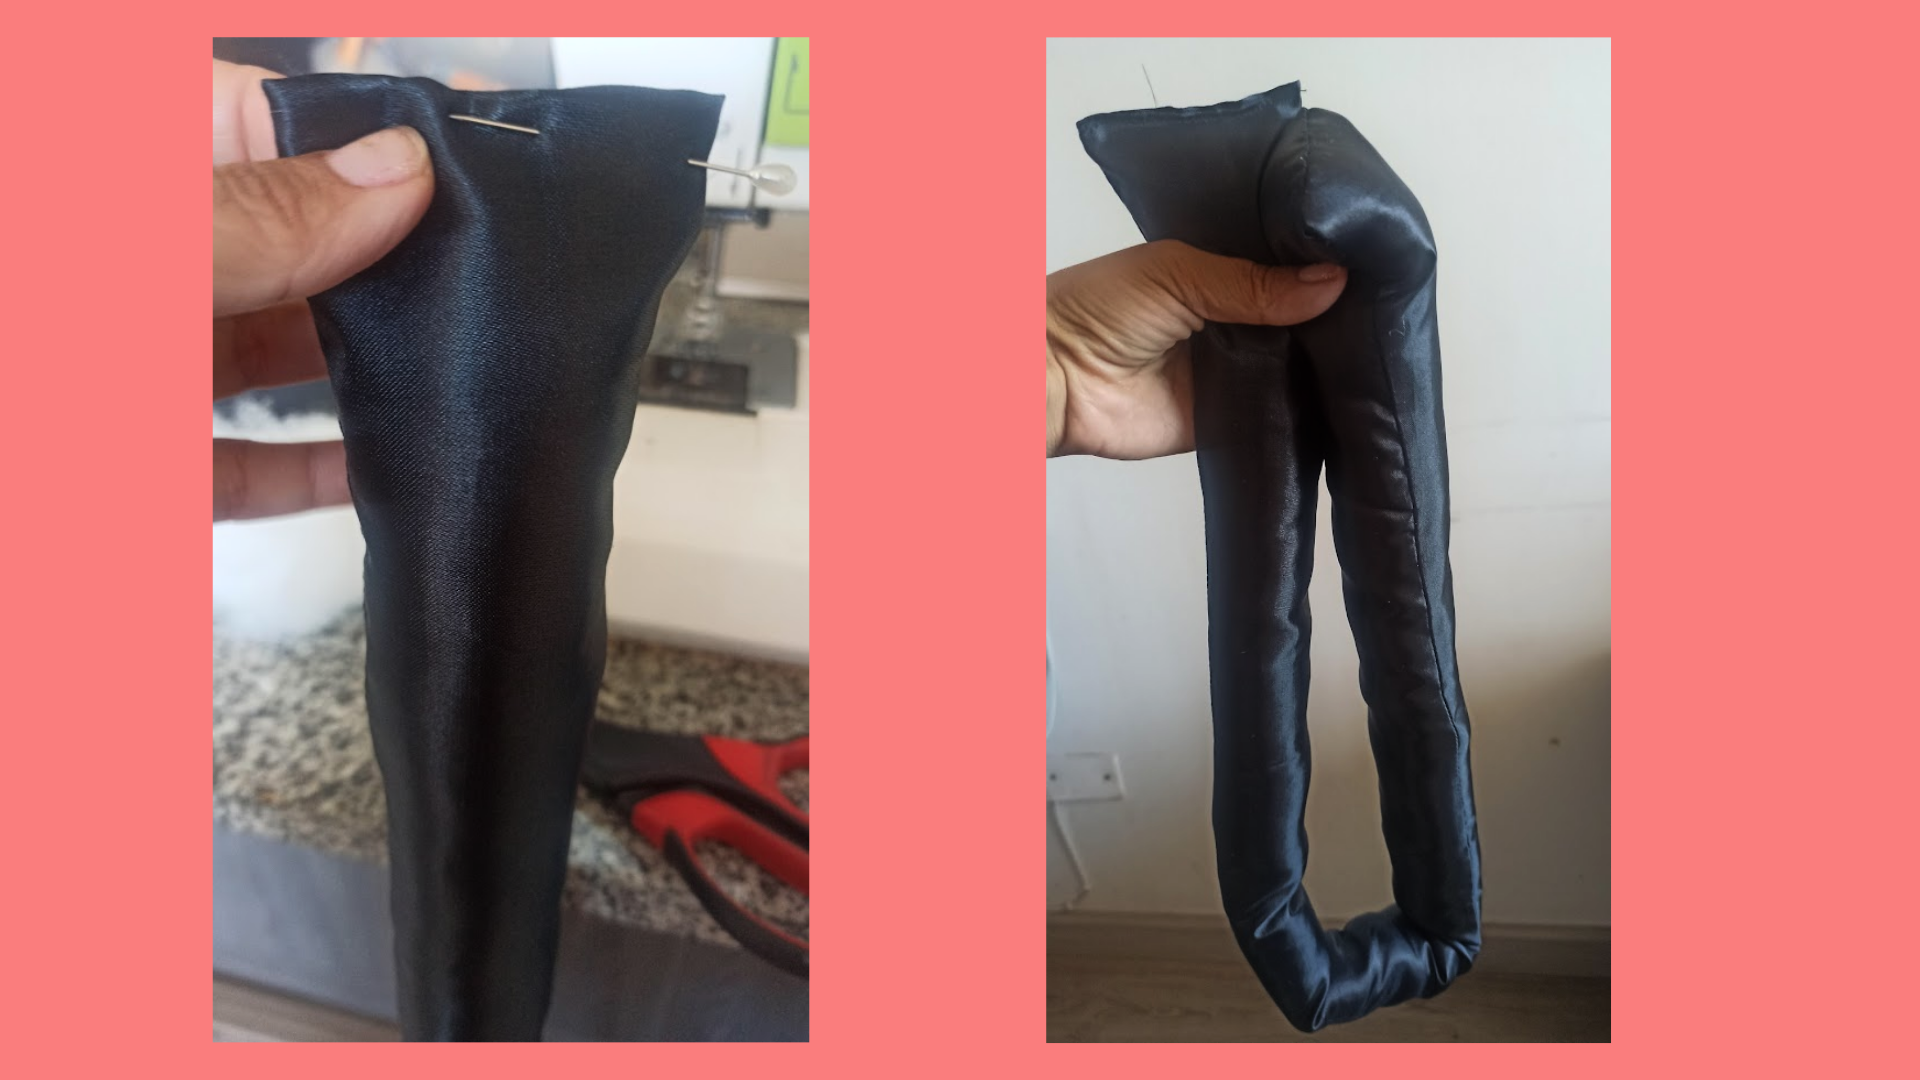
Bueno, este ondulador consta de 3 piezas que son: 2 Scrunchies, 1 rulador. Para este último corte un metro por 15 cm, pero luego me di cuenta que es mejor un poco más delgado, puedes hacerlo con 5 cm menos. Luego, enfrenté las telas por el derecho, con ayuda de alfileres sujete todo, pase una costura recta y luego en zig zag, dejando el lateral un lado abierto, para darle la vuelta, por allí rellenar con el algodón es importante que quede suave para que doble con facilidad, una vez listo, cerramos con una costura recta.
Well, this satin waving consists of 3 pieces which are: 2 Scrunchies, 1 curler. For this last one I cut a meter by 15 cm, but then I realized that it is better a little thinner, you can do it with 5 cm less. Then, I faced the fabrics on the right side, with the help of pins fasten everything, sew a straight seam and then zig zag, leaving the side open on one side, to turn it over, then fill it with the cotton, it is important that it is soft so that it folds easily, once ready, we close with a straight seam.
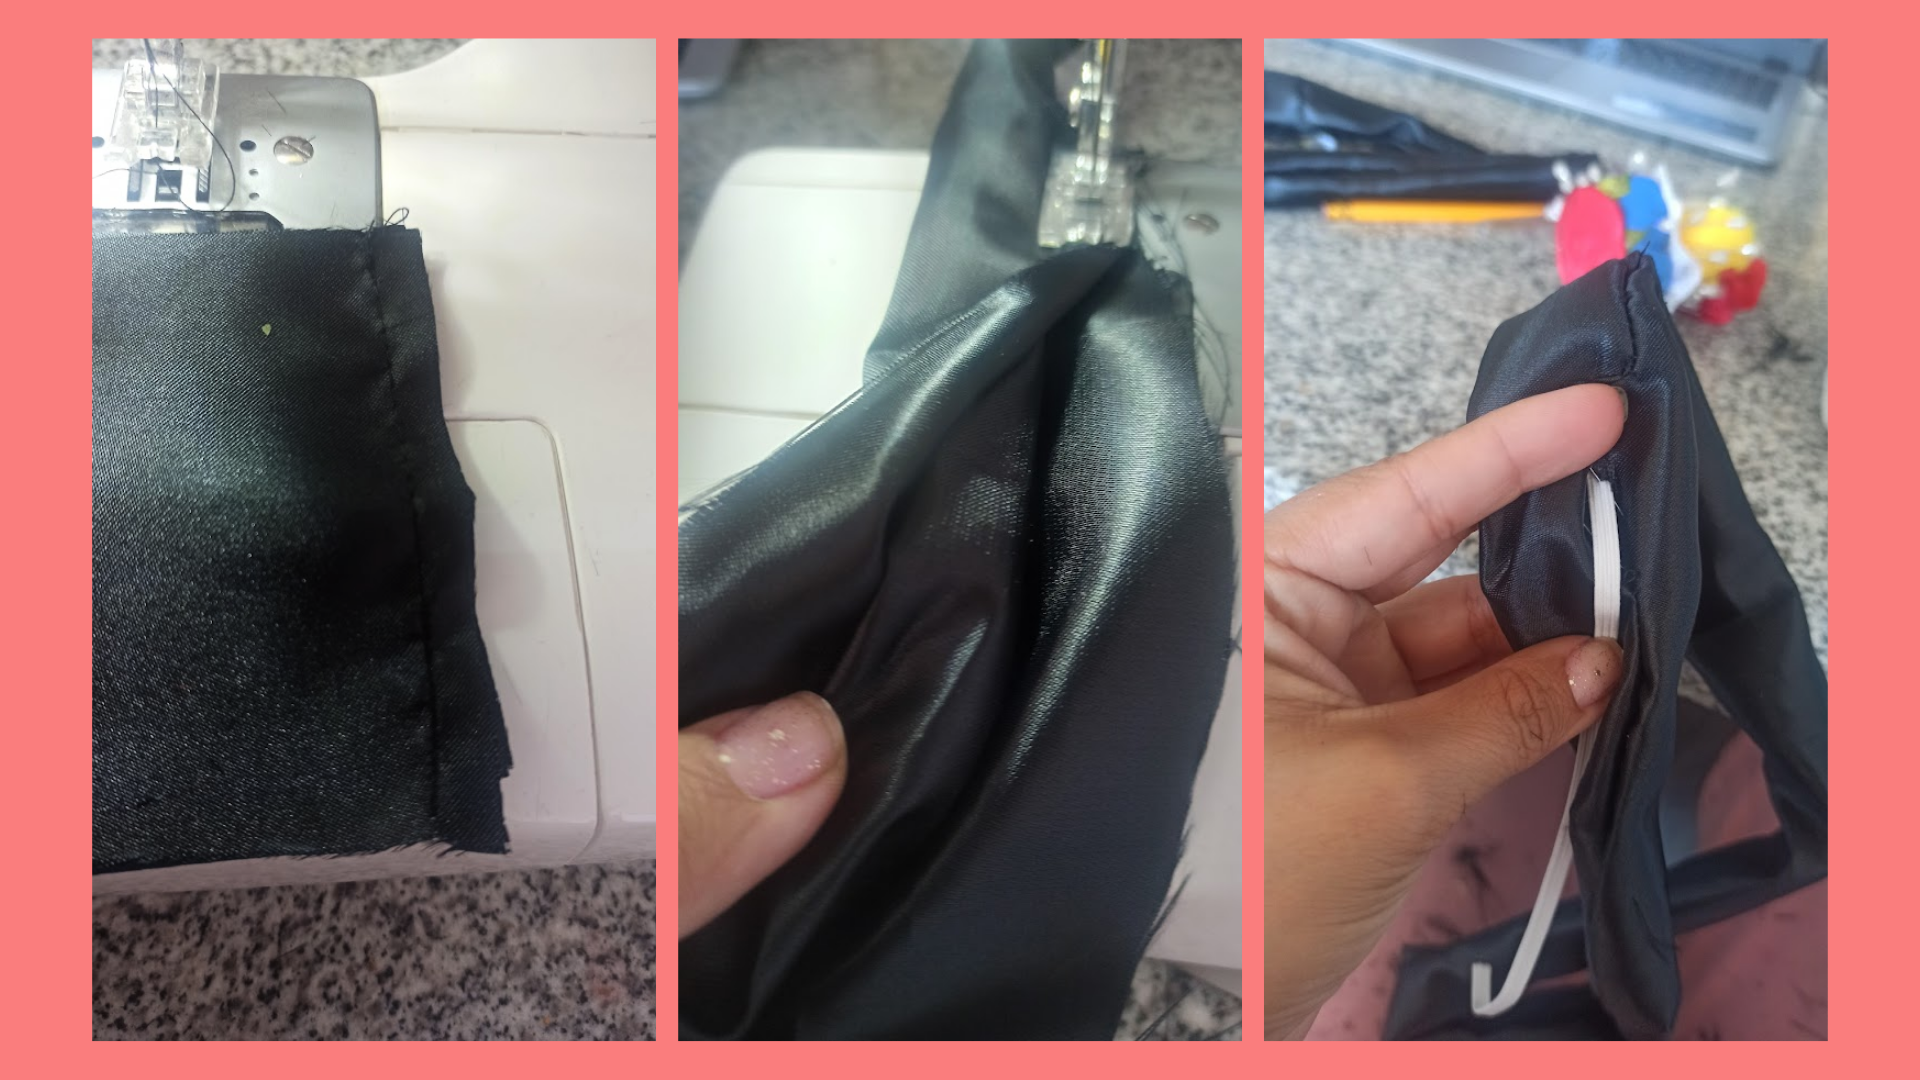
Para hacer los scrunchies, corté 2 rectángulos de 77 cm por 10 cm, enfrentando los derechos cosi, uniendo los extremos, y luego fue el turno de los laterales, primero una costura recta y luego la zig zag, le damos la vuelta, para atravesar el elástico con ayuda de un alfiler, después los uní con una costura, para luego cerrar toda la pieza con una costura recta en la máquina de coser. Para ver otras formas de hacerlo en mi perfil consigues otros tutoriales de scrunchies.
To make the scrunchies, I cut 2 rectangles of 77 cm by 10 cm, facing the rights I sewed, joining the ends, and then it was the turn of the sides, first a straight seam and then the zig zag, we turn it over, to go through the elastic with the help of a pin, then I joined them with a seam, to then close the whole piece with a straight seam on the sewing machine. To see other ways to do it in my profile you can find other scrunchies tutorials.
Ahora les voy a explicar cómo se usa, para esto necesitas una pinza grande cabello, luego me peiné bien, luego de desenredado todo el cabello y con mi aceite de argán de confianza, me separe en 2 partes, después sujeté el ondulador de satén con la pinza en el centro del cabello, te recomiendo una un poco más ancha que sostenga más cabello y no esa que ven en la imagen. Entonces comencé, mechon por mechon, darle vuelta alrededor del ondulador, una vez enrollado todo el cabello, sujeté con el scrunchie en cada lado.
Now I am going to explain how to use it, for this you need a large hair clip, then I combed my hair well, after detangling all the hair and with my trusted argan oil, I separated into 2 parts, then I fastened the satin waver with the clip in the center of the hair, I recommend a little wider one that holds more hair and not the one you see in the picture. Then I started, strand by strand, twisting it around the waver, once all the hair was rolled up, I fastened it with the scrunchie on each side.
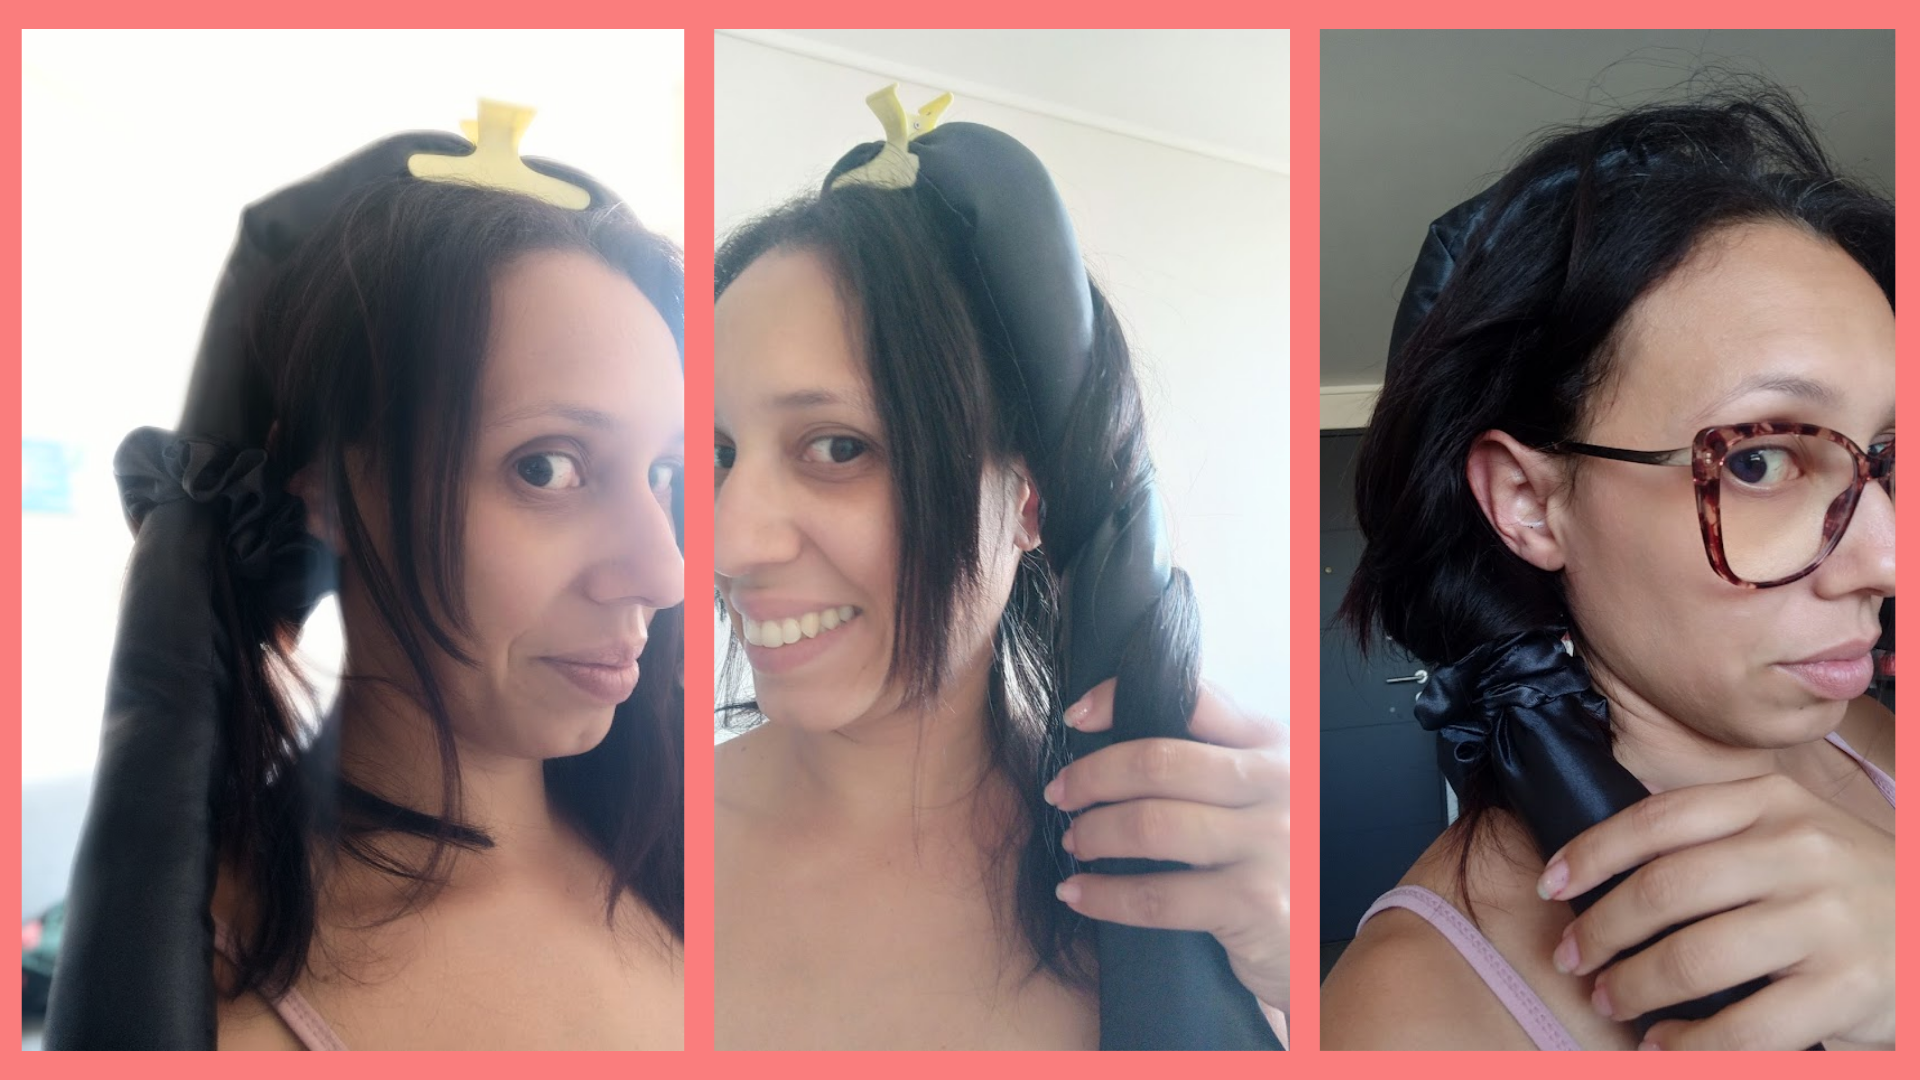
En las redes vi que la gente duerme con esto, yo les soy honesta y la verdad que no puedo dormir con nada así, ni zarcillos uso para dormir, así que te recomiendo si eres como yo usalo unas horas antes del evento o lo que vayas a usar tu cabello ondulado, yo me lleve unas 2 horas aprox, tomando en cuenta que mi cabello es delgado, si el tuyo es de hebra gruesa tal vez te lleve un poco más tiempo. Como yo tengo un flequillo bastante corto no pude sostenerlo con el ondulador, así que a él sí le pasé un poco la plancha del cabello. Luego, para quitarlo empecé separando los scrunchies y así fui aflojando el ondulador hasta soltar todo el cabello y lista la melena ondulada.
In the networks I saw that people sleep with this, I'm honest and the truth is that I can not sleep with anything like this, or tendrils use to sleep, so I recommend if you're like me use it a few hours before the event or what you're going to use your wavy hair, I took about 2 hours approx, taking into account that my hair is thin, if yours is thick strand may take a little longer. As I have quite short bangs I couldn't hold them with the waving iron, so I did run the hair straightener through them a bit. Then, to remove it I started by separating the scrunchies and so I loosened the waver until all the hair was loose and the wavy mane was ready.
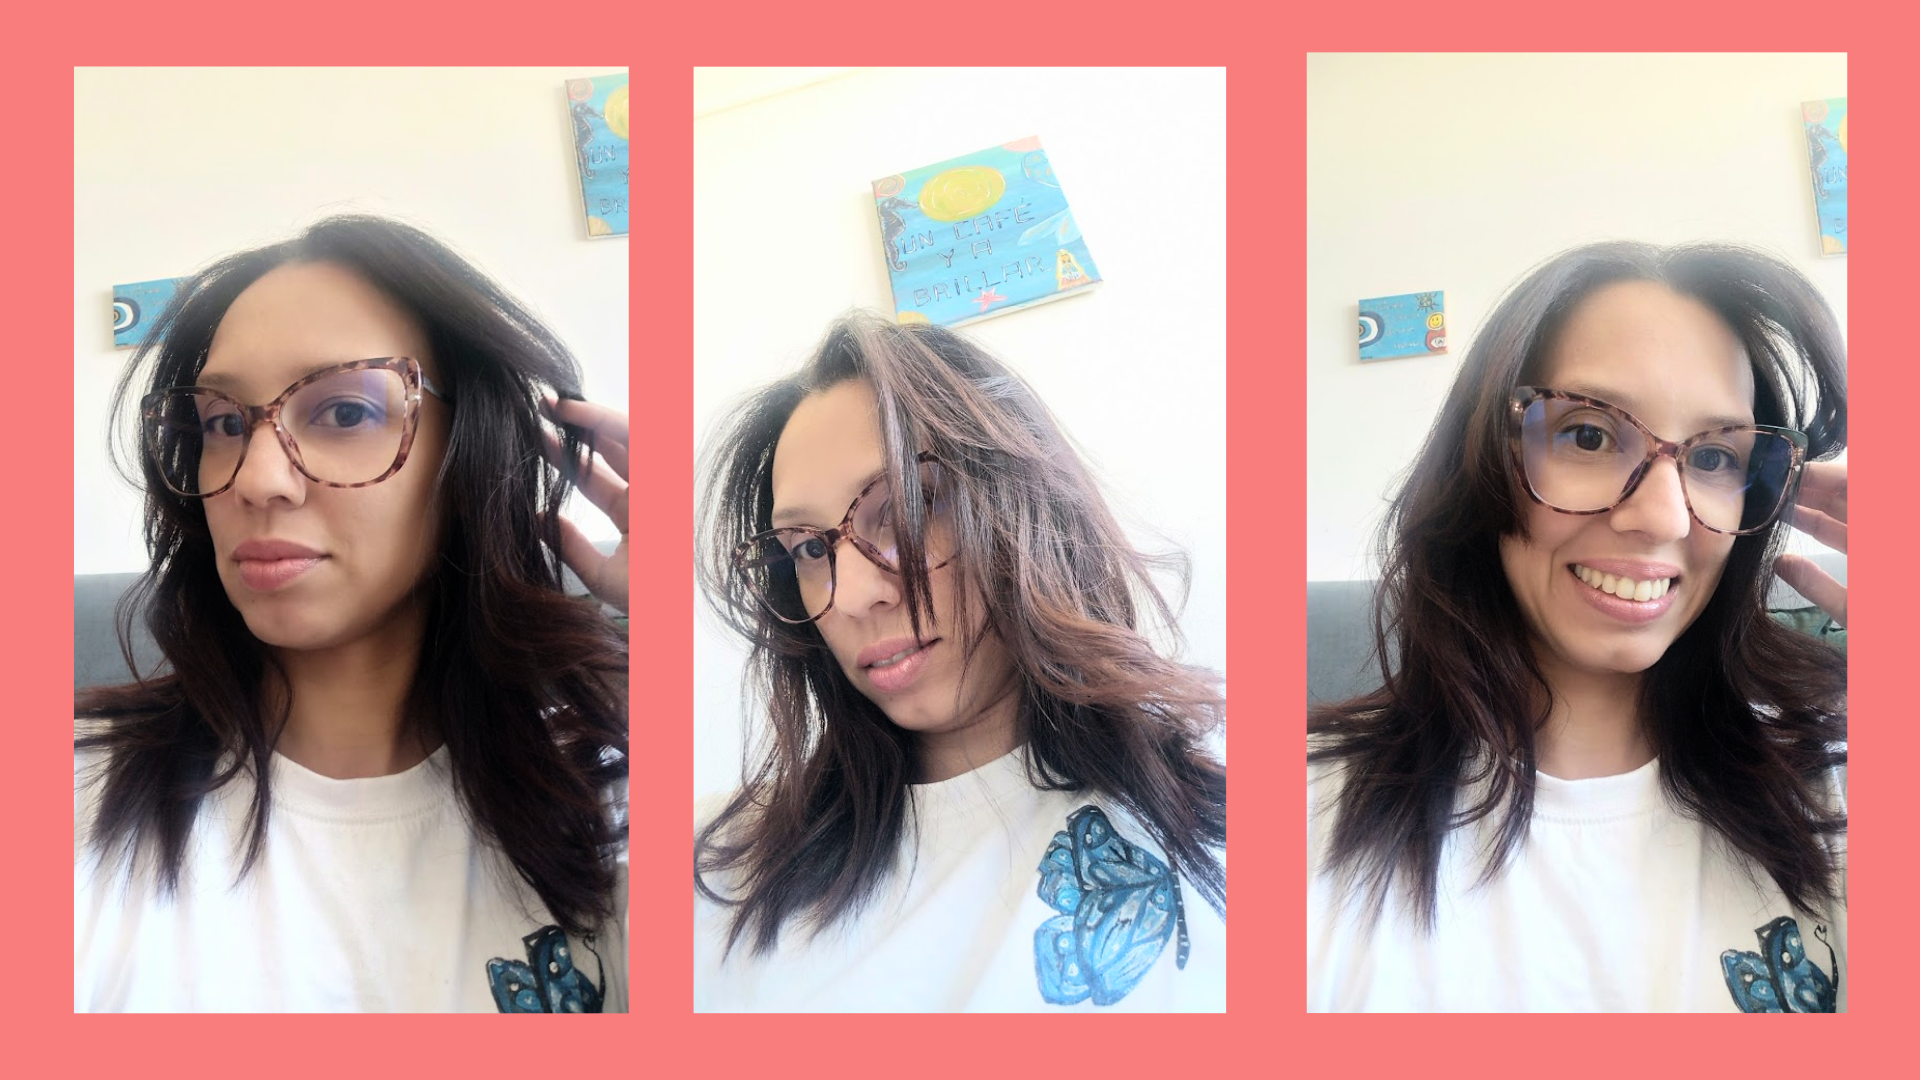
La verdad es una herramienta muy útil para no maltratar el cabello, si quieres que se sostenga por más tiempo puedes usar laca o gel fijador al momento de ondular y refuerzas cuando ya vayas a peinar para el look final ¿Qué les pareció hivers? Si se animan a hacerlo, me comentan que tal. Las fotos son registro personal editadas en Canva. Muchas gracias hivers, si tienen sugerencias o preguntas los espero en los comentarios.
The truth is it is a very useful tool to not mistreat the hair, if you want it to hold longer you can use hairspray or gel fixative at the time of waving and reinforce when you go to comb for the final look. What did you think about hivers? If you dare to do it, let me know what you think. The photos are personal records edited in Canva. Thank you very much hivers, if you have any suggestions or questions I'll be waiting for you in the comments.
Hola Afrika. Que bueno este artilugio enrrulador, nunca lo había visto jajaja. Es muy cómodo para usar y no quemarte todo el pelo, está bastante bueno. Te quedan lindas las onditas ❤️- ¡Saludos!
Hola Laura, muchas gracias. Te aconsejo tenerlo por al menos un par de horas con fijador 💥
No tenía idea de cómo se usaba el ondulado. Entre al post con curiosidad 😄 te felicito por tan buen trabajo
Ay mucha gracias por entrar. Hay que ser curioso en la vida 💥
I love it! I used to do this when my hair was still long. I tried sleeping with this on my head, it wasn't a comfortable sleep. Haha. I would recommend though doing it while the hair is still a bit wet after the shower. Use hair dryer to help dry the hair faster, and yeah, use hair spray or gel to ensure long lasting curls for the day.
Great tips, thanks a lot. It's really unconfortable sleep with it.
Amiga que idea tan buena. Me encanta porque así se evita el uso de la plancha y por ende el maltrato al cabello. Está genial. Gracias por compartirla. Yo también estoy procesando el que ya tenga canas en mi cabello 🤭
Jajajajaa hay que procesar. Muchas gracias, también puede ser hecho en terciopelo ví por allí💥😅