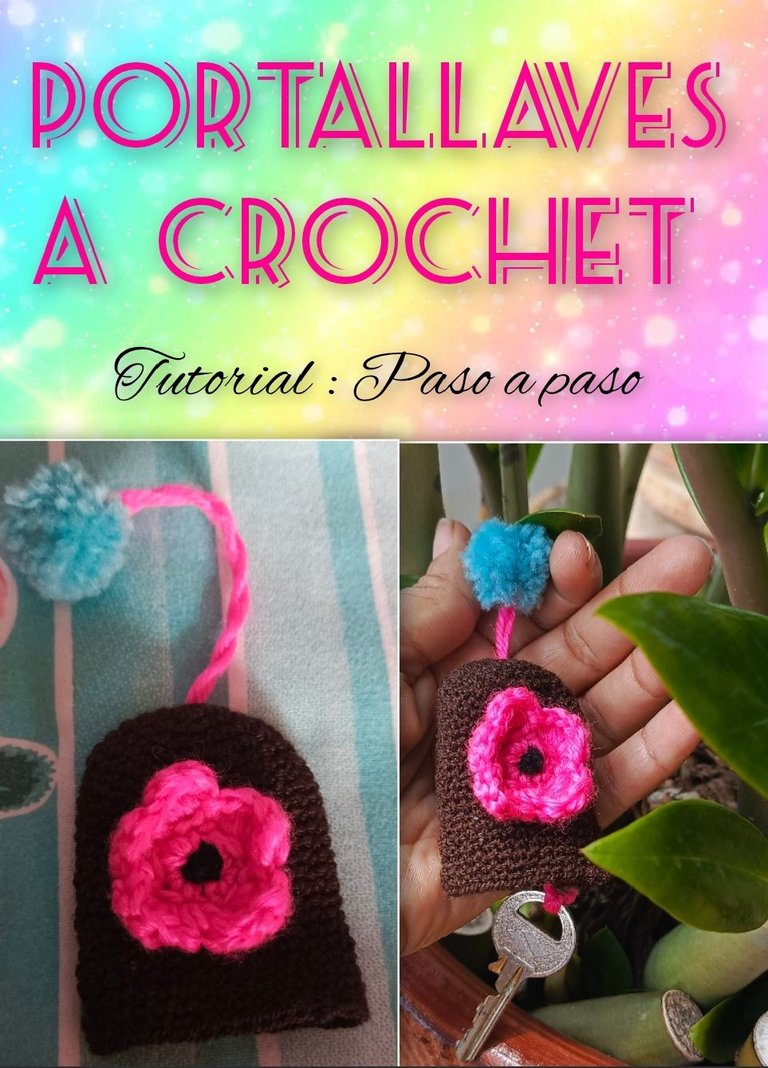
Hello hello a special greeting to all, I am @amores.sf2 and I am very happy to be able to learn and share in this appreciated community.
Today I share with you a wonderful idea that I found in the networks and I have decided to do it in my own style.
¿Se te enganchan los auriculares con las llaves ?
Y lo más usual y que Normalmente nos pasa a todas ¿Se te pierdes las llaves dentro de la carteras?
Is your cell phone screen scratched by your keys?
Do your headphones get caught in your keys?
And the most common thing that usually happens to all of us, do you lose your keys in your wallet?
Well here I bring you the solution to your problems for that reason today I want to share with all of you a simple tutorial on how to make a beautiful and creative key holder step by step.
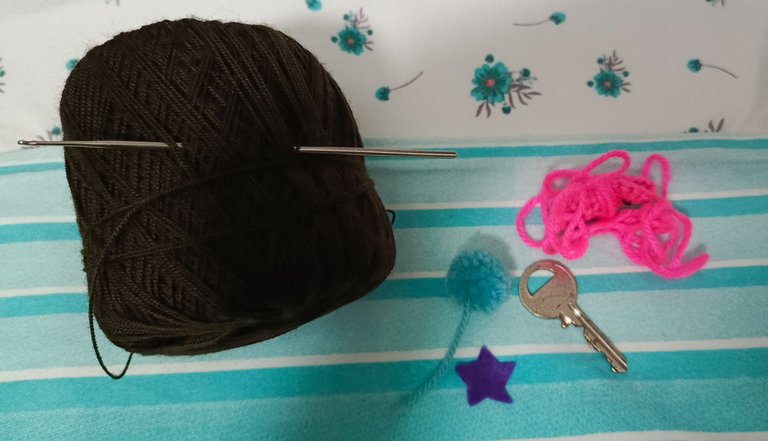
Para este proyecto vamos a necesitar los siguientes materiales.
Hilo de crochet
Aguja de tejer
1 llave
Detalles para decorar.
For this project we will need the following materials.
Crochet thread
Knitting needle
1 key
Details to decorate.
Step by step
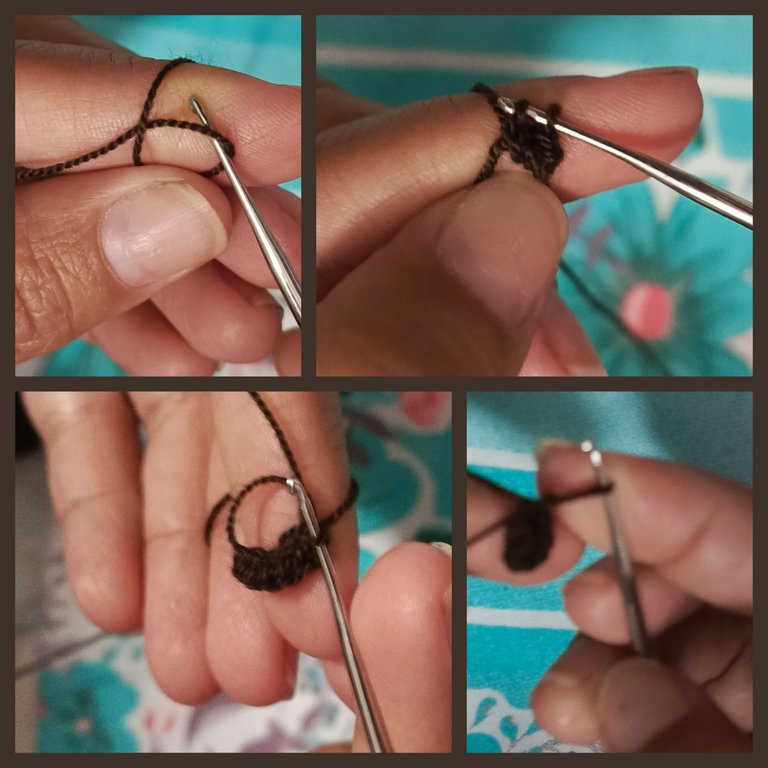
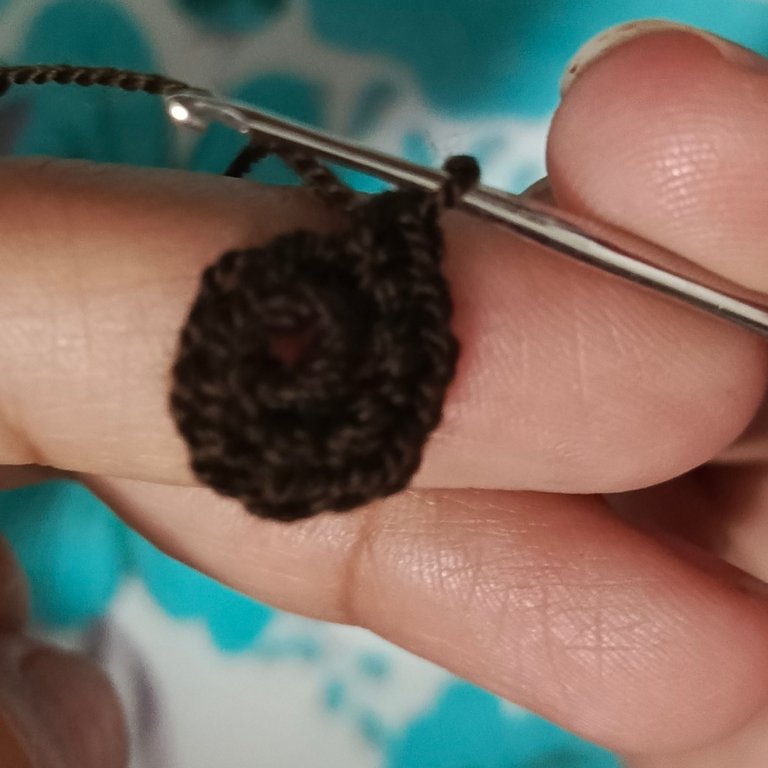
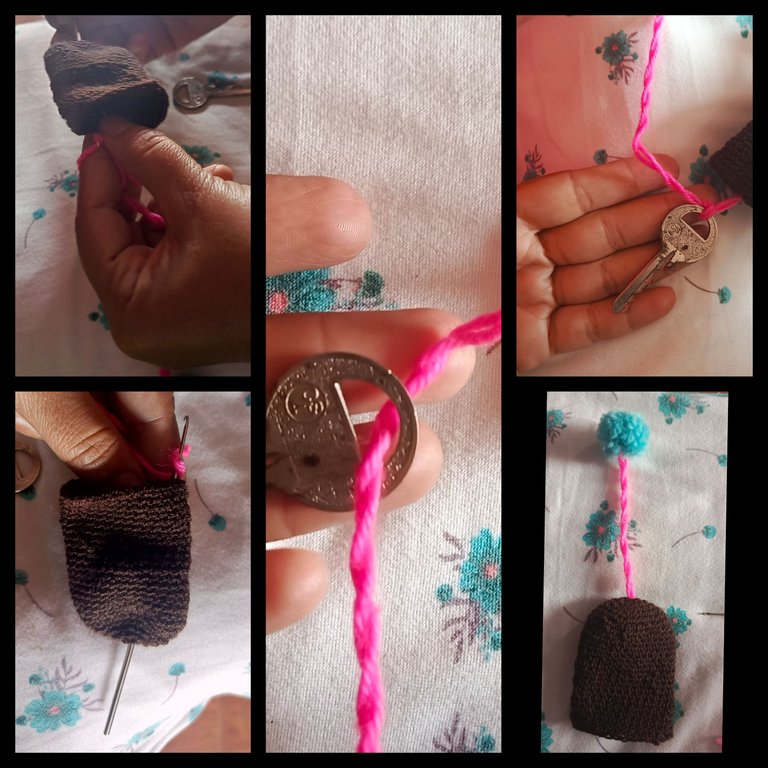
To begin with, we make a magic ring that consists of forming a sliding circle that we close after knitting the initial stitches of our fabric, we start knitting 6 single crochet stitches. Once this step is finished, I pull the yarn to adjust the magic ring and without closing it, we knit our first single crochet of the second round, I place a marker or a strand of yarn that will help me to guide me.
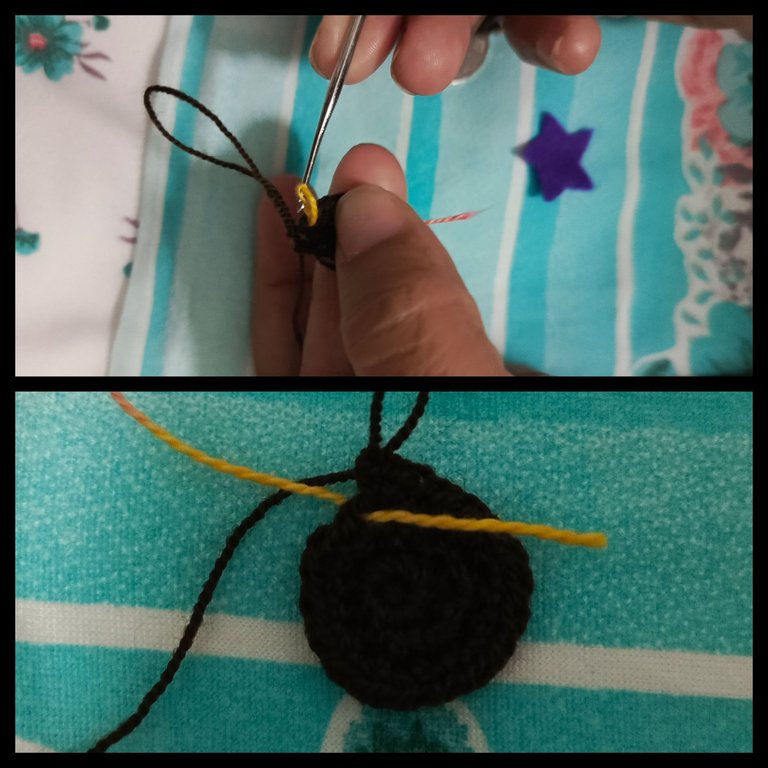
in this second row we are going to make increases, that is to say, in the same stitch we will make two single crochet stitches to obtain a total of 12 stitches.
The third row we knit a single crochet and a repeat increase (2 single crochets in the same stitch) and so on until we reach 18 stitches.
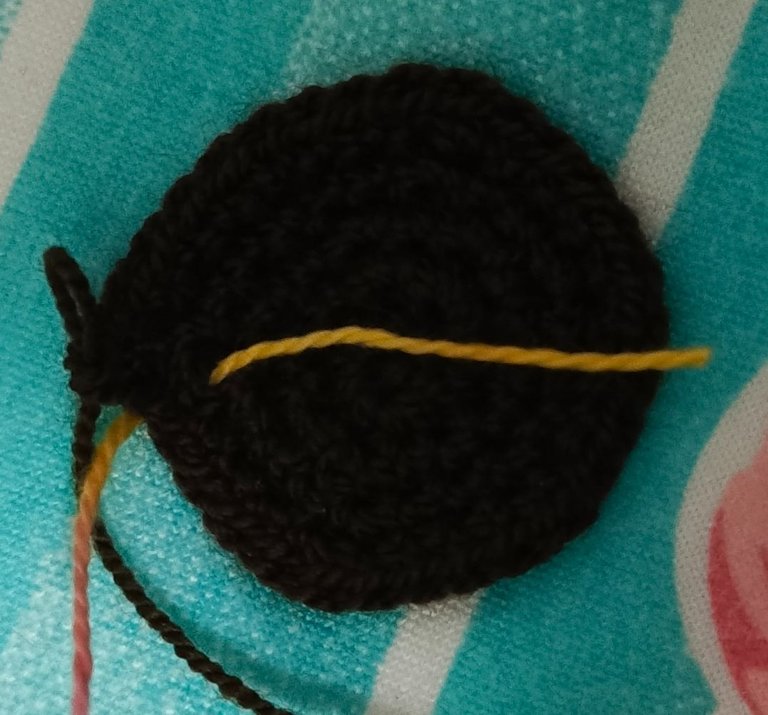
In the 4th row we knit two single crochets and one increase until we have 24 stitches
In the 5th row, knit three single crochets and one increase to 30 stitches.
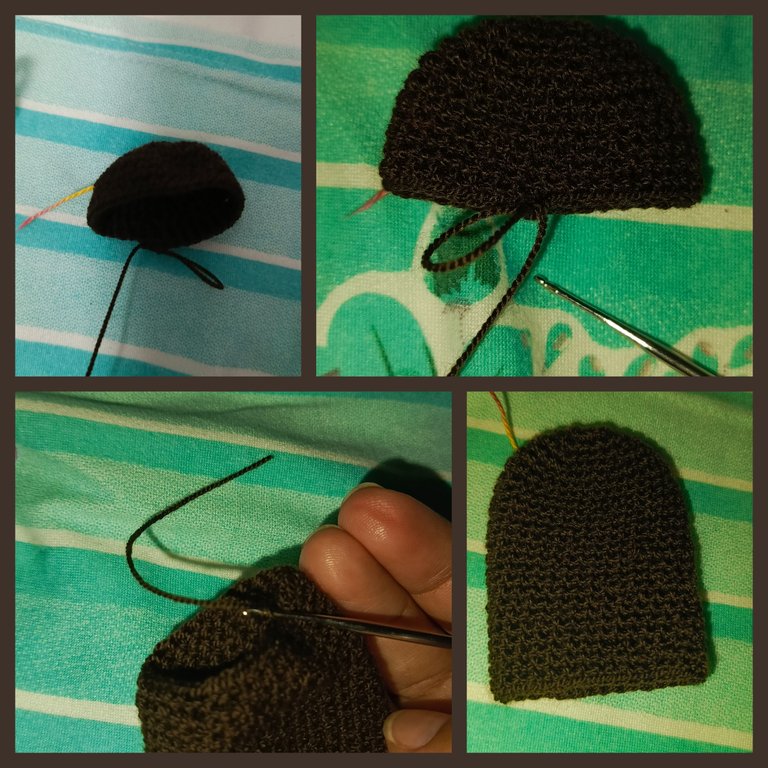
Now we continue making rows without increasing stitches, that is, stitches over stitches until we reach row 20, and finally we will make a row with a slip knot.
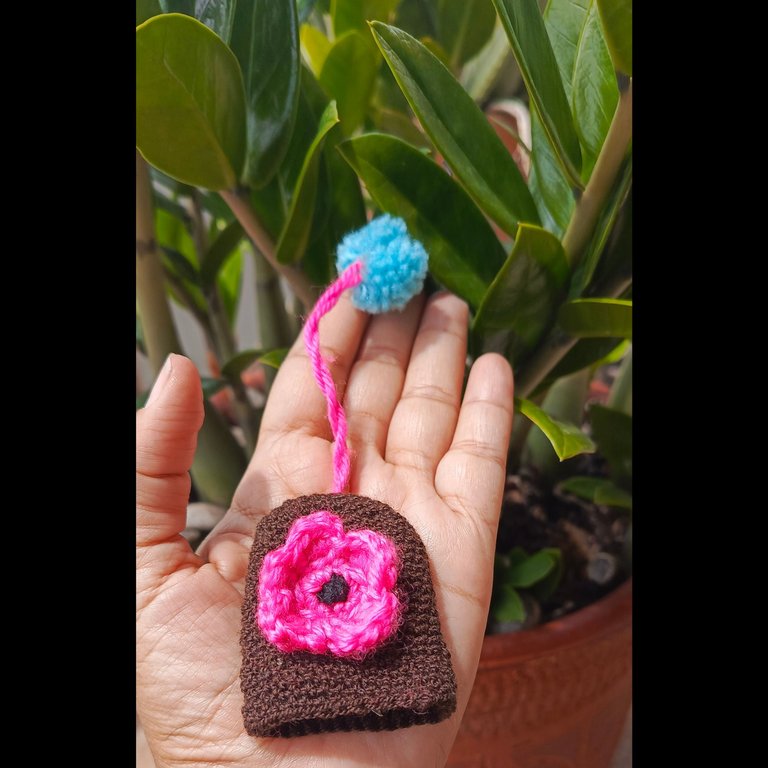
Ready our cover for the keys, let's proceed to place the details like the key pendant, I tell you that from other projects I had a small pompom and that is what I will use in addition to a decorative detail I have some stars in felt and I also have other details that may be more beautiful.
The next step is to place the decorative detail as I commented I have many details of previous works that serve me as decoration for this occasion other I think it is very nice detail is a woven flower, which I will attach to the cover for this only needle where I want to place the flower with the same bring the children inward and subject them very well so that it is well adjusted.
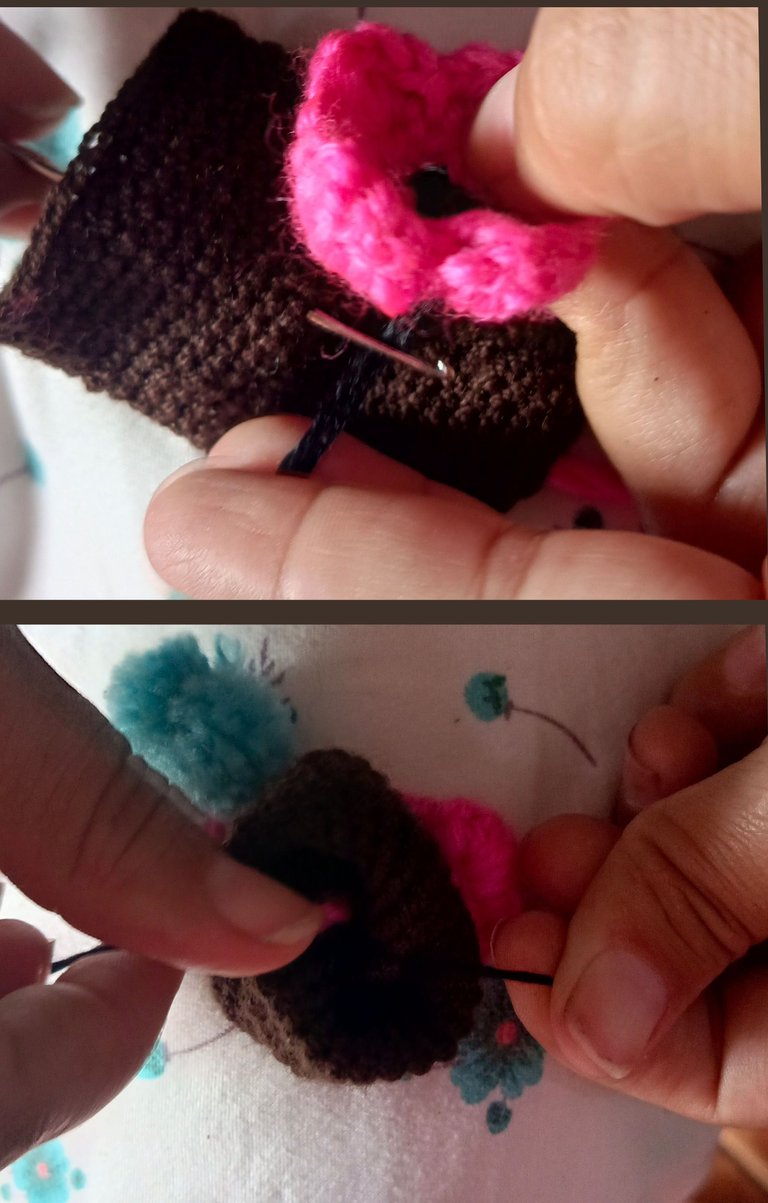
After this we proceed to place the pendant as I said I am using a pompom with fuchsia yarn that I love how the combination looks to place it performed the following, I introduce the knitting needle through the center of the magic ring and with the same halo the yarn, adjust the size I want it to be and tie the key with the same yarn. I cut the excess yarn and so we have ready our very creative key holder, easy and simple to make.
Here is the final result
The photos shown here are my own taken with my personal Infinix note 30 phone, the photos edited in Incollaje and my text translated by Deepl Translator.
I hope this tutorial is to your liking and of course that you are encouraged to make it really looks very beautiful and is also super useful. Success and blessings to all..
💛🩵♥️