¡HELLO MY NEEDLE AND THREAD FRIENDS!🙋
¡Les deseo una hermosa y bendecida noche! espero se encuentren muy bien. ¡Que la paz y el amor abunde en sus corazones!💗
Para comenzar quiero contarles que ayer estuve muy ocupada trabajando en este proyecto que le estaré mostrando a continuación.
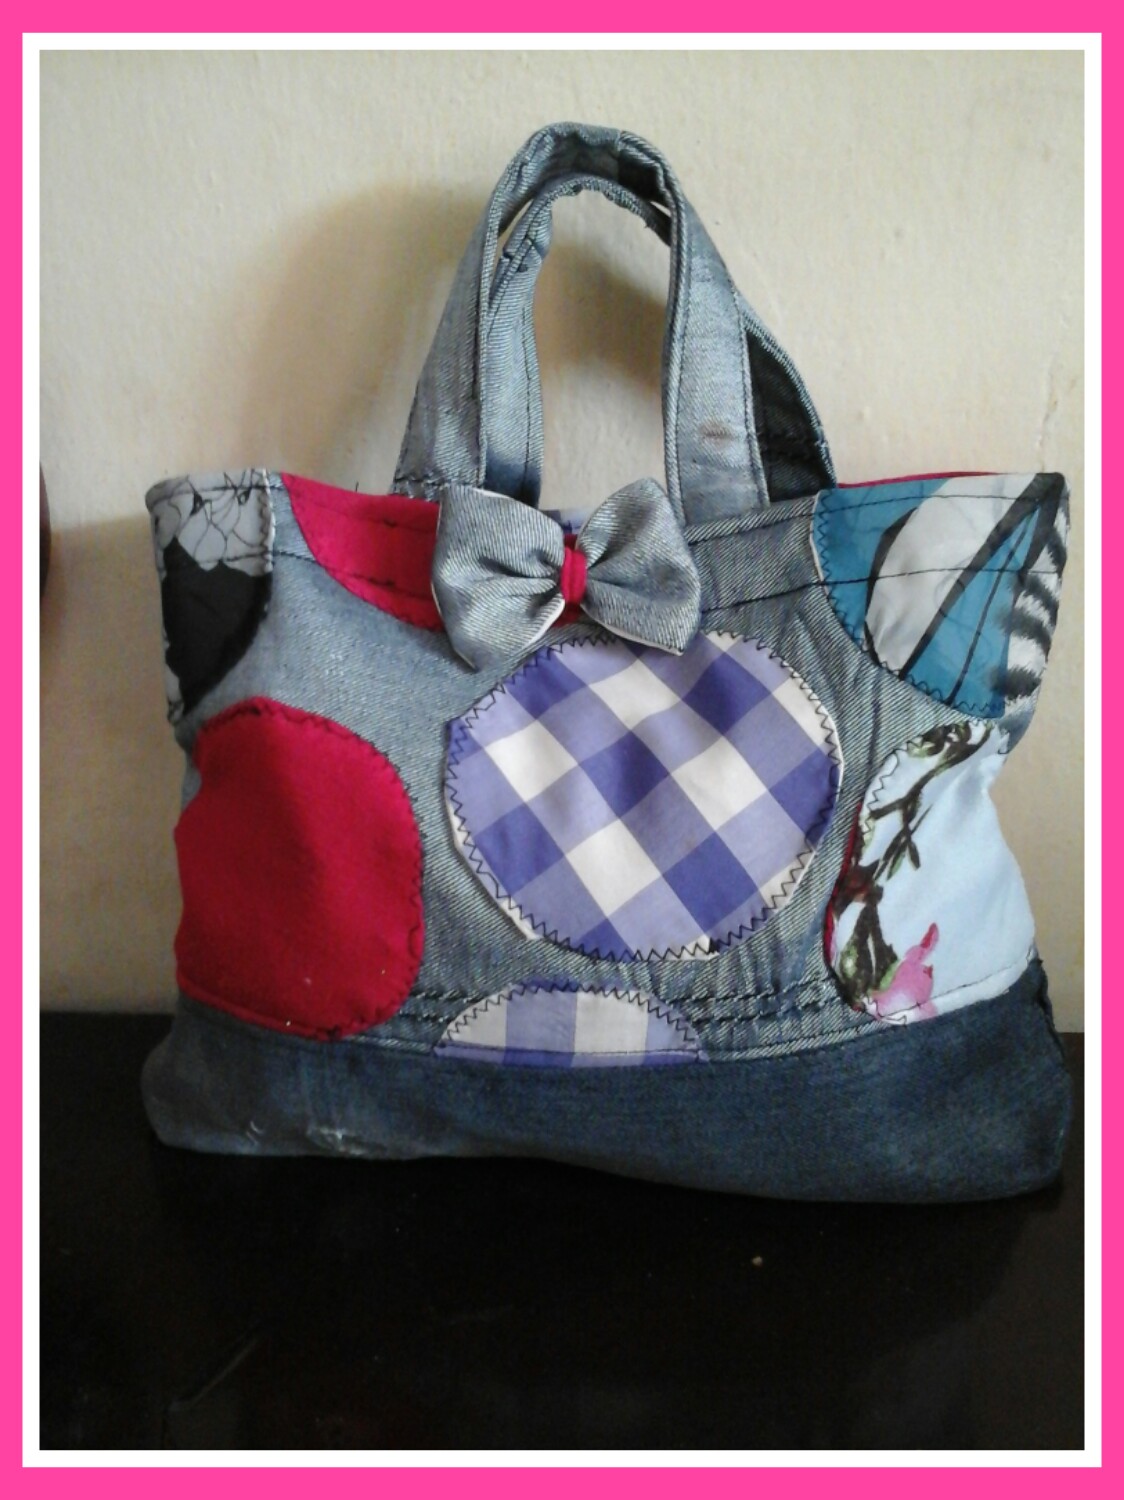
Se trata de un lindo bolso jeans de mano, con algunos apliques redondos, de retazos de tela. Creo que es mi primera vez que comparto con todos ustedes, un proyecto como este.
Hace mucho que queria un bolso que me permita llevar algunos implementos de trabajo a la hora de salir, ya que no siempre tengo la oportinidad de tener la máquina de coser en casa. Lo cierto es que no tenia un bolso que me permita llevar mis implementos de costura.
Fue entonces ayer cuando comencé a trabajar en la elaboración de este bolso el cual pude terminar con exito.
La verdad que me hubiese gustado un bolso más grande, pero solo tenía poca tela, permitiendome hacer solo uno pequeño, lo más importante es que lo pude terminar y obtener un buen resultado.
Quiero invitarte a leer mi post hasta el final y podrán apreciar el procedimiento.
I wish you a beautiful and blessed night! I hope they are fine. May peace and love abound in your hearts!💗 To begin I want to tell you that yesterday I was very busy working on this project that I will be showing you next. It is a cute jeans handbag, with some round appliqués, made of scraps of fabric. I think it's my first time sharing a project like this with all of you. I've wanted a bag for a long time that allows me to carry some work implements when I go out, since I don't always have the opportunity to have the sewing machine at home. The truth is that I did not have a bag that would allow me to carry my sewing implements. It was then yesterday when I started working on the elaboration of this bag which I was able to finish successfully. The truth is that I would have liked a bigger bag, but it only had a little fabric, allowing me to make only a small one, the most important thing is that I was able to finish it and obtain a good result. I want to invite you to read my post to the end and you will appreciate the procedure.
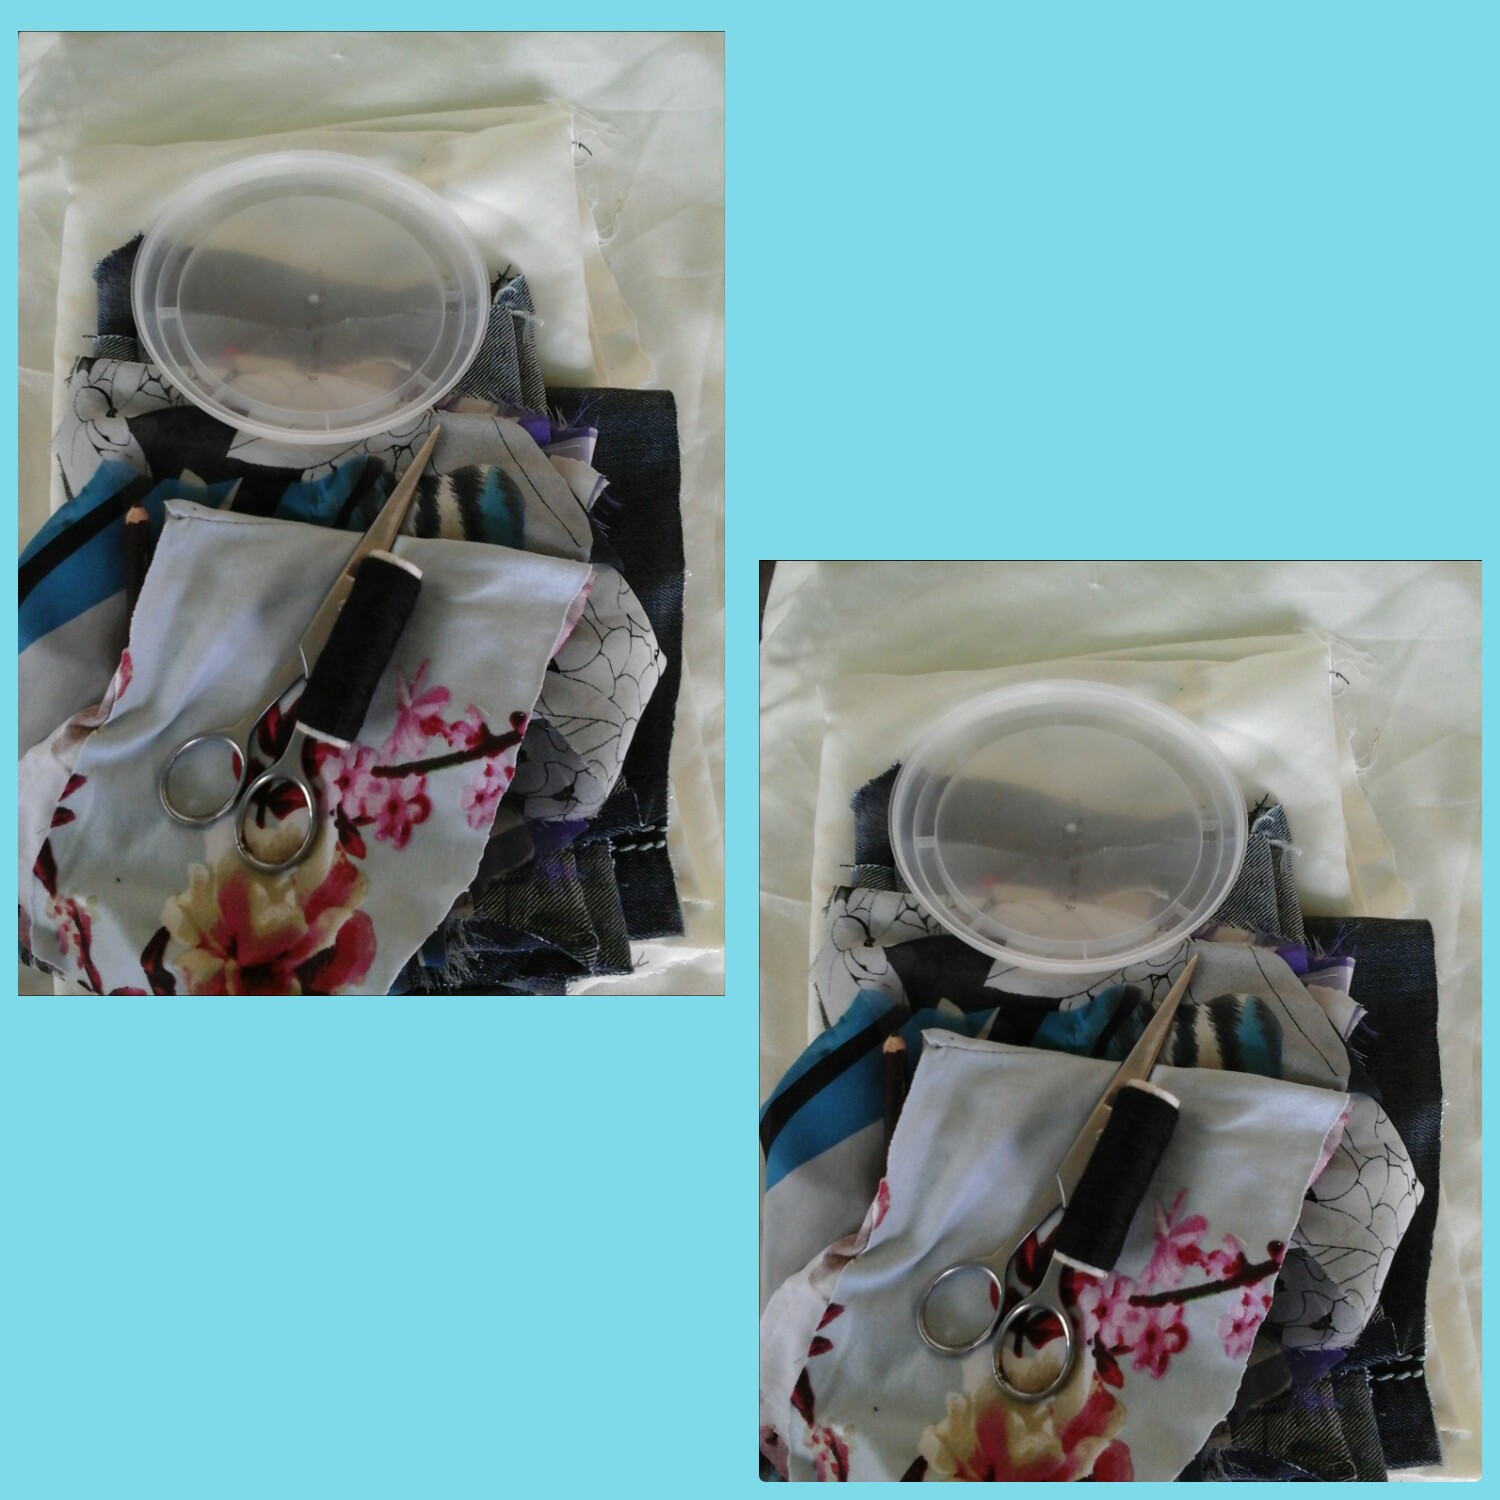
- Tela jeans y dry.
- Hilo.
- Lápiz.
- Tijera.
- Una tapa redonda.
- Retazos de tela.
MATERIALS I USED.
- Jeans and dry fabric.
- Thread.
- Pencil.
- Scissors.
- A round top.
- Pieces of cloth.
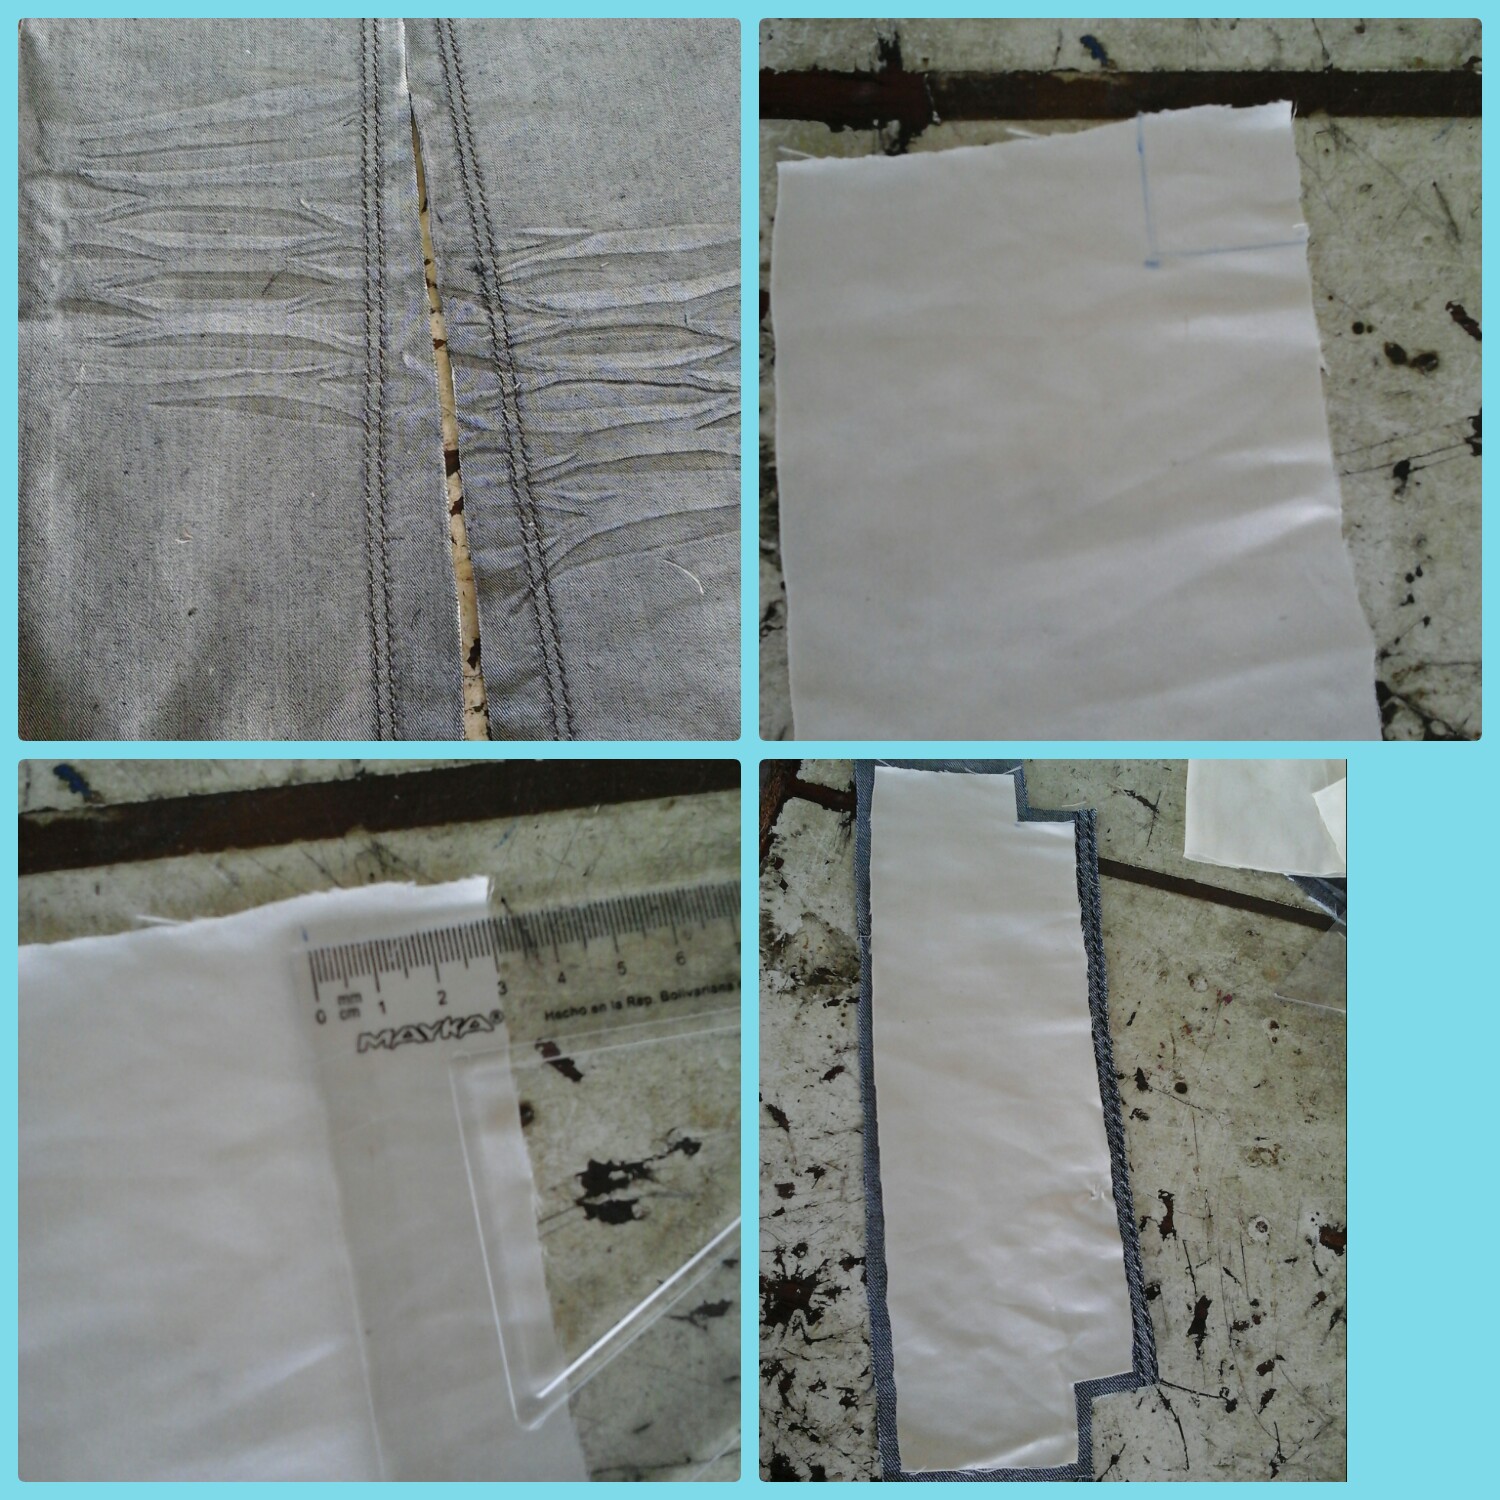
Para comenzar lo primero que hice fue tomar un trozo de tela jeans y recorté un par en forma rectangular, estos deben medir 30cm de ancho con 20cm de largo, estos serán delantero y posterior del bolso.
Para hacer la base del bolso, recorté un par de rectángulos de tela dry y jeans, estos deben medir 30cm de ancho con 12cm de largo, recorté un cuadrito de 3cm a cada lado, como pueden observar en la foto. De esta manera obtengo las piezas necesarias para comenzar hacer mi bolso.
To start the first thing I did was take a piece of jeans fabric and cut a pair into a rectangular shape, these should measure 30cm wide by 20cm long, these will be the front and back of the bag. To make the base of the bag, I cut out a couple of rectangles of dry cloth and jeans, these should measure 30cm wide by 12cm long, I cut a 3cm square on each side, as you can see in the photo. This way I get the necessary pieces to start making my bag.
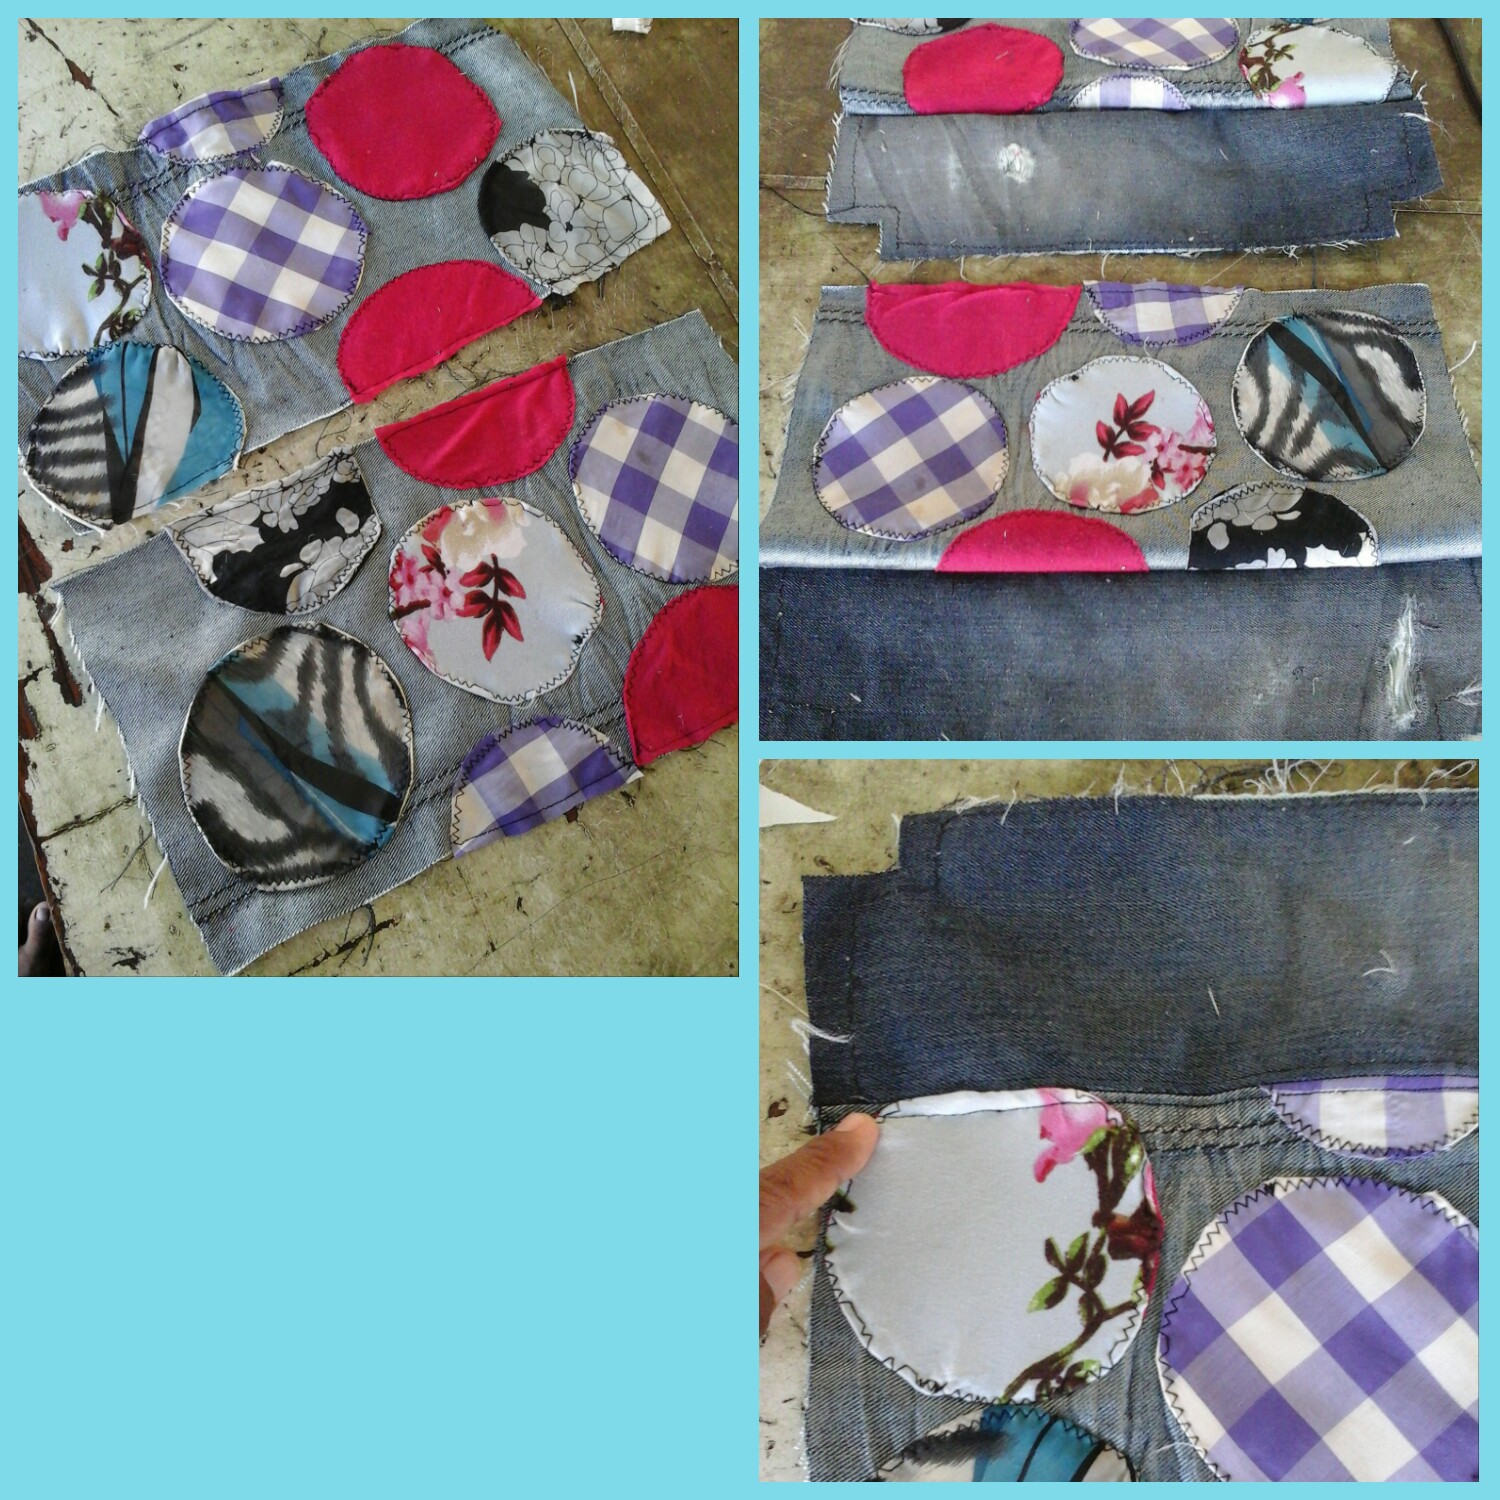
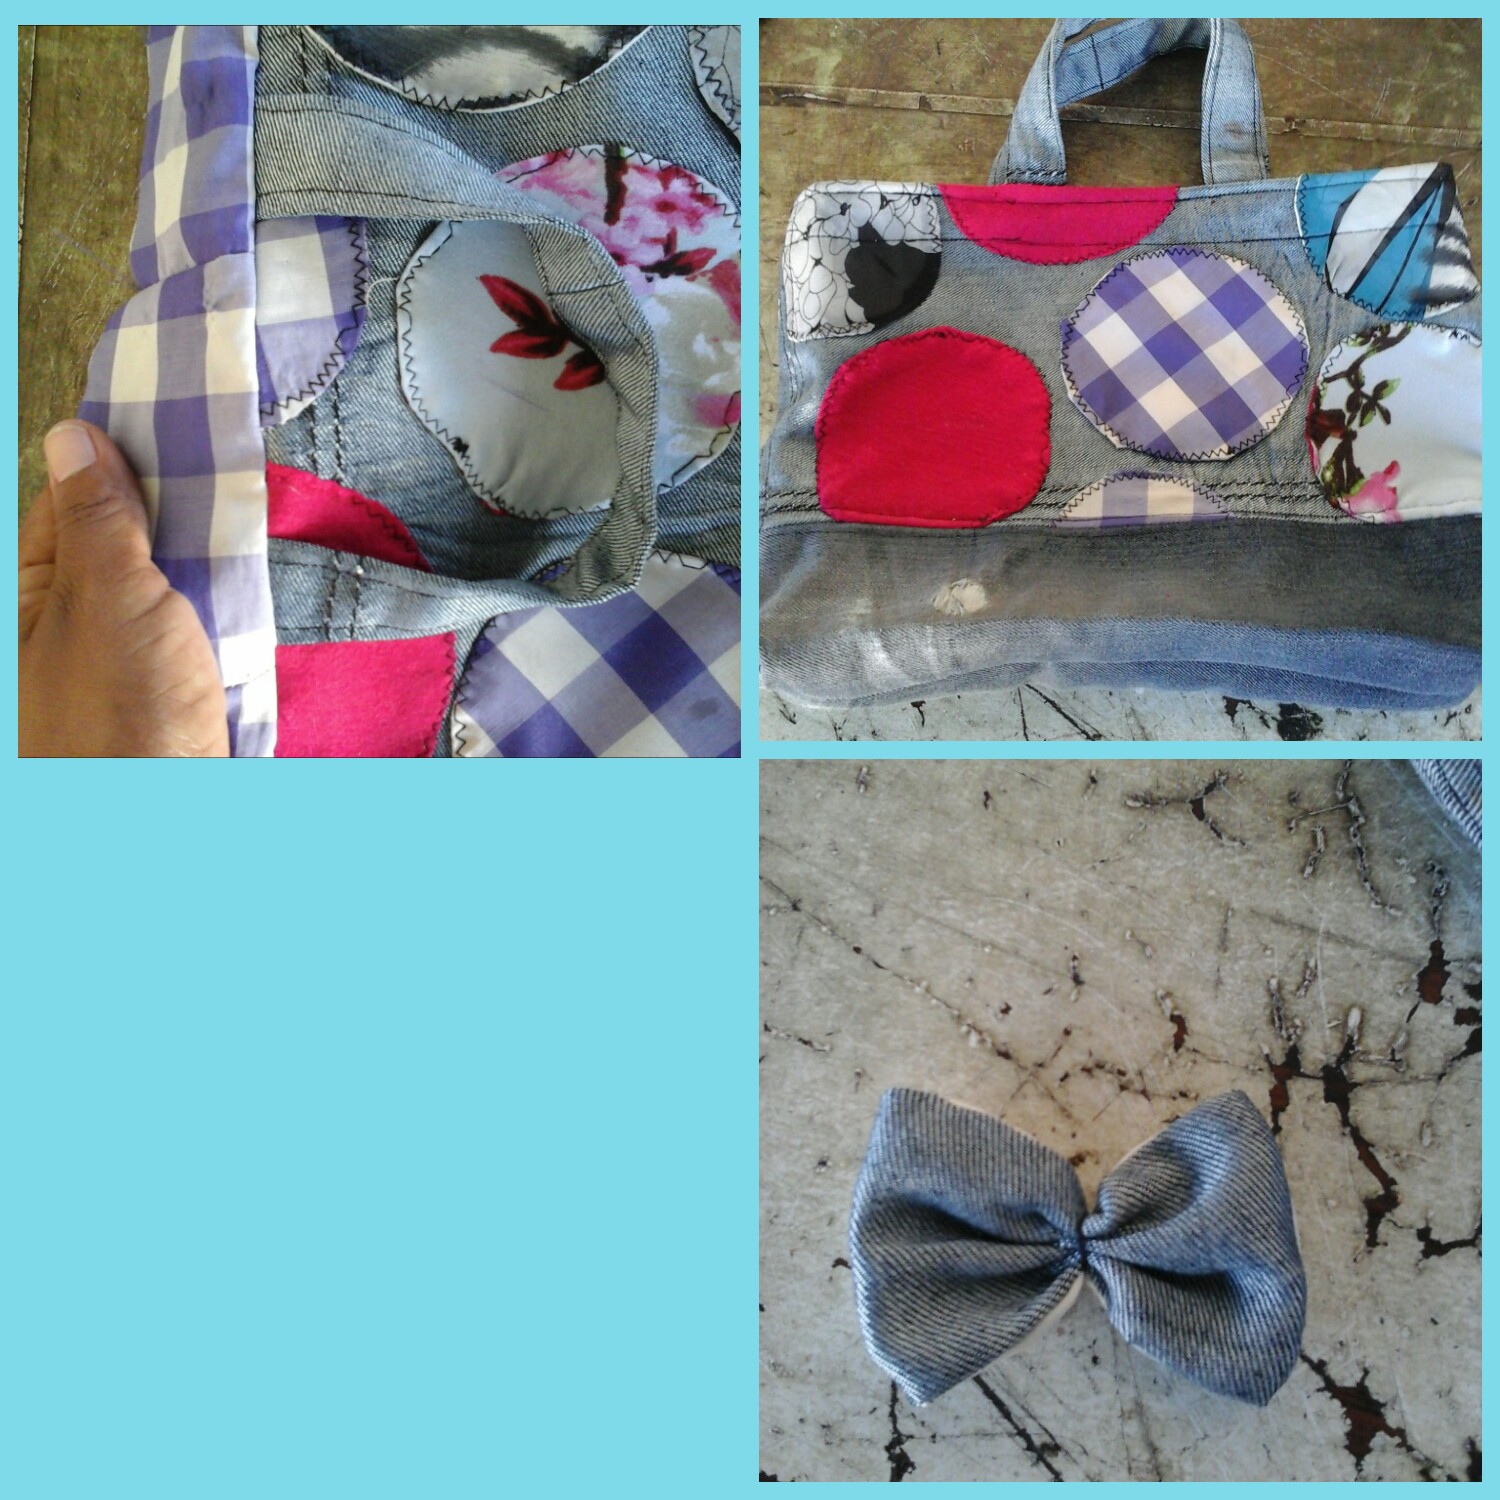
Para hacer los apliques redondos, lo que hice fue tomar los retazos de tela y recortar en forma cuadrada, tomé una pequeña tapa con forma redonda, y la coloqué sobre cada cuadro, marqué, recorté y cosí. Una vez que terminé de coser, corté para hacer una pequeña abertura en la parte trasera de cada aplique, esto me permitirá voltear cada uno sin dañar el borde.
To make the round appliques, what I did was I took the scraps of fabric and cut them into a square shape, I took a small round shaped cap, and I placed it over each square, I marked, I cut out and I sewed Once I'm done sewing, I cut to make a small slit in the back of each appliqué, this will allow me to flip each one over without damaging the edge.
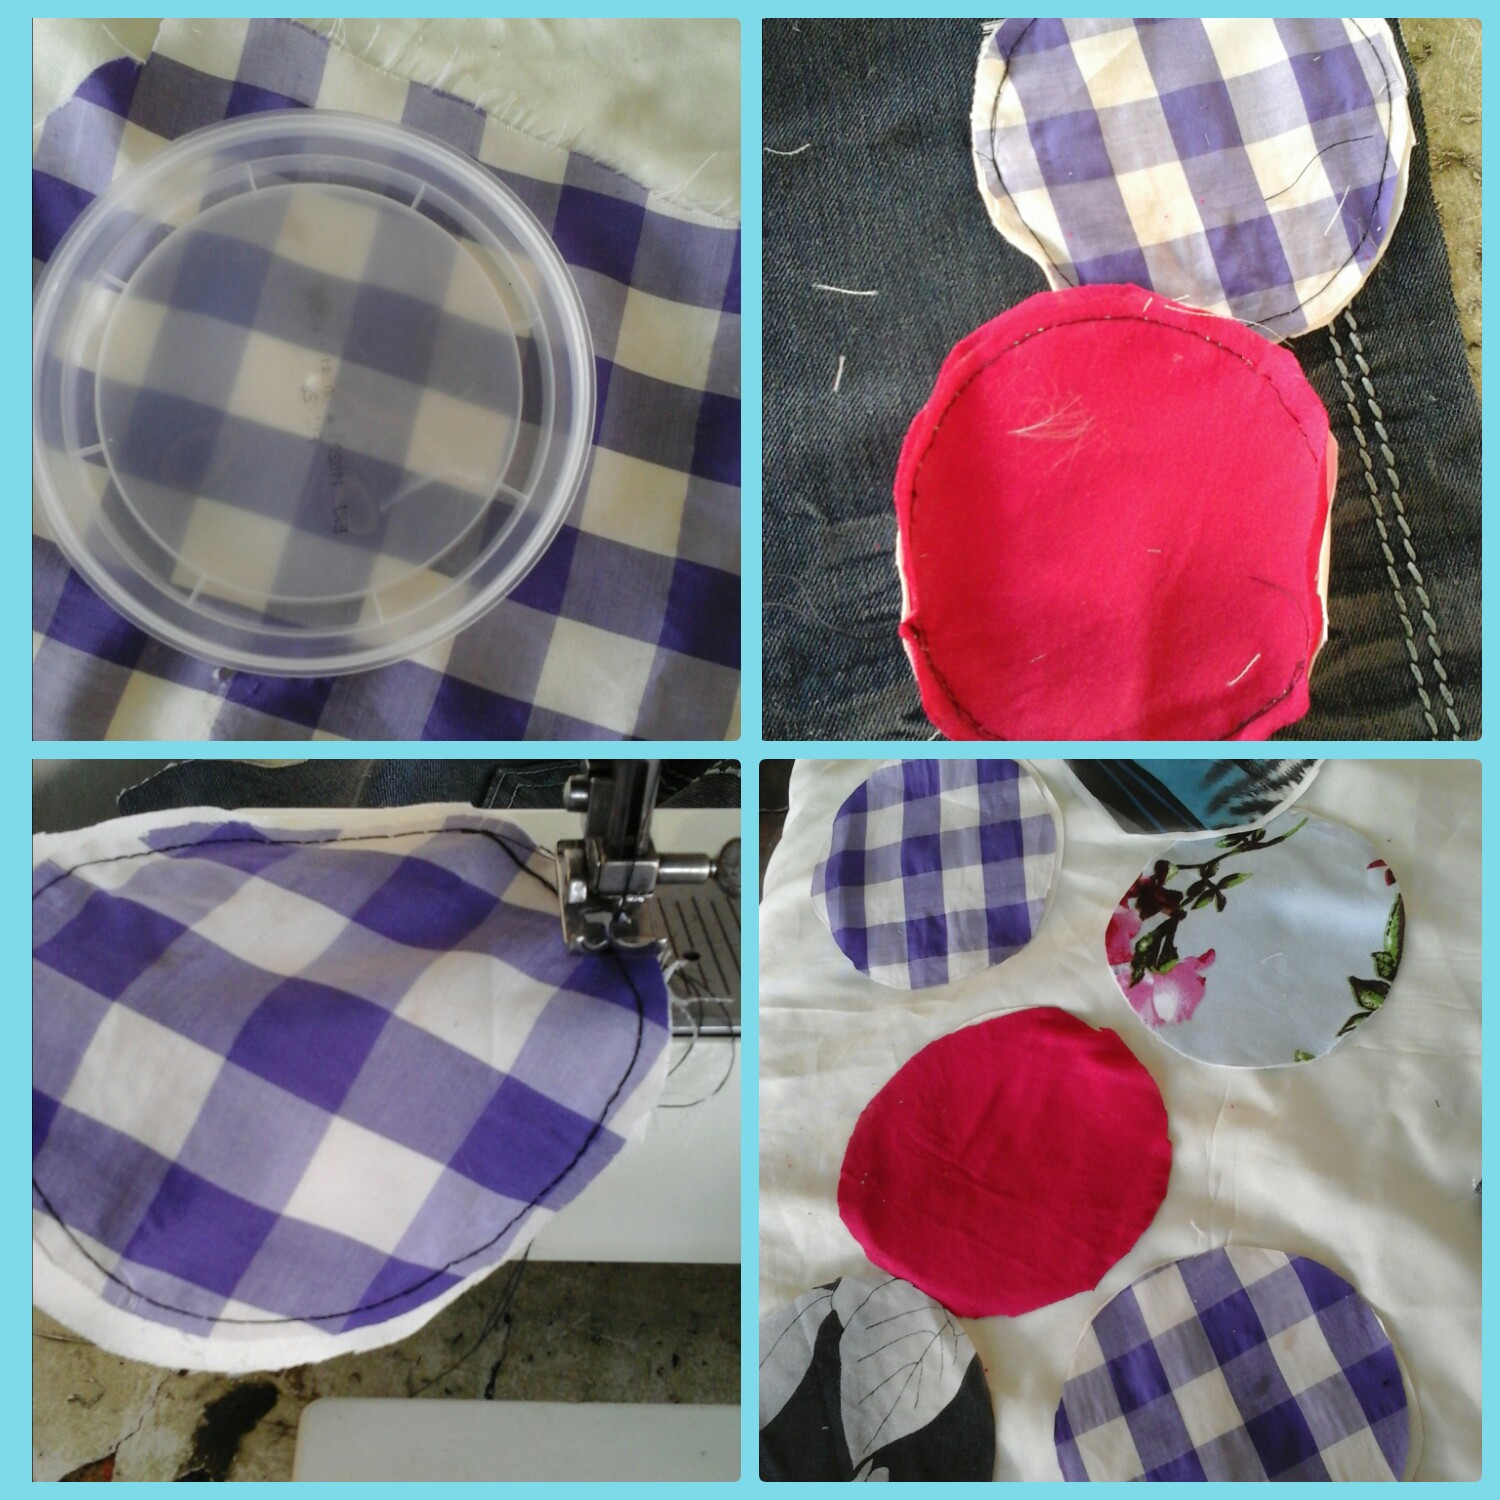
Cosí estos apliques redondos sobre la tela jeans, pero en este caso los coloque por la parte revés de la tela jeans, quise hacerlo de una manera diferente, por que siempre usamos la parte derecha de la tela, en este caso quiero aprovechar este lindo color gris brillante de la parte revés del jeans.
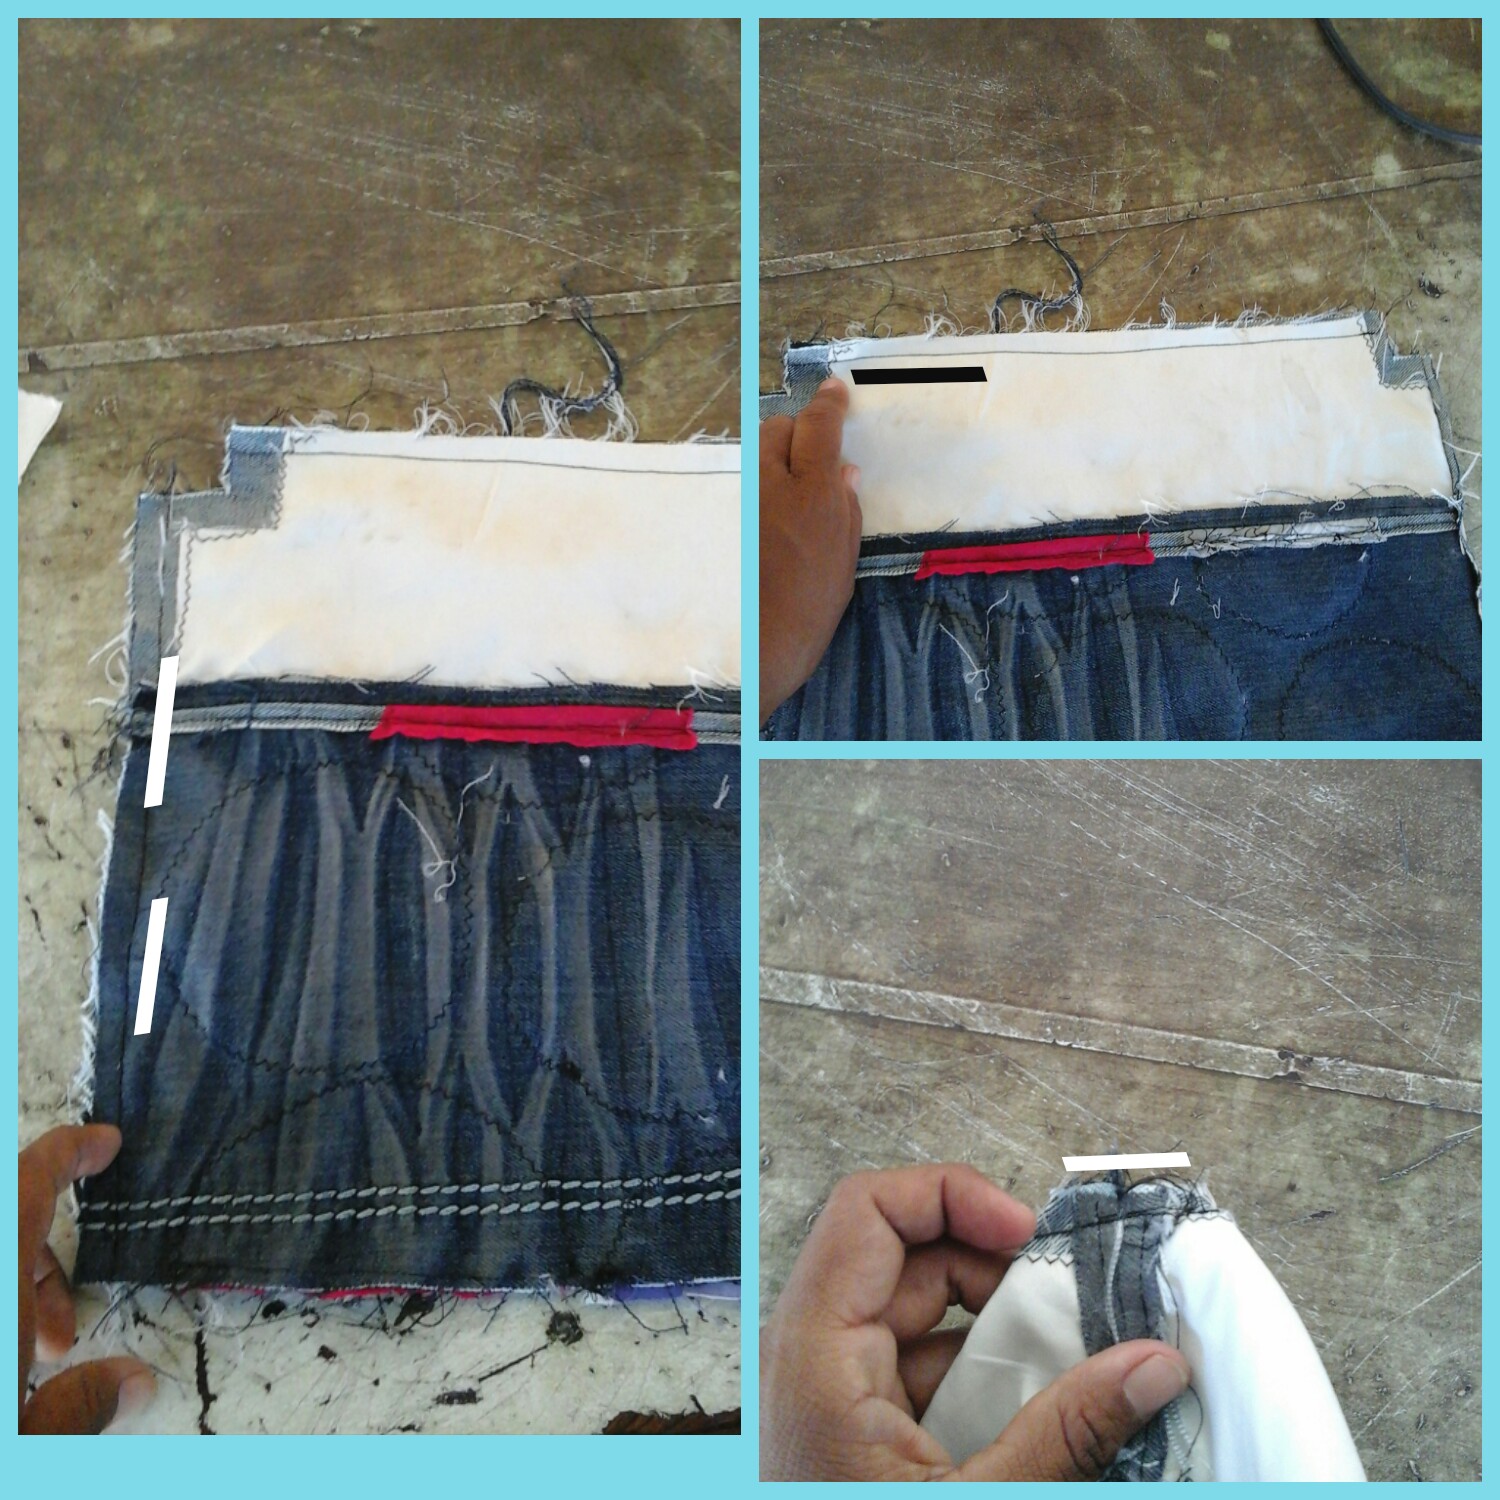
Seguidamente procedo a unir la base a la parte delantera y posterior, cosí, también hice doble costura por la parte derecha.
I sewed these round appliques on the jeans fabric, but in this case I placed them on the wrong side of the jeans fabric, I wanted to do it in a different way, because we always use the right side of the fabric, in this case I want to take advantage of this nice bright gray color from the back of the jeans. Then I proceed to join the base to the front and back, I sewed, I also double-stitched on the right side.
En este paso voy a coser cada pieza para comenzar a dar forma a este bolso, comence a unir delantero y posterior, cosiendo por los laterales, cosi la parte inferior la cual es la base y la abertura a cada lado.
In this step I am going to sew each piece to start shaping this bag, I started joining the front and back, sewing the sides, sewing the bottom part which is the base and the opening on each side.
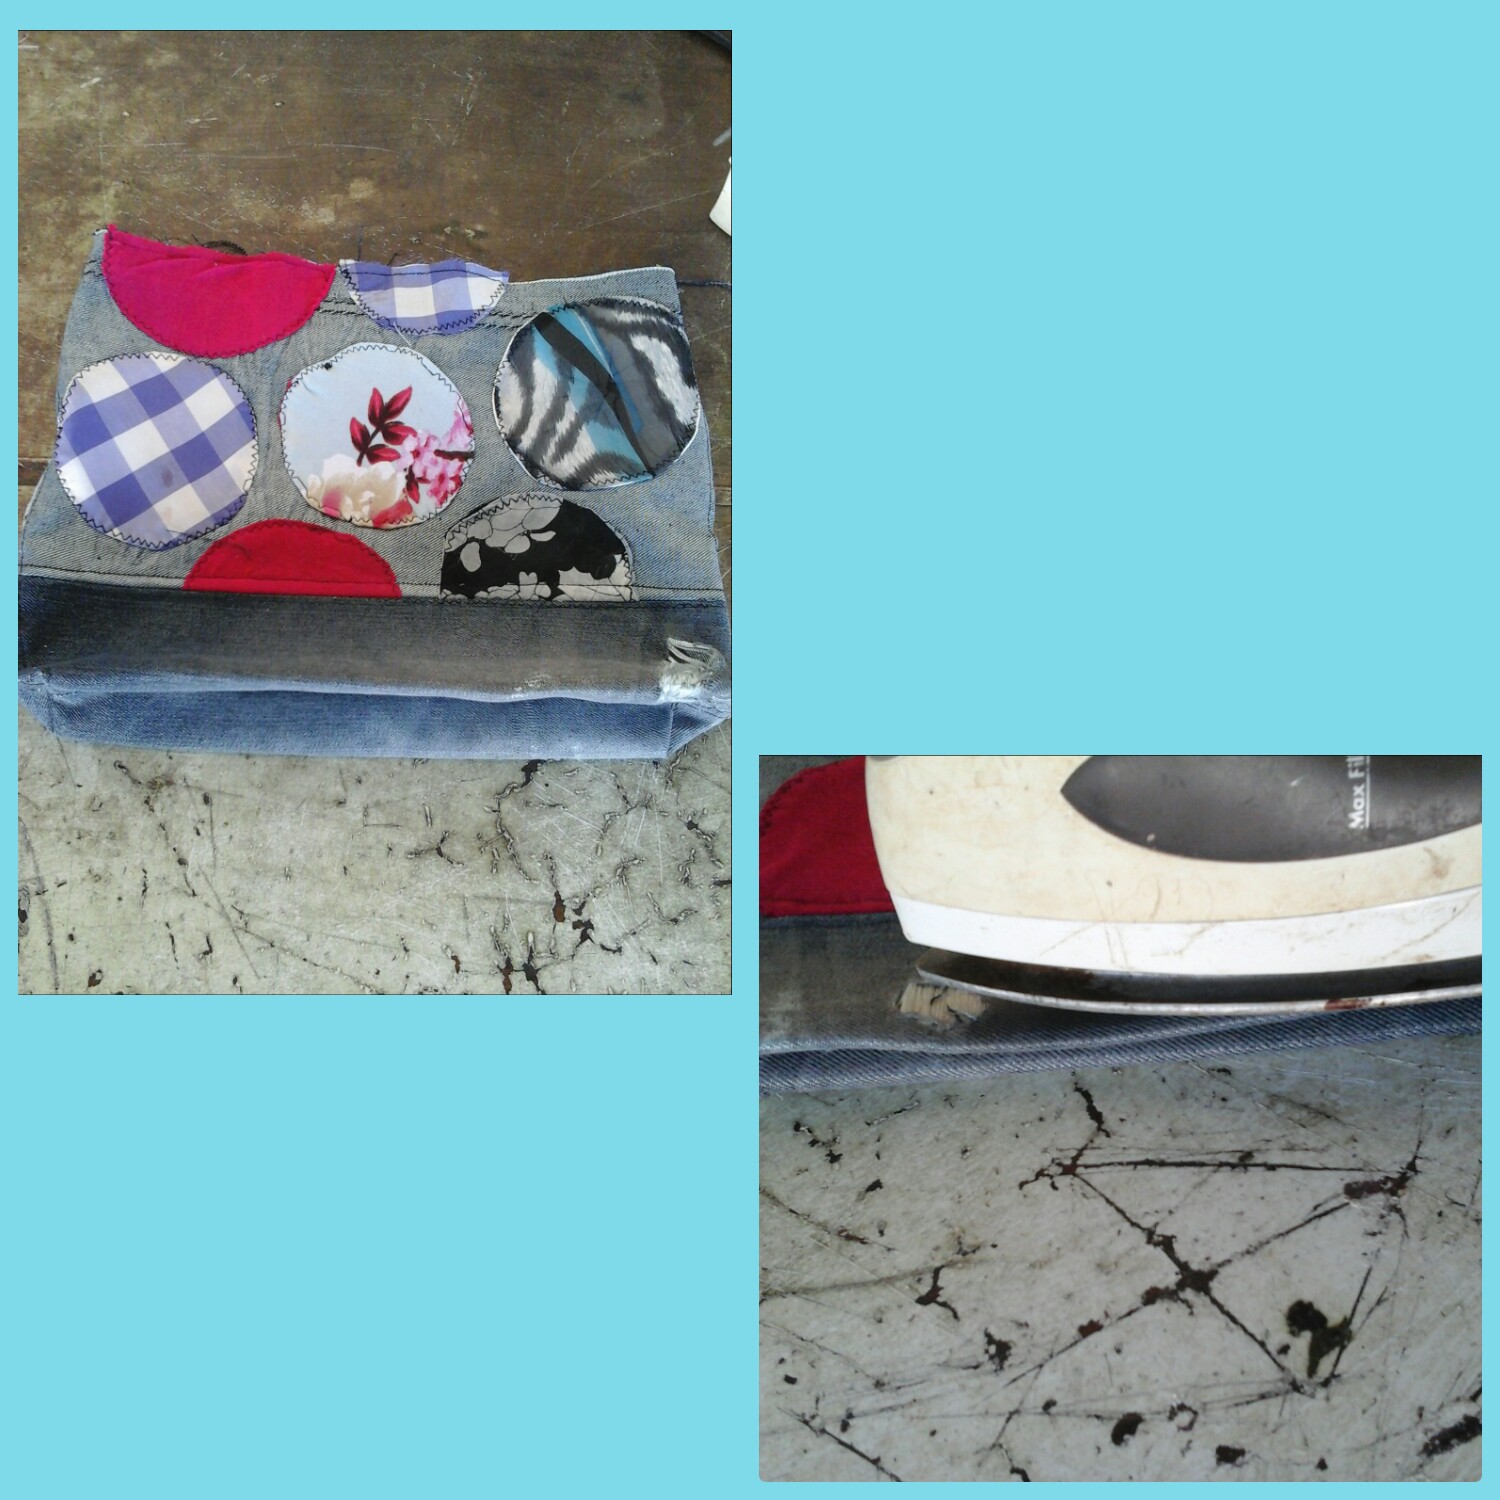
Ahora volteo por la parte derecha y plancho un poco para darke forma y pulir este bolso.
Now I flip to the right side and iron a bit to darke shape and polish this bag.
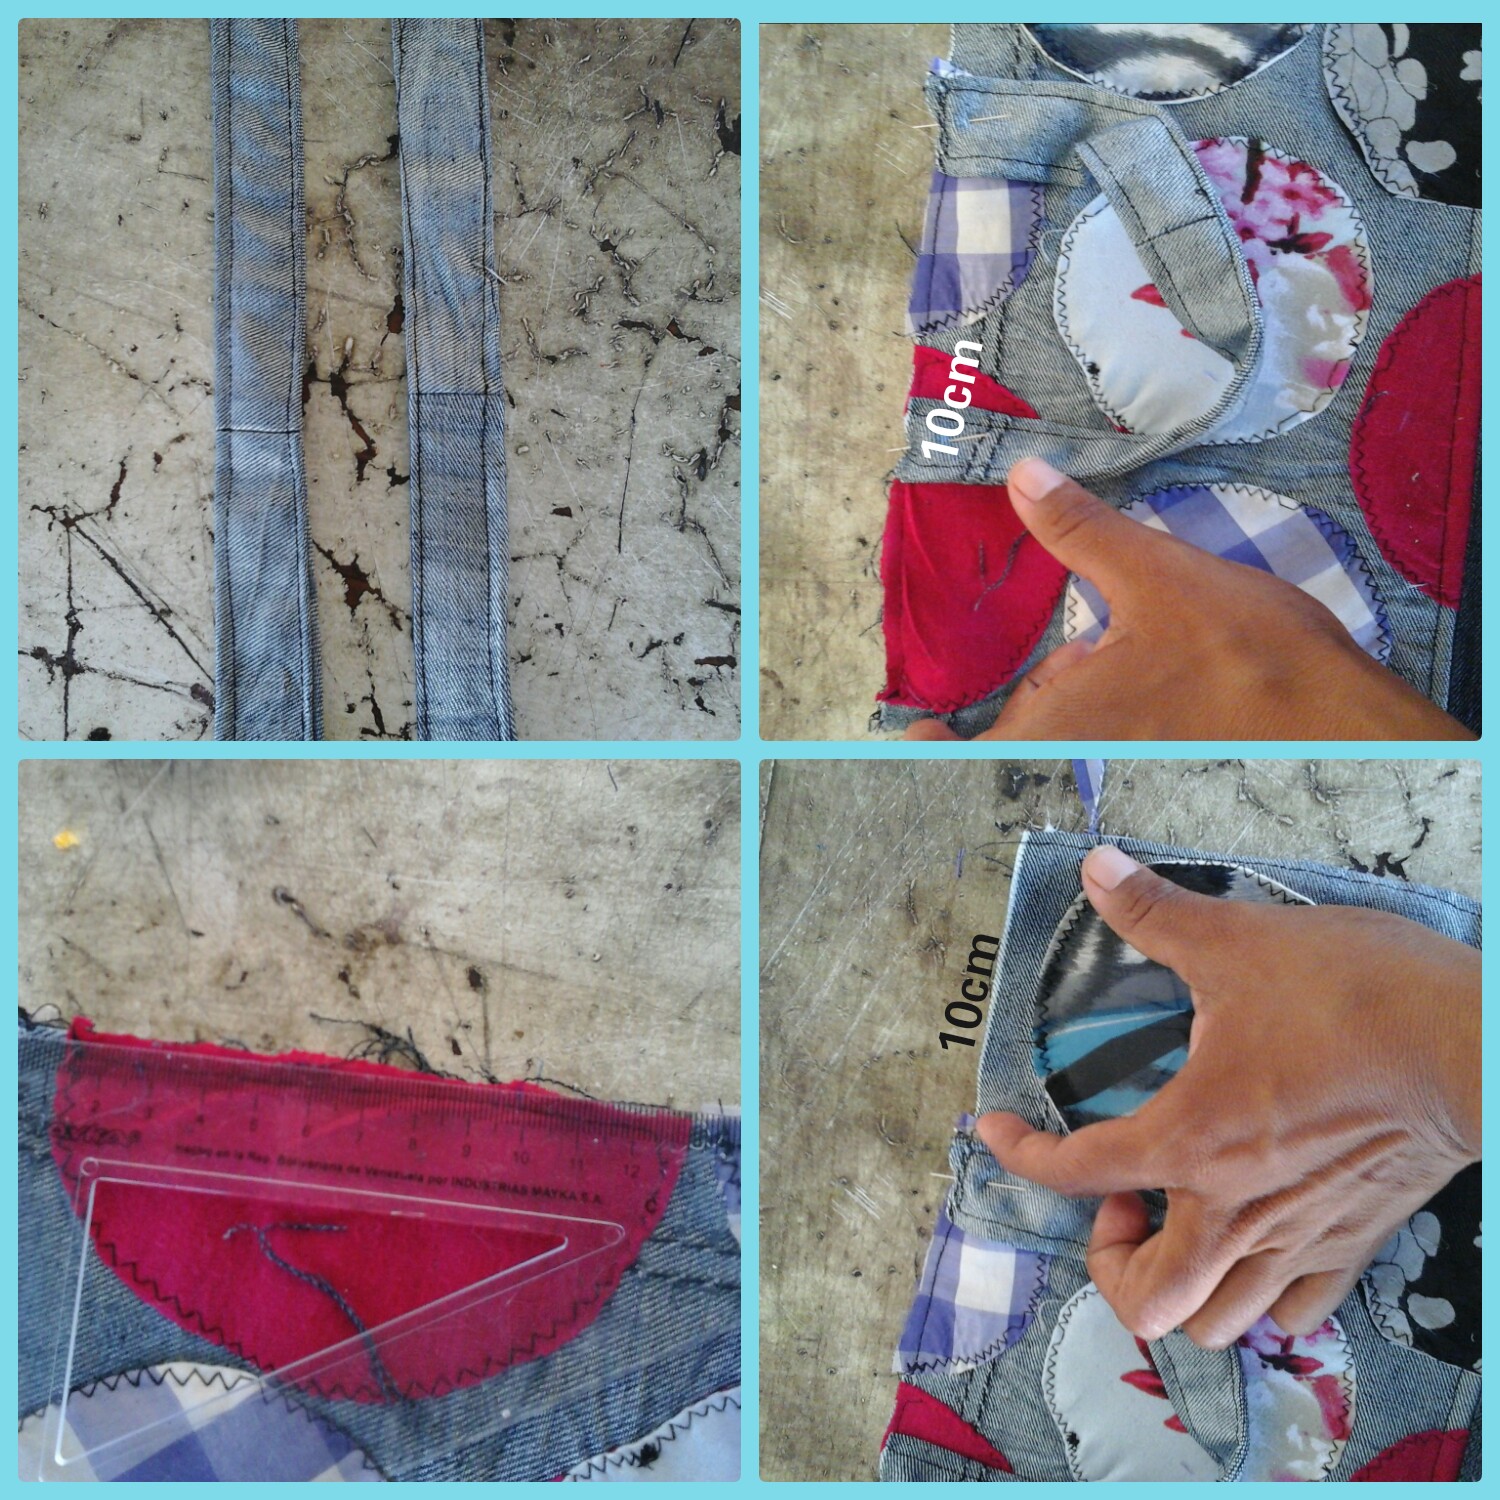
Para hacer los colgantes, recorté un par de tiras y las cosí, antes de coserla al bolso, primero medi 10cm de cada lado en la parte superior, marqué y sujete con alfileres antes de coser en la máquina, de esta manera quedarán centrados.
To make the pendants, I cut a couple of strips and sewed them together, before sewing it to the bag, I first measured 10cm from each side at the top, marked and pinned before sewing on the machine, this way they will be centered.
Para finalizar cosí una fina tira en el borde del bolso, y sobre los colgantes; doble, llevandola hacía la parte revés o interior del bolso e hice doble costura.
Finalmente hice un pequeño moño jeans y lo cosí en la parte delantera para terminar de decorar.
To finish I sewed a thin strip on the edge of the bag, and on the pendants; double, taking it to the back or inside of the bag and I double stitched. Finally I made a small jeans bow and sewed it on the front to finish decorating.
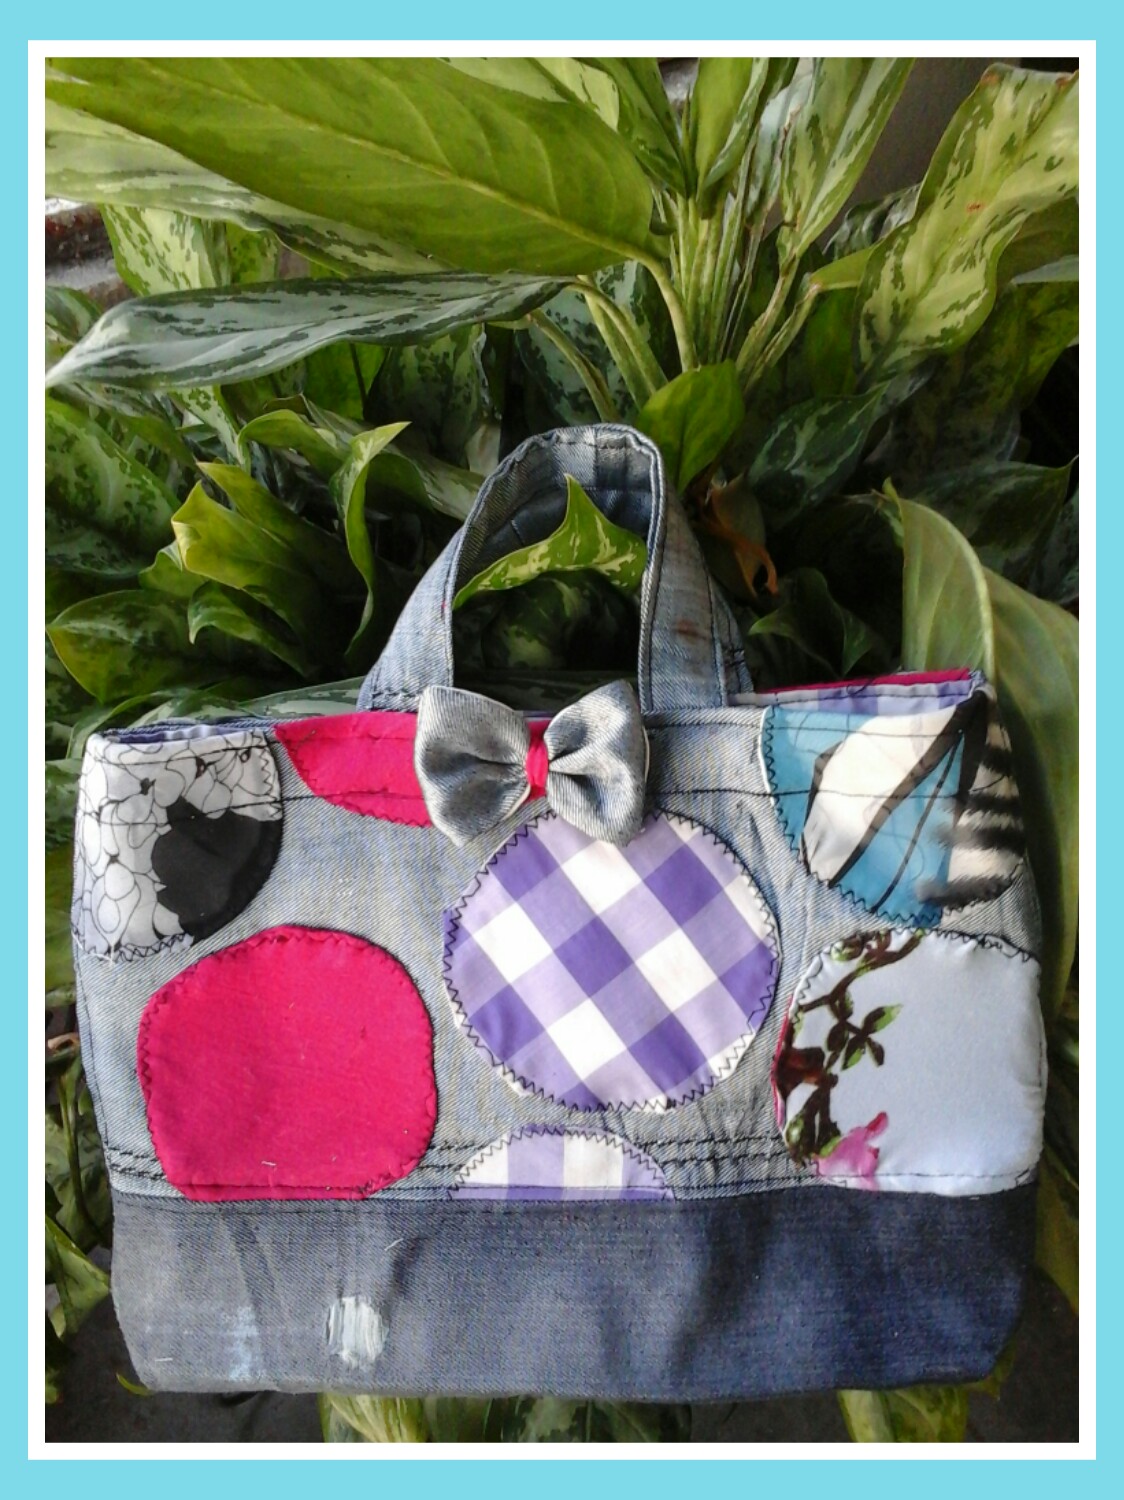
RESULT.
Este es el resultado que obtuve después de tanto procedimiento ¡jeje! asi es como ha quedado mi pequeño bolso jeans de mano. Así que no quiero esperar para usarlo desde ya, creo que apesar de ser pequeño, podrá ser de mucha utilidad.
Animense a confeccionar uno con todos esos retazos que tenemos.
This is the result I got after so much procedure hehe! This is how my small jeans handbag has turned out. So I don't want to wait to use it now, I think that despite being small, it could be very useful. Dare to make one with all those scraps we have.
Queridos amigos, ha sido un placer compartir con todos ustedes este hermoso proyecto. Les doy las gracias por leer cada paso y por su apoyo, el cual aprecio mucho.
Les envio ¡un fuerte abrazo virtual y les deseo muchas bendiciones! que tengan un fin de semana agradable, cuidense mucho ¡se les quiere!
Dear friends, it has been a pleasure to share this beautiful project with all of you. I thank you for reading each step and for your support, which I greatly appreciate. I send you a big virtual hug and wish you many blessings! Have a nice weekend, take care of yourselves, you are loved!
¡THANK YOU FOR VISITING MY POST!♥
Todas las fotos son de mi autoria capturadas por mi tablet Samsung galaxy, editadas por Collage_maker. Traductor utilizado ESP/ING (google.com)
All photos are my own, captured by my Samsung galaxy tablet, edited by Collage_maker. Translator used ESP/ING (google.com)
Me encantó el resultado, en especial los apliques, es que los mismos le dieron tanta vida y originalidad al bolso.
Gracias por compartir tu contenido creativo con nosotros.
Saludos
Muchas gracias!
Your content has been voted as a part of Encouragement program. Keep up the good work!
Use Ecency daily to boost your growth on platform!
Support Ecency
Vote for new Proposal
Delegate HP and earn more
Thank you for sharing this amazing post on HIVE!
Your content got selected by our fellow curator @rezoanulvibes & you just received a little thank you via an upvote from our non-profit curation initiative!
You will be featured in one of our recurring curation compilations and on our pinterest boards! Both are aiming to offer you a stage to widen your audience within and outside of the DIY scene of hive.
Join the official DIYHub community on HIVE and show us more of your amazing work and feel free to connect with us and other DIYers via our discord server: https://discord.gg/mY5uCfQ !
If you want to support our goal to motivate other DIY/art/music/homesteading/... creators just delegate to us and earn 100% of your curation rewards!
Stay creative & hive on!
Beautiful hand bag. I really want to learn how to sew hand back because the remain leather at my shop is always wasted
Muchas gracias!
Muy buena y práctica esta idea para reutilizar los jeans, gracias por compartir, saludos!
Muchas gracias, saludos y bendiciones!
Los detalles en circulo te quedarón muy lindos, me encanta la elaboración de bolsos siempre he tenido curiosidad por confeccionar uno, pronto me animare je je... aunque no es muy grande como deseabas, de seguro guardaras muchas cosas...
Muchas gracias!