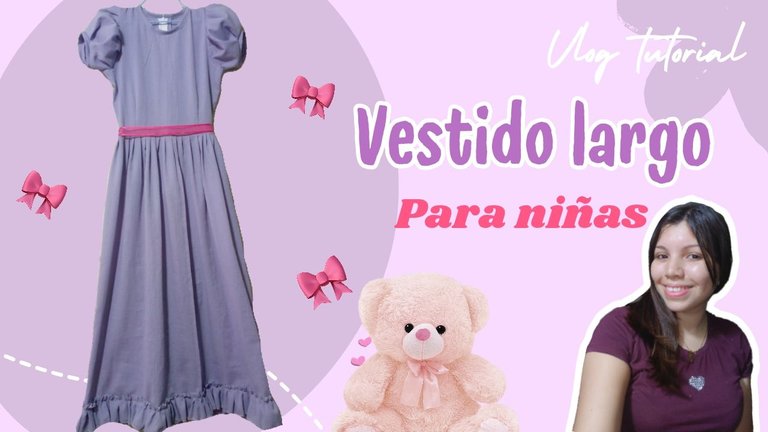
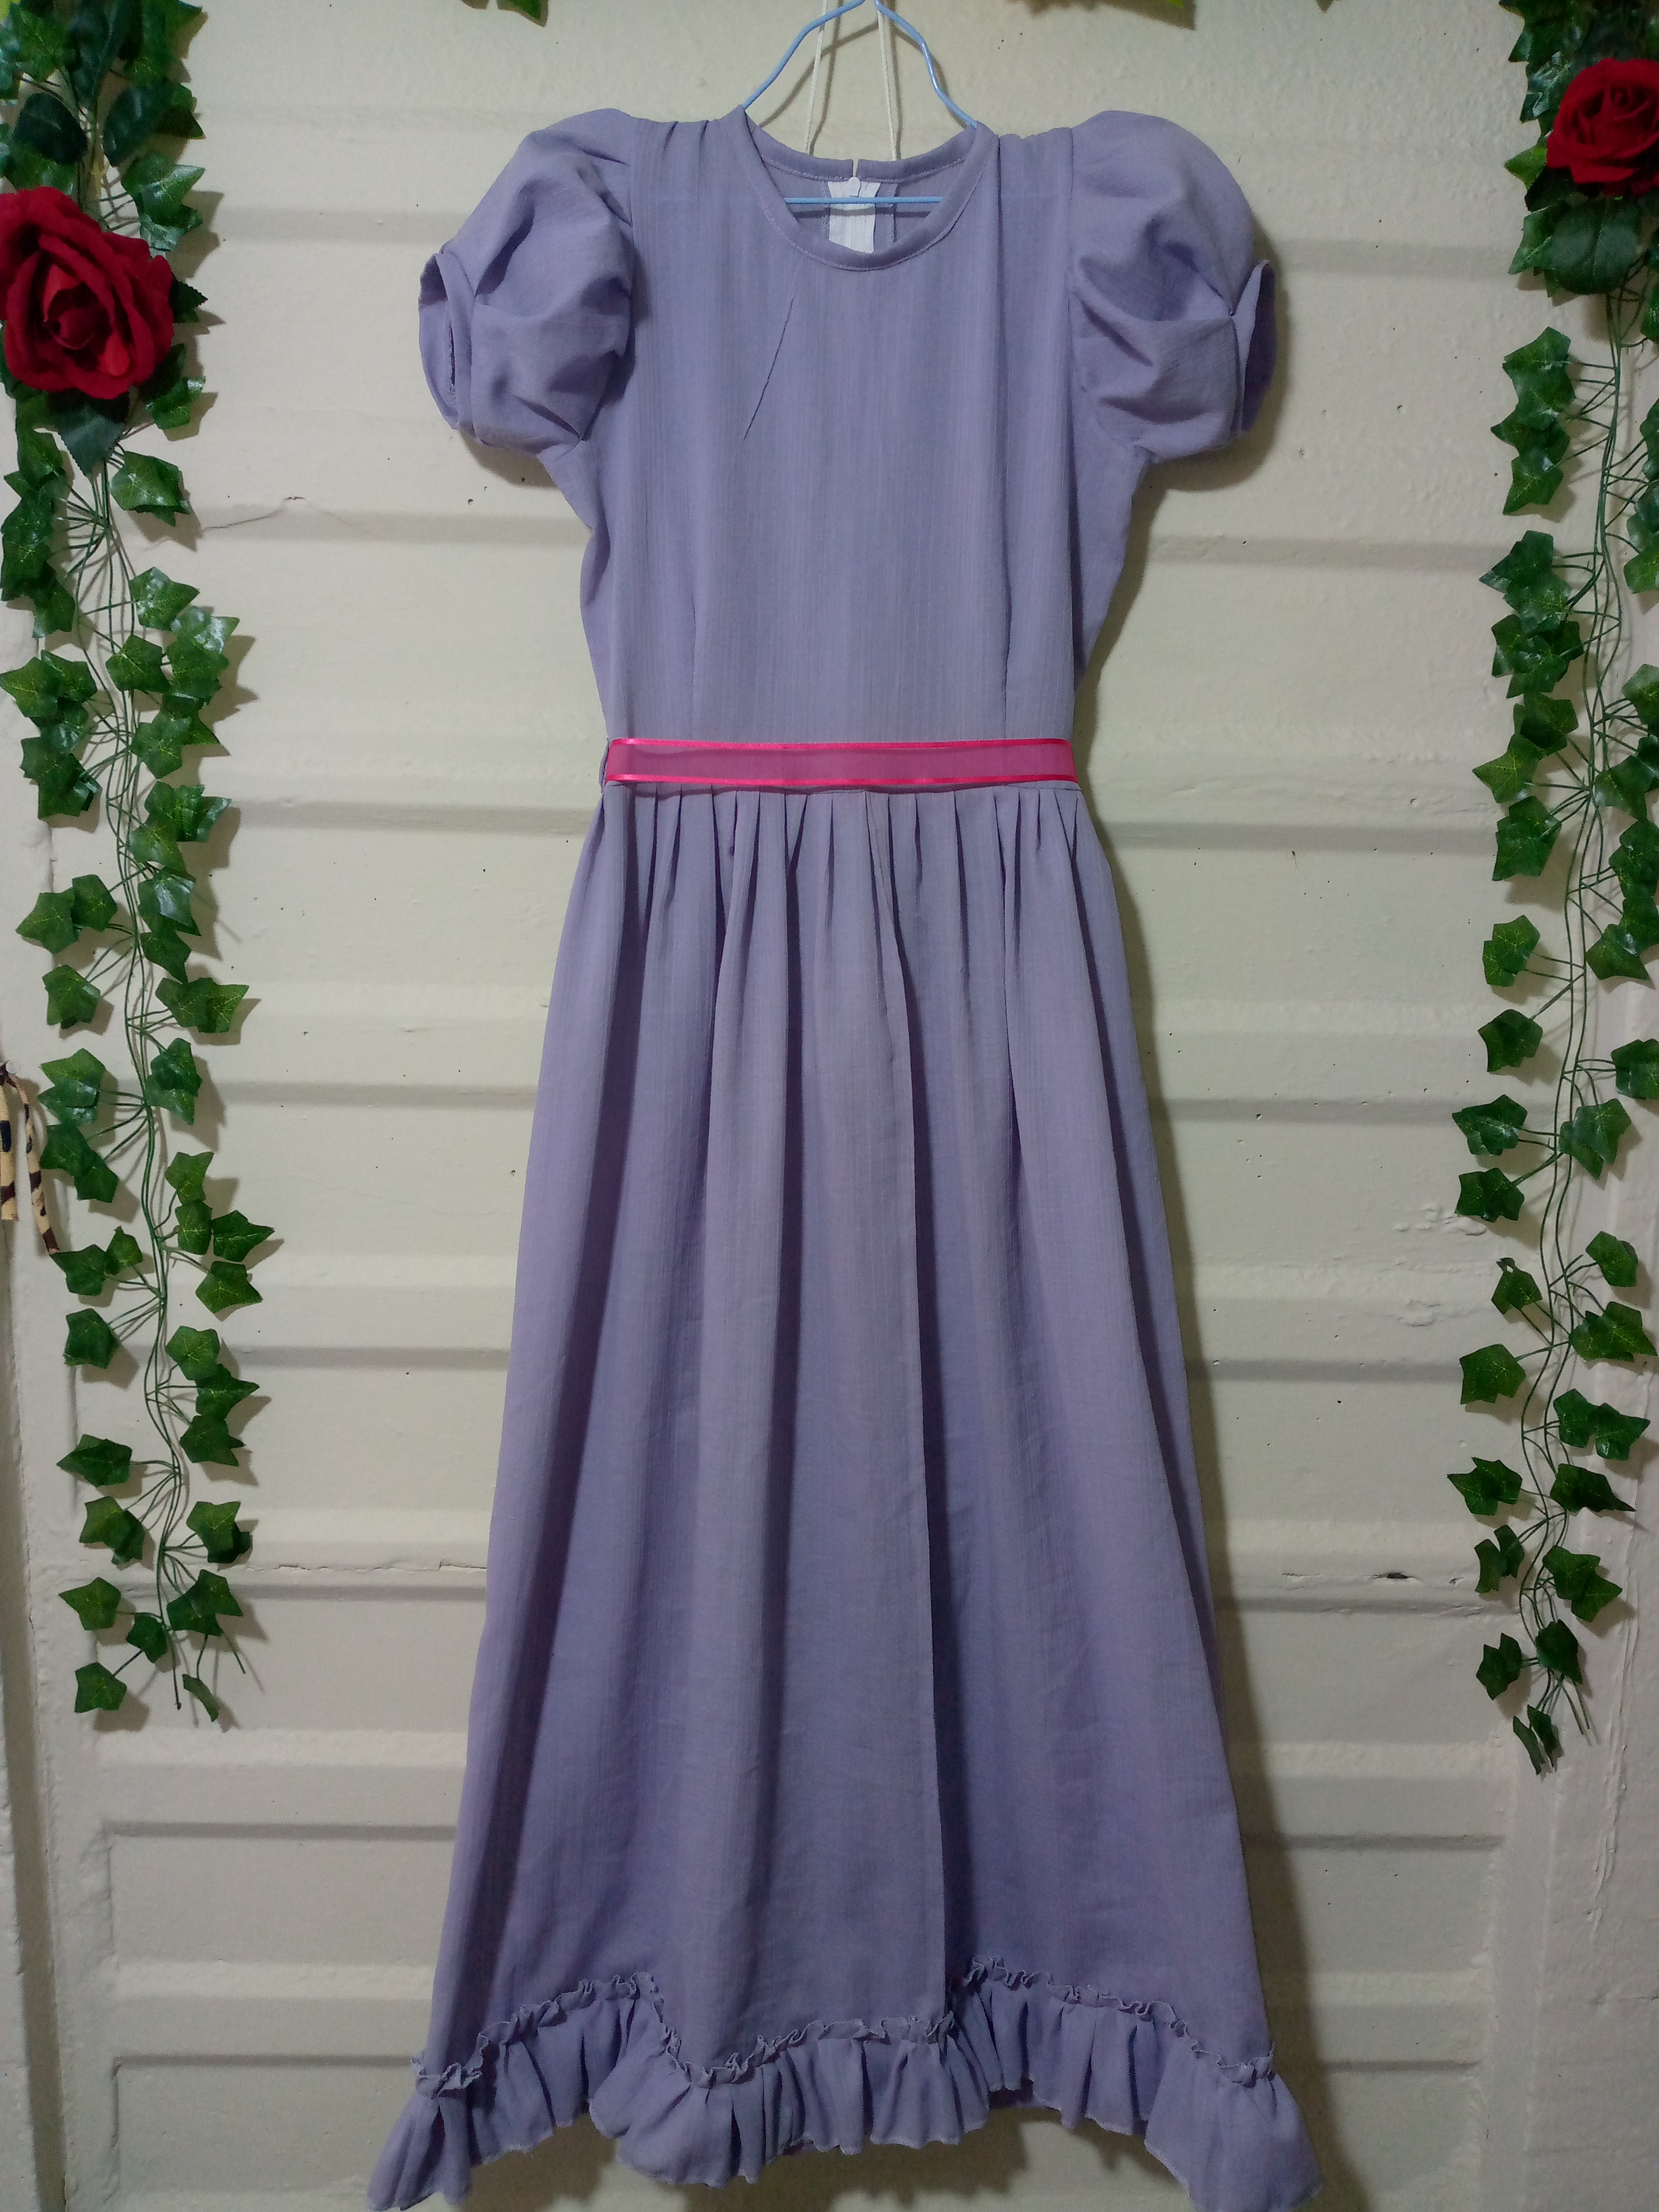
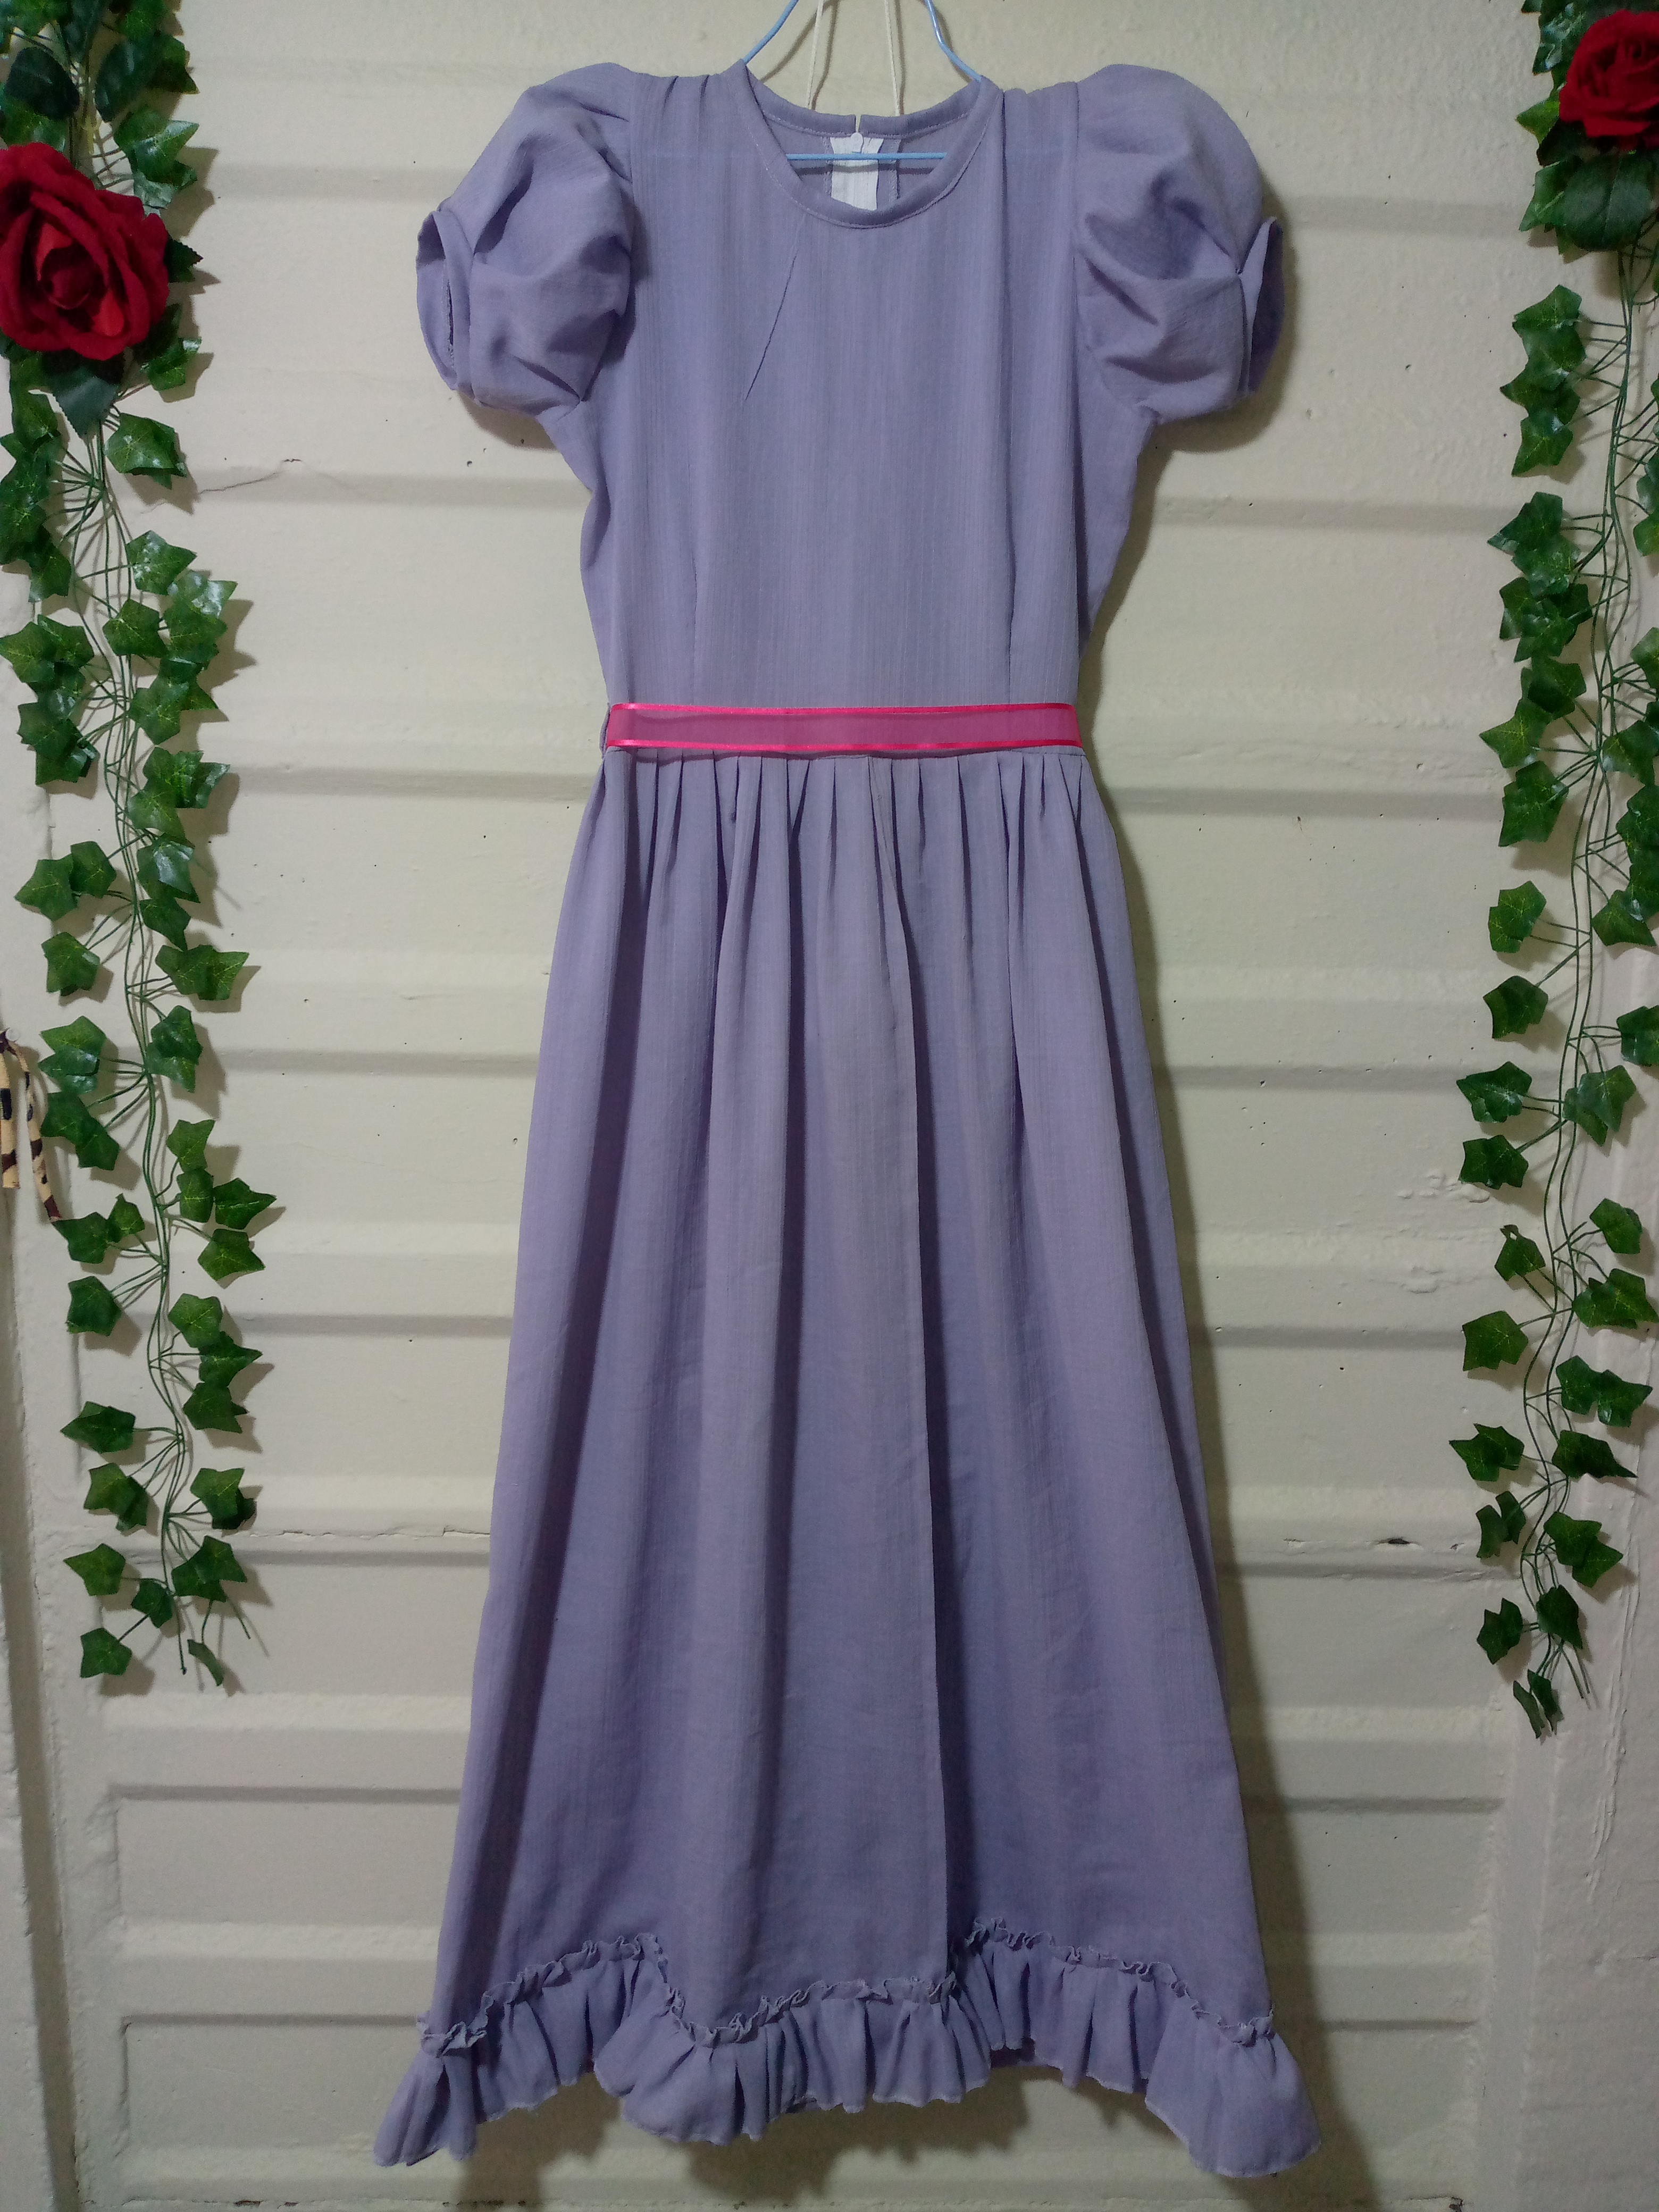
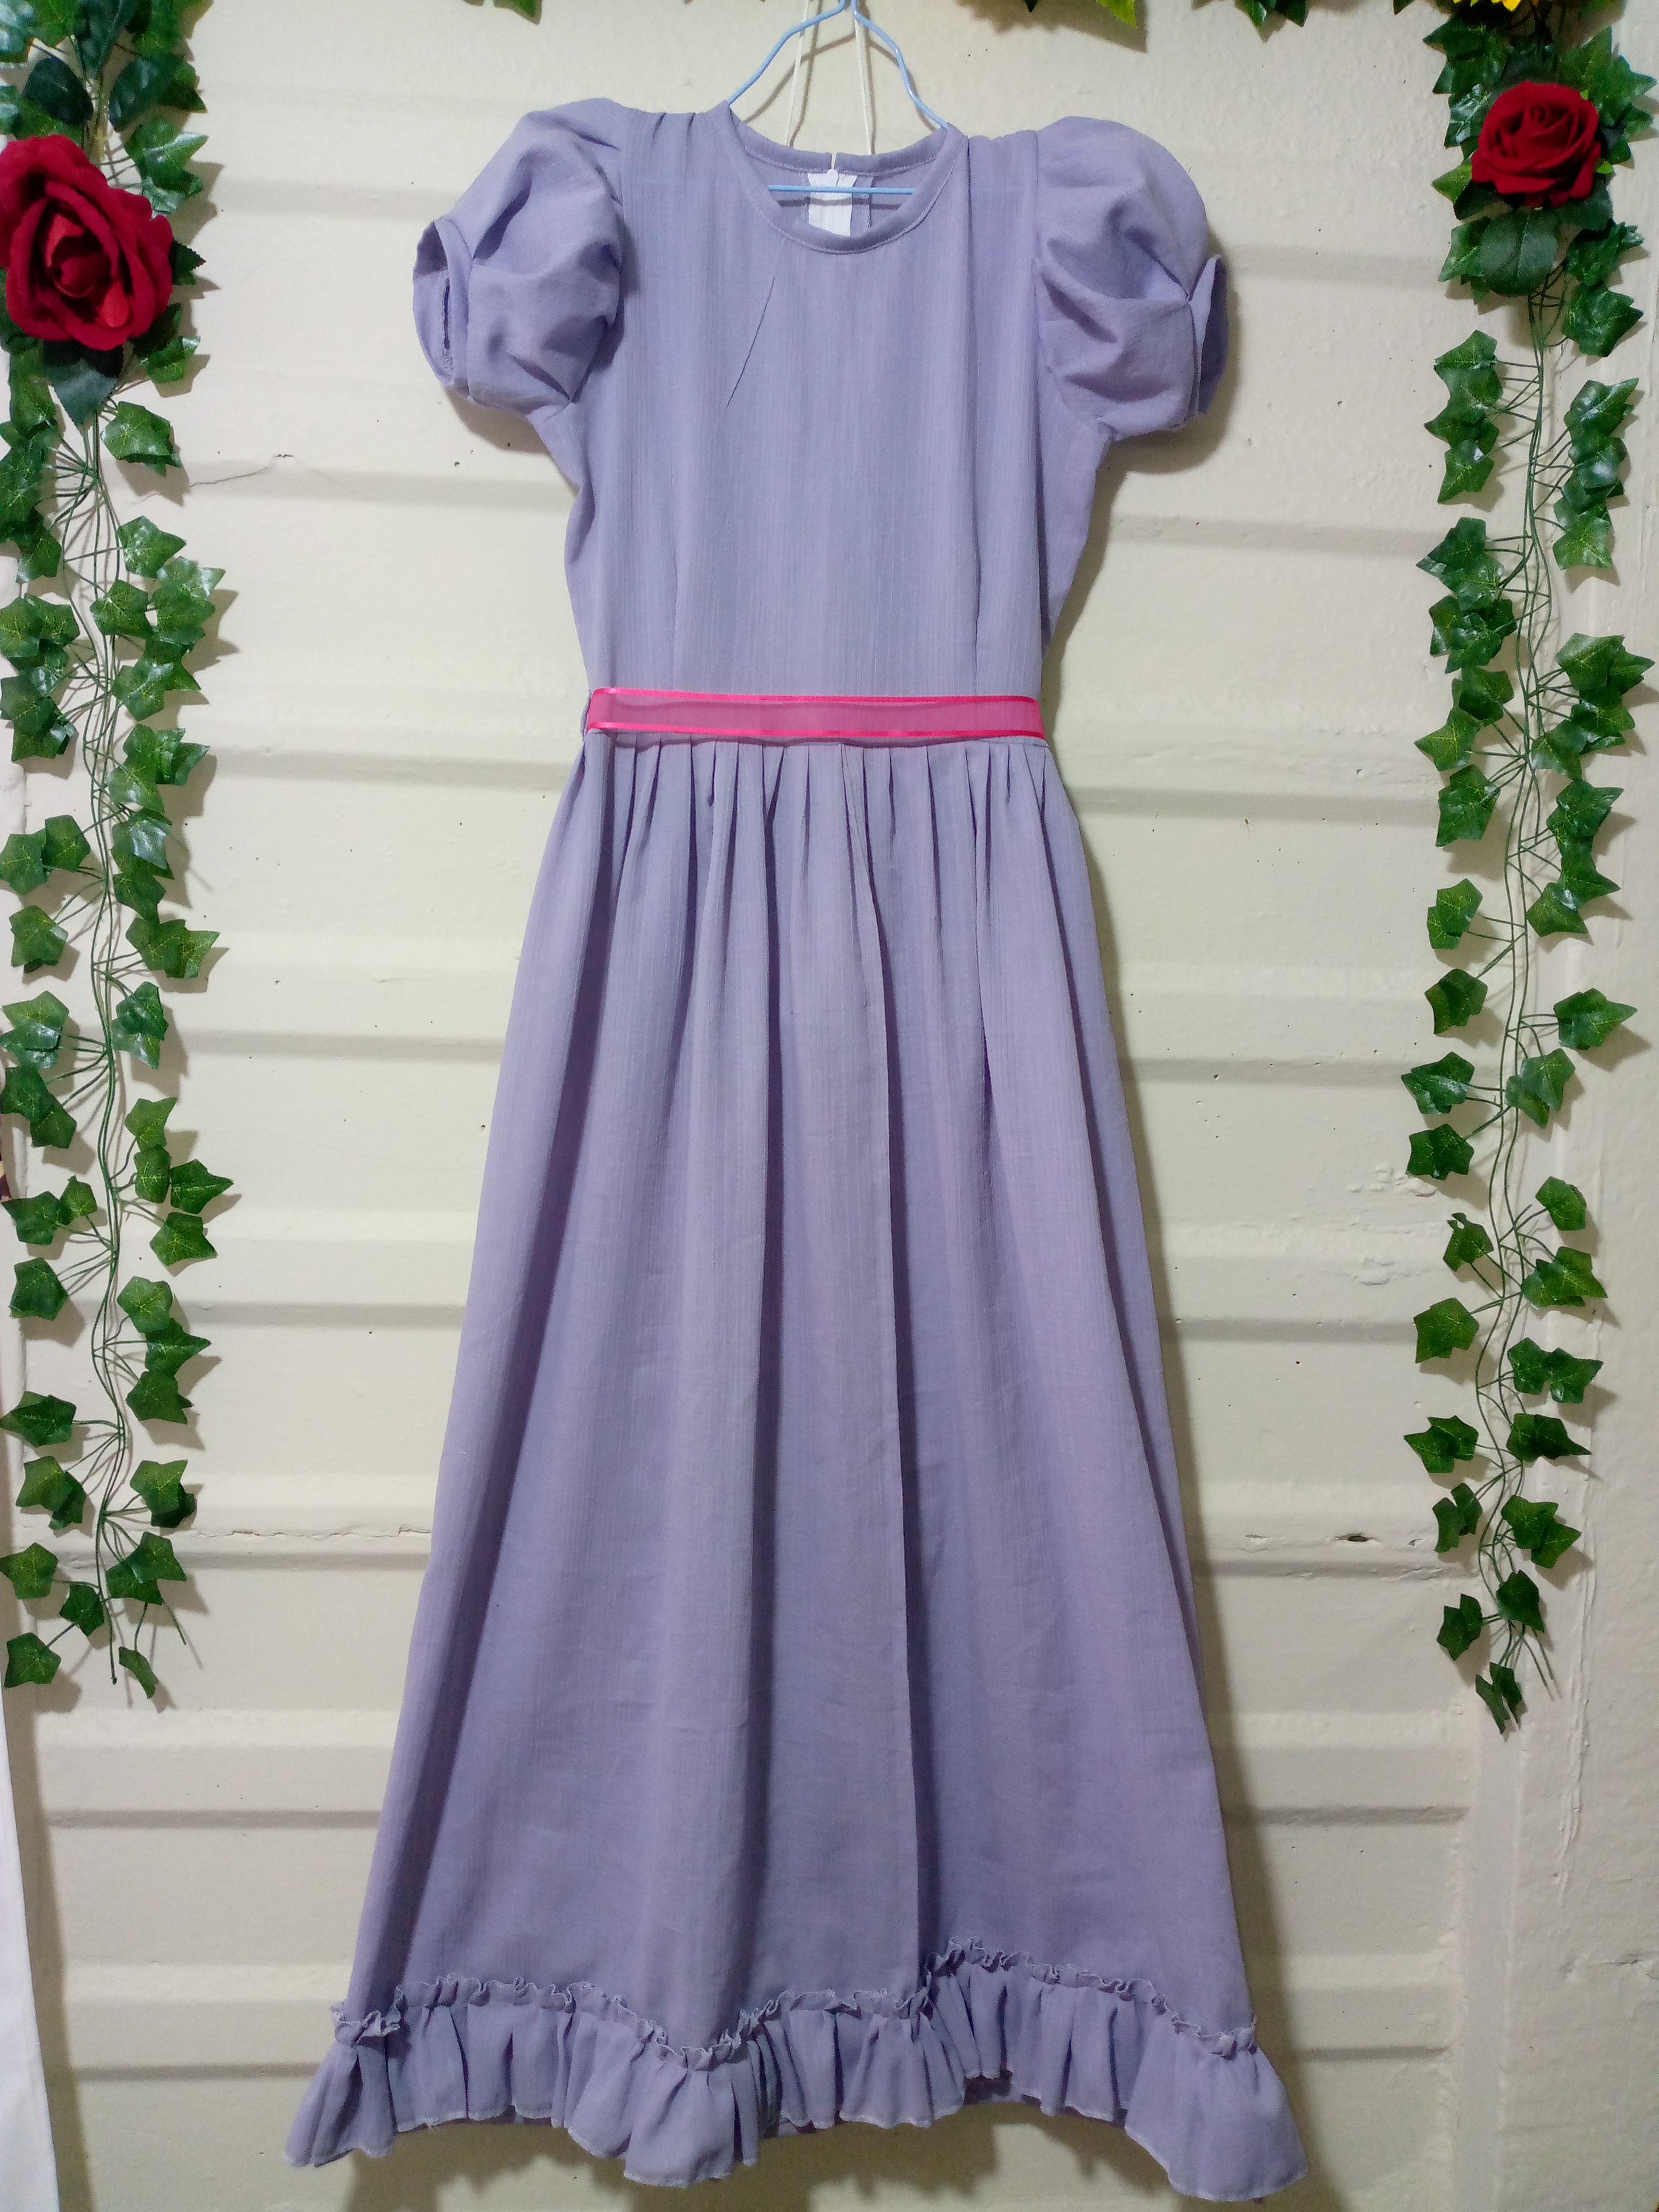
How are you #needlewokers I'm glad to know that you are very well with today's blessing. This afternoon I want to share with you the process of how I made a simple, long dress for a girl and a little elegant, my client wanted the dress to be as elegant as possible so she wanted me to make some sleeves that I call bombachas or with pleats in the armhole area and that gives a more princess-cut effect to the dress, I also wanted the bottom edge of the dress to have lace made of the same fabric with gathering, I made the seams with my overlock machine to highlight the delicate seams, finally as a decoration I wanted to place a fuchsia ribbon around the waist, if you really like making dresses you came to the right place where I will teach you in this simple blog how to make it.
.jpg)
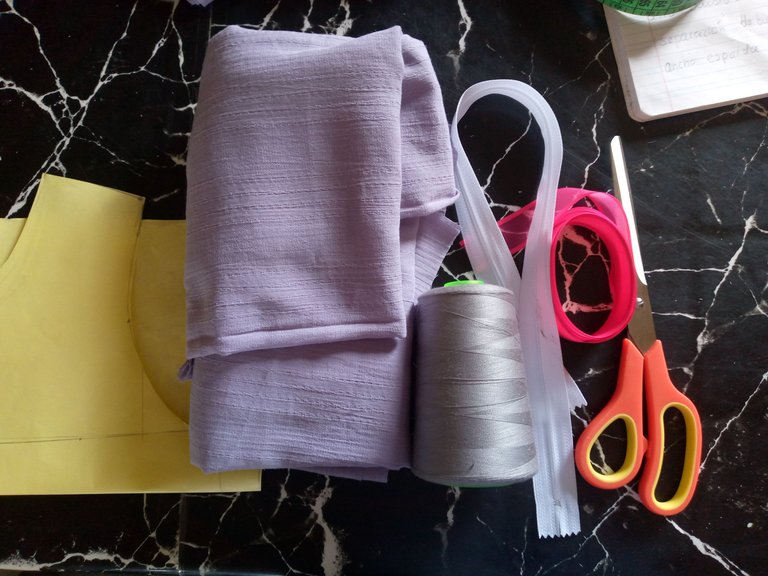
Materiales:// Materials:
- 1.40 cm de tela suave
- Hilo
- Alfileres
- Cinta para decorar
- Máquina de coser
- Cierre de 60 cm de largo
- Patrones
- Tijera
- 1.40 cm of soft fabric
- Thread
- Pins
- Ribbon for decoration
- Sewing machine
- 60 cm long zipper
- Patterns
- Scissors
Pasos a seguir://Steps to follow:
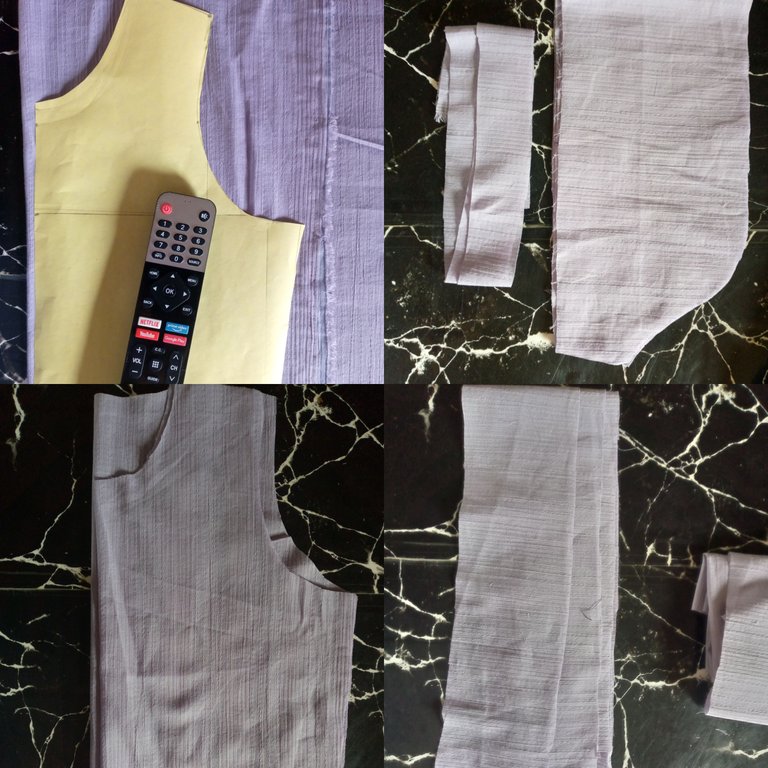
Paso 01
Step 01
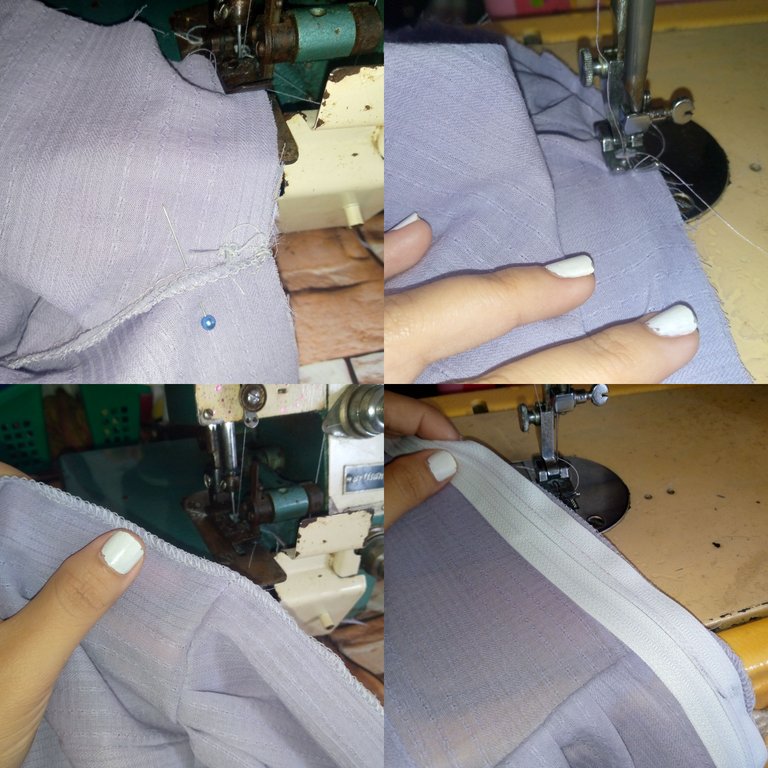
I will be using the pattern of the girl for whom we will make the dress in this case since we will make the pattern of the top piece because for the skirt we will simply make a square 87 cm long x 160 cm wide, we will cut the top pieces of the dress blouse as two sleeves, front and back piece and the bias pieces for the sleeves and neck.
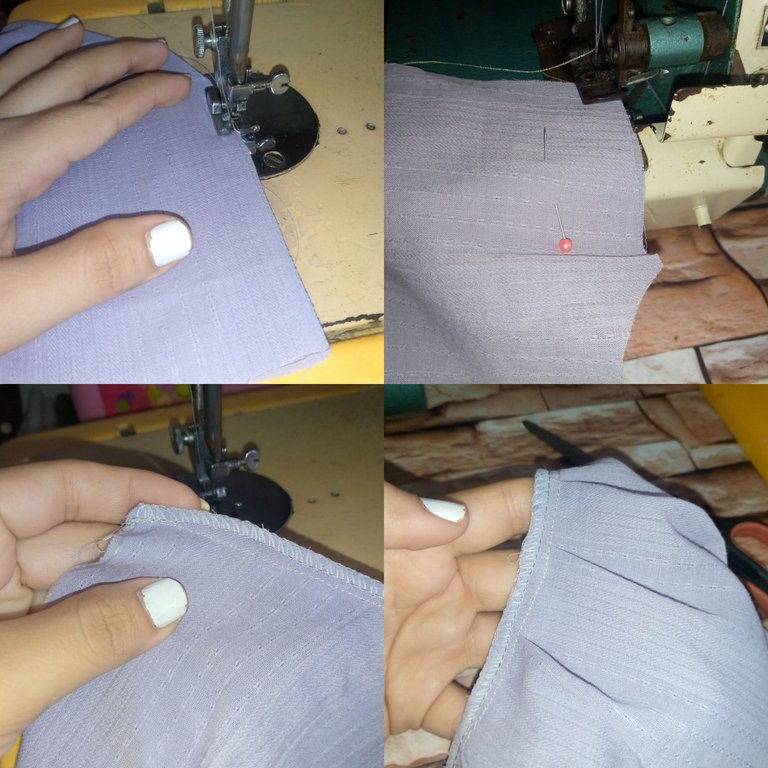
Paso 02
Step 02
We will start by sewing the shoulder part to seal the dress's bodice and we will sew with an overlock seam along the edge, then I will be opening precisely the armhole part and I will sew the sleeves making several folds of fabric to make our sleeve look puffy and gathered. I placed around 12 gathers on the sleeve. For this you should cut the sleeve a little wider than it normally is.
Paso 03
Step 03
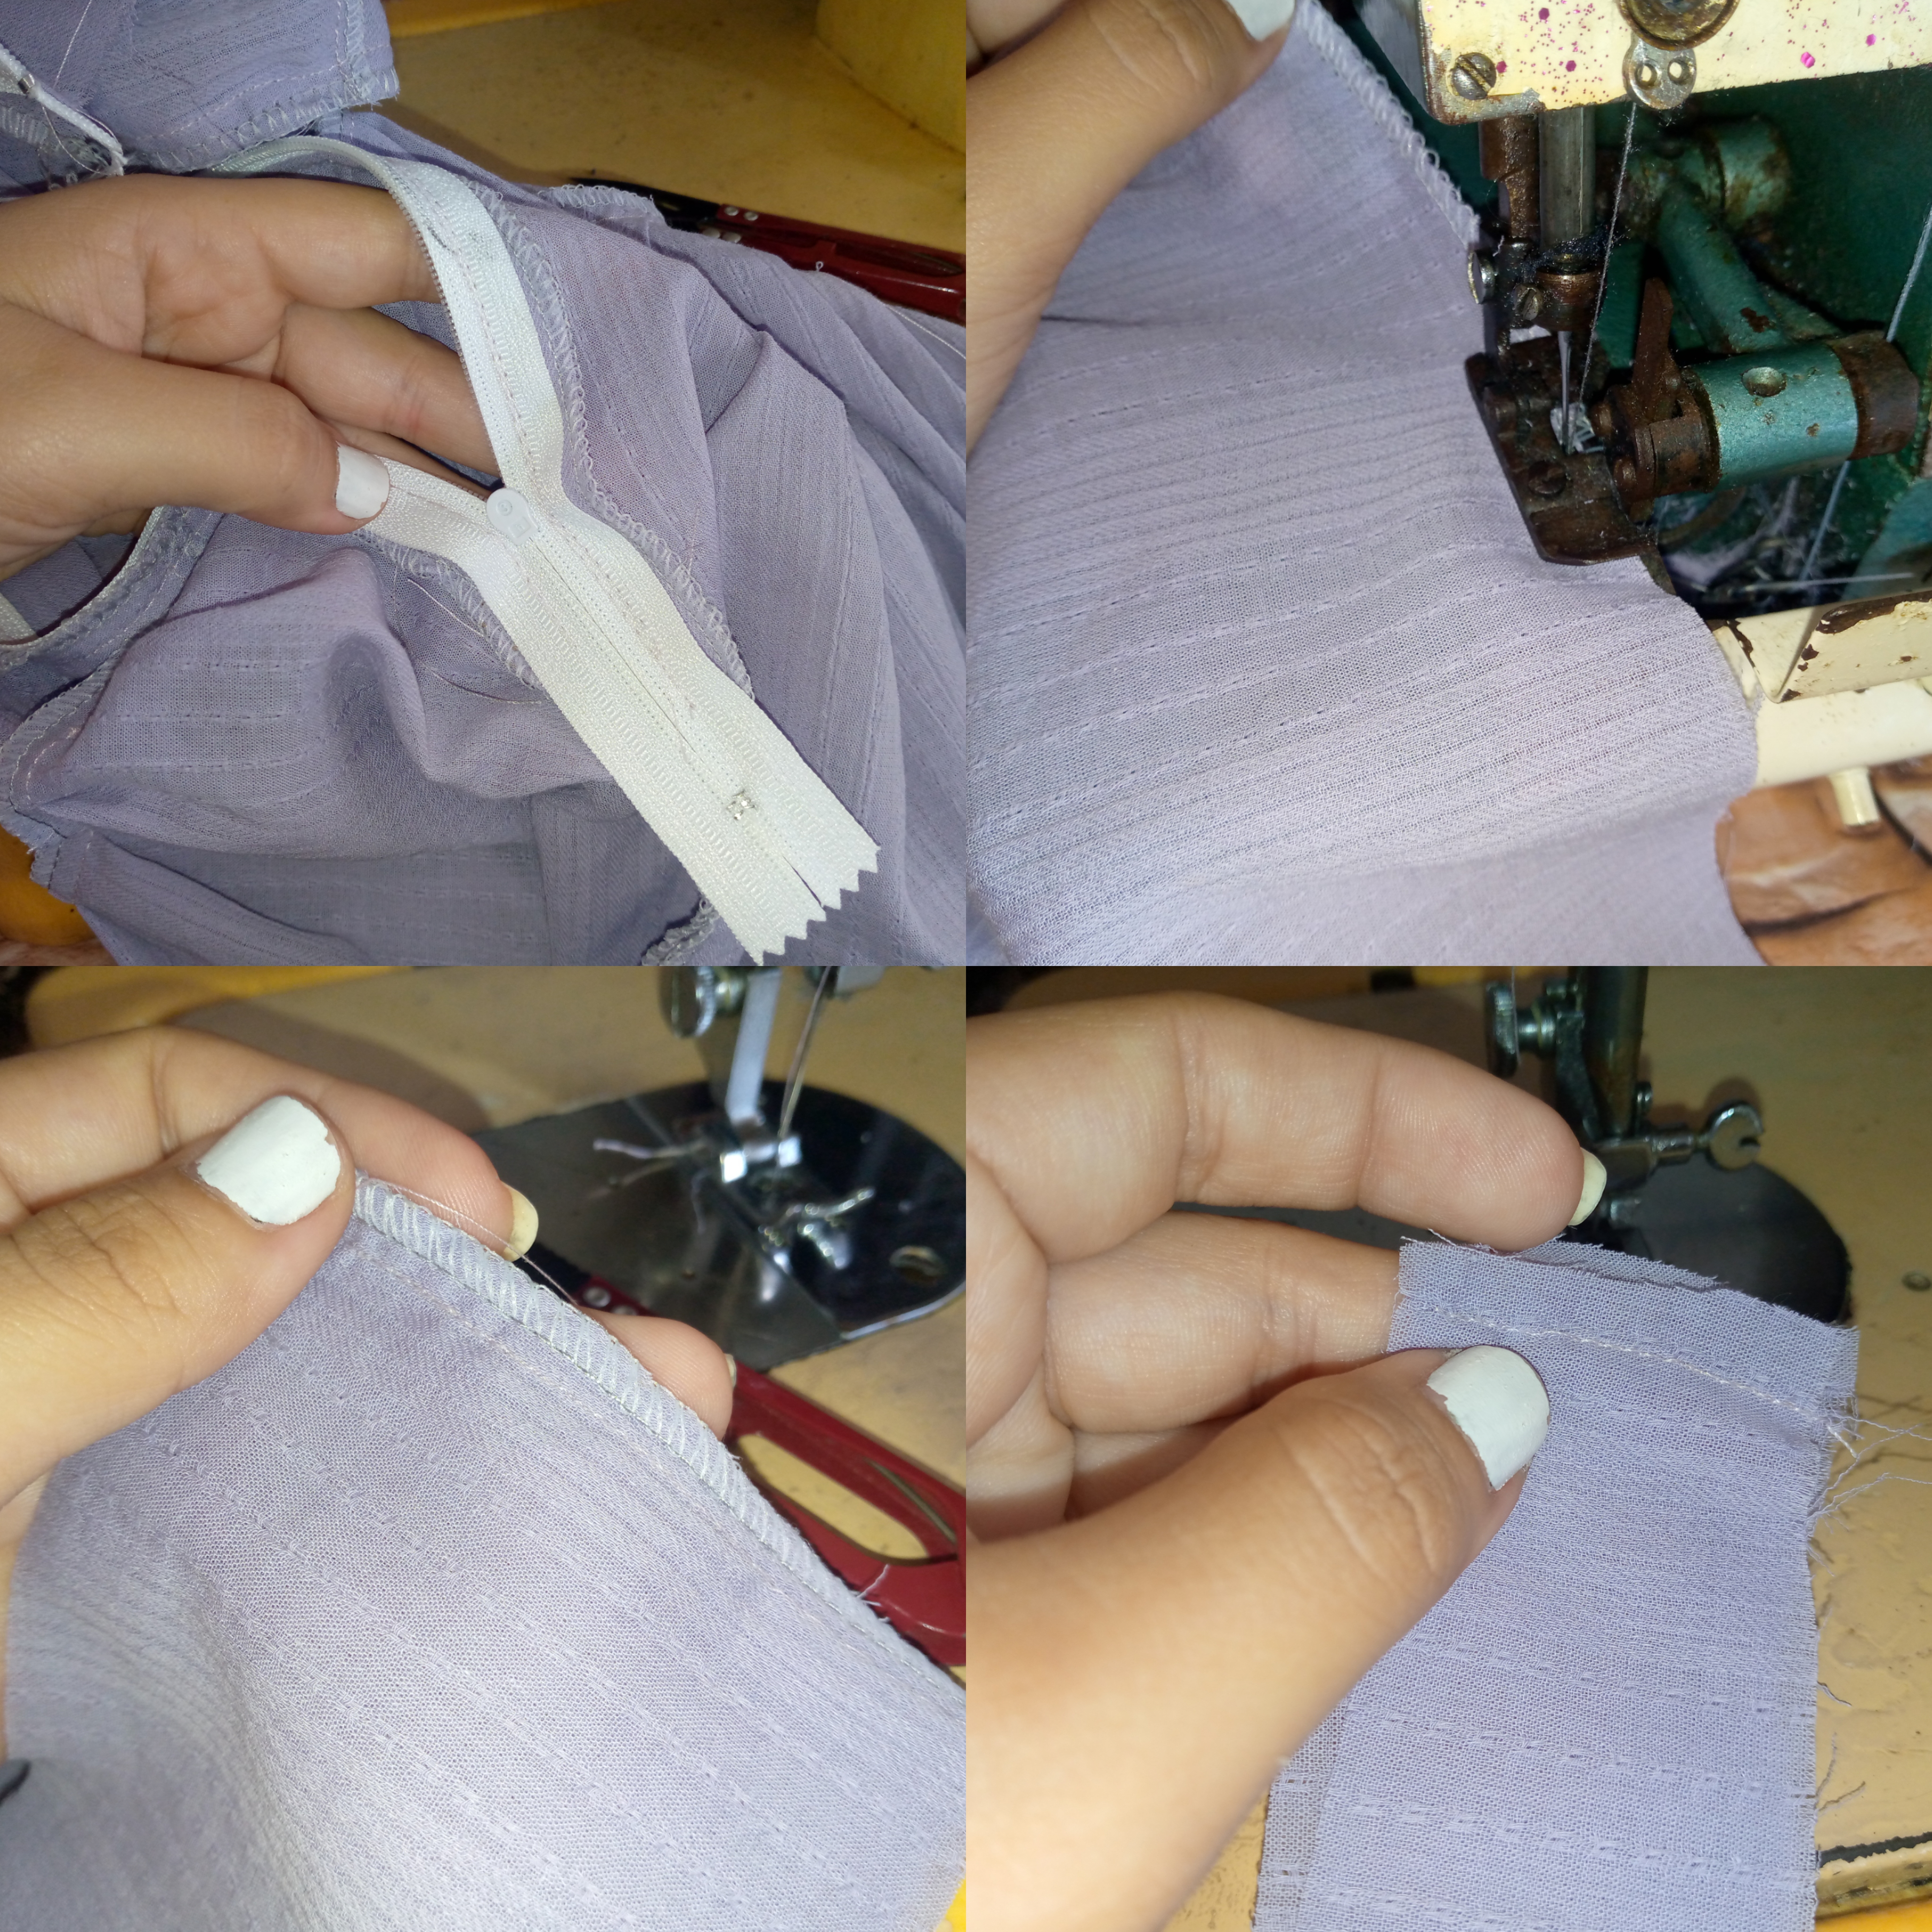
The next thing we will do is join the sides of the dress and reinforcing with a straight seam then we will sew our skirt to the waist of the dress and we will make small pleats of 2 cm each, if the fabric of course is wider we will place fewer pleats that depends on the skirt of your blouse, we sew the closure on the left side then on the right side leaving the view.
Paso 04
Step 04
Once I have sewn the closure on both sides, what I will do is sew the gathering piece below with an overlock on both sides and I will sew the union of the bias of each sleeve that we will place on the edge to gather the sleeve. We will also make some small tabs.
Paso 05
Step 05
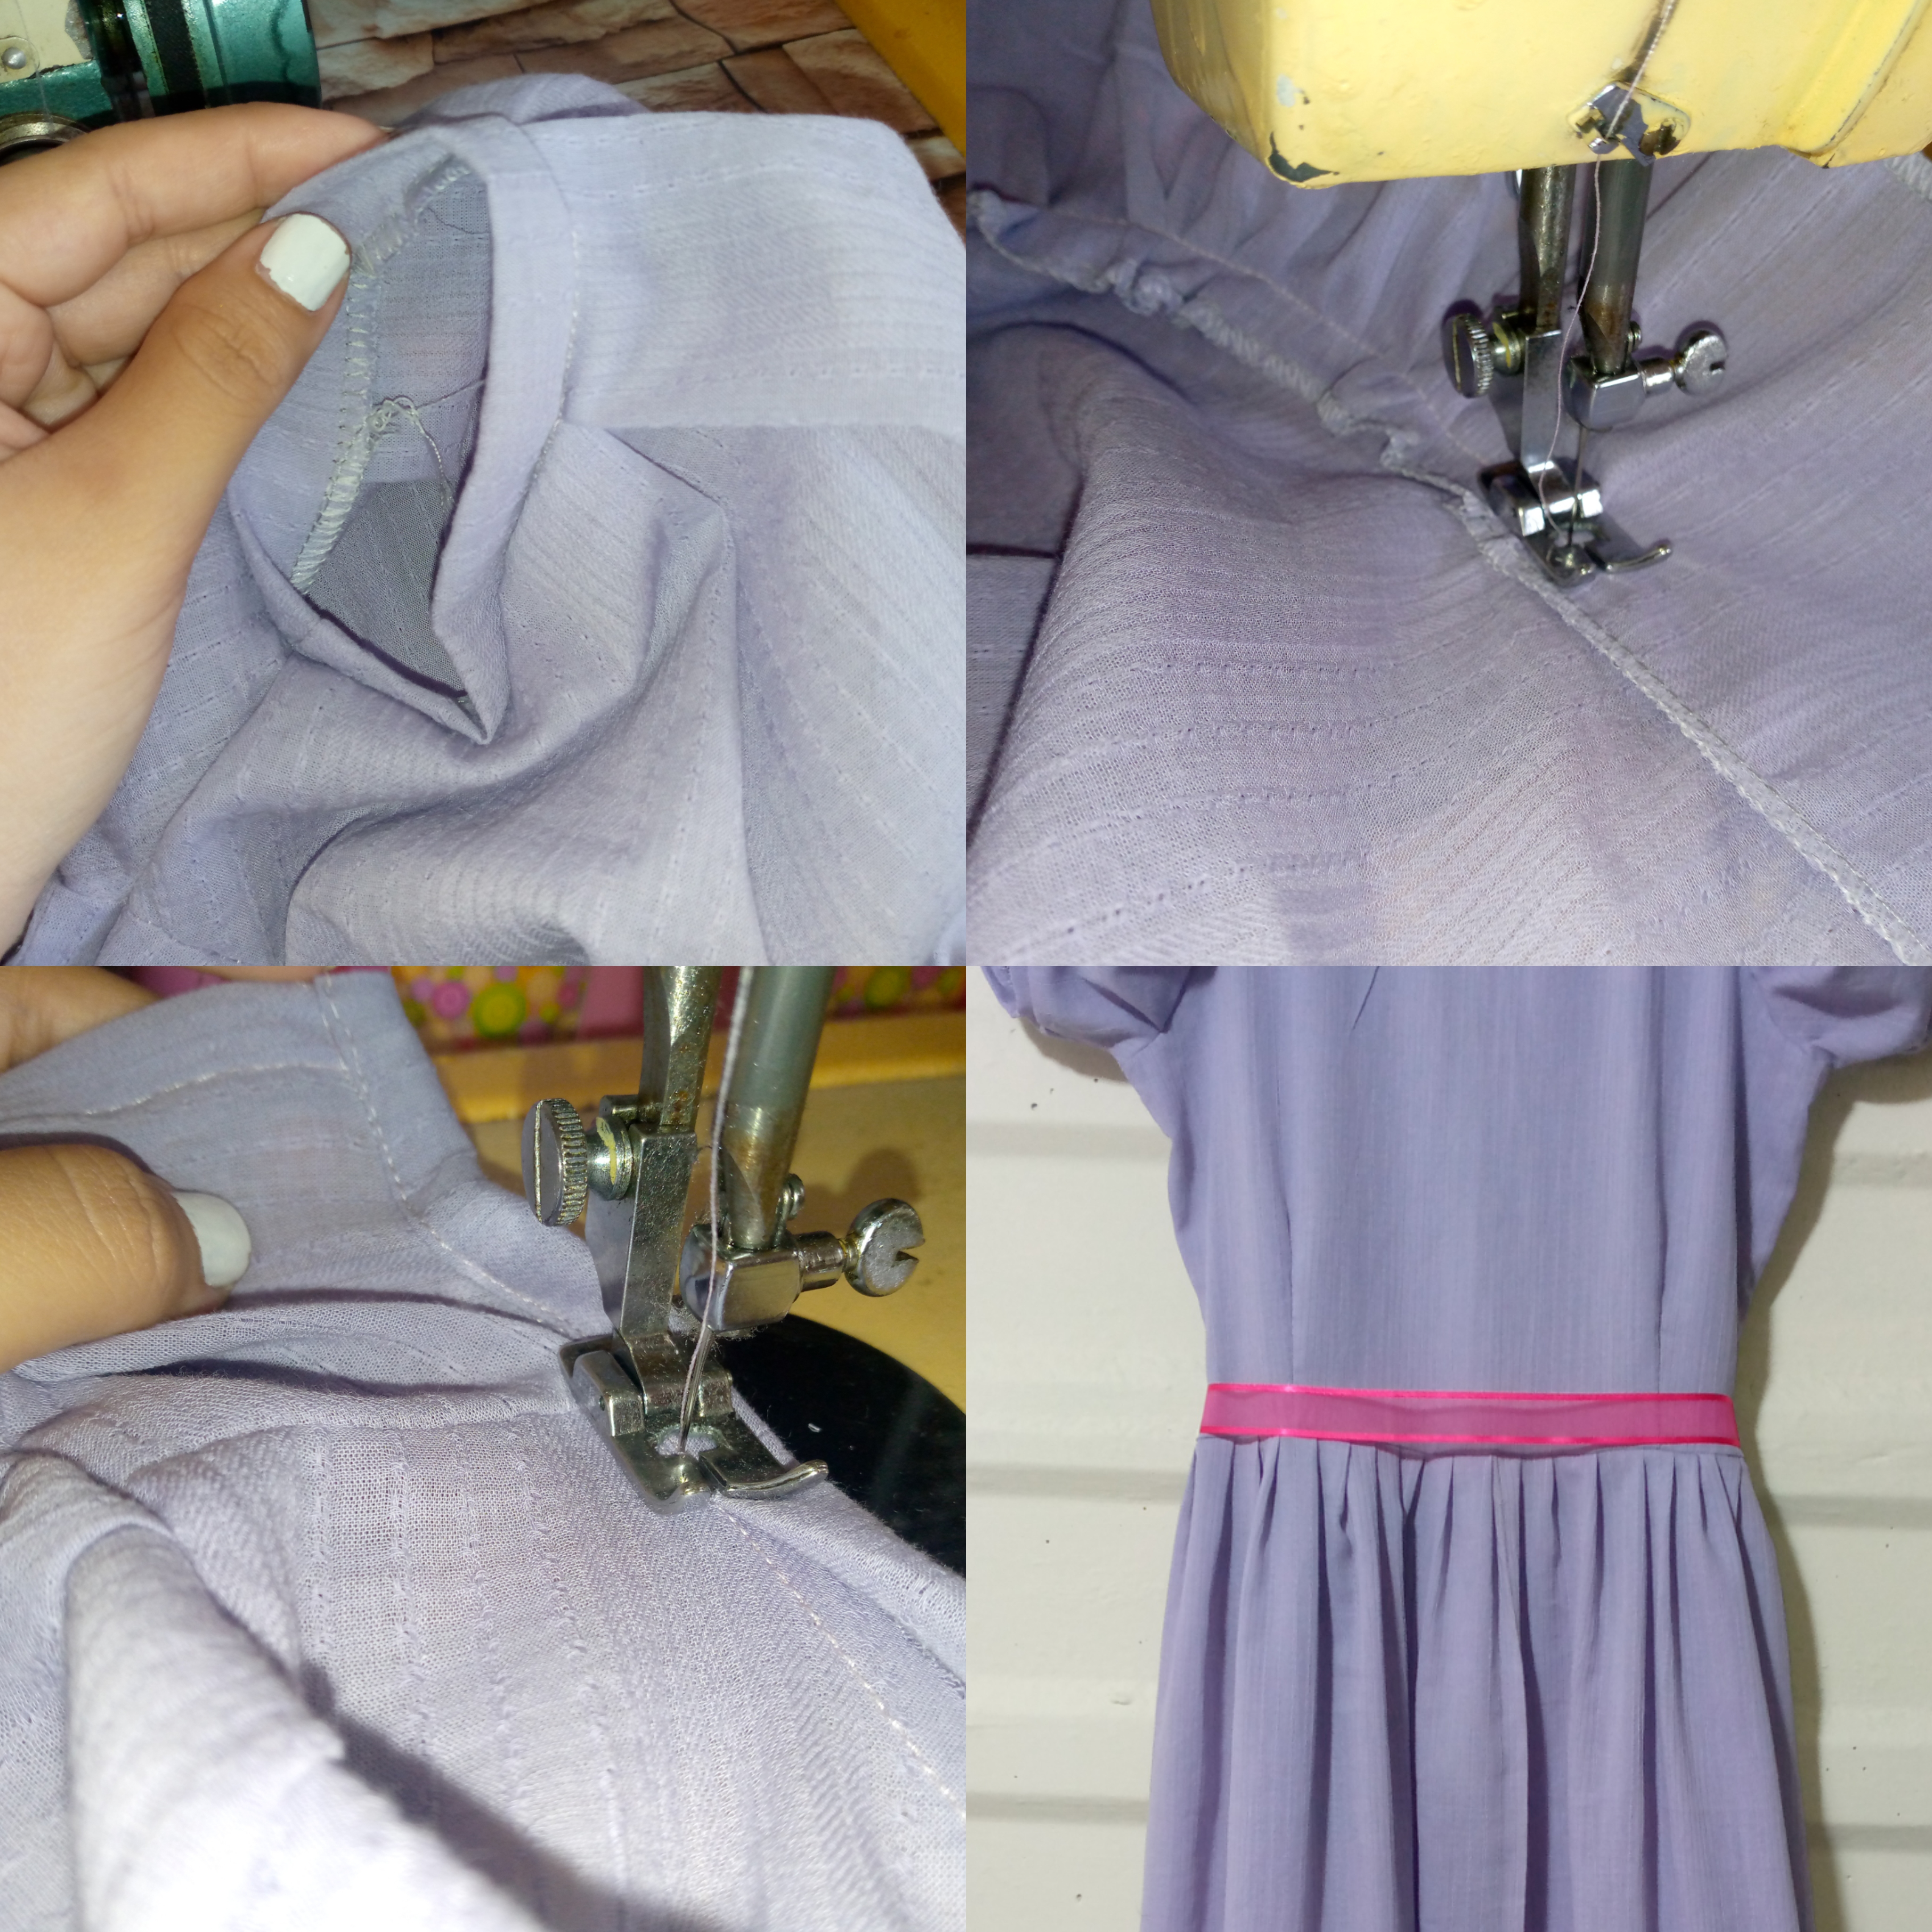
I finish by sewing the sleeve piece and now I will sew the gathering of the dress at the bottom. I cut this flare 10 cm long since that was the length of the fabric my client had brought me. Finally, I sewed the bias of the neck from the inside out, I re-stitched it and with this I finished making the dress by placing a ribbon at the waist.
Resultado:// Result:
Gracias por llegar al final de esta alegre confección y gracias también por leerme,les deseo una bella tarde y un abrazo virtual para ustedes ❤️🪡🧵.
Thank you for reaching the end of this joyful confection and thank you also for reading me, I wish you a beautiful afternoon and a virtual hug for you ❤️🪡🧵.
Creating things with love 🌷❤️
🦋✨ All the images in this publication are my author ,📱taken with my TecnoSpark8C cell phone |📸Photos edited in PicsArt and Canva. Text translated in Google Translate.
Wonderful dress you made! you are very talented dear and I ms sewing using sewing machine.
Thanks friend 🥰❤️
Thank you for sharing your beautiful work with us. Your tutorial is much appreciated. Lovely dress friend and keep up the good work.
selected by @ibbtammy
Thanks 🤗
Muy bonito vestidos, el detalle de las mangas bombachas le da un toque muy lindo. Felicidades.
Muchas gracias si quedó muy lindo 🥰👗
Great work! You made it look like it's very easy to make a dress! I wish I could make a dress for my kids too. I am struggling to find a dress long enough for them to wear at the church
Thank you so much friend for the comment and support 🥺🥰
That's really cute and cool dress. The Sleeves are really nice and elegant. I love long dresses. I will try this for one of my friend, she also loves these type of dresses.
Si son preciosos sencillos pero con todo el amor posible al hacerlos 🤭así quedan bonitos ,me alegra que te animes a hacerle uno le va a encantar este estilo 🤗💜
Nice dressing you made
This is well explained and easy to understand and practice
The dress is really really pretty. The ribbon on the waist is giving a more cute look on the whole frock.
What a pretty dress
It's gorgeous