
🌸Bienvenidos a mi blog 😊🪡🧵
🌸Welcome to my blog 😊🪡🧵
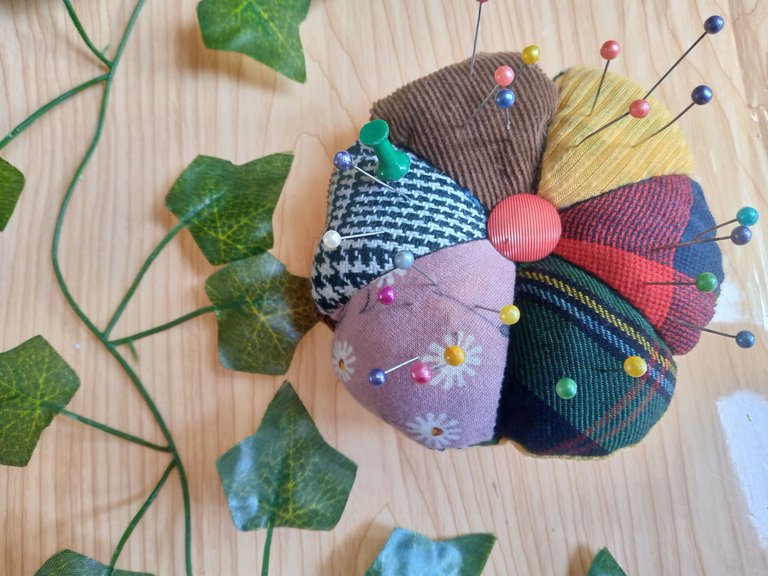
quise combinar algunas telas con estampado de cuadros y flores hasta unicolor y la verdad queda muy bien ,hasta incluso puedes hacer tu alfiletero únicamente que con telas de un solo color ya tu decides después cómo hacerlo 🥰 .
If you are passionate about sewing with scraps and making beautiful creations, you will really like this idea of making a pincushion with your fabric scraps, We will be making a beautiful flower in the shape of a pincushion. You can use any type of fabric to do this project,
I wanted to combine some fabrics with plaid and flower prints, even single color ones, and the truth is that it looks great,you can even make your pincushion only with single-color fabrics and then you decide how to do it .
.jpg)
🌸This pincushion will be very useful to organize the pins and have them closer at hand. If you are like me and want to have the pins close by when you are sewing, it will help you a lot. I hope you like this project and can do it. Let's start doing it and here are the simple steps.
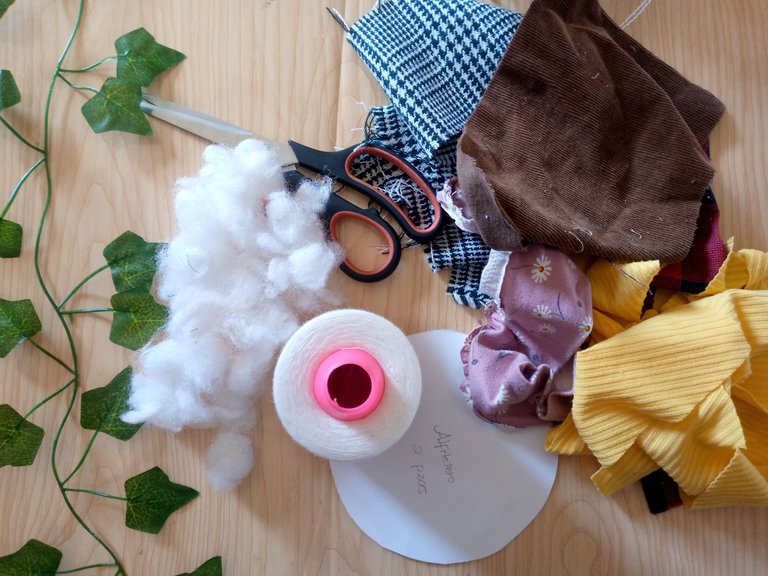
Materiales:// Materials:
- Usaremos recortes de tela de los que tú quieras y tengas en casa
- Relleno de muñecos
- Tijera
- Hilo y aguja
- 1 botón
- 1 círculo de cartón como patrón
- We will use fabric scraps of whatever you want and have at home
- Doll stuffing
- Scissors
- Thread and needle
- 1 button
- 1 cardboard circle as a pattern
Pasos a seguir://Steps to follow:

Paso 01
Step 01
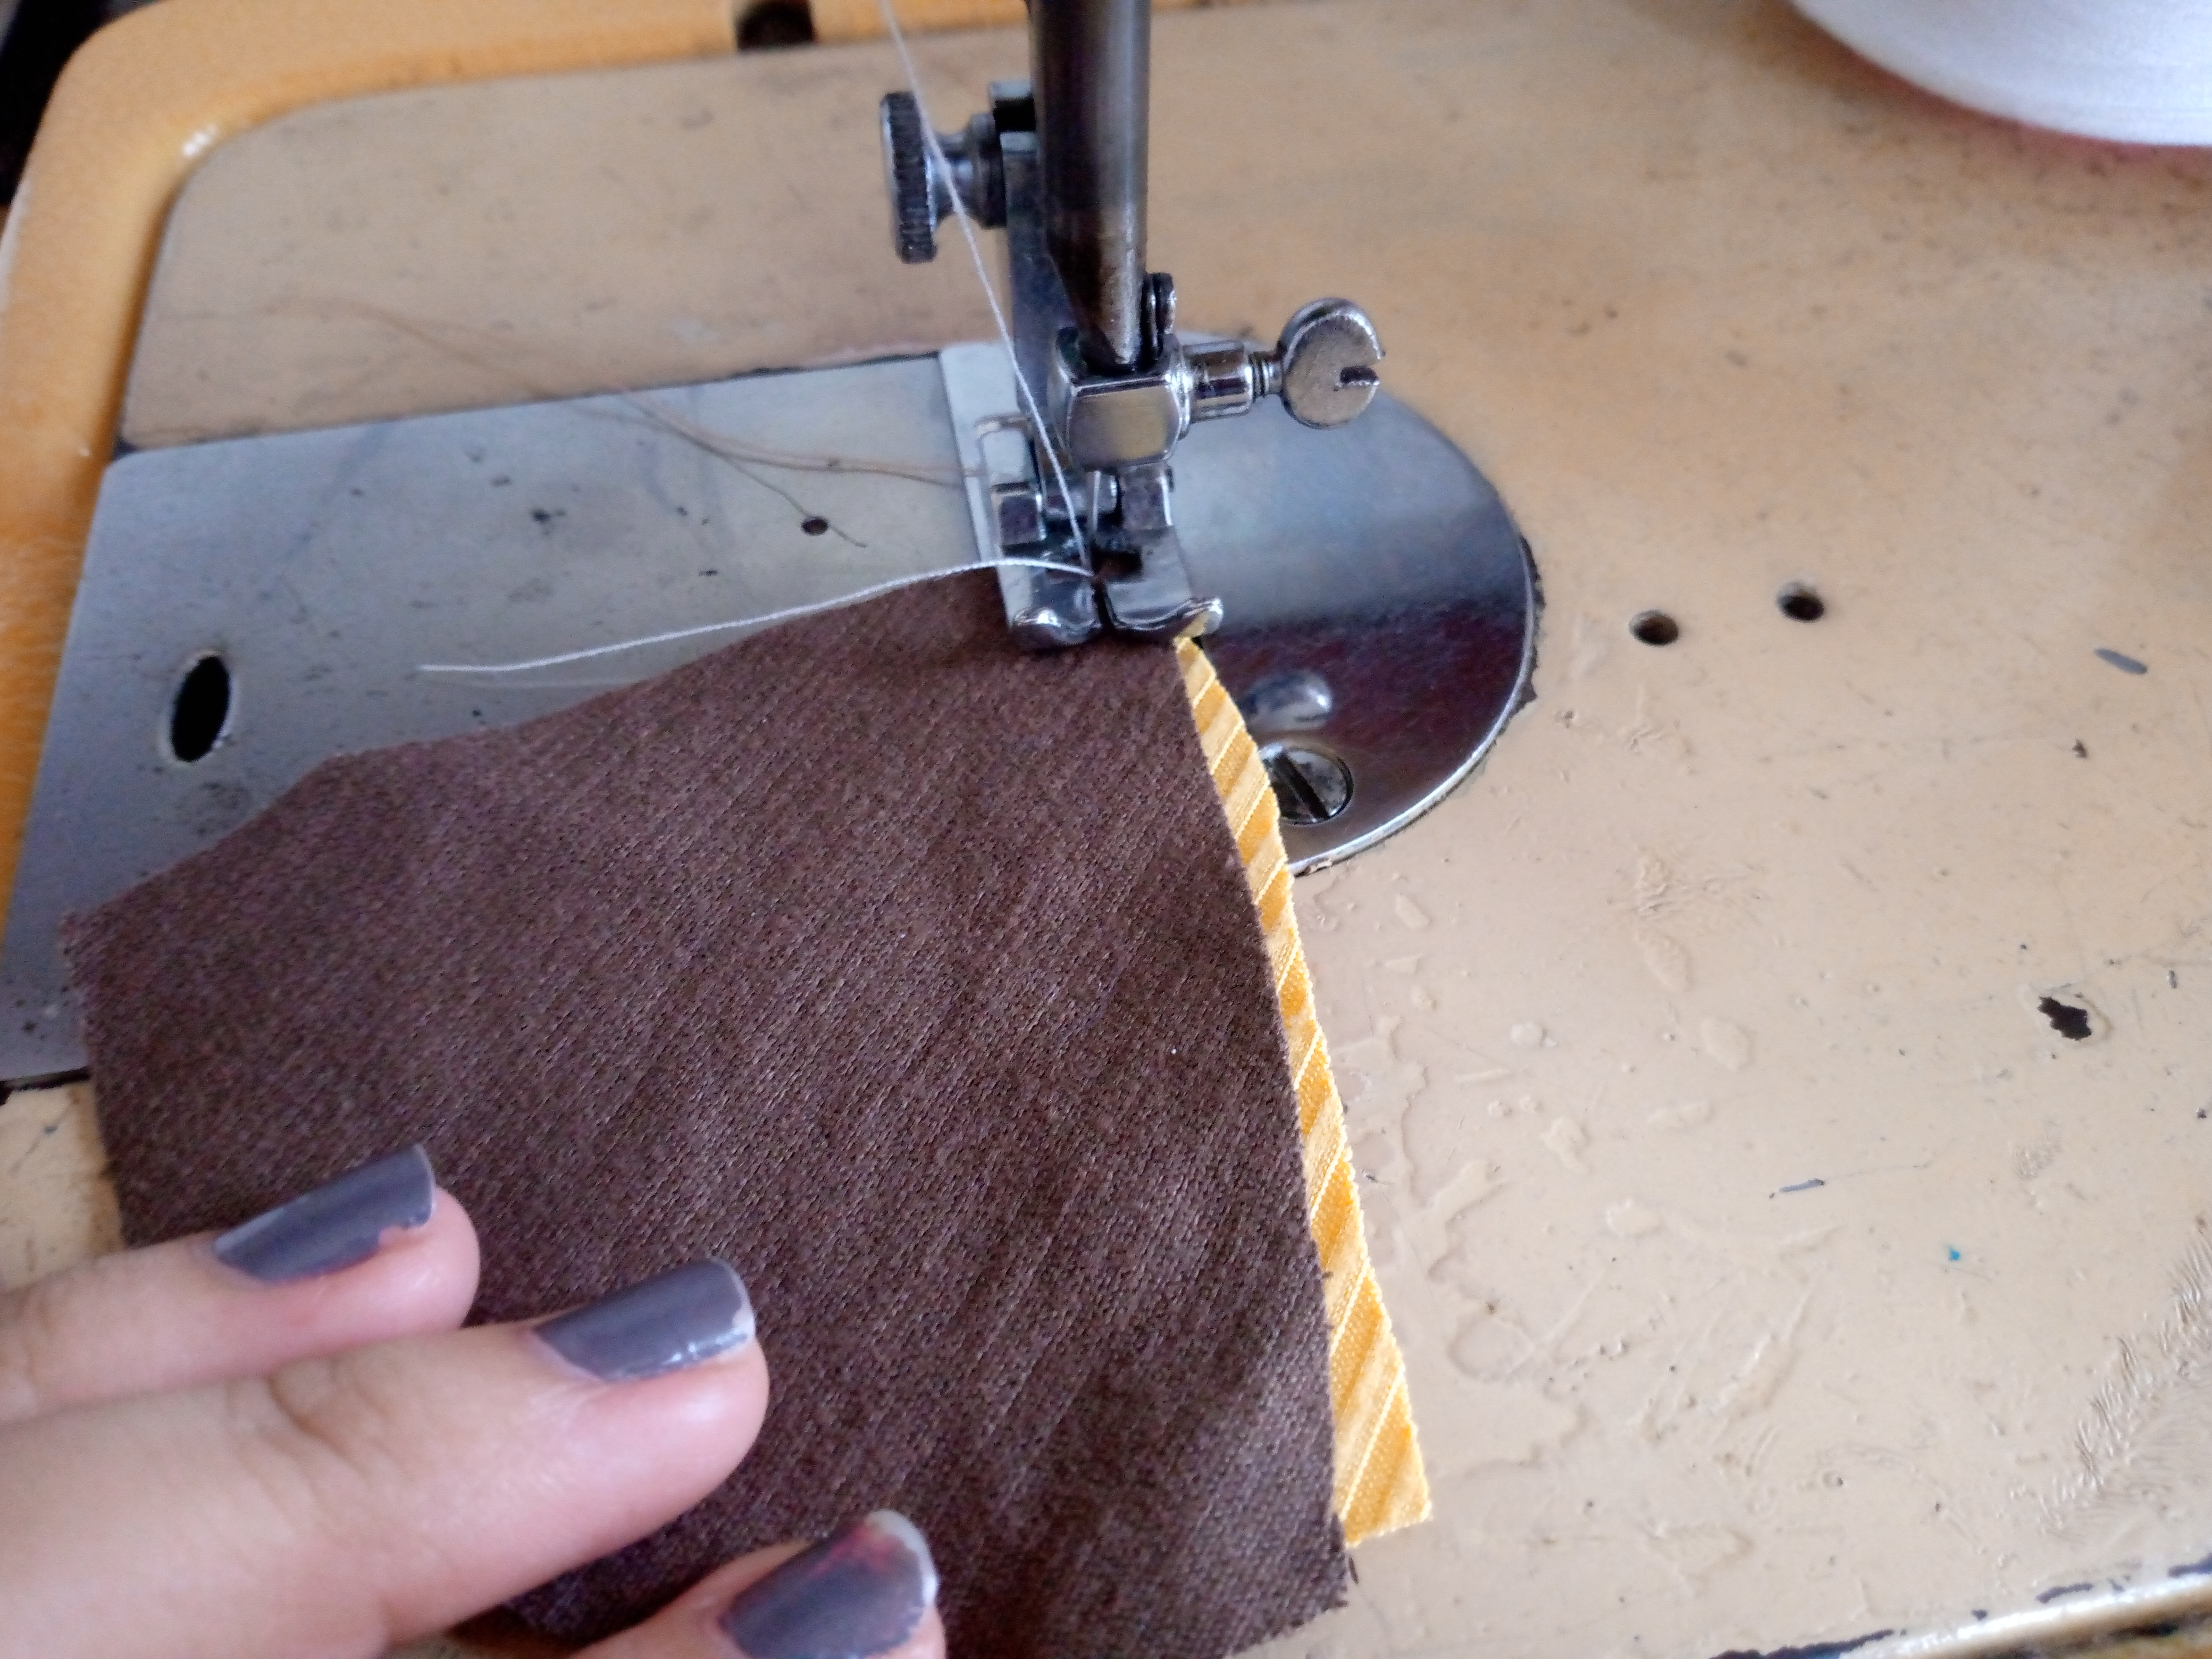
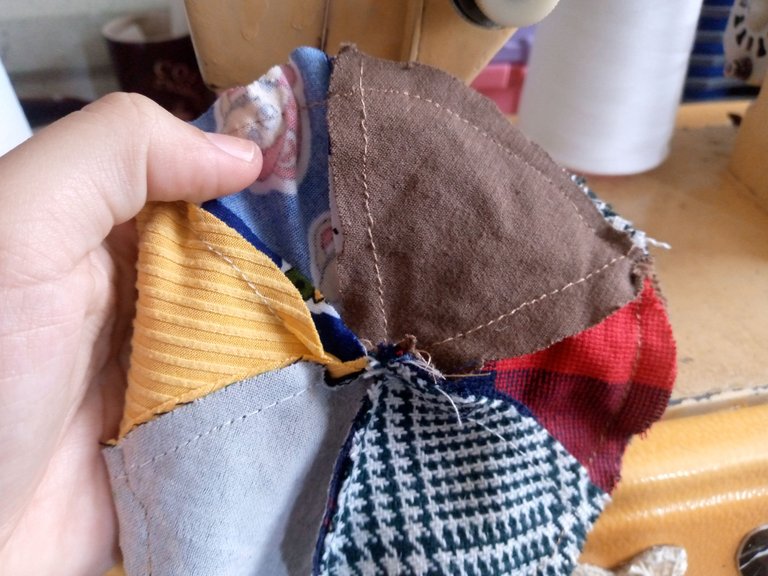
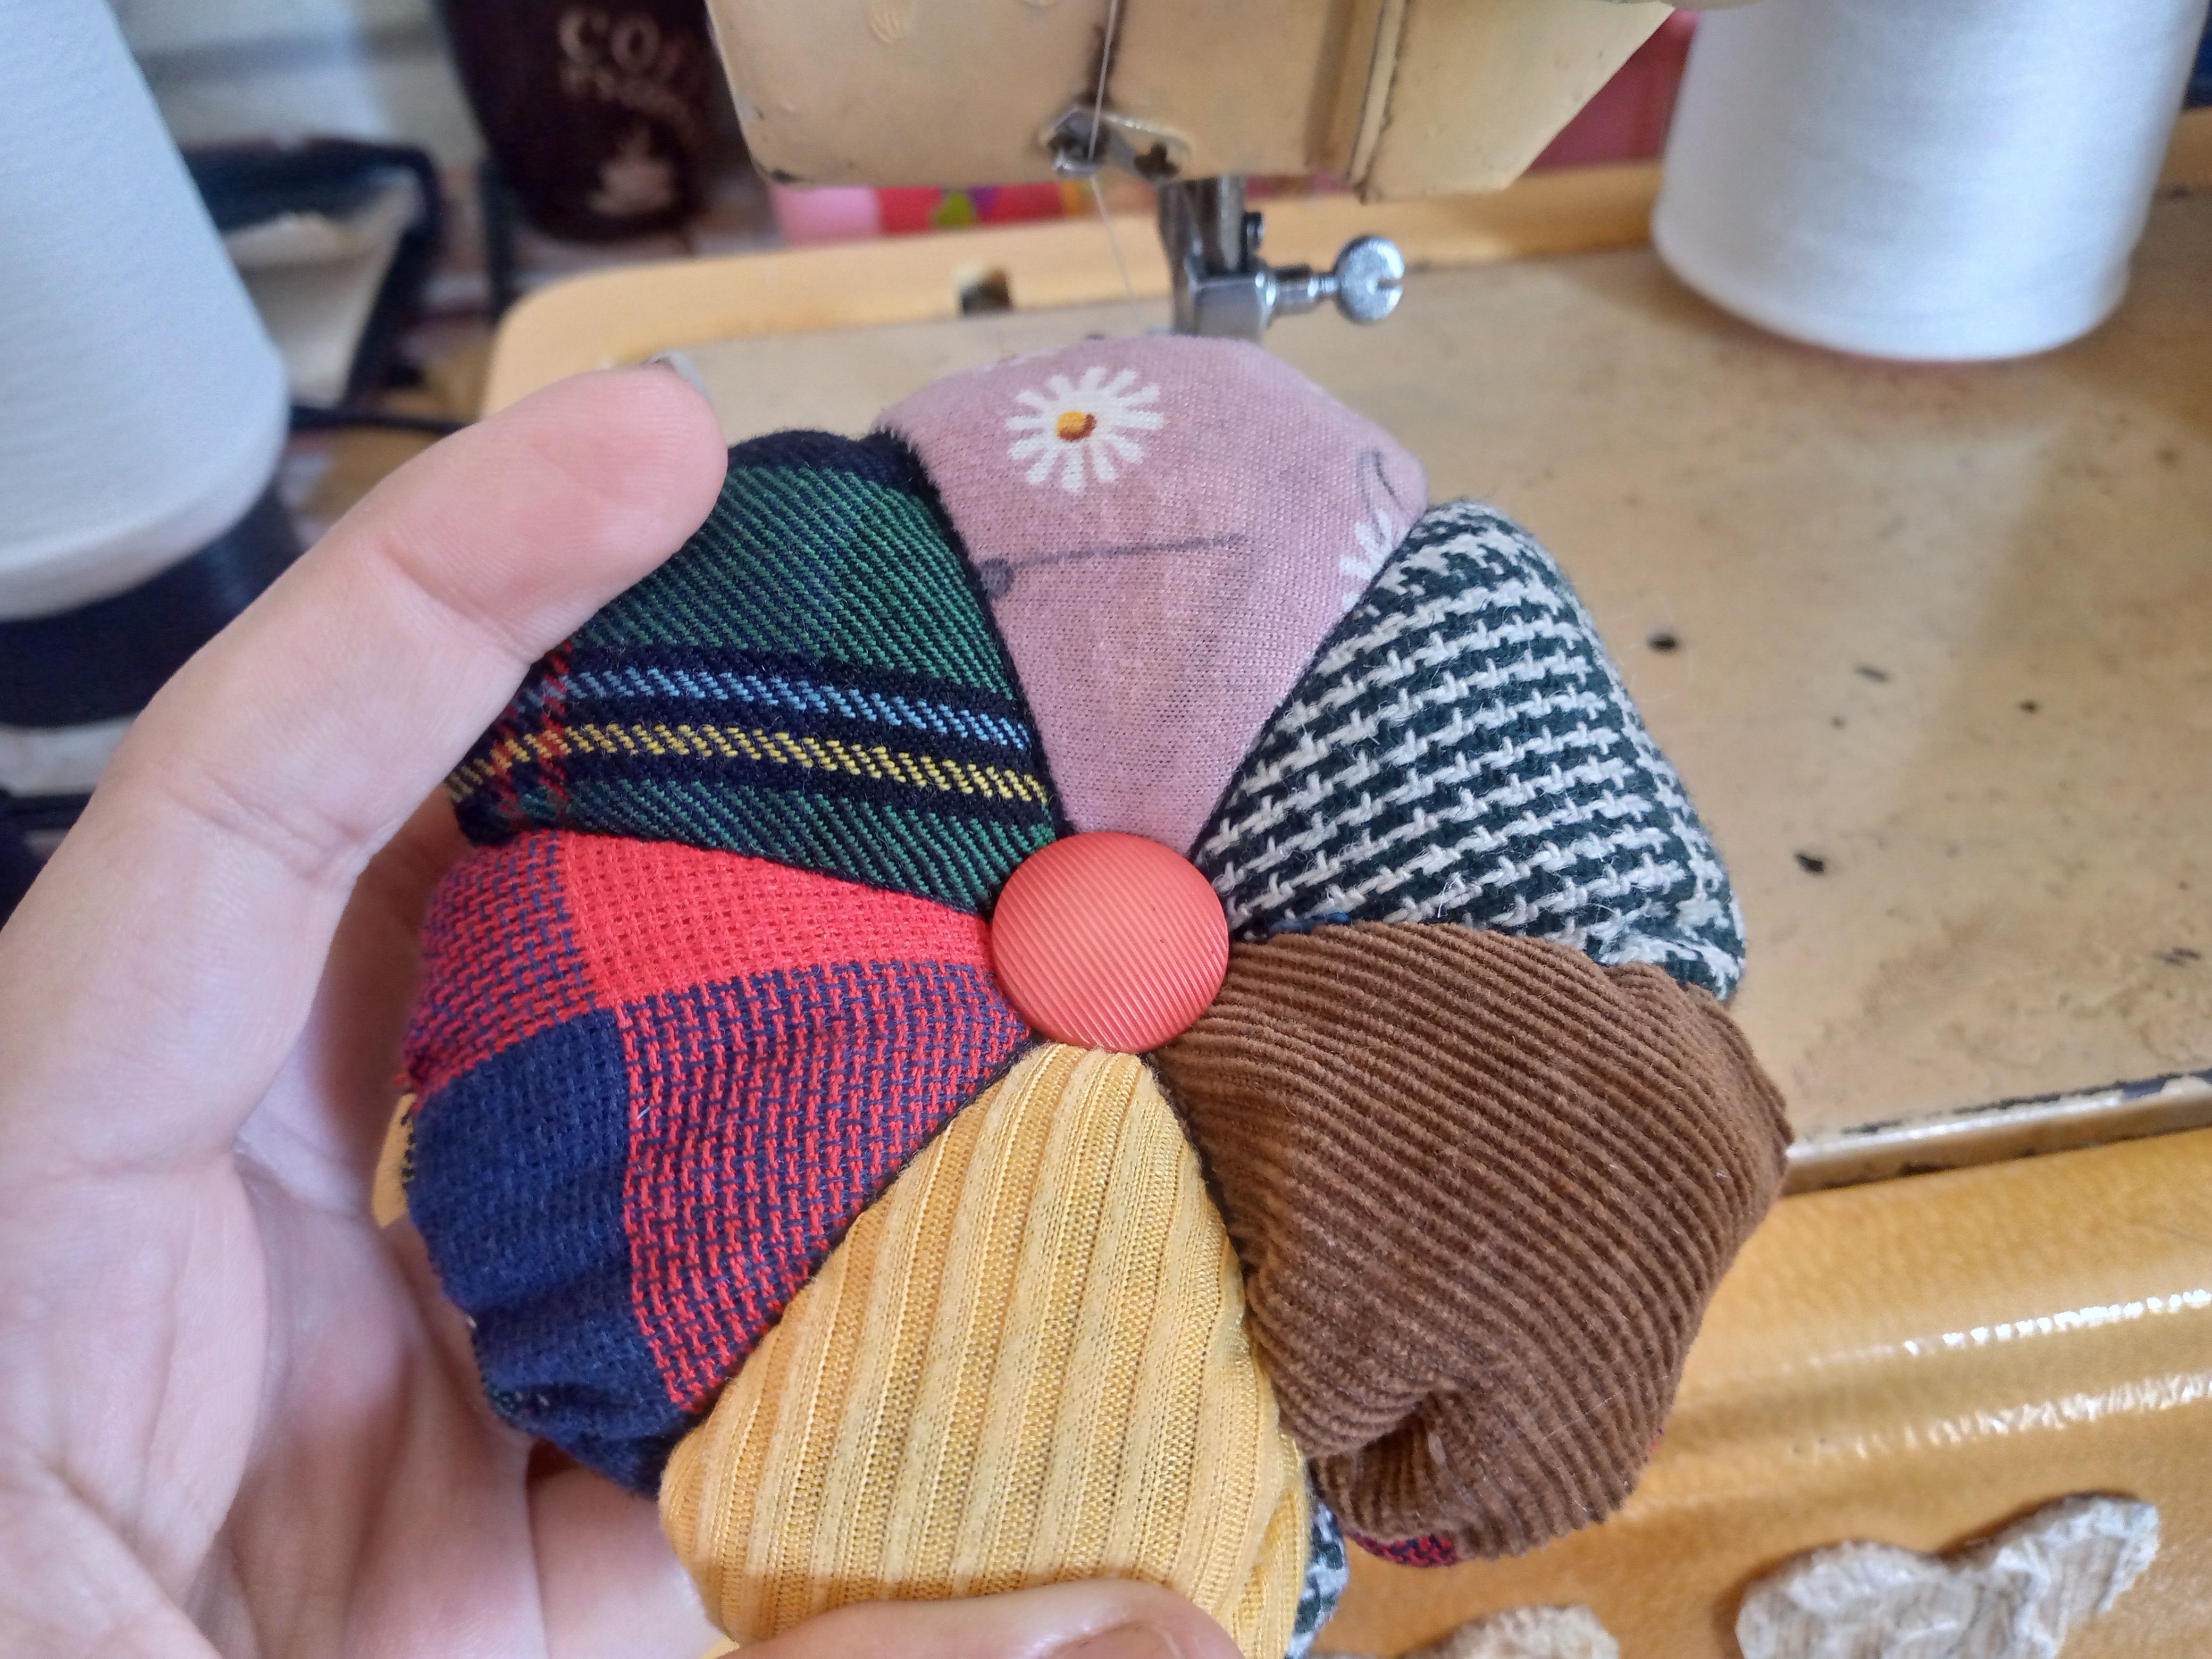
I started by cutting 12 triangles with my fabric scraps, we will use the cardboard circle to measure the size of the pincushion after we have joined both pieces, for now we are going to cut triangles, the size of your triangles depends a lot on the width you make the pincushion too, these that I have made from the tip of each triangle to the bottom are 6 cm, so on our machine we are going to join them, I placed one on top of the other and started sewing.
Paso 02
Step 02
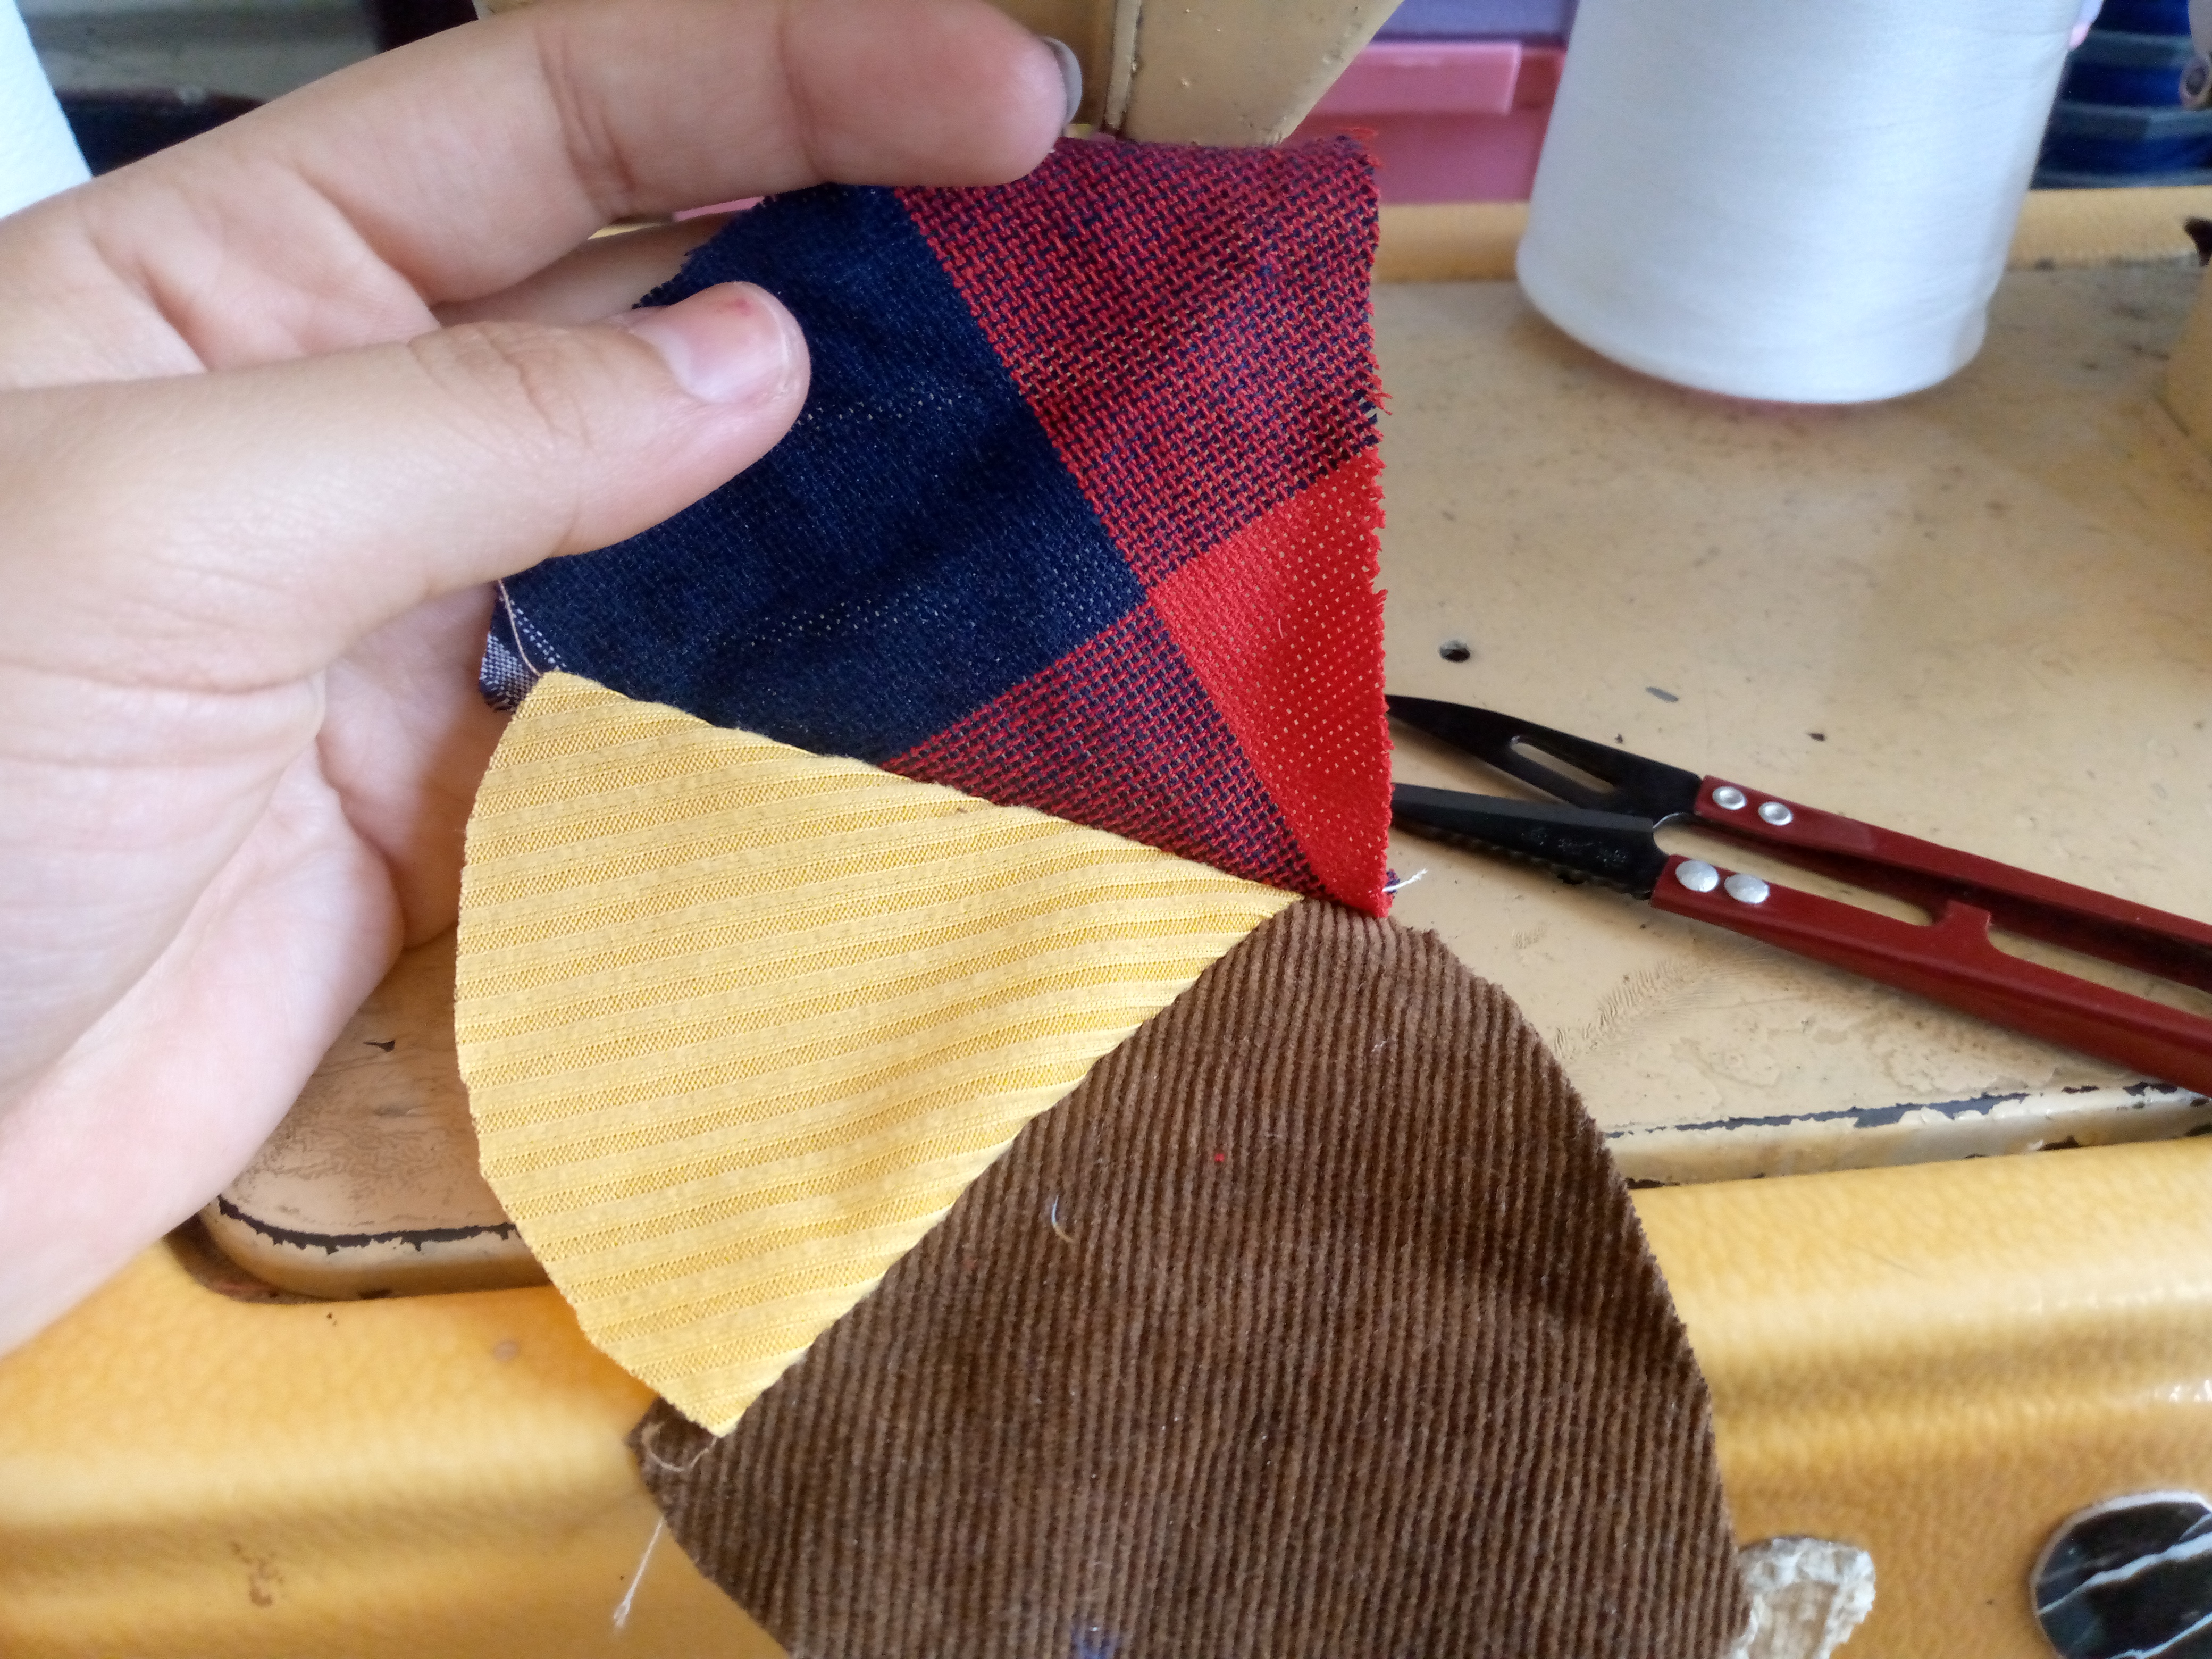
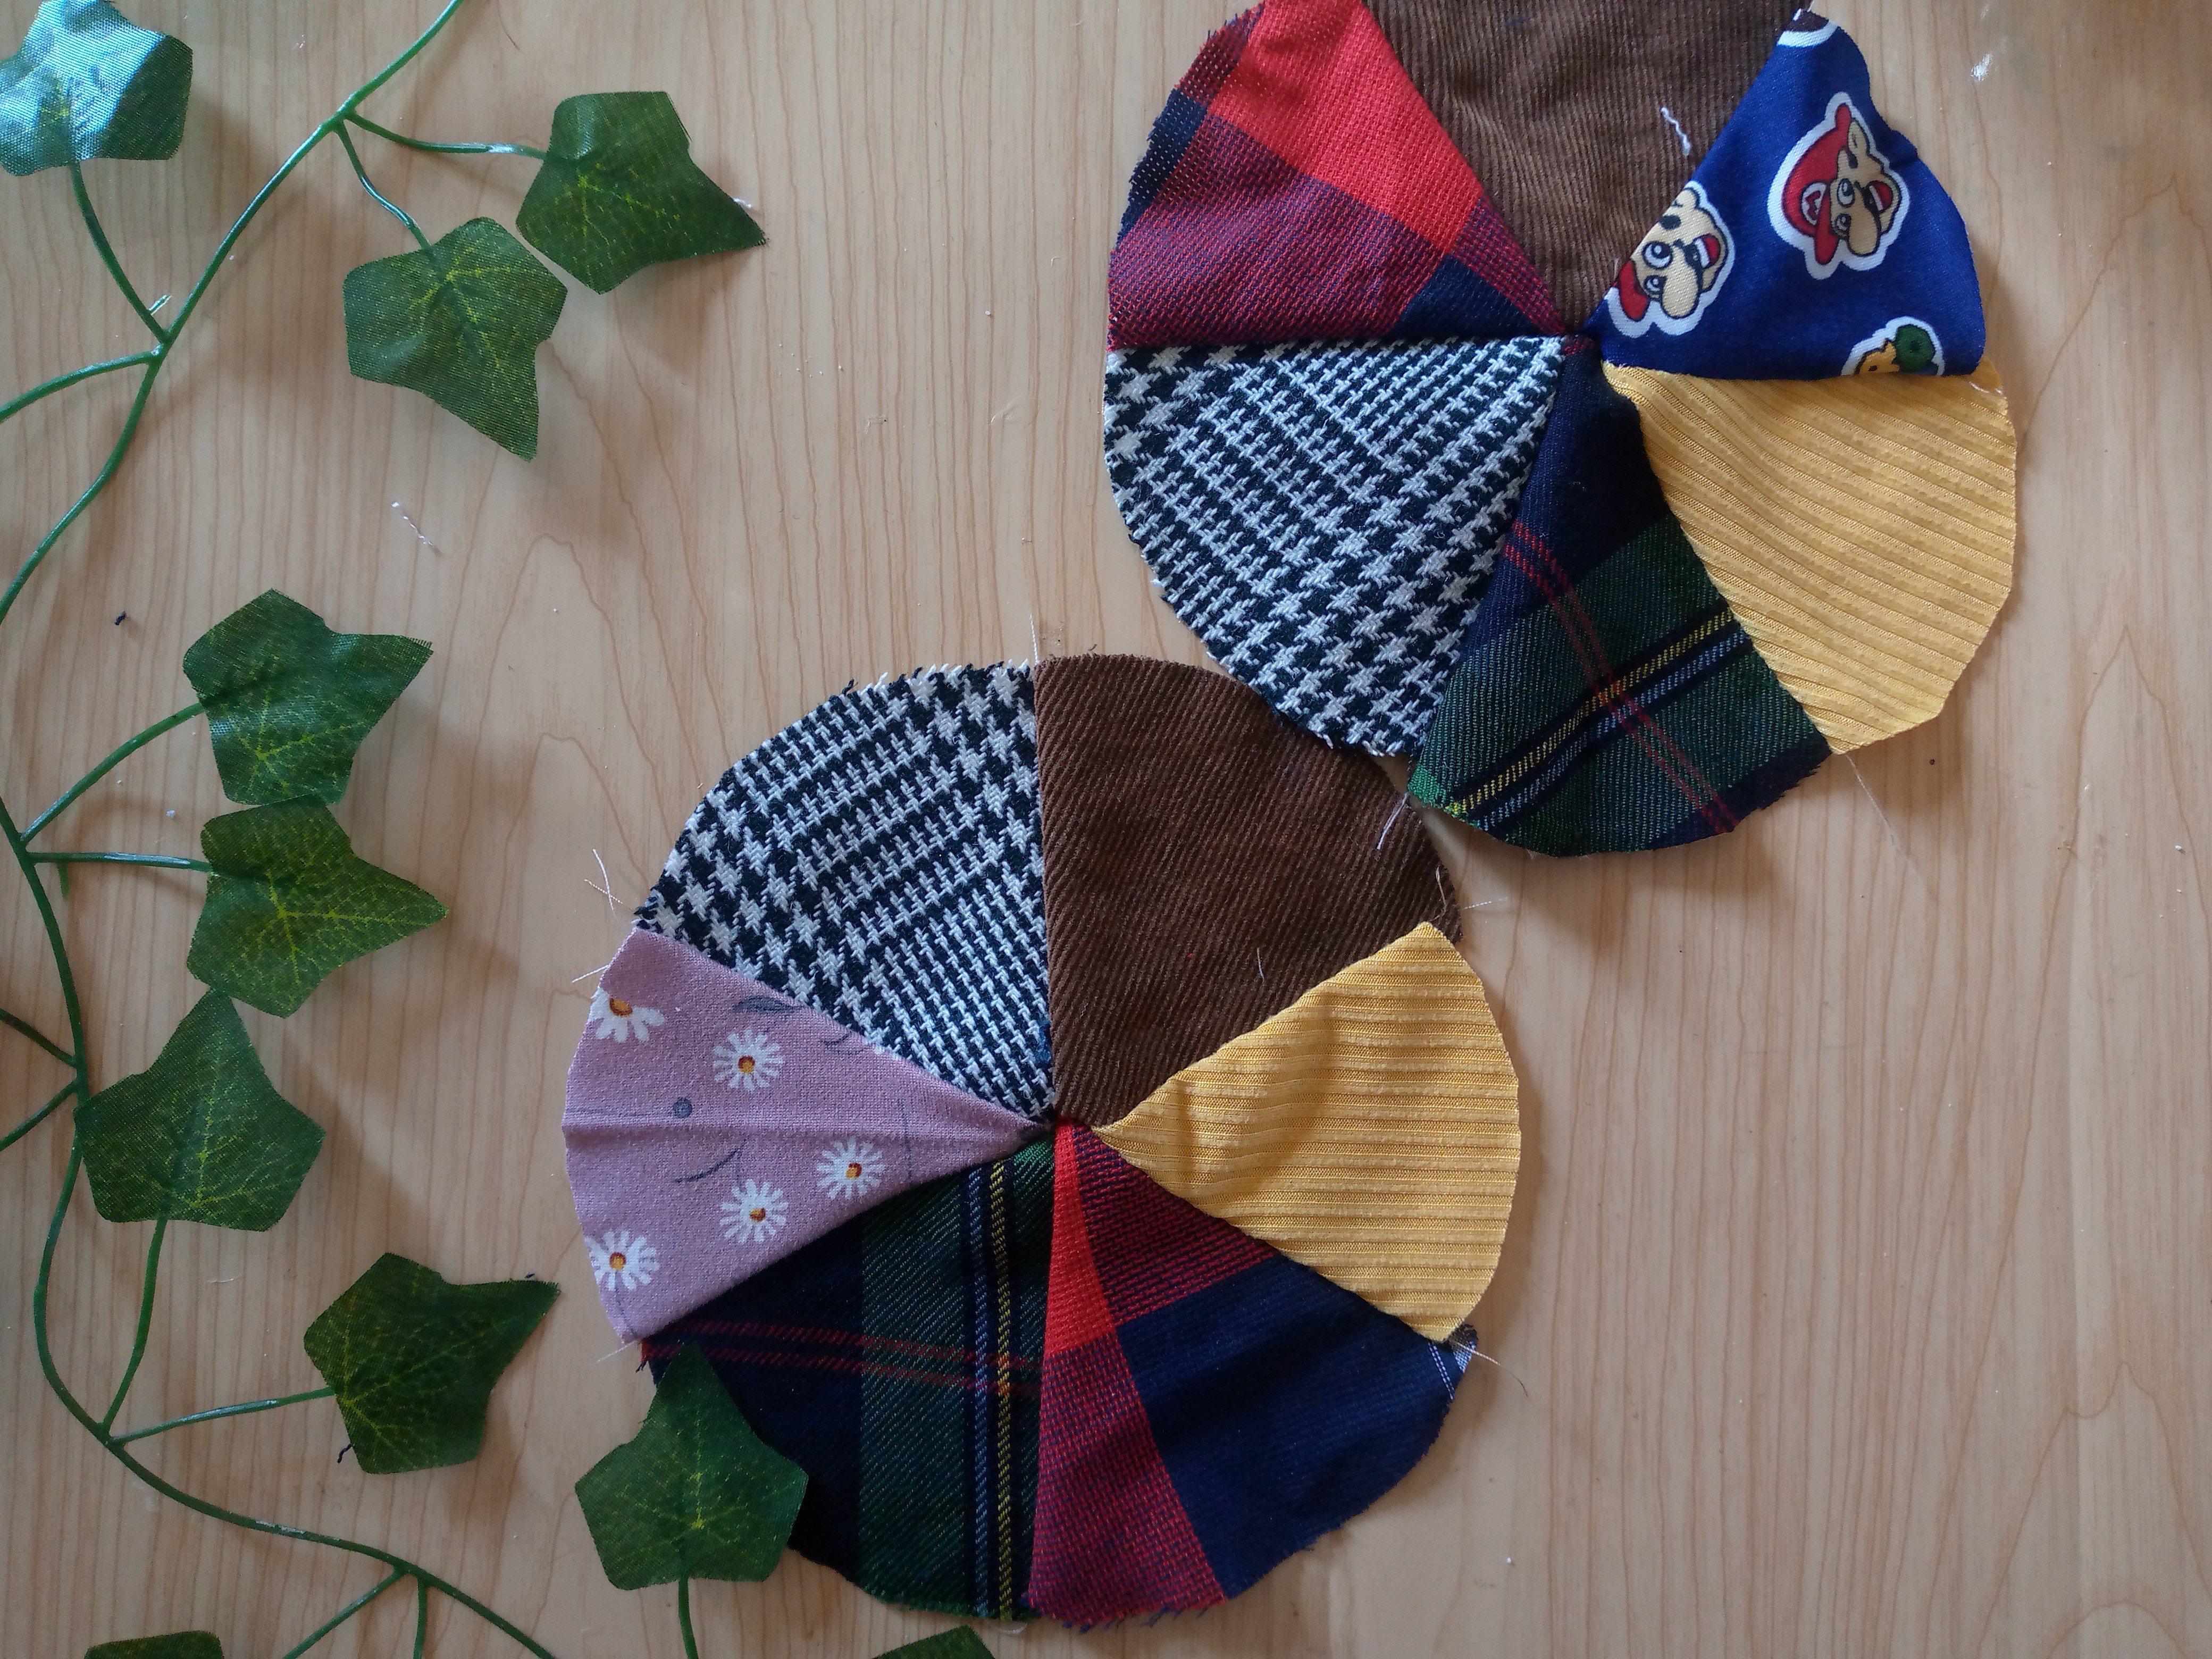
We are going to sew the third triangle on top of the second one and we are going to complete all the pieces, that is, sew them until we have sewn all 6 together, forming a circle that we are then going to measure with the cardboard. I wanted this measurement myself, but if you want your pincushion smaller, you can measure it using a slightly smaller glass or a round cup.

Paso 03
Step 03
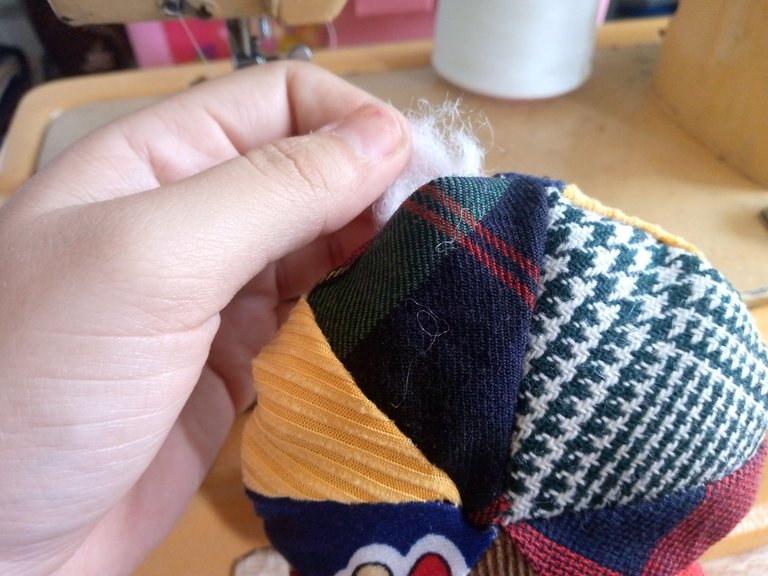
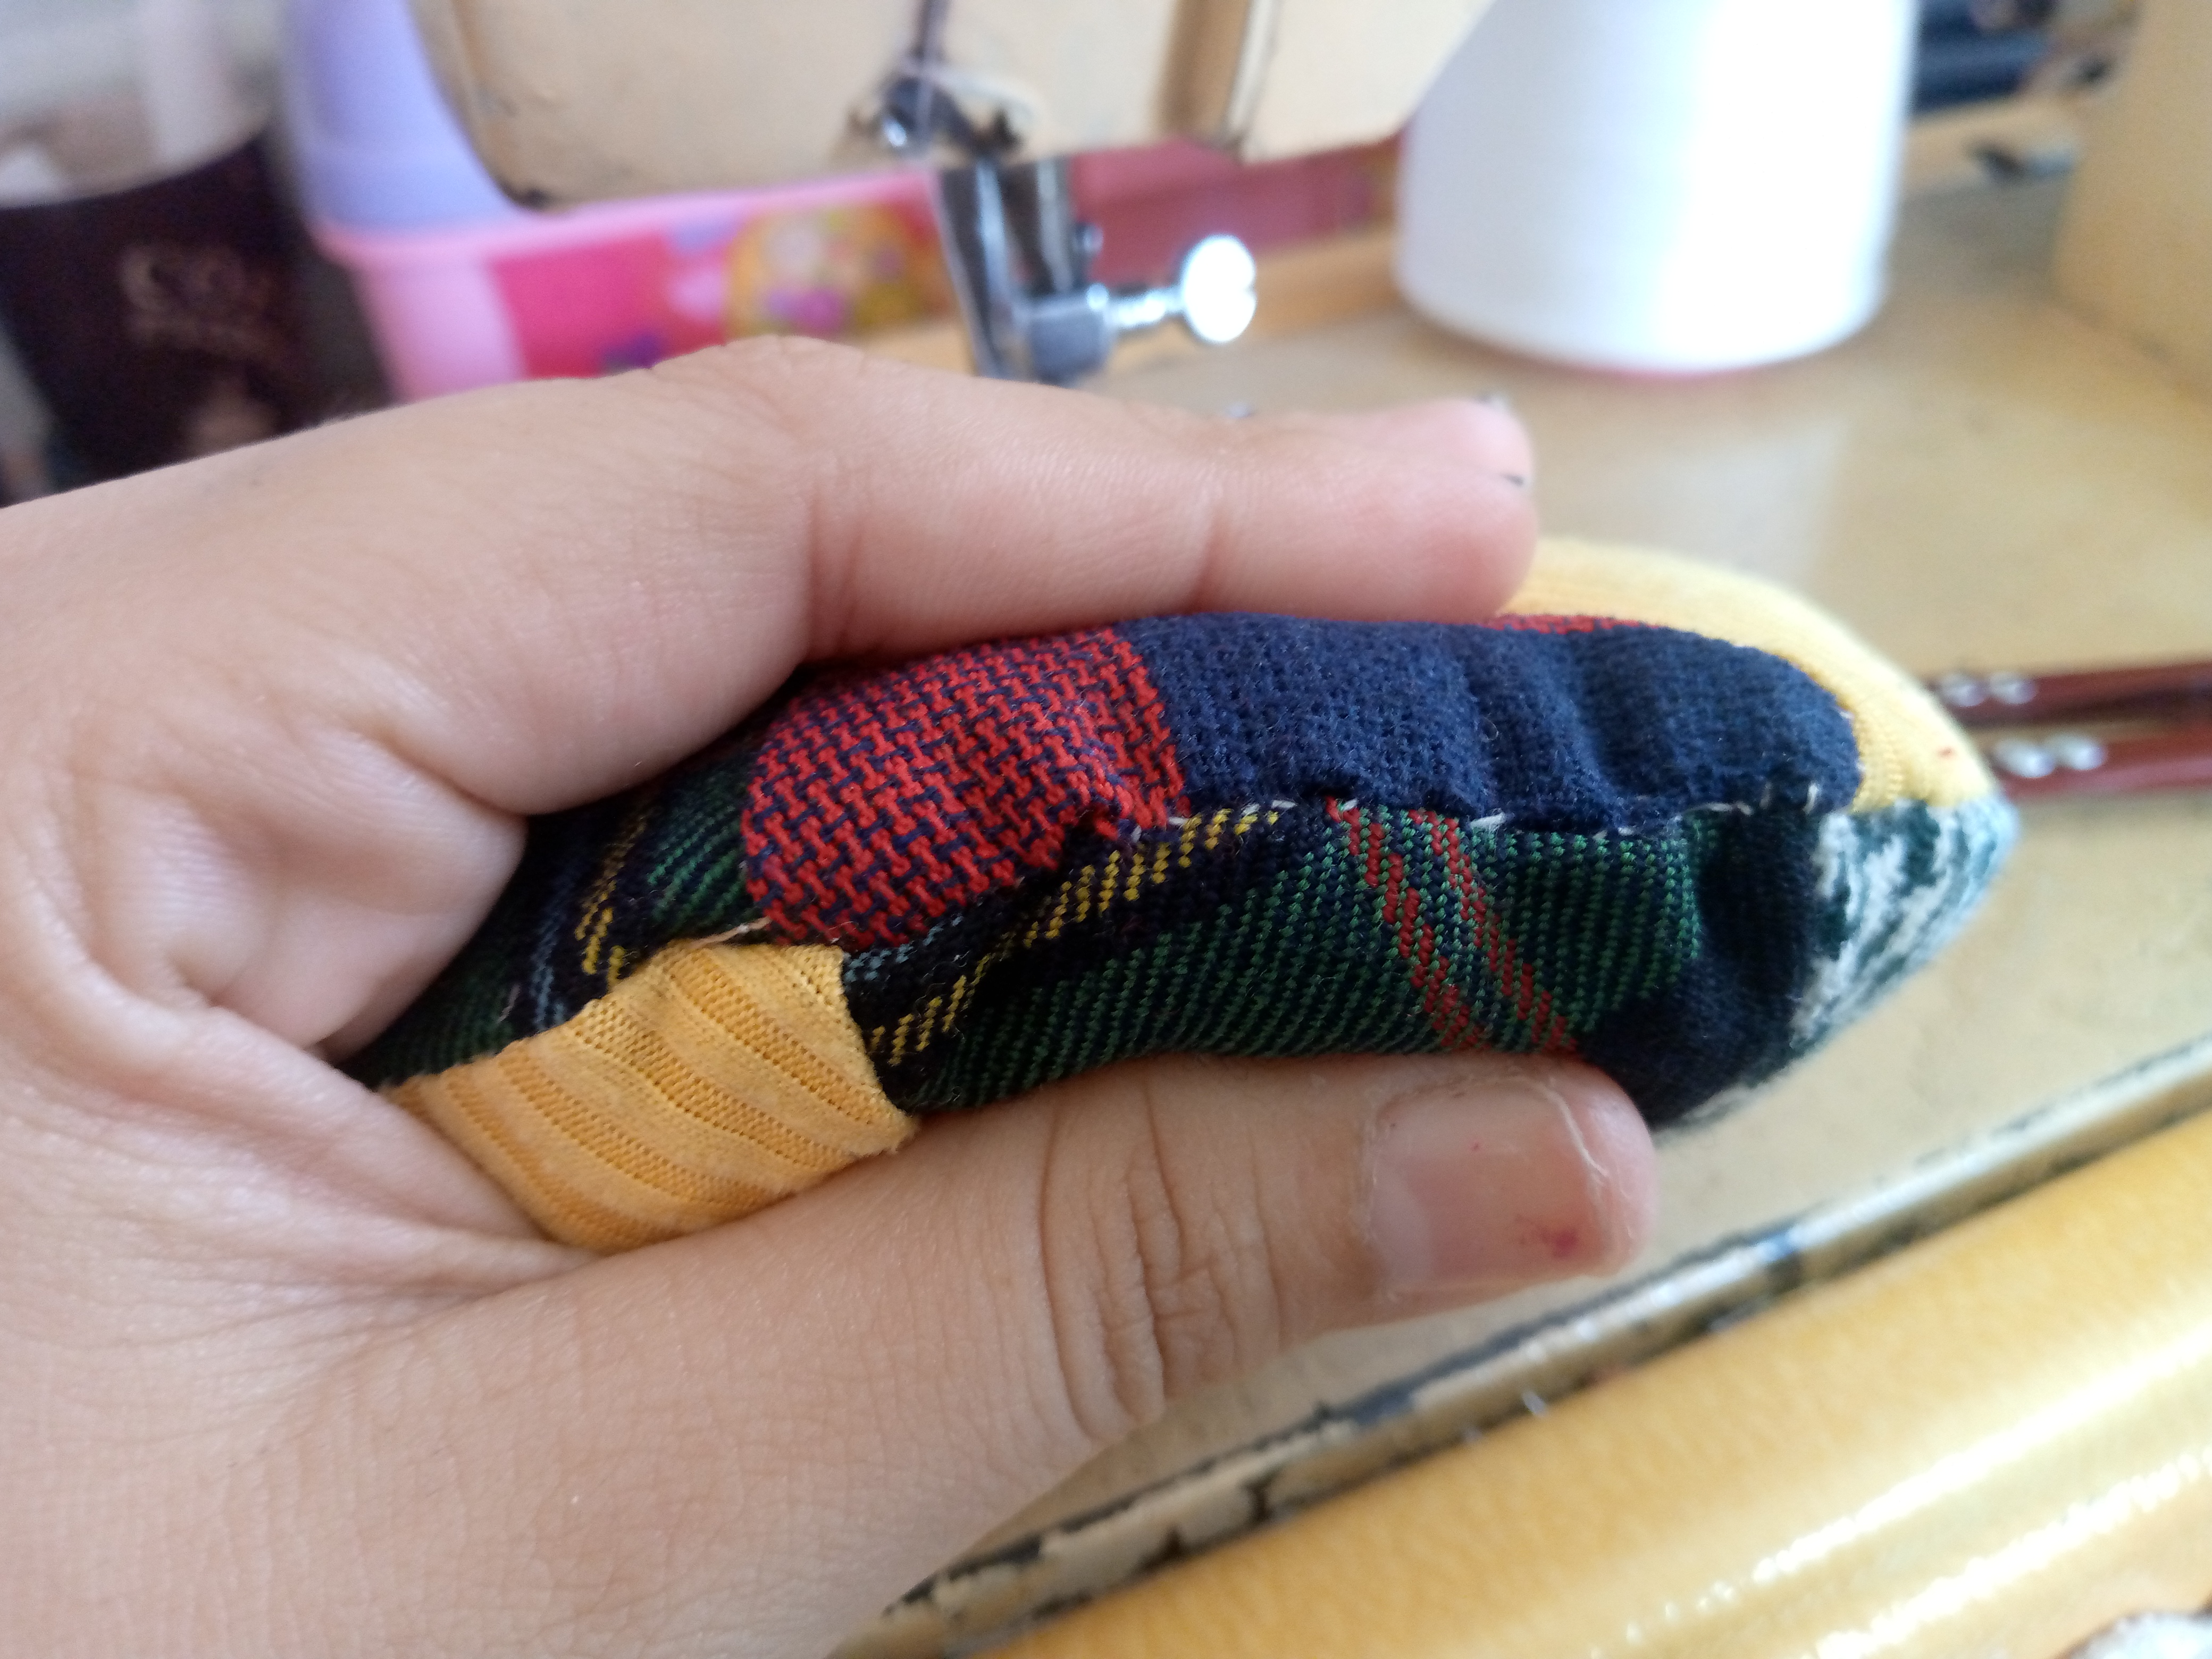
Then we sew the outline of our pieces by joining both circular pieces and we will leave an opening where we will insert the filling, then we will grab our thread and needle and in that part where we insert the filling, that little hole we will seal with invisible stitching so that our seam cannot be seen, with the same thread and needle we will make the shape of our flower on the pincushion by the parts where each triangle joins.

Paso 04
Step 04
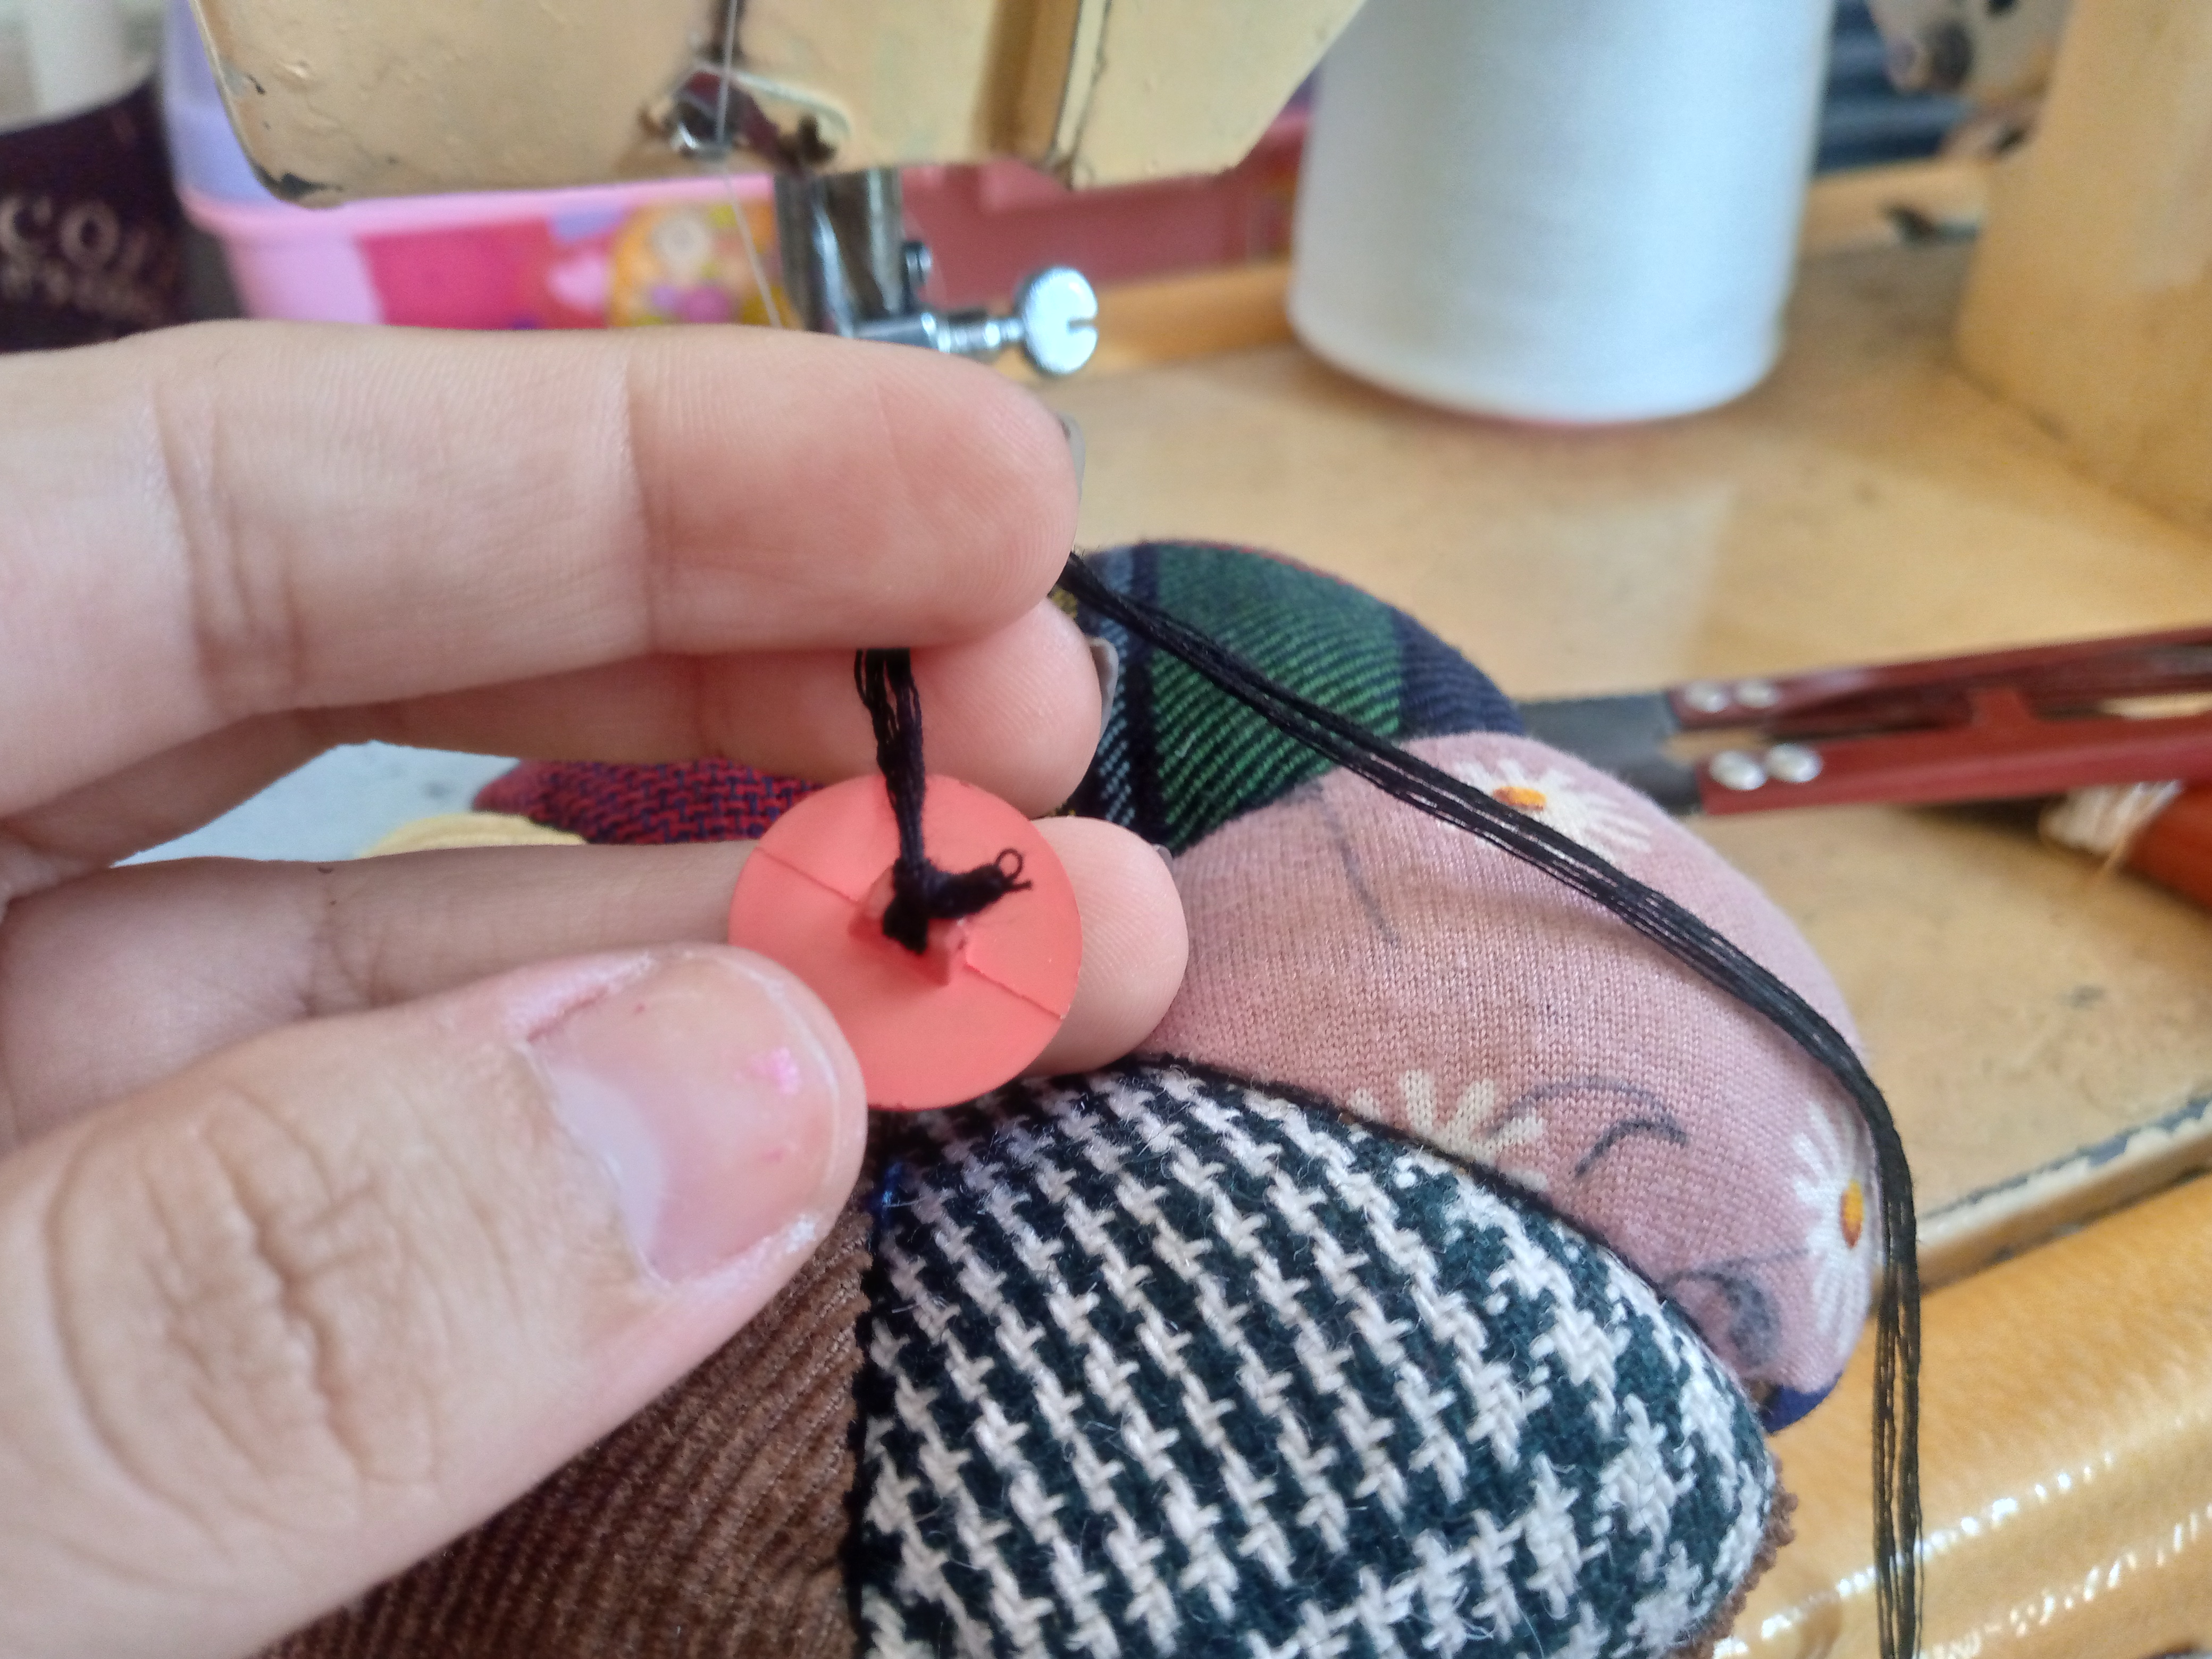
Finally, with my thick needle I decided to insert five strands of thread and sew the button. We adjust the strands of thread to the button so that it does not come loose. We sew it right in the center, so our flower is in the shape of a pincushion, now finished.
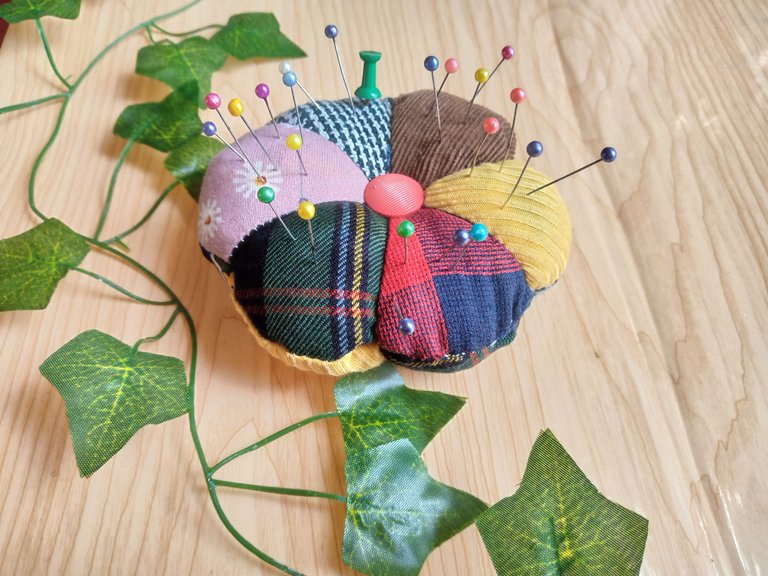
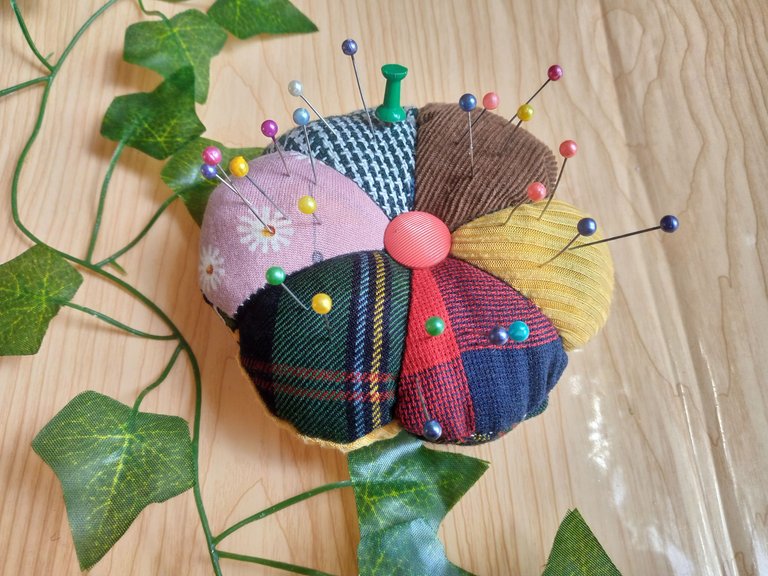
Resultado:// Result:
I really loved this pincushion and I think it will become one of my favorites over the next few months. It's very comfortable and practical when I sit down to sew in my favorite corner, the seams one. If you liked it, don't forget to tell me what you thought and if you've already made a pincushion like this, you could also leave me your photos in the comments. I'll be very happy to see your pincushions made by you 😍.
I hope you have a nice Tuesday and I say goodbye to you, I send you a virtual hug friends, see you soon 🫂💖.
Creating things with love 🌷❤️
🦋✨ All the images in this publication are my author ,📱taken with my TecnoSpark8C cell phone |📸Photos edited in PicsArt and Canva. Text translated in Google Translate.
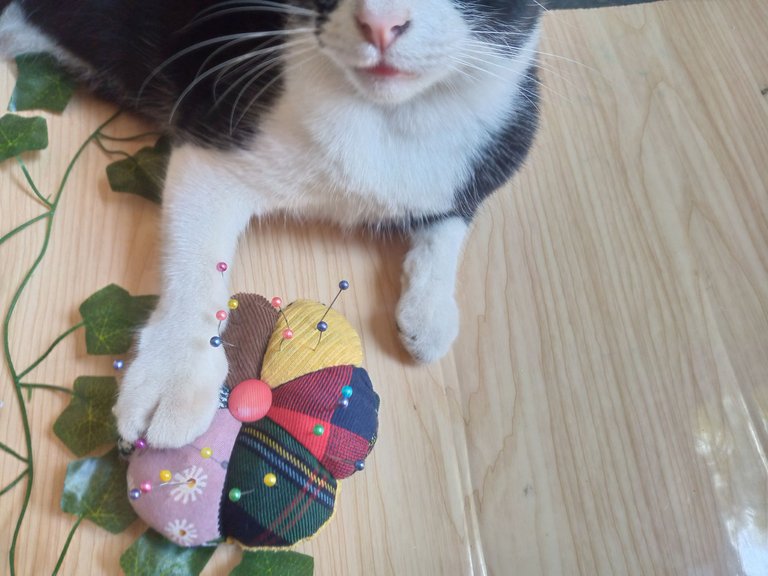
Kitty took interest in a new hobby 🤣
This was an enjoyable and informative post!!
El arte de la costura es un pasatiempo muy bueno ,si tienes problemas .....Con la costura se te van a olvidar un poco ,patrones medición,corte y confección,si que es un gran pasatiempo de habilidad 🤭🪡
I agree!! It’s good to have hobbies you enjoy 🥹
Such a darling idea! I adore how you used fabric scraps to create a pincushion in the shape of a flower. This is an excellent way to produce something functional and lovely at once and recycle materails. Clear and simple to obey, I especially appreciate your use of a cardboard circle as a pattern. Thanks for letting me share your project; I'm certainly going to try to create one of these myself.
Good morning, thank you so much for your comment, it encourages me a lot. I always like to share what I know with you because that way we get a lot out of our scraps. The truth is that it looks very beautiful. I also liked it a lot. I hope you are encouraged to make one, you will not regret it. 👍🏻😊
it is great to be part of this group with you. Seeing what everyone makes from their scraps is inspiring, and your advice and initiatives are always much appreciated. You're thrilled to try this one! Thank you for sharing.
Welcome 👍🏻🪡
Hermoso alfilero, sin duda alguna una magnífica idea para reciclar esos retazos de tela que siempre quedan y sobre todo los mas pequeños que no son suficiente para hacer gran cosa.
Sii así es 🥰me encantó mucho a mi también, gracias por animador comentario saludos @laranitacrochet 👋🏻🐸
You are so talented!!!😍
!BBH
Oh gracias 😊
!Saludos!
Super lindo, práctico y útil. Gracias por compartir tu proyecto con nosotros. Saludos y bendiciones.
Muchas gracias es bueno saber que te ha gustado esta idea 🤭🥰
It a great piece put together well done
Thanks friend 🥺🥰