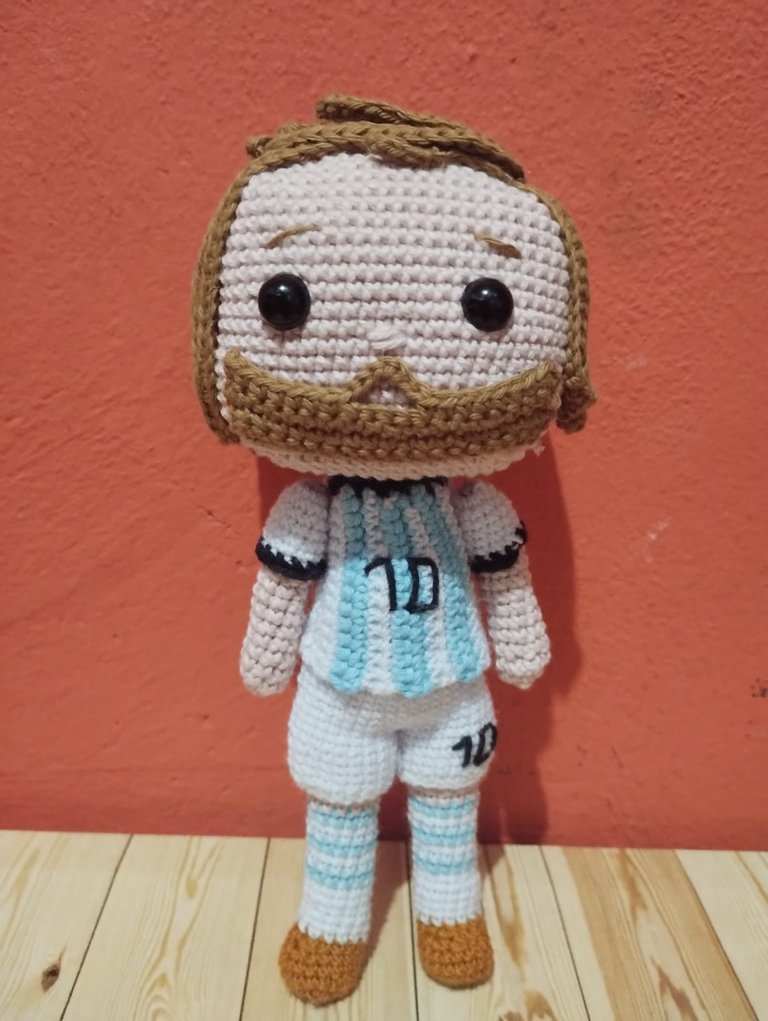

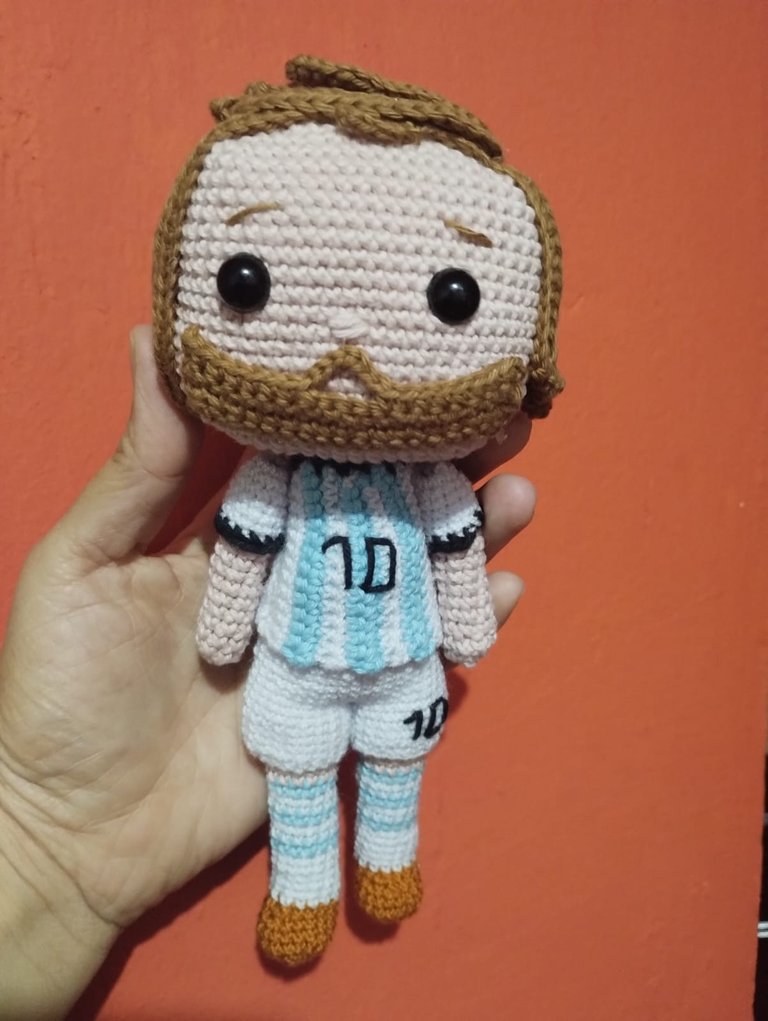
This time I tried something new and after my third place prize in the Valentine's Day contest, I thought I should venture to make a project a little more challenging. This time it's about Leo Messi, who doesn't know this soccer star, but I wanted to do something different from what I usually do and looking for inspiration I saw the Funko pop dolls. This design is characterized by its square head and somewhat small bodies in proportion to the size of his head. | Esta vez intenté algo nuevo y después de mi premio al tercer lugar en el concurso del día de San Valentín, pensé que debía aventurarme a realizar un proyecto un poco más retador. Está vez se trata de Leo Messi, quién no conoce a ésta estrella del fútbol, pero quería hacerlo algo diferente a lo que normalmente vengo haciendo y buscando inspiración ví los muñecos Funko pop. Este diseño se caracteriza por su cabeza cuadrada y cuerpos algo pequeños en proporción al tamaño de su cabeza. |
Well you will see that my Funko pop, is only the square head, since the body is not so small. The challenge of this character was to learn how to make the head. I made about ten attempts, really, believe me. It was always a bit lopsided and getting it perfectly square was an odyssey. | Pues verán que mi Funko pop, es solo la cabeza cuadrada, ya que el cuerpo no es tan pequeño. El reto de este personaje fue aprender a realizar la cabeza. Hice unos diez intentos, de verdad, créanme. Siempre me quedaba algo ladeada y conseguir que quede perfectamente cuadrada fue toda una odisea. |

I tried several methods according to the videos I could study on Youtube but I did not succeed. Until I understood what it was all about. It is necessary that we have the same amount of points on each side, counting the two increases that are made in the corners which should count one for one side and the other increase for the side with which the vertex is formed. Mathematics and geometry. | Probé varios métodos según los vídeos que pude estudiar en Youtube pero no lo conseguí. Hasta que entendí de qué se trataba. Es necesario que nos quede la misma cantidad de puntos de cada lado, contando los dos aumentos que se hacen en las esquinas el cual debe contar uno para un lado y el otro aumento para el lado con el que se forma el vértice. Matemáticas y geometría. |
Another change I made in comparison to the way I had been working my amigurumis, was in the hole in the head to introduce a long neck that gives a better finish to the figures. I started with 8 stitches in a magic ring, increased to 16 low stitches in the next round and then gave it height, by turning the fabric this shape will become a hole to insert the body. | Otro cambio que hice en comparación a la forma en que venía trabajando mis amigurumis, fue en el orificio de la cabeza para introducir un cuello largo que le da un mejor acabado a las figuras. Empecé con 8 puntos en un anillo mágico, aumenté a 16 puntos bajos en la siguiente vuelta y luego le di altura, al darle vuelta al tejido esta forma se convertirá en un orificio para insertar el cuerpo. |

After having the 16 low stitches we start with the increases to form the square base. The fabric grows in pairs and the increases are always two in each corner. In this round, which will be the first one, we will make a single crochet and two increases for the first corner. Then two single crochets for the second corner and two increases, two single crochets and two increases for the third corner and for the last corner two single crochets, we only have space left for one single crochet plus the single crochet we did at the beginning, we complete the two single crochets of separation between each corner. | Después de tener los 16 puntos bajos comenzamos con los aumentos para formar la base cuadrada. El tejido va creciendo en pares y los aumentos siempre son dos en cada esquina. En esta vuelta que será la primera vamos a realizar un punto bajo y dos aumentos para la primera esquina. Luego dos puntos bajos para la segunda esquina y dos aumentos, dos puntos bajos y dos aumentos para la tercera esquina y para la última esquina dos puntos bajos, sólo nos quedaría espacio para un punto bajo más el punto bajo que hicimos al inicio completamos los dos puntos bajos de separación entre cada esquina. |
In the next round we will make four single crochet stitches between each corner. We wait with two single crochets and the two increases, remember that those two single crochets will be added to the last two remaining ones and we will have the four stitches of separation between vertex and vertex. We continue with four single crochets plus two increases. The next increase will be six single crochet stitches. Then eight low stitches and so on until the desired size. | En la siguiente vuelta haremos cuatro puntos bajos de separación entre cada esquina. Esperamos con dos puntos bajos y los dos aumentos, recordemos que esos dos puntos bajos se sumarán a los dos últimos restantes y tendremos los cuatro puntos de separación entre vértice y vértice. Seguimos con cuatro puntos bajos más dos aumentos. El siguiente aumento será de seis puntos bajos de separación. Luego de ocho puntos bajos y así sucesivamente hasta el tamaño deseado. |
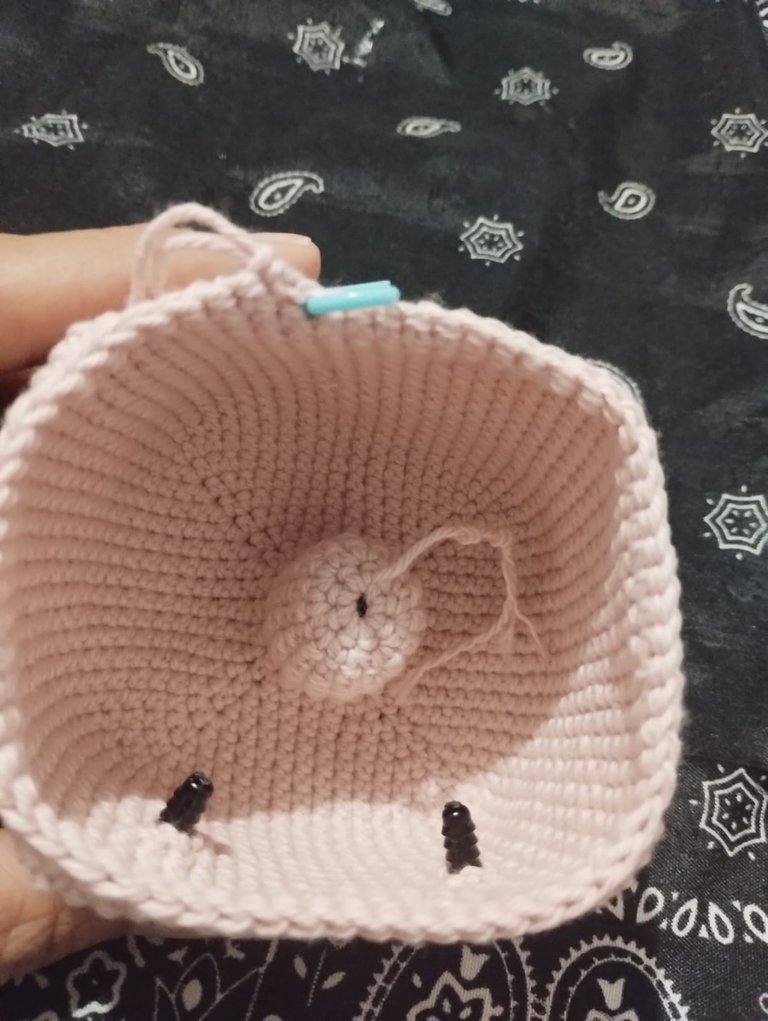

I worked 12 stitches of separation between each vertex. Then the height is worked and the decreases are made in the corners, also in pairs. We must take care that the decreases, since there are two, one is the end of one side and the other the end of the other, which together form the corner. | Trabajé 12 puntos de separación entre cada vértice. Luego se trabaja la altura y las disminuciones se realizan en las esquinas, también en pares. Debemos cuidar que las disminuciones ya que son dos, una sea el final de un lado y la otra el final del otro que juntas forman la esquina. |

I worked the legs separately and then joined them together at one point to work the body. I also worked the arms separately along with the sleeves of the character's uniform and separately made shorts and the rest of the shirt part. I placed the number 10 that characterizes the character and the hair and beard. | Trabajé las piernas por separado y luego las uní en un punto para trabajar el cuerpo. También trabajé los brazos aparte junto a las mangas del uniforme del personaje y aparte le hice pantalones cortos y la parte el resto de la camiseta. Coloqué el número 10 que caracteriza al personaje y el cabello y la barba. |


This is in summary the whole process of making my almost Funko pop inspired by Messi. It took a lot of time. Yes, it's true, but it was because I didn't know how to make the head, for the next one I think it will be much faster. It's a pleasure to share it on #needleworknonday. See you next time. | Este es en resumen todo el proceso de elaboración de mi casi Funko pop inspirado en Messi. Tarde un montón. Si, es cierto, pero fue por no saber hacer la cabeza, para la próxima creo que será mucho más rápido. Es un grato placer compartirlo en #needleworknonday. Hasta la próxima. |


Imágenes editadas en: inshot
Fotos tomadas con Redmi 10
Images edited in: inshot
Photos taken with Redmi 10
Wow querida @artsugar este futbolista quedó hermoso, te felicito mi sobrino se enamoró de él, jeje
Gracias querida. Mi hijo está igual. Jajajaja
Saludos
Te quedo super lindo :3 es increíble que hayas seguido intentando después de tantas veces de querer hacer la forma de la cabeza, pero solo volviendo a intentar se puede mejorar.
Exacto. Para avanzar hay que perseverar. Insistir en algo que sea de provecho siempre vale el esfuerzo pues al final podremos degustar el dulce sabor del éxito. Aún me falta mucho para mejorar, pero sigo adelante.
Saludos y muchas bendiciones
That’s my star and favorite player 🥰
You did great I love it and I’m glad you still finished even after not figuring out how to make the head at first
But you still did it anyway and I love it.
Thank You. ☺️🙏
You’re welcome
Muy lindo Yenys ❤️. Me encantó el Messi Funko Pop. Cuando veo todas estas cosas de crochet y todas las figuras que pueden crear me sorprende bastante. ¡Que concentración hay que tener para que salga perfecto! Te felicito 😃
Muchas gracias Laura. Seguimos aprendiendo cada día y siempre se nos presentan nuevos retos, este fue uno de ellos. Con muchos intentos conseguí una cabeza Funko aceptable. Aún tengo que trabajar en las proporciones para obtener un mejor resultado.
Saludos y muchas bendiciones
Quedo muy lindo el amigurumi de Messi. Te felicito 👏
Gracias querida Irene.
Abrazos y todos mis buenos deseos para ti.
This is so cute, little Messi haha
Nice work👏🏾
Thank You. 😁😁👋
wow little messi, this is really creative and beautiful, I can imagine how children will love to have this as a gift
Yessssss, my son wants it for himself.
Greetings and thank you for your kind comment.
Hola amiga, el futbolista te quedó espectacular, a pesar del tiempo que te tomó hacer la cabeza el resultado valió la pena, gracias por compartir tu creatividad y talento.
Saludos!
Totalmente. La simetría en este tipo de cabezas es fundamental y cuando se trata de geometría más crochet, resulta algo complejo, para mí.
Gracias por tu alentador comentario
No te lo puedo creer, wow, bellísimo, siempre vale el esfuerzo dar la milla extra 💝
Gracias mi bella. Valoro cada palabra en tu alentador comentario.
Tejer estilo Funko es un reto. Yo solo tejí uno (Harry Styles), jaja. Justo me encanta diseñar muñecos porque se mezcla bastante Matemáticas y Geometría... amo la Geometría. ¡Gran trabajo!.
Yo no amo tanto las matemáticas y la geometría, puessss. Lo que pasa es que no me gusta contar puntos, pues me distraigo y me pierdo, y eso que soy contador de profesión, que contrariedad. Jajajajaja
gracias