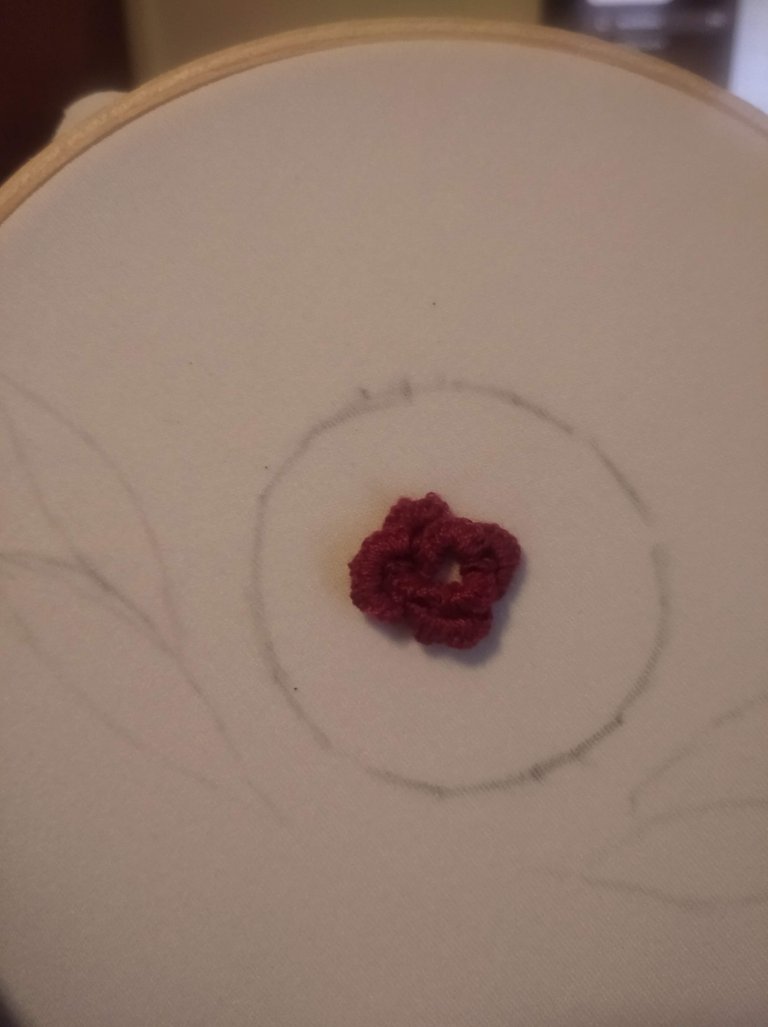
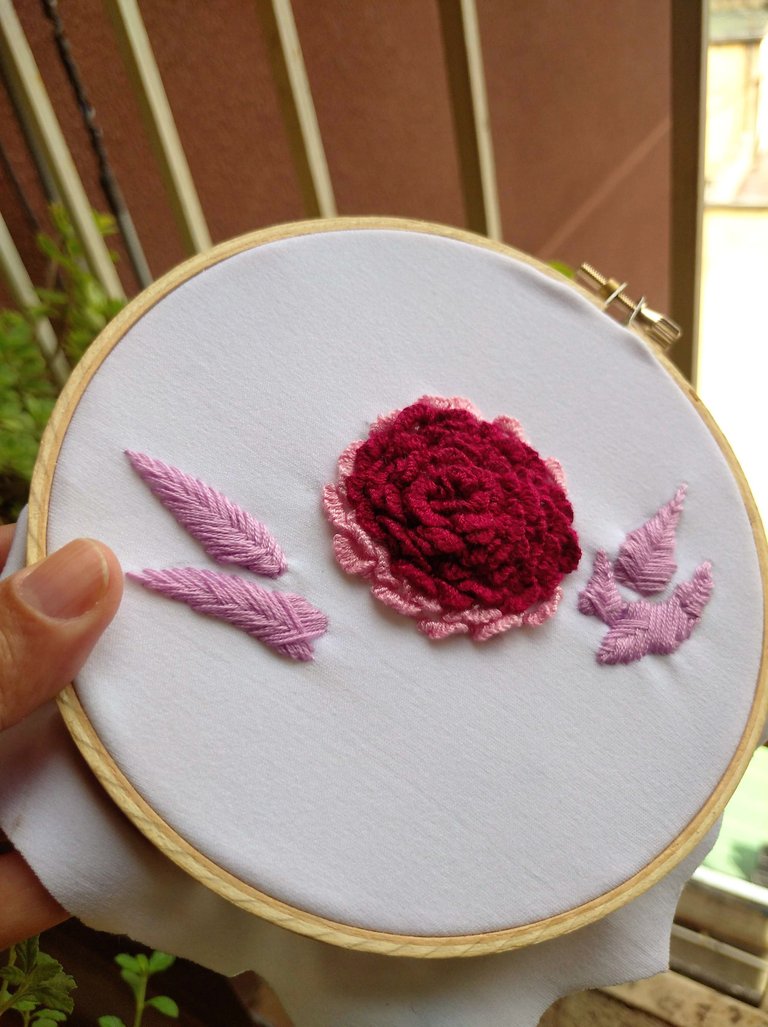
A few days ago I told you about a project I'm practicing for, aka handkerchiefs for my family, and the next lesson was how to make a tosa with this stitch that I've never embroidered before. I know I wanted to include roses in my embroidered flower repertoire, especially since they are my mom's favorite flowers. So I want to make them for her scarf.
I have seen various ways of making roses, all with different points, but this type of point had not had the opportunity to do it. It is not complicated at all but it does take a long time to complete the entire flower. It took me three times longer on this flower than on the lavenders I made the other day.
For my next practices, I will try to make lilies, daisies and astromelias.
Hola chicos!
Hace unos días les conté sobre un proyecto para el que estoy practicando, aka los pañuelos para mi familia, y la siguiente lección fue como hacer tosas con este punto que nunca había bordado antes. Sé que quería incluir rosas en mi repertorio de flores bordadas, especialmente porque son las flores favoritas de mi mamá. Así que las quiero hacer para su pañuelo.
He visto varias formas de hacer rosas, todas con distintos puntos pero este tipo de punto no había tenido oportunidad de hacerlo. No es nada complicado pero si tarda bastante en completarse toda la flor. Tardé tres veces más en esta flor que en las lavandas que hice le otro día.
Para mis próximas practicas, intentaré hacer lirios, margaritas y astromelias.
But going back to this embroidery, these are the steps with which I embroidered this rose:
Materials:
- Embroidery hoop.
- Cloth.
- Thread
- Needle.
- Pencil.
Pero volviendo a este bordado, estos son los pasos con los que bordé esta rosa:
Materiales:
-Aro de bordar.
-Tela.
-Hilo
-Aguja.
-Lapiz.
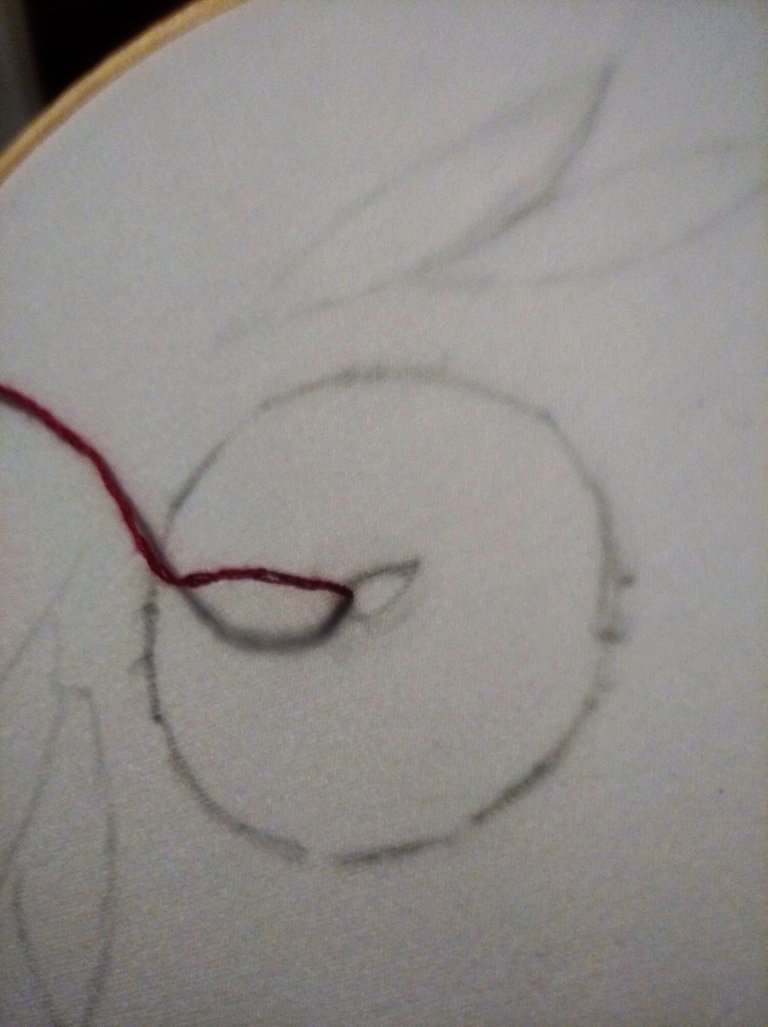
Embroidered Rose
Step 1:
Go through the fabric with the needle from the bottom up.
Rosa Bordada
Paso 1:
Atravesar la tela con la aguja de abajo hacia arriba.
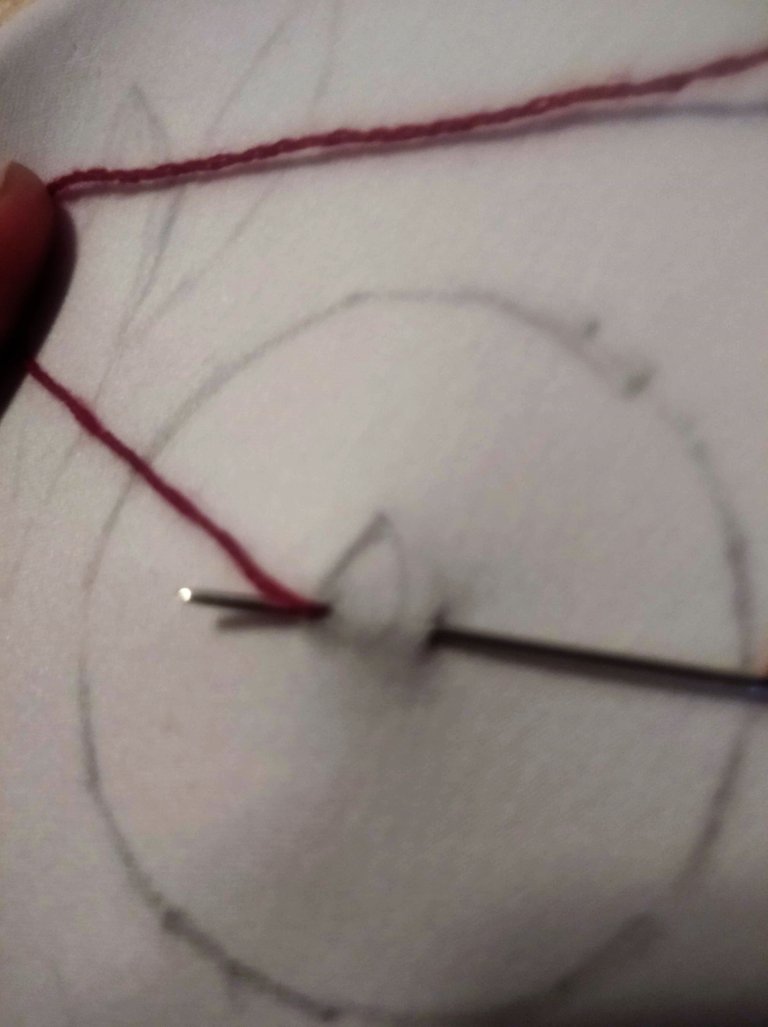
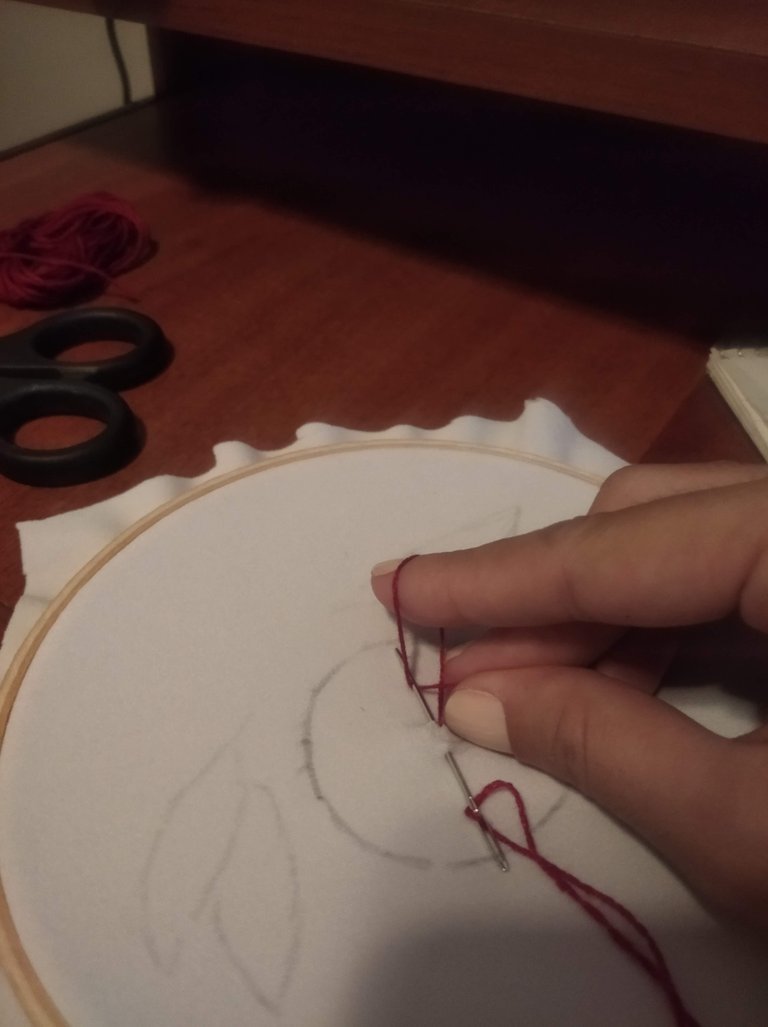
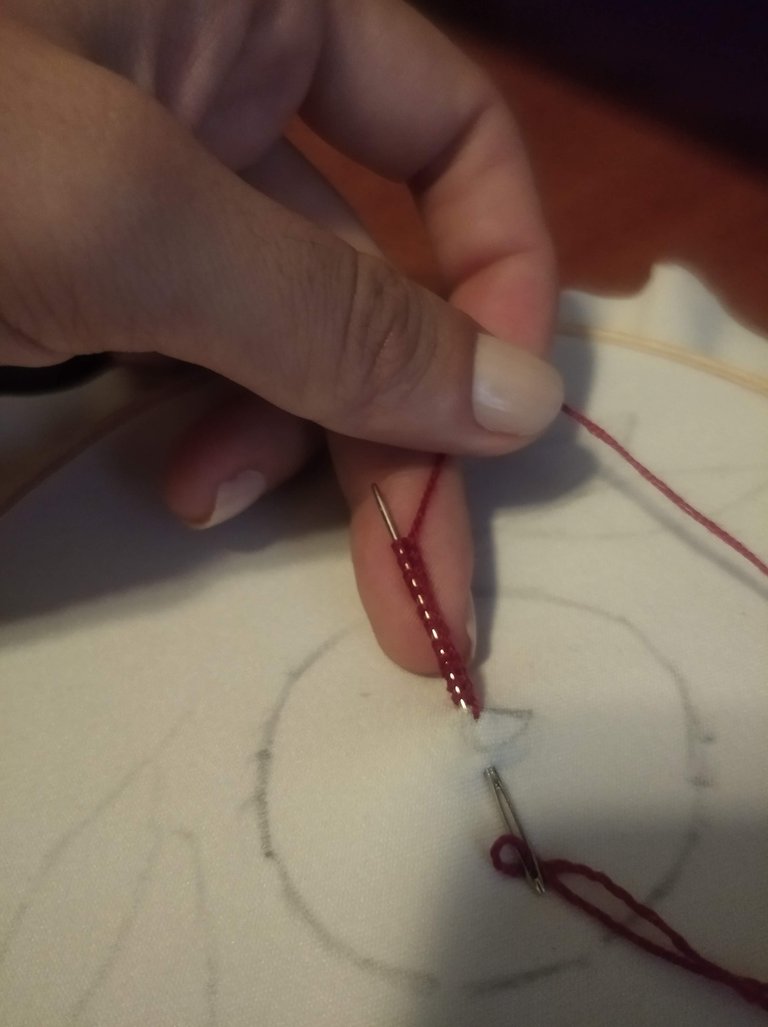
Step 2:
Insert the needle the desired distance and pull it out next to the first stitch (very close or at the same point) and do not pull the needle all the way out. It is very important NOT TO PULL OUT THE NEEDLE. It needs to stay in the fabric to be able to use the needle as a base to make this stitch.
Paso 2:
Introducir la aguja a la distancia deseada y sacarla al lado de la primera puntada (muy cerca o en el mismo punto) y no sacar la aguja por completo. Es muy importante NO SACAR LA AGUJA. Es necesario que se quede en la tela para poder usar la aguja como base para hacer este punto.
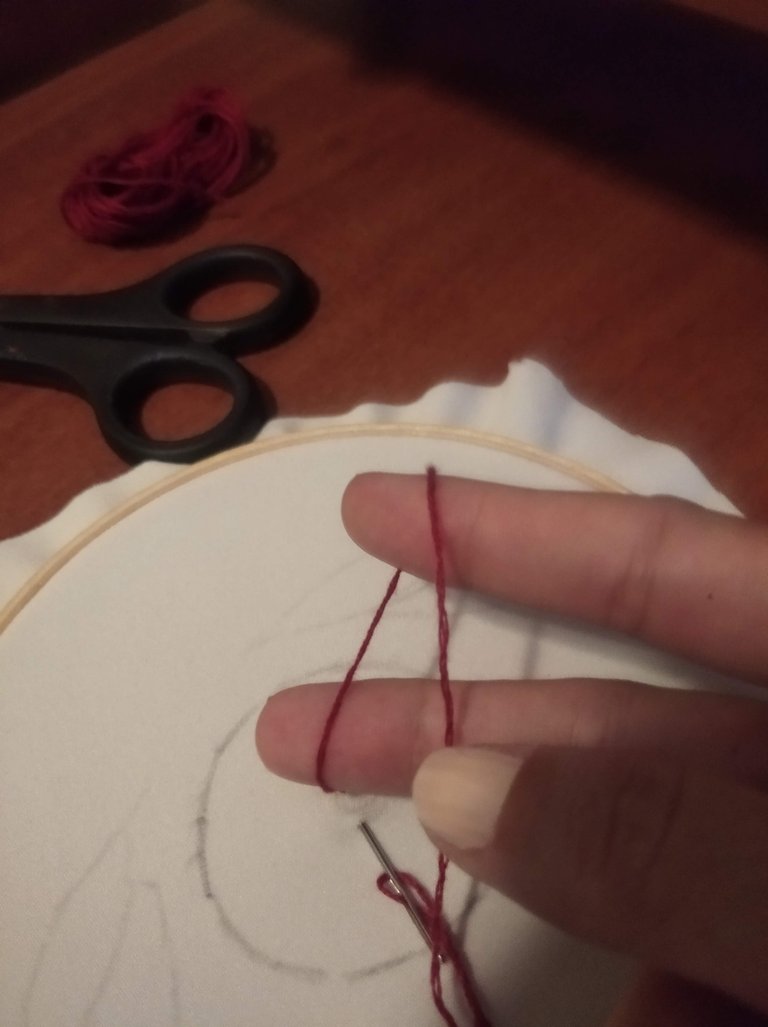
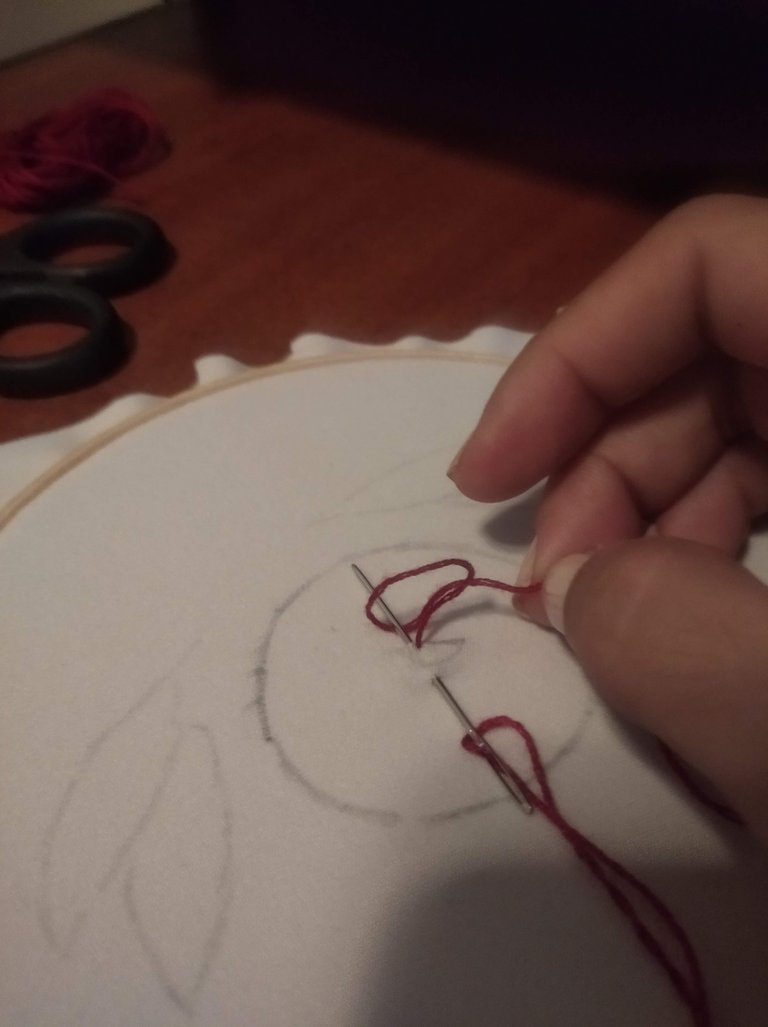
Step 3:
Wind the thread on the needle as many times as we want.
It sounds complicated but it is not. You just have to put the thread around your index finger and insert the needle through the side and push the thread with it until it comes out of the finger. And then pull so it's a little snug on the fabric.
Paso 3:
Enrollar el hilo en la aguja todas las veces que queramos.
Suena complicado pero no lo es. Solo tienes que poner el hilo alrededor de tu dedo índice y meter la aguja por el lado y empujar el hilo con ella hasta sacarlo del dedo. Y luego halar para que quede un poco ajustado en la tela.
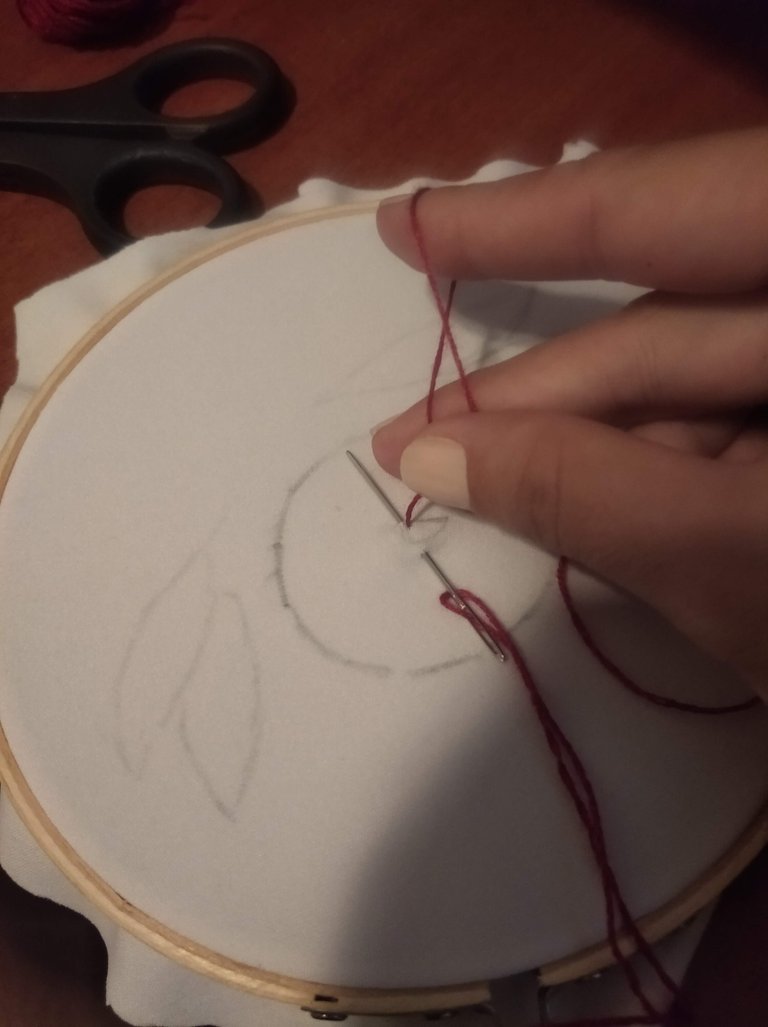
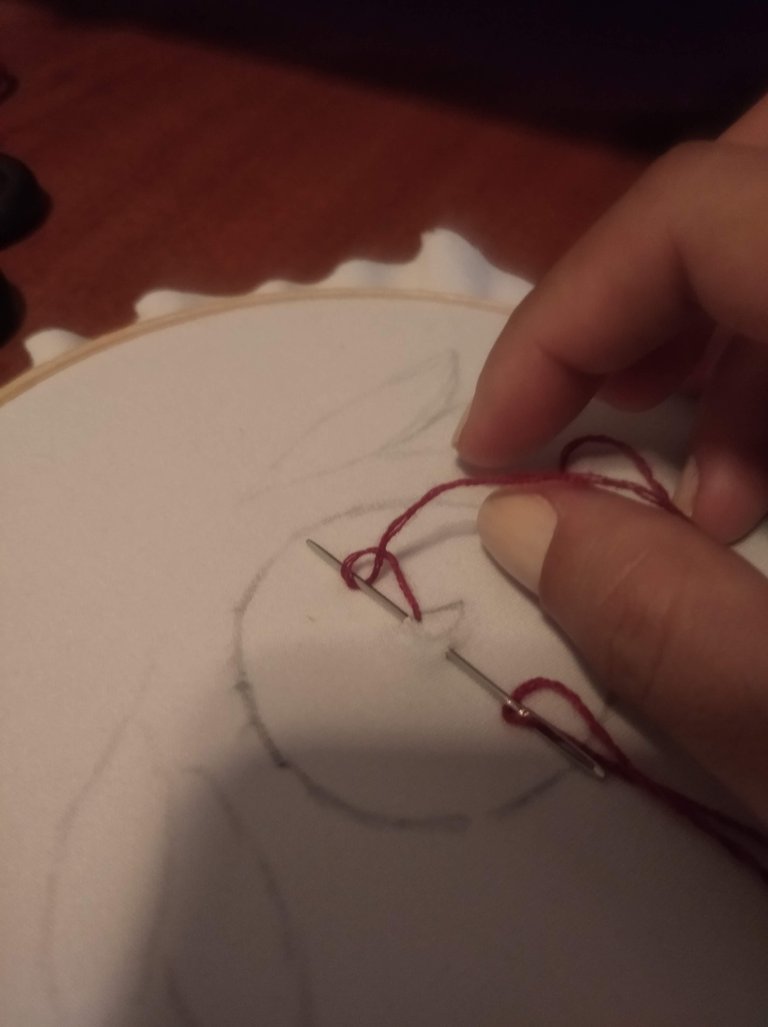
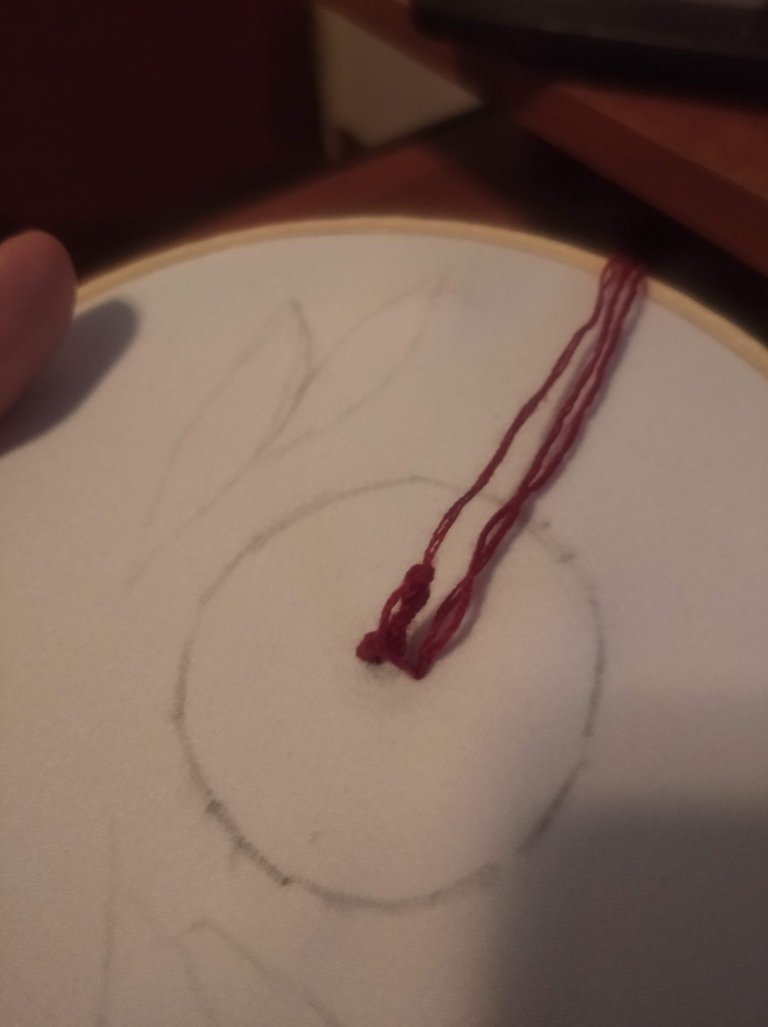
Step 4.
Repeat until we have a little more than the length of the stitch that we want to cover. I do 1.5-2 more times to make sure it's curled and curved.
Paso 4.
Repetir hasta que tengamos un poco más del largo de la puntada que queremos cubrir. Yo hago entre 1.5 o 2 veces más para asegurarme de que quede arruchado y curvo.
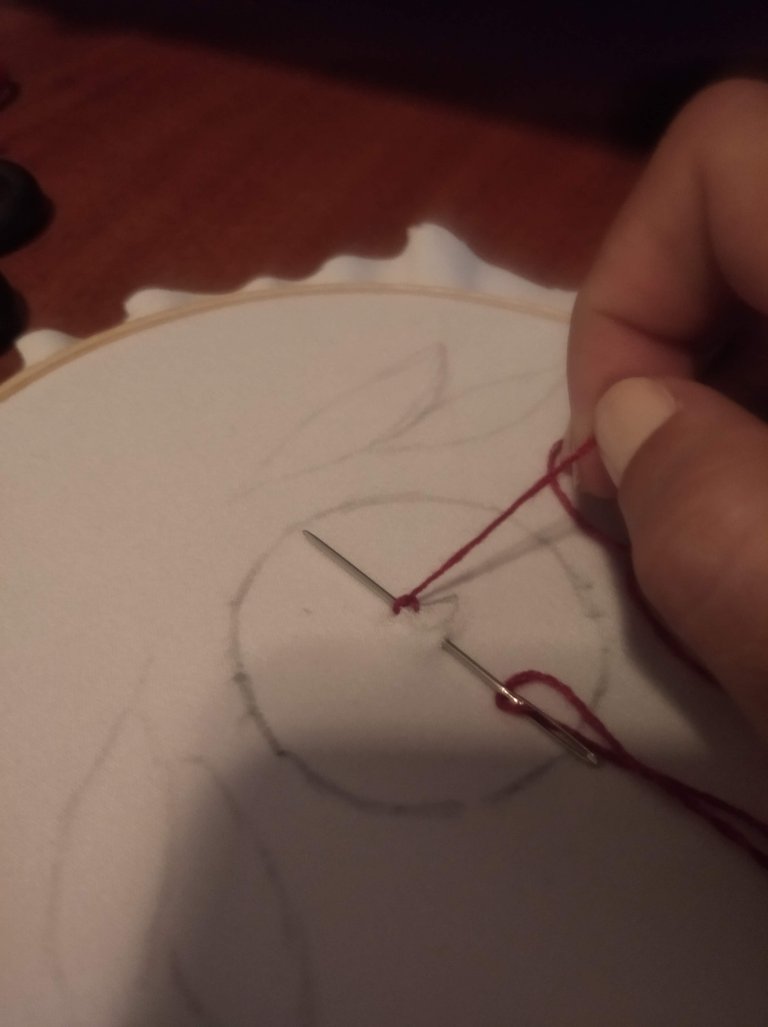
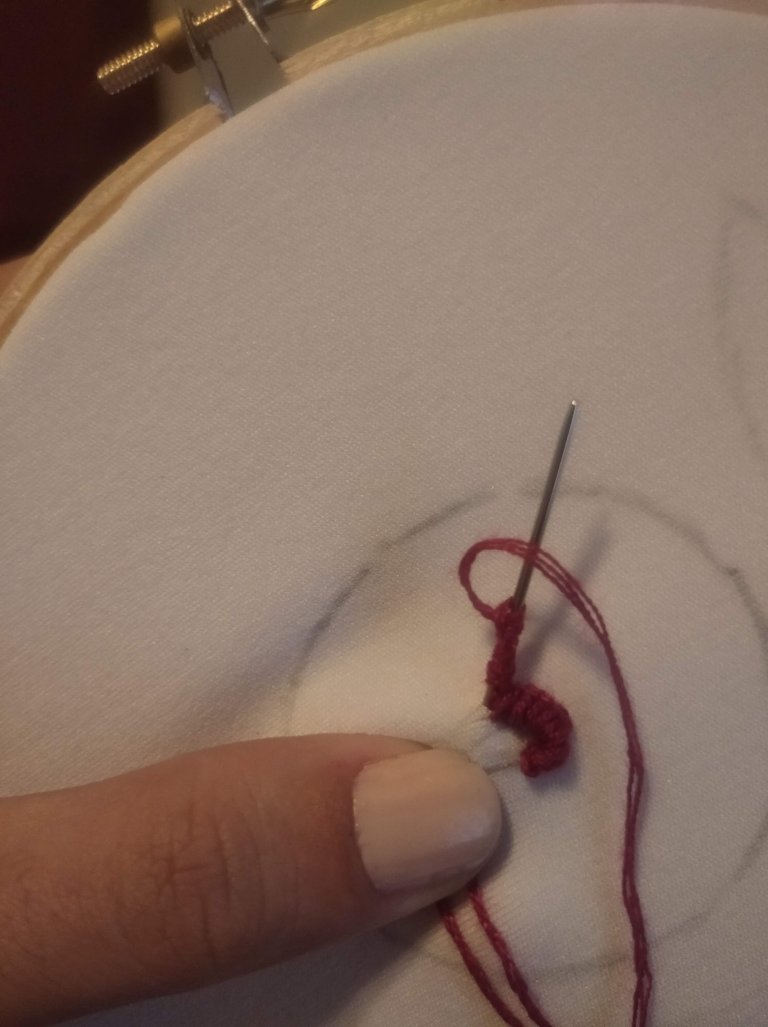
Step 5
Hold the knots and pull out the needle. This must be done carefully. You need to pull on the needle and thread so that the knots stay in place.
Paso 5
Sujetar los nudos y sacar la aguja. Esto debe hacerse con cuidado. Debes halar la aguja y el hilo para que los nudos queden en su lugar.
Step 6
Insert the needle at the end of the line of knots to secure them in the fabric.
Paso 6
Meter la aguja al final de la línea de nudos para asegurarlos en la tela.
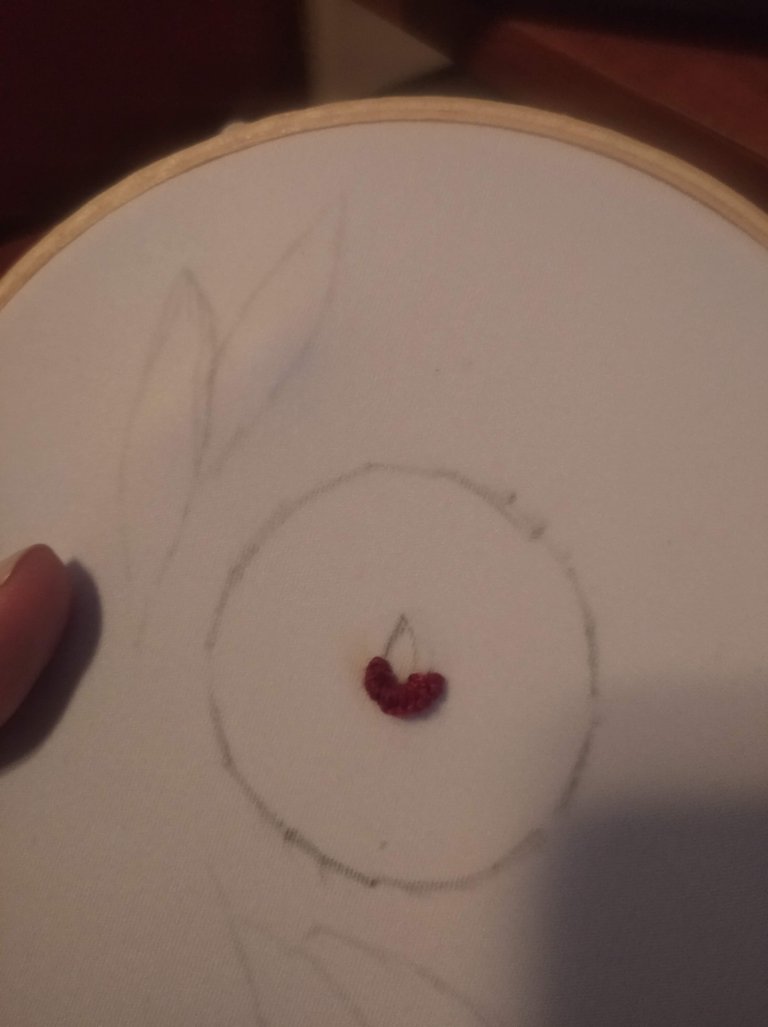
Step 7
Repeat the process in the desired location
Paso 7
Repetir el proceso en el lugar deseado
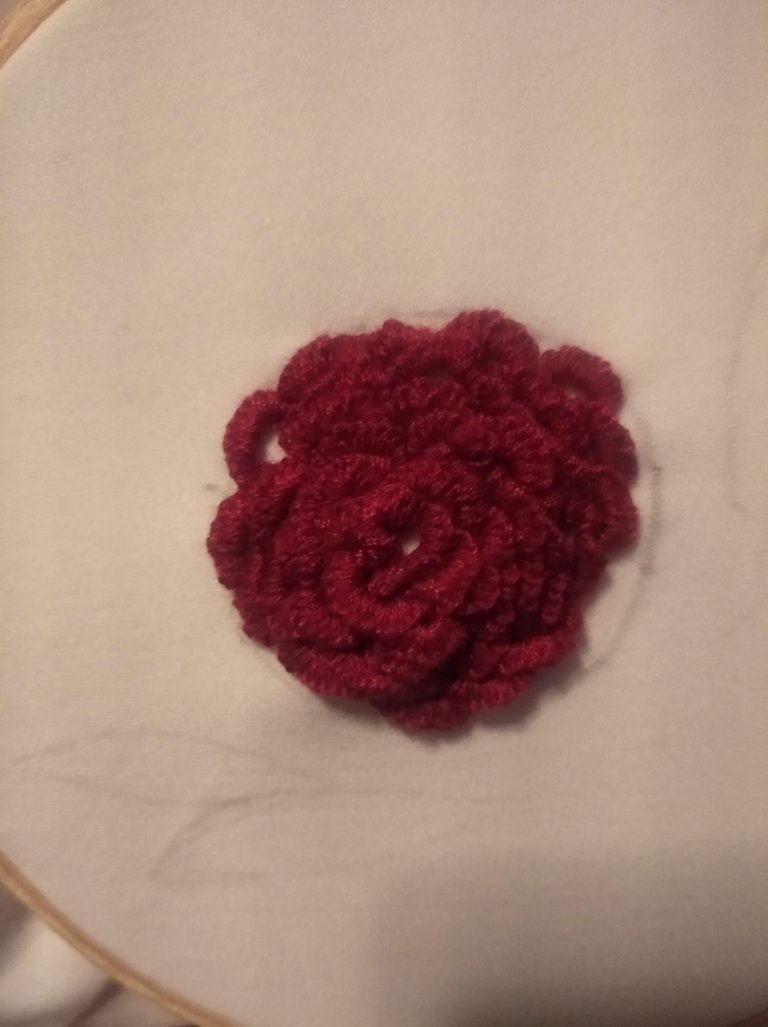
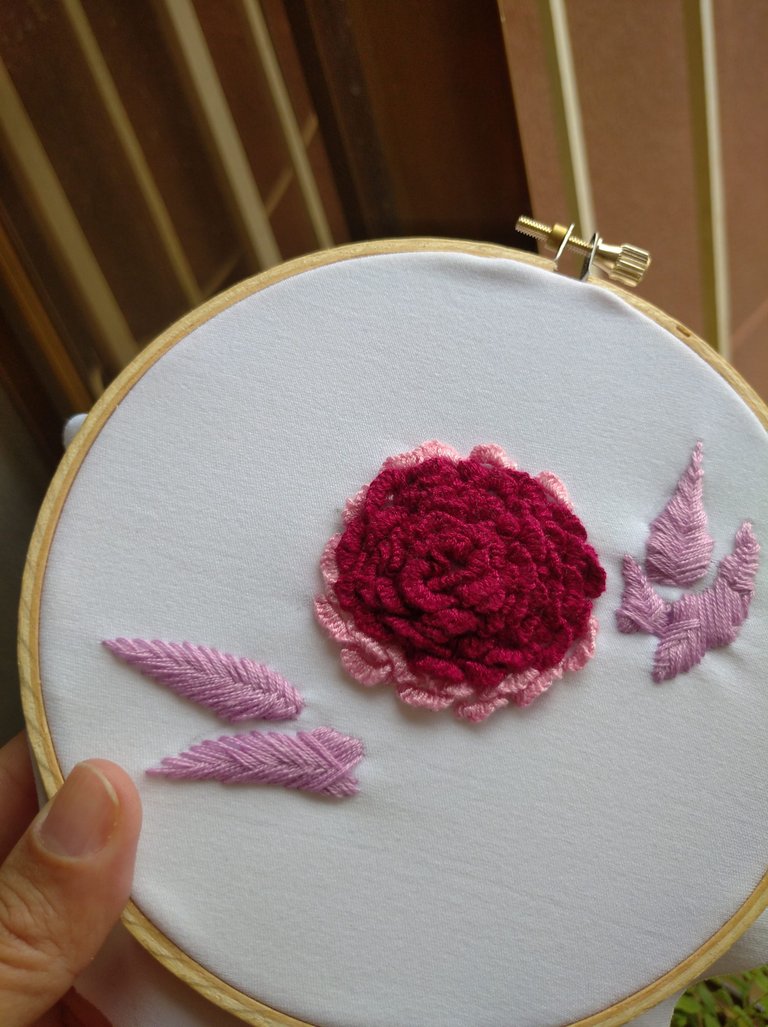
This point is perfect for making roses because it is curved like the edges of these flowers.
I know that on the outside of the flower, I used another color but... I ran out of thread 🙈
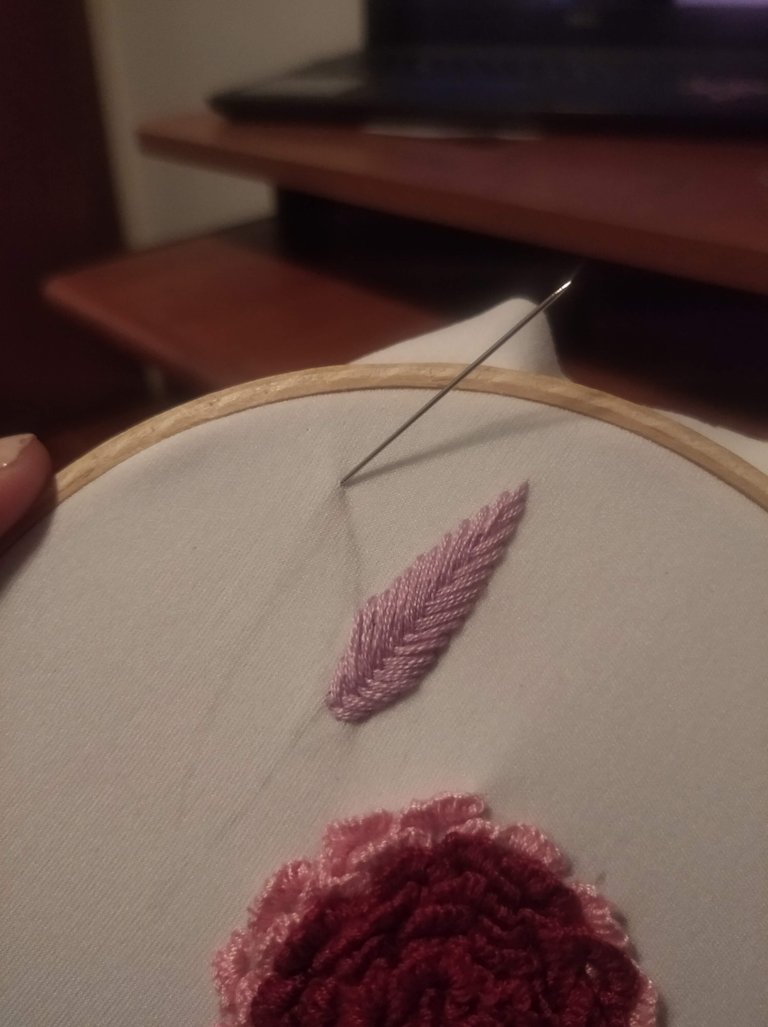
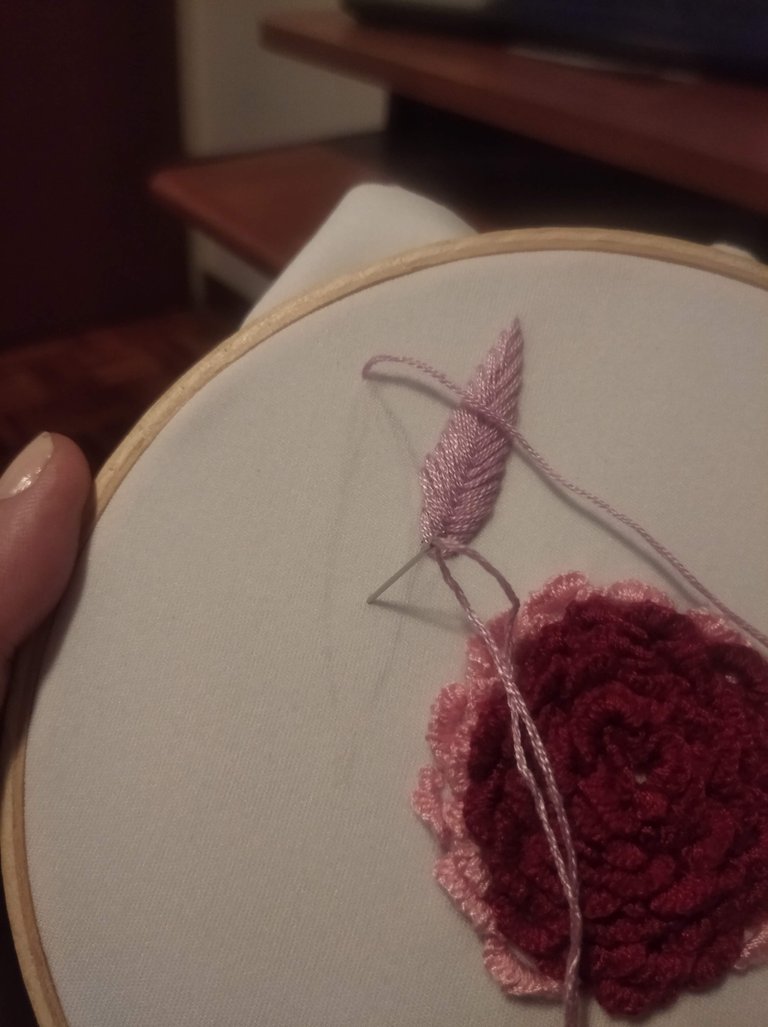
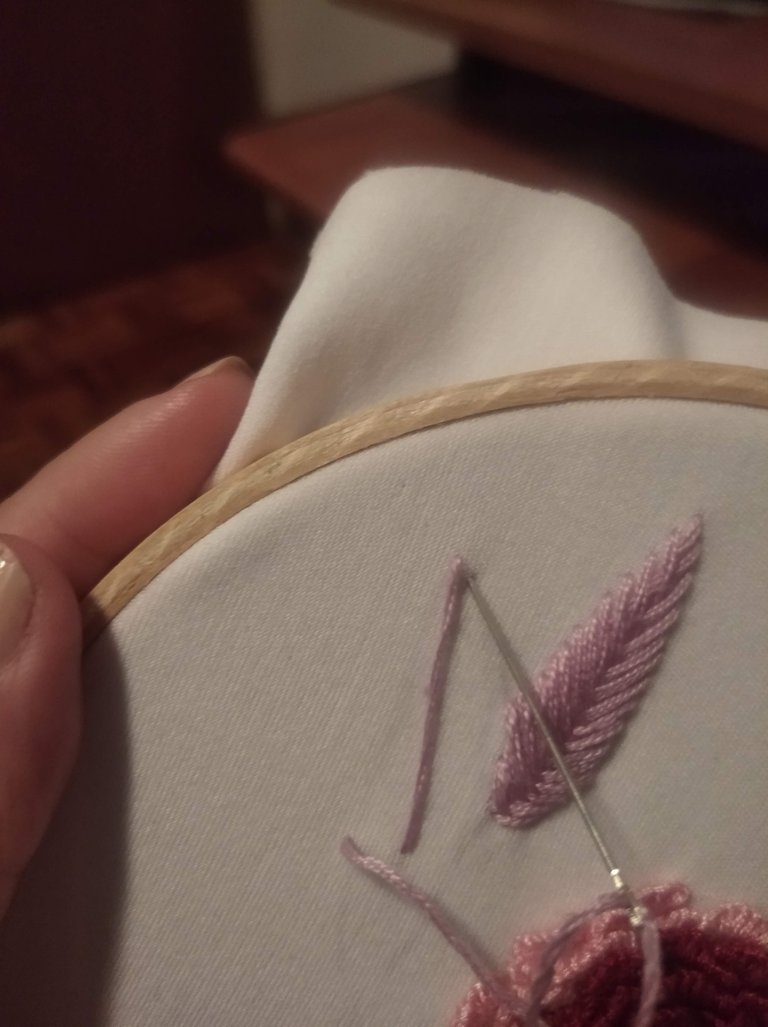
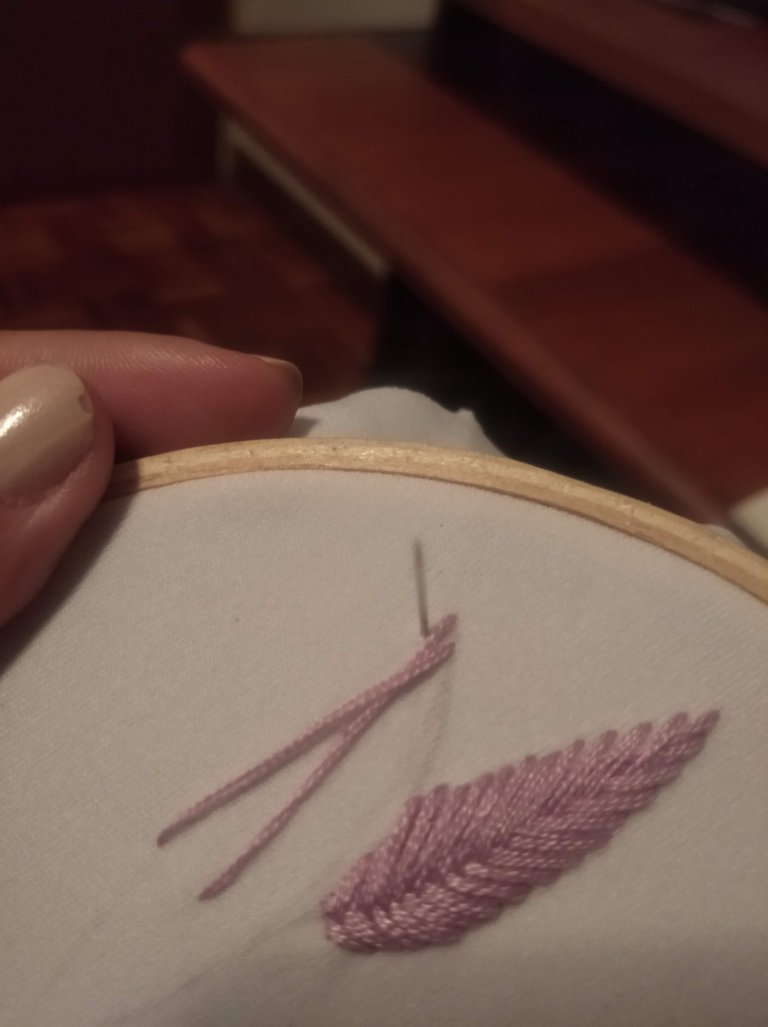
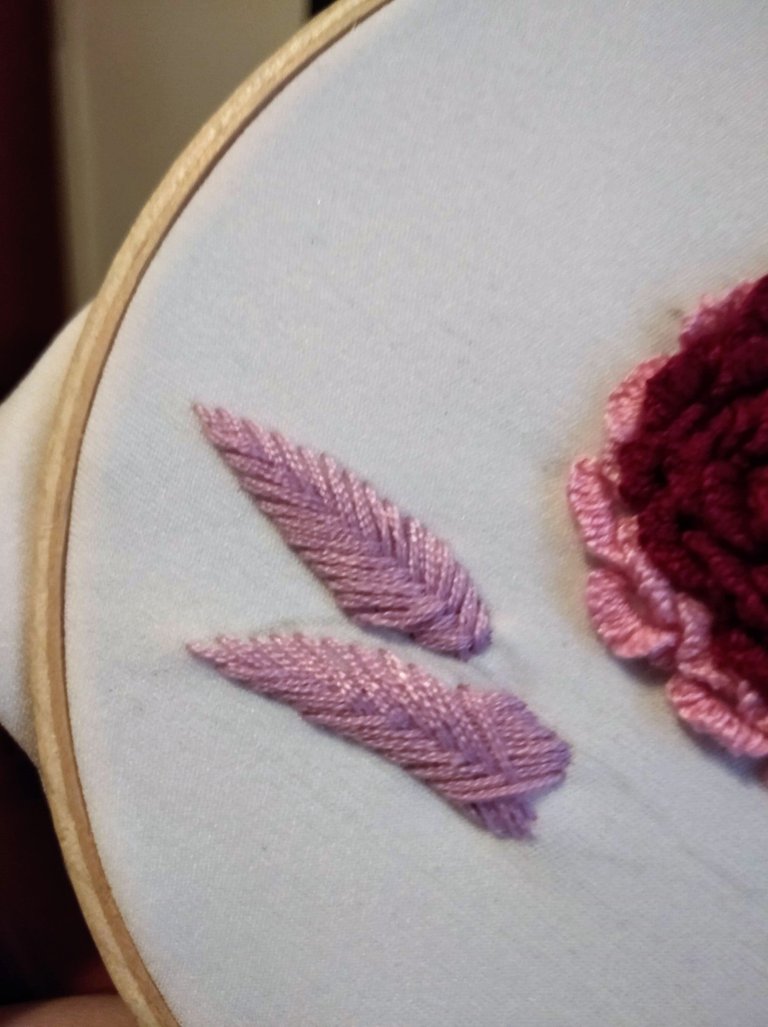
I made several leaves on the sides of the rose to give the design a twist. Most of it was fishtail except for the hybrid stitch on the right which we'll all pretend isn't there.
Este punto es perfecto para hacer rosas porque queda curveados como los bordes de estás flores.
Sé que en el exterior de la flor, use otro color pero.... Me quedé sin hilo 🙈
Hice varias hojas a los lados de la rosa para darle un giro al diseño. La mayoría la hice con punto cola de pescado excepto por el híbrido de puntos de la derecha que todos pretenderemos que no está allí.
This is how the fish stitch is made:
Así se hace el punto de pescado:
Step 1
At the tip of the blade, make a coarse stitch downwards. The ideal would be to do it in the middle of the sheet but I have realized that the closer to the base I do it, the more beautiful the sheet is.
Paso 1
En la punta de la hoja, hacer una puntada basta hacia abajo. Lo ideal sería hacerla en la mitad de la hoja pero me he dado cuenta que mientras más cerca de la base la haga, me queda más bonita la hoja.
Step 2
Pull out the needle on the left edge of the sheet at the height of the bottom of the front hem.
Paso 2
Sacar la aguja en el borde izquierdo de la hoja a la altura de la parte de abajo de la basta anterior.
Step 3
Insert the needle next to the beginning of the hem, that is, the tip of the blade. It should be a little lower than the tip but only a little lower
Paso 3
Meter la aguja al lado del principio de la basta, es decir la punta de la hoja. Debería hacerse un poquito más abajo de la punta pero solo un poquito más abajo
Step 4
Remove the needle from the other side of the tip of the blade, just at the height of the previous point
Paso 4
Sacar la aguja del otro lado de la punta de la hoja, justo a la altura del punto anterior
Step 5
Insert the needle into the right edge of the sheet at the height of the stitch made in step 2.
Paso 5
Introducir la aguja en el borde derecho de la hoja a la altura del punto hecho en el paso 2.
Step 6
Repeat the entire process from point 2 until completing the sheet.
Paso 6
Repetir todo el proceso desde el punto 2 hasta completar la hoja.
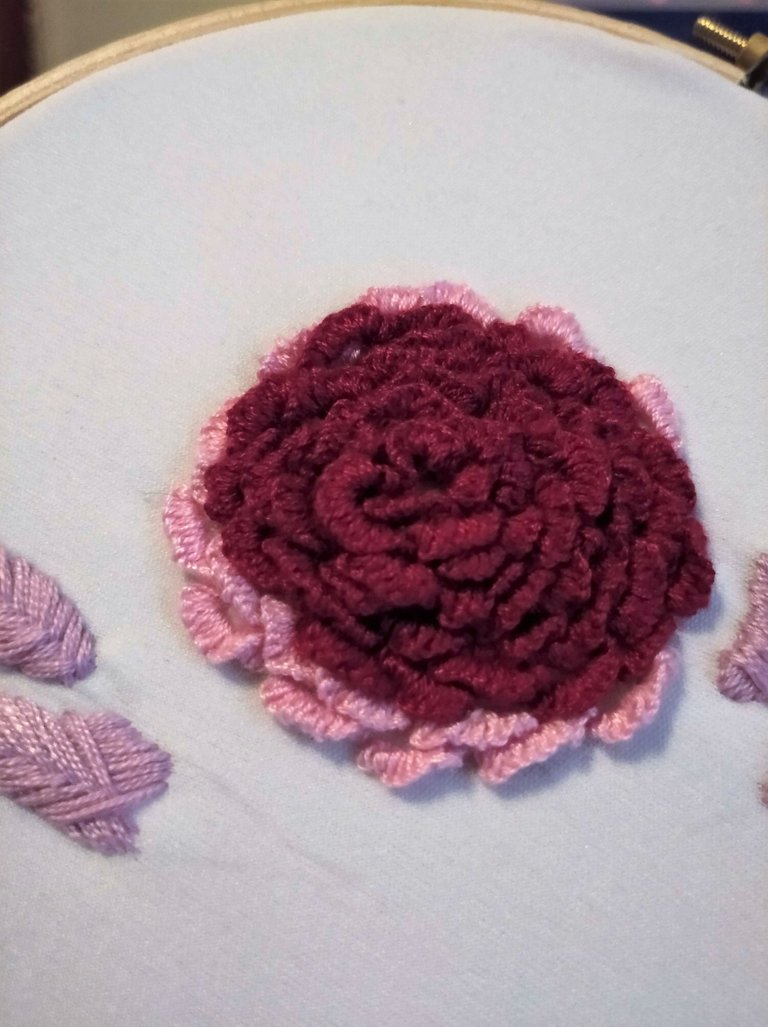
Well guys, this is how I made a rose with leaves on the sides using only two points.
Comment what you think and what flowers I can make for my Christmas gifts this year for my family
Bueno chicos, es así como hice una rosa con hojas a los lados usando solo dos puntos.
Comenten que les pareció y que flores puedo hacer para mis regalos de navidad de este año para mí familia.
El bordado es un arte muy bonito y delicado, las flores bordadas son hermosas y sirven para decorar y personalizar prendas, te felicito por tu avance en esta linda técnica. Gracias por compartir tu trabajo con nosotros, saludos!
Gracias
Excelente trabajo, te felicito!
Gracias!!
El bordado siempre me a encantado aunque no se hacerlo me encantaría aprender, sin duda estás rosas son una obra de arte gracias por compartir.
Gracias
Se ve hermoso ese bordado 🌹muy lindo.
Gracias
Beautiful on keep it up to your good work weldone
Thank you
The outcome looks beautiful. I think your mom will gonna love her new scarf knowing that you personally made it. How about adding it with your mom's inital? Just make it smaller not to affect your design. But that's only a suggestion. It's already beautiful as it is.
And thanks for sharing your project here @azucenastyle. God bless you dear.
Congratulations @azucenastyle! You have completed the following achievement on the Hive blockchain and have been rewarded with new badge(s):
Your next target is to reach 3000 upvotes.
You can view your badges on your board and compare yourself to others in the Ranking
If you no longer want to receive notifications, reply to this comment with the word
STOPCheck out the last post from @hivebuzz:
Support the HiveBuzz project. Vote for our proposal!