

Hello, hello fellow sewing enthusiasts! I hope you have a wonderful and blessed week. These past few days I've been using my afternoons to finish several sewing projects. Christmas is just around the corner and I haven't even made my first ornament yet! I hope to start on the Christmas decorations next week, but first I want to finish some pending projects for my son, my nieces, and a few orders. This time, I'm sharing a simple and useful project: a cloth or mini towel decorated with a Garfield design. To give it a different style, I added bias binding to the edges, but this depends on personal taste and you can substitute the bias binding with a hem. The decoration is also entirely up to you. It's ideal for carrying in your purse when you're running errands or traveling, for drying your hands or face. I invite you to join me in the process of making it.

Hola, hola amigos amantes de los hilos y las agujas, deseo que tengan una excelente y bendecida semana, en estos días he estado aprovechando las tardes para terminar varios proyectos de costura; ya estamos cerca de la Navidad y todavía no he hecho el primer adorno, espero la siguiente semana iniciar con los adornos navideños, pero primero quiero terminar con algunos proyectos pendientes para mi hijo, mi sobrinas y algunos encargos, en esta ocasión les comparto un sencillo y útil proyecto, un paño o mini toalla decorada con motivo de Garfield, para darle un estilo diferente le coloqué sesgo en los bordes, pero esto depende del gusto de cada persona y se puede sustituir el sesgo por un dobladillo, la decoración también va de acuerdo al gusto de cada persona, es ideal para llevar en la cartera cuando salimos a hacer diligencia o de viaje, para secarnos la manos o la cara, les invito me acompañen en el proceso de elaboración.


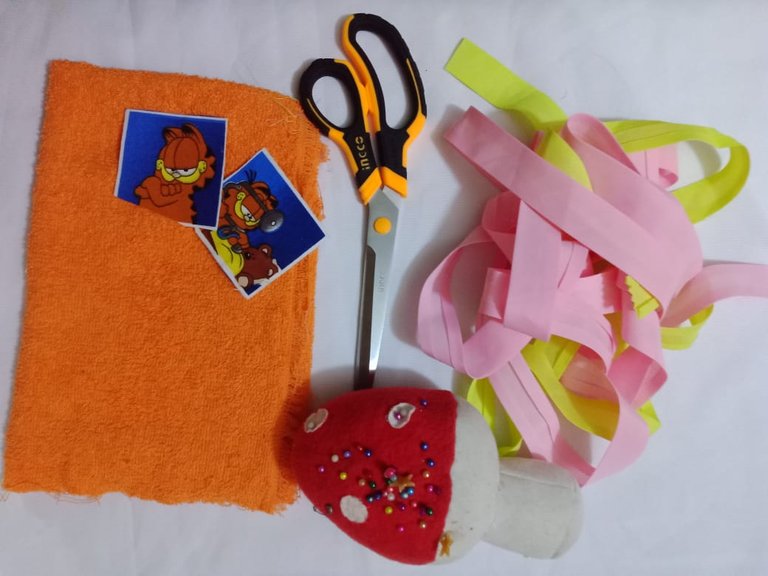
The materials used were:
Terry cloth
Garfield sticker
Bias tape
Scissors
Pins
Sewing machine
Los materiales usados fueron:
Tela de toalla
Sticker de Garfield Sesgo
Tijera
Alfileres
Máquina de coser
Elaboration
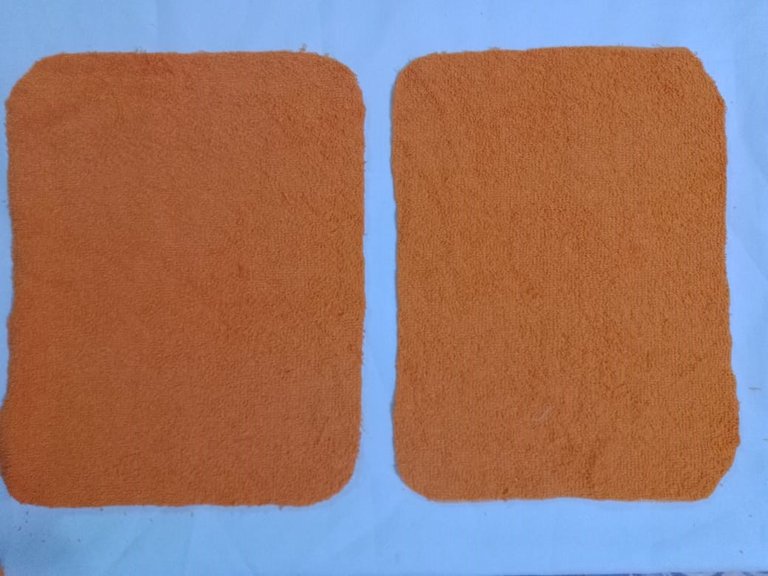
As I mentioned before, the project is simple and requires few steps. I started by cutting two rectangles of 18 * 25 centimeters, then I rounded the corners. I particularly like rounded corners because it looks more elegant.
Elaboración
Como lo mencioné anteriormente el proyecto es sencillo y requiere pocos pasos, inicié cortando dos rectángulos de 18 * 25 centímetros, luego redondeé las esquinas, particularmente me gustan las esquinas redondeadas porque se ve más elegante.
After cutting off the corners, I placed the Garfield sticker in an upper corner, secured it with pins, and sewed it with a zigzag stitch. For added strength and better coverage of the edges, I added a double stitch. The Garfield stickers were pre-cut and have adhesive backing, which makes them more secure and the sewing process easier.
Cortadas las esquinas coloqué el sticker de Garfield en una esquina superior, fijé con alfileres y cosí con puntada de zigzag, para que quede más fuerte y cubrir mejor los bordes le pasé doble costura; los stickers de Garfield previamente fueron cortados y en la parte de atrás tienen pelón con pega, esto permite que queden más firmes y al momento de coser el proceso sea más fácil.


The third and final step for this useful project is to attach the bias tape to the edges. I measured the perimeter to determine the amount of bias tape needed, then attached the bias tape so that it covered the top and bottom. This time, I didn't use a decorative stitch; I sewed with a straight stitch. I started on one side, making sure the bias tape covered both sides (front and back). When I reached the corners, I stretched the bias tape slightly to create a semi-curved shape and then continued until the entire edge was covered. To finish, I left a margin of approximately 2 centimeters of bias tape, placed it on top of the previous layer, and stitched it over. With these three simple steps, two beautiful towels for drying your hands or face are finished.
El tercer y último paso para este útil proyecto, es colocar el sesgo en los bordes, medí el contorno para conocer la camntidsad de sesgo requerida, la luego coloqué el sesgo de tal forma que cubra la parte de arriba y abajo, en esta oportunidad no usé puntada decorativa, cosí con puntada recta, inicié en uno de los lados verificando que el sego cubra ambas partes (delantero y posterior), al llegar a las esquinas estiré un poco el sesgo para que haga la forma de semi curva y luego continúe hasta cubrir todo el borde, para finalizar deje un margen de aproximadamente 2 centímetros de sesgo, lo coloqué encima del anterior y repisé, así con estos tres sencillos pasos están terminadas dos hermosas toallas para secarse las manos o el rostro.


I hope you find this tutorial useful. Besides making hand towels, you can also decorate towels for the kitchen and bathroom using these steps.
Espero el tutorial le sea de utilidad, además de hacer toallas para las manos con estos pasos se pueden decorar toallas
para la cocina y el baño.
Blessings!
Bendiciones!
Hasta luego!
Translated with https://www.deepl.com/translator
              All images are my own.


   Todas las imágenes son de mi autoría.
Wow simple steps to create something unique
Greetings @praiselove, it's a simple and useful project to make when we travel or run errands.
This would be lovely as a gift
I really like it.
I personally think I should try this out.
Greetings @blisstime, yes, it's a good idea for gifts for friends and family, and it's also easy to make.
The steps look easy
Nice creativity
Greetings @harhess, that's right, a simple project to make with few materials.
Nice
Thanks for the comment
🤗😊
Muchas gracias por el apoyo