
Hello, beautiful Needlework Monday community: I hope you are all well on this beautiful evening. I send you warm regards and a virtual hug. Today I want to share with you a project that has kept me busy and excited: making a window curtain. For some time now, I've been reflecting on the importance of curtains in home decor. Not only do they serve a practical function by providing privacy and controlling light, but they can also completely transform the feel of a room. However, I must confess that at first I didn't want to commit to making this curtain. The main reason is that, as many of you know, working with fabric can be challenging; you often have to deal with multiple layers and different types of materials. This time, it was a request from a very frequent client, whom I care deeply about. She has always trusted me with her sewing projects, and I didn't want to let her down. After careful consideration, I decided it was time to take on the challenge and commit to making the curtain. I opted for a design that would not only be functional but also add a touch of elegance to the space. Every step, from cutting to sewing, was an opportunity to learn and improve my skills.
In my dressmaking experience, I've encountered several obstacles when working with large quantities of fabric. One of the biggest challenges is measuring and cutting the sides accurately. Often, fabrics come from the store incorrectly cut, forcing me to level the square to ensure my work is done correctly. On this occasion, the client wanted the curtain to be more than plain. To provide an appropriate solution to her request, I explained that although she desired a ruched curtain effect, this generally requires a larger amount of fabric across the width. Draping the fabric across the window achieves that voluminous effect, but she didn't have enough material, especially since she also wanted two curtains. So, I came up with an alternative: I suggested using pleats, similar to those used on skirts. This way, the curtain would not only have a more beautiful finish but would also adapt to the amount of fabric available. Plus, since the curtain was for her daughter's room, I thought this design would add a special and charming touch to the space. I assured her not to worry, that the curtain would be beautiful. This experience reminded me of the importance of communicating with the client and finding creative solutions to challenges that arise along the way.
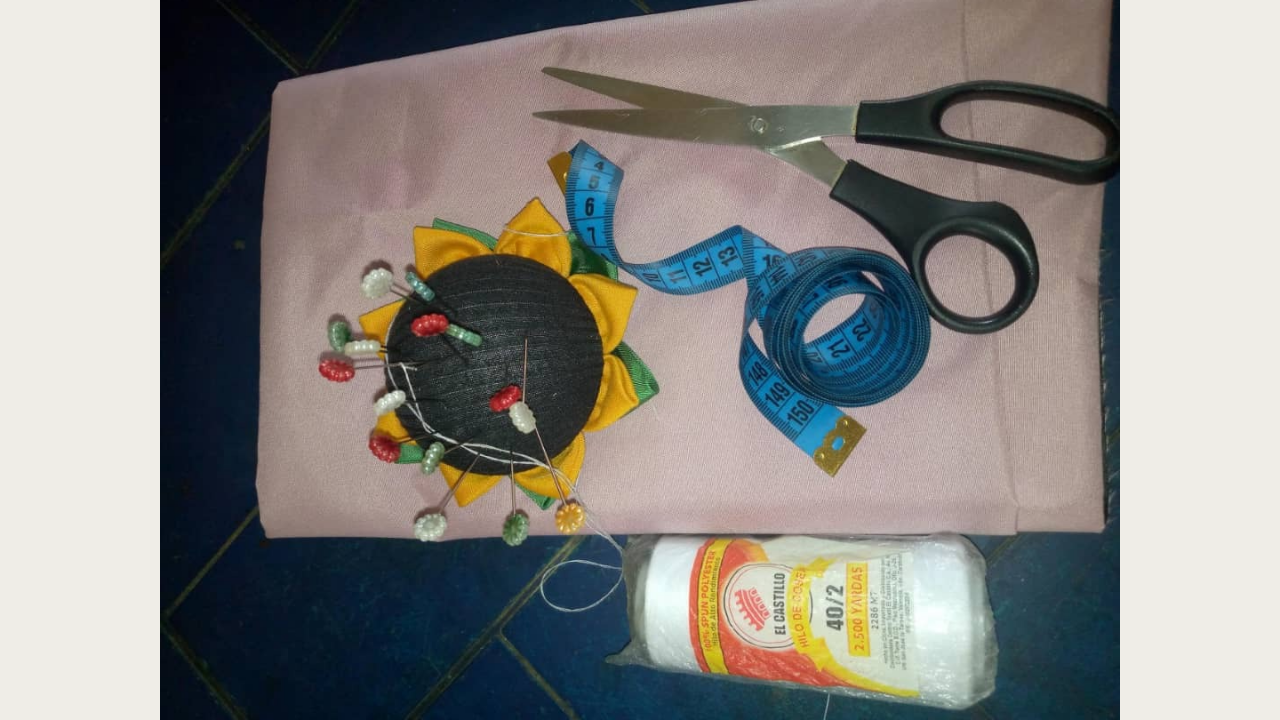
(Materiales:)||(Materials:)
- Tela luminisada
- Tijeras
- Hilo
- Un metro
- Alfileres
- Máquina de coser
- Luminescent fabric
- Scissors
- Thread
- One meter
- Pins
- Sewing machine
(Procedimiento:)||(Procedure:)
Paso nro 1
Paso nro 1
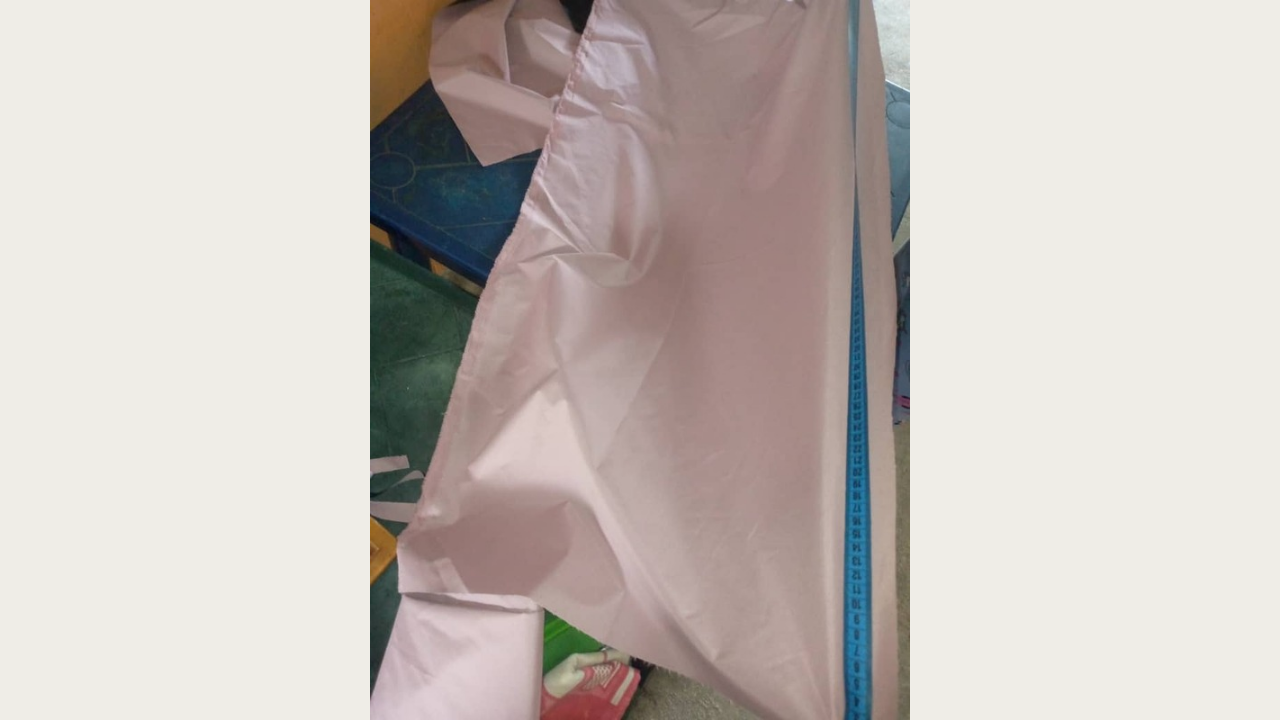
To kick off the project, I began by preparing the fabric, a fundamental step before measuring and cutting. To make the process easier, I used two tables, which allowed me to lay the fabric out lengthwise and have a better view of what I was going to cut. I proceeded to cut the fabric for a window measuring 1.20 m by 1 m. I also cut the section where the tube will go, using a measurement of 1.20 m by 11 cm wide. As I mentioned earlier, sometimes fabric comes cut incorrectly, and this time was no exception. I had to make some adjustments to remedy this, so I cut a little more fabric to even everything out properly. While going through this process, I couldn't help but think about the fabric waste this entails. It's a constant reminder of the importance of working precisely and planning each cut well to minimize waste. Despite the challenges, I always try to look on the bright side.
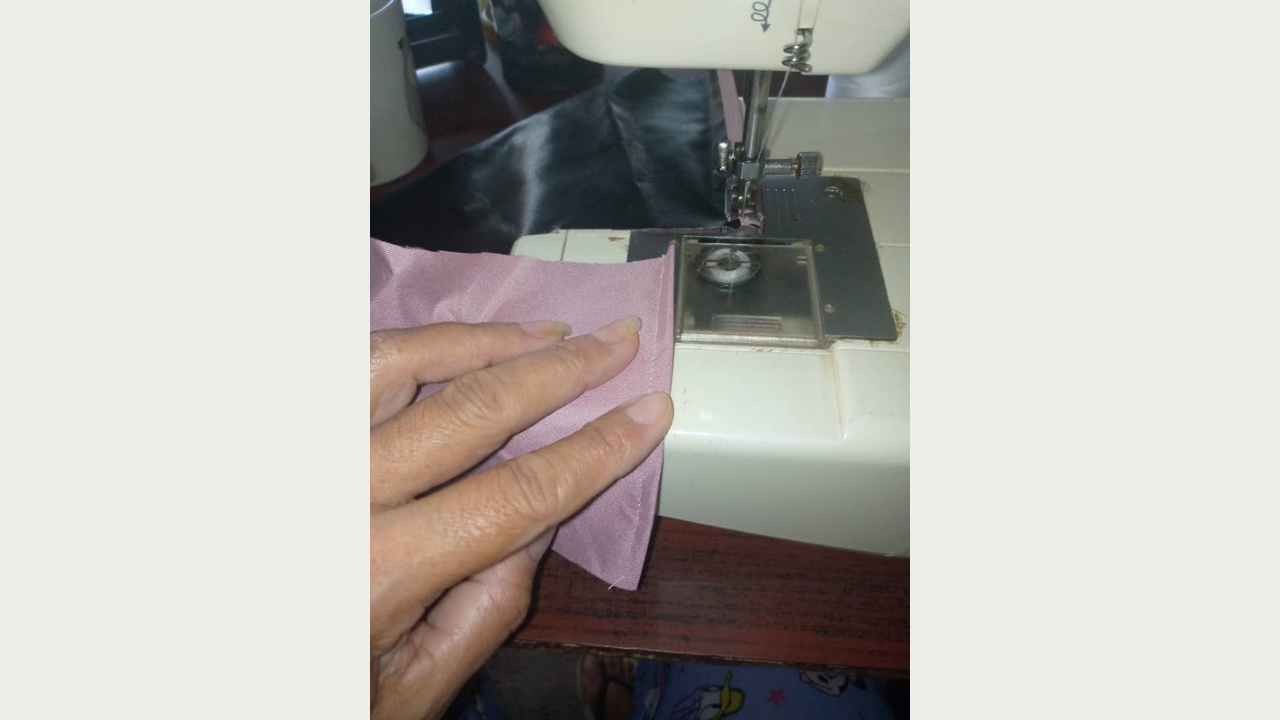
Paso nro 2
Paso nro 2
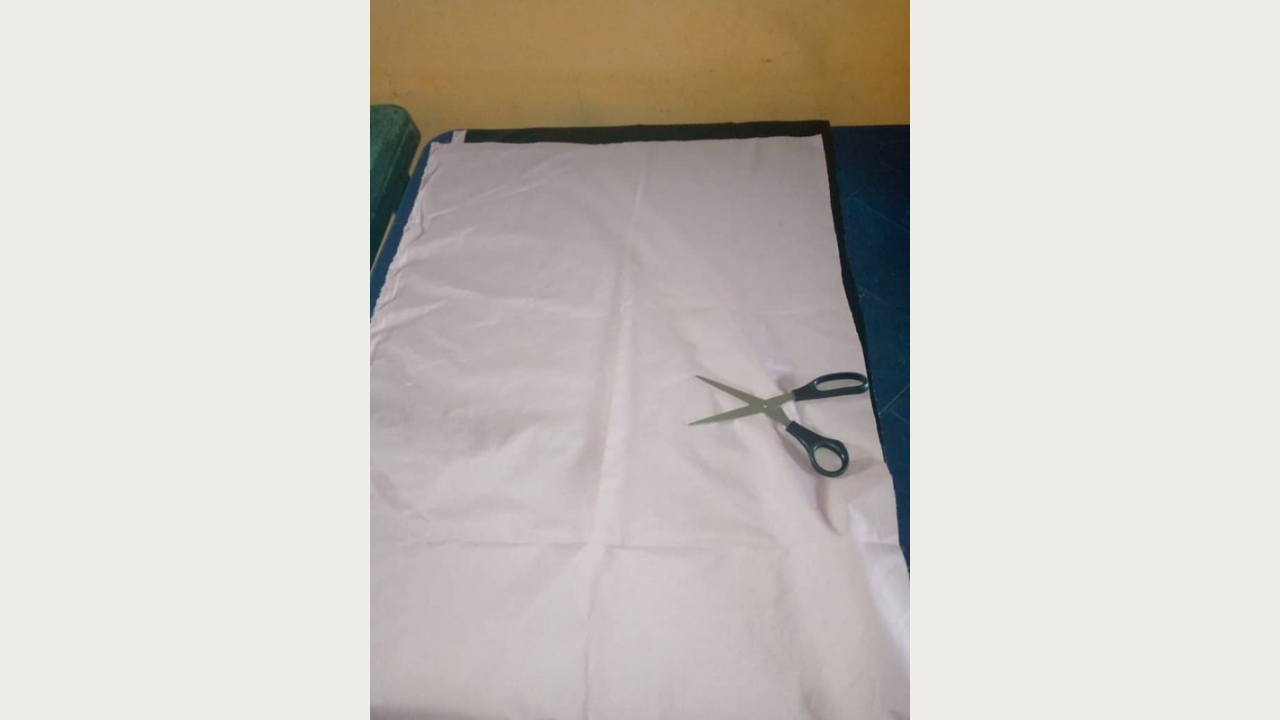
Now I'm going to start sewing the curtain. First, I'll focus on the part where the curtain tube will go. I started by sewing the sides of this section, making sure it was tight and ready to support the weight of the curtain. Once I finished with the tube section, I proceeded to cut the sides of the curtain. This step is crucial, as it will allow me to properly join it to the tube section. After this, I moved on to sewing the hems, which will give it a clean and professional finish. Although I already have the basic structure of the curtain, we are not finished yet. There are several details I must consider before the project is complete. Each step is important to ensure the final product is of high quality and meets my client's expectations.

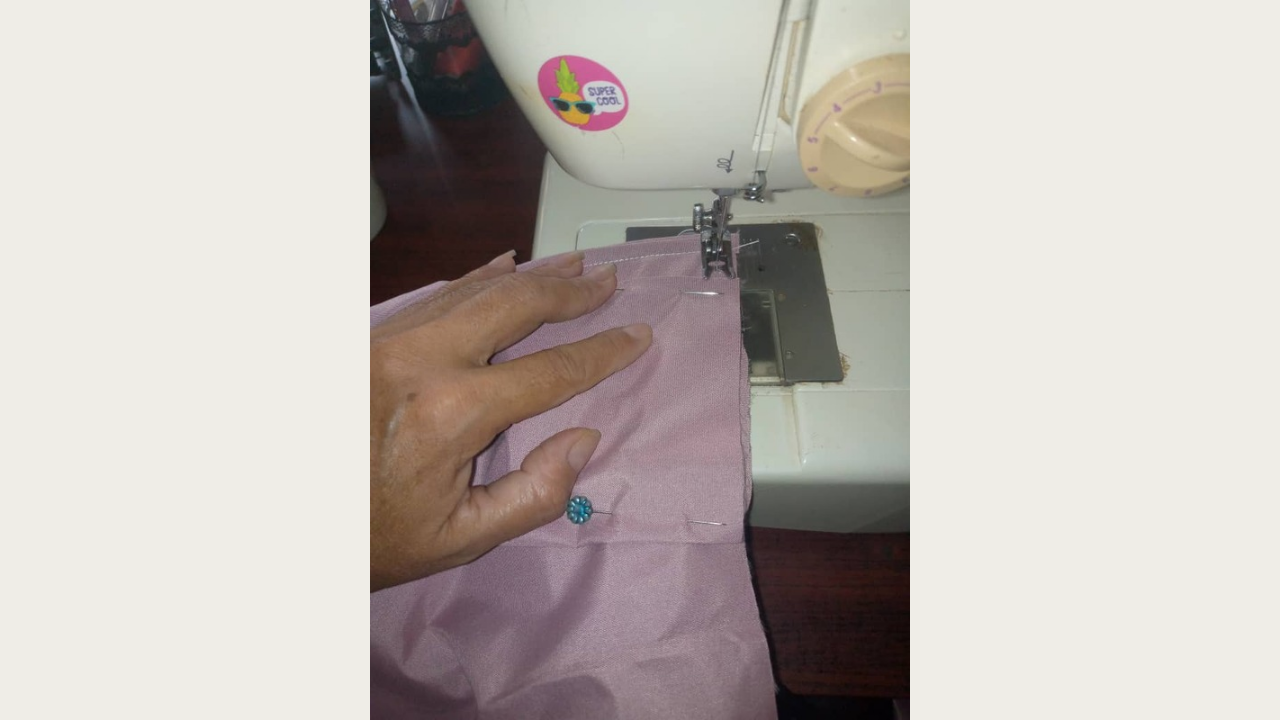
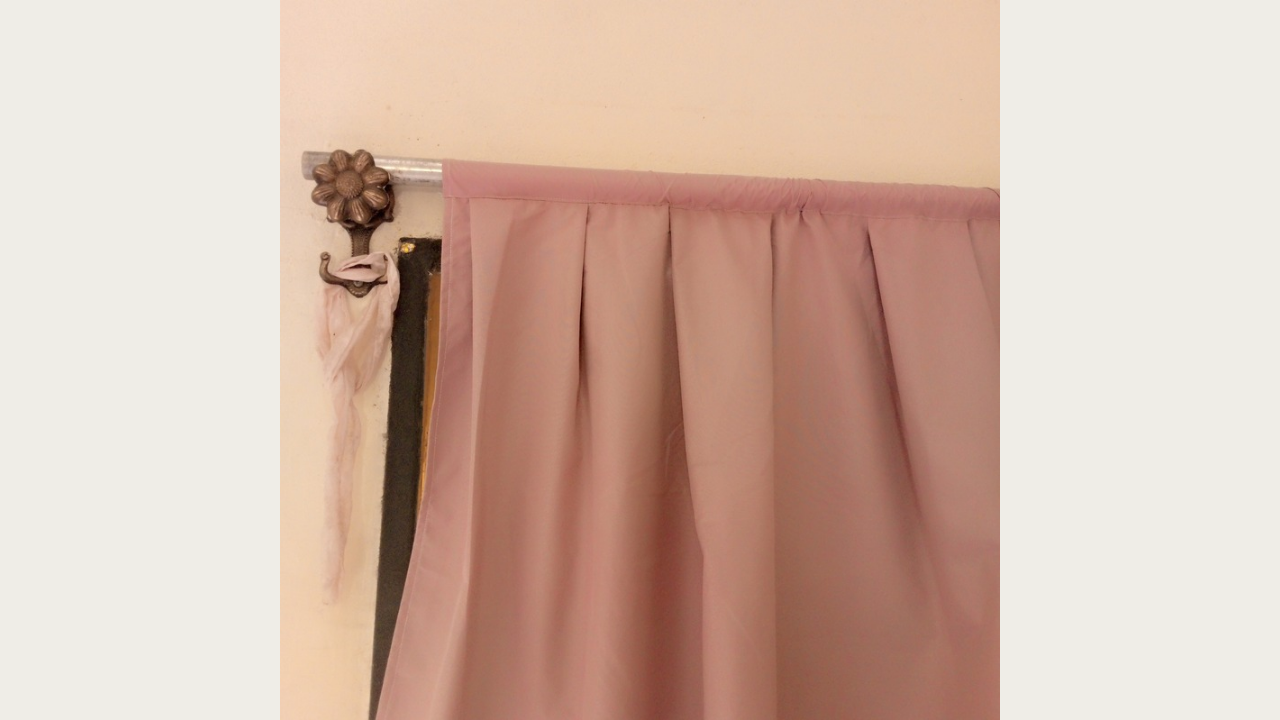
Paso nro 3
Paso nro 3
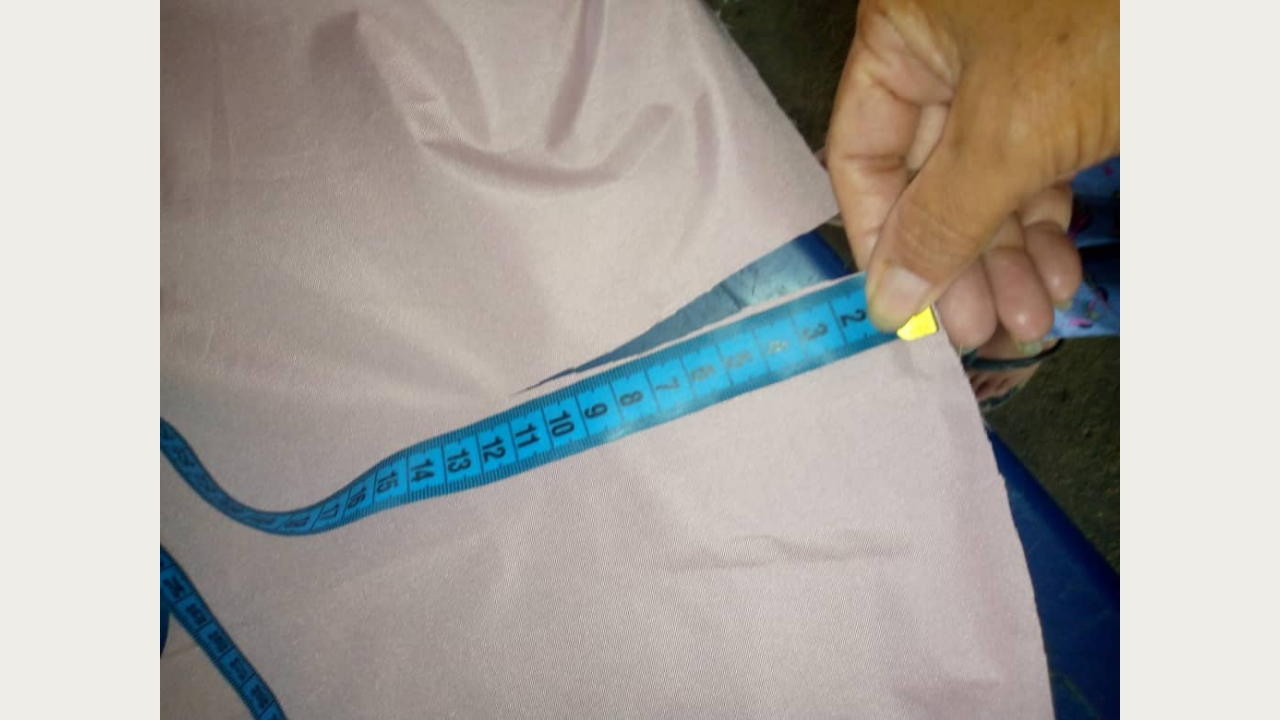
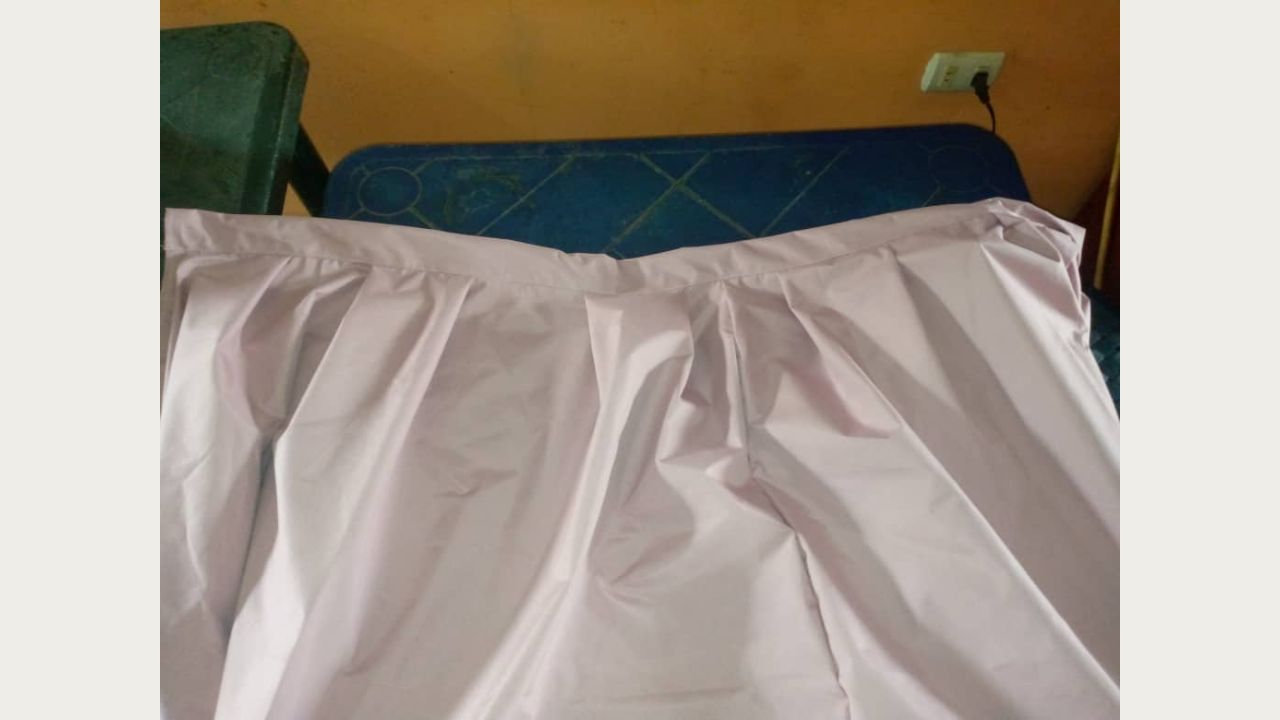
Now I'm going to move on to the part where I'll sew the pleats. For this, I started by making a 3cm stud. I used pins to secure it in place, making sure it was secure. Then, I left a 10cm gap before making the next stud, but this time I placed it in reverse, so that both studs alternated and looked balanced. I continued with this same sequence, again leaving a 10cm gap between each stud. This method not only gives the curtain a more dynamic look, but also helps create an attractive and elegant visual effect. As I progressed, I made sure each pleat was properly aligned, which is key to a professional-looking end result.
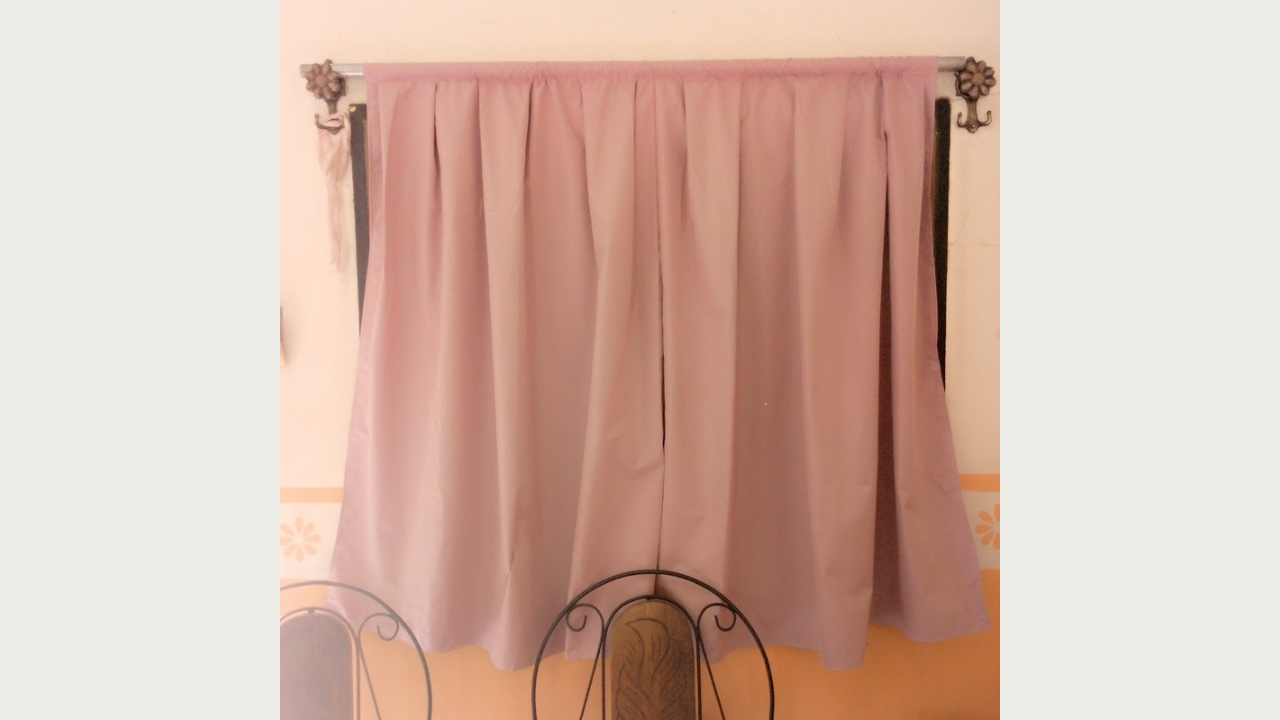
(Resultado final:)||(Bottom line:)
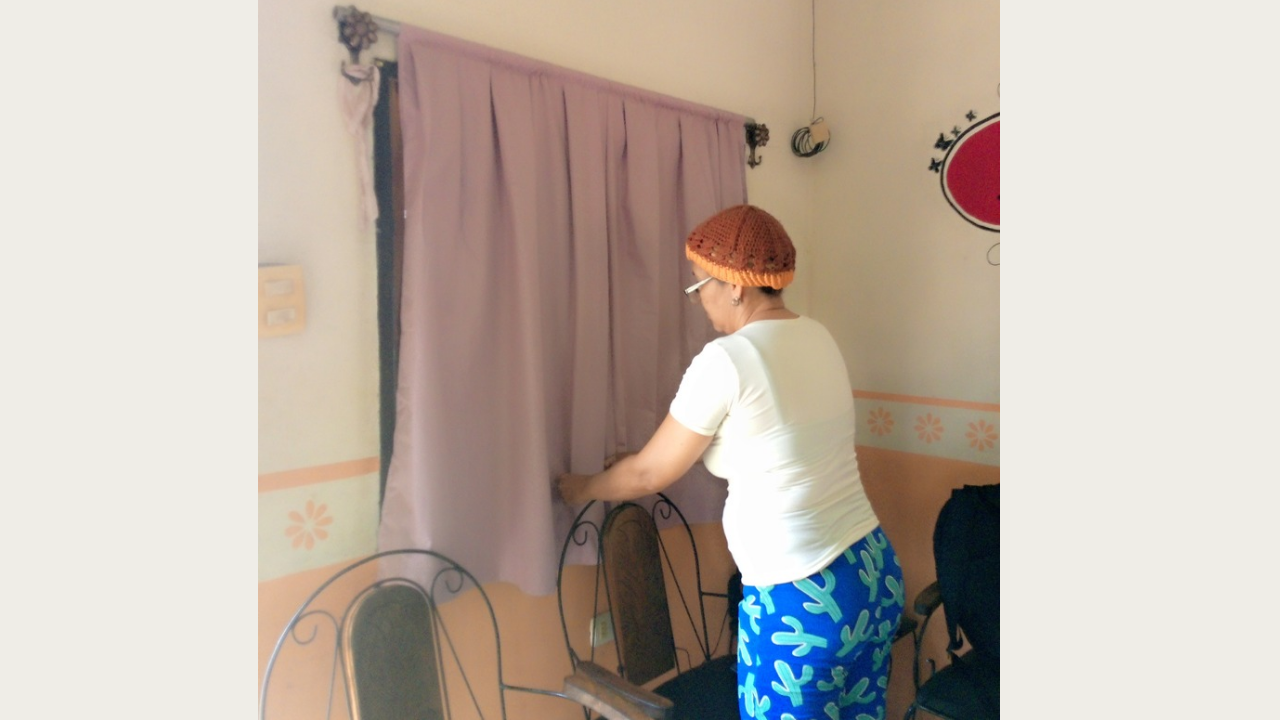
Finally, I made a few improvements to finalize the curtain. Before letting my client know it was ready, I decided to test it on my living room window. It really looks very pretty, and the quality of the fabric, for the most part, is quite good. I hope you like this curtain and I'm eager to hear your comments. If you have any other ideas or tips you can share, that would be great, as it's always rewarding to help each other. Thank you for joining me in this process, and I'll see you another time!
The photos presented in this blog are my responsibility. The images have been edited using Canva. The photographs were taken with my Infinix hot 10 cell phone. The content has been translated with Google translator.
This is really beautiful
thank you
Welcome 🤗
Beautifully done. The pleats add a refined touch, and the fabric choice gives it a soft, elegant flow. nicely done.
selected by @stevenson7
thank you🙂