Español:
¡Sean bienvenidos otra vez a mi blog!
El día de hoy veremos el paso a paso para crear un monedero circular.
Desde hace unos días tenía muchísimas ganas de hacer un monedero circular, así que aproveché para reciclar una tela rosa de unos viejos pantalones para hacerlo. Además, para que no fuera un monedero aburrido, quise a agregarle la cara de Kirby, lo cuál creo que es perfecto, ya que el personaje es redondo.
Soy principiante en esto de la costura, pero le puse mucho cariño para que quedara lo mejor posible y poder regalárselo a mi novio, a quien le encanta Kirby y todo lo relacionado con videojuegos. Espero que este paso a paso sea de su agrado y les sea de utilidad.♥
Bueno, ya es suficiente charla, es hora de trabajar.
¡Comencemos!
English:
Welcome back to my blog!
Today we are going to see the step by step to create a circular purse.
Since a few days ago I really wanted to make a circular purse, so I took the opportunity to recycle a pink fabric from some old pants to do it. Also, so it wouldn't be a boring purse, I wanted to add Kirby's face, which I think is perfect, since the character is round.
I'm a beginner in this sewing thing, I'm more into embroidery, but I put a lot of love into it to make it look as good as possible and to give it to my boyfriend, who loves Kirby and everything related to video games. I hope this step by step is to your liking and will be useful to you.
Well, that's enough talk, it's time to get to work.
Let's get started!

~Los Materiales~
~Materials~
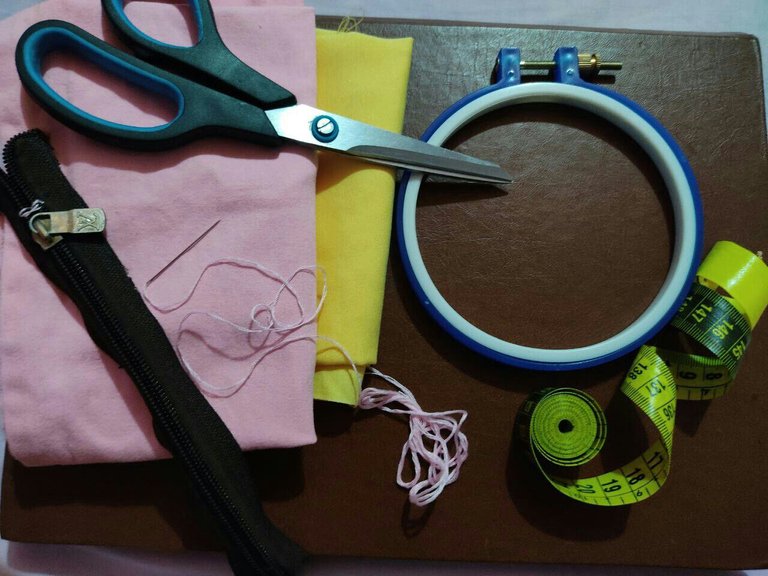
- Cierre: en mi caso estoy usando un cierre de 18 cm. Las medidas que daré son para un monedero con un cierre de 18 cm, así que toma eso en cuenta.
- Bastidor para bordar: Yo lo uso por dos motivos, el primero es que lo uso para bordar la cara de Kirby, y el segundo motivo es porque lo uso para dibujar el patrón.
- Cinta métrica: muy útil para sacar todas las medidas.
-Tijeras de costura.
-Hilo y aguja: En total usé dos tipos de agujas, una pequeña que usé al principio en las zonas delgadas y otra más gruesa para coser esas zonas en donde había muchas capas de tela.
-Hilos para bordar: Para bordarle la carita a Kirby.
-Alfileres: Tambien pueden ser agujas extras.
- Fabric: Two types of fabric are required, the outer fabric and the lining fabric. A 50cm x 50cm piece of each fabric is enough.
- Zipper: in my case I am using an 18cm zipper. The measurements I will give are for a purse with an 18cm zipper, so have that in mind.
- Embroidery frame: I use it for two reasons, the first is that I use it to embroider Kirby's face, and the second reason is because I use it to draw the pattern.
- Tape measure: very useful to get all the measurements.
- Sewing scissors:.
- Thread and needle: In total I used two types of needles, a small one that I used at the beginning in the thin areas and a thicker one to sew those areas where there were many layers of fabric.
- Embroidery threads: To embroider Kirby's face.
- Pins: can also be extra needles.
~El patrón~
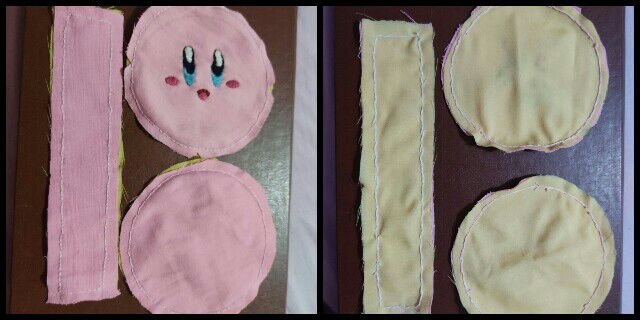
Para empezar, se requieren 2 círculos de tela de exterior y de la tela de forro, en total siendo cuatro. Yo usé el bastidor como guía para realizar éstos círculos, teniendo un total de área de 38 cm. Este es sólo mi caso, si tú deseas realizar este monedero, sólo debes recortar 4 círculos que tengan 12 cm de diámetro (puedes realizarlo usando un compas, poniéndolo con una distancia de 6 cm) más el centímetro de costura.
~The pattern~
To start, you need 2 circles of outer fabric and the lining fabric, in total being four. I used the frame as a guide to make these circles, having a total area of 38 cm. This is just my case, if you want to make this purse, you only need to cut out 4 circles that are 12 cm in diameter (you can do it using a compass, placing it with a distance of 6 cm) plus the centimeter of stitching.

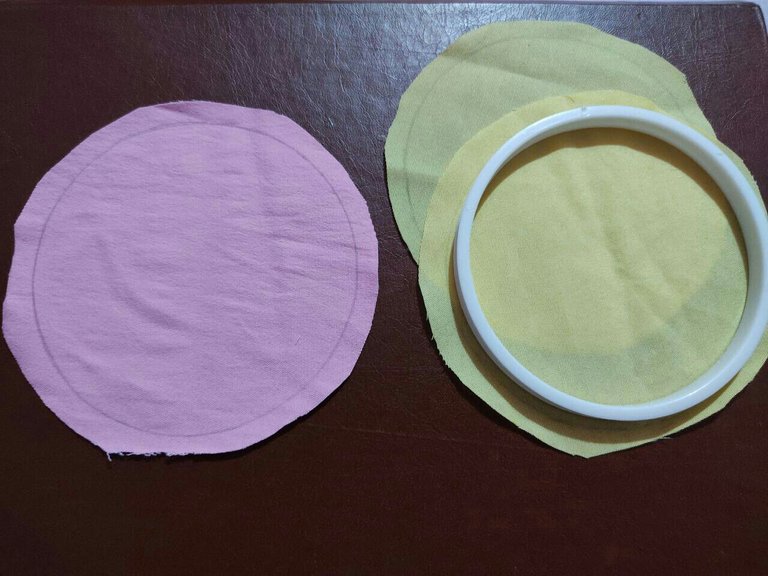
The marks you see at the ends were made to mark the middle of the drawing to guide me when it is time to sew it to the purse.
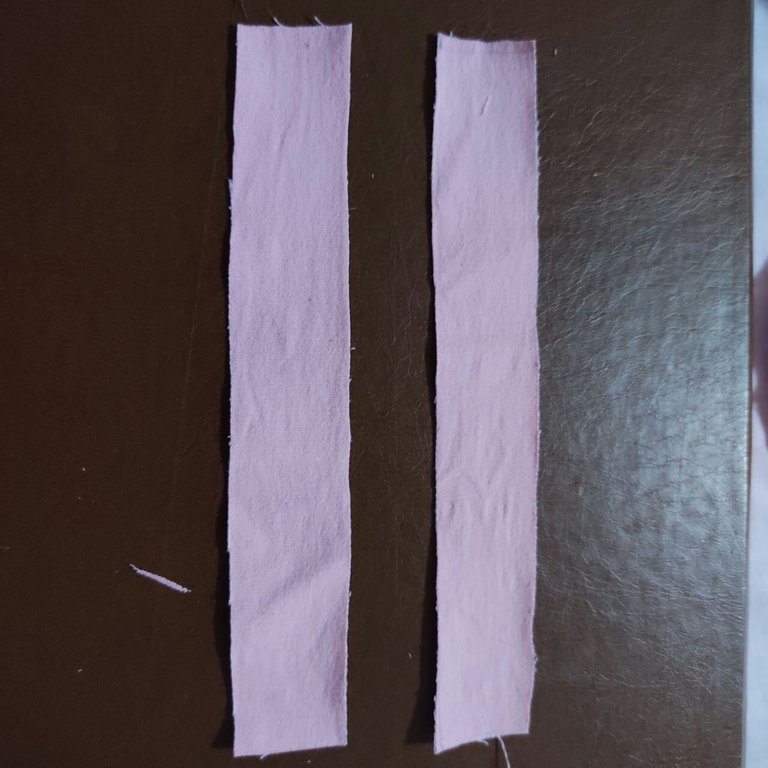
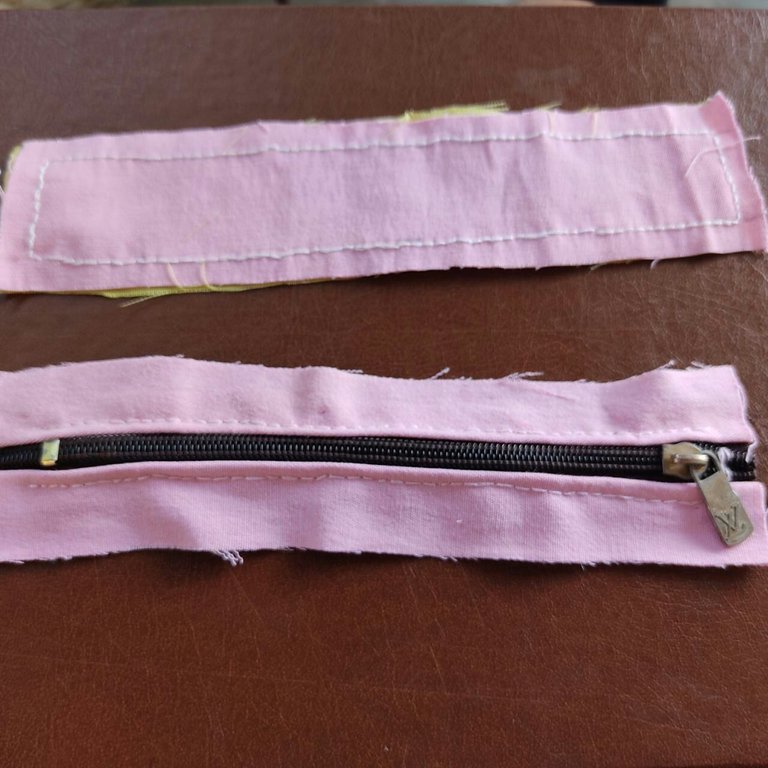
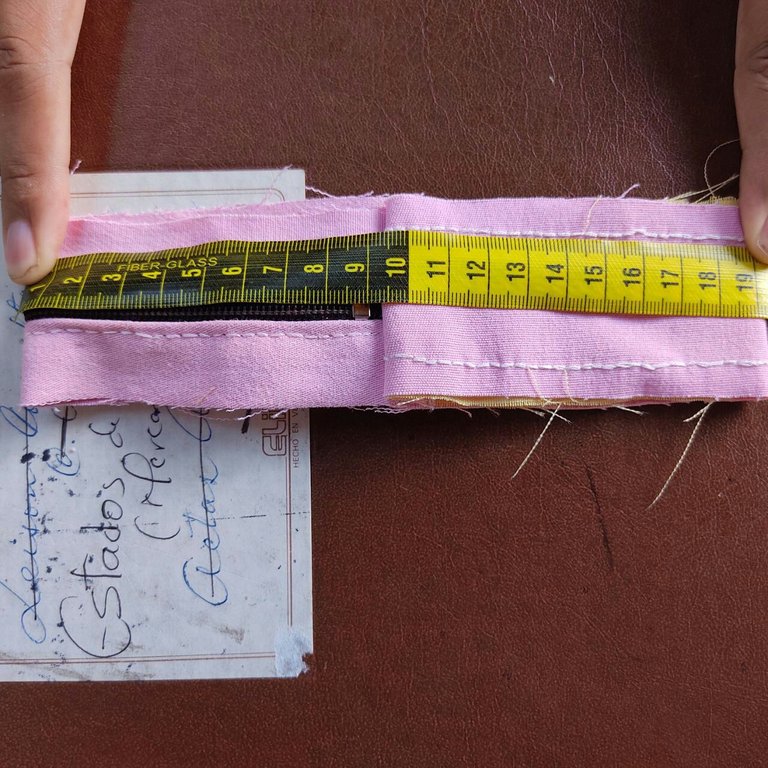
Área del monedero - largo del cierre = largo de la tira de la parte baja.
Cómo el área de mi monedero es 38 cm, y el largo de mi cierre es de 18 cm, la tira debe medir 20 cm. Al cortar la tela, siempre deja 1 cm de costura en cada lado (izquierda, derecha, arriba y abajo) y marcarlo con un lapiz para guiarte a la hora de coser.
Purse area - length of the zipper = length of the strip at the bottom.
How the area of my purse is 38 cm, and the length of my zipper is 18 cm, the strip should measure 20 cm. When cutting the fabric, always leave 1 cm seam allowance on each side (left, right, top and bottom) and mark it with a pencil to guide you when sewing.
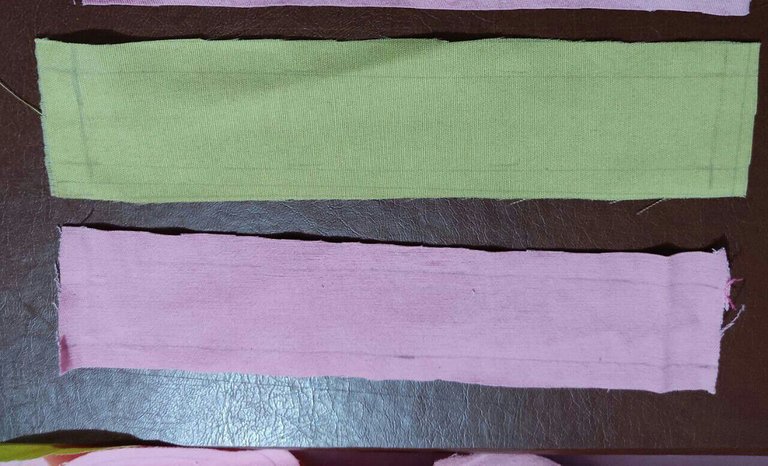
As an extra step, cut two strips 2 cm thick and long that are the size of the purse area (in my case 38 cm) plus one centimeter. This will be used later to cover the seams.
~El proceso~
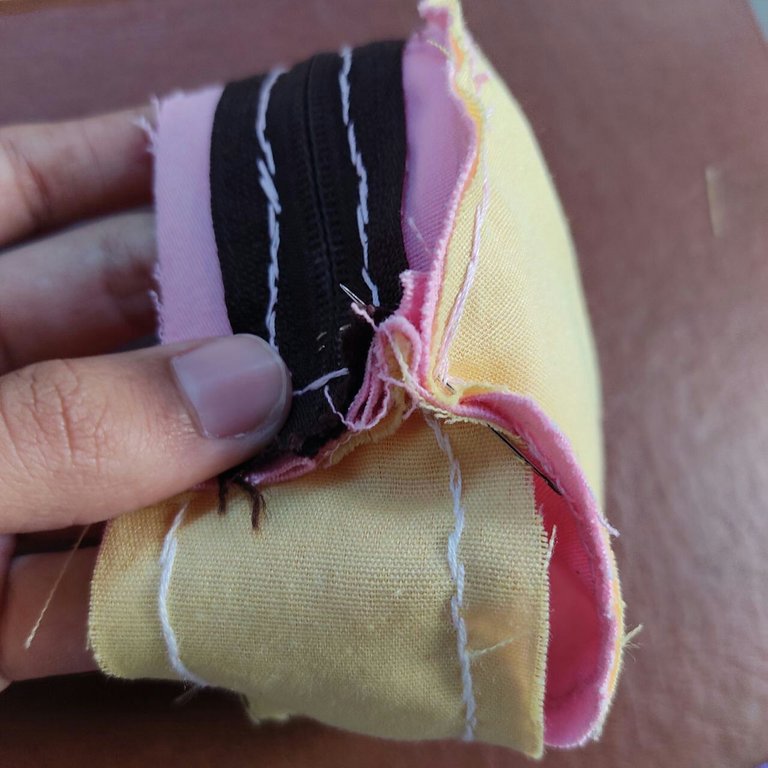
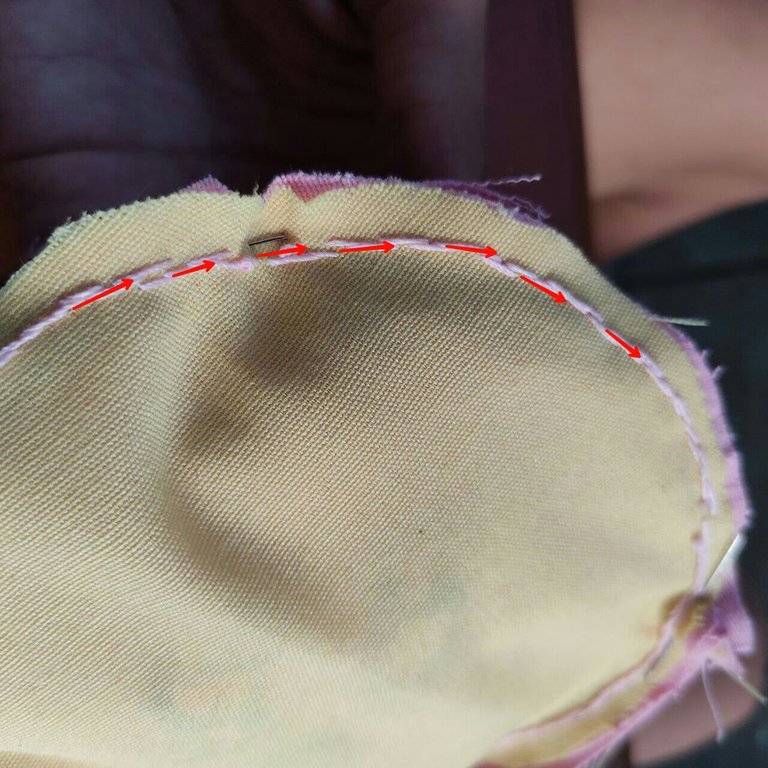
Una vez ya teniendo todas las piezas cortadas, el primer paso a seguir es unir los círculos (un círculo rosa con uno amarillo) y coserlos por la linea marcada. Yo lo hice mano, ya que no tengo máquina de coser y lo hice usando la puntada hacía atrás. Puedes usar alfileres o agujas para mantener la tela junta.
~The process~
Once you have all the pieces cut, the first step to follow is to join the circles (a pink circle with a yellow one) and sew them along the marked line. I did it by hand, since I don't have a sewing machine and I did it using the backstitch. You can use pins to hold the fabric together.
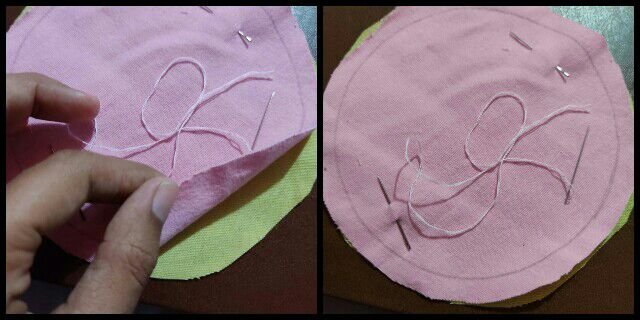
This is how it looked to me once it was sewn together
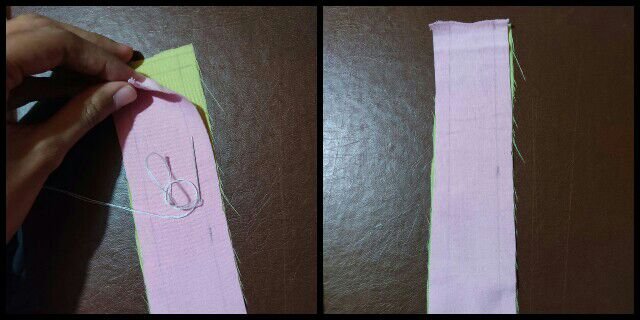
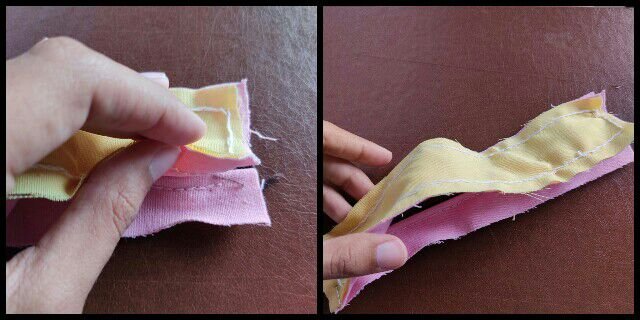
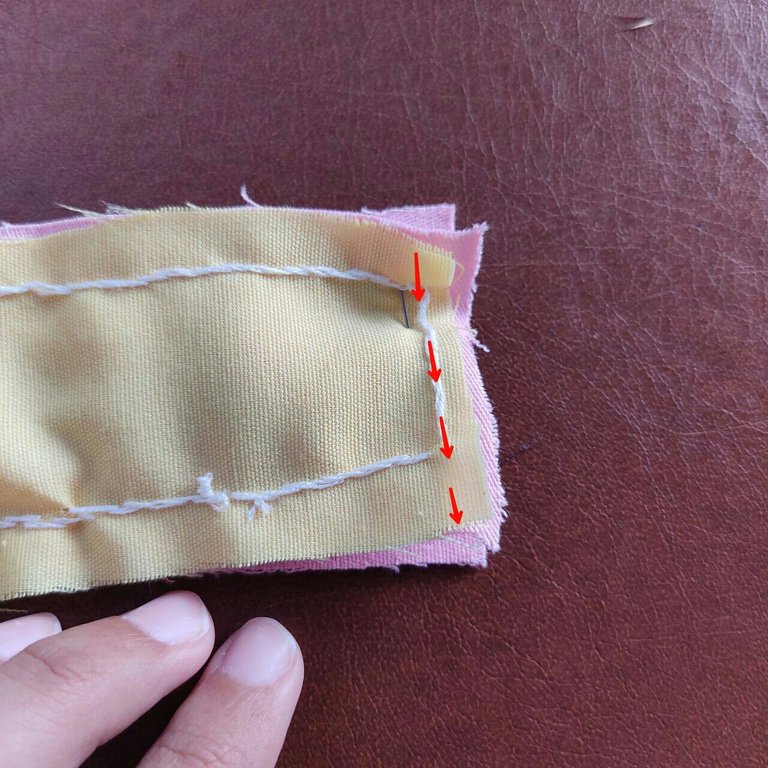
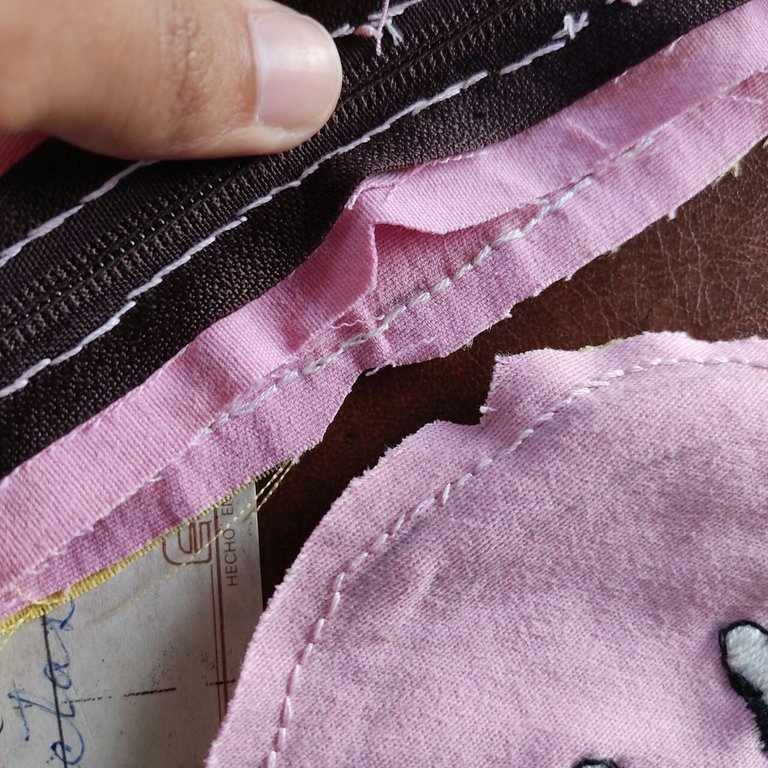
Ahora, es tiempo de unir las otras tiras al cierre, con ayuda de los alfileres (o en mi caso agujas) hay que hacerles un pliegue a cada tira y coser una a cada lado del cierre.
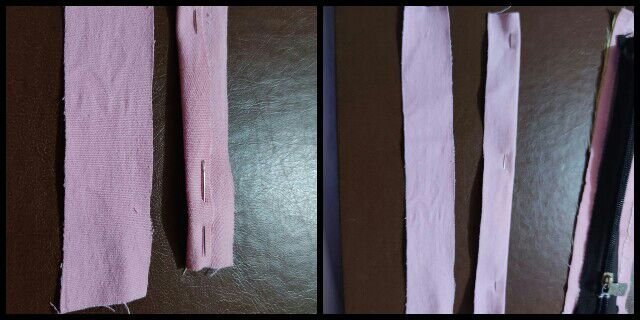
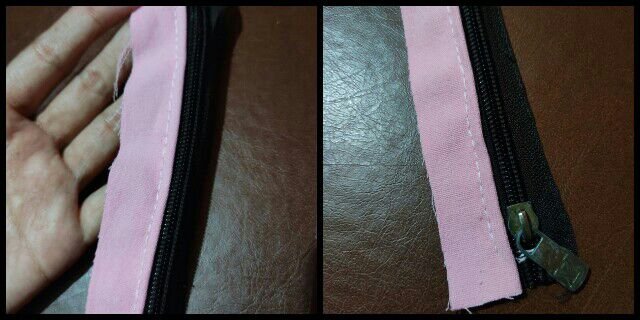
Now that we have the lower part and the zipper ready, it is time to join them, for this we will put them face to face (as shown in the photo) and sew along the thickness line. It is necessary to help yourself with the pins to hold as one strip is longer than the other.
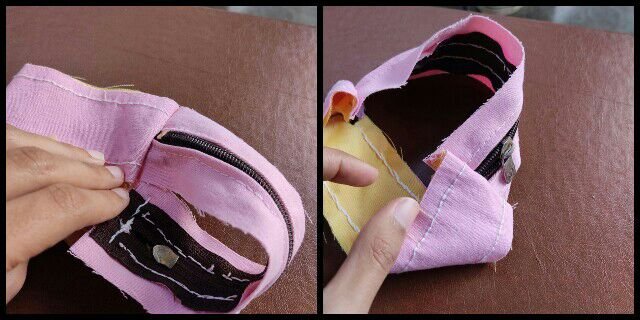
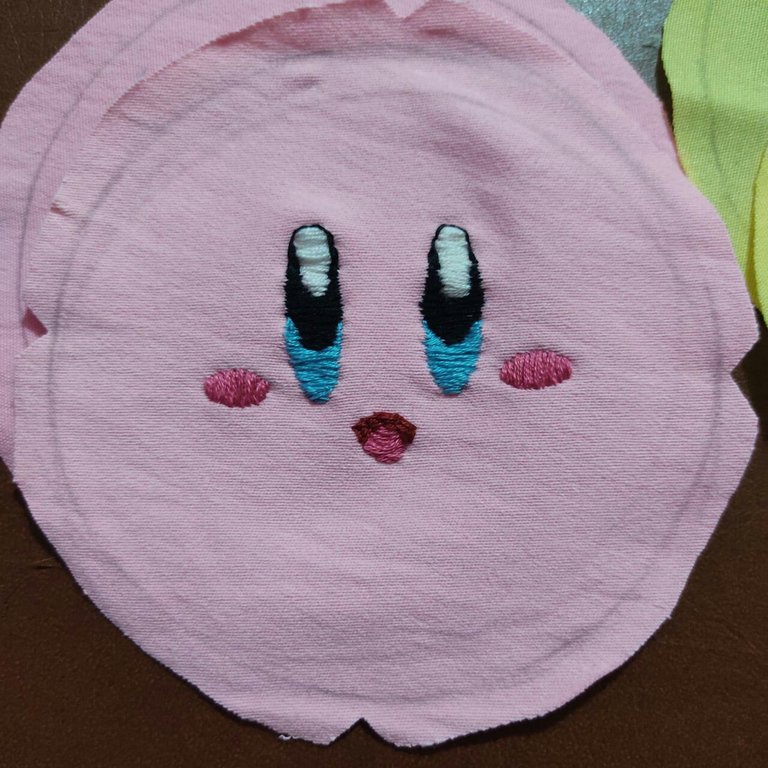
Ahora viene el paso más laborioso, coser los círculos. Primero empezaremos cosiendo la cara de Kirby, esto fue algo complicado, ya que tenia que medir bien la mitad de la tira del cierre unido a la tira de la parte baja para que la cara de Kirby quedara derecha. Pero con la ayuda de la cinta métrica, pude marcar las mitades y así unirlas.
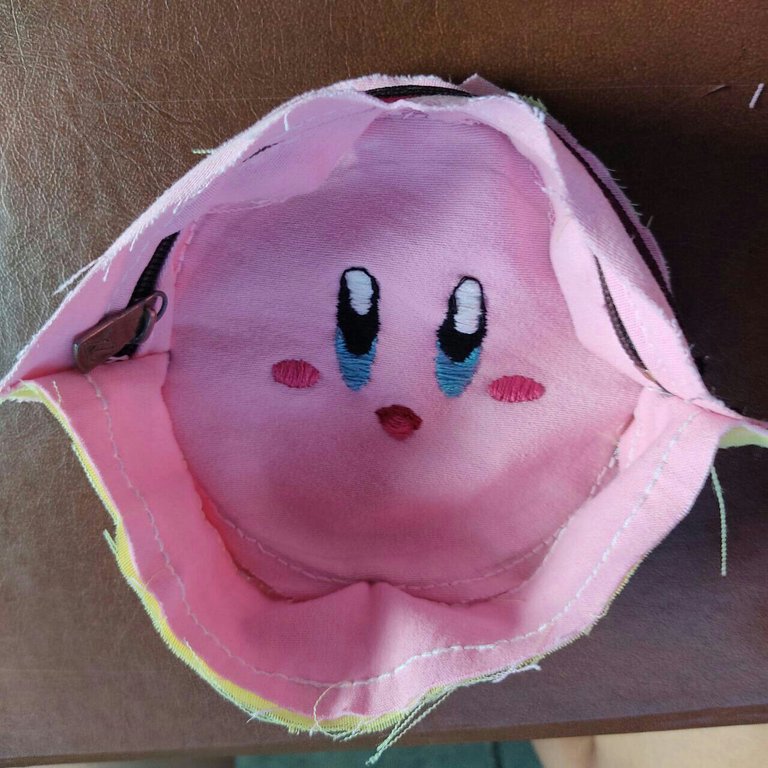
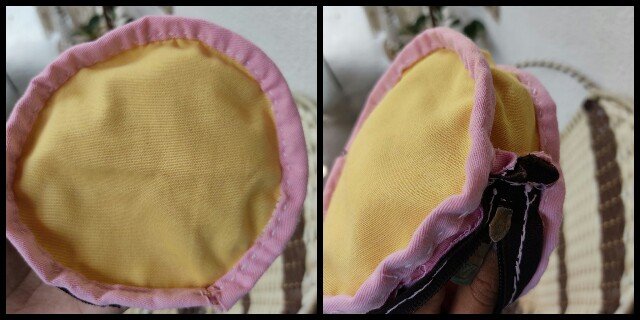
WARNING: before doing this step, open the zipper of the coin purse, so that you can turn it over once it is ready.
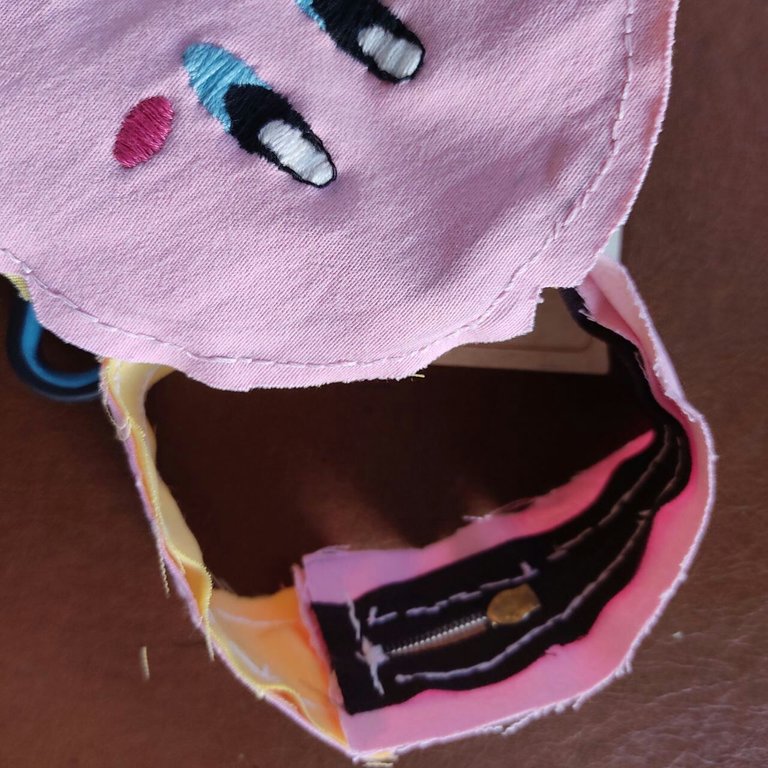
¡Terminado!
Aquí ya yo había cosido los dos círculos al monedero y antes de darlo por terminado, tapé las costuras con las tiras que había comentado en el último paso de el patrón. Lamentablemente, no pude tomarle fotos a ese proceso, me disculpo por eso. Sin embargo, es muy sencillo el proceso, sólo debes tomar la tira de 3 cm de grosor, y con la ayuda de los alfileres, hacer pliegues con ella y coserlos en el monedero para tapar todas las costuras. Este paso es algo importante, ya que sin él, las costuras se descoserian e irían arruinando poco a poco el monedero.
All done!
Here I had already sewn the two circles to the purse and before finishing it, I covered the seams with the strips that I had mentioned in the last step of the pattern. Unfortunately, I couldn't take pictures of this process, I apologize for that. However, the process is very simple, you just have to take the 3 cm thick strip, and with the help of the pins, make folds with it and sew them on the purse to cover all the seams. This step is very important, because without it, the seams would unpick and gradually ruin the purse.
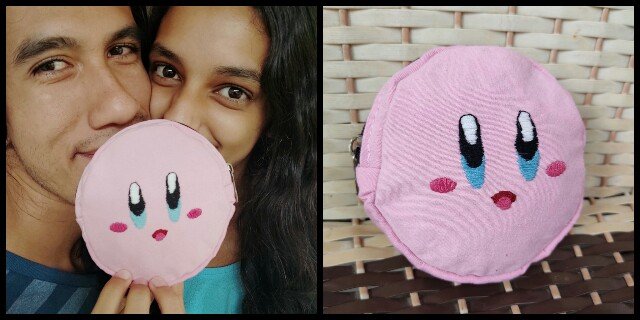
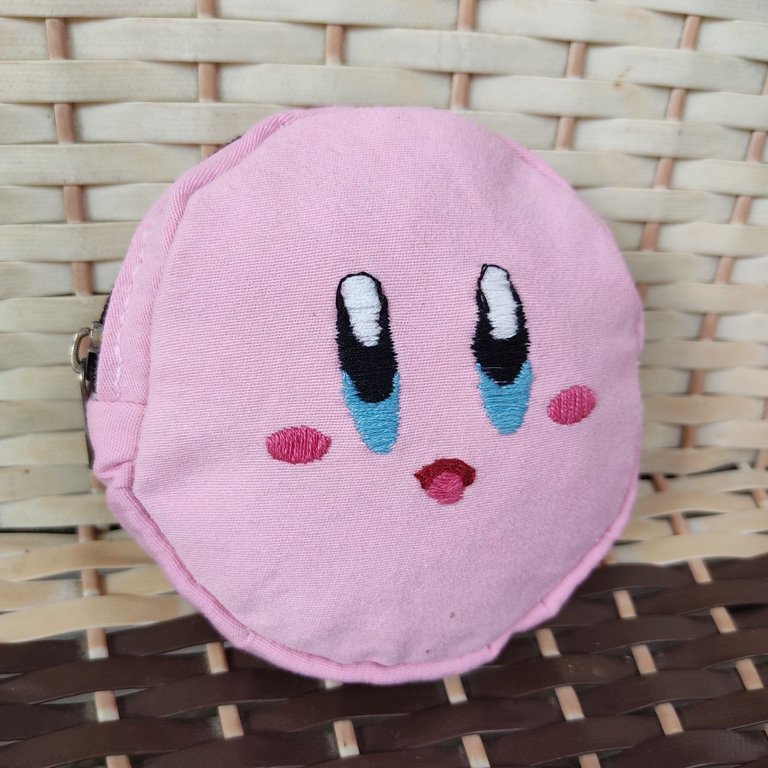
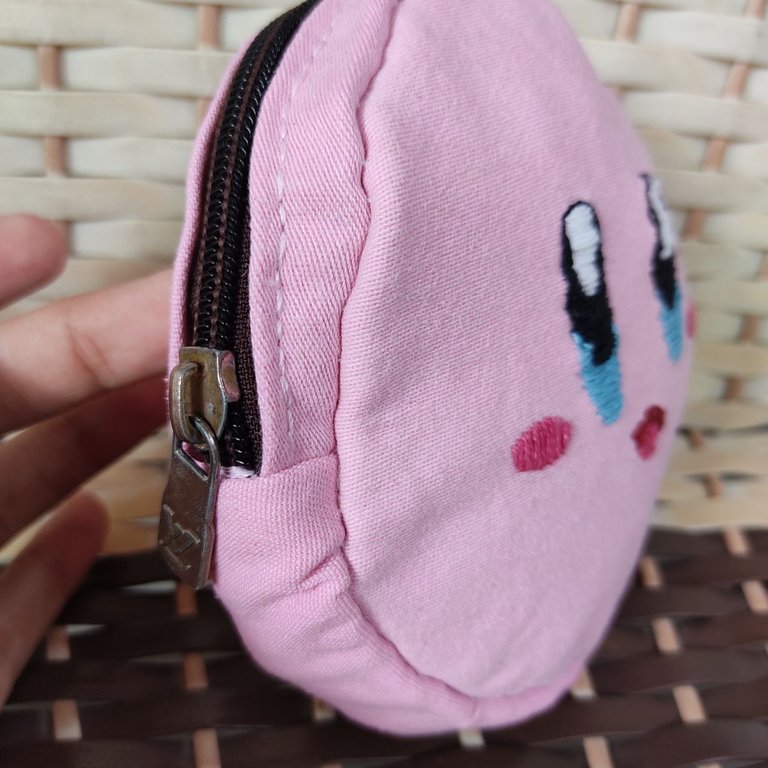
Aquí podemos ver el resultado final ♥
no es completamente redondo, pero por favor, tengame paciencia, es la primera vez que hago uno. Si tú tienes más experiencia en la costura, te aseguro que siguiendo estos pasos obtendrás un mejor resultado.
Here we can see the final result ♥
it's not completely round, but please be nice with me, it's the first time I make one. If you have more experience in sewing, I assure you that following these steps you will get a better result.
Espero que te haya gustado este tutorial, muchas gracias por leer ♥
Si te interesa el bordado, la costura o las manualidades, te invito a seguirme para ver más.Todas las fotografías fueron tomadas por mi y me pertenecen. La segunda imagen es un dibujo del personaje Kirby, el cuál le pertenece a la compañia Nintendo.
I hope you liked this tutorial, thank you very much for reading ♥
If you are interested in embroidery, sewing or crafts, I invite you to follow me to see more.All the pictures were taken by me and belong to me. The second image is a drawing of the character Kirby, which belongs to the Nintendo company.
Your content has been voted as a part of Encouragement program. Keep up the good work!
Use Ecency daily to boost your growth on platform!
Support Ecency
Vote for Proposal
Delegate HP and earn more
Hola @bunnysneedle, realmente te felicito ya que has hecho un trabajo estupendo.
Me gusta mucho tu manera tan detallada de explicar todo el proceso para la elaboración de este lindo y tierno monedero.
El resultado final es un trabajo muy prolijo.
Gracias por compartir tu contenido en esta comunidad.
Saludos y bendiciones 🤗
Muchísimas gracias ♥ comentarios cómo el tuyo me animan a seguir y mejorar
¡Yo quiero unooo! Me fascinó, Marle. Y nuevamente te felicito por la dedicación y el tiempo que le inviertes a tus maravillosos tutoriales.
Gracias bella ♥♥ estoy a la orden