¿A quiénes de mis amigas les gustaría recibir flores el próximo 14 de febrero? Seguro que todas levantarán la mano. ¿Cuántos de los caballeros de esta comunidad ya tienen encargadas las flores que nos van a regalar?
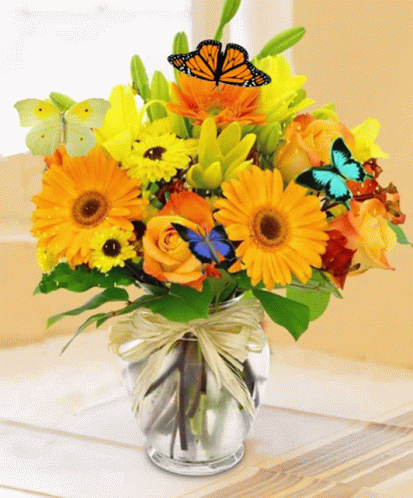
El día de hoy les traigo un proyecto de flores bastante sencillo que te gustará. Sabemos que la manera convencional de obsequiar flores es en ramo o ramillete. Hace unos días le entregué a mi mamá los tulipanes de varios colores que elaboré en tela, los que tejí y unas flores de variados modelos que hice con material reciclado, ella me comentó que los pondrá en un pequeño altar donde tiene la foto de mi papá.

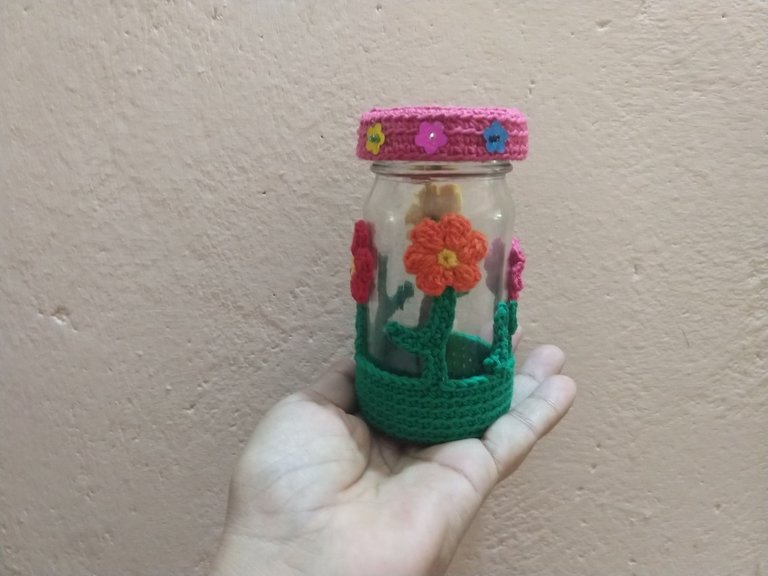
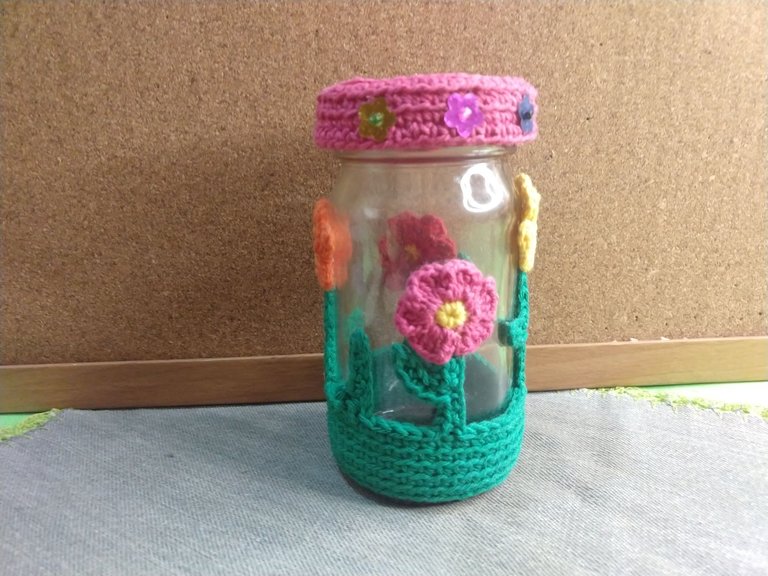
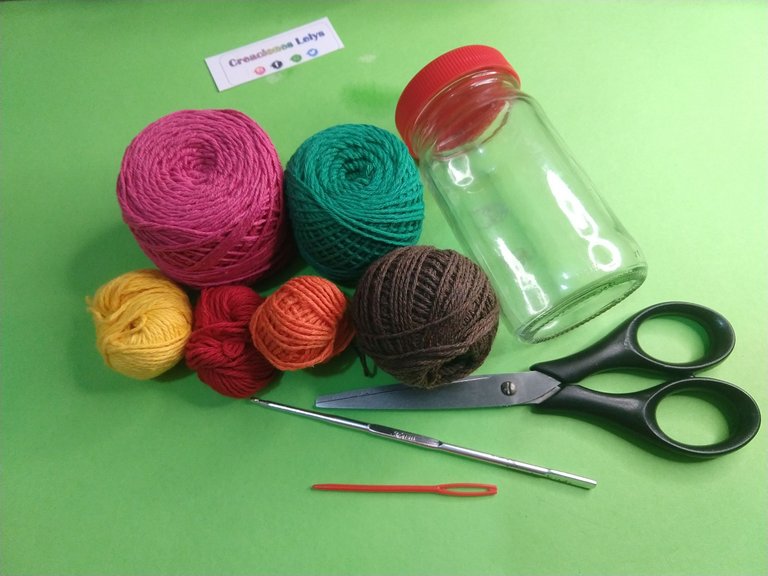
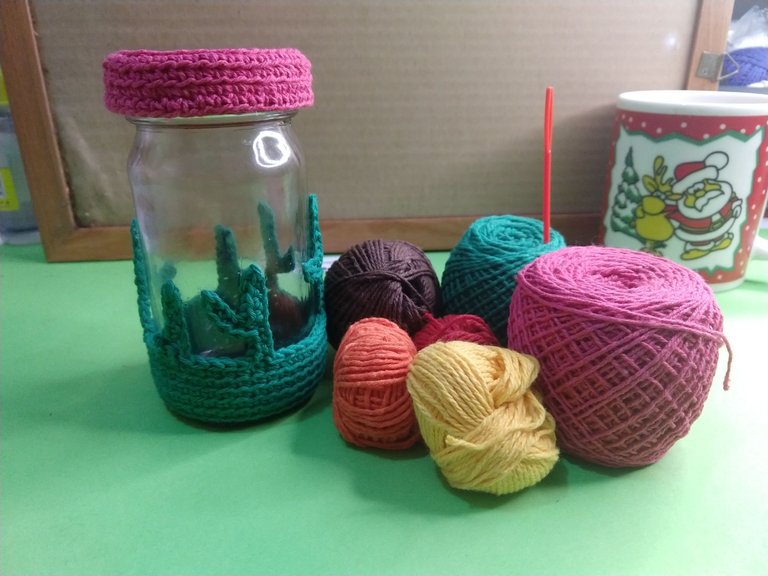
Ahora quise elaborar para ella y para obsequiar a otras personas estos bellos, útiles y decorativos frascos de vidrio reciclados a los que les tejí un muy bonito y colorido jardín. Estoy segura que te gustará y tomarás la idea para hacerlos. Todos tenemos en casa frascos de vidrio o plástico que vamos desocupando. Lo primero que haremos es ubicarlos, lavarlos y secarlos.

- Frascos de vidrio.
- Hilos pabilos.
- Aguja de crochet de 2,5 mm.
- Aguja lanera.
- Tijeras.
- Abalorios y cintas (opcional)

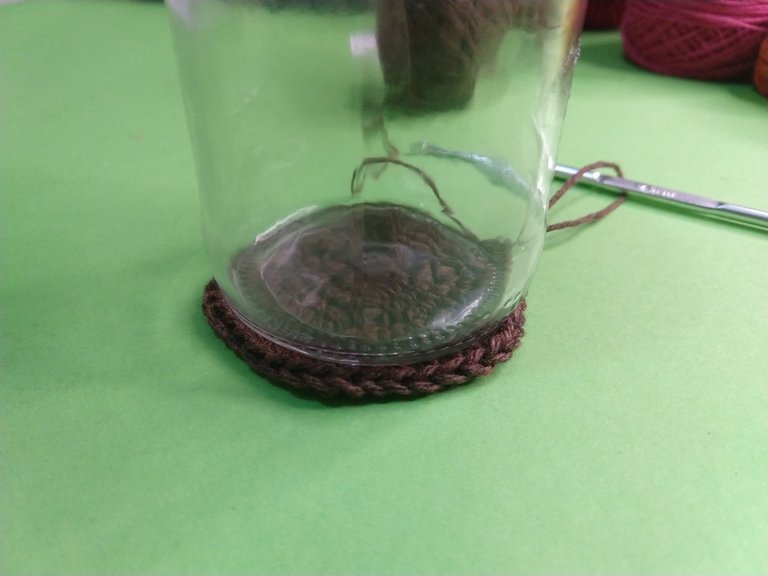
Tejemos la base en color marrón. Para ello iniciamos con un anillo mágico de 6 pb. Luego haremos aumentos hasta obtener el tamaño ideal del fondo de nuestro frasco.
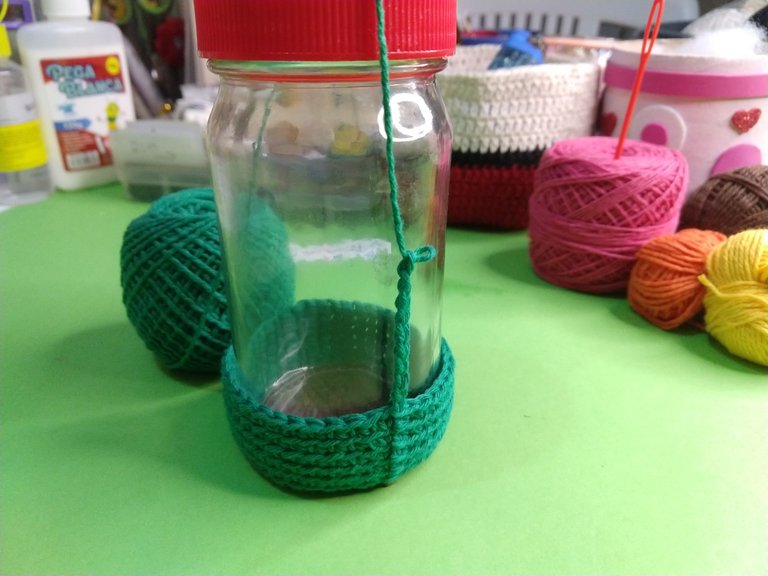
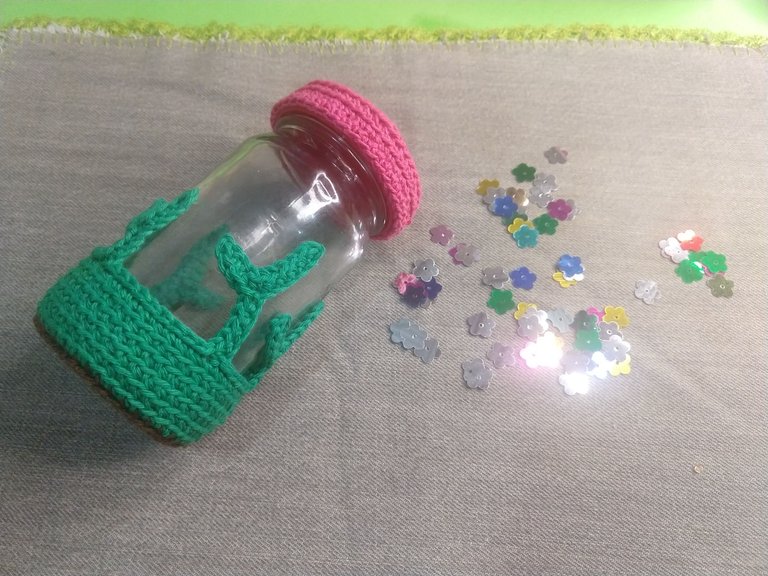
Cambiamos el hilo a color verde y tejemos tantas vueltas sean necesarias, sin aumentos, hasta obtener la altura deseada. Tomando en cuenta que dejaremos los espacios para los tallos y flores del jardín.
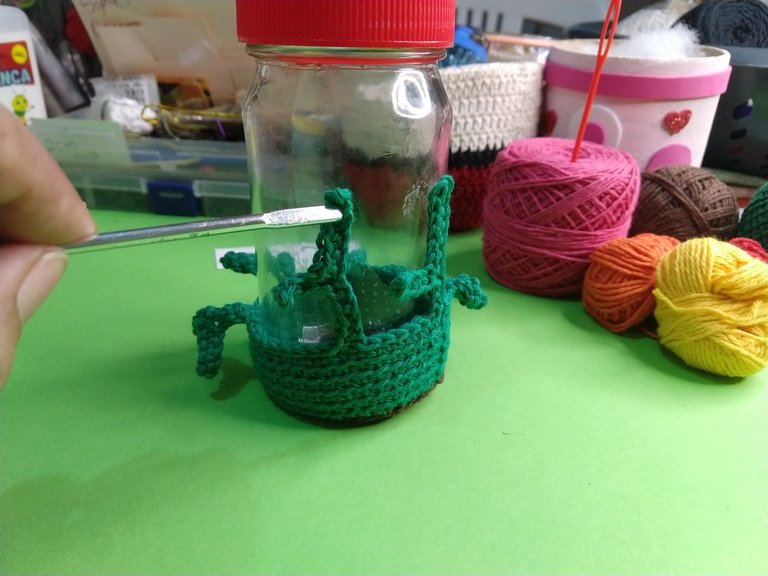
Tejemos ahora cadenas de diferentes tamaños, unas más altas que otras. Nos devolvemos con punto bajo. En un lugar de la cadena hacemos una más pequeña y también le tejemos puntos bajos (para hacer las hojas) continuamos tejiendo el tallo. Para desplazarnos de tallo a tallo usamos puntos deslizados.
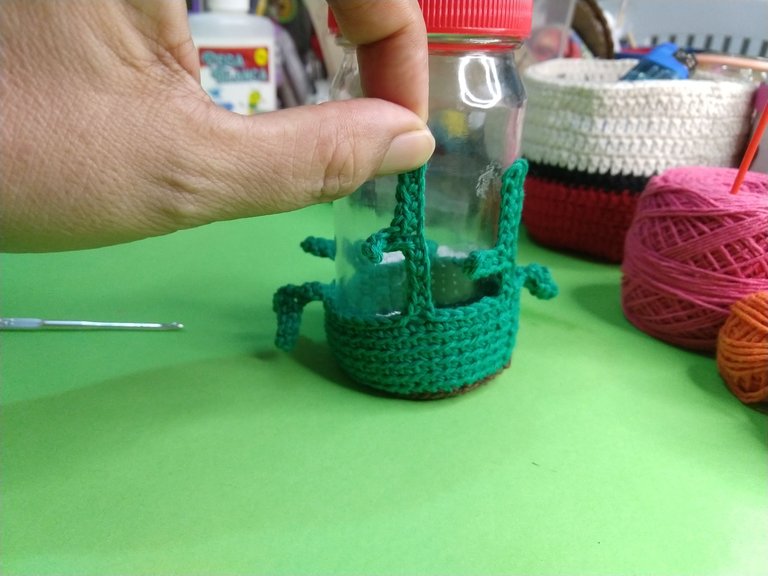
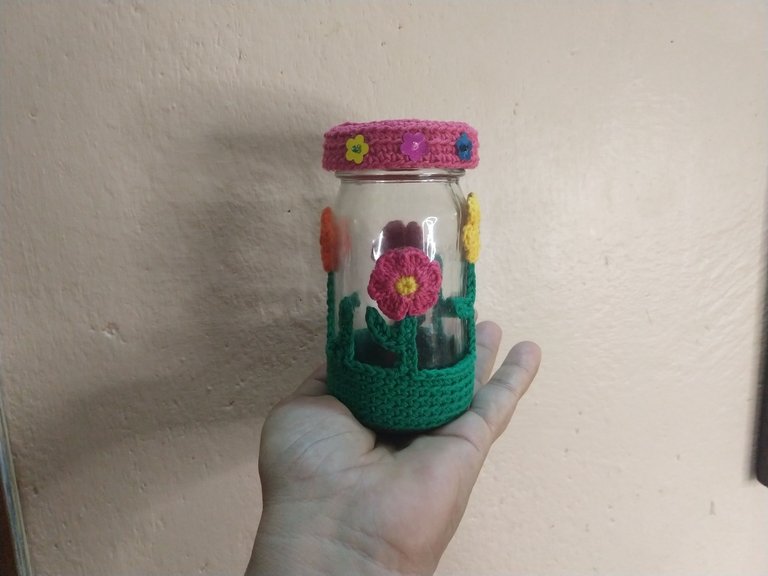
Después colocamos un punto de pegamento en los tallos y hojas para ajustar en el frasco.
Ahora procedemos a tejer las flores de nuestro jardín. Pueden ser todas de una misma especie o variadas. A tu elección.
Yo elegí realizar flores pequeñas de variados colores.

Colocamos las flores sobre los tallos y fijamos con pegamento. De esta forma habremos terminado. Puedes colocar otros adornos si gustas.
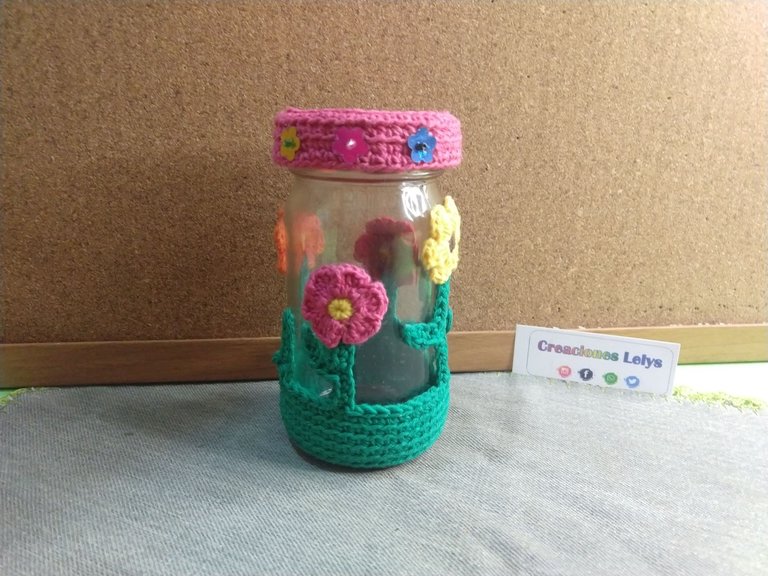
Para forrar la tapa sigue los pasos para la base del frasco.
Visita mis redes:
https://youtube.com/channel/UCRRLYHutL-tHmhlKzN7Z4HA
Todas las fotos son de mi autoría. Tomadas con la cámara de mi teléfono MotoX. Editadas con Polish. Usé el traductor de DeepL. Gracias por la visita.

English.
Which of my friends would like to receive flowers on February 14? I'm sure they will all raise their hands. How many of the gentlemen in this community have already ordered the flowers they are going to give us?
Today I bring you a very simple flower project that you will like. We know that the conventional way to give flowers as a gift is in a bouquet or corsage. A few days ago I gave my mom the tulips of various colors that I made in fabric, those that I knitted and some flowers of various models that I made with recycled material, she told me that she will put them in a small altar where she has the photo of my dad.
Now I wanted to make these beautiful, useful and decorative recycled glass jars for her and to give as gifts to other people, to which I wove a very nice and colorful garden. I am sure you will like it and will take the idea to make them. We all have glass or plastic jars at home that we are using up. The first thing to do is to place them, wash them and dry them.
- Glass jars.
- Wick yarns.
- Crochet needle of 2.5 mm.
- Wool needle.
- Scissors.
- Beads and ribbons (optional)
We knit the base in brown. To do this we start with a magic ring of 6 sb. Then we will make increases until we get the ideal size of the bottom of our jar.
We change the yarn to green and knit as many rows as necessary, without increasing, until we obtain the desired height. Keeping in mind that we will leave the spaces for the stems and flowers of the garden.
We now knit chains of different sizes, some higher than others. We return with low stitch. In one place of the chain we make a smaller chain and we also knit a single crochet (to make the leaves) and continue knitting the stem. To move from stem to stem we use slipped stitches.
Now we proceed to weave the flowers of our garden. They can be all of the same species or varied. Your choice.
I chose to make small flowers of various colors.
We place the flowers on the stems and fix them with glue. This way we are done. You can place other decorations if you like.
To line the lid follow the steps for the base of the jar.
Visit my networks:
https://youtube.com/channel/UCRRLYHutL-tHmhlKzN7Z4HA
All photos are my own. Taken with the camera of my MotoX phone. Edited with Polish. I used DeepL translator. Thanks for visiting.
Hola @creacioneslelys, feliz domingo
He quedado enamorada con esta creación, seguramente lo haré cuando tenga que hacer un regalo y dentro del frasco colocar unas galletitas que haga o unos caramelos.
Es un frasco primaveral y tierno.
Gracias por compartir e inspirarme.
Saludos.
Hola. Muy buenos días. Me alegro que te guste el jardín. Lo mejor es que le damos tiempo y utilidad al frasco.
Gracias por pasar a leer.
Wow lovely thanks for sharing @creacioneslelys
The rewards earned on this comment will go directly to the person sharing the post on Twitter as long as they are registered with @poshtoken. Sign up at https://hiveposh.com.
Amiga que hermoso frasco decorado con flores, es muy hermoso, yo quiero uno!
Tu mami está muy consentida! Ya tiene las flores y lo va a colocar en el altar de tu papá! ... Me suena lindo y romántico!
Hola. Qué tal estás? Si, mi mamá aún está por aquí, desesperada por irse a su pueblo. Mientras tanto ella es mi inspiración. Sé que ella cuida bastante sus cosas y le encantan las flores. Estoy segura que le dará un excelente uso a este frasco.
Gracias por pasar a comentar. Feliz noche.
Hola, gracias a Dios, estoy mucho mejor!
Imaginate tu mamí se quiere ir! y tu con ganas de consentirla
Hola @creacioneslelys, realmente es un proyecto muy bonito y práctico. Me gustaron mucho las flores tan coloridas. Gracias por la idea, creo que me animaré a hacer algo parecido. Saludos!
Me alegro que te haya gustado. Esa es la idea, presentar proyectos que puedan servir de inspiración.
Muchas gracias por visitar mi blog y apreciar mi contenido. Saludos.
I love it. Nice job (^_^)
Thanks you 🤗
You're welcome (^_^)
Te quedó hermoso amiga. Es un gran detalle para el día del amor y la amistad,
Hola. Muchas gracias por apreciarlo. Es ideal para regalar el día de la amistad. Aprovechamos los recursos que hay en casa, creatividad y mucho cariño al hacerlo. Saludos.