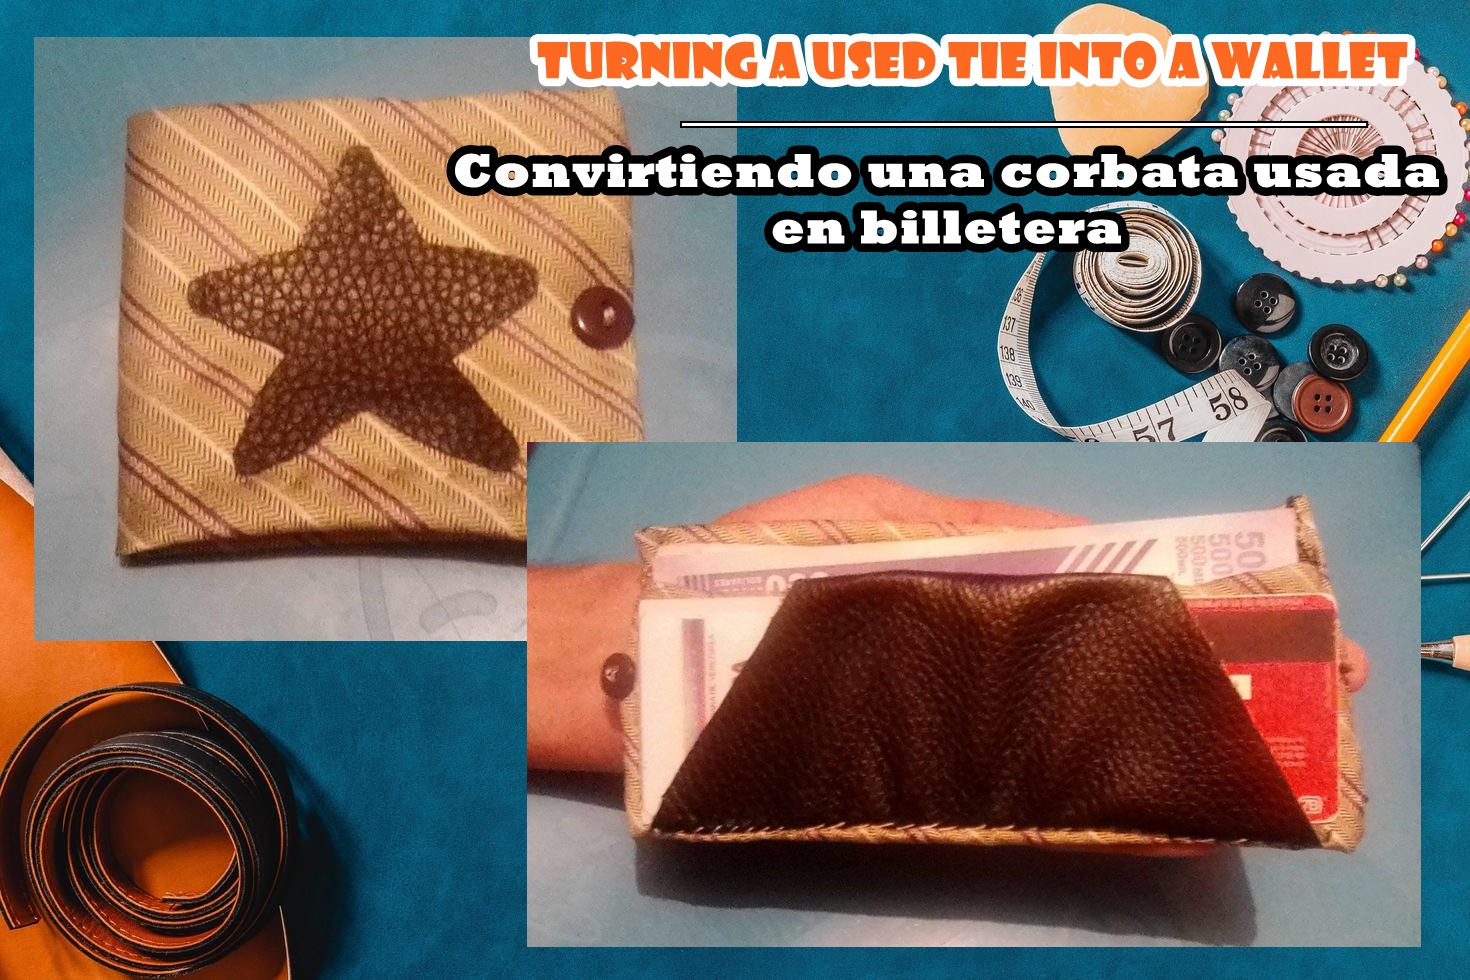
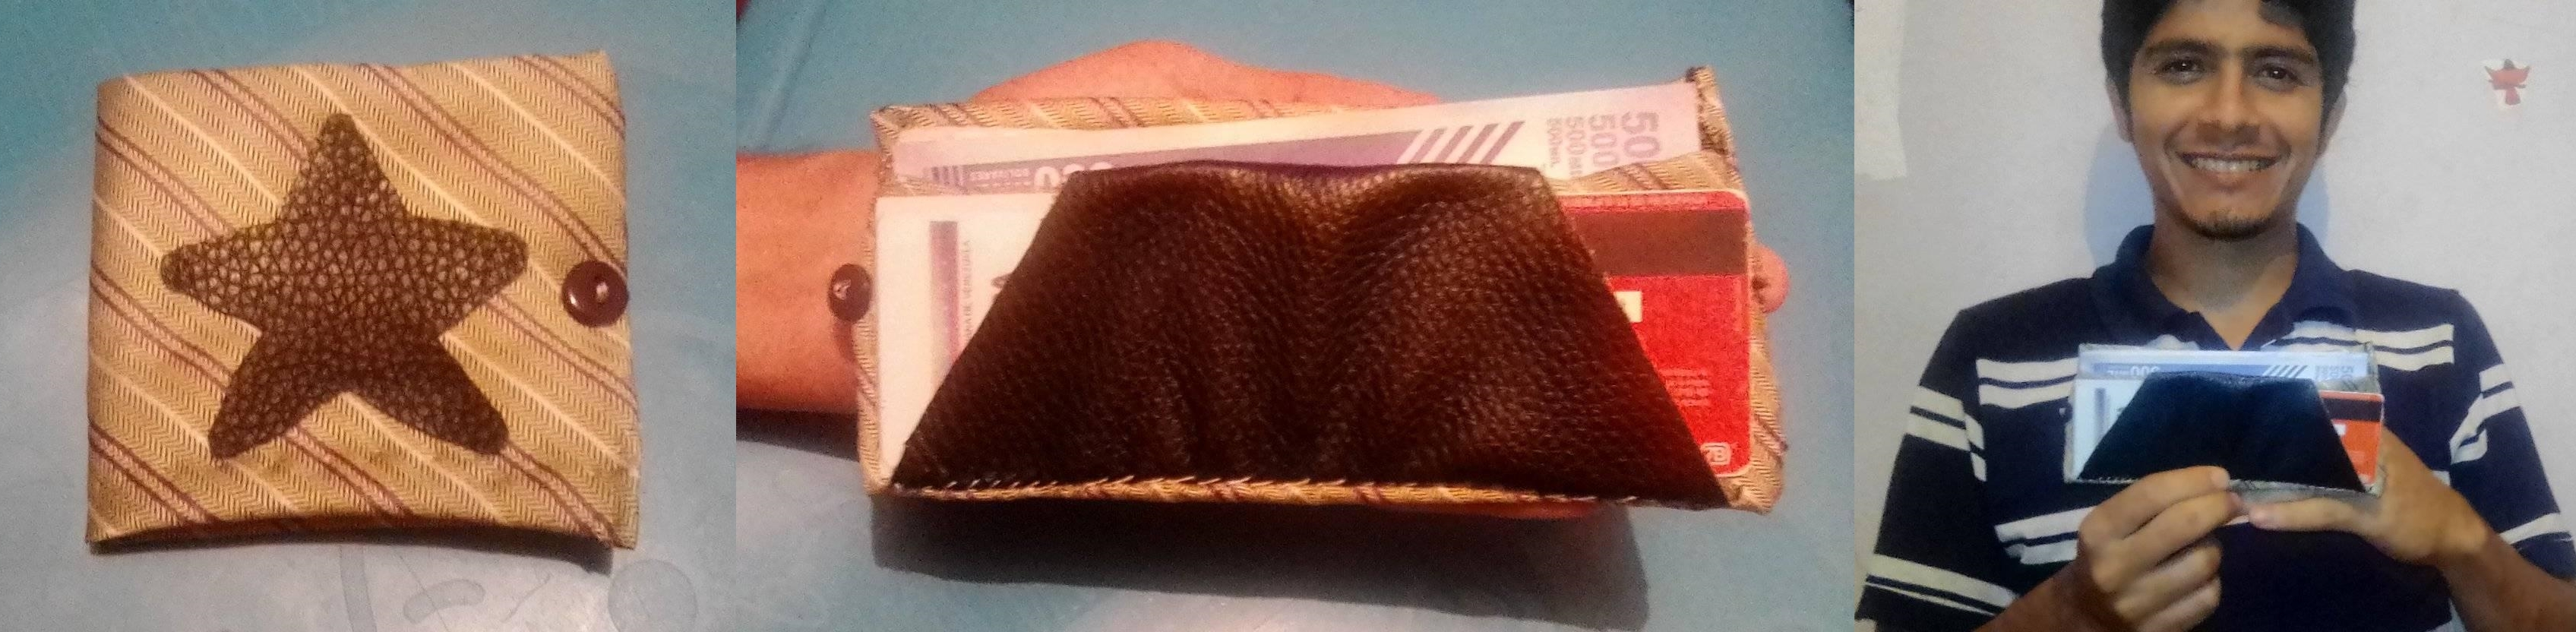
Today I was encouraged to create something for me, an article where I can keep my cash and some cards that I have nowhere to put them, yes, this is a wallet that I made with a tie that I did not use, well without further ado: HANDS TO WORK ...
Hola amigos míos, amantes de la creación y renovación, sean todos bienvenidos, deseo muchas bendiciones para ustedes.
El día de hoy me anime a crear algo para mi, un articulo donde pueda guardar mi efectivo y algunas tarjetas que no tengo donde colocarlas, si, se trata de una billetera que hice con una corbata que no usaba, bueno sin mas preámbulos: MANOS A LA OBRA...
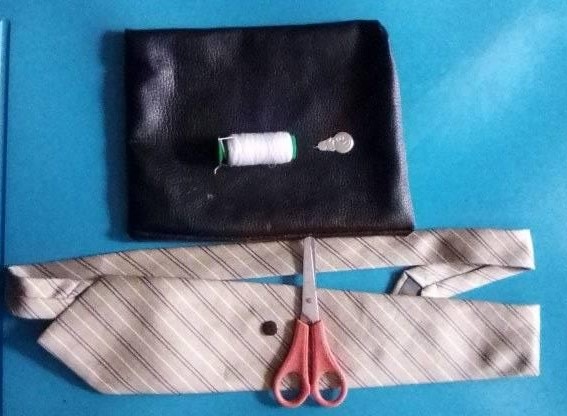
•1 Used tie.
•Scissors.
•Thread and needle.
•Black fabric. (I used semi leather fabric).
•1 button.
•1 seam ripper.
•1 Corbata usada.
•Tijera.
•Hilo y aguja.
•Tela negra. (yo use tela semi cuero).
•1 botón.
•1 Descosedor de costura.
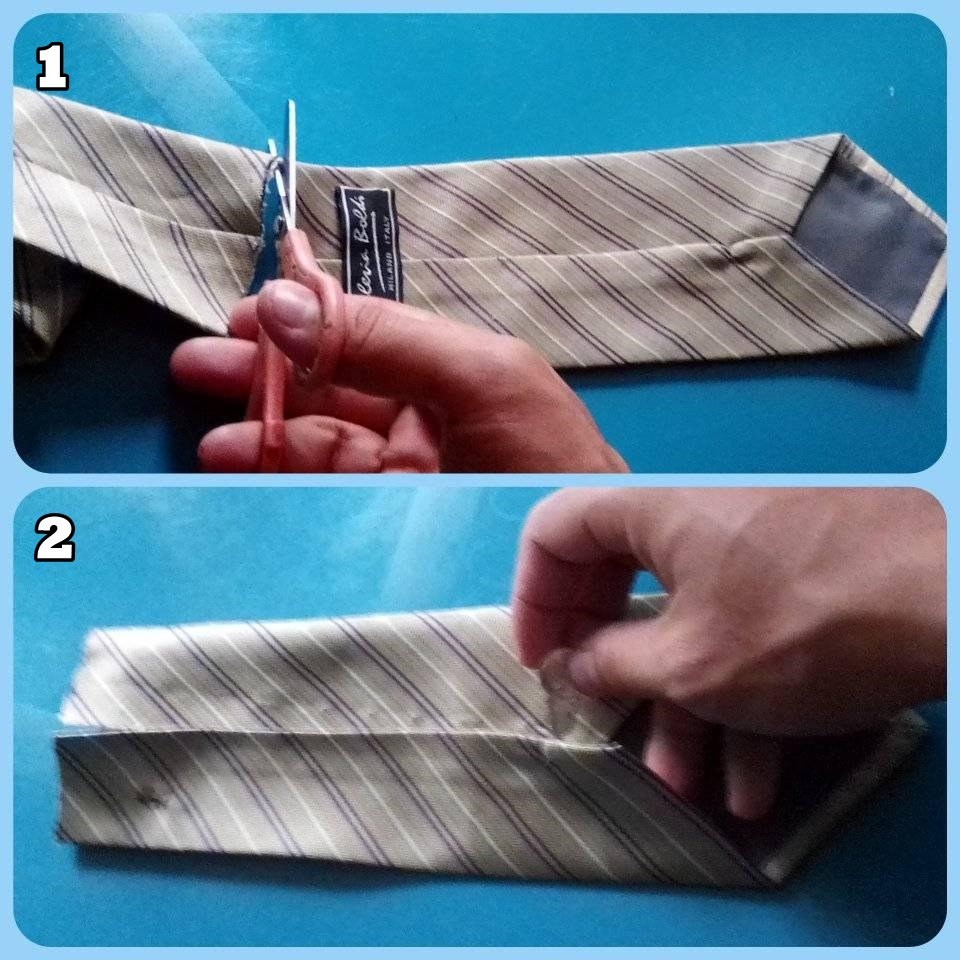
•STEP 1: Cut and separate the tie at 25 centimeters (we will use the thick part).
•STEP 2: Now we use the unstitcher and remove all the stitching from the fabric we will use, leaving it clean.
•PASO 1: Cortamos y separamos a 25 centímetros la corbata (usaremos la parte gruesa).
•PASO 2: Ahora usamos el descosedor y le quitamos toda la costura a la tela que usaremos, dejándola limpia.
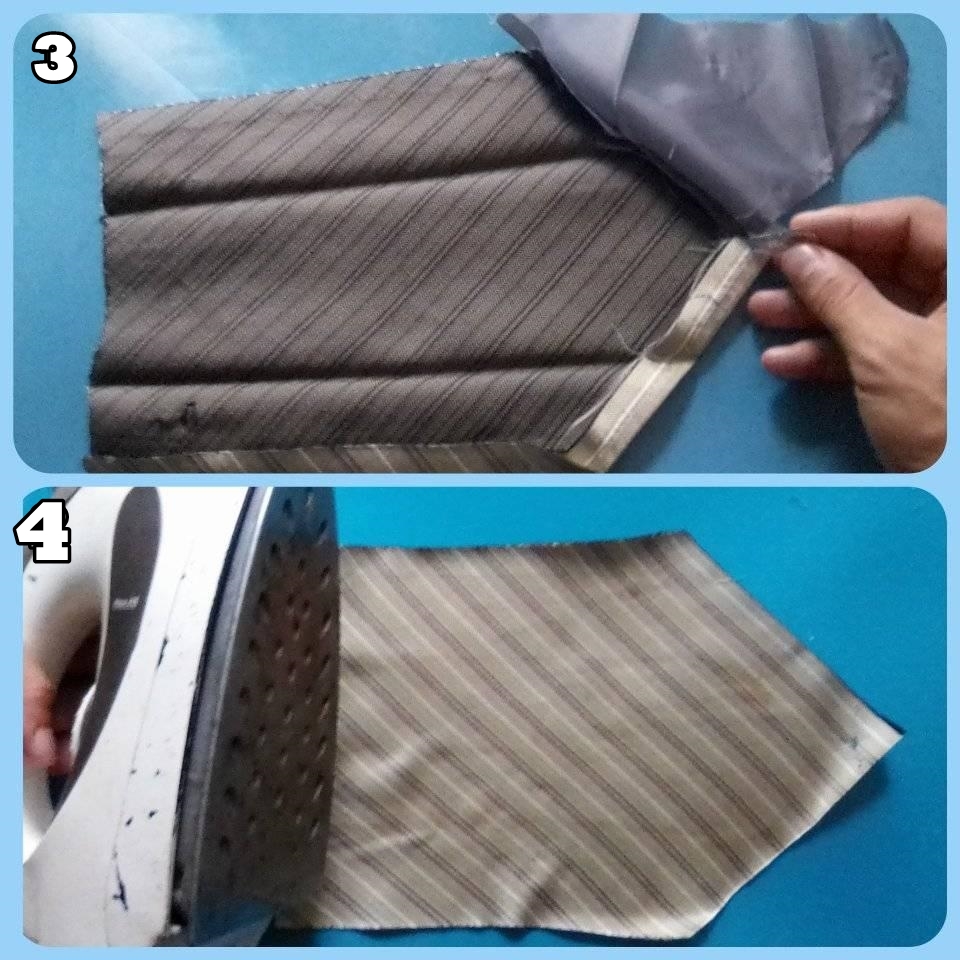
•STEP 3: We remove the semi-transparent fabric that is cooked inside the tie and discard it.
•STEP 4: We use a clothes iron and iron the thick part of the tie that we will use, so that the fabric is completely stretched without wrinkles.
•PASO 3: quitamos la tela semi transparente que esta cocida dentro de la corbata y la desechamos.
•PASO 4: Usamos una plancha de ropa y planchamos la parte gruesa de la corbata que usaremos, de manera que la tela quede completamente estirada sin arrugas.
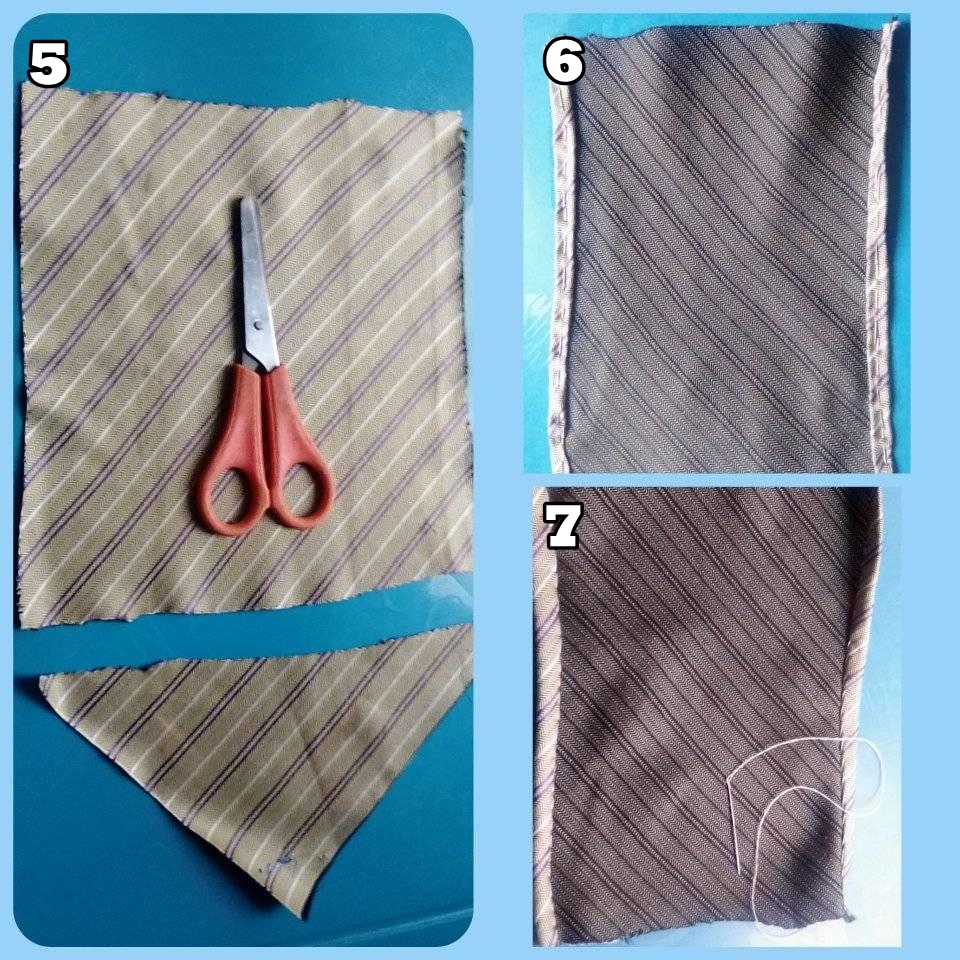
•STEP 5: Cut and separate the triangular part of the tie and keep the rectangle part.
•STEP 6: Important! This step is for people who do not have a sewing machine, but sew by hand. We fold half a centimeter and secure with several needles or pins the 2 longer edges of the fabric.
•STEP 7: Sew the edges that we just secured with pins.
•PASO 5: Cortamos y separamos la parte triangular de la corbata y nos quedamos con la parte en forma de rectángulo.
•PASO 6: Importante! Este paso es para las personas que no tienen máquina de coser, sino que cosen a mano. Doblamos medio centímetro y aseguramos con varias agujas o alfileres los 2 bordes más largos de la tela.
•PASO 7: Coser los bordes que acabamos de asegurar con alfileres.

•STEP 8: Fold the fabric and sew along the inside of the side edges leaving the hole on the wide side, then turn the fabric to the outside.
•PASO 8: Doblamos la tela y cosemos por la parte interior los bordes laterales dejando el agujero de la parte ancha, luego giramos la tela hacia el exterior.
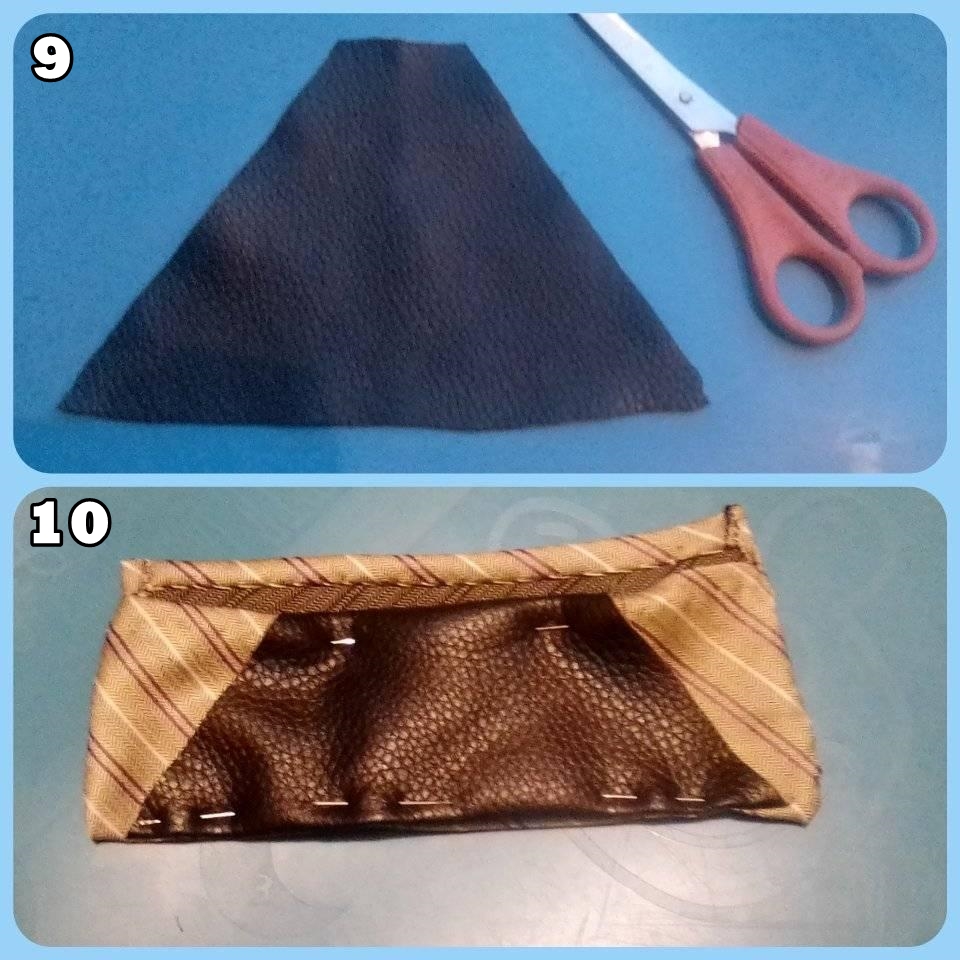
•STEP 9: Cut a triangle out of the semi-leather fabric (this will be for the inside pockets of the wallet).
•STEP 10: This step is for those who do not have a sewing machine. We secure with pins or needles (without thread), the semi leather fabric to the inside of the wallet simulating pockets.
•PASO 9: Cortamos un triángulo de la tela semi cuero (esta será para los bolsillos interiores de la billetera).
•PASO 10: Este paso es para los que no tienen máquina de coser. Aseguramos con alfileres o agujas (sin hilo), la tela de semi cuero a la parte interior de la billetera simulando bolsillos.
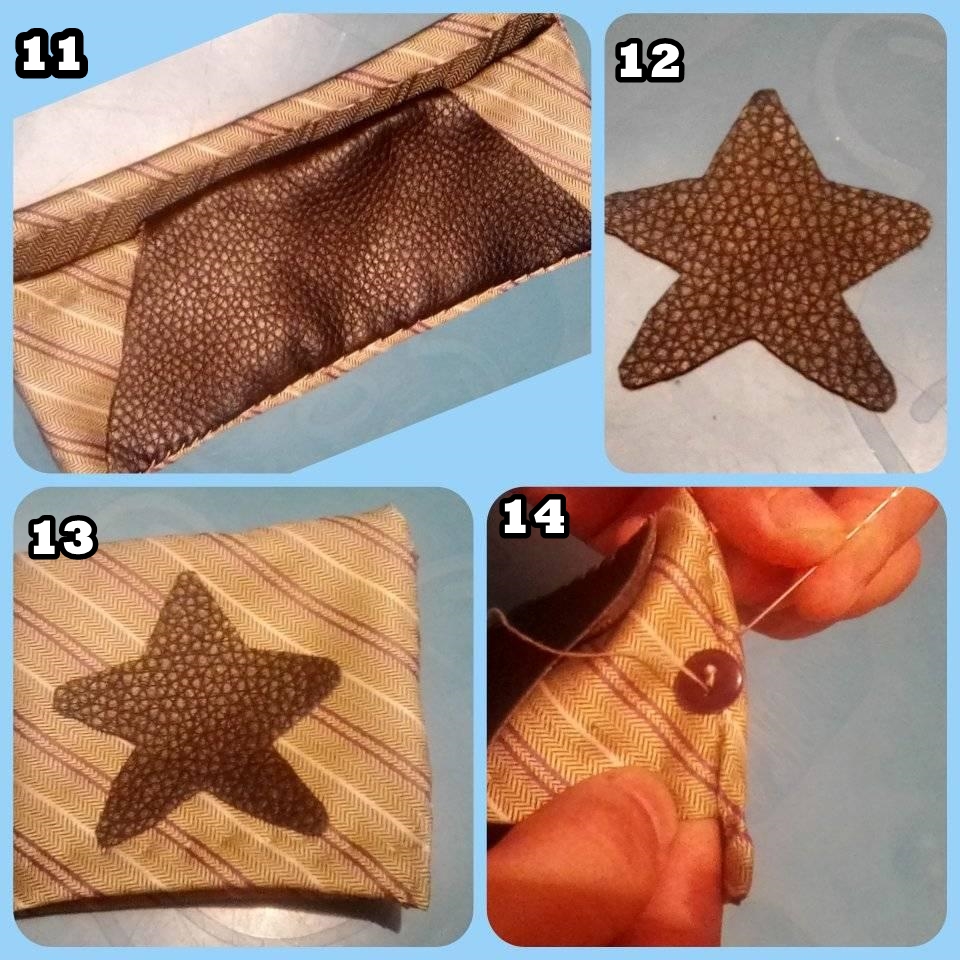
•STEP 11: Sew the triangle in the shape of a circle to the inside of the wallet.
•STEP 12: Draw and cut out a star on the semi leather fabric (this is a design for the outside of the wallet).
•STEP 13: Glue or sew the star we just created to the outside of the wallet.
•STEP 14: Sew the button to one side of the wallet.
•PASO 11: Cosemos el triángulo en forma de circulo a la billetera por la parte interior.
•PASO 12: Dibujamos y recortamos una estrella en la tela semi cuero (este es un diseño para la parte exterior de la billetera.
•PASO 13: Pegar o coser la estrella que acabamos de crear a la parte exterior de la cartera.
•PASO 14: Cosemos el botón a uno de los laterales de la billetera.
All photos are my own, edited in PhotoScape, translator used: DeepL.

Congratulations @deivisperez! You have completed the following achievement on the Hive blockchain and have been rewarded with new badge(s) :
Your next target is to reach 2750 upvotes.
You can view your badges on your board and compare yourself to others in the Ranking
If you no longer want to receive notifications, reply to this comment with the word
STOPCheck out the last post from @hivebuzz:
Support the HiveBuzz project. Vote for our proposal!