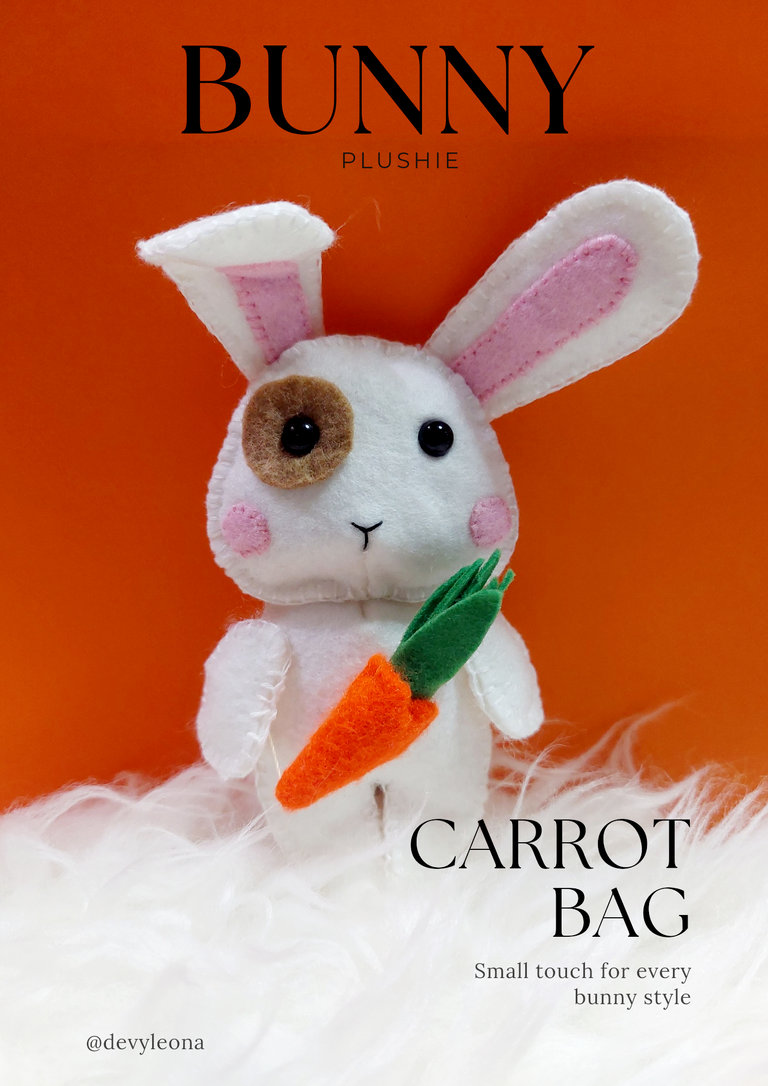
Hello, friends especially needleworkers!
Today i would like to share the craft project i made up on weekend. Long time i haven't done any craf projects and this project made me a little worried cause i am not a pro in joining the body parts, but i tried my best to make this bunny plushie and finally i could finish it, with extra carrot bag.
I tried my best to make it as easy as i can and i took pictures of the making process accurately so that you could make it for yourselves too. Let's follow me to see how i made it!
Project Time: approximately 10 hours
Difficulty: Quite difficult for me
Skills Needed:
- running stitch
- back stitch
- blanket stitch
- whipped stitch
Materials & things needed:
- paper to make the pattern
- paper scissors
- craft scissors
- pins
- felt fabrics in white, soft brown, soft pink, orange and green
- sewing needle
- safety doll eyes in 7 mm size
- pinset
- filling stuff (dacron fibre)
- wire
- embroidery thread
How to make it:
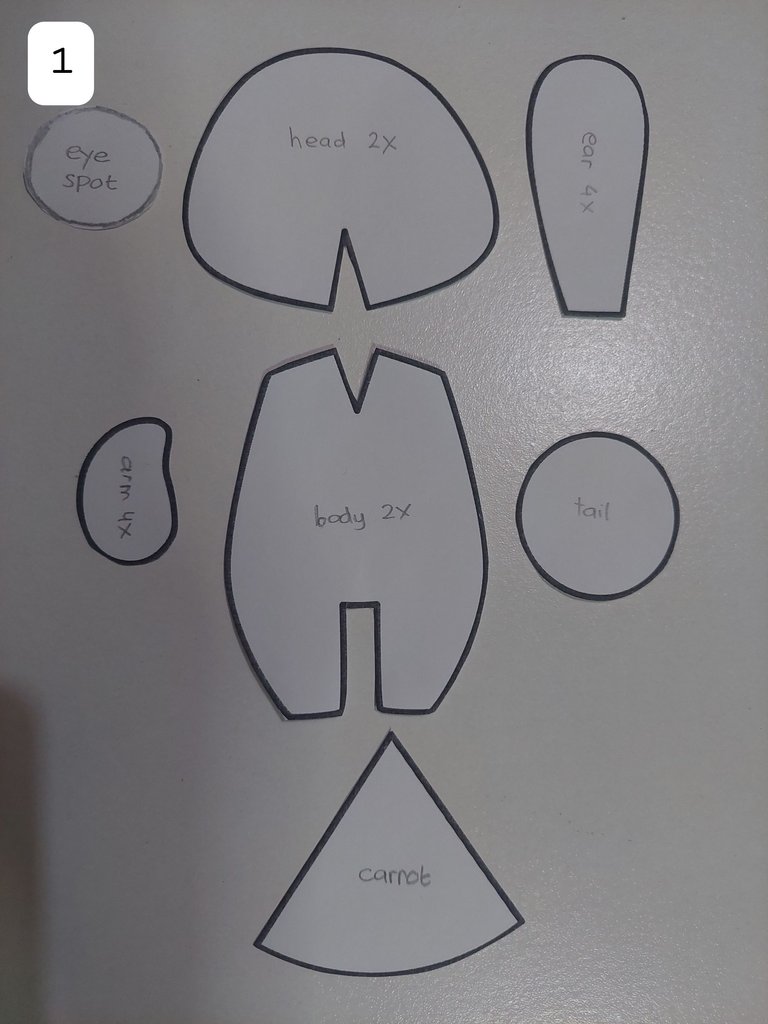
1ST
I drew the pattern for the bunny and carrot bag then i cut them off.
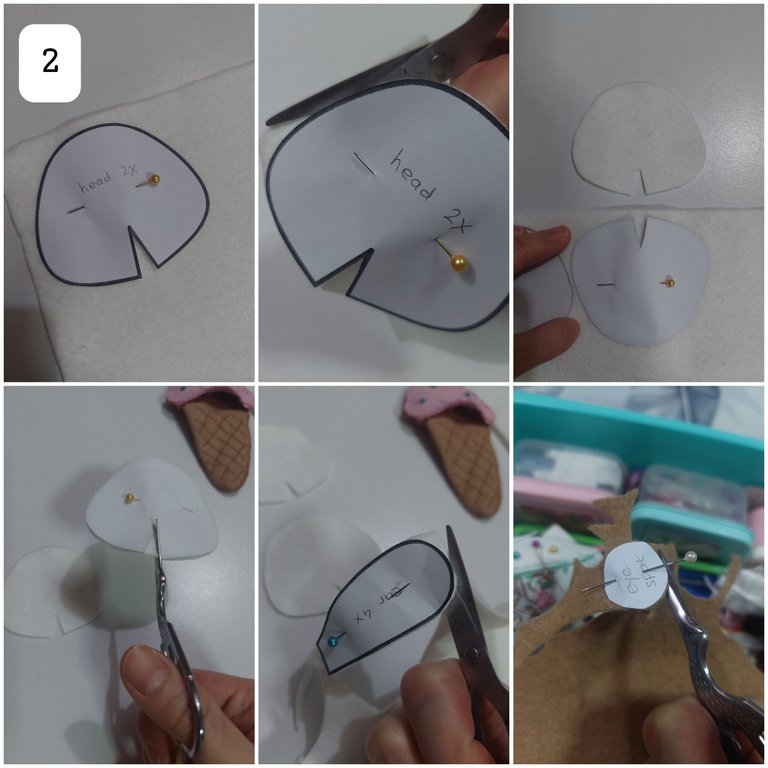
2ND
Next, i pin the head on the white felt. Cut two of it. I also cut out the ears. Then the dot for one of the eye with soft brown felt.
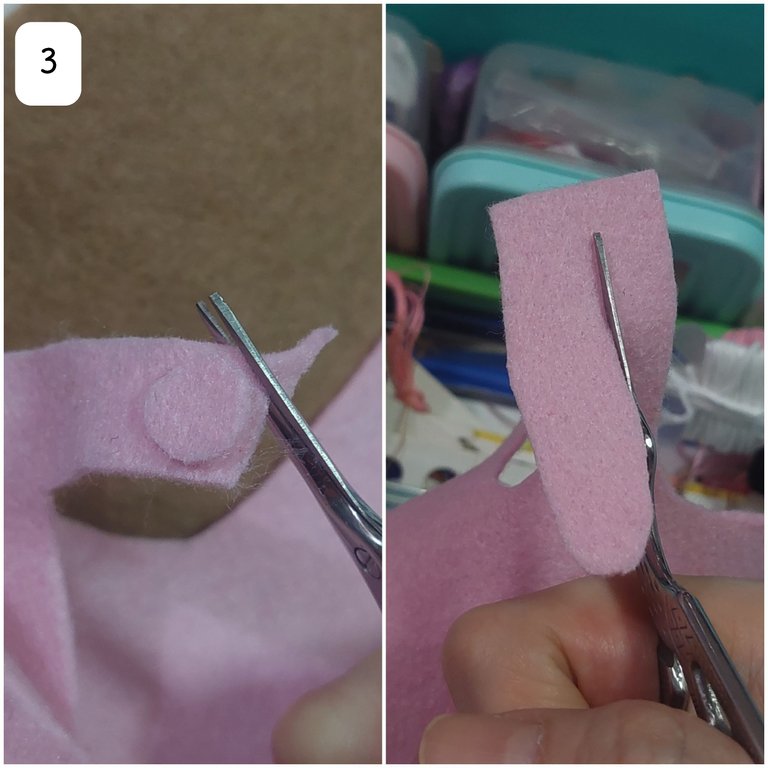
3RD
I also cut two little circles and inner ear areas with soft pink felt.
4TH
I then joined the opened area on the head with back stitch. I did the same for the front and back parts. After that, i whipped stitch the two little circles for the cheek. After finished, i made the nose and mouth like below.

5TH
Next i cut the back of the eyes cause they were too long. After that i made the holes on the brown circle area, and head for the eyes. Put the eyes ther, so that now the head had the eyes.
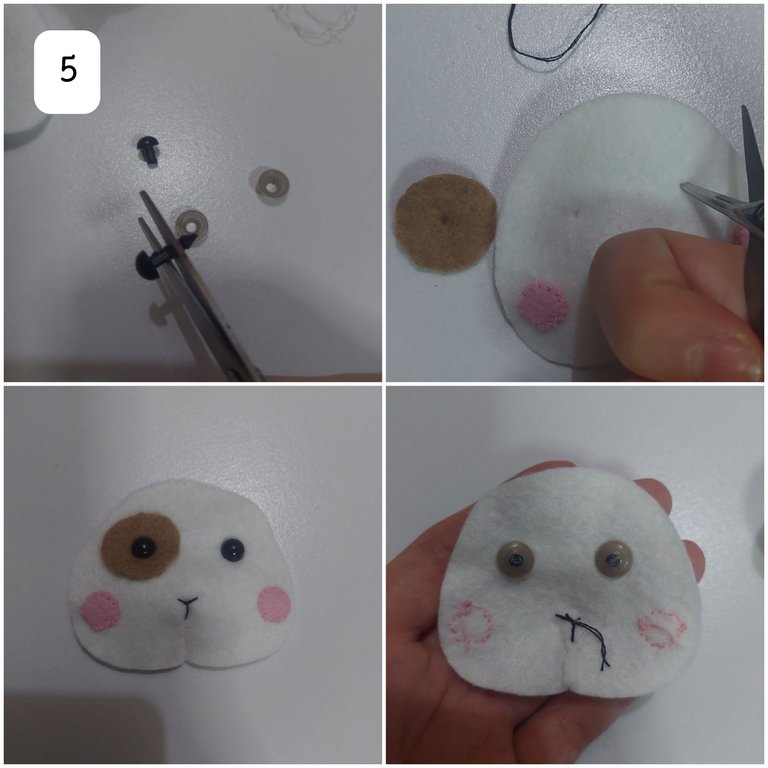
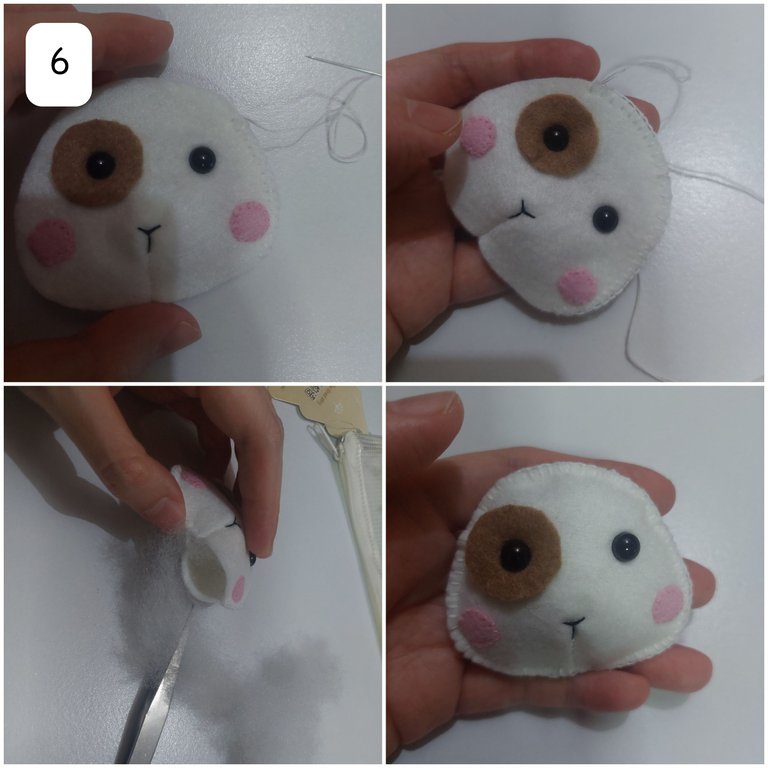
6TH
Then i did the blanket stitch to join the front and back of the head parts. I also put the filling fiber in it before i closed it. Now the head was done.
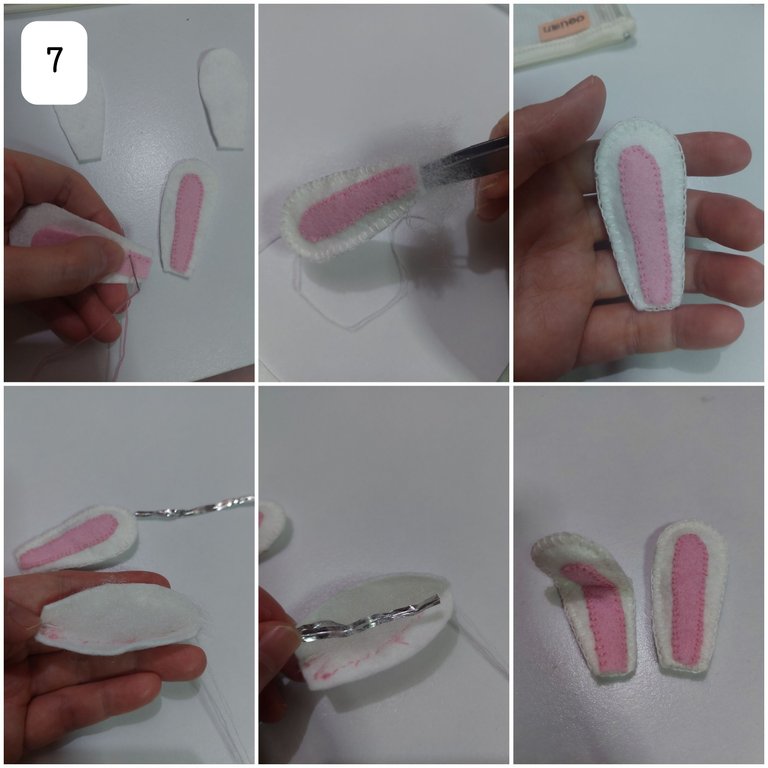
7TH
After that i whipped stitched the inner soft pink area to the white ears. I did for both of the ears. While for one ear i only filled the filling stuff in it, i added the wire on the other. In order to join the front and back parts of each ear, like the head, i also used blanket stitch.
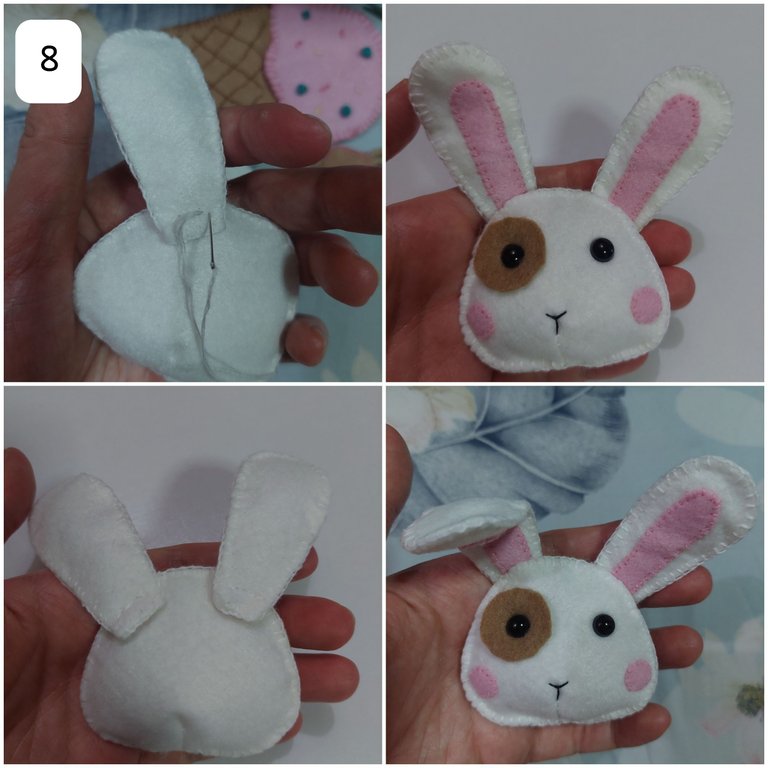
8TH
Now it was my time to joining the ears with the head. This time i used back stitch behind. The bunny's head now finished.
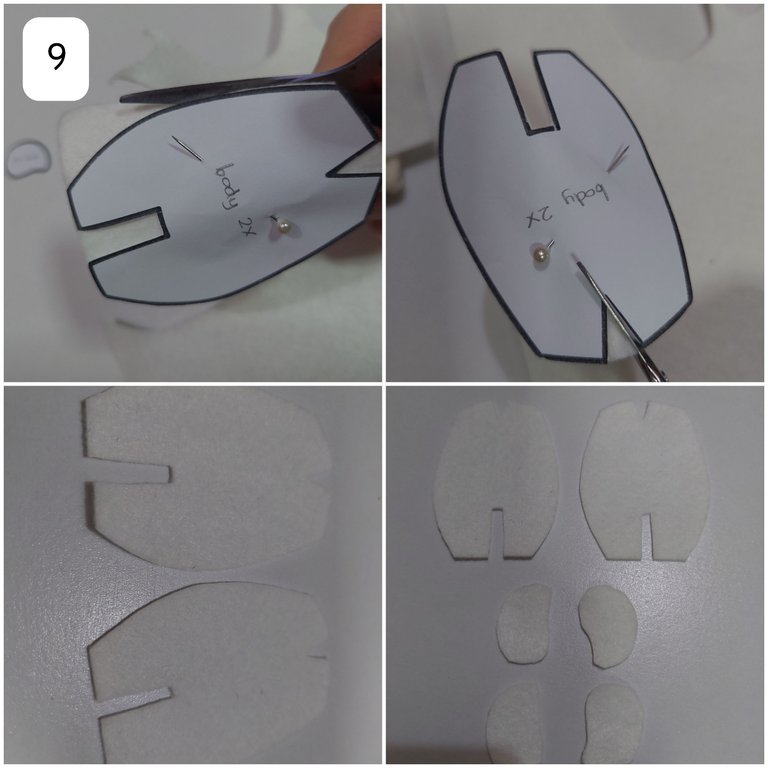
9TH
I pinned the body on the white felt and cut them out. I also did the same for the arms. While i cut 2 same parts for the body, i cut 4 same parts for the arms.
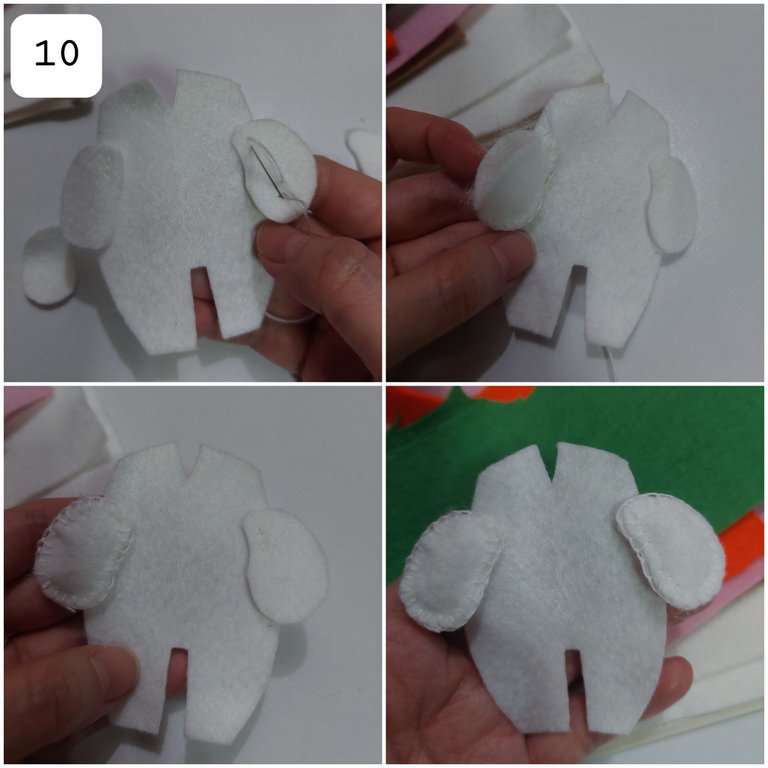
10TH
Now it was my time to join the back of the arms parts with the body. I used back stitch here. Then i stitched around both arms with the blanket stitch. I also didn't forget to fill the filling stuff on them before i closed it. Now they were done.
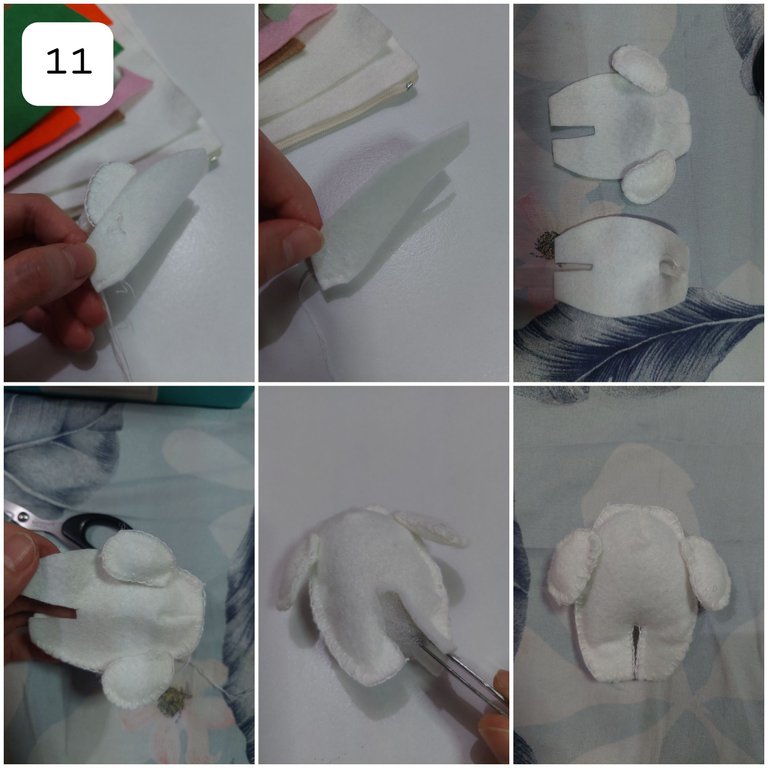
11TH
Now i closed the upper v holes on the front and back of the body with the back stitch. Then i joined the front and back parts with blanket stitch. I also put on the filling fiber before i closed it.
12TH
Next i also sew the head with the body. Now the bunny was done.

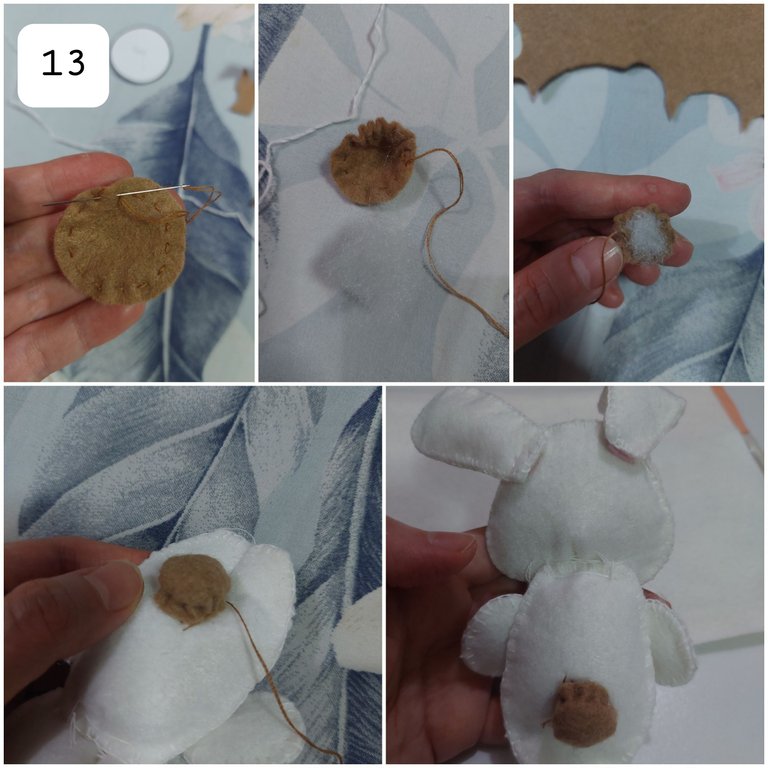
13TH
I cut out the bunny tail with the brown color. Then i did the running stitch around it, filled it with the fibre then pull it and sew it at the back of the bunny.
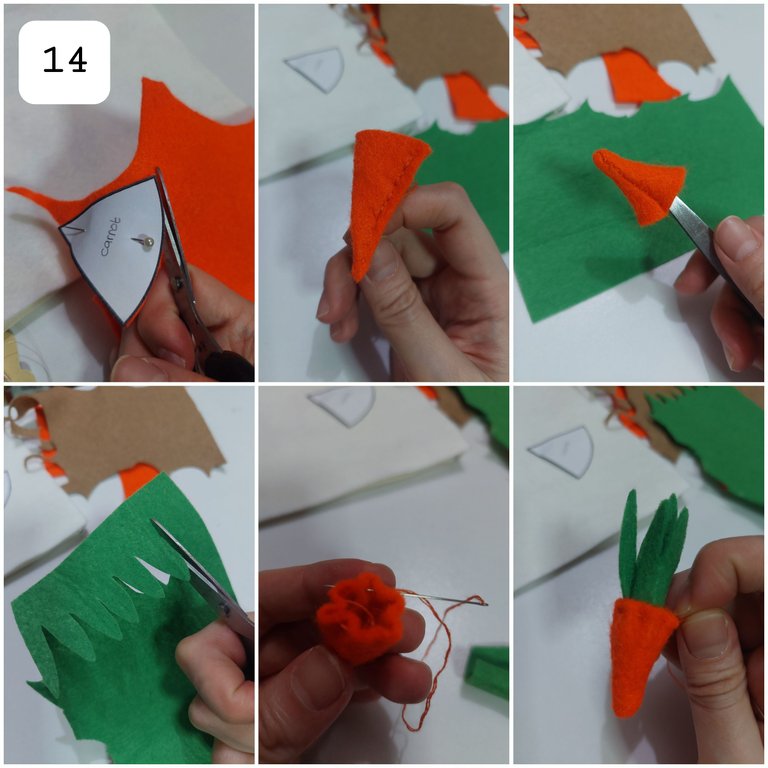
14TH
Next for the carrot, i cut out the orange felt. Then i did the back stitch and turned it upside down with the help of the pinset. I cut out the green felt as the leaves like below. Running stitch around the carrot, rolled and put the leaves in it then pulled the thread and made a knot.
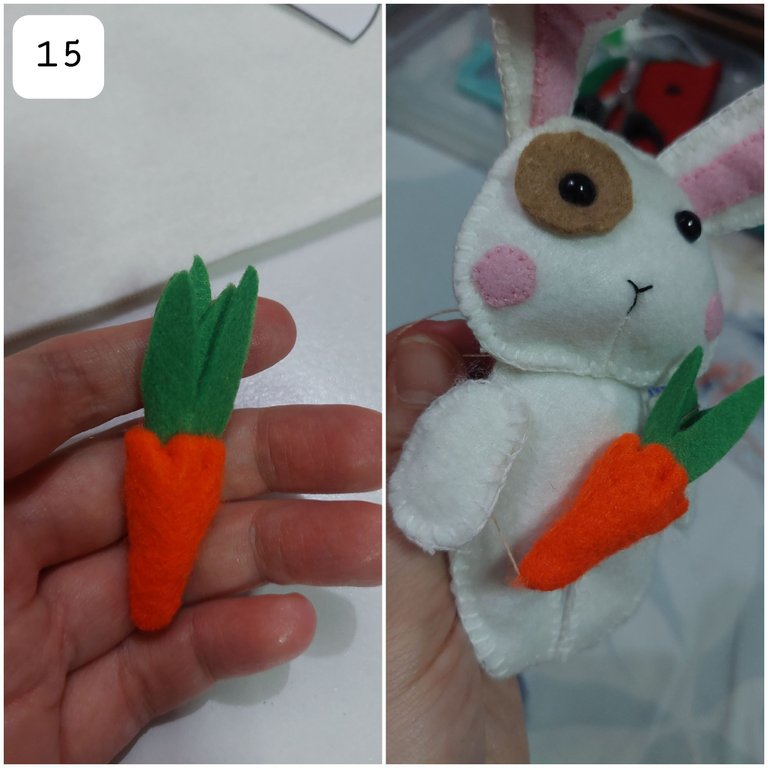
15TH
Finished with the carrot i added the thread in it so it could be bring by the bunny.
VOILA, ta da this is it, Bunny Plushie with a carrot bag.
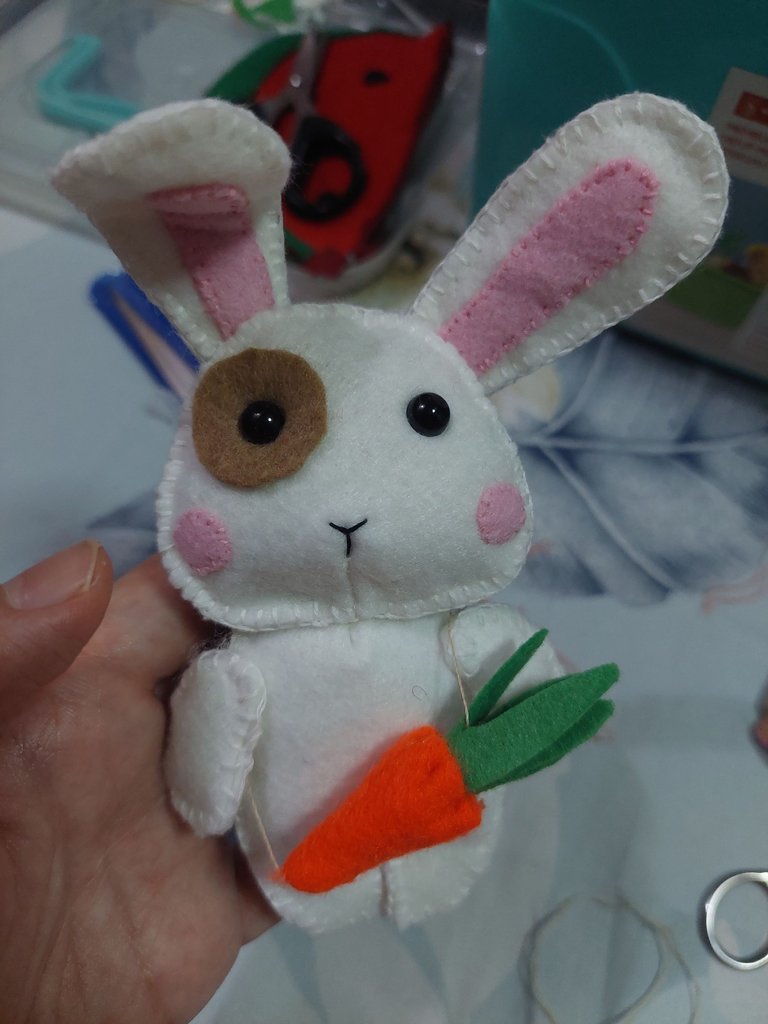
Isn't it cute?
Thanks for reading my article, hope you enjoy it and stay tune for more CRAFT things from me!
A bit about the author
She works in a bank but she interests in CRAFT (CRaft, Art, Food and Travel). To pursue her art passion she does the cross stitch, embroidery, handsewing, crafts, crochet and also draws. Find hers in https://www.redbubble.com/people/de-creartique/shop?asc=u and https://decreartique.threadless.com/designs . Also find her cute collectibles pixel cat pictures here https://opensea.io/collection/pixelcryptocat .
This is lovely dear and alot of task For you to have gotten all the measurements right and sew this very neatly. The bunny is a lovely one
Well done dear.
Thanks a lot :) i am so glad you came by
👏 Keep Up the good work on Hive ♦️ 👏
❤️ @equipodelta suggested sagarkothari88 to upvote your post ❤️
🙏 Don't forget to Support Back 🙏
Thanks
@devyleona, you are most welcome!
Please Support Back
Here is !ALIVE token gift for you
@devyleona! You Are Alive so I just staked 0.1 $ALIVE to your account on behalf of @ hivecurators. (1/10)
The tip has been paid for by the We Are Alive Tribe through the earnings on @alive.chat, feel free to swing by our daily chat any time you want, plus you can win Hive Power (2x 50 HP) and Alive Power (2x 500 AP) delegations (4 weeks), and Ecency Points (4x 50 EP), in our chat every day.

Thanks
esto es lo mas lindo que he visto hoy en Hive. una cuchitura.
Gracias
Que bonito! Me encantó
Gracias :)
That is so cute! You did a great job! I made some little felt animals before that fit in a small tin (altoid box) for travel fun.