
Hola familia de #hive , #gems y #needlework. Espero la estén pasando excelente al lado de sus familiares.
Hoy les mostraré un paso a paso de una moñera elegante para ella. Es un estilo muy bonito que sirve para toda ocasión y lo bueno es que lo pueden usar las niñas de la casa. Es un tutorial muy fácil de hacer y lo bueno es que lo puedes hacer junto con tus niñas. Otra cosa es que también lo puedes coser a mano y utilizar el tipo de tela que quieras. el tiempo de duración es de aproximadamente 12 min. Eso depende de la agilidad que tenga la persona en hacerlo y las condiciones de uso. Me gusta mucho lo que hago y me complace enseñar a otros lo que aprendí en el trayecto de mi vida para que también puedan elaborar sus propios de gran utilidad en la vida cotidiana.
Hello #hive, #gems and #needlework family. I hope you are having an excellent time with your family.
Today I will show you a step by step of a stylish bow tie for her. It is a very beautiful style that serves for all occasions and the good thing is that it can be used by the girls of the house. It is a very easy tutorial to do and the good thing is that you can do it together with your girls. Another thing is that you can also sew it by hand and use the type of fabric you want. the duration time is approximately 12 min. That depends on the agility that the person has in doing it and the conditions of use. I really like what I do and I am pleased to teach others what I learned in the course of my life so that they can also make their own useful in everyday life.
Para hacer esta hermosa moñera necesitaremos los siguientes materiales:
Materiales:
• Tela
• Tijera
• Hilo "el castillo" 100% poliester
• Elástica de 0.5 mm
• Cinta métrica
• Aguja
• Gancho de pelo
• Palillo de altura
To make this beautiful bow tie we will need the following materials:
Materials:
• Cloth
• Scissors
• Thread "the castle" 100% polyester
• 0.5 mm elastic
• Measuring tape
• Needle
• Hook hair
• High stick

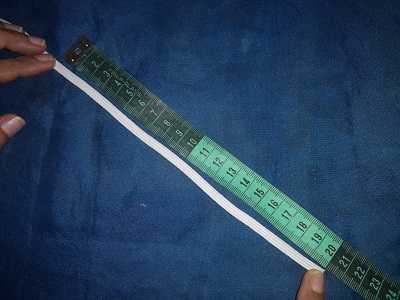
1er Paso
Se miden dos rectángulos
a.-( 6 x 60)cm ; b.-(12 x 100)cm y se corta 20cm de elástica
Se procede a coser los dos rectángulos “a” y “b”. "a" por el lado al revés y a lo largo y "b" por el lado derecho, como se ve en la foto. Nota: Si no tienes mucha experiencia en la costura te recomiendo que bastees las piezas con hilo primero.
1st Step
Two rectangles are measured
a .- (6 x 60) cm; b .- (12 x 100) cm and cut 20cm of elastic
The two rectangles "a" and "b" are sewn. "a" on the reverse side and along and "b" on the right side, as seen in the photo. Note: If you do not have much experience in sewing, I recommend that you thread the pieces first.
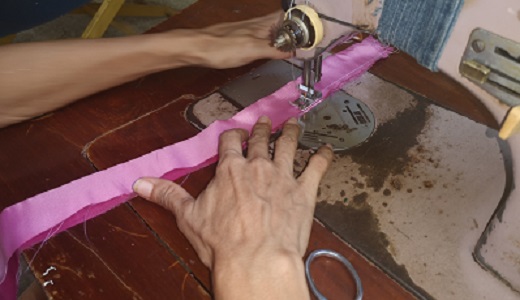
Cosiendo el rectangulo "a"
Sewing the rectangle "a"
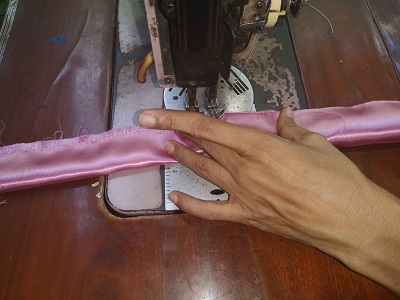
Cosiendo el rectangulo "b"
Sewing the rectangle "b"
Midiendo la elastica, 20 cm
Measuring the elastic, 20 cm
Se voltea la piezas "a" por el lado derecho, ver foto.
2nd Step
Turn the pieces "a" on the right side, see photo
Se introdujo un palo de altura para voltear el rectángulo "a" ya cosida.
A tall stick was inserted to flip the rectangle "a" already sewn.
Aqui se puede observar cuando va saliendo el derecho del rectángulo cosido.
Here you can see when the right of the sewn rectangle comes out
Y aquí ya esta volteado
And here it is already flipped
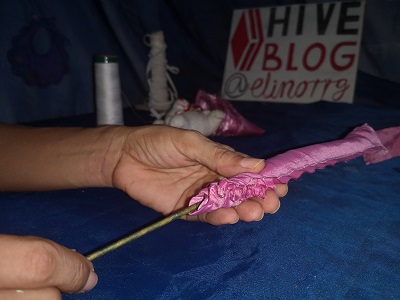
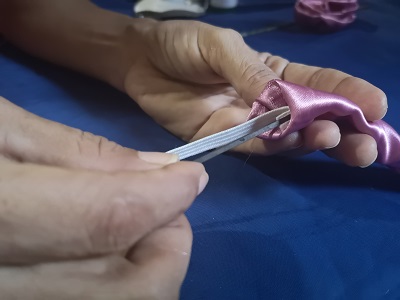
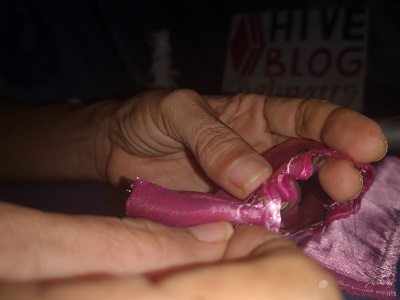
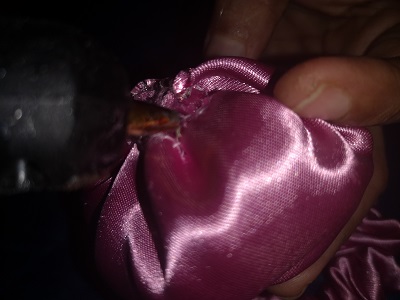
3er Paso
La elastica es para la pieza “a“ de la moñera. Se le introduce la elástica y se amarra como se observa en la foto. Yo tome un ganch
** 3rd Step **
The elastic is for the piece "a" of the moñera . The elastic is inserted and tied as shown in the photo.
Introducimos la elástica
We introduce the elastic
Elástica en curso
Elastic in progress
La sacamos por el otro costado
We take it out from the other side
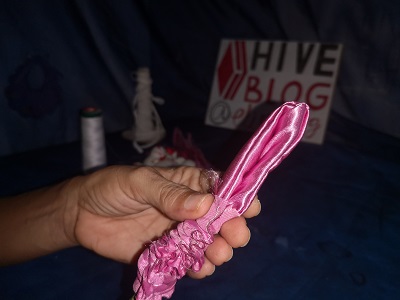
Amarramos la elástica
We tie the elastic
Y terminado
And finished
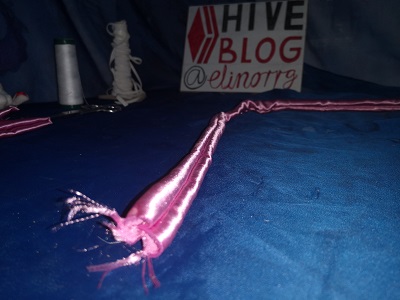
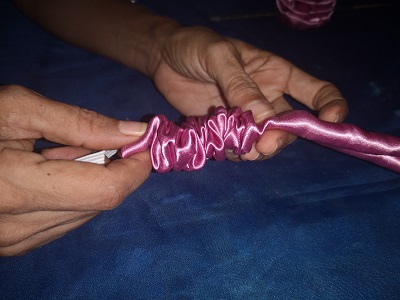
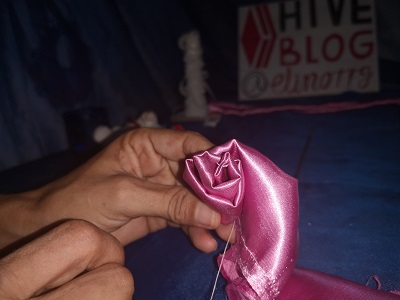
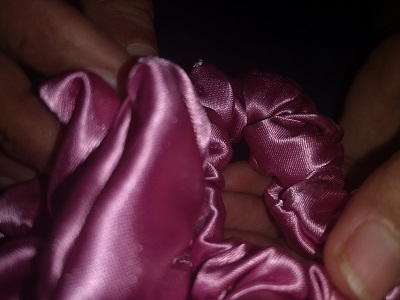
4to Paso
La pieza “b” se enrolla para formar la flor como se observa en la foto
4th Step
Piece "b" is rolled to form the flower as seen in the photo
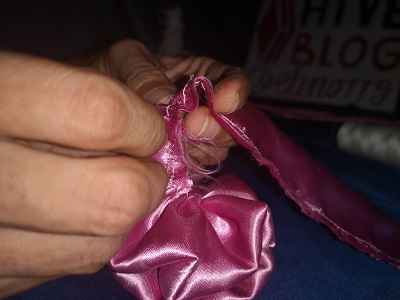
Se comienza enrollando un poco la tira y se va cosiendo a mano
You start by rolling the strip a little and sew it by hand
Y vas enrollando y cosiendo
And you are rolling and sewing
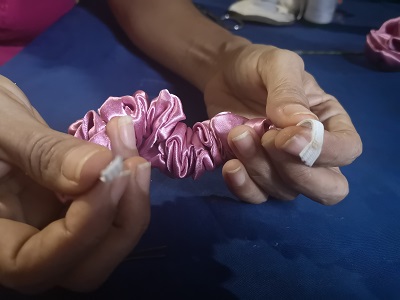
Ahí se observa ya casi formada la flor
There the flower is almost formed
Y la flor ya esta formada
And the flower is already formed
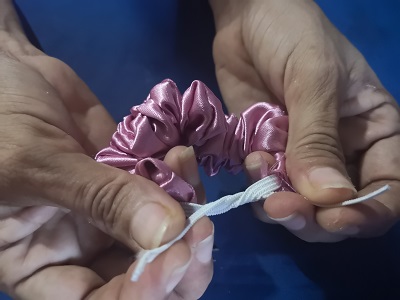
5to Paso
Una vez terminadas las dos piezas se pegan o se cosen, ver foto
** 5th Step **
Once finished the two pieces are glued or sewn, see photo
Le agregamos el silicón a cualquiera de las dos piezas
We add the silicone to either of the two pieces
Y pegamos
And we glue
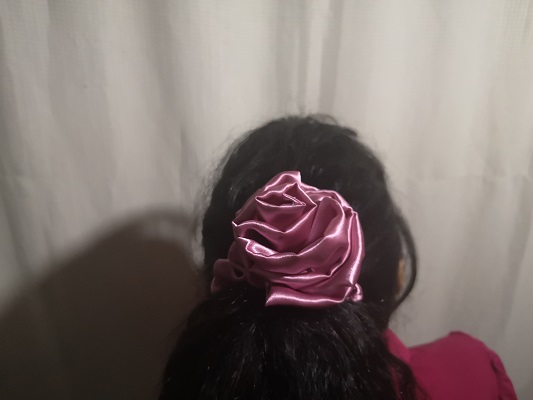
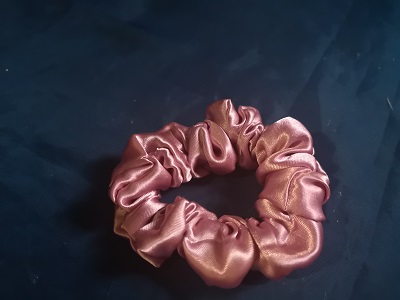
6to Paso
Moñera lista
** 6th Step **
Ready moñera
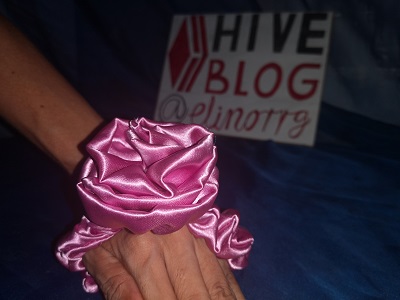
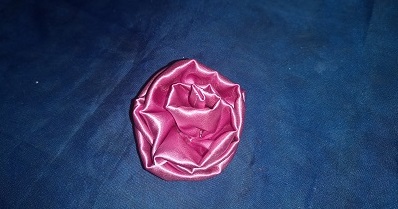
Aquí tenemos a la hermosa moñera
Here we have the beautiful moñera
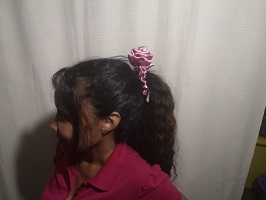
Did you see how easy it is to make a bow tie? I invite you to do them with your daughters and so they will have to share, learn and tie their hair. Cheer up !!
Gracias por ver mi tutorial. Espero les haya gustado.
Thanks for watching my tutorial. I hope you liked it.
Agradeciendo antemano a @åppreciator, @qurator, @needlework, @upmewhale, @Cervantes, @curie, @neoxian, @spanish, @dclub, @gems, @powerhousecreatives, , @community, etc por apoyarme siempre en estos bellos arte creativo.
Thanks in advance to @ åppreciator, @qurator, @needlework, @upmewhale, @Cervantes, @curie, @neoxian, @spanish, @dclub, @gems, @powerhousecreatives,, @community, etc. for always supporting me in these beautiful creative art.
Apreciando sus comentarios
Appreciating your comments.
Greetings to the entire #hive community

Congratulations @elinorrg! You have completed the following achievement on the Hive blockchain and have been rewarded with new badge(s) :
You can view your badges on your board And compare to others on the Ranking
If you no longer want to receive notifications, reply to this comment with the word
STOPTo support your work, I also upvoted your post!
Support the HiveBuzz project. Vote for our proposal!
Fabuloso, reciente publique otra manera de hacerlo. QUe fino encontrar personas con quien compartir el arte.
Gracias. Si eso es bueno así aprendemos de todos