Hello, today I bring you another version of a children's diver, this time with a hood. Sizes range from 1 year to 14 years, with colors to identify each size.
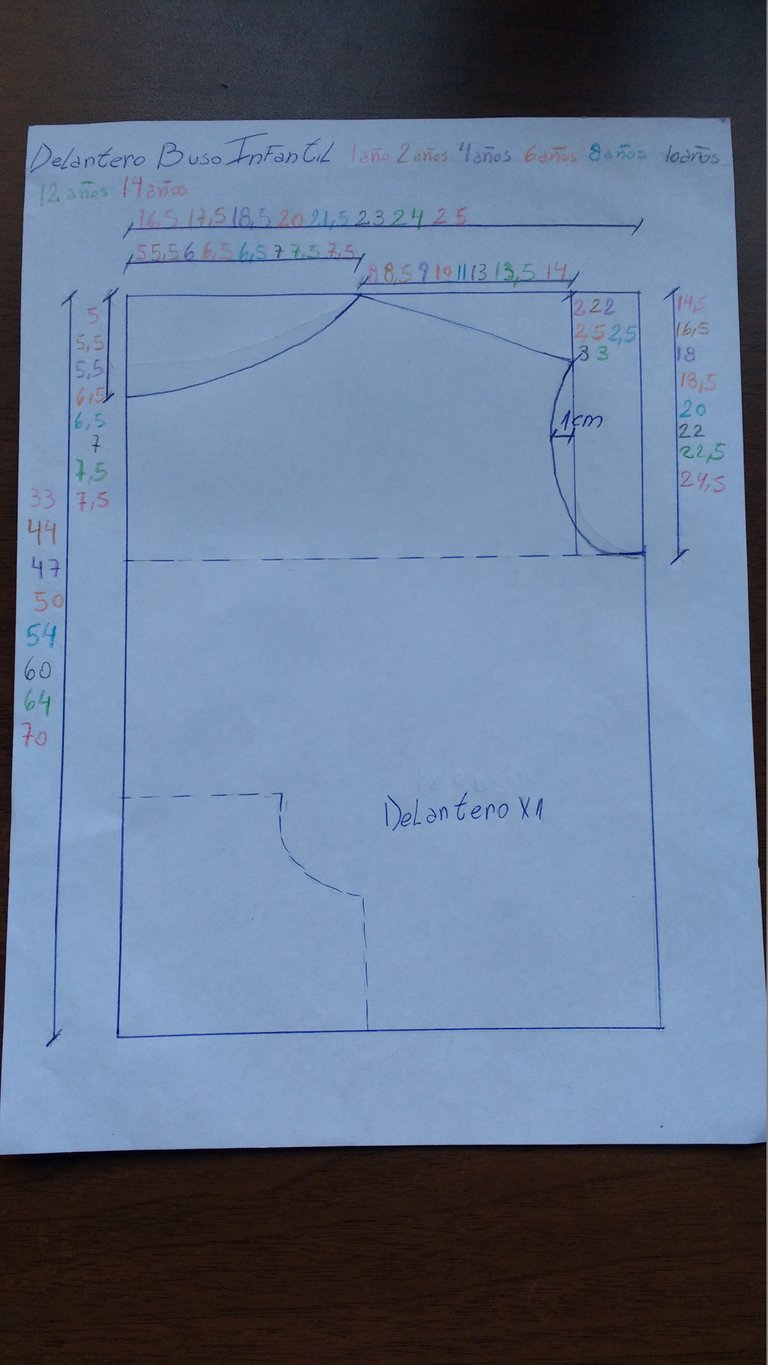
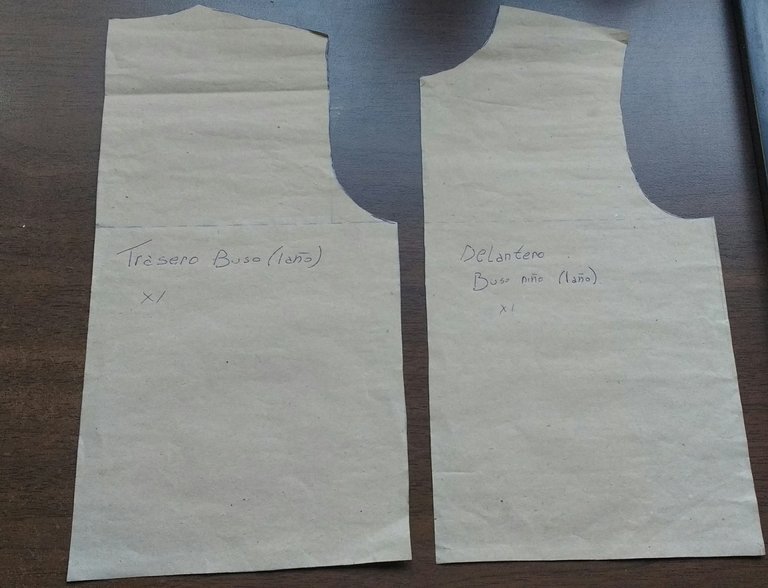
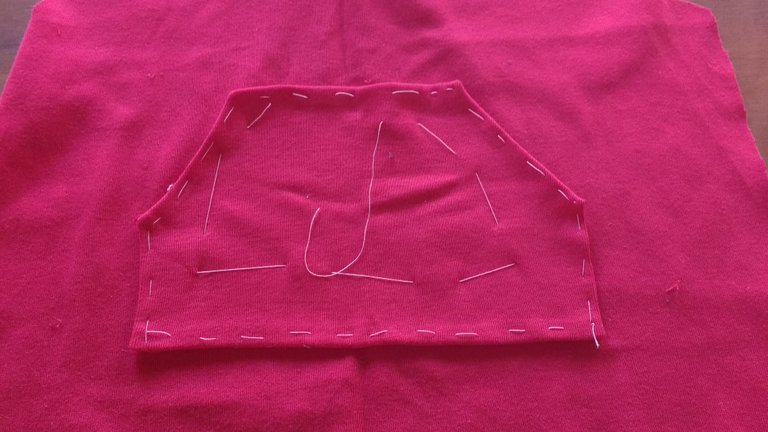
Front mold.
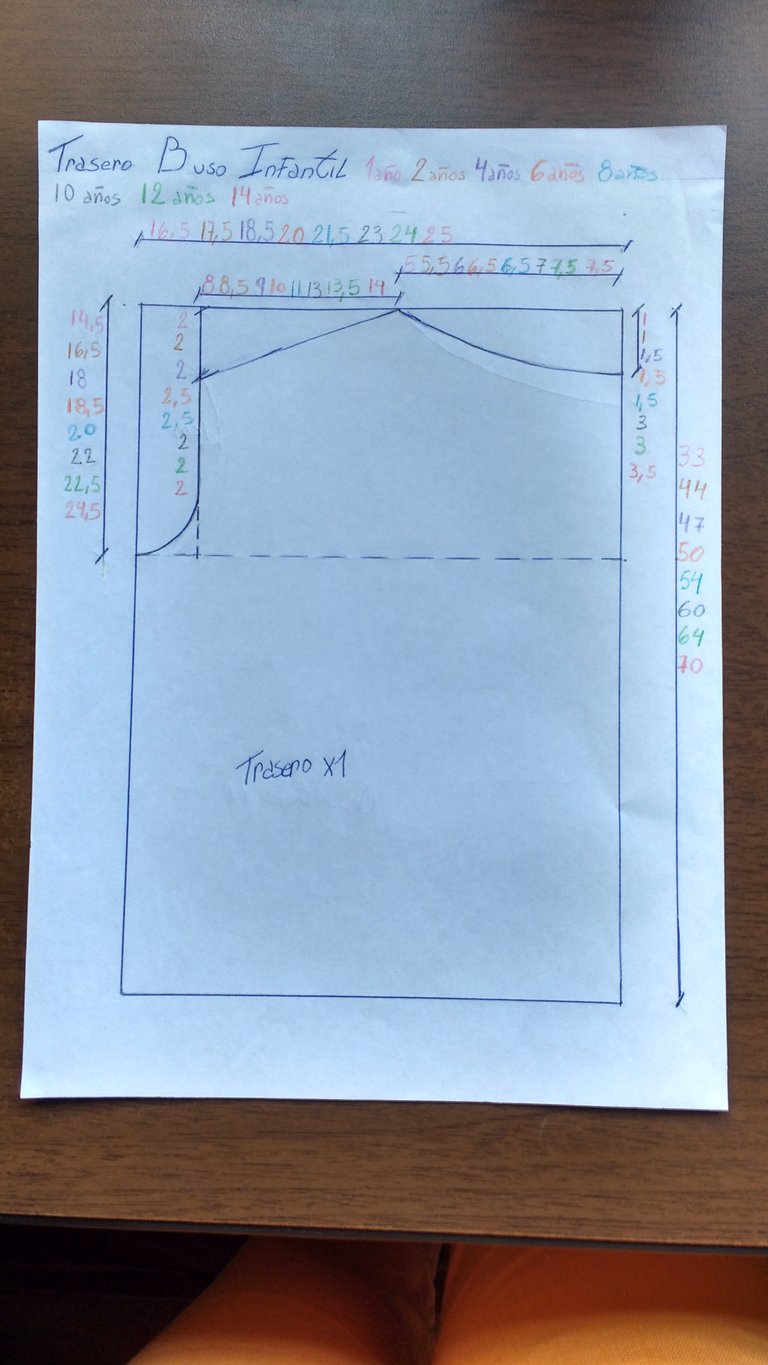
Rear mold, unlike the front one, has no curve for the armhole.
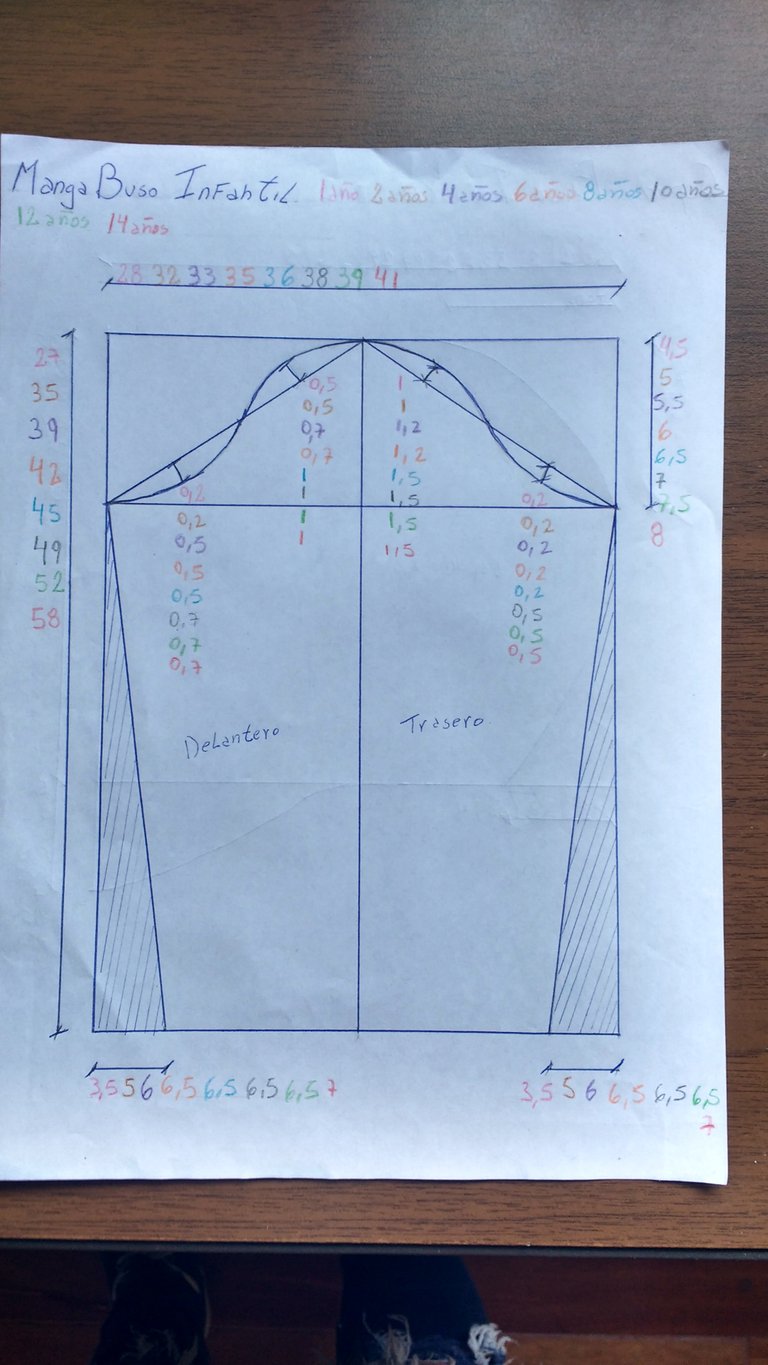
Sleeves mold.
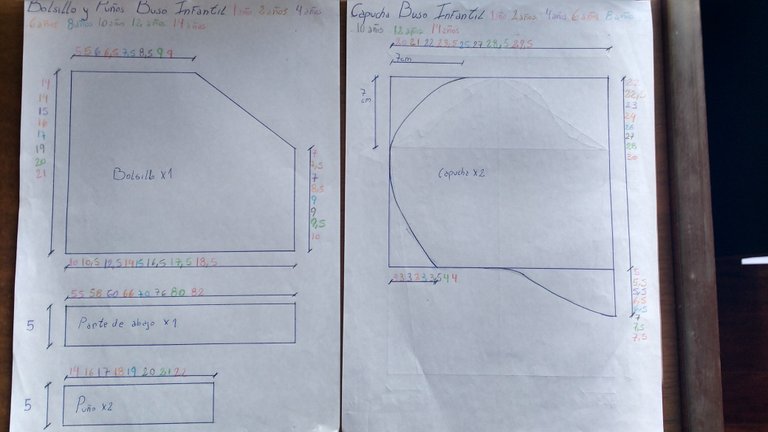
Pocket mold and straps for the cuffs and bottom of the diver. All the measurements that are in the pen are not modified according to the size, on the contrary, they always remain that way.
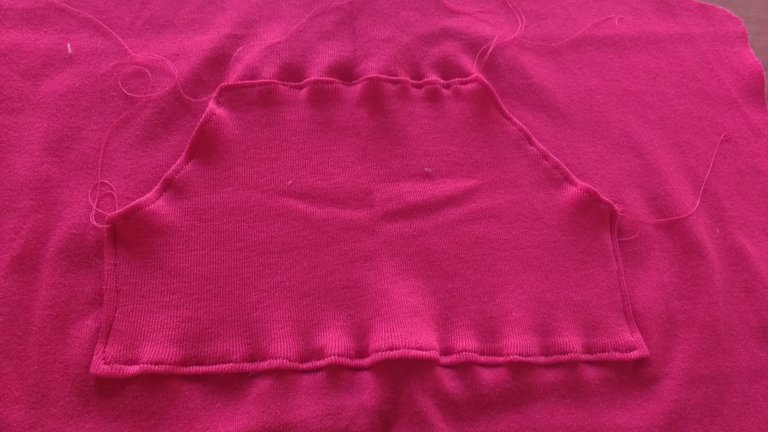
Cut mold, front and rear.
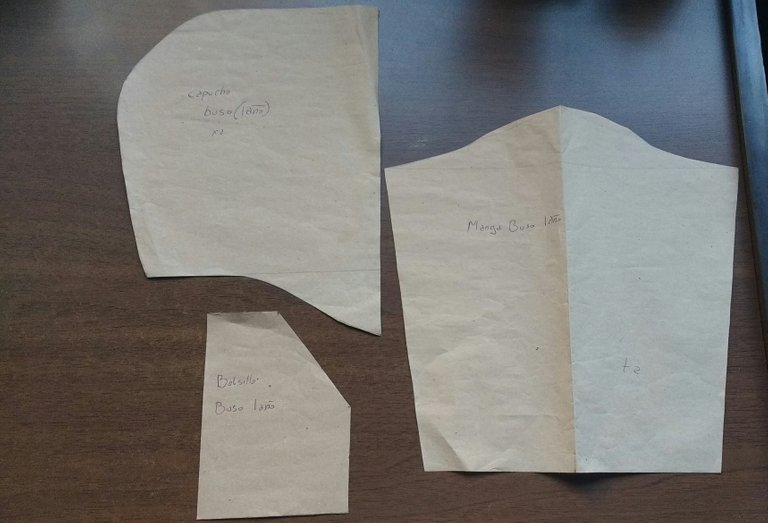
Sleeves, hood and pocket cut moldings. Remember to leave 1.0 cm for the seam allowance.
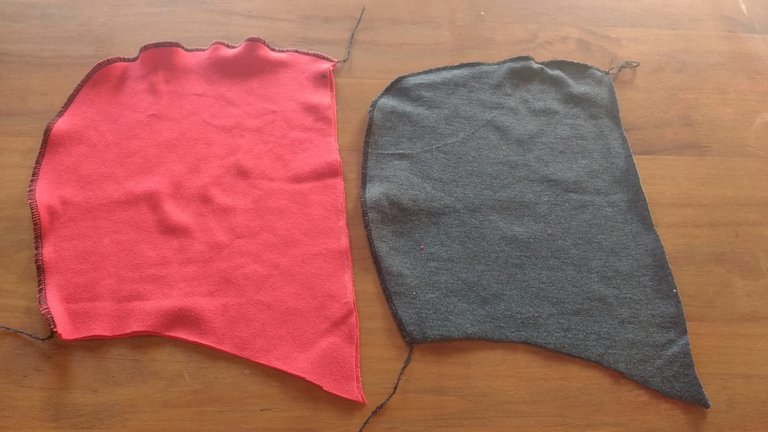
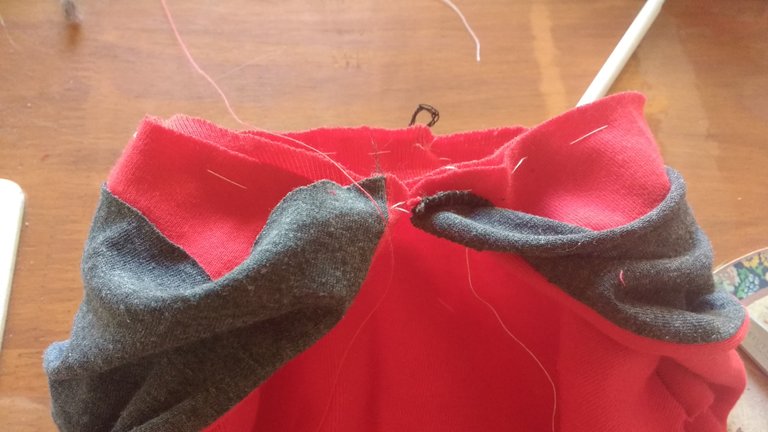
Once they have all the fabric cut, we go on to make. The first thing we are going to sew are the hoods, I cut 4 parts, so it would be two hoods. As seen in the image.
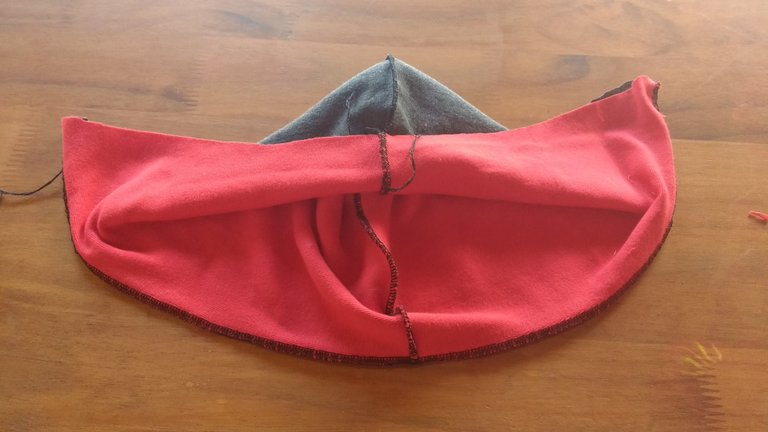
Then we put one hood inside the other, with visible seams, and sew the entire outline, as seen in the image.
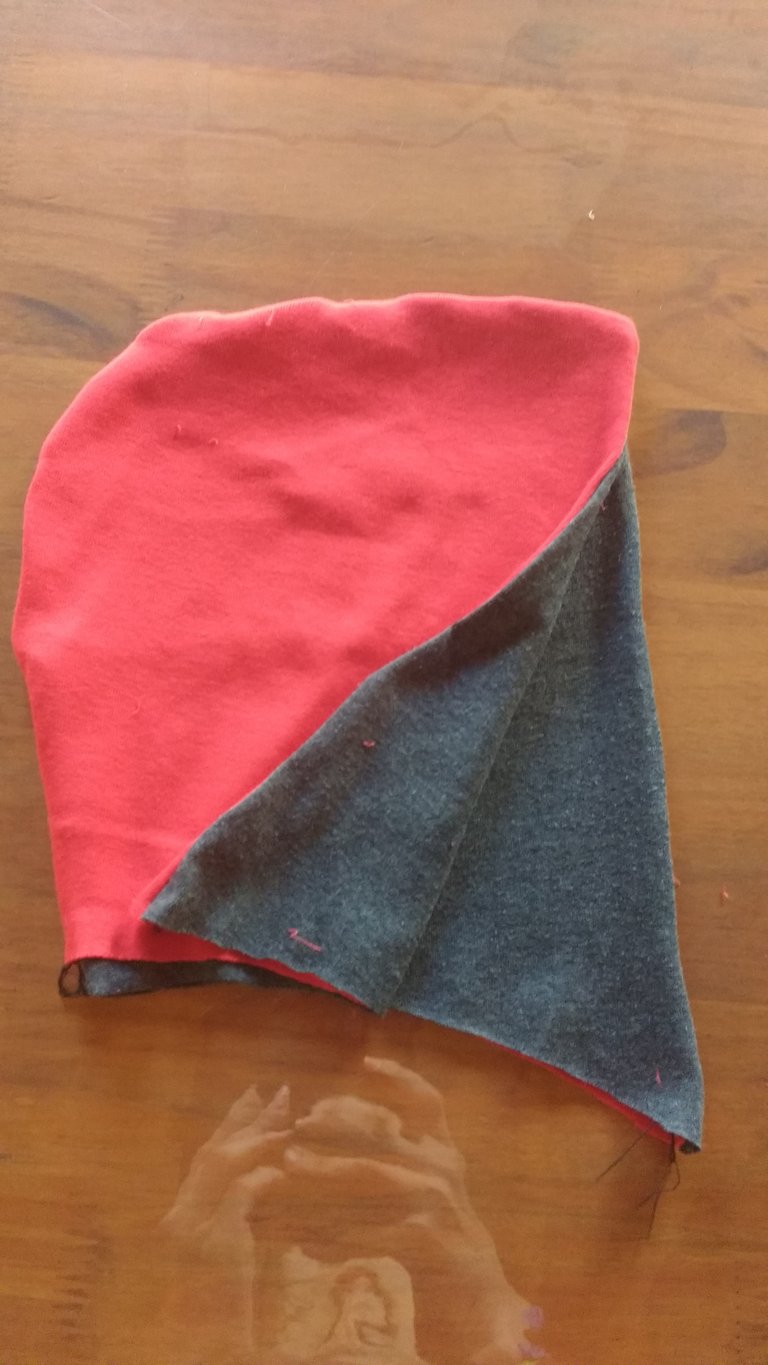
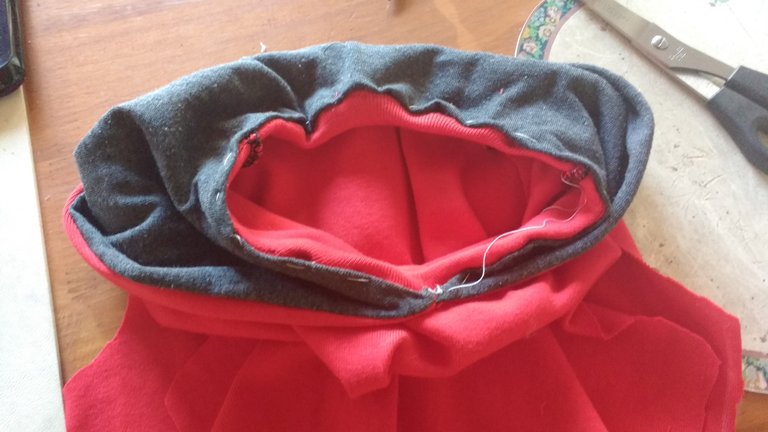
When we finish, we turn the hood over and we have all the seams on the internal side, giving it a better finish.
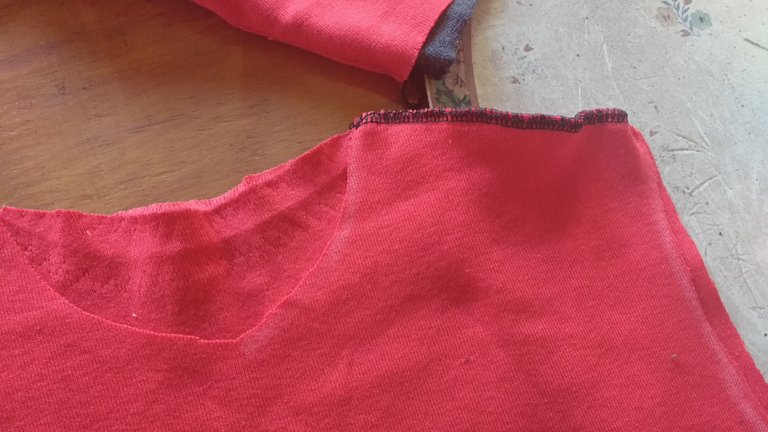
We leave the hood aside and continue with the garment, we sew one of the front shoulders with a back one, as seen in the image.
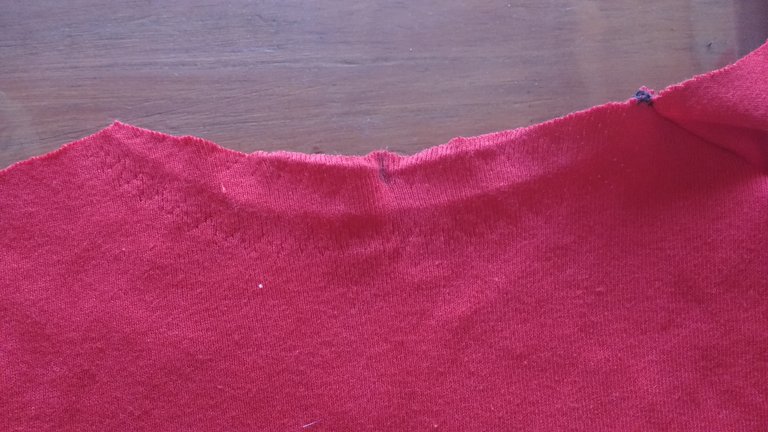
Then we mark the middle of the back mold, as I did in the image.
After marking the middle, we close the other front shoulder with the rear.
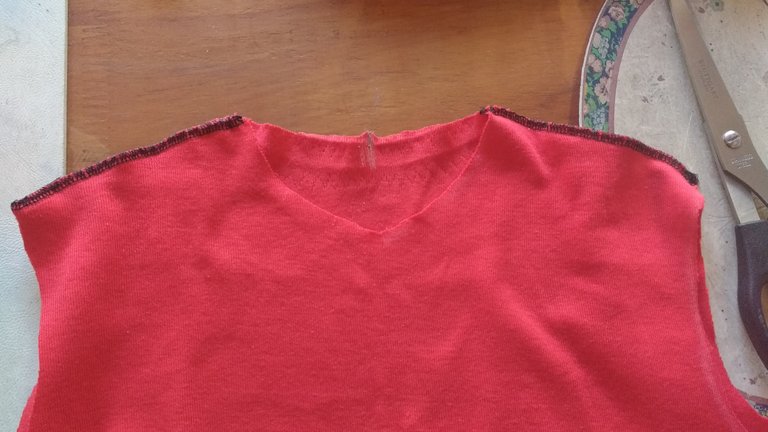
Now we will place the hood, for this what we have to do is: first secure the entire outer side of the hood to the diver, in the image the side that secures is the red one. We help ourselves with the mark made in the previous step and with the middle of the seam of the hood.
We sew all that contour and with the internal part of the hood we repeat the previous step, that is, we fold it and we are securing it all around the contour. As seen in the image, in this case it is gray.
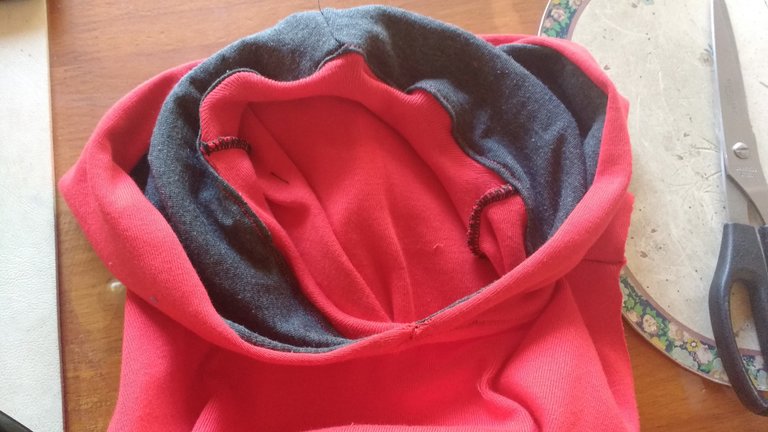
Finally, we sew and finish the placement of the hood.
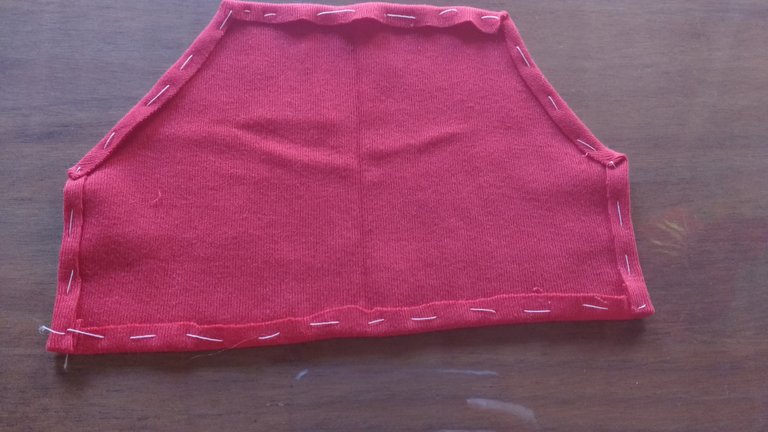
Now we continue with the pocket, what we have to do is fold the entire contour of it and secure it, as seen in the image. We only passed the machine to the sides where the hands would enter.
We secure the pocket in the front center of the diver, it will be easy for you since we have not sewn the sides yet.
We finish the pocket, sewing it without touching the parts where the hands enter.
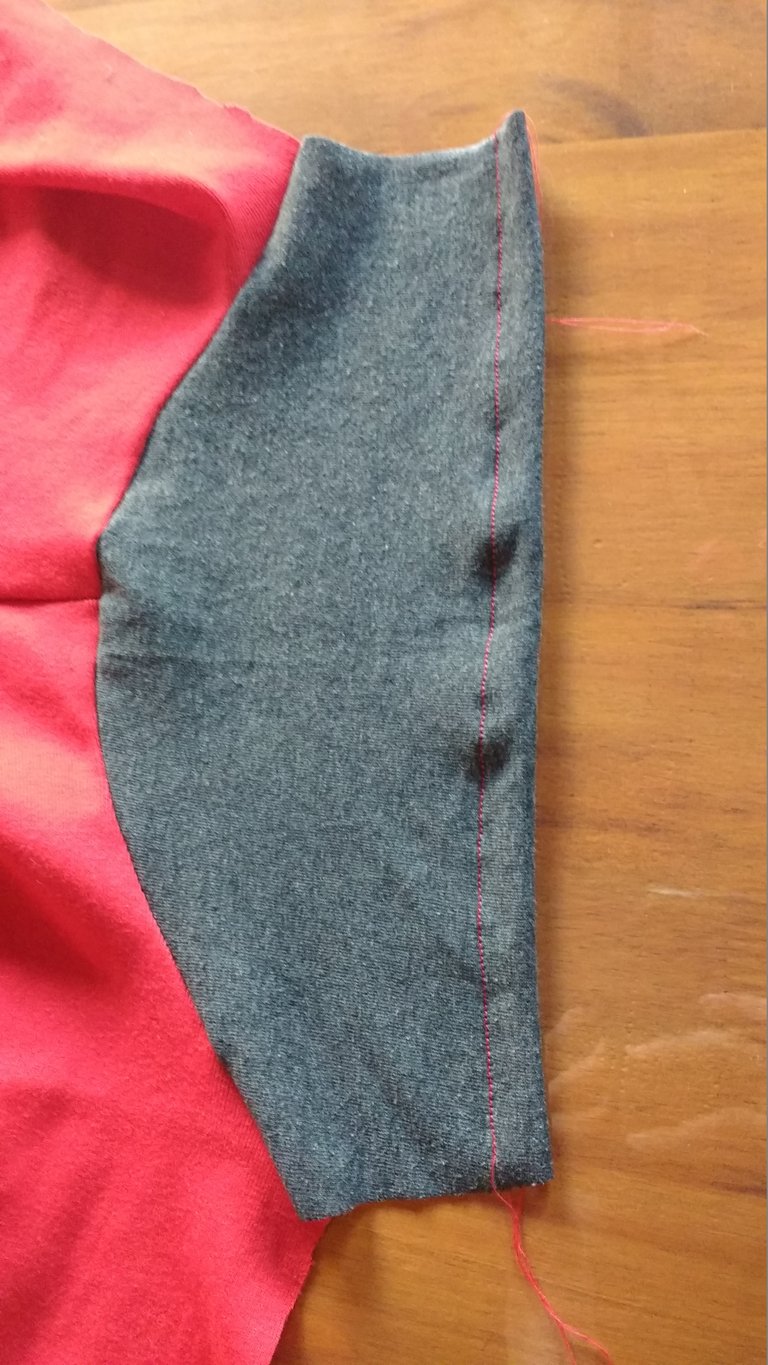
Sleeves: in this case I could not have enough fabric to make long sleeves, so I made it with short sleeves.
To place the sleeves, what we have to do is center it in the center of the garment and sew from end to end, since it does not have more fabric and is short sleeves, I could not make cuffs so I just doubled the edge and I sewed it. If you do it with long sleeves, before closing the side what you have to do is sew the cuff.

Once the sleeves are finished, we close one of the sides, as seen in the image.
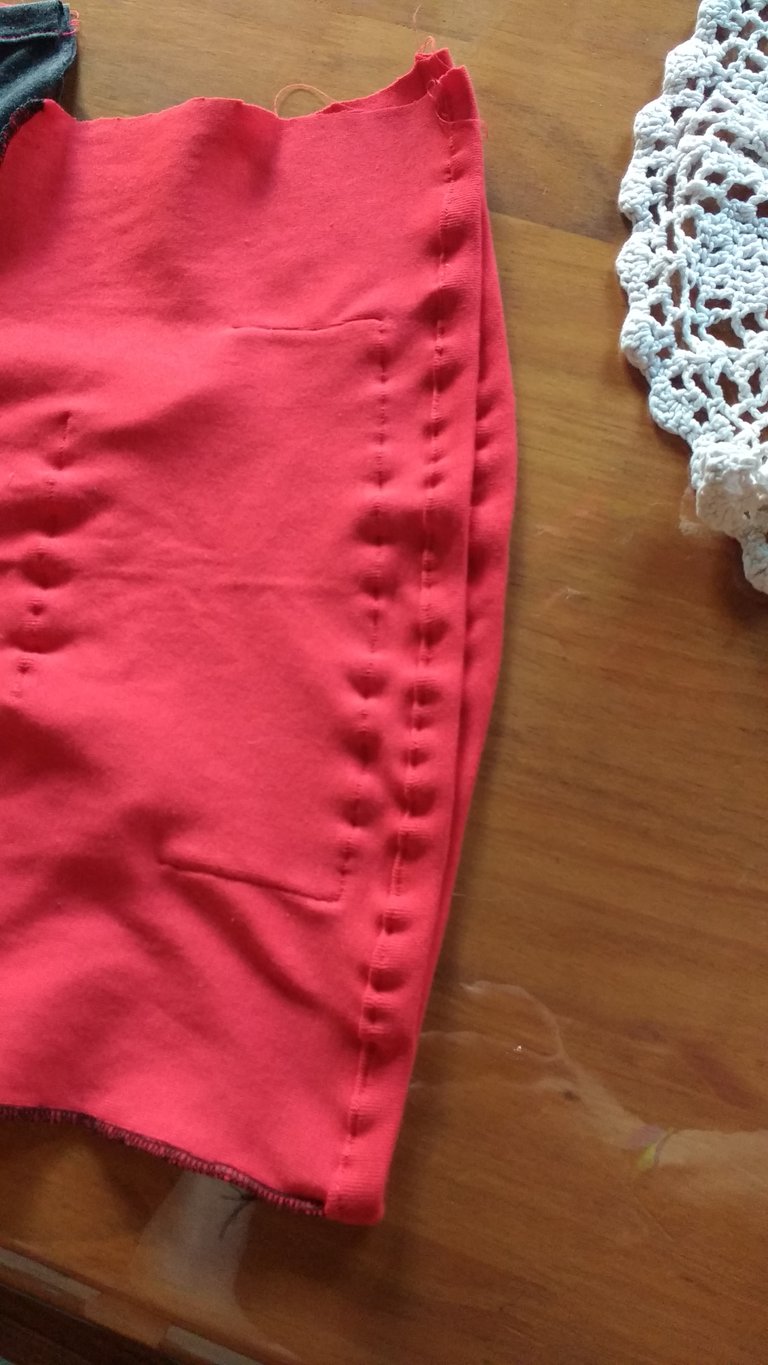
As in the case of the sleeves, it had no fabric, so I folded the entire contour and thus made the hem. If you have the fabric, what you have to do is mark the middle of it, secure it to the seam already made on the side, place one end of the tape on one side and the other end on the other side, then sew them.

Finally, they close the other side, and voila, that's how we finish the children's hooded diver.