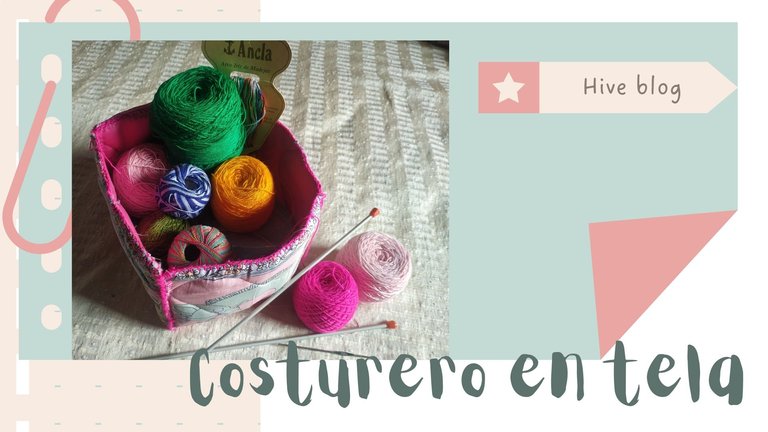

Feliz martes mis queridos amigos de Hive, llega un nuevo mes y por supuesto muchos proyectos. Y para el día de hoy quiero compartir con ustedes un costurero hecho completamente a mano y de tela.
Debo comentar que en mi casa normalmente se usa de costurero las latas de galletas de navidad, desde niña siempre ha sido así jaja y creo que al igual que muchas de las casas.
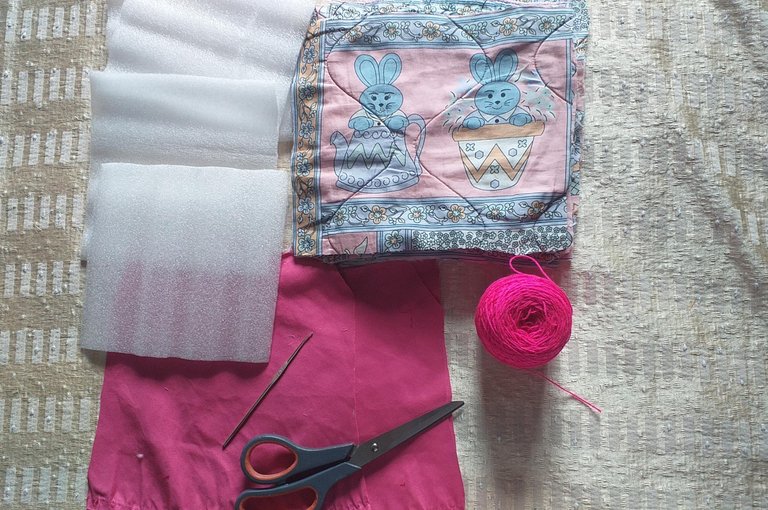
Pero de vez en cuando hay que hacer un cambio y esta era la ocasión ideal. Aquí les dejo los materiales y el paso a paso a seguir.

- Tela rígida (unicolor y estampada).
- Guata rígida de la que usan para hacer bolsos.
- Hilo de crochet.
- Aguja de crochet número 3 o 000 triple cero.
- Tijeras.
- Un patrón en forma de cuadrado de 16x16.

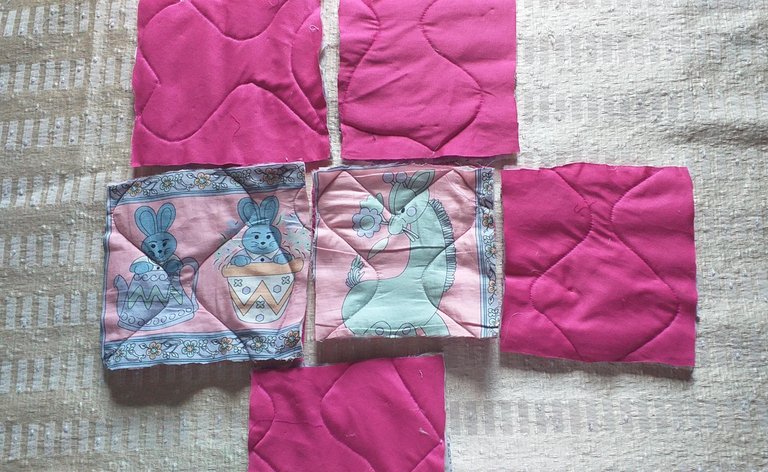
Se cortan cinco cuadrados que serán las 5 tapas de 16x16 cm, esto lo haremos en tela estampada, en la tela del forro y en la guata.
También haremos una sola tapa de 16,5 cm de cada lado que nos servirá como la tapa del costurero.
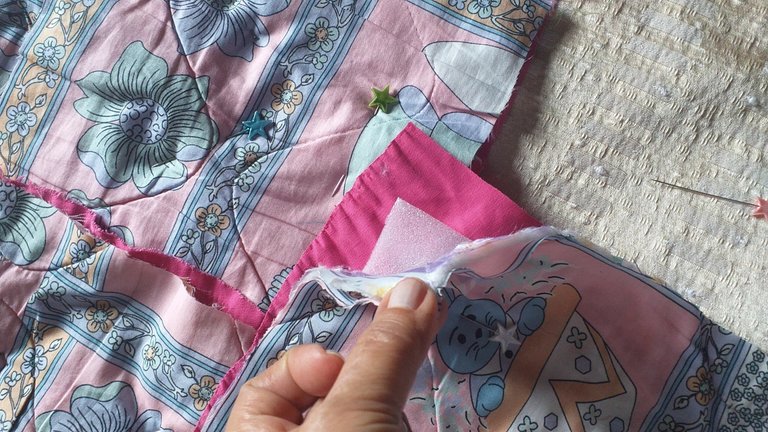
Para armar cada tapa será de la siguiente manera:
Se coloca la tela de forro, la guata y la tela estampada, en este orden se procede a pasar costura para acolchar a todas las tapas.
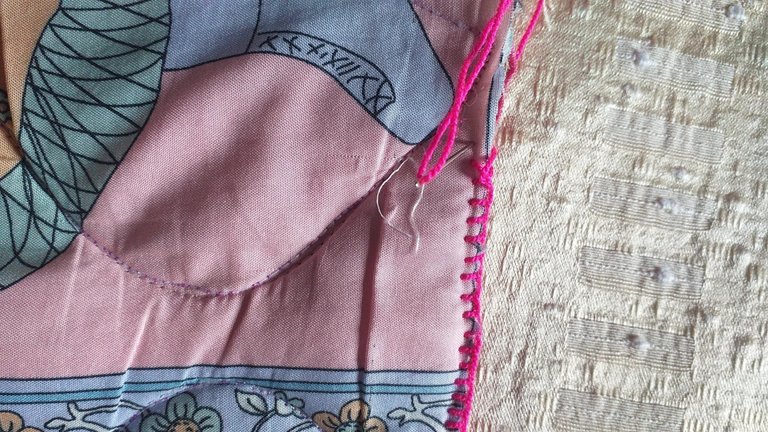
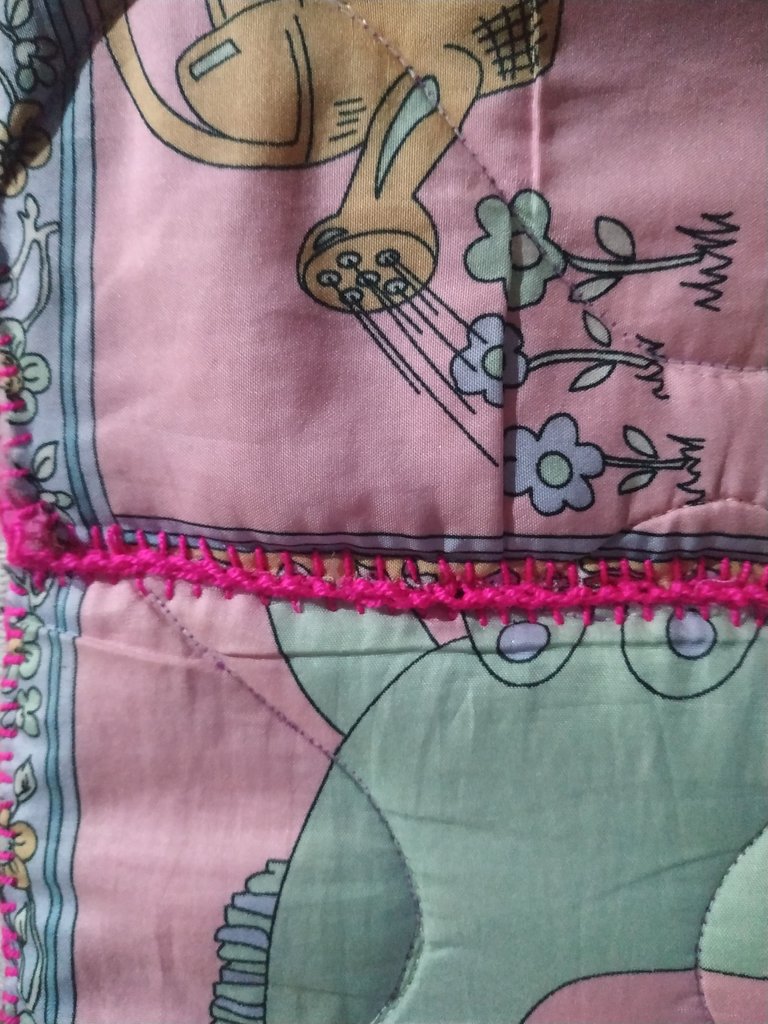
Luego debemos hacerle un orillo a cada una de las tapas, tomamos nuestro hilo, en este caso de color fucsia que combina muy bien con las telas de las tapas. Este orillo lo vamos a hacer con punto festón, es bastante sencillo luego de que agarras la técnica, pero hay que tener mucha paciencia y tiempo para que quede bien.
Este paso tomo hacerlo aproximadamente dos días.
Luego de tener todas las piezas con el punto festón, continuamos uniendo cada una. Esto con un tejido medio punto o con festón si así lo deseas.
Se arma todas las partes, dejando un cubo y por último se coloca la tapa que solo la vamos a unir por uno de los cuatro laterales.
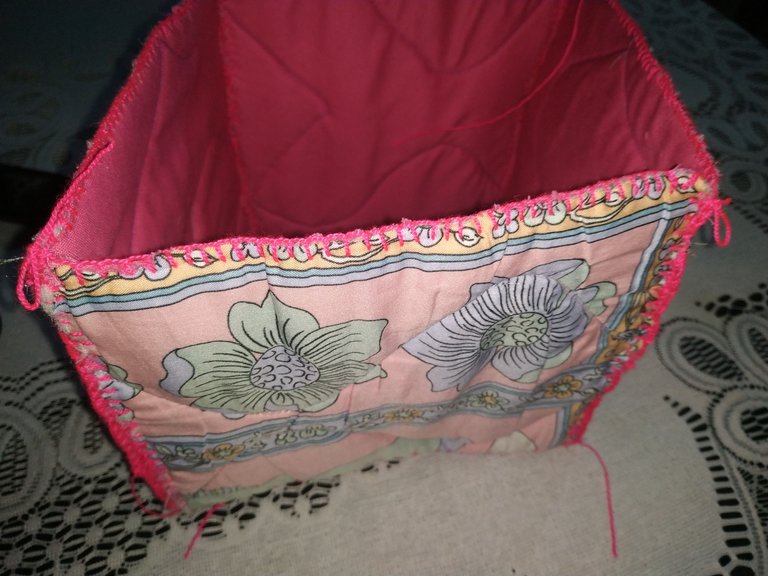
De esta manera se forma el hermoso costurero, se decora a gusto personal y se le pueden agregar aplicaciones hechas a mano.
Espero les haya gustado mi publicación del día de hoy, les deseo una hermosa semana y que tengan un feliz día y noche.


Happy Tuesday my dear friends of Hive, here comes a new month and of course many projects. And for today I want to share with you a sewing box made entirely by hand and made of fabric.
I must comment that in my house usually used as a sewing box the Christmas cookie tins, since I was a child it has always been like that haha and I think like many of the houses.
But from time to time you have to make a change and this was the ideal occasion. Here are the materials and the step by step to follow.
- Rigid fabric (unicolor and printed).
- Stiff wadding used to make bags.
- Crochet thread.
- Crochet needle number 3 or 000 triple zero.
- Scissors.
- A square pattern of 16x16.
We cut five squares that will be the five 16x16 cm lids, we will do this in printed fabric, in the lining fabric and in the wadding.
We will also make a single cover of 16.5 cm on each side that will serve as the lid of the sewing box.
To assemble each cover will be as follows:
Place the lining fabric, the wadding and the printed fabric, in this order proceed to pass seam to quilt to all the covers.
Then we must make a selvage to each of the tops, we take our thread, in this case fuchsia color that combines very well with the fabrics of the tops. This selvage we are going to do with scallop stitch, it is quite easy after you get the technique, but you have to have a lot of patience and time to get it right.
This step took me about two days to do it.
After we have all the pieces with the scalloped stitch, we continue joining each one. This with a half stitch or scallop stitch if you wish.
All the parts are assembled, leaving a cube and finally the lid is placed, which we are only going to join by one of the four sides.
In this way the beautiful sewing box is formed, it is decorated to personal taste and you can add handmade applications.
I hope you liked my publication today, I wish you a beautiful week and have a happy day and night.

Fotos tomadas de mi teléfono Xiaomi Redmi Note 6 Pro || Fotos tomadas desde mi teléfono Xiaomi Redmi Note 6 Pro.
What a nice and practical sewing kit I congratulate you @gabimramirez excellent work.🥰
This was so cool and will definitely be useful for so long
We also use the cookie container for sewing box and it’s just always disappointing to open and see it full of needle stuff instead of cookies😂
Te felicito quedó muy hermoso, una manera de aprovechar nuestros retazos de tela y ala vez organizar nuestros hilos.
Excelente idea para guardar los hilos de tejer, me gustó. Gracias por mostrar este trabajo, me han dado ganas de organizar todo el desbarajuste que tengo con los rollos de hilos🙃