
¡Hola a todos mis queridos amigos de Hive!
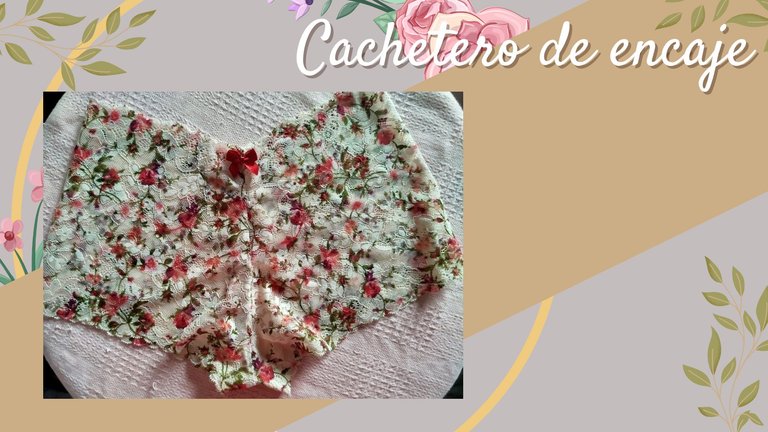
Bienvenidos a este espacio donde exploraremos la belleza y la sensualidad de una prenda íntima y se trata de un cachetero de encaje de flores.
En este blog, nos centraremos en una prenda en particular: el cachetero de encaje de flores. Esta prenda, que combina la comodidad del cachetero con la sensualidad del encaje, se ha convertido en un básico imprescindible en el armario de muchas mujeres. Podremos ver su versatilidad y sus diferentes estilos.
Sigue este tutorial paso a paso, donde te mostraré cómo adaptar el patrón a tu talla para que puedas crear tu propio cachetero perfecto.

- Encaje elástico de 18 - 20 cm de ancho.
- Tela de algodón para el refuerzo.
- Tijeras.
- Alfileres.
- Hilo.
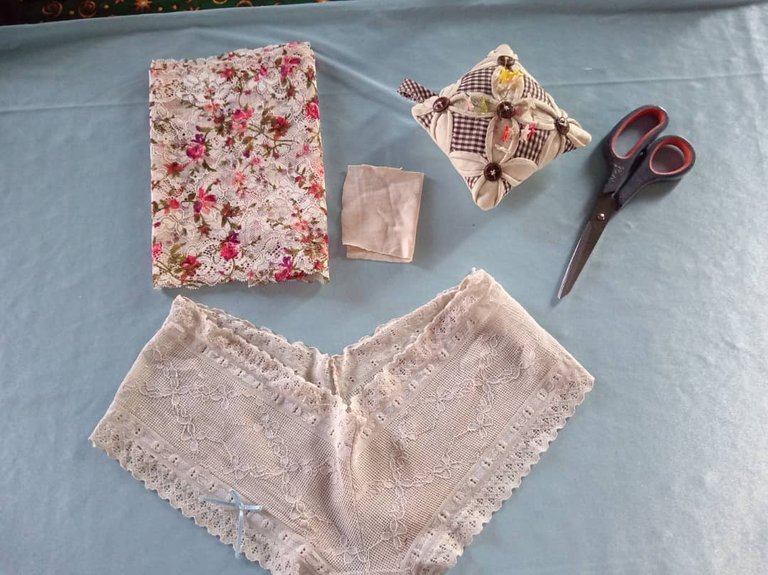

Para comenzar, debes extender el cachetero que usarás como molde sobre una superficie plana. Si es necesario, plánchalo para eliminar arrugas y asegurarte de que quede completamente plano, como estamos usando encaje no será necesario, pero en caso de que desees clonar otro estilo de prenda, seria lo ideal.
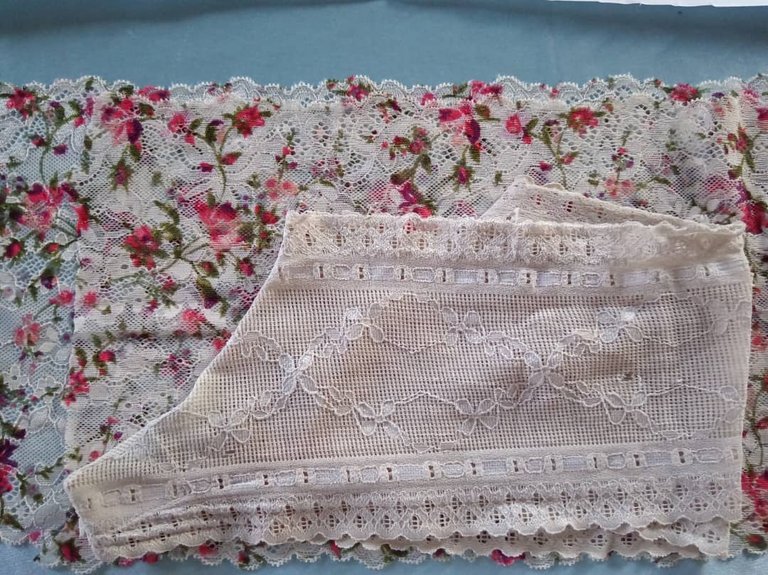
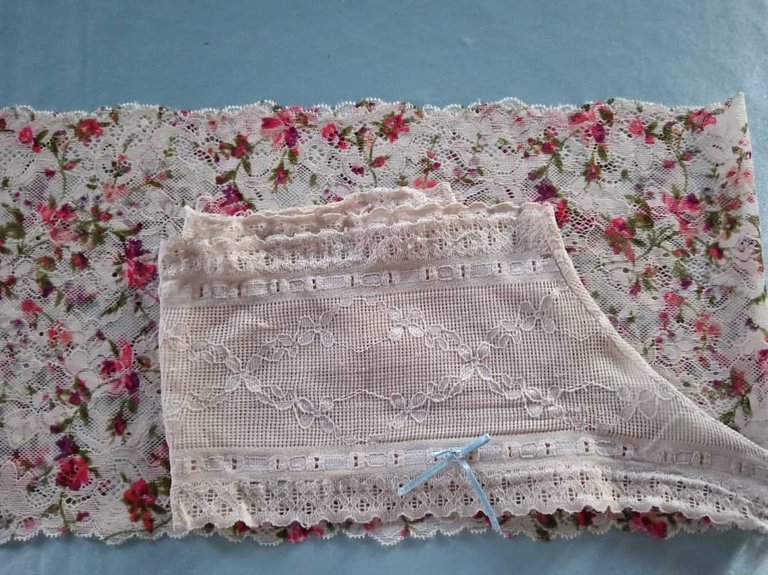
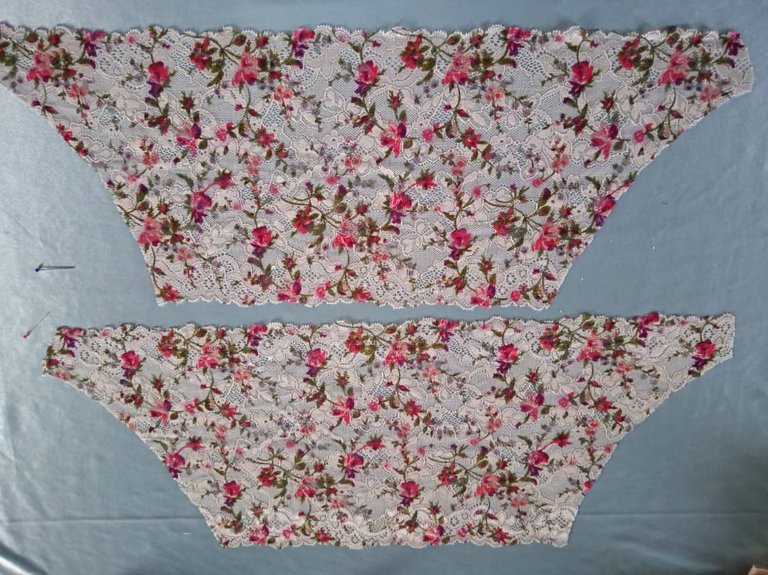
Dobla la tela de encaje por la mitad. Luego, coloca el cachetero molde sobre la tela doblada, alineando la parte trasera del cachetero con el doblez de la tela.
Sujeta el molde con alfileres para evitar que se mueva.
Corta la tela siguiendo el contorno del molde, dejando un margen de costura de aproximadamente 1 cm. Repite el proceso para cortar la parte delantera del cachetero, asegurándote de que la tela esté doblada.
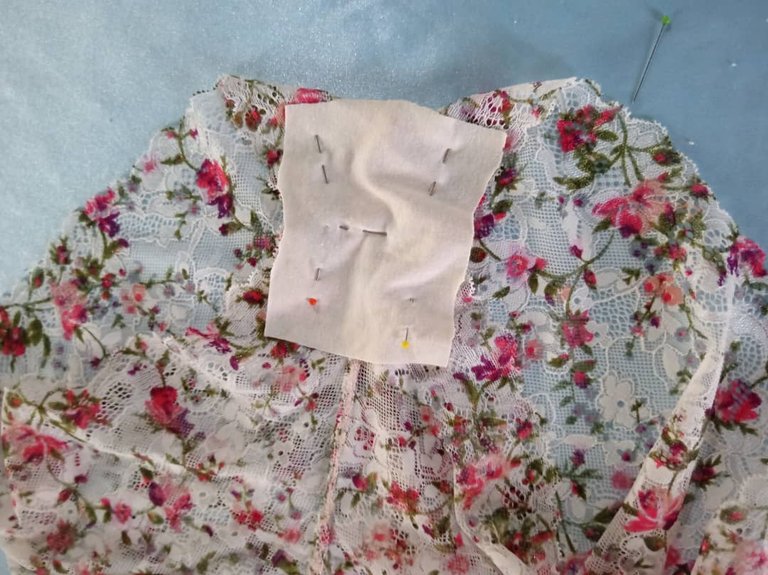
Corta la pieza de refuerzo de algodón para la entrepierna. Puedes usar la misma pieza del molde para obtener la forma exacta.
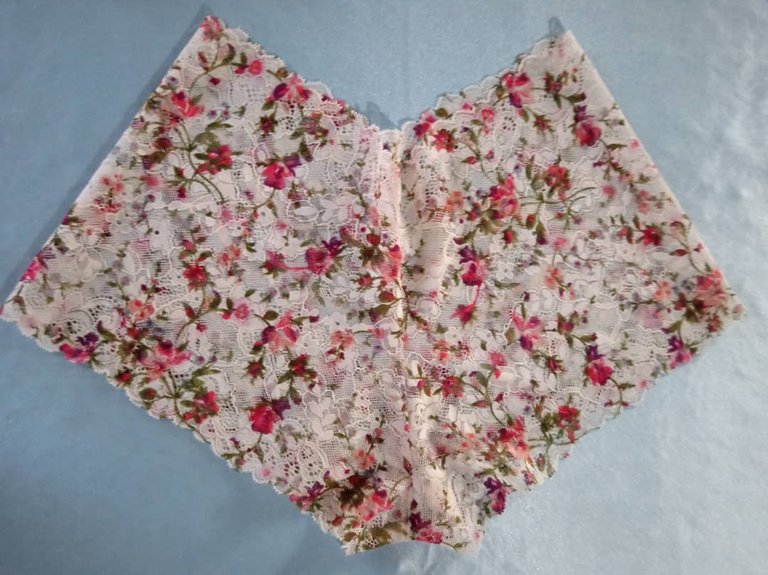
Une las piezas delantera y trasera del cachetero con alfileres, asegurándote de que los lados coincidan.
Cose las piezas a lo largo de los lados, utilizando una puntada recta o en zigzag, luego une la pieza delantera y trasera por la parte de la entrepierna.
Coloca la pieza de refuerzo de algodón en la entrepierna del cachetero, alineando los bordes. Sujeta el refuerzo con alfileres y cóselo en su lugar, utilizando una puntada recta o en zigzag.
Por último, puedes agregarle algún detalle extra, como un pequeño lazo o corbata a la parte delantera.
Y con esto tendremos listo este bello cachetero de encaje de flores, espero se animen a realizarlo.
Gracias por llegar hasta aquí, que tengan un feliz día y noche.

Hello to all my dear friends of Hive!
Welcome to this space where we will explore the beauty and sensuality of an intimate garment and it's all about a flower lace cheeky.
In this blog, we will focus on one garment in particular: the floral lace cheeky. This garment, which combines the comfort of the cheeky boxer with the sensuality of lace, has become a must-have basic in many women's closets. We will be able to see its versatility and different styles.
Follow this step-by-step tutorial, where I'll show you how to adapt the pattern to your size so you can create your own perfect chapstick.
- Elastic lace 18 - 20 cm wide.
- Cotton fabric for reinforcement.
- Scissors.
- Pins.
- Thread.
To begin, you should spread the cheek piece that you will use as a mold on a flat surface. If necessary, iron it to eliminate wrinkles and make sure it is completely flat, as we are using lace it won't be necessary, but in case you want to clone another style of garment, it would be ideal.
Fold the lace fabric in half. Then, place the molded paisley over the folded fabric, lining up the back of the paisley with the fold of the fabric.
Pin the mold in place to prevent it from moving.
Cut the fabric following the contour of the mold, leaving a seam allowance of approximately 1 cm. Repeat the process to cut out the front part of the cheek piece, making sure the fabric is folded over.
Cut the cotton gusset piece for the crotch. You can use the same piece from the mold to get the exact shape.
Pin together the front and back pieces of the cheek piece, making sure to match the sides.
Sew the pieces together along the sides, using a straight or zigzag stitch, then join the front and back pieces at the crotch.
Place the cotton gusset piece in the crotch of the crotch strap, lining up the edges. Pin the gusset and sew it in place, using a straight or zigzag stitch.
Finally, you can add some extra detail, such as a small bow or tie to the front.
And with this, we will have ready this beautiful flower lace chevron, I hope you are encouraged to make it.
Thank you for coming here, have a nice day and night.
Lovely work friend, you did an awesome job, well done and thanks for sharing.
Me encantó este estampado, soy muy fan de los encajes y blondas estampadas y este es hermoso. Gracias por compartir. Saludos 🤗
Me encantó, ciertamente no podría faltar entre la lencería de una mujer.
Este tipo de proyectos despierta en mí el deseo de aprender a coser.
Que preciosa la tela, este tipo de ropa interior es muy sexy y se ve super facil de hacer, me encanta el resultado
Una prenda de lujo nos has compartido, que belleza, me encantó ese estampado del encaje, quisiera poder encontrar unos aquí para hacer estas prendas tan lindas. Felicidades por tu lindo trabajo.