Hello, friends of this beautiful community. Happy Monday to all of you. Today I want to show you how I made a cute top. I wear them a lot, since as a nursing mom I don't wear bras because they are a bit tight and uncomfortable. They are also more comfortable when breastfeeding my baby.
Hola, amigos de esta bella comunidad. Feliz lunes para todos. Hoy quiero enseñarles como he realizado un lindo top. Yo los uso mucho, ya que como mamá lactante no uso brasieres debido a que son un poco ajustados e incómodos. También son más cómodos al momento de darle pecho a mi bebé.

For this top I used:
- Stretch fabric.
- Sewing machine.
- Thread.
- Scissors.
- Pins.
- A height stick.
Para este top use:
- Tela elástica.
- Máquina de coser.
- Hilo.
- Tijeras.
- Alfileres.
- Un palito de altura.

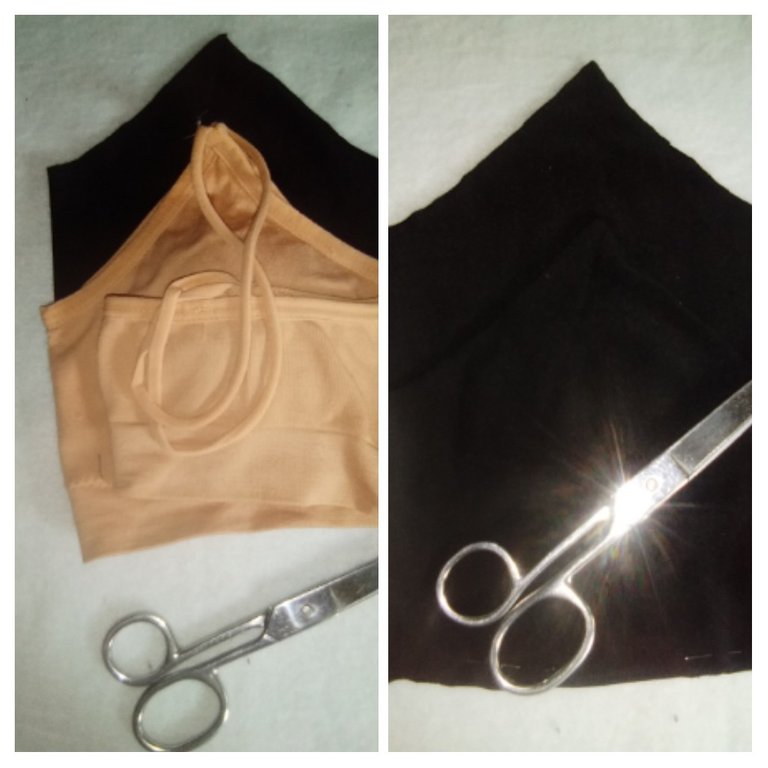
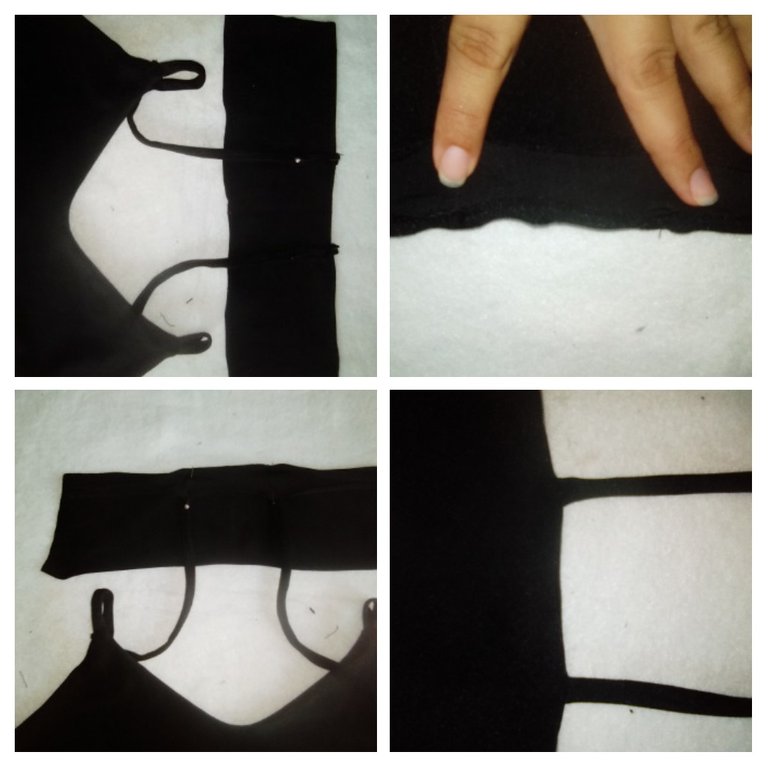
Step 1:
We cut out the front. I used as a guide a top I already have. From this we take 2 layers.
Paso 1:
Cortamos la parte delantera. Yo usé de guía un top que ya tengo. De este sacamos 2 capas.
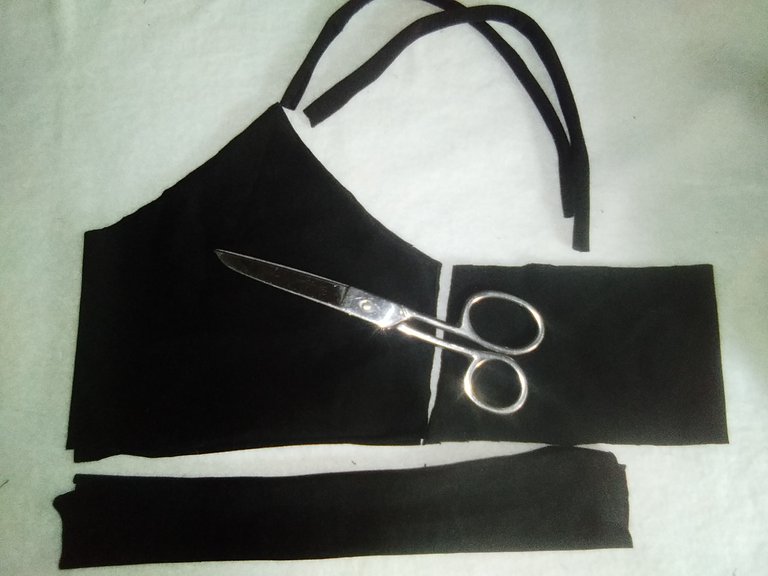
Step 2:
We cut the rest of the pieces of the top. One part for the back using the example top as a guide. We take out 2 straps for the straps, 1 strap for the support of the straps in the back and 1 thick ribbon for the torso.
Paso 2:
Cortamos el resto de las piezas del top. Una parte para la espalda guiándonos del top de ejemplo. Sacamos 2 tiras para los tirantes, 1 tira para el soporte de los tirantes en la espalda y 1 cinta gruesa para el torso.
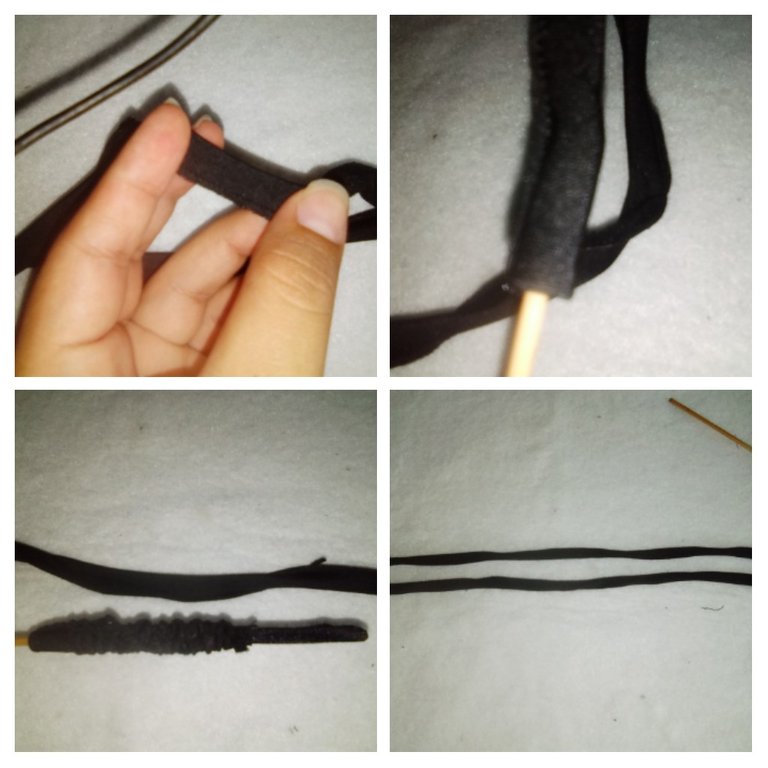
Step 3:
We will start with the straps. Fold, sew along the edge and turn over with the help of a height stick.
Paso 3:
Comenzaremos con los tirantes. Doblamos, cosemos en la orilla y damos vuelta ayudándonos con un palito de altura.
Step 4:
With the help of some pins we will place the straps on the front. We place one layer, the straps and then the other layer. Once this is done, we sew from one end of the armhole to the other. And proceed to turn.
Paso 4:
Con la ayuda de unos alfileres ubicaremos los tirantes en la parte delantera. Colocamos una capa, los tirantes y luego la otra capa. Hecho esto, cosemos desde una punta de la sisa a la otra. Y procedemos a dar vuelta.
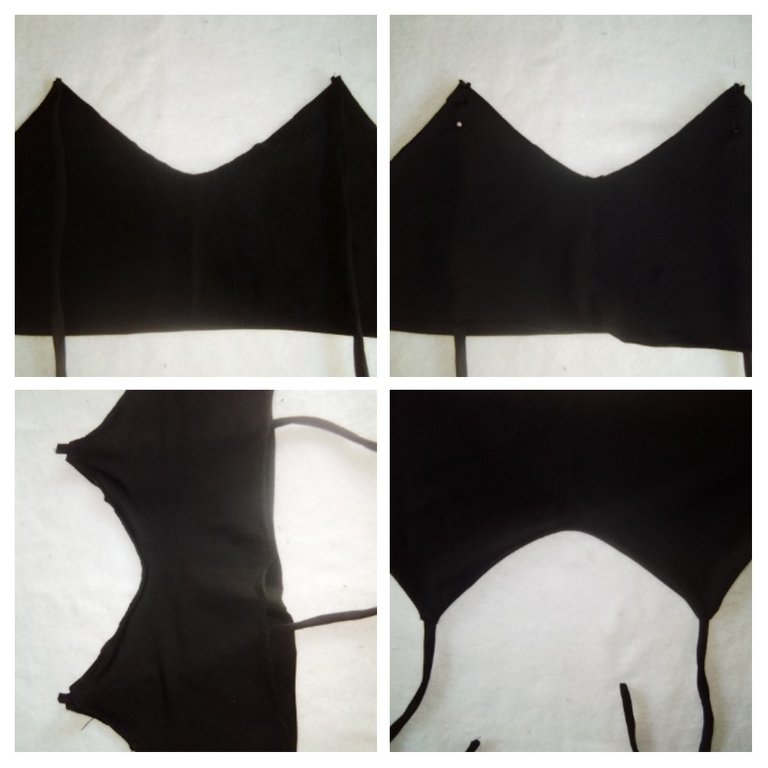
Step 5:
In this step we will repeat the previous process but with the back. We will place the straps in the center to give better support.
Paso 5:
En este paso repetiremos el proceso anterior pero con la parte trasera. Ubicaremos los tirantes bien al centro para que dé mejor soporte.
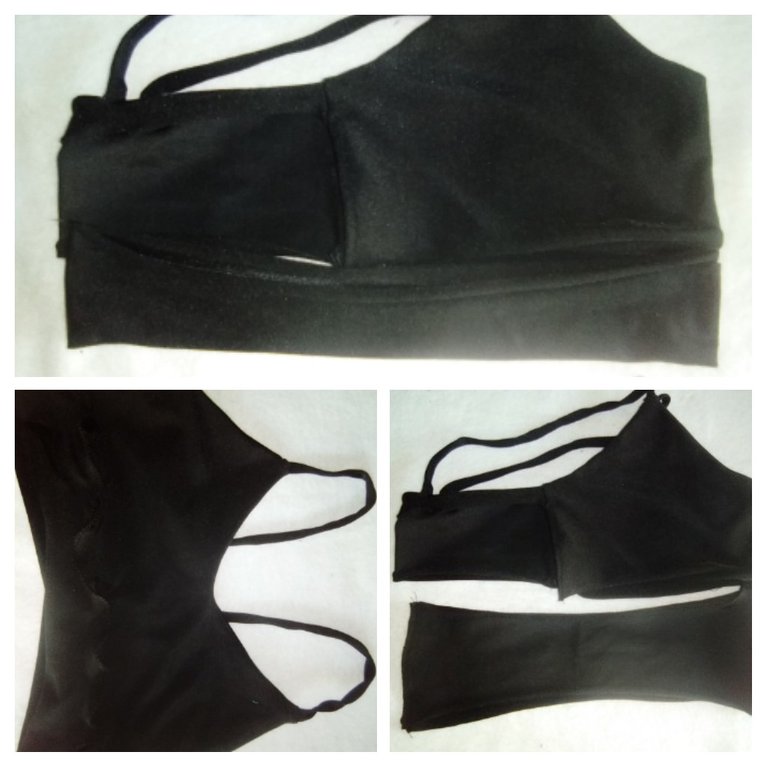
Step 6:
We will join the front and back. We will make loops on each strap and an edge on the layer that will go inwards. This will function as a pillow pocket.
Paso 6:
Uniremos las parte delantera y trasera. Haremos presillas en cada tirante y una orilla en la capa que irá hacía adentro. Esto funcionará como bolsillo para almohadillas.

Step 7:
We seal the ends of the thick ribbon, fold and glue on the edge of the entire top with a zigzag stitch.
Paso 7:
Sellamos las puntas de la cinta gruesa, doblamos y pegamos en la orilla de todo el top con una puntada de zigzag.
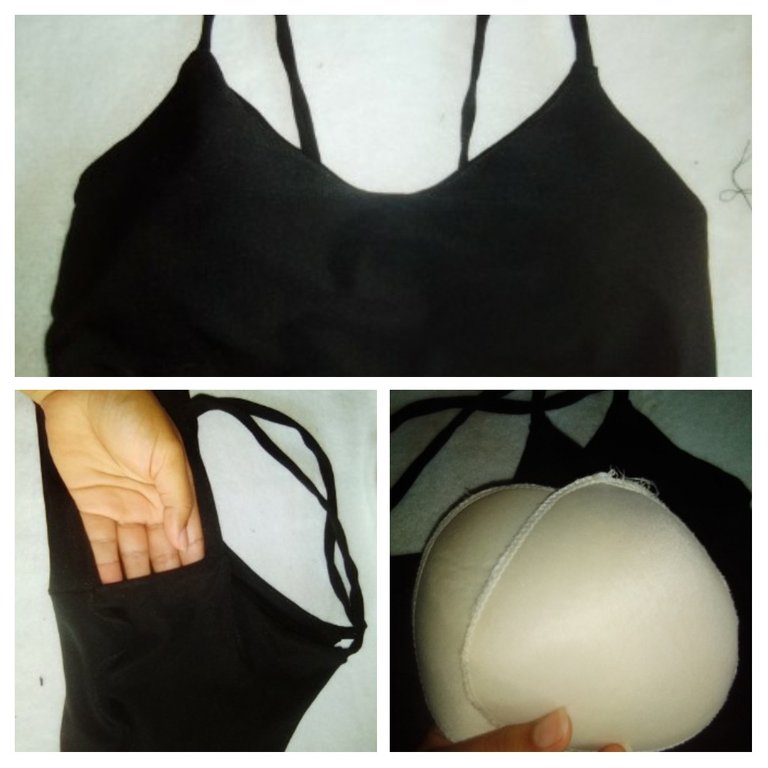
With this our top is ready.
Con esto ya está listo nuestro top.
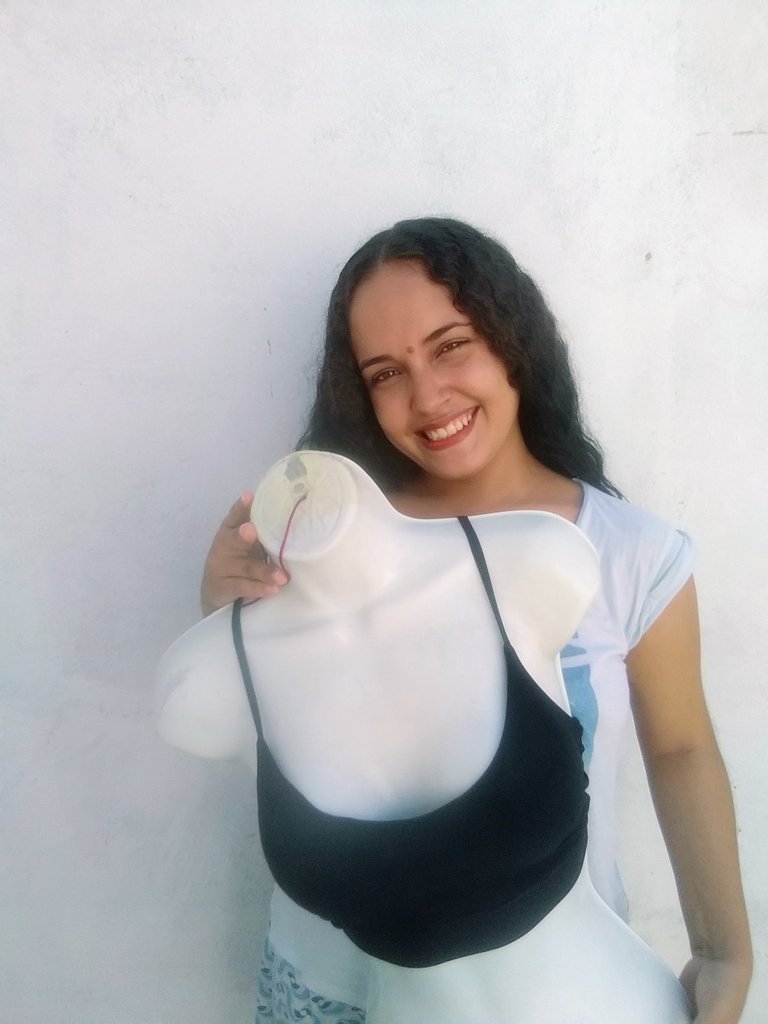
I hope you liked it. For me in particular they are very helpful, since it is no secret that as a nursing mother many times our breasts are loaded and begin to leak. My mom gave me one as a gift and I have used it as a guide to make others.
If you have made it this far, thank you so much for reading. I will be happy to answer your comments.
Espero que les haya gustado. A mí en lo particular me son de mucha ayuda, ya que para nadie es un secreto que como mamá lactante muchas veces nuestros senos se cargan y empiezan a derramarse. Mi mamá me regaló uno y con el me he guiado para hacer otros.
Si han llegado hasta acá, muchas gracias por leerme. Estaré feliz de responder sus comentarios.
Translation made with [DeepL] (https://www.deepl.com/es/translator-mobile).
Pictures taken with Alcatel X1 phone.
Traducción hecha con [DeepL] (https://www.deepl.com/es/translator-mobile).
Fotos tomadas con teléfono Alcatel X1.