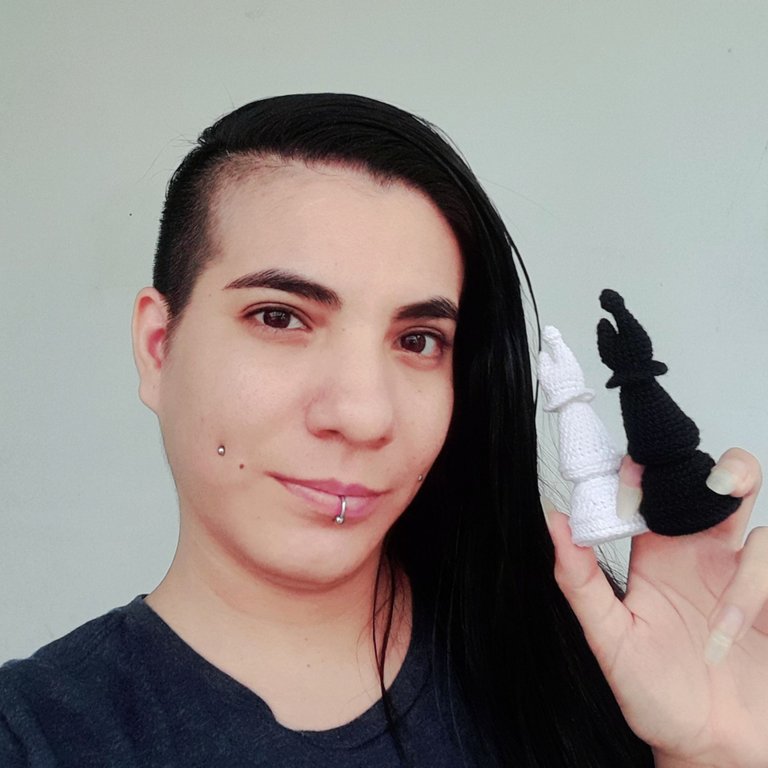
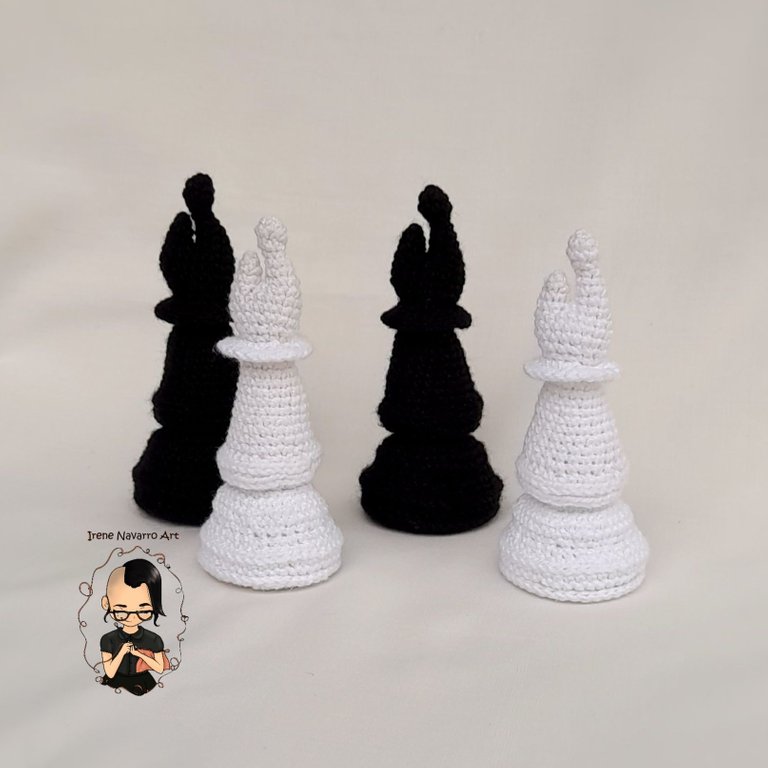
Greetings dear community, happy NeedleWorkMonday, every day there is less to finish my great crochet chess project, this is the third part where I share the detailed process to obtain the Bishop chess piece, this is repeated four times in the board, two are white and two are black, I really enjoyed its realization and I hope you like it, as always I share the links to the previous pieces at the end of the publication.

Materiales/ Materials
Acrylic crochet thread in black and white, hook # 4 (1.25mm), stuffing, 4 plastic circles for the bases, 4 glass marbles, Scissors.
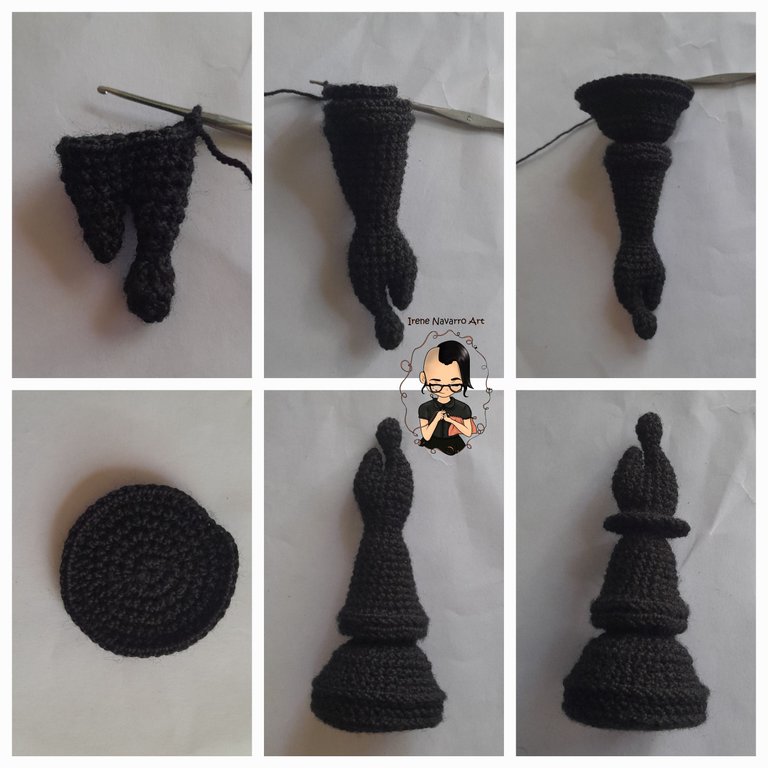
Se comienza por la base, en las dos figuras anteriores la base se realiza de la misma forma por lo que solo en esta parte las instrucciones son iguales.
Hacer 8 puntos bajos en un anillo.
Hilera 1: 8 aumentos. Total de puntadas: 16
Hilera 2: (1 punto bajo, 1 aumento) X 8. Total de puntadas: 24
Hilera 3: (1 punto bajo, 1 aumento, 1 punto bajo) X 8. Total de puntadas: 32
Hilera 4: (3 puntos bajos, 1 aumento) X 8. Total de puntadas: 40
Hilera 5: 40 puntos bajos. Terminar con 1 punto deslizado.
Hacer 2 bases blancas y 2 negras.
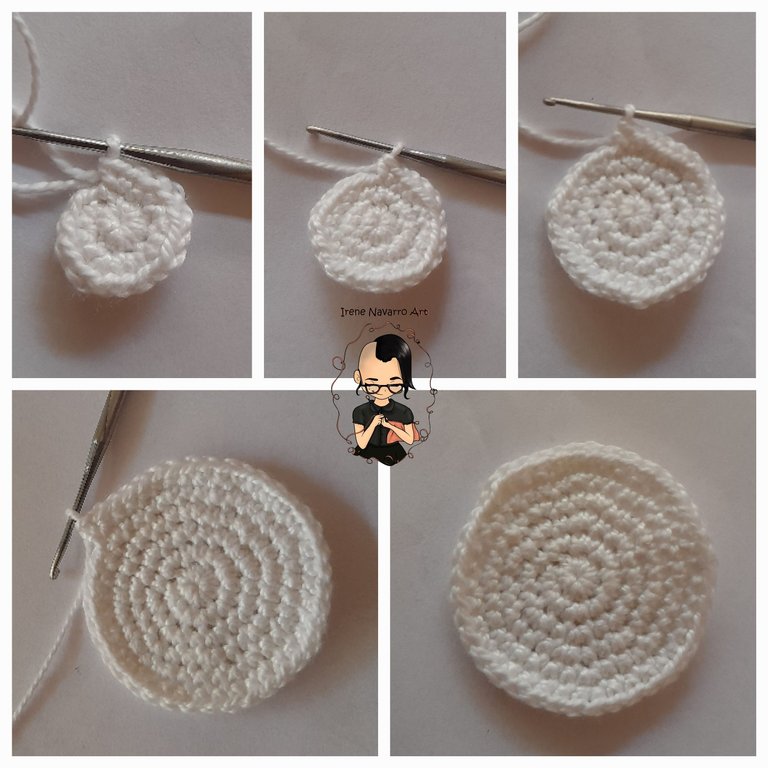
It begins with the base, in the two previous figures the base is made in the same way, so only in this part are the instructions the same.
For the base make 8 single crochets in a ring.
Row 1: 8 increases. Total stitches: 16
Row 2: (1 single crochet, 1 increase) X 8. Total stitches: 24
Row 3: (1 single crochet, 1 increase, 1 single crochet) X 8. Total stitches: 32
Row 4: (3 single crochet, 1 increase) X 8. Total stitches: 40
Row 5: 40 single crochet. Finish with 1 slip stitch.
Make 2 white and 2 black bases.
Hacer 4 puntos bajos en un anillo.
Hilera 1: 3 puntos bajos, 1 aumento. Total de puntadas: 5
Hilera 2: 2 puntos bajos, 1 aumento, 2 puntos bajos. Total de puntadas: 6
Dejar estar primera parte en suspenso y comenzar la segunda parte de la siguiente manera:
Hacer 4 puntos bajos en un anillo
Hilera 1: 4 aumentos. Total de puntadas: 8
Hilera 2: 8 puntos bajos.
Hilera 3: 4 disminuciones
Hilera 4: 3 puntos bajos, 1 aumento. Total de puntadas: 5
Hilera 5: 2 puntos bajos, 1 aumento, 2 puntos bajos. Total de puntadas: 6
Hilera 6: 5 puntos bajos, 1 aumento. Total de puntadas: 7
Hilera 7: 3 puntos bajos, 1 aumento, 3 puntos bajos. Total de puntadas: 8
Hilera 9: 2 puntos bajos, 1 aumento, 1 punto bajo, en la primera parte que habíamos dejado en suspenso hacer 3 puntos bajos, 1 aumento y 2 puntos bajos, regresar a la parte segunda parte y hacer 1 aumento, 3 puntos bajos y un aumento. Total de puntadas: 18
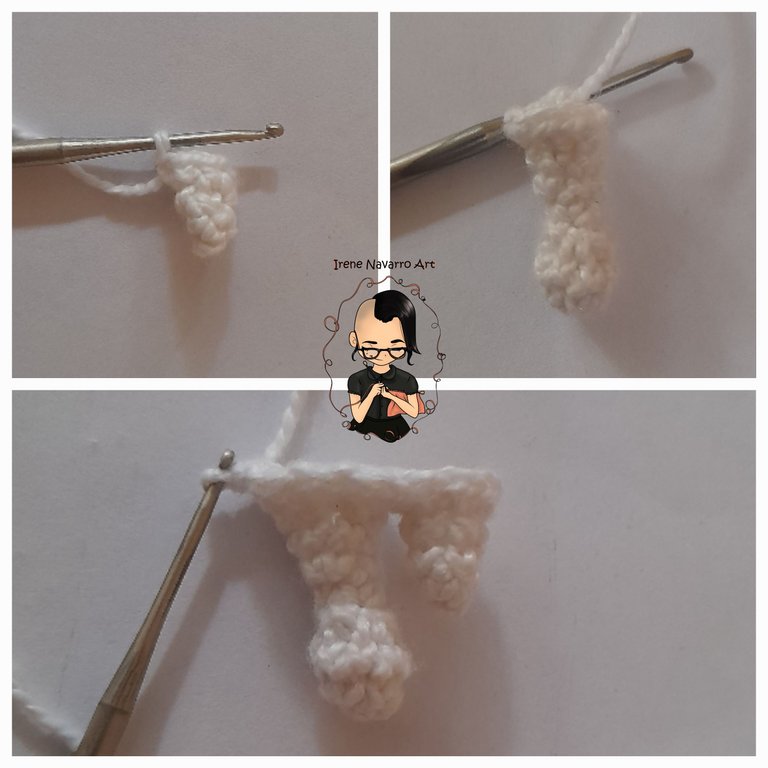
Make 4 single crochets in a ring.
Row 1: 3 single crochet, 1 increase. Total stitches: 5
Row 2: 2 single crochet, 1 increase, 2 single crochet. Total stitches: 6
Leave the first part in suspense and start the second part as follows:
Make 4 single crochet in a ring
Row 1: 4 increases. Total stitches: 8
Row 2: 8 single crochet.
Row 3: 4 decreases
Row 4: 3 single crochet, 1 increase. Total stitches: 5
Row 5: 2 single crochet, 1 increase, 2 single crochet. Total stitches: 6
Row 6: 5 single crochet, 1 increase. Total stitches: 7
Row 7: 3 single crochet, 1 increase, 3 single crochet. Total stitches: 8
Row 9: 2 single crochet, 1 increase, 1 single crochet, in the first part that we had left in suspense make 3 single crochet, 1 increase and 2 single crochet, return to the second part and make 1 increase, 3 single crochet and one increase. Total stitches: 18
Hilera 10-12: 18 puntos bajos.
Hilera 13: (2 puntos bajos, 1 disminución, 2 puntos bajos) X 3. Total de puntadas: 15
Hilera 14: (3 puntos bajos, 1 disminución) X 3. Total de puntadas: 12
Hilera 15: Tomando solo el lado de atrás hacer 12 puntos bajos.
Hilera 16: 12 puntos bajos.
Hilera 17: (3 puntos bajos, 1 aumento) X 3. Total de puntadas: 15
Hilera 18-19: 15 puntos bajos.
Hilera 20: (2 puntos bajos, 1 aumento, 2 puntos bajos) X 3. Total de puntadas: 18
Hilera 21-22: 18 puntos bajos.
Hilera 23: (5 puntos bajos, 1 aumento) X 3. Total de puntadas: 21
Hilera 24-25: 21 puntos bajos.
Hilera 26: (3 puntos bajos, 1 aumento, 3 puntos bajos) X 3. Total de puntadas: 24
Hilera 27: Tomando solo el lado frontal hacer (1 punto bajo, 1 aumento, 1 punto bajo) X 8. Total de puntadas: 32
Hilera 28: Tomando solo el lado frontal hacer 32 puntos deslizados.
Hilera 28.1: Tomando solo el lado de atrás de la hilera 27 hacer 32 puntos bajos.
Hilera 29: Tomando solo el lado frontal hacer 32 puntos deslizados.
Hilera 29.1: Tomando solo el lado de atrás de la hilera 28.1 hacer (1 punto bajo, 1 disminución, 1 punto bajo) X 8. Total de puntadas: 24
Hilera 30: 12 disminuciones
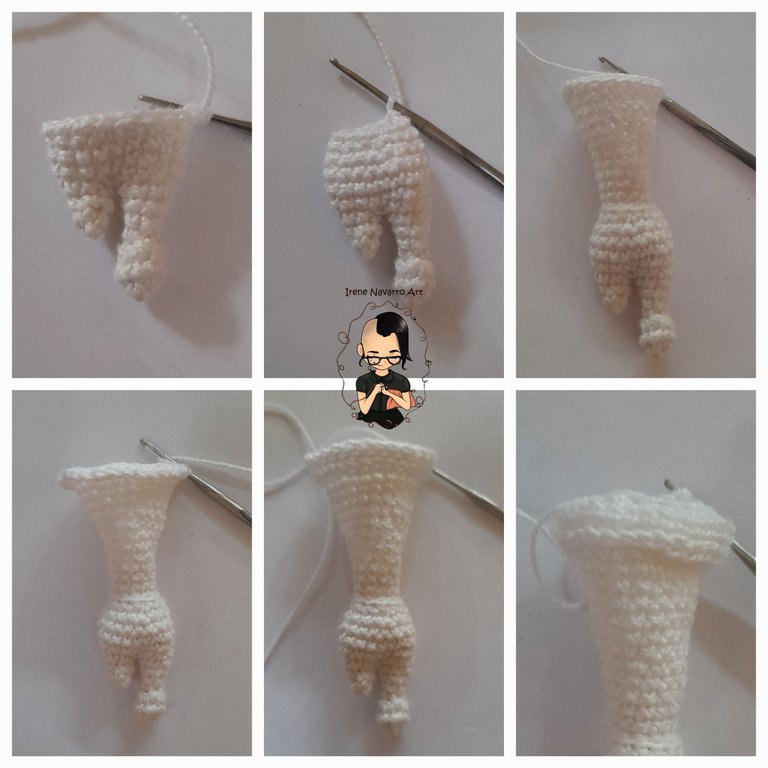
Row 10-12: 18 single crochet.
Row 13: (2 single crochet, 1 decrease, 2 single crochet) X 3. Total stitches: 15
Row 14: (3 single crochet, 1 decrease) X 3. Total stitches: 12
Row 15: Taking only the back side make 12 single crochet.
Row 16: 12 single crochet.
Row 17: (3 single crochet, 1 increase) X 3. Total stitches: 15
Row 18-19: 15 single crochets.
Row 20: (2 single crochet, 1 increase, 2 single crochet) X 3. Total stitches: 18
Row 21-22: 18 single crochet.
Row 23: (5 single crochet, 1 increase) X 3. Total stitches: 21
Row 24-25: 21 single crochets.
Row 26: (3 single crochet, 1 increase, 3 single crochet) X 3. Total stitches: 24
Row 27: Taking only the front side make (1 single crochet, 1 increase, 1 single crochet) X 8. Total stitches: 32
Row 28: Taking only the front side make 32 slip stitches.
Row 28.1: Taking only the back side of row 27 make 32 single crochets.
Row 29: Taking only the front side make 32 slip stitches.
Row 29.1: Taking only the back side of row 28.1 make (1 single crochet, 1 decrease, 1 single crochet) X 8. Total stitches: 24
Row 30: 12 decreases
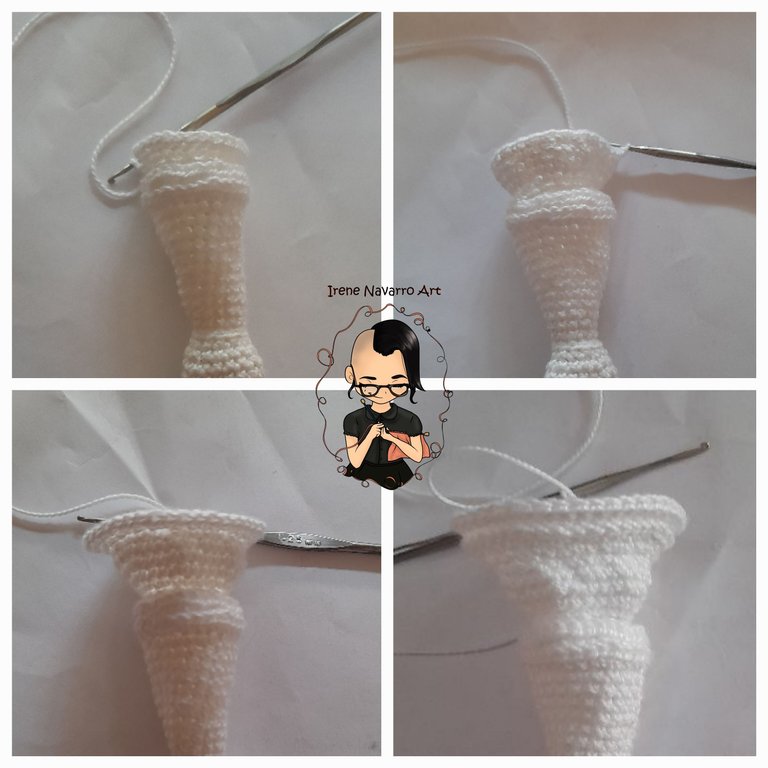
Hilera 31: Tomando solo el lado frontal hacer 12 aumentos. Total de puntadas: 24
Hilera 32: (3 puntos bajos, 1 aumento) X 6. Total de puntadas: 30
Hilera 33: (2 puntos bajos, 1 aumento, 2 puntos bajos) X 6. Total de puntadas: 36
Hilera 34: 36 puntos bajos.
Hilera 35: (1 punto bajo, 1 disminución) X 12. Total de puntadas: 24
Hilera 36: Tomando solo el lado frontal hacer (1 punto bajo, 1 aumento) X 6. Total de puntadas: 36
Hilera 37: (4 puntos bajos, 1 aumento, 4 puntos bajos) X 4. Total de puntadas: 40
Hilera 38: Tomando solo el lado frontal hacer 40 puntos deslizados.
Hilera 38.1: Tomando solo el lado de atrás de la hilera 37 hacer 40 puntos bajos.
Hilera 39: 40 puntos bajos.
Row 31: Taking only the front side make 12 increases. Total stitches: 24
Row 32: (3 single crochet, 1 increase) X 6. Total stitches: 30
Row 33: (2 single crochet, 1 increase, 2 single crochet) X 6. Total stitches: 36
Row 34: 36 single crochets.
Row 35: (1 single crochet, 1 decrease) X 12. Total stitches: 24
Row 36: Taking only the front side make (1 single crochet, 1 increase) X 6. Total stitches: 36
Row 37: (4 single crochet, 1 increase, 4 single crochet) X 4. Total stitches: 40
Row 38: Taking only the front side make 40 slip stitches.
Row 38.1: Taking only the back side of row 37 make 40 single crochet.
Row 39: 40 single crochets.
Rellenar, colocar la canica y el círculo de plástico, unir la base haciendo una hilera de puntos deslizados tomando solo el lado frontal de cada lado, esconder la hebra por dentro.
Retomar los lados frontales del la hilera 15 y levantar 12 aumentos. Hacer 24 puntos bajos y luego tomando solo el lado de atrás hacer 24 puntos deslizados y esconder la hebra por dentro
Fill, place the marble and the plastic circle, join the base by making a row of slip stitches taking only the front side of each side, hide the yarn inside.
Pick up the front sides of row 15 and make 12 increases. Make 24 single crochets and then taking only the back side make 24 slip stitches and hide the yarn inside
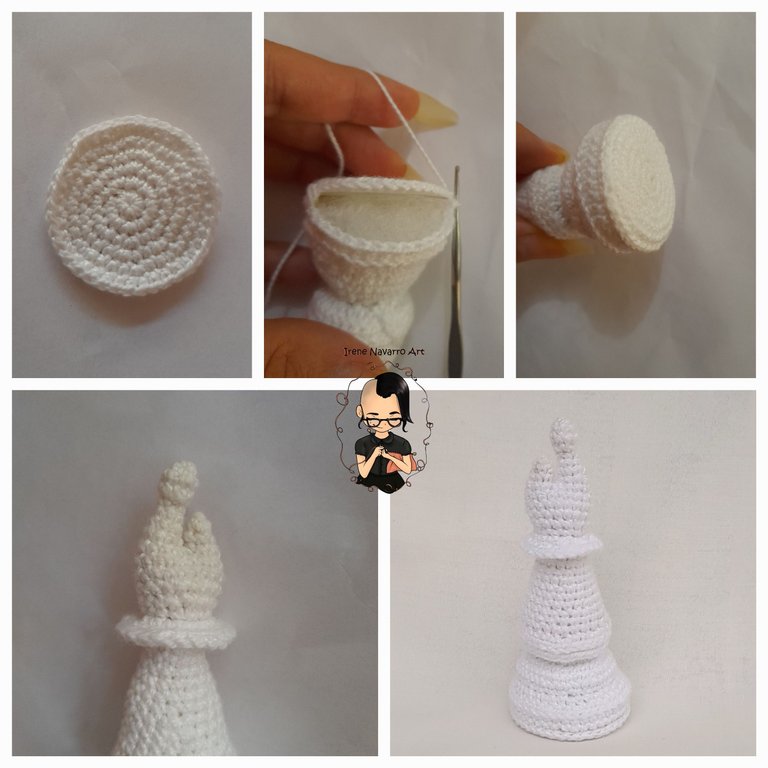
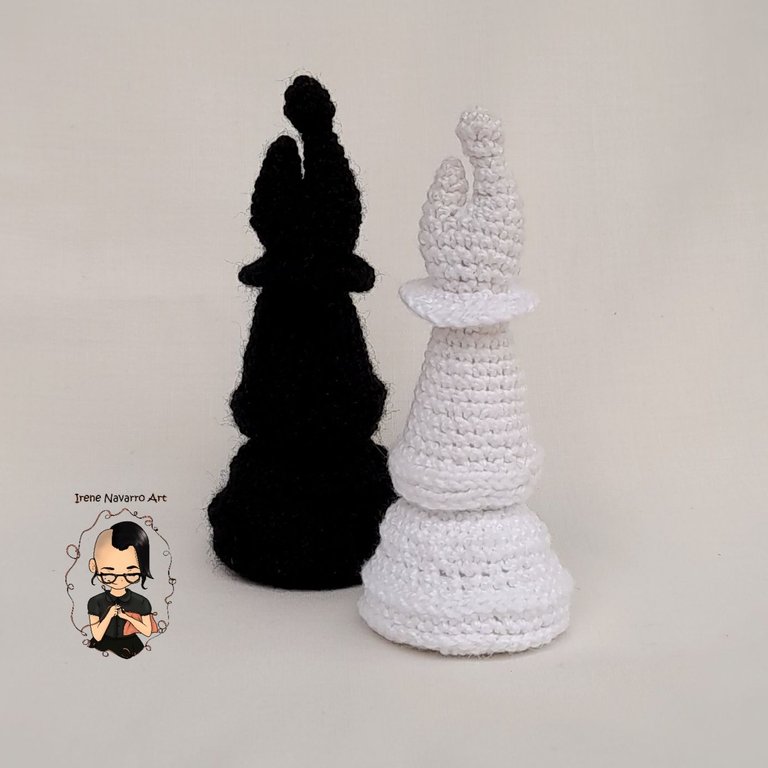
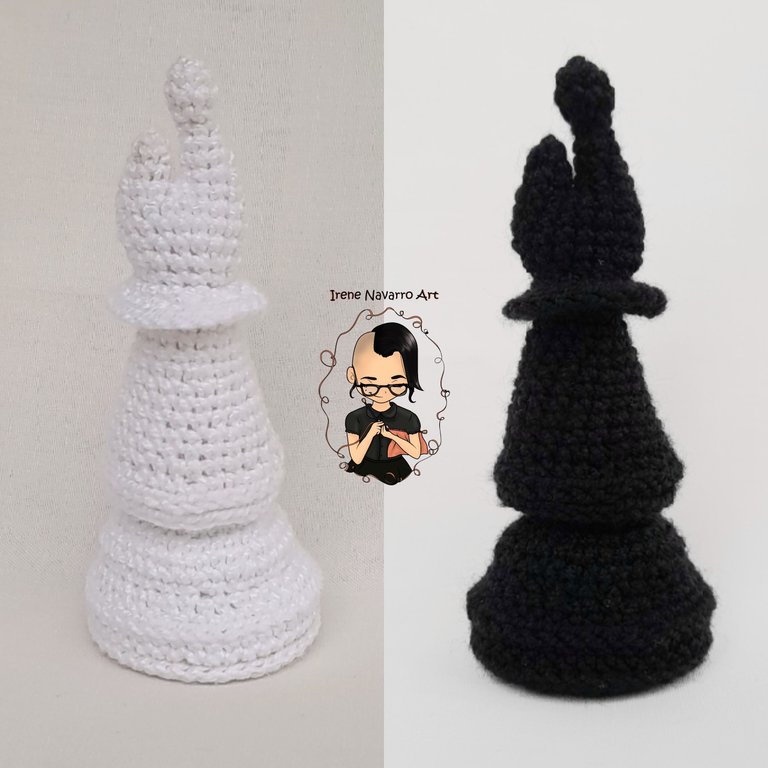
Resultado / Result
Believe it or not, so far this has been the crochet chess piece that I have enjoyed making the most, the design made me comfortable and it did not take as long as I thought it would, just as sometimes there are unexpected results, there are times that everything turns out the first time and this is one of those great experiences where everything went well, I'm happy and I hope you share my joy in the comments 🥰
Ajedrez a crochet – Parte 1: Peón
Ajedrez a crochet – Parte 2: Torre
Imágenes tomadas con dispositivo Samsung A12. Portada editada en Canva
Pictures taken with Samsung A12 device. Cover edited in Canva
Invítenme un Café/Support Me on Ko-Fi

https://ko-fi.com/irenenavarroart
If you want to support my art you can also make donations for the value of a coffee (Ko-Fi)

Espero les haya gustado. Les invito a leer mis próximas publicaciones y siempre estaré dispuesta a responder sus preguntas y comentarios, también pueden seguirme y contactarme en cualquiera de mis redes sociales. ¡Muchas gracias!
I hope you liked it. I invite you to read my next publications and I will always be willing to answer your questions and comments, you can also follow me and contact me on any of my social networks. Thank you!
The rewards earned on this comment will go directly to the people( @johndieo ) sharing the post on Twitter as long as they are registered with @poshtoken. Sign up at https://hiveposh.com.
Waoo es increíble ver este trabajo, muy bonito y bien explicado. Gracias por compartirlo😉
Muchas gracias, para mi es un placer compartir el proceso 😊
Se ve que amas lo que haces y la pasión que le pones. Te felicito 👏 haces un hermoso trabajo 👍🏻
Muchísimas gracias 😊
Thank you for sharing this amazing post on HIVE!
Your content got selected by our fellow curator @stevenson7 & you just received a little thank you via an upvote from our non-profit curation initiative!
You will be featured in one of our recurring curation compilations and on our pinterest boards! Both are aiming to offer you a stage to widen your audience within and outside of the DIY scene of hive.
Join the official DIYHub community on HIVE and show us more of your amazing work and feel free to connect with us and other DIYers via our discord server: https://discord.gg/mY5uCfQ !
If you want to support our goal to motivate other DIY/art/music/homesteading/... creators just delegate to us and earn 100% of your curation rewards!
Stay creative & hive on!
Thanks for the support
Excelente tu trabajo, me encanta como vas explicando paso a paso, cada día mas me enamoro de tu arte y dedicación... muchos éxitos, saludos
Muchas gracias @evacarolina que bueno verte por acá. Saludos 🤗
No imagine que se podía hacer de esta manera. En el taller hace años cuando estudiaba, los hicimos en bronce y acero inoxidable. Es un trabajo muy bonito, gracias por compartirlo.
Muchas gracias, hacer las piezas artesanalmente independientemente del material es algo muy bonito
Me encontré esta imagen en Twitter y de inmediato me vino usted a la memoria. Que tenga una excelente semana, buena suerte.
excelente tu labor querida @irenenavarroart poco a poco vas creando el juego completo, al finl el tablero, saludos feliz dia
Muchas gracias 🥰 aun debo diseñar la reina y el Rey, vamos a ver como me salen
¡Lindo!. Recuerdo cuando moría mi alfil y sentía que gran parte del juego ya estaba perdido, jaja. Y cuando el peón pedía el deseo, reina y alfil eran los anhelados. ¡Gran trabajo!.
Muchas gracias 🥰
Me encanta señorita ,imagino la tranquilidad que trasmite hacer esas cosas tan bonita, Éxitos.
Muchas gracias @sarix ciertamente tejer es una actividad que te desconecta por un buen tiempo. Abrazos 🤗